Designing and Building a Multi-Function Voronoi Lamp – SCOPES-DF

Lesson Details

Subjects *
Age Ranges *
Author

Author

Shaun Lane
Shaun Lane
K-12 teacher
A Technology teacher since 1999, I have a passion for providing students with opportunities to develop their skills and personal interests, with a focus on ‘having a go’ through provision of educational opportunities in step with current trends in technology… Read More

Summary

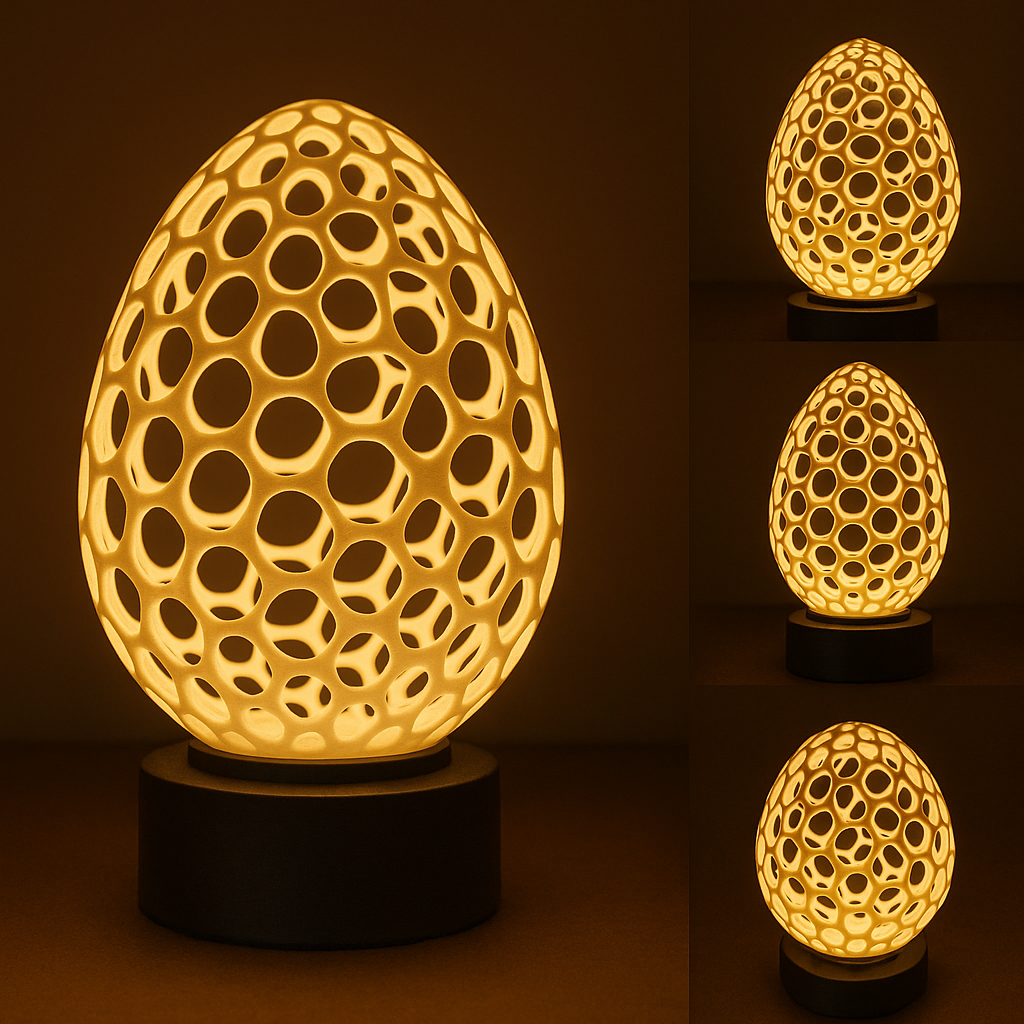
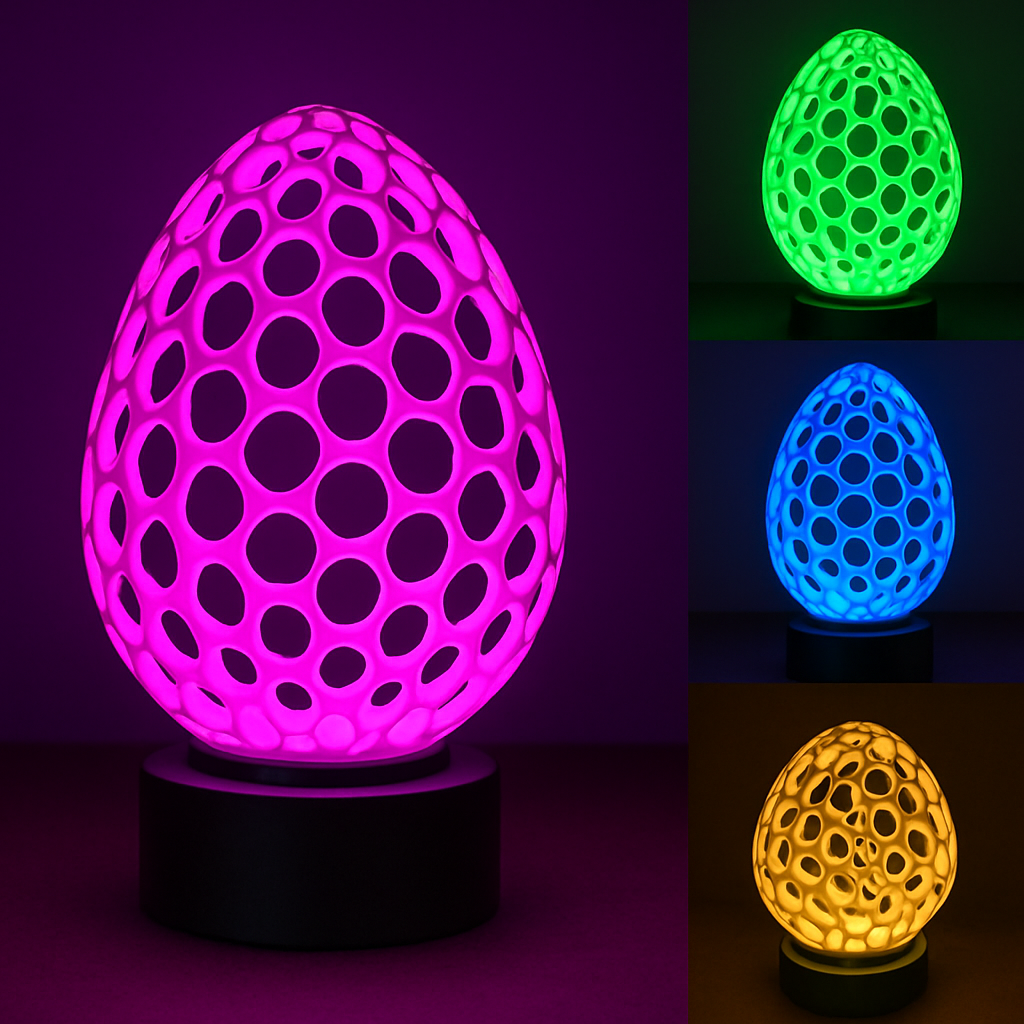
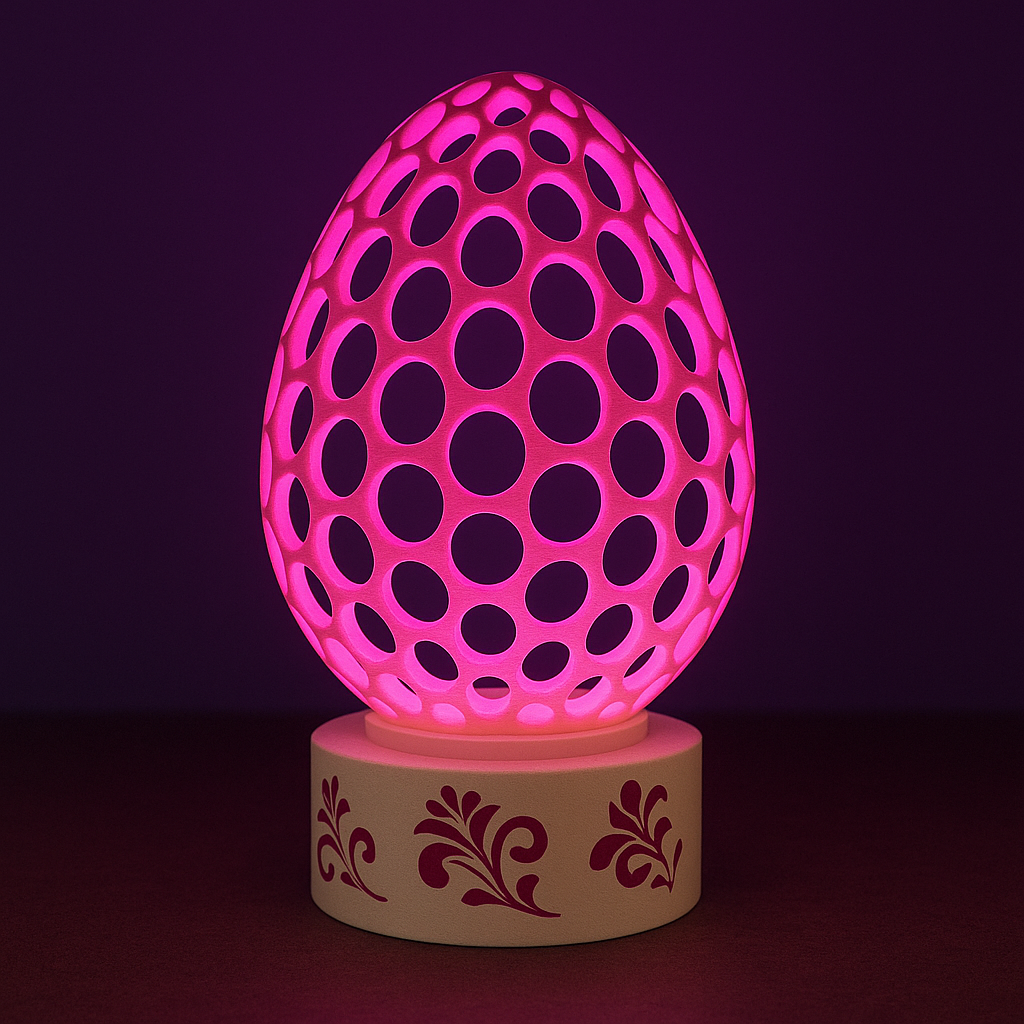
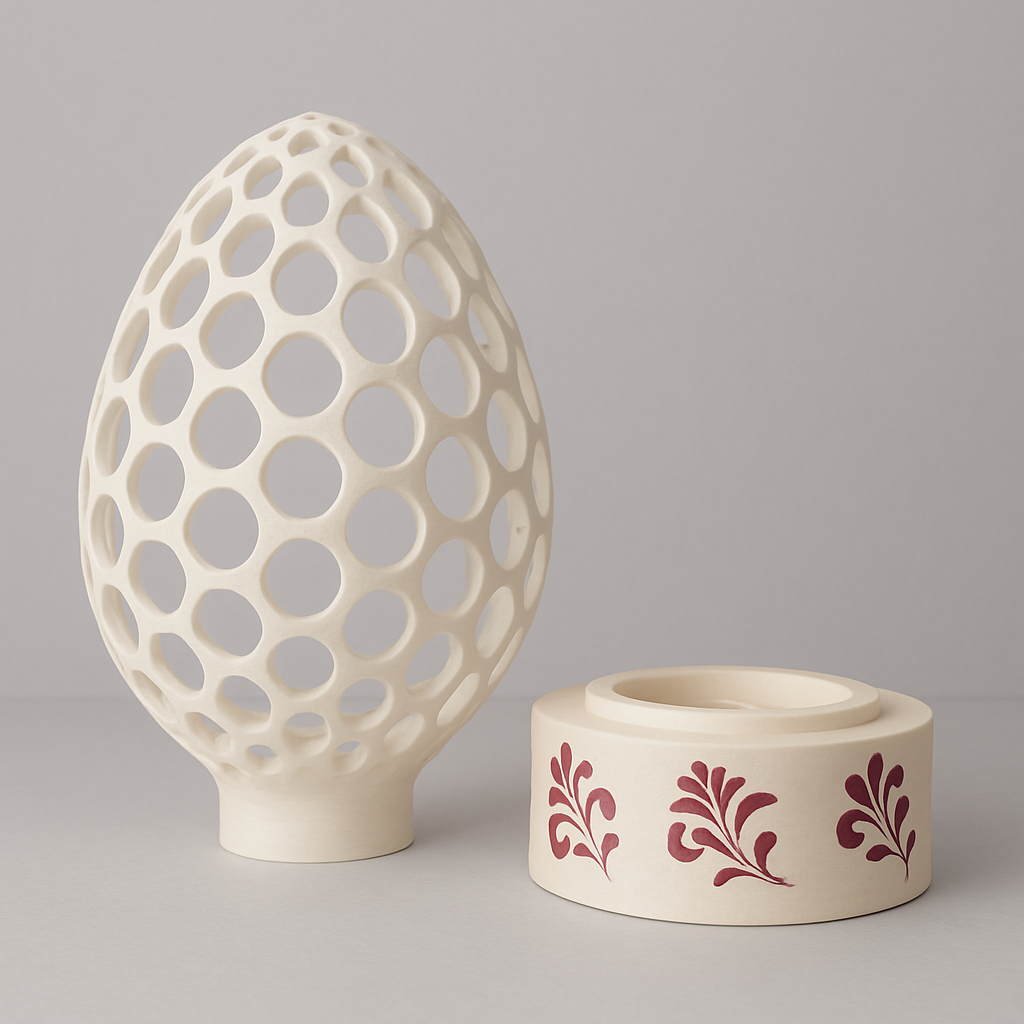
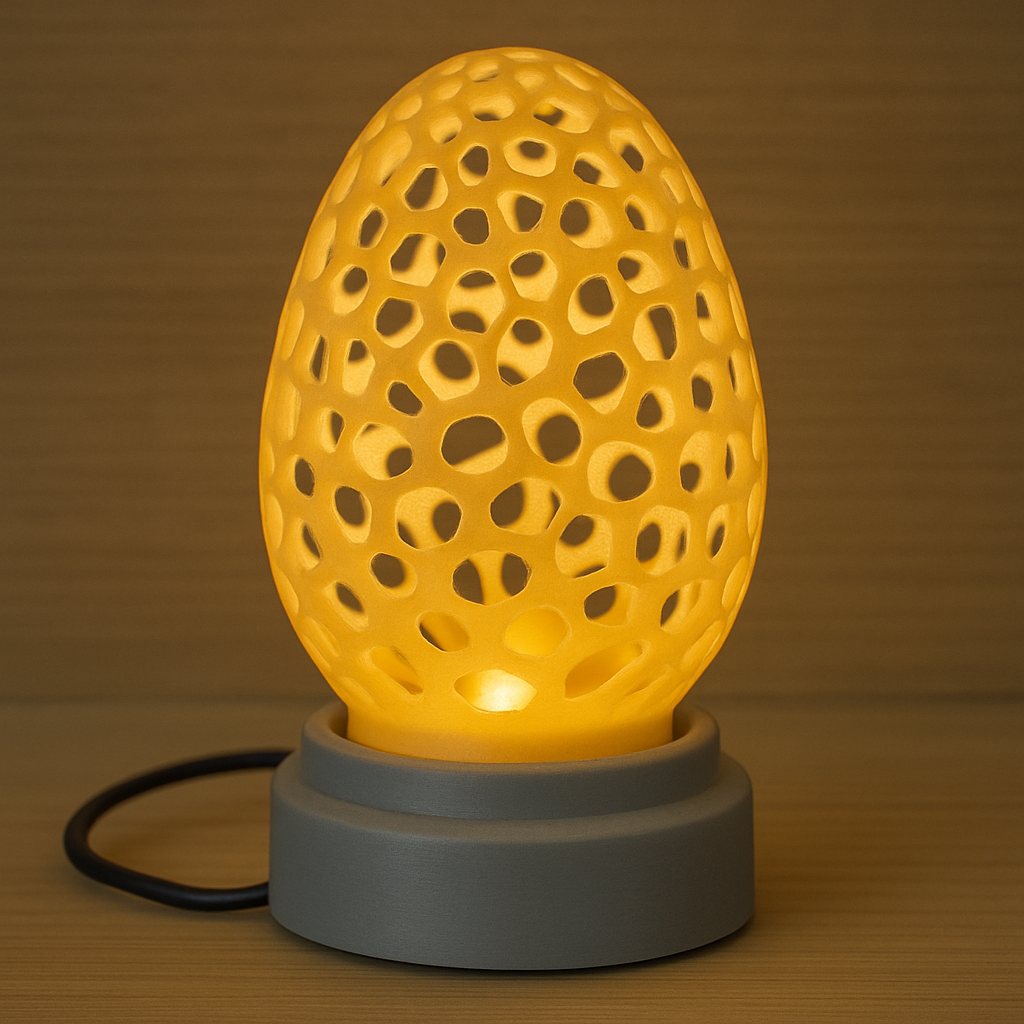
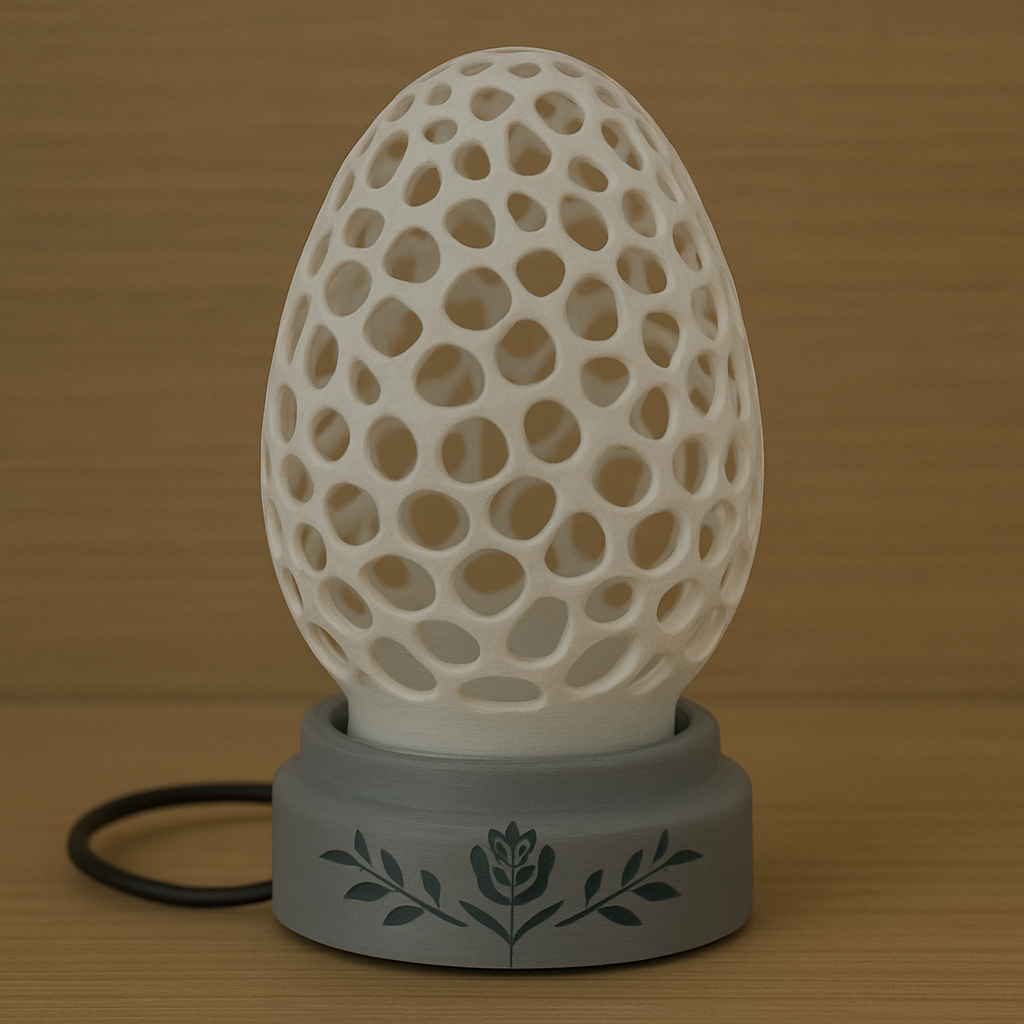
Students will design and create a Voronoi-style 3D-printed lamp shade using MakeMyVase, model and fabricate a base for the Adafruit Circuit Playground Express, and incorporate components from the Adafruit Electronics Playground Express Kit. They will program the lamp to include interactive features such as light adjustments, sound activation, and decorative motion using Adafruit MakeCode. The project will be completed with personalized vinyl decals designed and cut using a Brother ScanNCut machine.


This project integrates 3D design, electronics, programming, and creativity, culminating in a functional lamp that can be used as a tabletop, suspended, or wall-mounted light.

What You'll Need

Materials

  • PLA filament (for 3D printing the lamp and base)
  • Vinyl sheets (compatible with Brother ScanNCut)
  • Adhesive for decals


Hardware

  • 3D Printer (Bambu Labs, Prusa, Creality)
  • Brother ScanNCut machine
  • Adafruit Circuit Playground Express
  • Adafruit Electronics Playground Express Kit:
  • Servo motor
  • Light sensor
  • Sound sensor
  • LED strip
  • Battery pack
  • USB cables and power bank (optional for portability)


Software

  • MakeMyVase online tool
  • 3D Modeling software (e.g., Fusion 360, TinkerCAD)
  • Adafruit MakeCode (online programming environment)
  • Brother ScanNCut CanvasWorkspace

Lesson Materials

  • Step-by-step project instructions
  • Tutorials on using the Adafruit Electronics Kit components
  • Circuit Playground Express programming guides (lighting, sensors, and servos)
  • Videos on designing and cutting vinyl decals


Lesson Materials

Learning Objectives

By completing this project, students will:

Design & Engineering

  • Understand the principles of Voronoi pattern generation and apply them to 3D modeling.
  • Develop skills in parametric design using MakeMyVase (MakerWorld).
  • Design and modify a custom 3D-printed base to house the Adafruit Circuit Playground Express.

Digital Fabrication & Prototyping

  • Gain hands-on experience with 3D printing, including print settings, material selection, and post-processing.
  • Learn how to use the Brother ScanNCut for vinyl decal creation to enhance aesthetics.

Electronics & Coding

  • Assemble and integrate the Adafruit Circuit Playground Express into a functional lamp.
  • Program the Circuit Playground Express using Adafruit MakeCode (makecode.adafruit.com) to:
  • Respond to audible clap or sound-based triggers.
  • Control LED lighting patterns.
  • Play sounds or music in response to interactions.

Problem-Solving & Iterative Design

  • Apply design thinking and iteration to refine 3D models and functional components.
  • Troubleshoot issues related to 3D printing, electronic wiring, and coding logic.

Presentation & Reflection

  • Document the design and development process through sketches, CAD models, and test iterations.
  • Reflect on the interdisciplinary nature of the project, combining design, electronics, and programming.
  • Present final functional Voronoi lamps and discuss potential improvements or alternative designs.


Reflection

This project provides a multidisciplinary learning experience that aligns with the evolving landscape of technology education and the skills required for future industries. It merges design, digital fabrication, electronics, and programming, preparing students for careers in STEM, advanced manufacturing, product design, and embedded systems development.

1. Future-Ready Skills Development

The project fosters key competencies essential for the future workforce, including:

  • Digital Fabrication & Prototyping: Mastering 3D printing, laser cutting, and vinyl decal production equips students with additive manufacturing and rapid prototyping skills used in aerospace, automotive, medical, and consumer product design industries.
  • Electronics & IoT Integration: Understanding microcontrollers (Adafruit Circuit Playground Express) introduces students to smart systems, automation, and IoT development. These skills are crucial as industries integrate embedded systems into everyday products.
  • Coding & Computational Thinking: Using block-based (MakeCode) and potentially JavaScript/Python programming strengthens logical thinking, algorithmic design, and real-world coding applications—essential for careers in software development, robotics, and AI-driven industries.
  • Human-Centred & Sustainable Design: Applying biomimicry (Voronoi structures) encourages students to design with nature-inspired efficiency, an approach widely used in architecture, structural engineering, and sustainable product development.

2. Industry 4.0 & Emerging Technologies

The project aligns with Industry 4.0 principles by integrating:

  • Smart Technologies: Hands-on experience with responsive, sensor-driven electronics builds foundational knowledge for automated systems, robotics, and interactive product design.
  • Personalized & Adaptive Design: Students learn to create customized solutions, a skill valued in modern product development where consumer personalization and rapid iteration are in demand.
  • Digital-to-Physical Workflow: Exposure to CAD, parametric modeling, and digital fabrication tools mirrors processes used in high-tech design and engineering fields.

3. Problem-Solving & Critical Thinking

This project reinforces an iterative design approach where students:

  • Prototype, test, and refine their lamp designs through 3D modelling and real-world testing.
  • Troubleshoot coding and circuit issues, fostering debugging and logical problem-solving skills applicable in both software and hardware engineering.
  • Work through design challenges, such as fitting electronic components into custom enclosures, improving spatial reasoning and technical adaptability.

4. Cross-Disciplinary Learning & Career Pathways

By blending engineering, computer science, and digital design, this project introduces students to careers in:

  • Product Design & Advanced Manufacturing (3D printing, CAD, material science)
  • Embedded Systems & IoT Development (smart devices, automation)
  • Software & Game Development (coding, interactive systems)
  • Creative Technologies & Digital Art (vinyl cutting, aesthetic design integration)

Conclusion

This project bridges traditional and future-focused skills, offering a hands-on, real-world application of technology. It aligns with educational goals that prioritize STEM integration, creative problem-solving, and industry-relevant skills. By working through design, electronics, and programming, students gain an appreciation for how technology shapes modern industries and how their skills can contribute to the innovations of tomorrow.

The Instructions

Lesson 1: Introduction to the Project

Objective: Familiarize students with the project scope, tools, and materials. Students will develop an understanding of the overall scope of the project, including the integration of design, electronics, and coding. They will be introduced to Voronoi design principles and begin documenting their design process. This sets the foundation for an iterative and reflective approach to learning.

Tutorial Steps:


  1. Explain the Project: Show a completed Voronoi lamp with interactive features and discuss its components.
  2. Show Tools in Action: Provide a brief demo of MakeMyVase, Fusion 360, and Adafruit MakeCode.
  3. Introduction to Circuit Playground Express Kit: Unbox the kit and explain the components, emphasizing how each will be used in the project.
  4. Brainstorming Session: Students sketch their ideas for the lamp design, considering how the sensors and decals will be integrated.


Lesson 2: Designing the Voronoi Lamp Shade

Objective: Use the MakeMyVase tool to create a Voronoi lamp shade. Students will explore parametric design using an online Voronoi generator and begin developing their spatial reasoning by digitally modelling a lamp shade and custom base. Through this, they will learn how digital tools can be used to plan and prepare physical objects for 3D printing and electronic integration.

Tutorial Steps:


  1. Access MakeMyVase: Open the MakeMyVase tool.
  2. Create a Design:
  • Adjust parameters for height, width, and density of the Voronoi pattern.
  • Preview how light would pass through the pattern and adjust accordingly.
  • Export the STL File: Save the design for use in 3D printing.
  • Review and Iterate: Share designs with peers for feedback.


Lesson 3: 3D Modeling the Lamp Base

Objective: Model a base to house the Circuit Playground Express and kit components. Students will apply 3D modelling skills to design a functional base that securely accommodates the Adafruit Circuit Playground Express and additional components from the electronics kit. The design must consider size constraints, ventilation, mounting options, cable management, and structural stability. Through this task, students will deepen their understanding of spatial planning, digital prototyping, and user-centred design, ensuring that the base integrates seamlessly with the lamp structure and supports the interactive features of the final product.

Tutorial Steps:


Introduction to CAD Tools: Briefly demonstrate the tools in Fusion 360 or TinkerCAD.

Base Design:

  1. Create a cylinder to match the lamp shade’s base diameter.
  2. Add a hollow compartment for the Circuit Playground Express.
  3. Design slots or brackets to secure sensors and a servo motor.
  4. Export the STL File: Save the completed base model.
  5. Test Fit Virtually: Use virtual components in the CAD tool to ensure compatibility.


Lesson 4: 3D Printing and Base Assembly

Objective: Print and assemble the lamp components. Students will learn how to prepare, execute, and troubleshoot a 3D print using slicing software and a 3D printer. They will understand the material and mechanical considerations involved in turning a digital model into a physical object, and how to refine a print through cleaning and finishing techniques.

Tutorial Steps:


Prepare for Printing:

  1. Slice the STL files using software like Cura or PrusaSlicer.
  2. Ensure proper settings for PLA (temperature, layer height).
  3. 3D Print: Print the lamp shade and base.
  4. Clean and Finish: Sand edges if necessary and ensure components fit together.
  5. Assemble the Shade and Base: Check for stability and adjust if needed.


Lesson 5: Programming the Circuit Playground Express

Objective: Use Adafruit MakeCode to program the lamp’s interactive features. Students will be introduced to the Circuit Playground Express microcontroller and learn how to set up and interact with its onboard components. By developing basic programs using MakeCode, students will understand how to translate user inputs into electronic outputs like lighting and sound. Students will then deepen their understanding of interactive programming by integrating sound input to trigger lighting and sound outputs. This lesson extends their knowledge of conditional logic and input/output control, demonstrating how microcontrollers can respond dynamically to the environment.

Tutorial Steps:


  1. Connect the Circuit Playground Express: Plug it into a computer via USB.
  2. Open MakeCode: Navigate to Adafruit MakeCode.
  • Light Sensor Programming:
  • Add a block to read light sensor values.
  • Set thresholds to adjust LED brightness.
  • Sound Sensor Programming:
  • Program the sound sensor to toggle LEDs when a clap is detected.
  • Use a conditional block to set sensitivity levels.
  • Music Playback:
  • Use sound blocks to program basic melodies.
  • Trigger playback based on input (e.g., button press or clap).
  • Test and Debug: Download the code to the Circuit Playground Express and test all features.


Lesson 6: Designing and Cutting Vinyl Decals

Objective: Use the Brother ScanNCut to create custom decals for personalization. Students will explore the aesthetic dimension of product design by creating and applying custom vinyl decals. They will use digital design software and the Brother ScanNCut to personalise their lamp, learning how modern fabrication tools allow for functional and artistic expression.

Tutorial Steps:


Design Decals in CanvasWorkspace:

  • Use the drawing tools to create custom patterns.
  • Import logos or graphics if desired.
  • Cutting the Vinyl:
  • Load the vinyl sheet into the ScanNCut machine.
  • Adjust settings for vinyl thickness and start cutting.
  • Applying the Decals:
  • Carefully peel and stick the decals onto the lamp.
  • Use a scraper tool to smooth out air bubbles.


Lesson 7: Final Assembly and Testing

Objective: Integrate all components and test the lamp. Students will bring together all components—3D-printed parts, electronics, and decorative elements—to create a fully functional and personalised lamp. They will evaluate their outcomes, reflect on their learning journey, and present their work to peers, fostering communication and critical thinking skills.

Tutorial Steps:


  1. Install Electronics: Secure the Circuit Playground Express and sensors in the base.
  2. Connect Components: Wire the servo motor, light sensor, and sound sensor to the board.
  3. Power On and Test: Ensure all programmed features work correctly.
  4. Adjust and Finalize: Make final adjustments for aesthetics and functionality.


Lesson 8: Reflection and Evaluation

Objective: Reflect on the project’s success and brainstorm improvements. Students will evaluate their completed project by reflecting on the design and development process, identifying both strengths and areas for improvement. Through structured self-assessment and peer feedback, they will consider how effectively their lamp met the design brief, functioned technically, and demonstrated creativity. This reflection encourages students to think critically about their problem-solving strategies, collaboration, and application of technology skills, while fostering a growth mindset for future design challenges.

Tutorial Steps:


  • Class Presentation: Each student presents their lamp, highlighting the design choices and programming features.
  • Feedback Session: Peer review and group discussion on challenges and successes.
  • Improvement Ideas: Students suggest how to enhance the project, such as using additional sensors or different materials.


Lesson Feedback

Contact us

Having trouble? Let us know by completing the form below. We'll do our best to get your issues resolved quickly.

"*" indicates required fields

Name*
Email*
This field is for validation purposes and should be left unchanged.
?