- Loading…


Disabilities appear in many forms. Assistive devices help people with disabilities live a better life. In this project, students design and develop a useful assistive device for people challenged by fine motor skill disability who cannot grasp and control objects. In the process of designing prototype devices, they learn about the engineering design process and how to use it to solve problems.


A computer with Internet access (if using an online 3D modeling resource) or another resource to create a 3D model.
A 3D printer
Typical classroom supplies such as pencils, paper, rulers.
Introduce and explain Engineering design. Introduce and explain disabilities with focus on fine motor skills. Explain unique/specific project criteria
Connect the problem statement to the engineering design process. This is Step 1: Identify the Problem. Explain that it is important to clearly identify the statement of need before beginning the design process.
Include time for questions and discussion about the EDP and the project criteria.
Students will spend time gathering background information After research is complete they can start brainstorming ideas for their designs.
Have student groups conduct Internet research to answer research sheet questions. This is Step 2: Research the Problem.
Instruct students to begin brainstorming project ideas. This is Step 3: Develop Possible Solutions.
Advise them to keep notes in a notebook, including rough sketches, ideas from research and simple sketches. Require that they come up with two different good solutions/plans for the device, which they will further evaluate to determine the best one to construct and test.
Students will spend time as needed to develop plans for their devices. This will happen at different paces for each group. Attention should continually be paid to the unique project criteria during the design step.
When ready and student designs are approved by the teacher, students will begin the 3D modeling phase of the design process.
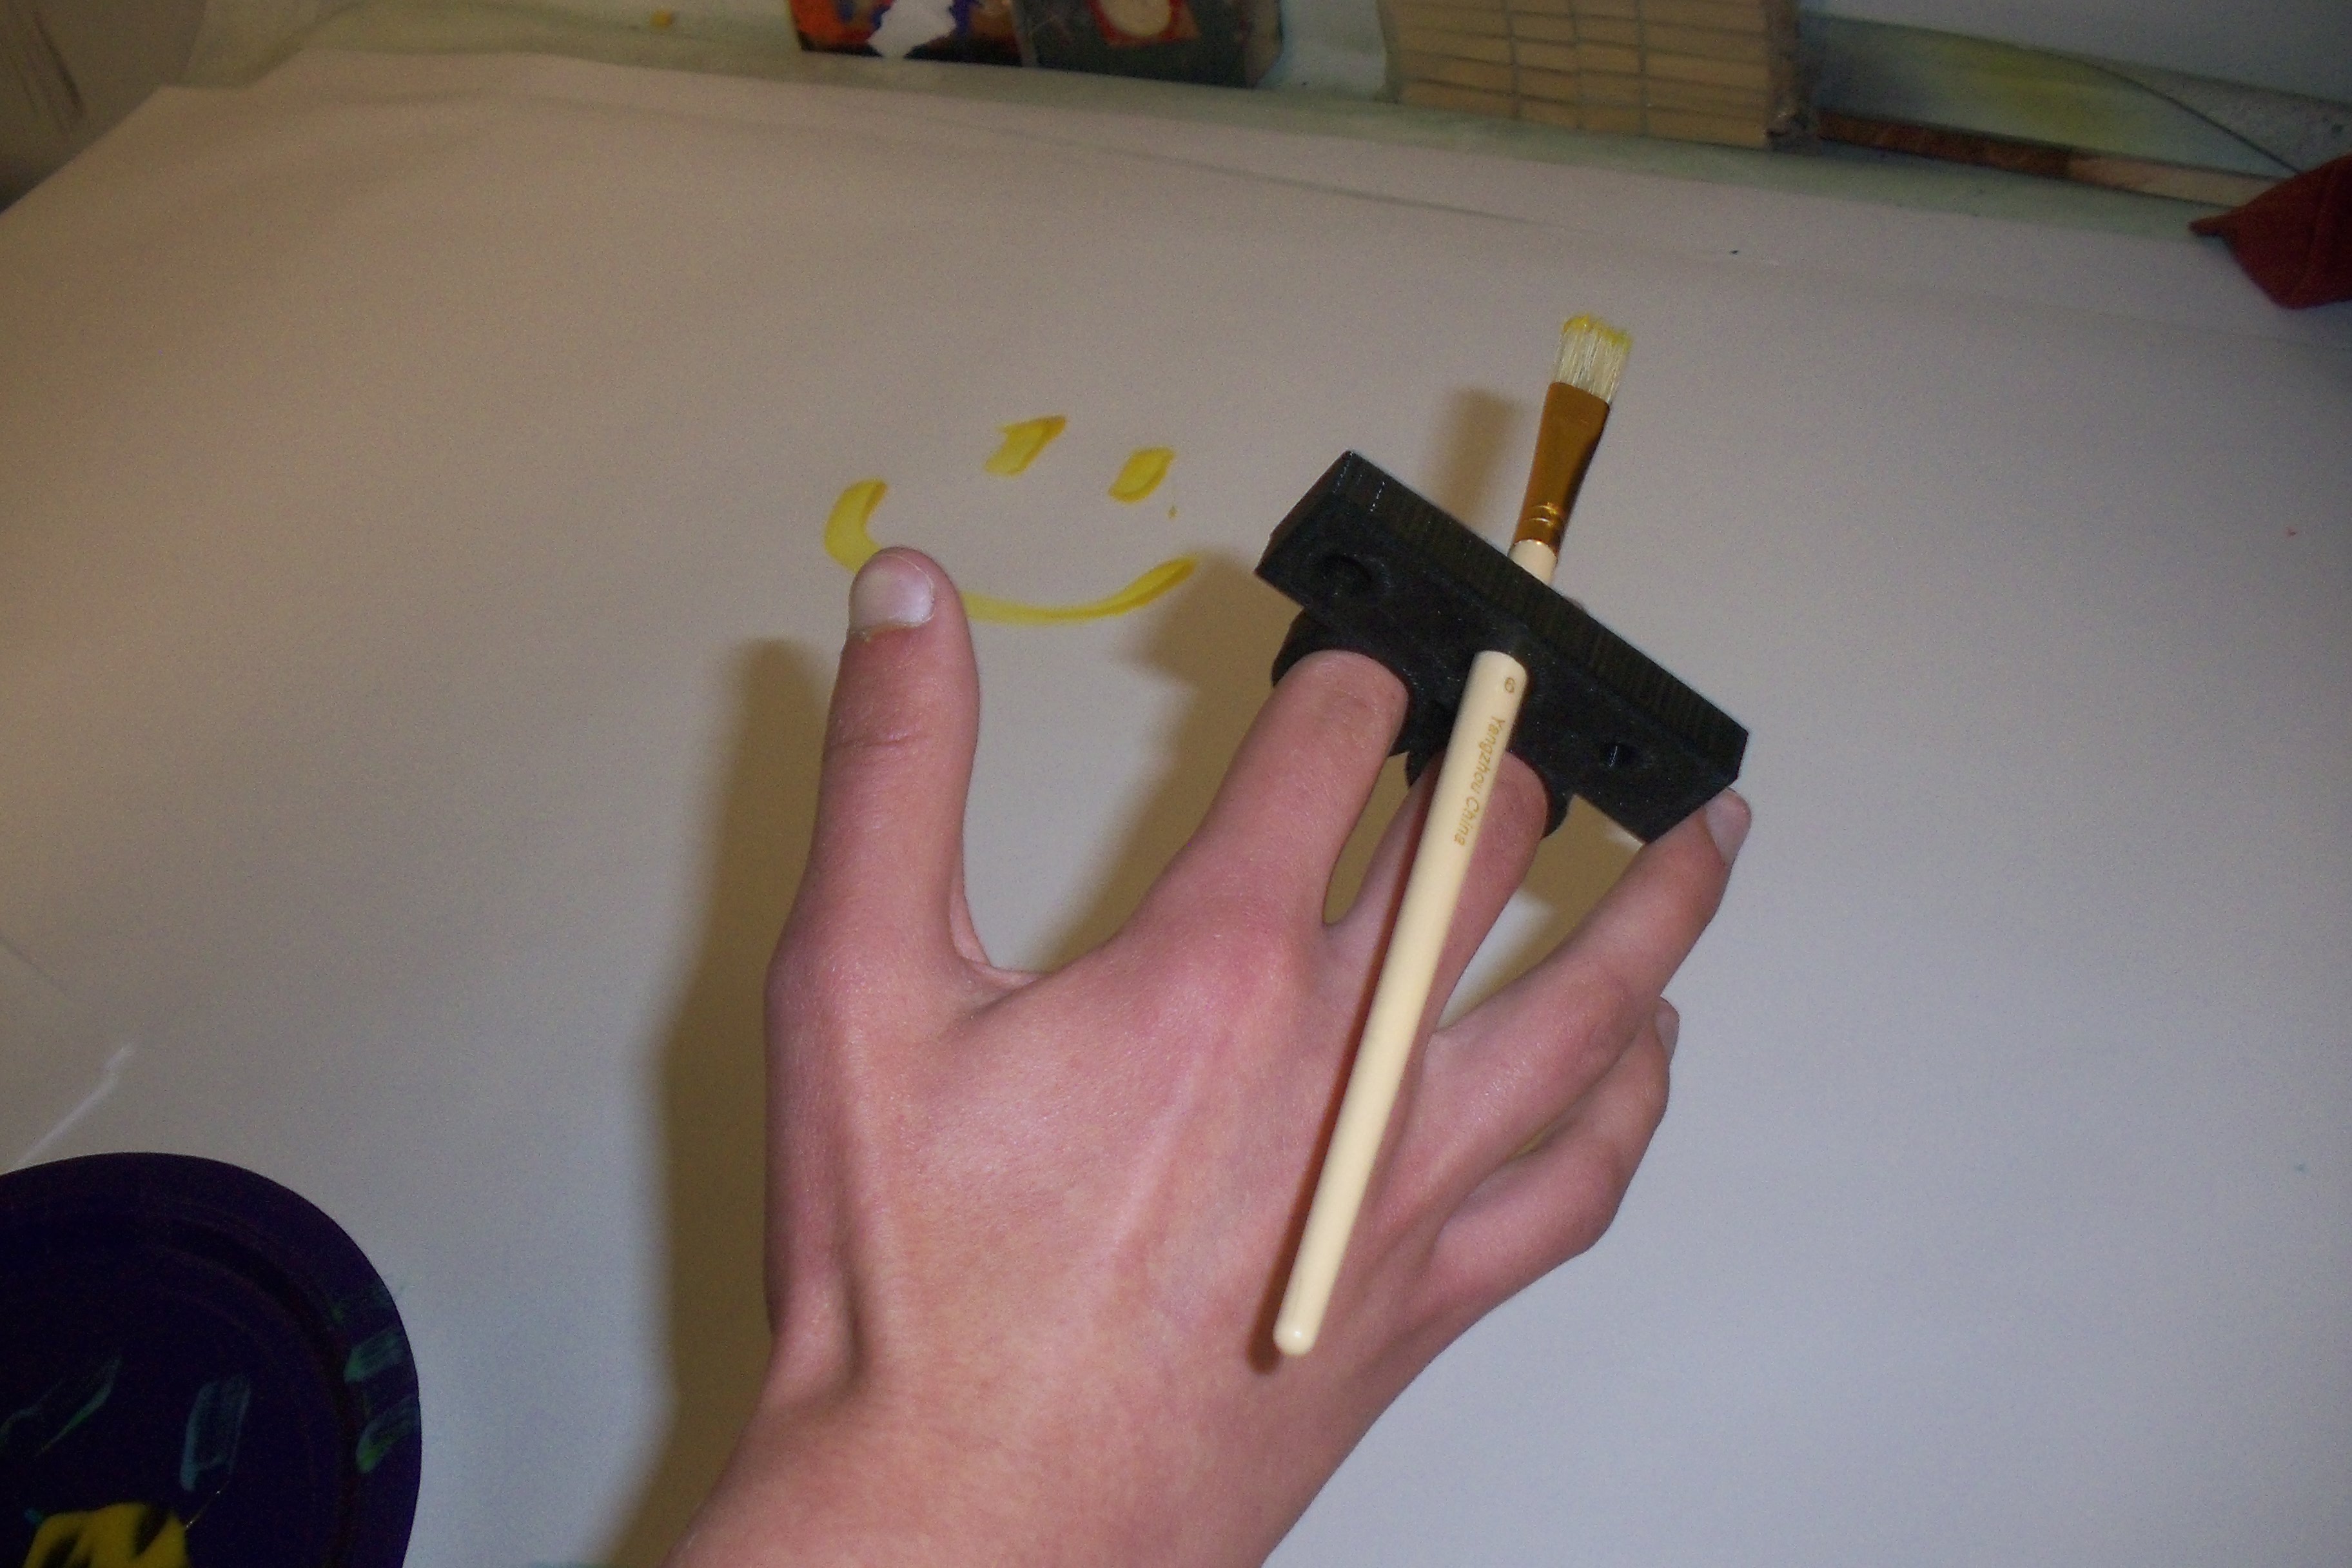
Provide time for groups to build and evaluate their prototypes. This is Step 5: Construct a Prototype. Expect teams to require different amounts of time, depending on the complexity of design, availability of 3D printers, time needed for each print, etc.; you may need to be flexible with the time you provide. If necessary, have students create mock-ups with cardboard or other inexpensive materials before creating 3D-printed prototypes; doing this also has the benefit of helping students better explore, understand and determine how to attach their designs onto a hand or wrist.
After design have been 3D printed, students will evaluate other student's projects based on original project criteria.
Instruct students to evaluate and refine their prototypes against the original constraints—safety, durability, weight, cost, attachment, ease of use, secure utensil holding. This begins Step 6: Test and Evaluate the Solution.
Explain that for each group’s prototype, three other students will conduct a performance assessment to evaluate the device while using it to perform the intended task, that is, painting with a small paintbrush. During the evaluation, the prototype must be tested without being held by the user in any way—so as to simulate its use by a person with fine motor skill disability. Direct students who evaluate another group’s device to fill out an evaluation sheet as part of the process. Ask the testers to each write on the evaluation sheet at least one constructive criticism about the prototype’s performance.
Based on user feedback, give students time to revise or redesign their devices. This is Step 8: Redesign, or sometimes described as design iteration—when the design team goes back to earlier EDP steps like researching, brainstorming or selecting a different solution as it evolves towards an improved prototype design.
Having trouble? Let us know by completing the form below. We'll do our best to get your issues resolved quickly.
"*" indicates required fields