- Loading…
This lesson is on how to make a unique fire making tool called a Fire Piston. It ignites a small piece of tinder by rapid compression/depression of air inside of a cylinder. When used correctly, it can produce an ember in under a second. It can be a useful tool and a fun way to demonstrate a few scientific principals.
⦁ 6in piece of 1/2in Aluminum tubing
⦁ 7in piece of 3/8in Aluminum Solid Rod
⦁ Resin
⦁ Small O-ring
⦁ Mold making materials
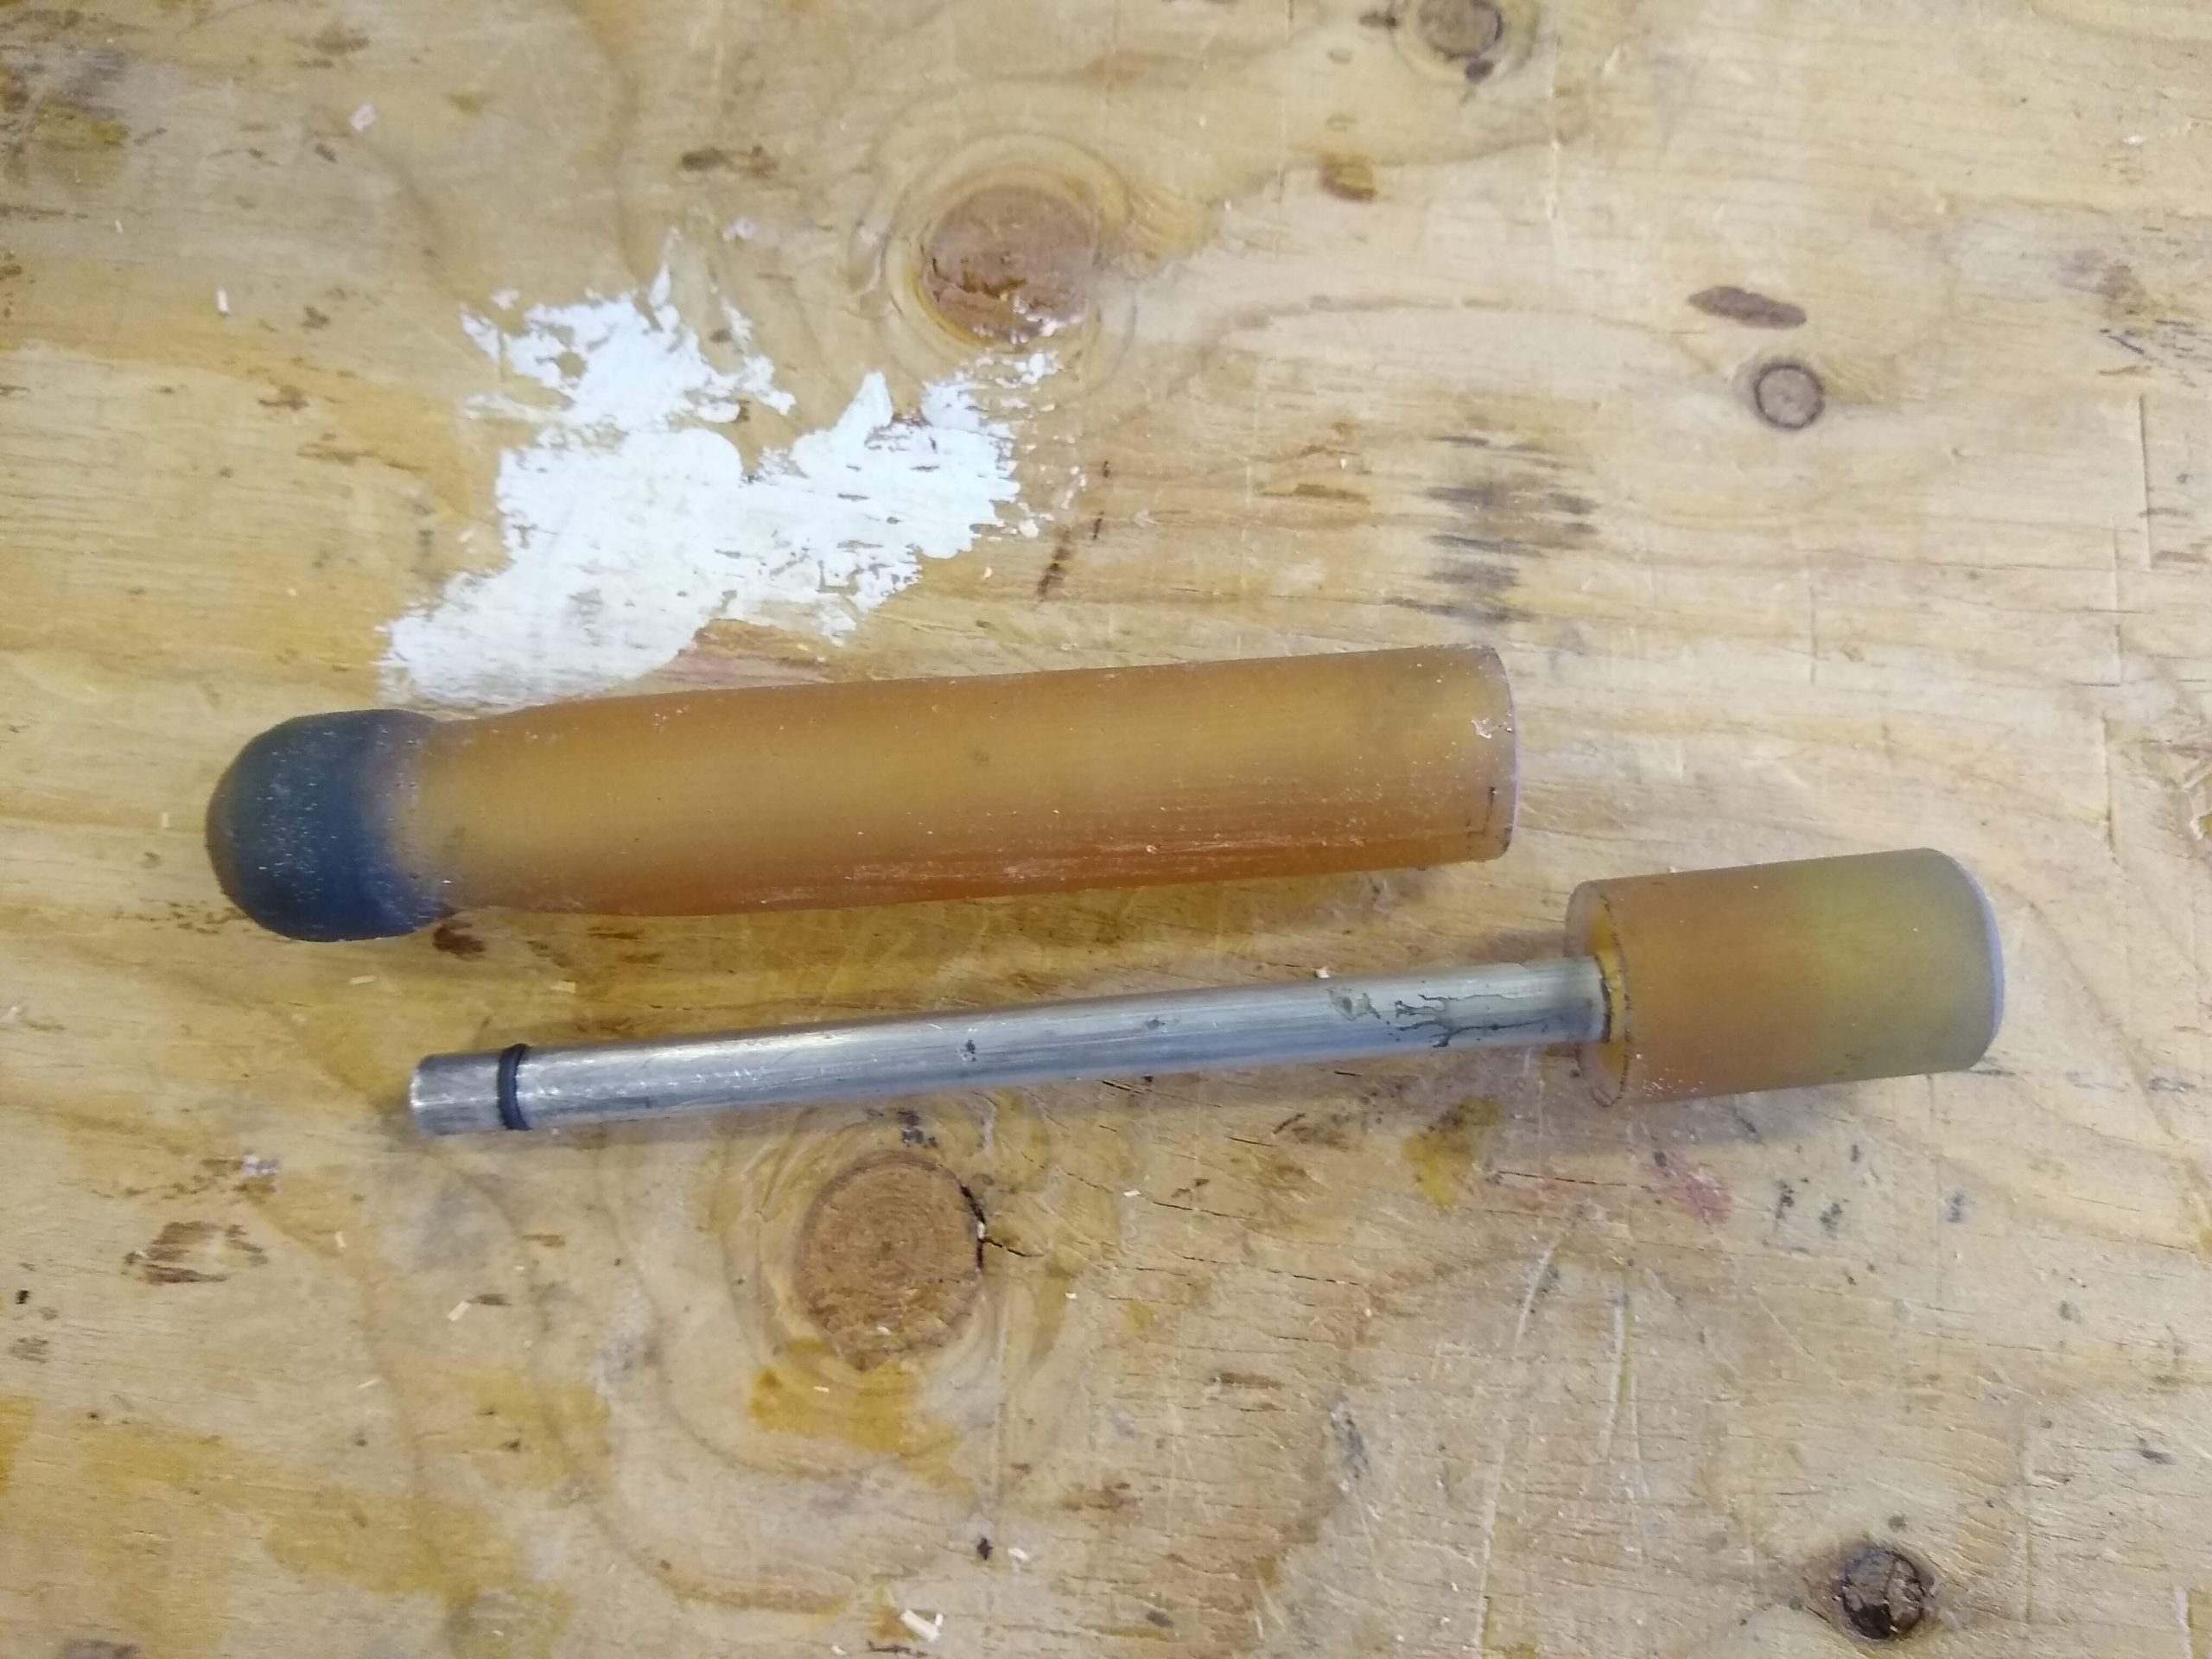
Here is the full layout for the process
⦁ Cut a 6 inch section out of the tubing AND rod. A drill and a hacksaw make for fun and fast cutting.
⦁ Score the end of the solid rod about ½ inch from the tip. This is where the O-Ring will go. The same drill/hacksaw technique works really well to evenly score the rod. Score it deep enough so that the rod and O-Ring will just barely fit in the 1/2in tubing. Lightly sand one end of the tubing so it does not cut the O-Ring while you are testing it.


⦁ Drill out a small recess to hold the tinder. Do it on the end of the rod that has the O-Ring and drill down about 1/4in and use a size that is just a bit smaller than the 3/8 diameter rod. Sand the end of the rod afterwards to remove and sharpness.

⦁  Now we need a handle for our plunger. I made a mold that allows for two plungers to be cast out of resin. I just set the rod in resin and let cure. You could also drill out wood and shape a wooden handle also. Just glue it in a go. It is important the end of your plunger should reach as close as possible to the bottom of the cylinder so don’t cast more than 1 1/2 inch up the rod.

⦁ Seal the tubing and make it air tight by setting the end in a small amount of resin and let it harden. Let it fill the bottom no more than ½ inch.

⦁ Break off the resin and remove any material on the outside so it is just tubing again with a resin plug still inside. This keeps resin from coming up the tube when we cast the rest in resin.
⦁ Make a mold that will fully encase the tubing in resin when cast. I used a box and piece of wood that was the right shape for what I wanted. A groove at the end was to help with grip when driving the plunger.


⦁ Remove the molding material after taking apart the box. Then suspend the tubing in the mold full of whatever resin and color you want.
You can create spacers to keep the tube centered in the resin. I cut some out of acrylic using the laser cutter. (File attached)


⦁ Remove the finished cylinder and cut the tubing flush with the top of the resin. Re-sand the mouth of the tube so the plunger and gasket enter in smoothly. 


⦁ Now that the Fire Piston is completed, we need material to use as tinder. Char-cloth is the most consistent and functional. To make charcloth, put small squares of cotton-only material (either clothing or canvas works great) into a small container that can take flames without burning. A small metal tin like altoids works great. Close the container and poke a few holes to allow for offgassing. Burn for about 5 minutes or until thick smoke stops coming out.


Char cloth should be fully charred to be ideal. Notice the left side of the container has cloth that did not char all the way. Pull out any charred material and save the rest for re-burning.
⦁ To use the fire piston, add a little charcloth into the end of the plunger. Insert the plunger into the cylinder just past the o-ring. Push the plunger in as far as it will go and pull the plunger out very rapidly and with a good amount of force. The tinder is ignited through the rapid compression and will go out if not pulled back out of the cylinder rapidly enough.
First run prototype without fully cast cylinder
Having trouble? Let us know by completing the form below. We'll do our best to get your issues resolved quickly.
"*" indicates required fields