- Loading…
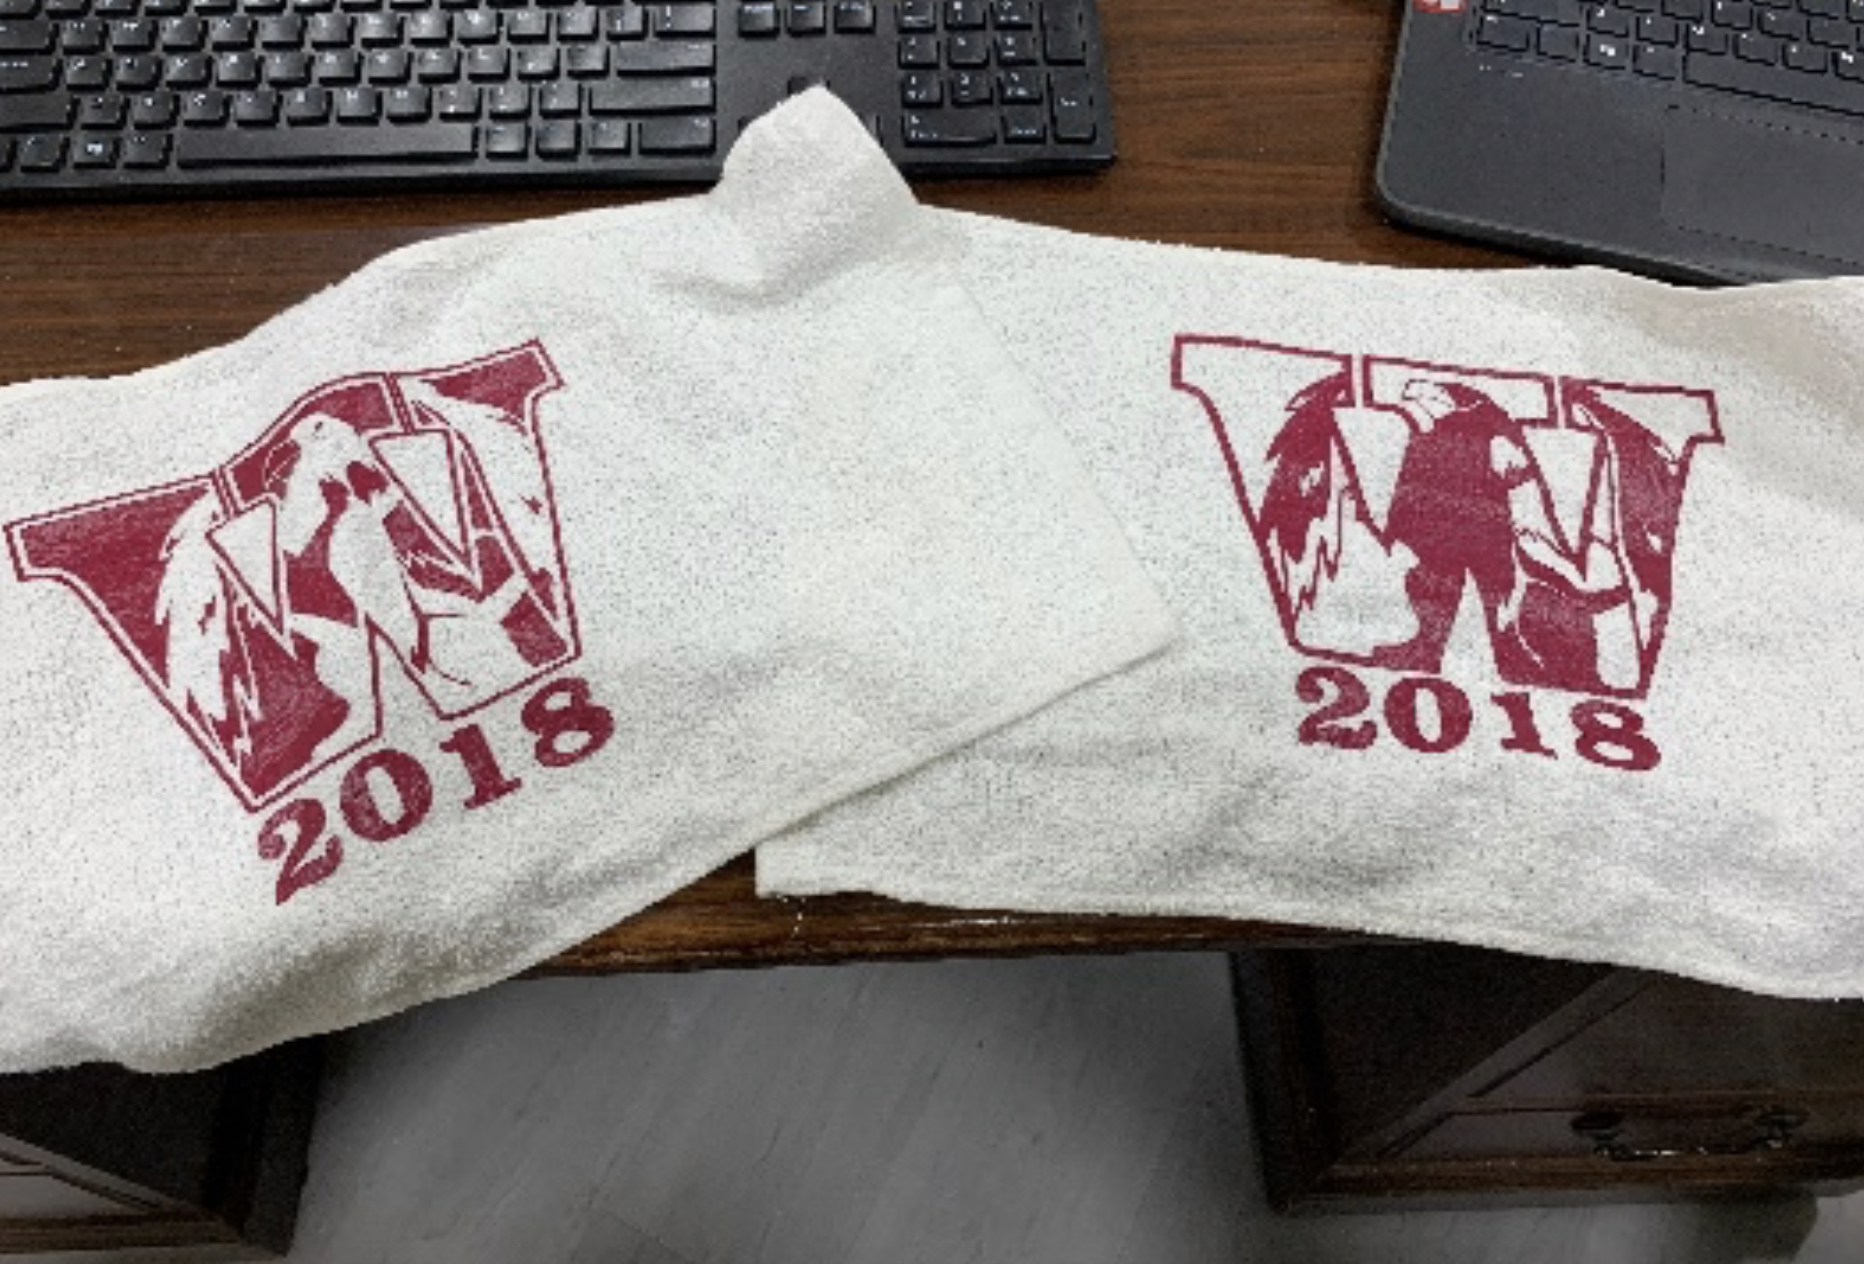
Students will create a personalized rally towel that contains at least one image and a name. This can be done using the step-by-step tutorial design that follows, or by creating their own unique and original design. They will be given all of the needed materials to complete the project.
Instructional Time
40-Minute Sessions for 2 days
Hardware:
Software:
Mental Health Component – Michelle Voithofer, UI1 Social Worker
Vinyl sticker designs as student creative expressions of Gratitude and Act of Kindness. Students share the Rally Towels, giving completed project towels as keepsakes or gifts as memorials for family & friends, birth of child or sibling, or other significant life events.
Goals:
Student begin with mindful breathing exercise “Take 5” quieting and relaxing their minds and bodies with breath counting. https://www.youtube.com/watch?v=DSgOW879jjA with visual,
Or https://soundcloud.com/search?q=take%205%20breathing without visual demonstration.
Center for Healthy Minds Innovations research suggest that mindfulness, as measured through breath counting, is associated with more self-awareness, less mind wandering and better emotional state. “Creating space to come down from the worried mind, and get back into the present moment has been shown to be enormously helpful in mitigating the negative effects of our stress response,” Elisha Goldstein writes in Mindful magazine. “When we drop into the present, we’re more likely to gain perspective and see that we have the power to regulate our response to pressure.” The beginning breath exercise functions to help students focus introspectively, calming both body and mind.
Gratitude – feelings of thankfulness when you look at, or think of, an object, person, or situation you have experienced. Simply focusing for a minute on what you are grateful for shifts your thinking to a positive perspective or mindset, that produces a feeling of quiet joy or comfort in your body. Although students can find it difficult to name what they are thankful for, learning practices of expressing gratitude are important for changing neural wiring and changing negative mindsets. Students are taught this practice of gratitude enables all of us to let go of hurtful or negative emotions, such as resentment and jealousy, and to replace those thoughts with thoughts of gratitude, positively changing brain neural circuitry and perspective.
Gratitude Exercise: Instruct students to begin by thinking of people, situations, things they are grateful for today. Ask students to choose 2 ideas to share out with class. Use whiteboard to write collection of shared ideas. State that this sharing of ideas increases our commonality and forges social connections among peers. Donald Hebb, influential Canadian psychologist who introduced brain- based neuropsychology theory said, “neurons that fire together wire together.” Introduce students to the idea that thinking gratitude thoughts and performing acts of kindness will fire neurons in the brain that will remember gratitude feelings and the brain will want to repeat that behavior.
Researcher Glenn Fox, Ph.D. reports in Greater Good Magazine that practices of gratitude change neural responses in different areas of the brain responsible for emotions of happiness and empathy.
https://greatergood.berkeley.edu/article/item/what_can_the_brain_reveal_about_gratitude
Audio Guided Mindfulness: Students listen to compassion exercise from Healthy Minds Innovations Center for Healthy Minds. https://centerhealthyminds.org/assets/files-resources/compassion2eC.mp3
Performing Acts of Kindness: Acting in thoughtful ways – such as sharing, listening, helping – that benefits others and how you perceive yourself. Sharing kindness is formative in making and keeping friends by strengthening social relationships. And students learn from the neural feedback they receive in kinder thoughts and feelings, that being kind to someone else you are also being kind to yourself.
Rally Towel Group Reflection: Gratitude thoughts and acts of kindness reflected in vinyl design choice and completed towel designs as memorial or keepsakes are shared out in group discussion. https://www.youtube.com/watch?v=lrHJYeAVoKU
Students are encouraged to keep practicing thoughts of gratitude and to share acts of kindness beyond their FabLab project completion as a life choice.
National Standards for Technological Literacy
Have students discuss what they know about the terms “positive space” and “negative space” and how it relates to art. Watch this video to assist with explanation : https://www.youtube.com/watch?v=B-wYU1LJe00 or https://www.youtube.com/watch?v=q3Wx8vDsXuI
TEACHER NOTE: Ask students the importance of utilizing positive and negative space when using consumable materials.
Essential Questions: How can gratitude and acts of kindness be shown to create apparel with logos or pictures on them?
Students will learn the steps needed to search for copyright free images. Another option is for students to create their own images inside the design software, CorelDraw.
Formative Assessment: Students should understand the general concept of positive and negative space and how it will relate to their finished project.
Essential Question: What type of images work best for creating vinyls?
TEACHER NOTE: I would take the opportunity here to zoom in very close on the image before converting it to show the students that a black and white image from the internet can contain other variations of gray and white. This will show the reason behind converting the image to a black and white bitmap to remove those other colors.
TEACHER NOTE: Students can also choose to create their own image within the design software.
Formative Assessment: To show that students have a basic understanding of the software, have them review the steps the used to prepare their image.
Formative Assessment: Have students review the attached rally towel rubric (attached) and discuss what changes might improve their performance.
Having trouble? Let us know by completing the form below. We'll do our best to get your issues resolved quickly.
"*" indicates required fields