- Loading…

This “Hour of Code” project is part of Computer Science Education Week from December 3 – 7 but the lesson can be done any time of the year. Students explore art (printmaking), computation and physical computing by creating an electronic postcard or greeting card using Tinkercad Codeblocks (for coding the design) and the Love to Code Chibi Chip (for adding electronics).
For coding the design (Hour of Code activity):
Note: The following materials and supplies are for creating the electronic postcard or greeting card using the Tinkercad Codeblocks design.
For laser etching the raster image:
For adding the electronics (additional Hour of Code activity w/ laser etching):
Total time for the entire project: around 2 hours
Quickly engage students in problem-solving, while also exposing them to the concepts of control structures and parameters through playing with variables and other components of an algorithm.
For Hour of Code (Computer Science Education Week), try the Designing Algorithms with Tinkercad activity.
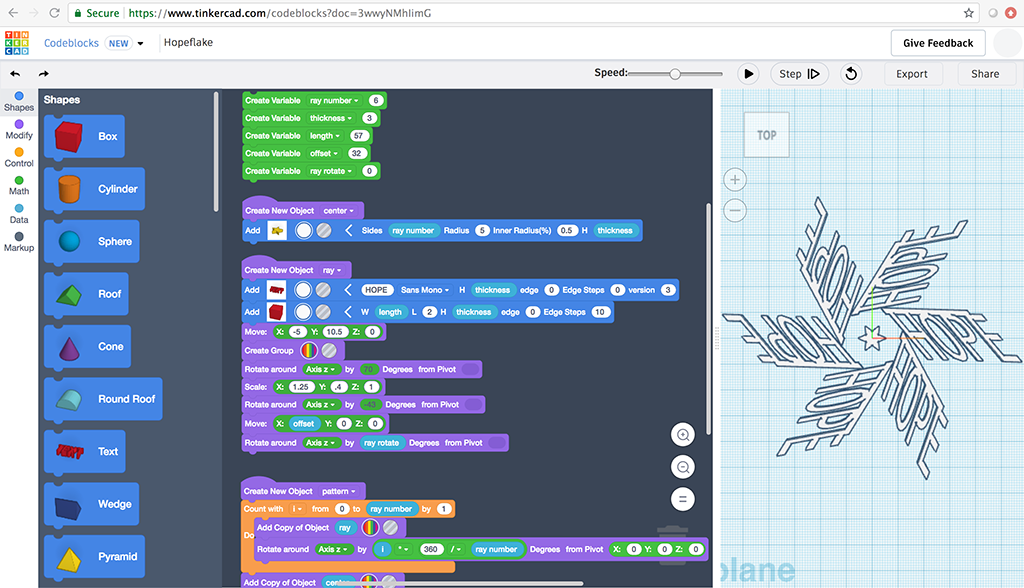
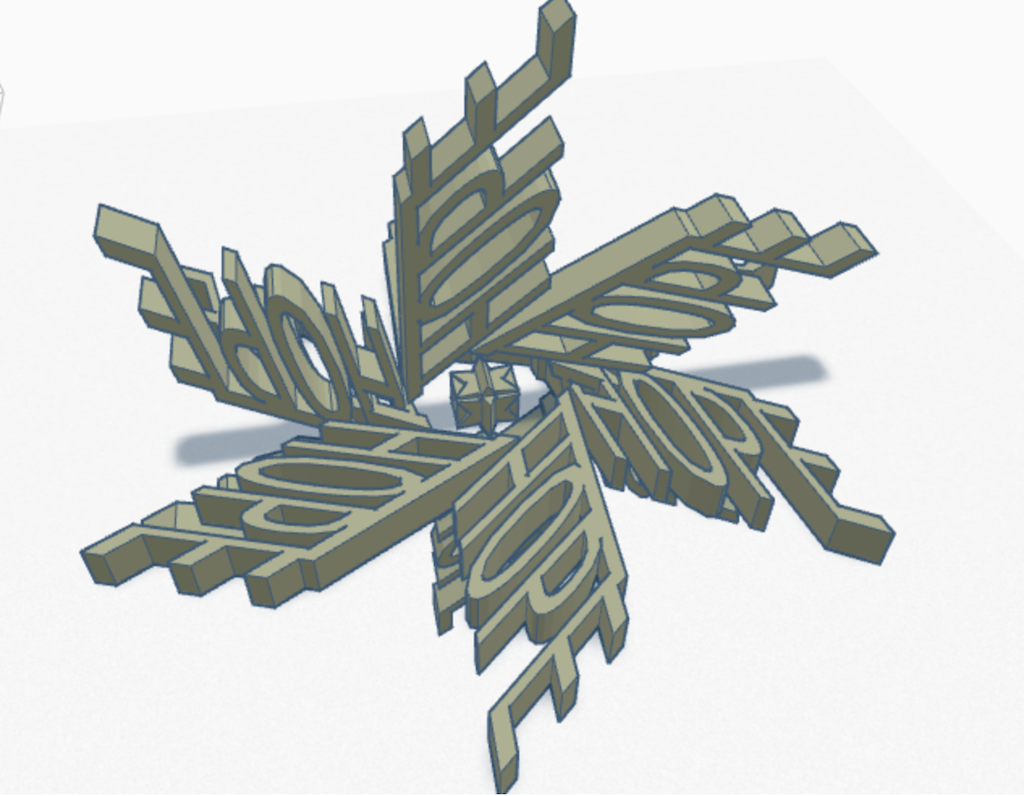
Log in to Tinkercad and choose Codeblocks from below your profile image on the main homepage. On the next screen, choose “New Design.” Create a snowflake design or kind of design for the postcard.

Click “Export” (top right) as an STL file for Tinkercad (and additional 3D designing), or
Click “Share” (next to Export) and save the screenshot for laser etching using a laser cutter.

More advanced method:
Import Codeblocks STL file into Tinkercad 3D Design and create a 3D object by copying and translating (flipping, turning or rotating) the original object (see above).

Note: These methods also meet Common Core math requirements (CCSS.MATH.CONTENT.8.G.A.3).
Learn how to use relief printmaking techniques in which the Tinkercad Codeblocks image is incised into wood using a laser cutter.
Basic method:
Save the screenshot image as a PDF, then send directly to the laser cutter to etch the image into a piece of wood. For Epilog laser cutters (ex. Zing, Fusion), use the following recommended settings:
Raster Setting – 100% Speed; 100% Power
Vector Setting – 10% Speed; 100% Power; 20% Freq.

More advanced method (optional):
Add additional graphics in Inkscape, then create a vectorized halftone of the image (see instructions here), flip and invert the image and save as a PDF file (see sample file attachments). Send PDFs to the laser cutter and etch the image into a piece of wood or other printable material.
Explore relief printing (in art printmaking), which a process consisting of cutting or etching a printing surface in such a way that all that remains of the original surface is the design to be printed. Examples of relief-printing processes include woodcut and linocut (using 100% linoleum).
Get your water-soluble block printing ink ready (using a tray)
Apply ink to the laser etched wood block

Place the block ink side down onto the paper
Press the block down, flip the block and paper carefully, then rub the surface of the paper to transfer the ink (from the block to the paper)
Peel off the paper to reveal the print

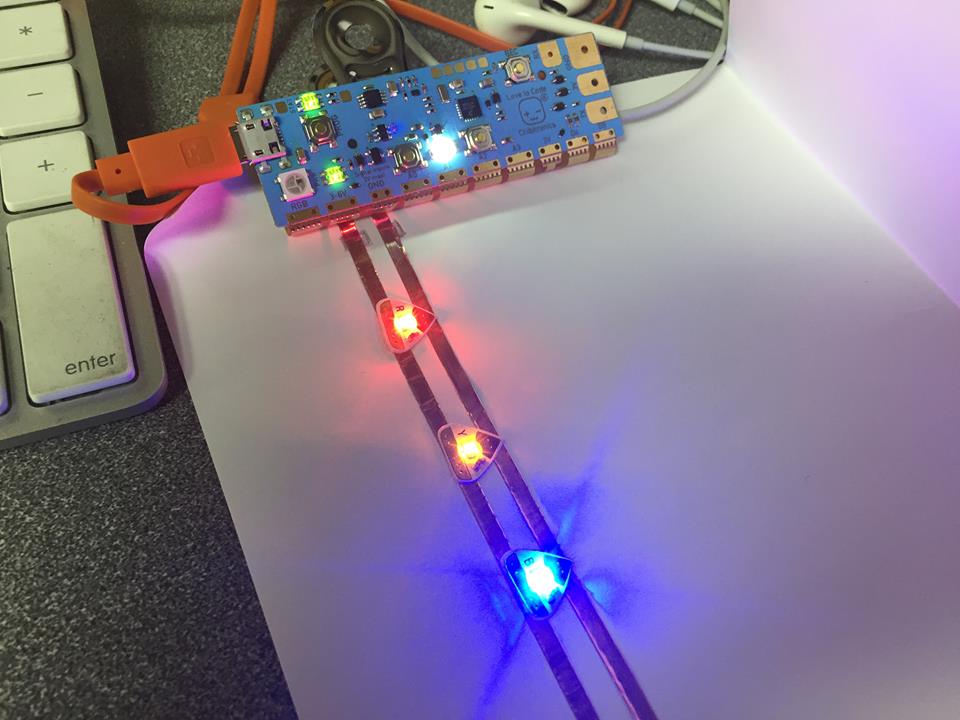
Embed electronics into the postcard using the Chibi Chip to bring life to the image by making LEDs blink and fade. This step requires coding.
Follow these instructions to prep the Chibi Chip: https://learn.sparkfun.com/tutorials/getting-started-with-chibi-chip-and-clip?_ga=2.259068682.1835772651.1544020194-1370435768.1544020194
Activity: Use copper tape and LEDs to create a circuit on the chipboard or cardboard and light an area of the postcard. Make a small hole in the top of the postcard where the LED will show through.

Next, code (program) the Chibi Chip (also see instructions in the url above):

Write code using the Microsoft MakeCode programming editor. Novice-level students can use the “Blocks” program (see above) and more advanced students can use the “Javascript” version that is similar to Arduino IDE.

After coding, click the “Upload” button, press and hold the program button on the Chibi Chip until the PROG light stays red. Then, click the “Ready” button.

Clip the Chibi-Chip and postcard to the chipboard circuit and make sure the LED shows on the top of the postcard.

More ideas can be found in the guide.
Having trouble? Let us know by completing the form below. We'll do our best to get your issues resolved quickly.
"*" indicates required fields
This one is awesome!
Thank you for your fab contribution!