- Loading…
Often we don’t realize that objects we use today come from centuries of engineering, of ingenuity in harsh conditions. This is the case of kayaks we enjoy in the summer! The word itself comes from the Greenland Eskimo word ‘qayaq’ meaning ‘small boat of skins’. In this instructable, we will make a model of kayak used by Yup’ik people of Western Alaska, on the shores of Bering Sea.
We will need to know a few terms in kayak building:

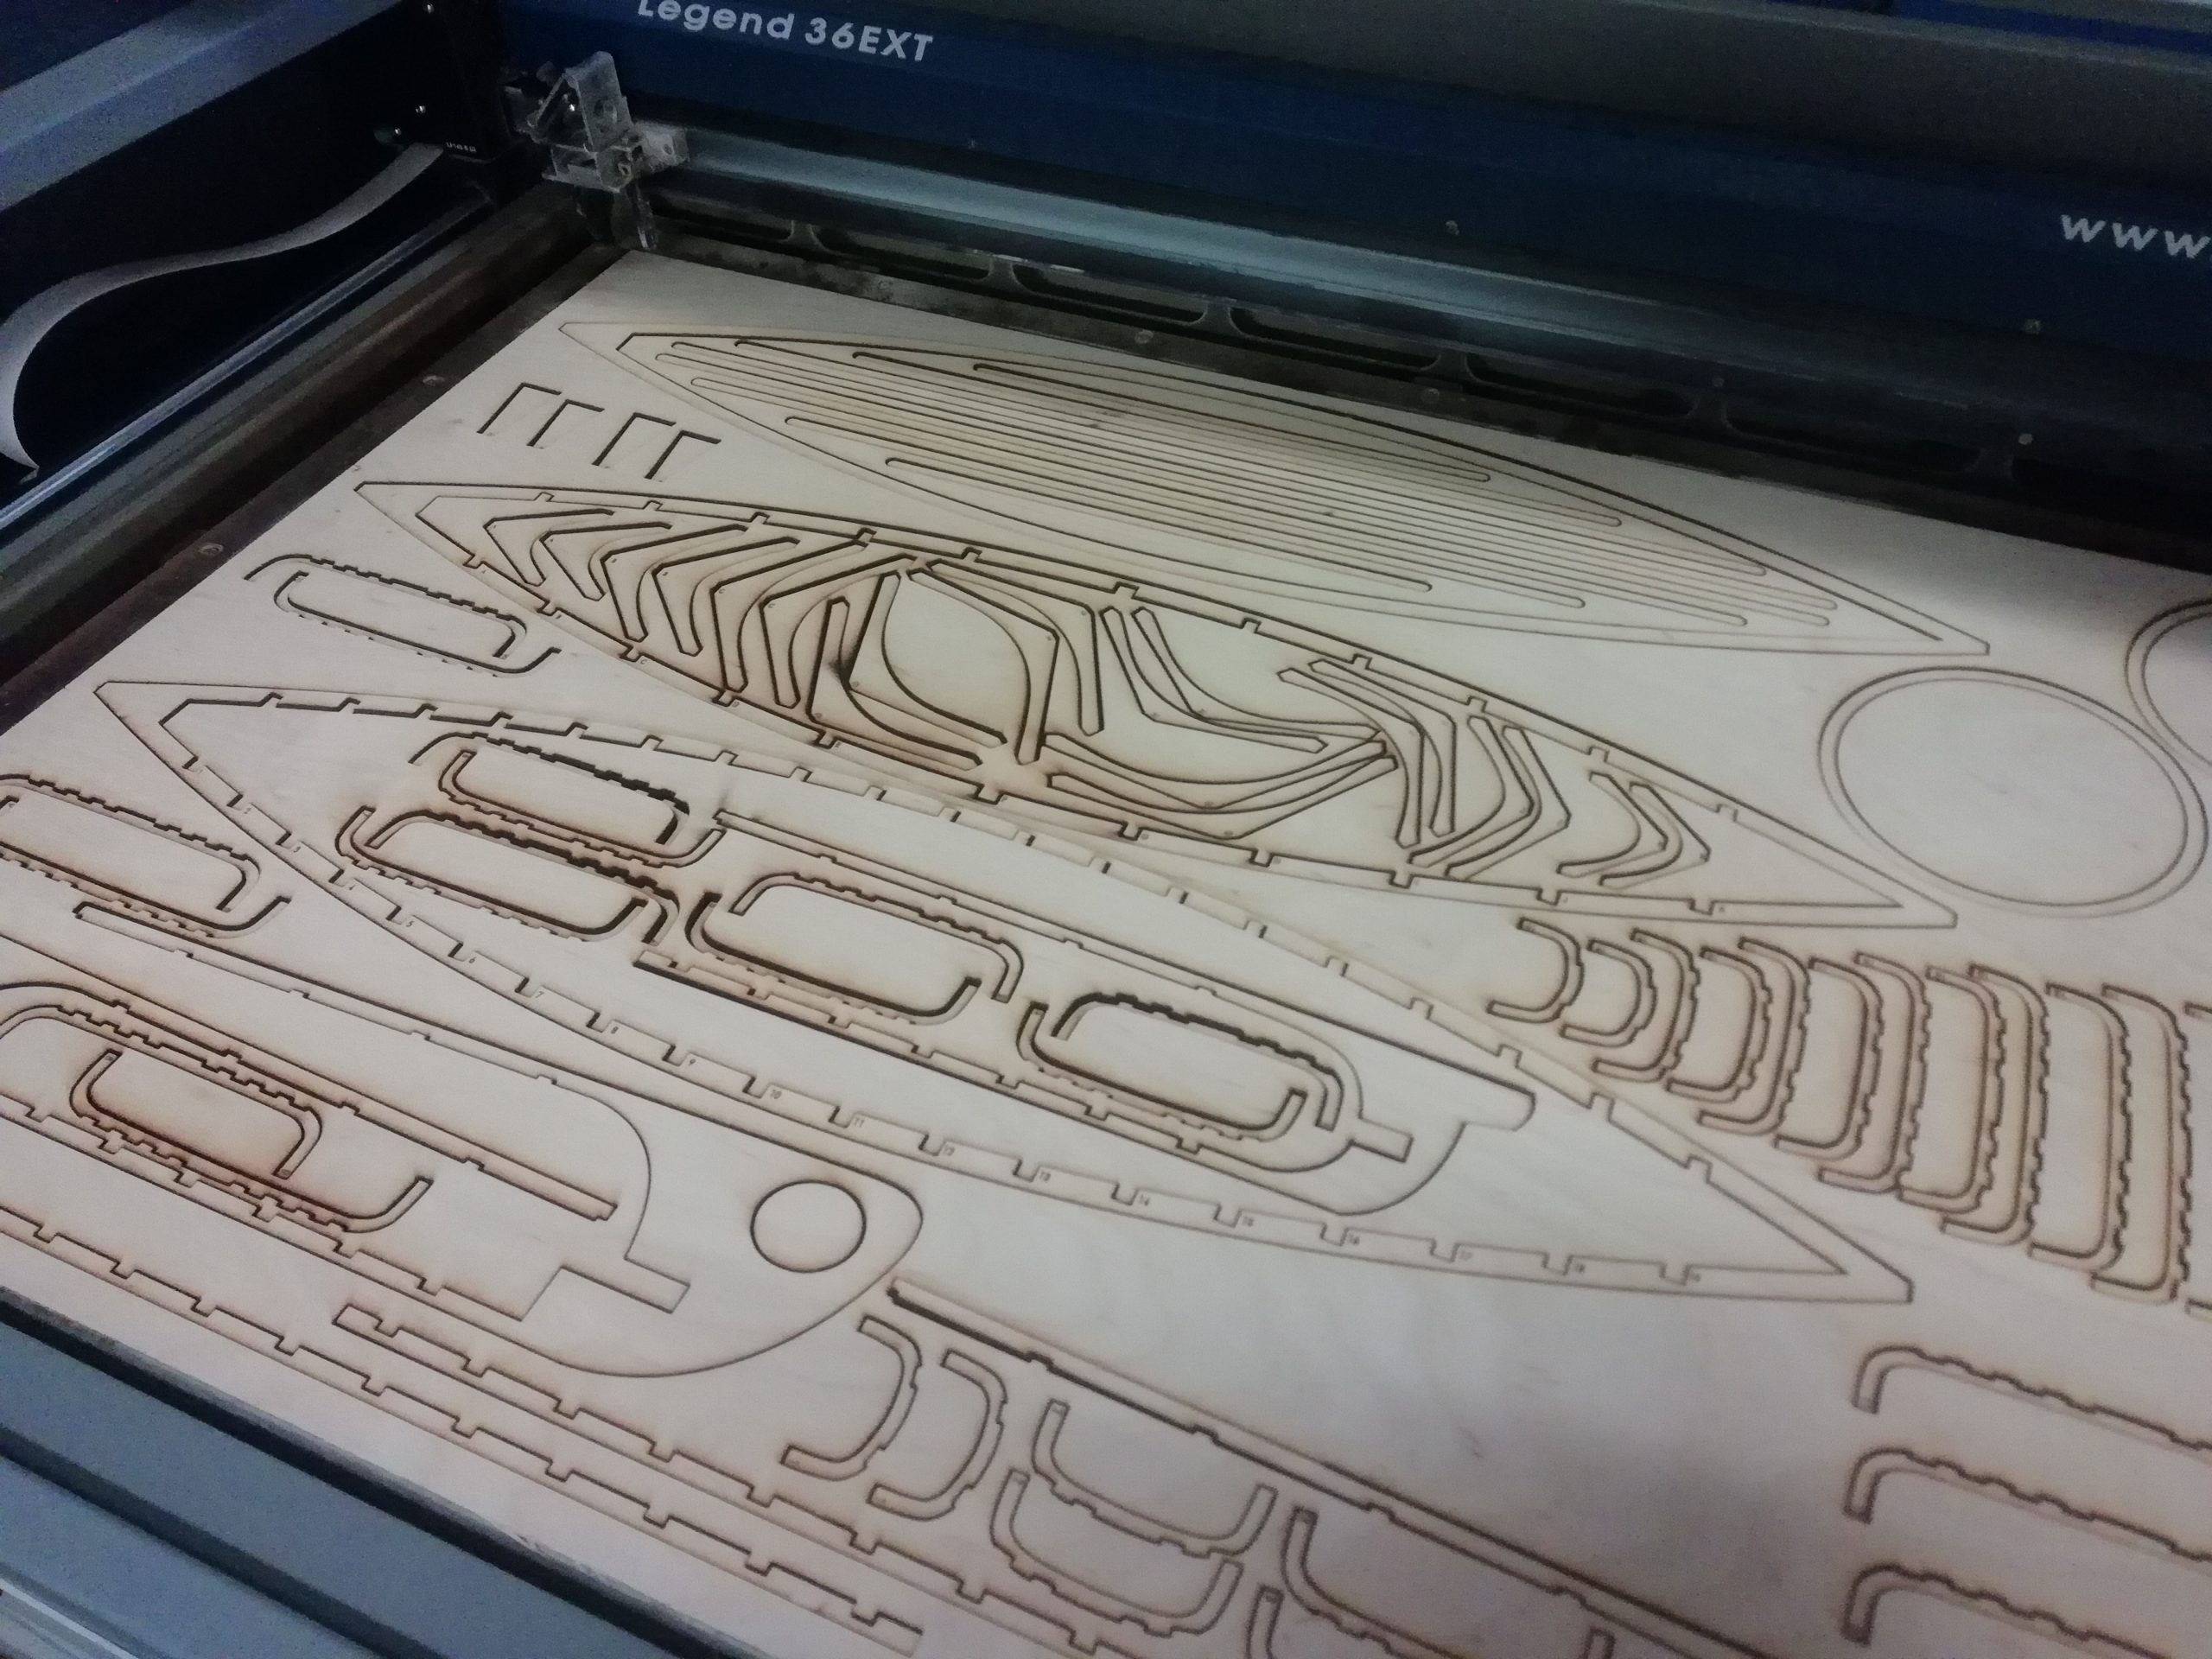


Tools: 36×24 laser cutter
Contents: wood or craft glue
Materials: 1/8th inch plywood, 36×24 inches
Make sure you watch the laser while it's cutting!
Laser cut the pieces out of plywood.
The files attached have 2 pages to ‘print’, in alignment:
– One with numbering to make it easier to find the right pieces that can be engraved or scored (a 100% speed laser cut with less than 50% power)
– Second with the actual pieces

Let's put it together.
Organize and glue your pieces, referencing the attached vocabulary poster:
– 3 boat shaped pieces – the gunwales. Glue them like a sandwich with the ones with notches on the top and bottom, full one in the middle.

Make sure that the numbers and letters remain visible, and your fronts and backs are aligned!
Continuing...
– 2 bow pieces, the front of the kayak
– 2 stern pieces, the back
– 4 pairs of sticks – stringers – we’ll use them later

Glue together the bow pieces. You will notice that one of them is longer – this is to create overlap to connect the stern pieces, also glued together and with one longer beam.
Make sure the notches in the deck stringer (upper beam) and keelson (lower beam) are very well aligned!
Otherwise it will be hard to fit ribs and deck beams into them.

More glueing
– 2 rings for the cockpit coaming
– 2 paddle pieces
– 4 stanchion pieces, marked with letter F
Glue the rings and paddles together.
Sandwich a longer and shorter F piece and glue them together, aligned at the bottom. The broader top should create a ledge, on top of which the cockpit coaming will sit.
Repeat with the other pair.

The bone-like pieces
– 19×2 ribs, that will shape the hull, numbered 1-19
– 10×2 deck beams, letters A-K


Glue pairs of ribs and deck beams.
Now things will start to take shape. Let’s connect our gunwales with bow, stern, keelson and deck stringer.
Make sure that the A and 1 notches in gunwales are at the bow – by the ‘eye’. Letters facing up, numbers facing down.


Let's build the hull and deck
Time to put in the deck beams (A-K) and ribs (1-19). Carefully glue them into their assigned notches in the gunwales, deck stringer and keelson.


Almost there...
You will notice that there is no F deck beam – this is where the stanchions come in! Glue them into the F slots in gunwales, the ledge facing inwards. Next, mount the cockpit coaming in the middle, resting on E, F and G pieces.


Find the 4 pairs of sticks
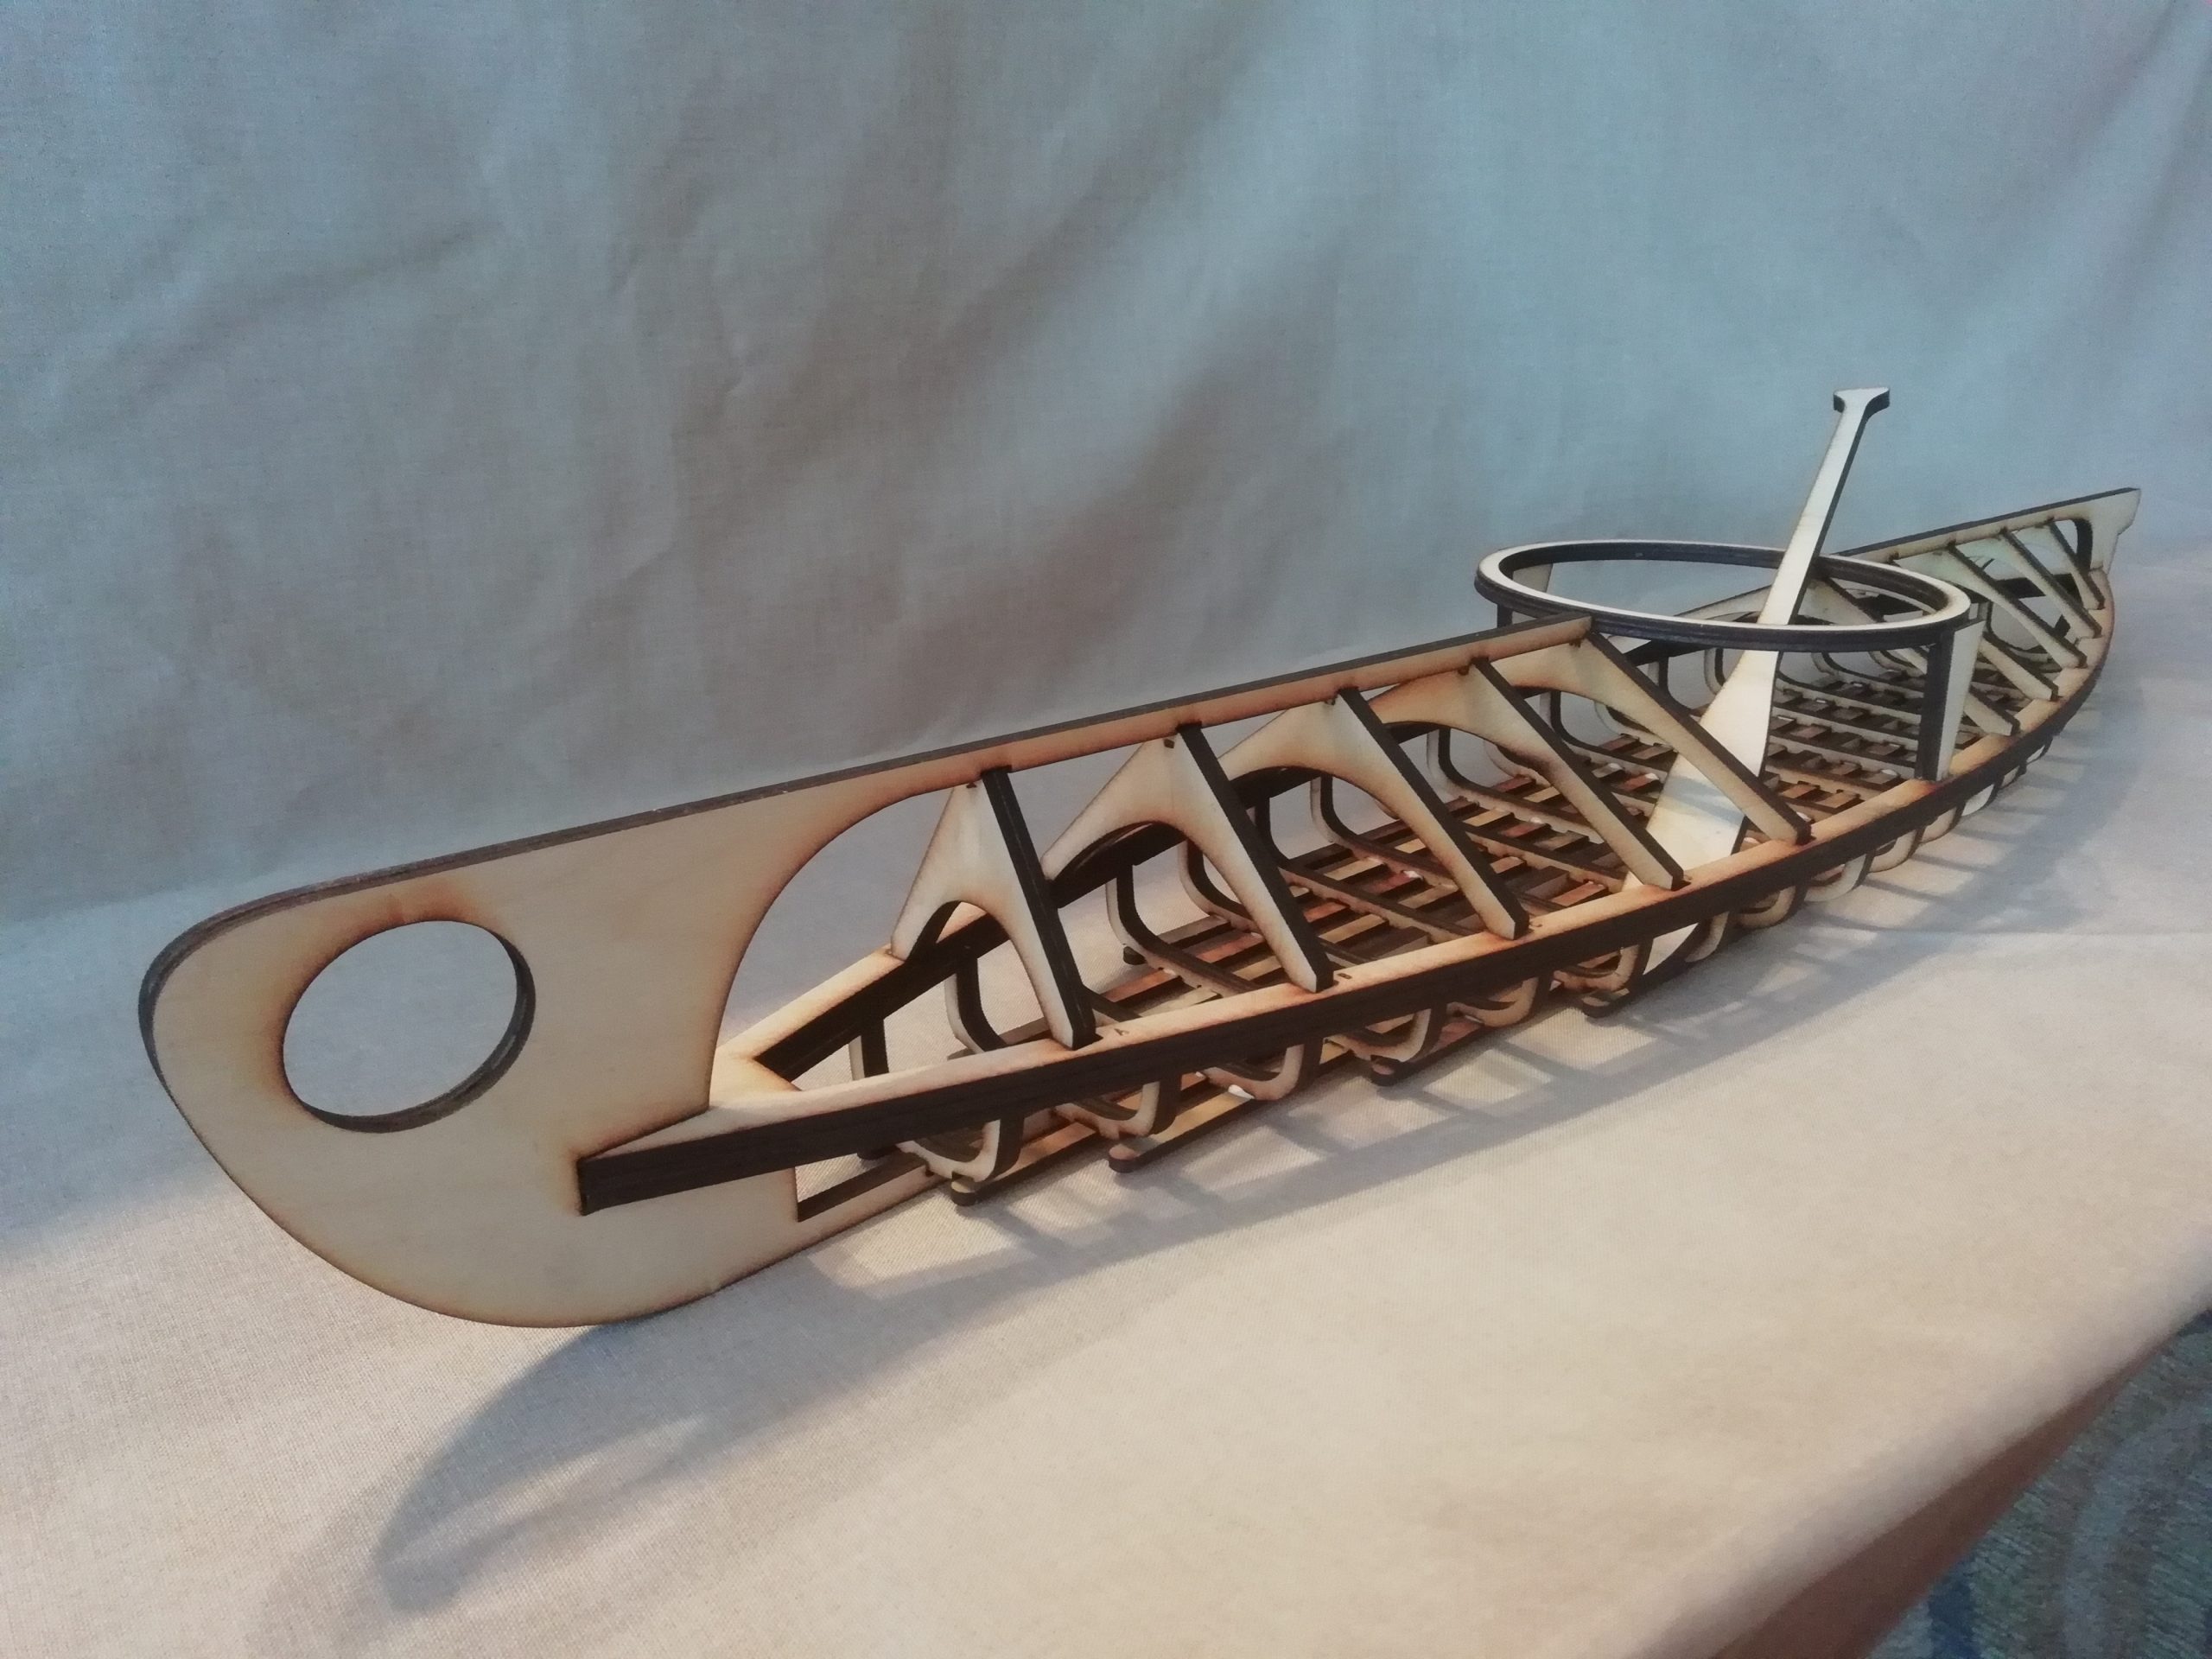
Almost ready! The last thing is to glue the stringers on the bottom of the hull. Start with the longest ones closest to the keelson in the middle, to the shortest on the outside.

You made your own model of Yup’ik kayak! If you’d like, you can decorate it using paint, crayons, or whatever you have on hand.
Additionally, you can sand your paddle to a more real shape, and paint your design on it. See if you can find information on how kayaks and paddles were traditionally decorated J
Having trouble? Let us know by completing the form below. We'll do our best to get your issues resolved quickly.
"*" indicates required fields