- Loading…


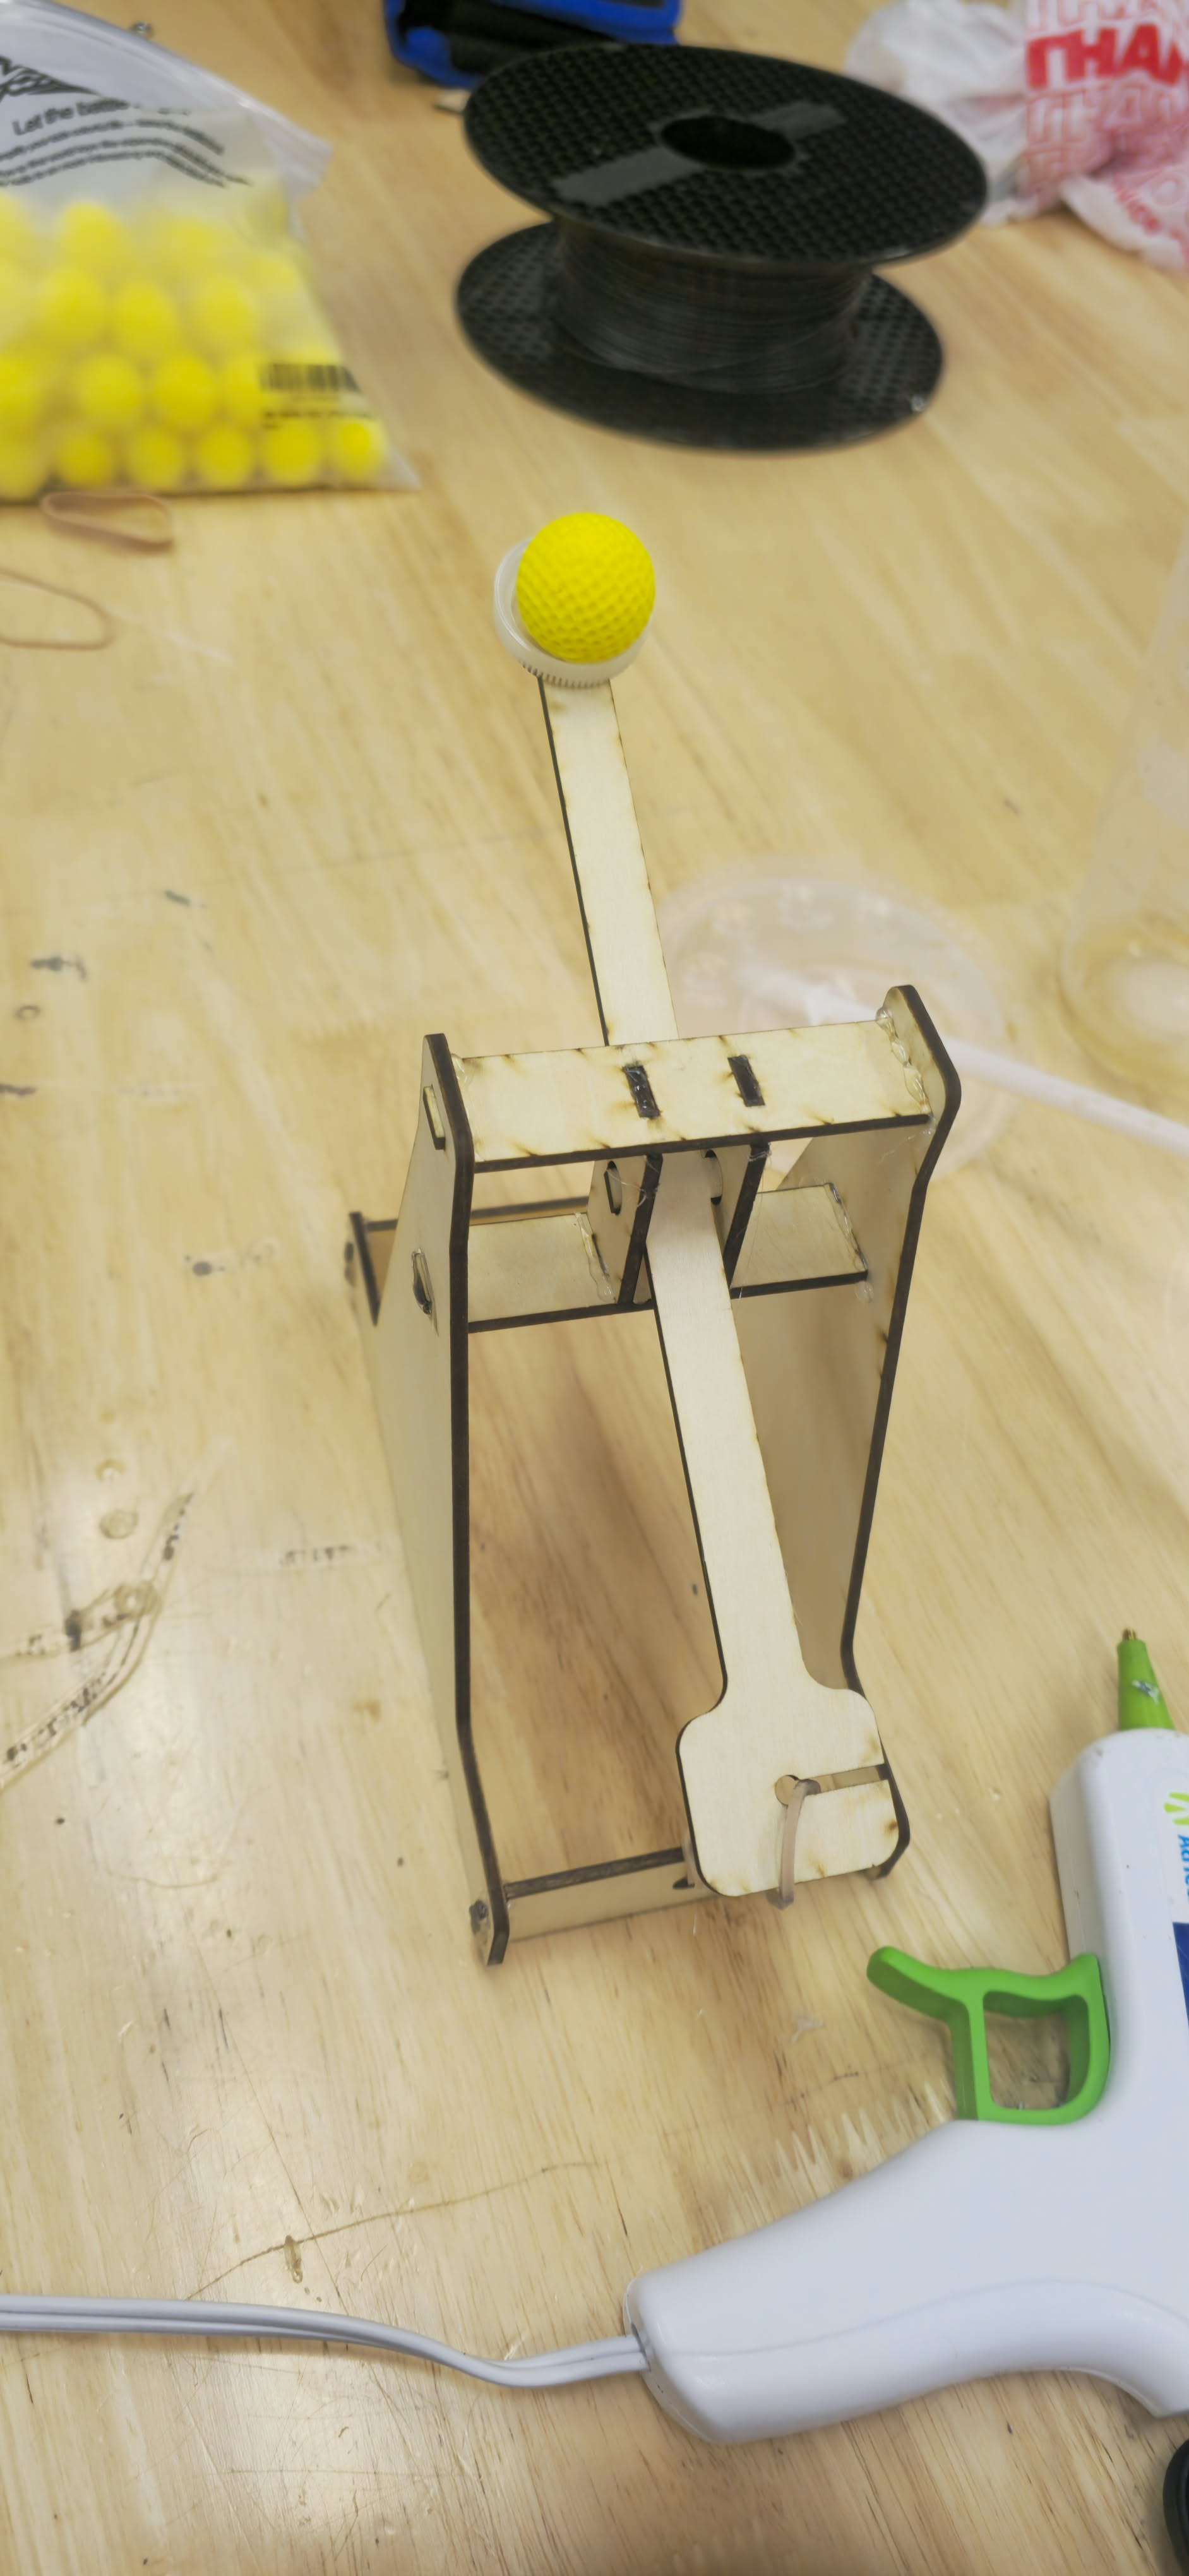
How did medieval engineers use gravity to challenge castle defenses? In this hands-on STEM lesson, students operate an instructor-built, laser-cut, tabletop counterweight trebuchet to explore energy transfer, levers, variables, measurement, and engineering design. After learning how trebuchets were used during medieval sieges, teams predict and measure the effects of pre-approved counterweight settings on the travel distance and accuracy of soft pom-poms. Finally, students test a lightweight cardboard castle wall and recommend improvements to its defensive design. The laser cutter is used by the instructor before class; students focus on historical inquiry, safe experimentation, data analysis, and discussion.
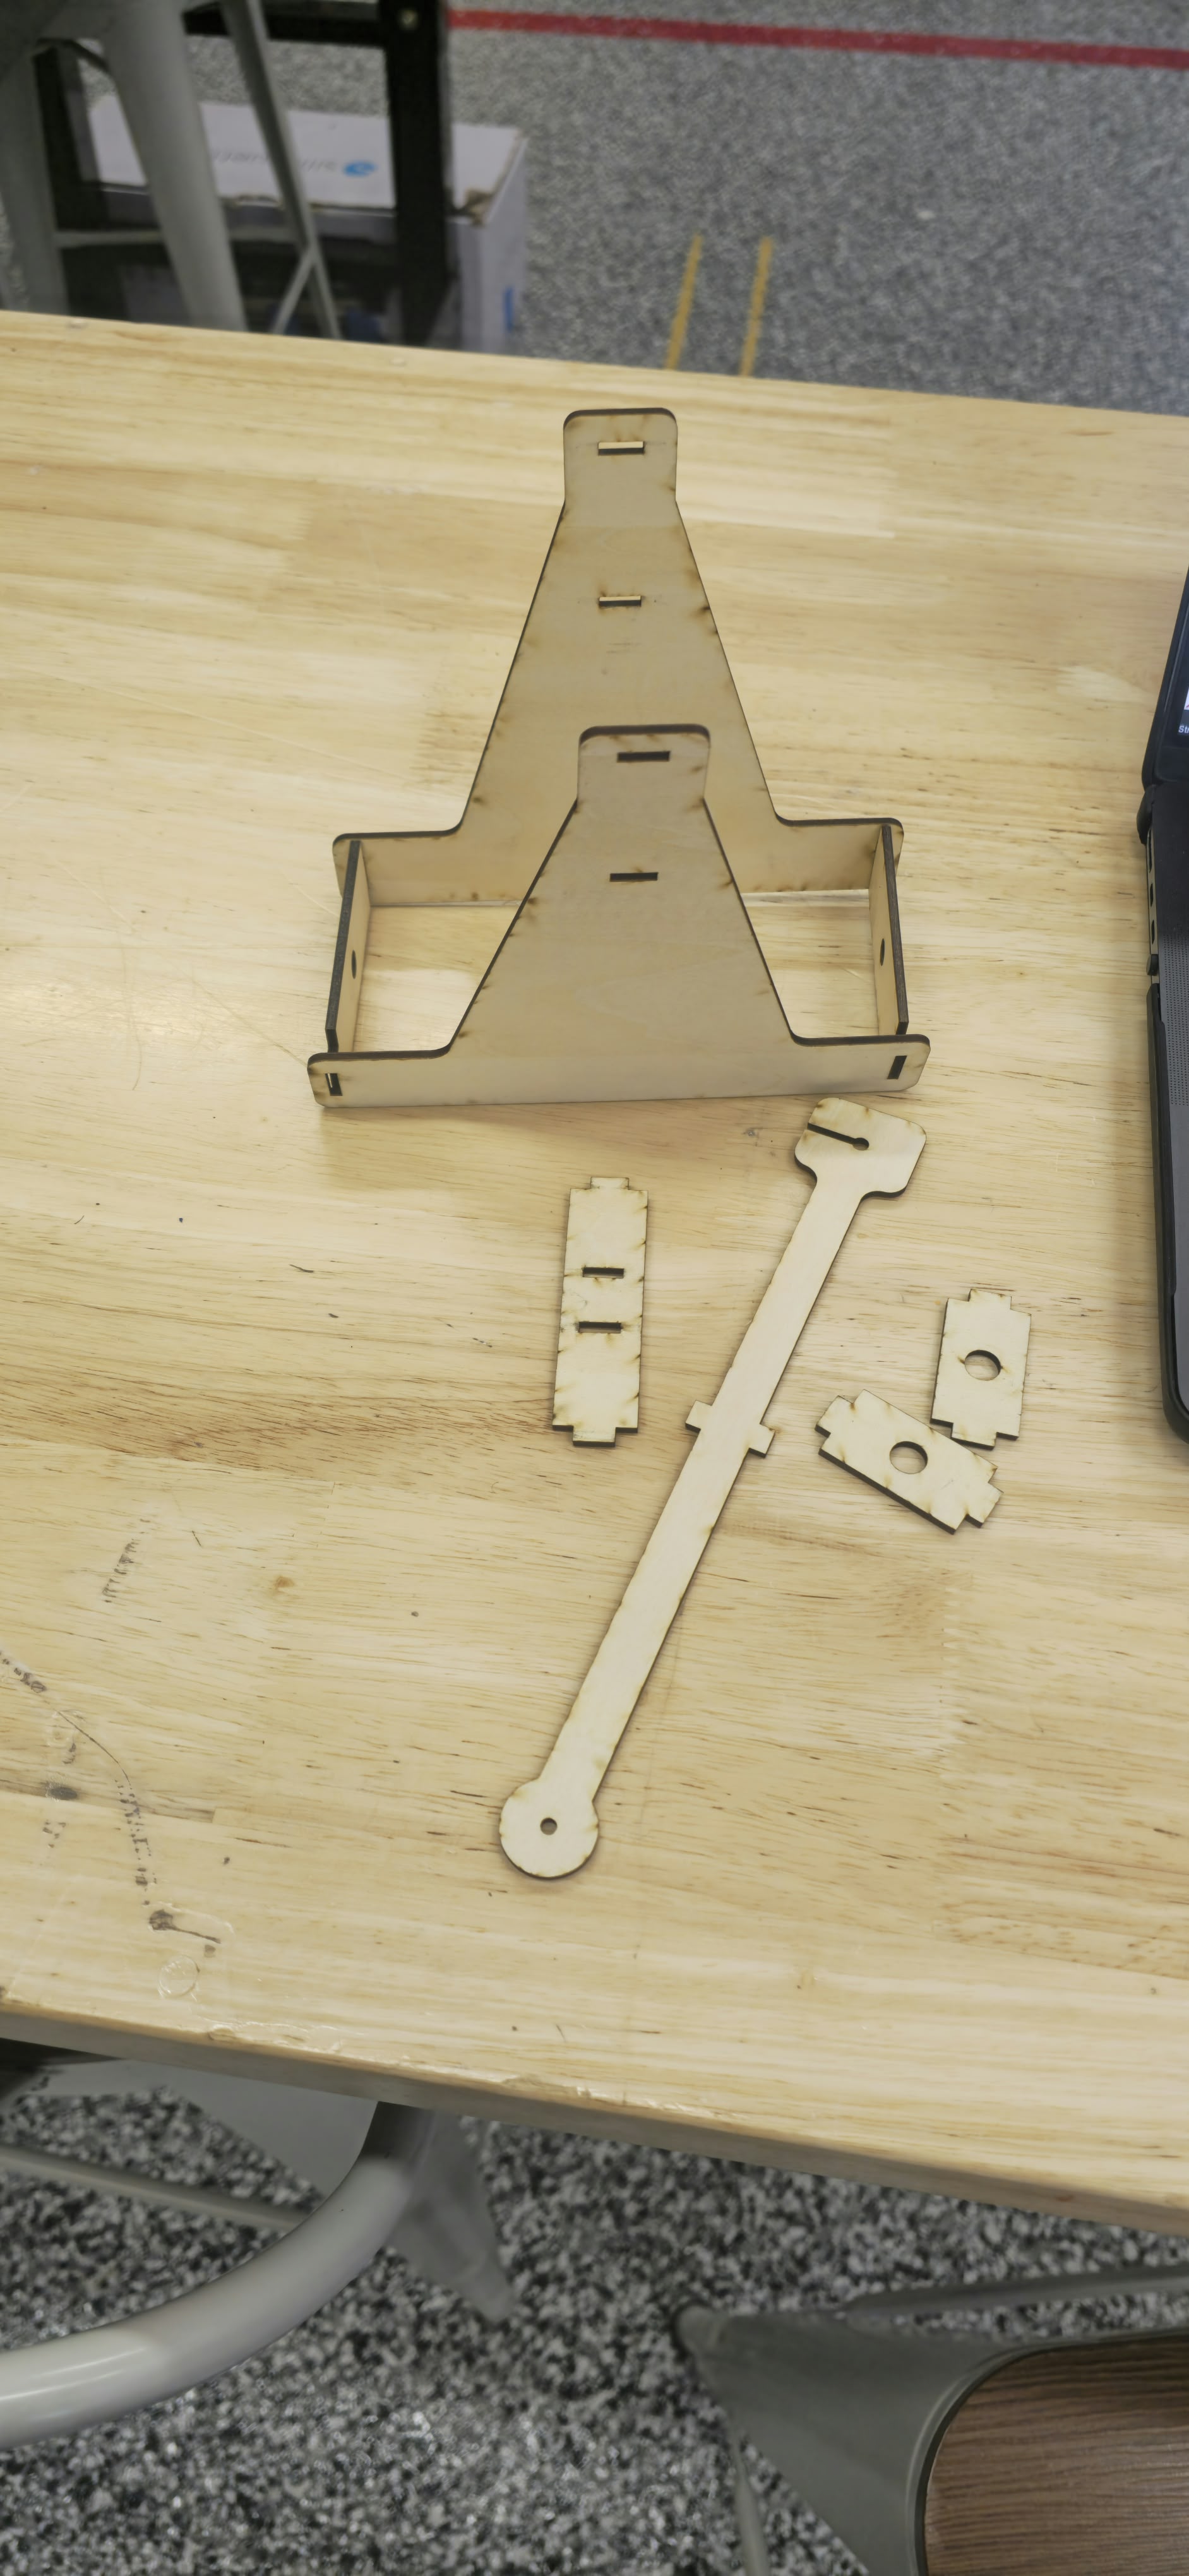
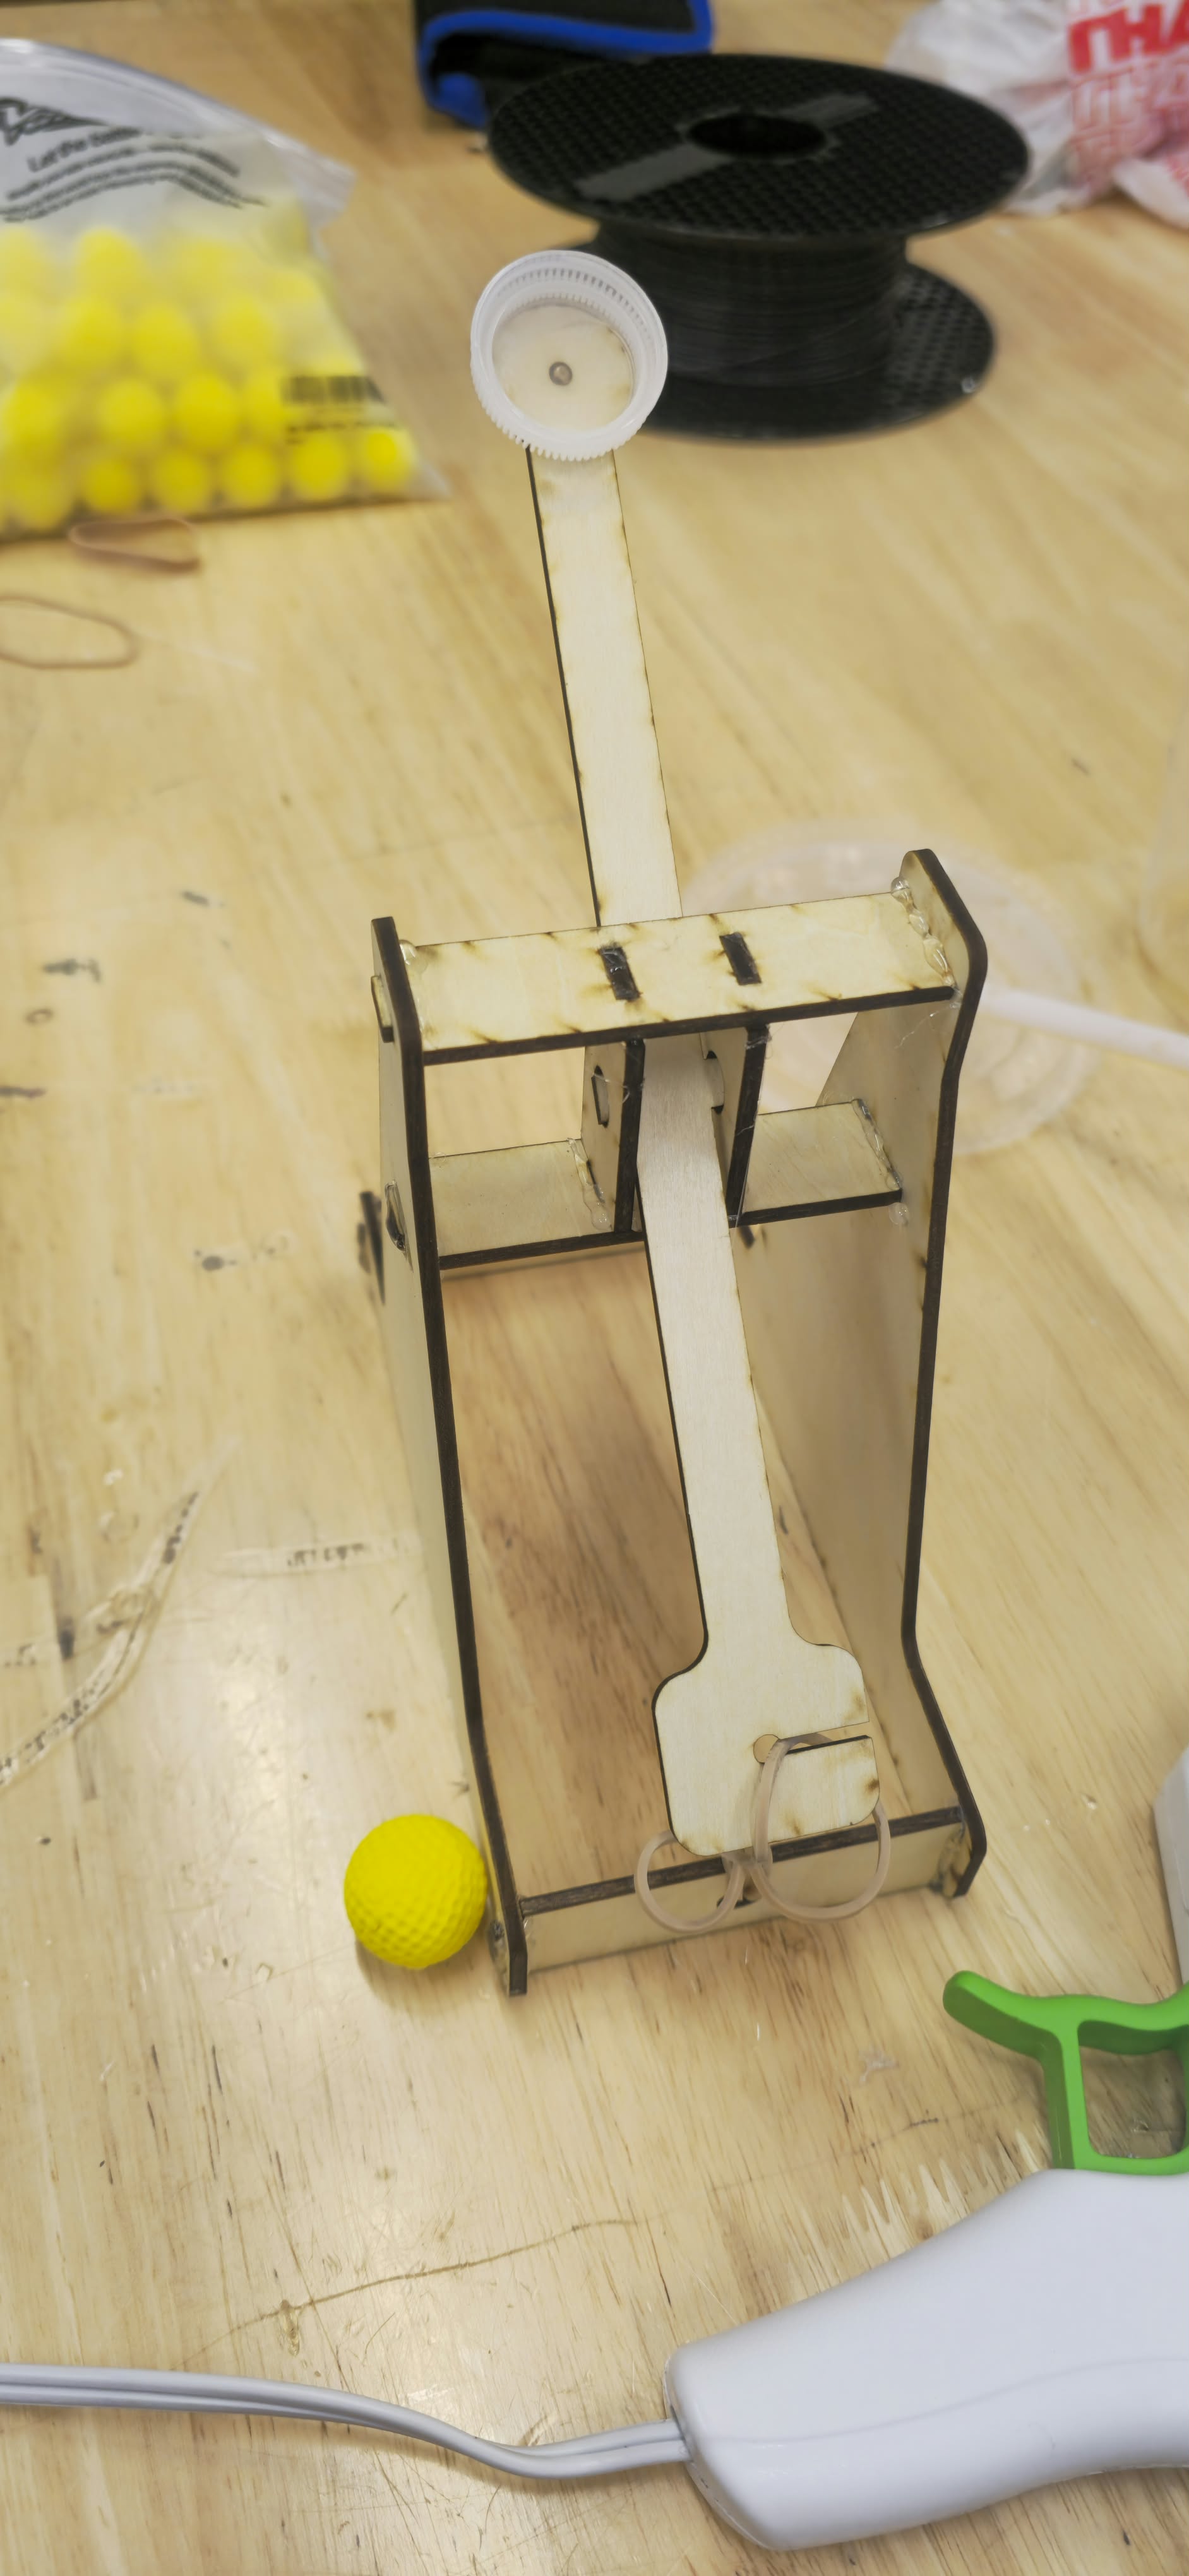
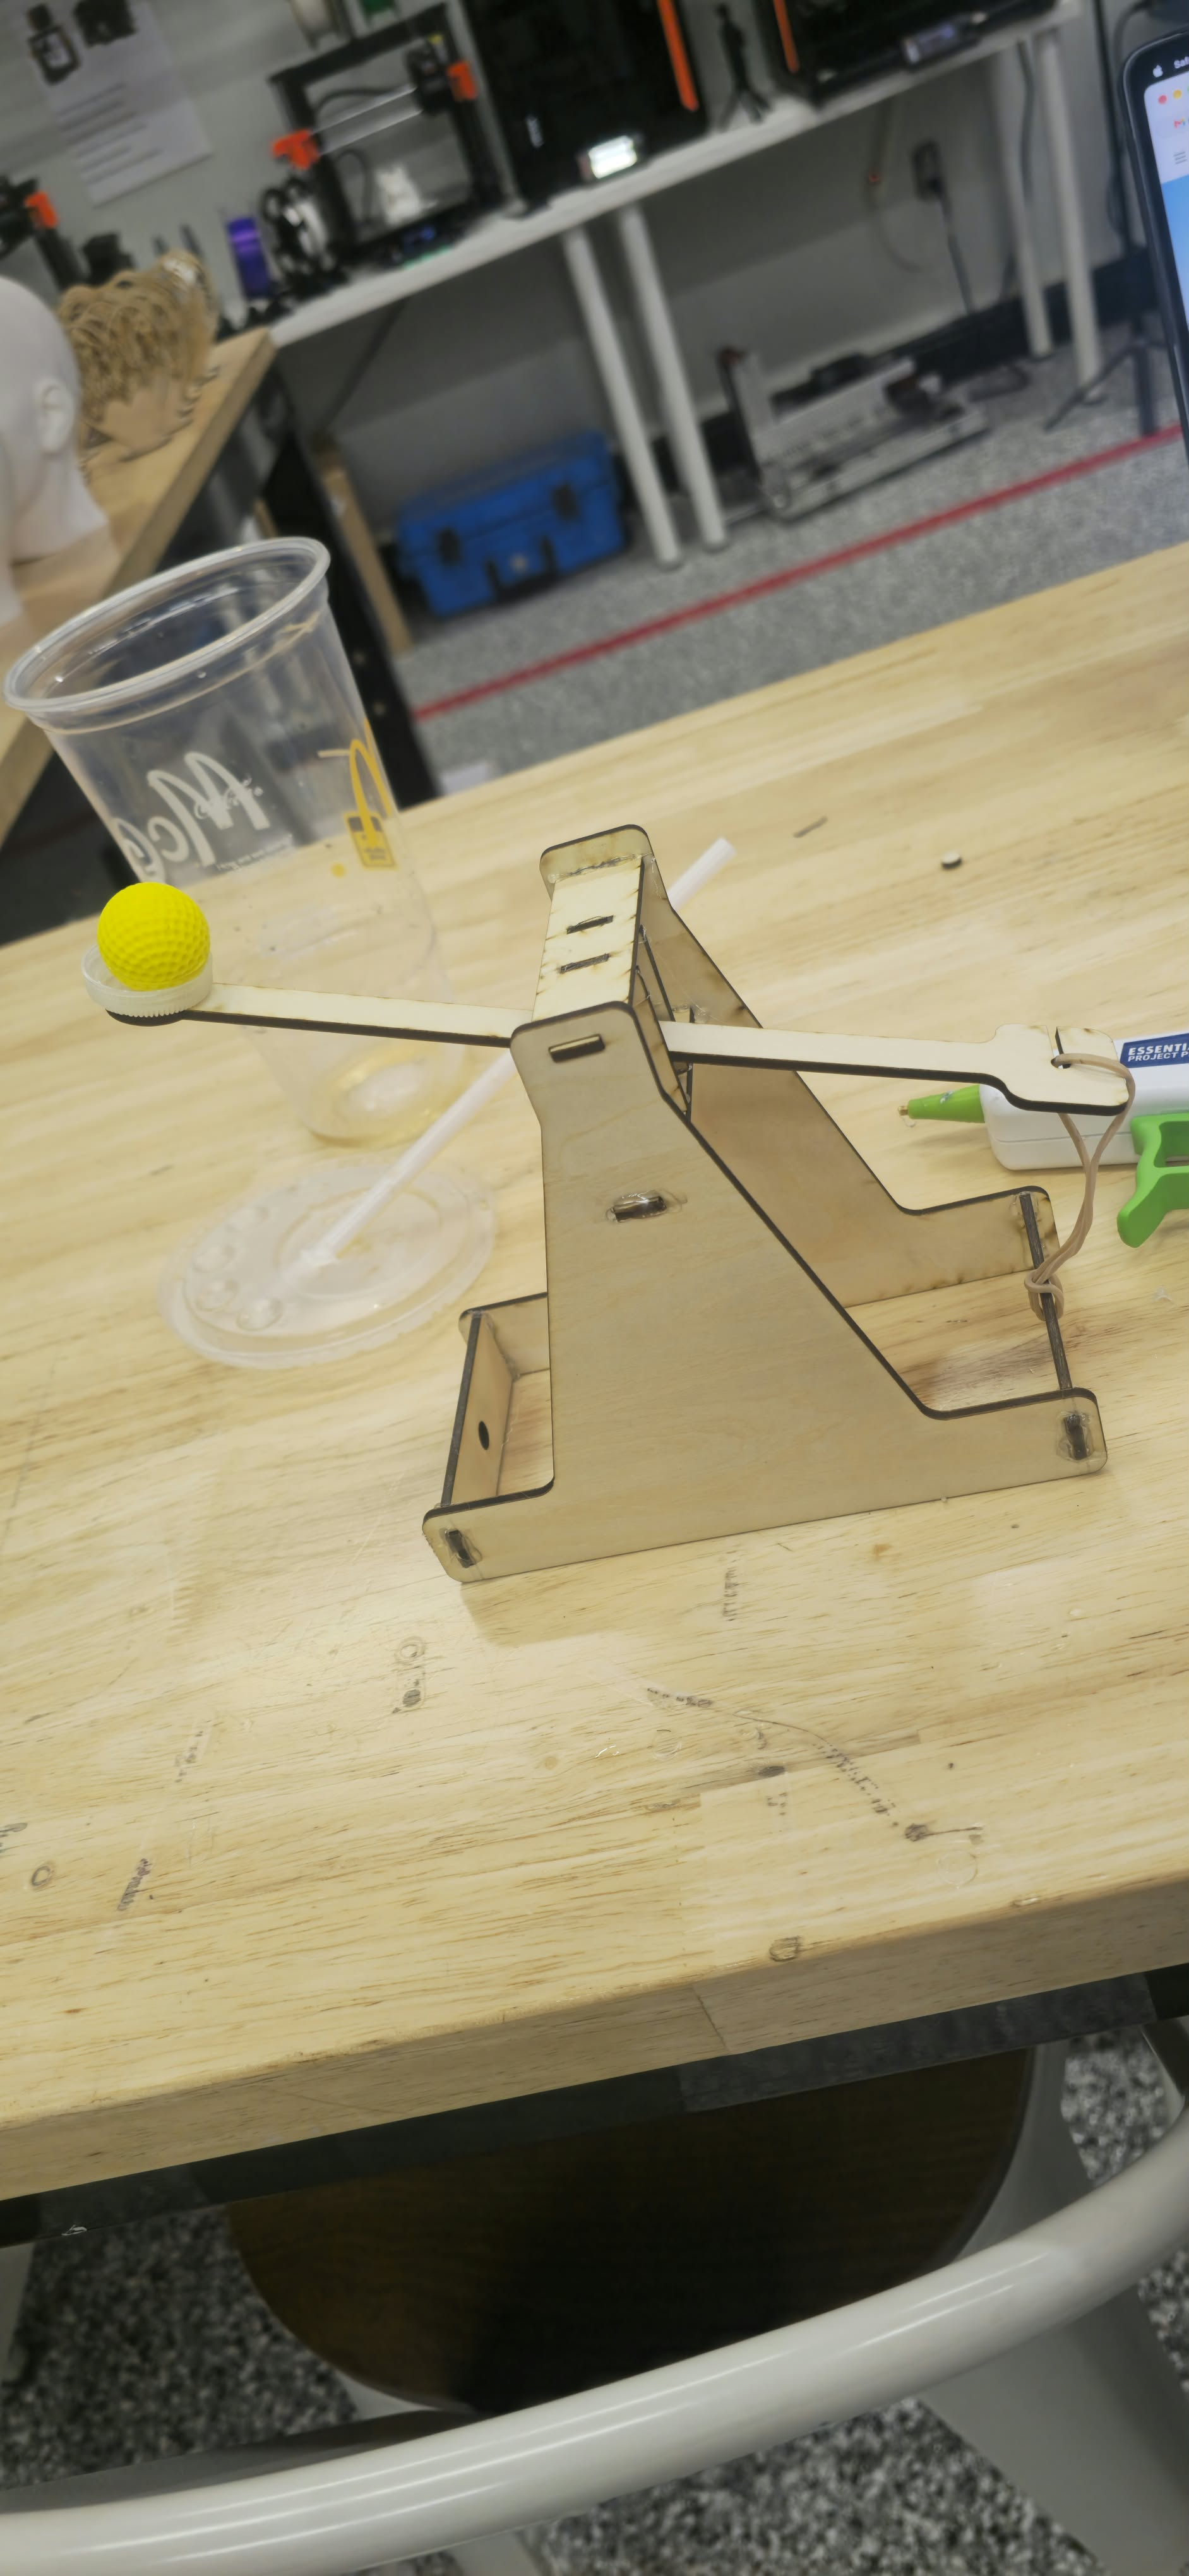
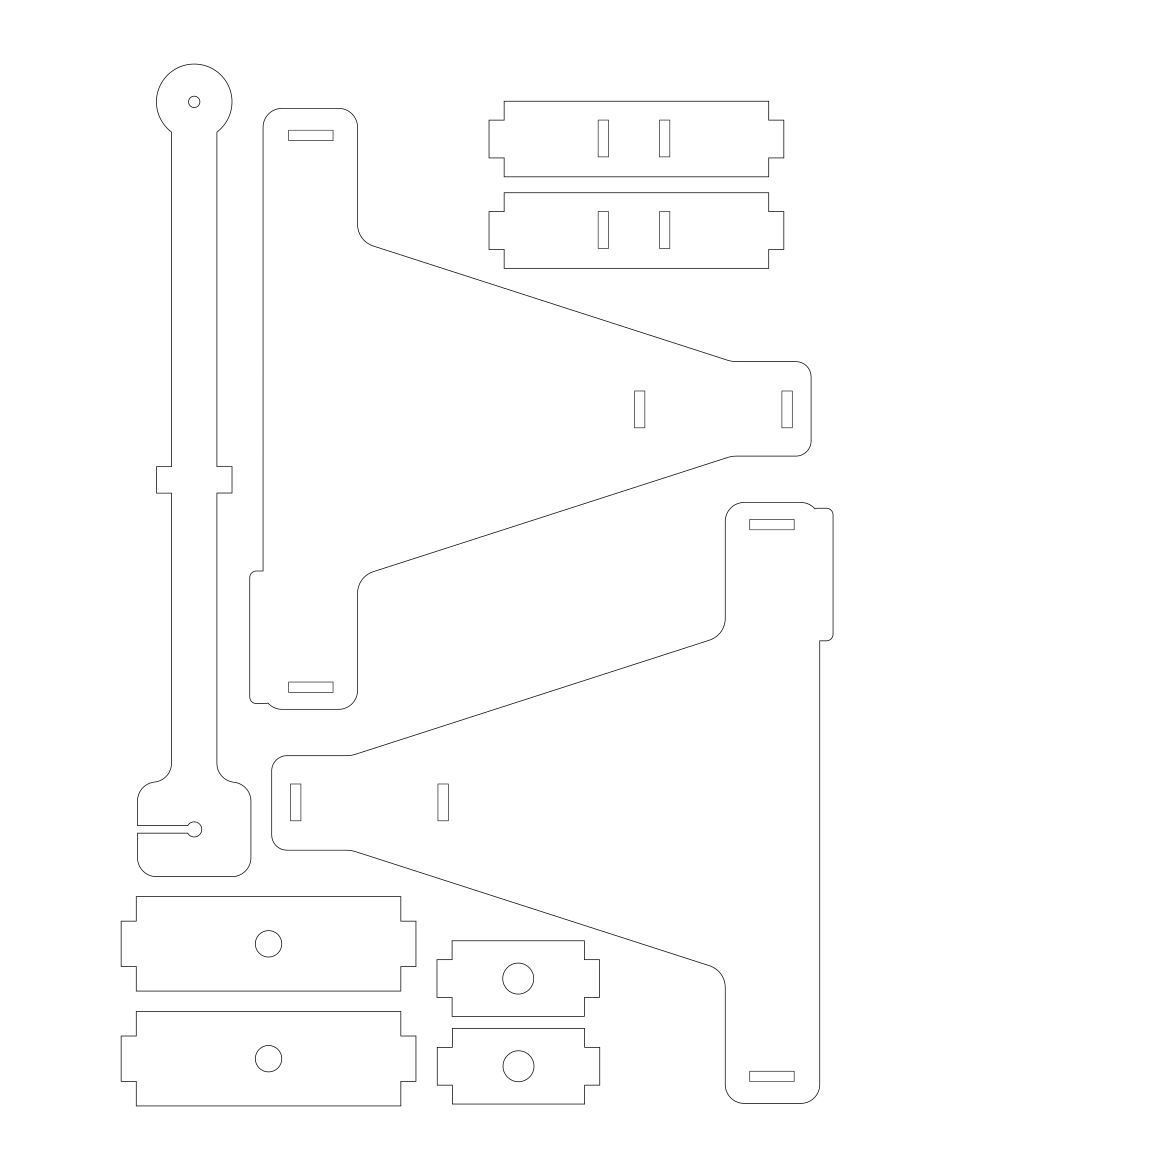
Epilog Mini laser cutter (instructor use only)
computer with laser-cutting design software
3 mm laser-approved plywood or other manufacturer-approved material;
basic hand tools for instructor assembly.
Before class: 1–3 instructor-built tabletop counterweight trebuchets, approximately 6–8 in tall, each securely fixed to a stable base; use an enclosed counterweight and limit launching energy. Test every setting in advance.
Soft, lightweight pom-poms only (no stones, metal balls, hard wooden pieces, or sharp projectiles); a shallow catcher/backstop; floor or tabletop launch lane approximately 3–4 ft long.
1 miniature castle target, approximately 10–12 in wide, made from loosely assembled lightweight cardboard panels; replacement wall sections.
Three clearly labeled, instructor-approved low-energy counterweight settings (low/medium/high); students do not change mechanical components themselves.
Measuring tape or meter stick; masking tape for launch line and target; safety boundary markings; recording sheets; pencils; calculator.
Projector or printouts with an image of a medieval counterweight trebuchet and a simple lever/energy diagram.
Instructor preparation: laser-approved plywood, cutting file, dowels, wood glue and hardware as appropriate for the chosen design. Follow the cutter manufacturer’s material, ventilation, fire-watch and training rules.
instructor reflection (revise after teaching; the Field Activity Assignment questions were not supplied): This activity makes historical engineering visible through a miniature physical model. Students can observe how gravity provides energy, connect the pivoting arm to the concept of a lever, and test predictions using simple measurements. Because the instructor constructs and prepares the trebuchets in advance, classroom time is reserved for inquiry, collaboration, data collection, and analysis rather than fabrication. The soft-pom-pom and cardboard demonstration is a deliberately low-energy analogy: a real medieval siege used much larger devices and heavy stone ammunition. I will evaluate student learning through their explanations of energy transfer, recorded trial results, and evidence-based castle-design recommendations. After implementation, I will note whether the timing, student operation protocols, and selected counterweight settings worked as planned and adjust future lessons accordingly.
Students encounter the challenge of attacking a heavily defended medieval castle. They learn what a trebuchet is and why counterweight-based siege engines mattered. The teacher connects historical engineering to gravity and levers.
1-Time: 10 minutes. Show an image of a historical counterweight trebuchet and castle; ask: “How could an army attack a high stone wall before modern explosives?”
2-Explain that medieval counterweight trebuchets used a descending mass, pivoting arm, and often a sling to launch stones; repeated impacts and other siege methods could damage defenses.
3-Display the classroom model and identify its pivot, arm, counterweight, frame, and soft projectile cup. Explain that the classroom version models principles rather than replicating historical destructive force.
4-Ask students to predict which part supplies the energy and which part directs the projectile.
The instructor demonstrates one short, controlled launch. Students observe the movement of the counterweight and arm. Before testing, the class agrees on operating rules and makes predictions.
Teams conduct repeatable, low-energy launches at a paper landing zone. They measure travel distance and record whether the projectile hits the target. They compare outcomes across the preapproved settings.
Students test how a soft pom-pom interacts with a lightly assembled cardboard castle wall. They compare a fragile wall and a reinforced arrangement. Teams use evidence to suggest how medieval defenders might improve fortifications.
Having trouble? Let us know by completing the form below. We'll do our best to get your issues resolved quickly.
"*" indicates required fields