- Loading…
This lesson is written for High School aged learners interested in museum studies, accessibility, and/or education. It is written for use in a multi-day museum classroom context, but can be altered for classroom and home learning. It invites them to explore the importance of tactile-based museum exhibits to visually impaired and otherwise disabled visitors, and to design their own tactile exhibit materials using digital fabrication software.
In the previous decade, tactile exploration of objects has become a central tenet of accessibility in museums. For visitors with visual impairments, access to tactile-based exhibits ensures an equitable educational experience. Additionally, providing multi-sensory exhibits improves the experience of all visitors! (Object based learning is increasingly being implemented in higher-ed and museum contexts for its ability to inspire active inquiry in learners of all ages and abilities). Oh, did I mention tactile-based exhibits also help cater to the broad learning styles of neurodiverse visitors?
Lesson summary: Learners will do a deep dive into tactile and non-tactile based exhibits, and will participate in reflection exercises designed to inspire empathy and innovation around the topic of accessibility in museums. After reflection, learners are invited to redesign one of their home museum’s exhibits to incorporate tactile-based practices.
The use of digital fabrication in the lesson is twofold:

Learners will…
Reflection questions for learners post-lesson:
Introduction of the importance of accessibility in museums. Specifically, students will focus on tactile-based exhibits and their importance for visually impaired museum goers.
Introduce several questions to the group:
Spend about a minute talking about each question before you watch the videos. Break to watch videos.
Re-pose the questions and lead a discussion on them. Write down key points. Introduce the key question of this project: How can we use digital fabrication to make museums more accessible?
Apply the information learned in Session One to a field trip experience.
Visit at least two museum exhibits. One should be non-tactile, the other should be tactile. Below are examples of museums located in Washington, DC, but I am happy to advise on museums in other locations as well!
Note: If exhibit visits are not possible, plenty of museums have exhibit tours on Youtube!
Tactile exhibits:
House and Home, National Building Museum, Washington DC
The Capitol Visitor Center’s Exhibition Hall, Washington, DC
Q?Rius, Smithsonian NMNH, Washington, DC
Tactile tour of the Jefferson Building, Washington, DC
Non-tactile exhibits:
Visible Vault, National Building Museum, Washington, DC
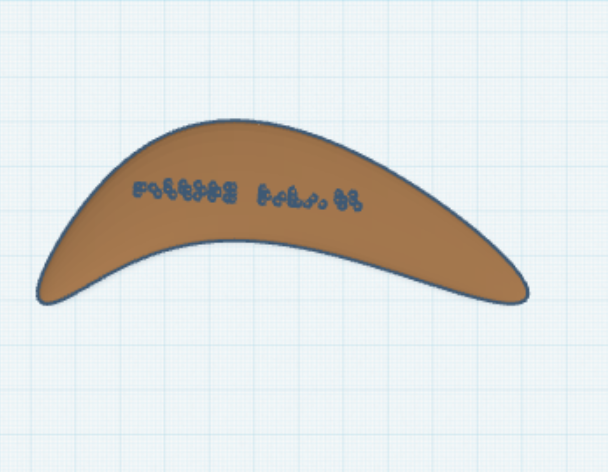
The Stars We Do Not See, National Gallery of Art, Washington, DC
The Bone Hall, Smithsonian NMNH, Washington DC
State Fair: Growing American Craft, Smithsonian Renwick, Washington DC
Visit a tactile exhibit first, and have students take notes and/or discuss what they think the tactile element of the exhibit adds to the overall learning experience.
Visit the non-tactile exhibit second. Make sure students know that they are not only there as critics– to improve the exhibit, they have to appreciate things from it! Have them take notes on their favorite parts of the exhibit, what they would like to touch, and any parts of the exhibit they think could be improved by tactile-based additions.
Have students lead a conversation about what they liked about the exhibits, what they would change, and how they would use digital fabrication to make the second exhibit more accessible.
Using the reflections from the field trips, students will brainstorm, plan, and create an element of a tactile-based exhibit.
Fabrication time! Finally!
Direct each student to pick an exhibit within your museum that they think they can make more accessible through tactile-based exhibit design. Have them spend about thirty minutes in their exhibit, observing visitors’ use of the space, taking notes, and planning. Once back in the classroom space, have each student draw out their exhibit redesign on large paper. Conduct a gallery walk with all of the students’ designs, allowing time for conversation and questions.
Direct students to pick one tactile element from their exhibit redesign to fabricate digitally. This is where learners are encouraged to all go off in different directions as they explore the vast world of digital fabrication. Some students may choose to use Inkscape and Tinkercad, or borrow from Thingiverse and build upon what others have already created. Students may end up using the Laser Cutter, 3D Printer, or even the vinyl cutter in their final object renditions.
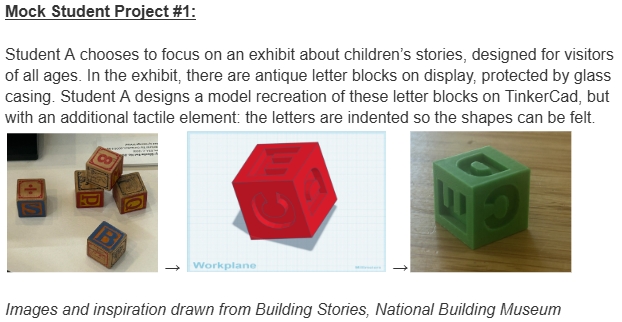
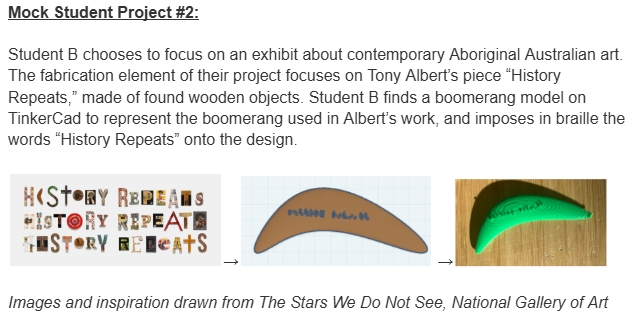
Since projects at this point will vary so widely in practice, the only instructions I can give to the educator are “Support, support, support!” I have included a couple examples of paths students may take in this project, but one of the joys of supporting students in their development as digital fabrication practitioners and changemakers is that we don’t know the directions they may go in!
Having trouble? Let us know by completing the form below. We'll do our best to get your issues resolved quickly.
"*" indicates required fields