- Loading…
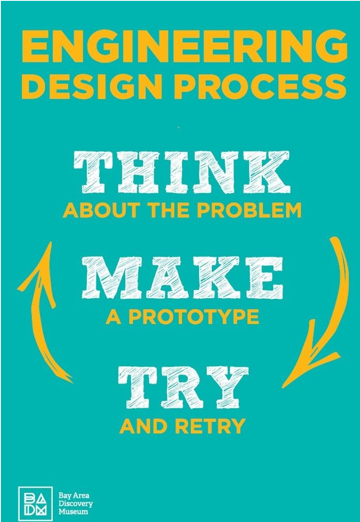
During this lesson, students will work together on engineering design challenges and station-based activities for approximately 75 minutes each day. Day 1 will focus on the developmentally-appropriate design process: Think, Make, Try. Students will: Think about the problem; Make a prototype; and Try and retry until they show some success. Day 2 will focus on tool and material exploration. Day 3 will focus on combining knowledge of process and tools to complete a more open-ended design challenge.
Materials List
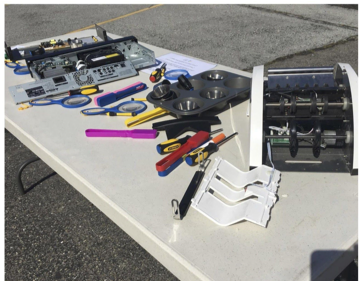
Materials include familiar ones such as: pipe cleaners, cardboard egg cartons, feathers, aluminum foil, strawberry cartons, and yarn. Low tech tools are: scissors, hammers, saws, wrenches and screwdrivers.
High tech tools include a laser cutter and 3D printer. Software used is Maker Studios and Adobe Illustrator
Digital Fabrication Equipment Details
Hardware
3D printing
Laser cutter
Software
Maker Studios
Adobe Illustrator (or equivalent vector graphic software)
Preparation:
TEACHER NOTE: During this lesson, student groups will work together on engineering design challenges and station-based activities for about 75 minutes each day. Day 1 will focus on the developmentally appropriate design process: Think, Make, Try. This is expanded to the phrases: Think about the problem, Make a prototype, and Try and retry. Day 2 will focus on tool and material exploration. Day 3 will focus on combining knowledge of process and tools to complete a more open-ended design challenge. A full description can be found in the attached “Animal Engineers Program.”
A. Opening Whole Group Time (20 min)
Essential Question: Engineering is…
TEACHER NOTE: Read the following quote:“Engineers find and solve problems through the engineering design process. Humans are engineers, but so are animals, and today we will learn from animal engineers.”
B. Stations or Challenge Time in Small Groups (40 min)
TEACHER NOTE: Design Prompt: “Let’s take on the role of animal engineers as we build nests that will protect eggs from extreme rainy weather or predators”
C. Closing Whole Group Time (15 min)
Essential Question: What was hard about being an engineer today?
D. Feedback/Evaluation
Pass out post-its to all students and ask them to place them on the material, activity area, or portion of the experience that they most enjoyed and want us to keep
A. Opening Whole Group Time (20 min)
TEACHER NOTE: Tell students “Engineers find and solve problems using tools and materials, as well as the engineering design process. Engineers start by thinking about how to use a new tool safely and they experiment with it and try it out to see what it can do. They also test new materials to learn about their properties in order to determine what works best for solutions and designs. ”
B. Stations or Challenge Time in Small Groups (40 min)
TEACHER NOTE: Activity Prompt: “Today, we will explore both familiar tools and new tools as we learn about different ways in which engineers create solutions for problems. You will have a chance to experiment with new tools and to participate in building one classroom, collaborative project that you will get to keep!”
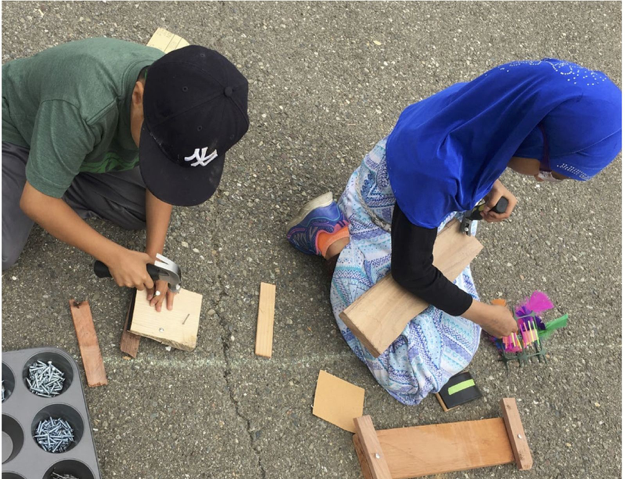
TEACHER NOTE: Provide tablets so that students can modify existing designs/create new designs related to classroom collaborative birdhouse project. (Student may also want to 3D print a bird model to inhabit the nest or a symbol/sign for the birdhouse).
2. Hammer and nails station – For students who are not ready to use hammers and nails: Let older student practice hammering nails into a tree stump. For younger students, let them practice hammering golf tees into a
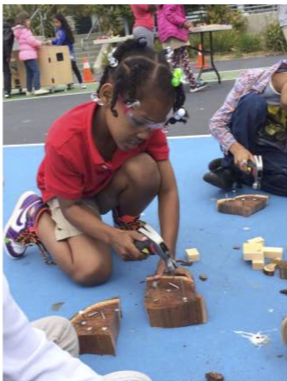
TEACHER NOTE: Provide explicit instruction around aligning wood pieces together and hammering at appropriate areas for birdhouse project. Suggestion: Sketch it out first.
3. Miter saw station – wood, foam, corkboard, sticks of different sizes available, practice sawing through different materials.
TEACHER NOTE: Provide explicit instruction around sketching out a drawing of a birdhouse, measuring, cutting wood into those appropriate sized pieces.
4. Weaving station – cardboard/laser cut loom and pliers; demonstrate weaving with little looms and model how to weave with natural materials versus string.
TEACHER NOTE: Add a weaved, platform/hammock-like construction underneath birdhouse to catch baby birds if they fall.
5.Sandpaper station – foam, sponges, other materials that work for this, experimenting with sanding down different materials and seeing the impact.
6. Another material station – look at combination of natural and manmade materials and compare how to manipulate them into shapes; provide sorting and investigation activities like nature studio.
C. Closing Whole Group Time (15 min)
TEACHER NOTE: On a whiteboard, invite students to give name, description and use of tools from the lesson (be sure they link tool and purpose). Provide images on laminated cards, descriptor words as scaffolds, if necessary.
TEACHER NOTE: In preparation for the next day’s program: Provide one “thinking and planning sheet” per student. Ask students to sketch out what they might build using one of the new tools and materials, as well as items used on the previous day. Ask students to determine why they will engineer shelter for animals in our habitat: to protect them from weather; to protect them from predators; or to allow them to continuing living in an urban environment.
A. Opening Whole Group Time (20 min)
TEACHER NOTE: Tell students: “Engineers can use tools and the engineering design process to solve problems for animals and the environment we all live in. Let’s see how we can do that at our own school and in our own neighborhood.”
TEACHER NOTE: Look at examples of other types of animal that need shelters. Discuss how engineering can help each animal. Then, pick 3-4 local animals that live in distinct local habitats for focus.
B. Stations or Challenge Time in Small Groups (40 min)
TEACHER NOTE: Design Prompt: “Let’s take on the role of human engineers who use tools and the engineering design process to create shelters for animals in their environments.”
1.) THINK station – butcher paper down on the table; do one together at the carpet talking through ideas, materials, adding labels. Provide explicit prompting around which tools or materials used on previous day make sense for that design.
TEACHER NOTE: Check in with a specific table and discuss similarities and differences in designs between students.
2.) MAKE station – natural materials, craft materials, some larger cardboard, recycled materials such as milk cartons, pizza boxes. Only some of tools from Day 2 will be available (not miter saw or 3D printer) — unless students really want to use them and have a stated reason in doing so.
3.)TRY station –Work with a partner to test out design based on the problem you decided to solve.
C. Closing Whole Group Time (15 min)
Essential Question: What was hard about being an engineer today?
More documentation on Facilitation / Procedures: Animal Engineers Program
Having trouble? Let us know by completing the form below. We'll do our best to get your issues resolved quickly.
"*" indicates required fields