- Loading…

The light painting technique is nothing new. It consists of taking long exposure photographs while someone, or something, moves with coloured lights in dark spaces. This usually gives visually interesting results.
Anprino Robot
We can use a robot and its movements as a basis these projects. We’re going to use an Anprino robot, but the basics of the light painter bot can be done with any other type od educational robot, provided that your robot has programmable leds, can be programmed, and you have access to a smartphone.
An Anprino is an educational robot developed by portuguese teachers at ANPRI. It’s goal is to use 3D printing, arduino and visual coding to enable a low-cost, highly customizable robotics platform for schools.
Mobile phones generally have powerful cameras. Usually, we value its capacity in megapixels, but photography applications allows us to go further. In addition to automatic modes, optimized for various environmental conditions, they provide access to digital versions of traditional photographic tools and techniques. Using these settings, we can explore more creative photography options, which require us to excercise greater user control over our smartphone camera.

In this robotics projects, we can combine technology and arts, always from an educational perspective. Hence this scenario proposal, crossing photography with coding and robotics.
Learning goals:
Develop coding and robotics skills and knowledge;
Use coding and robotics in tangible projects;
Blend learning arts and ICT concepts;
Use mobile devices in educational settings;
Learn about photography (framing, white balance, temperature, film sensibility, exposure, shutter speed).
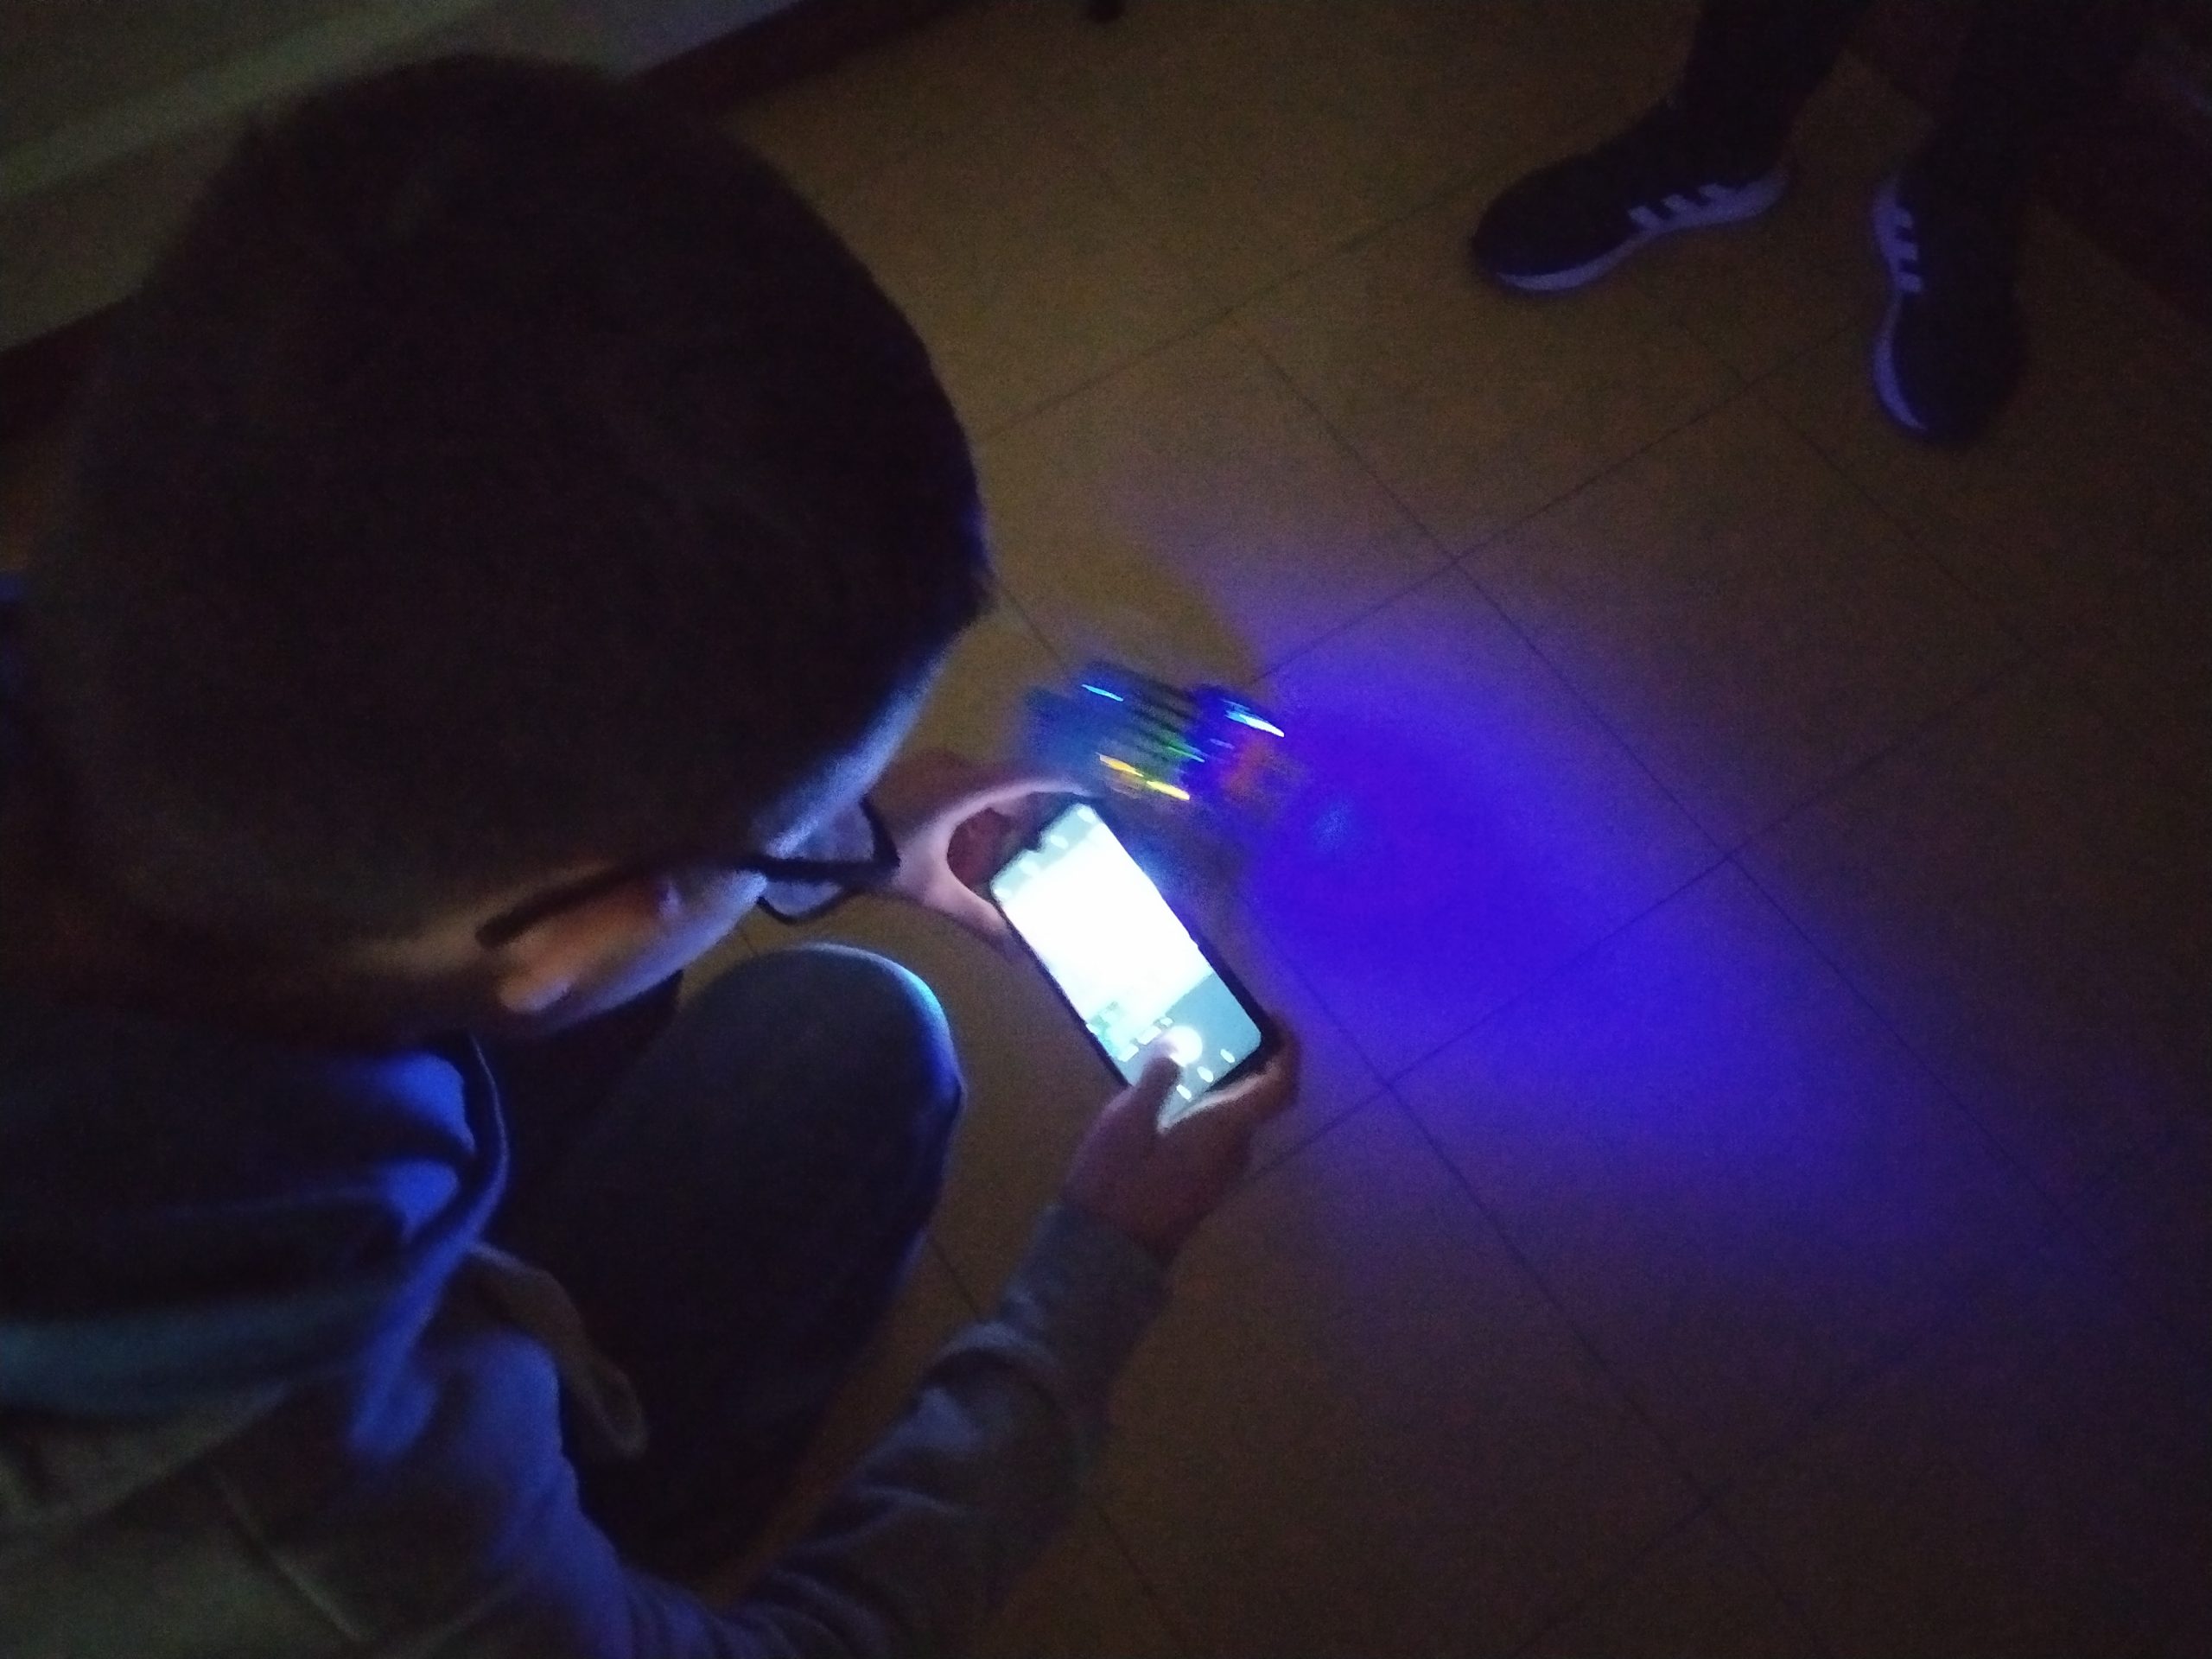
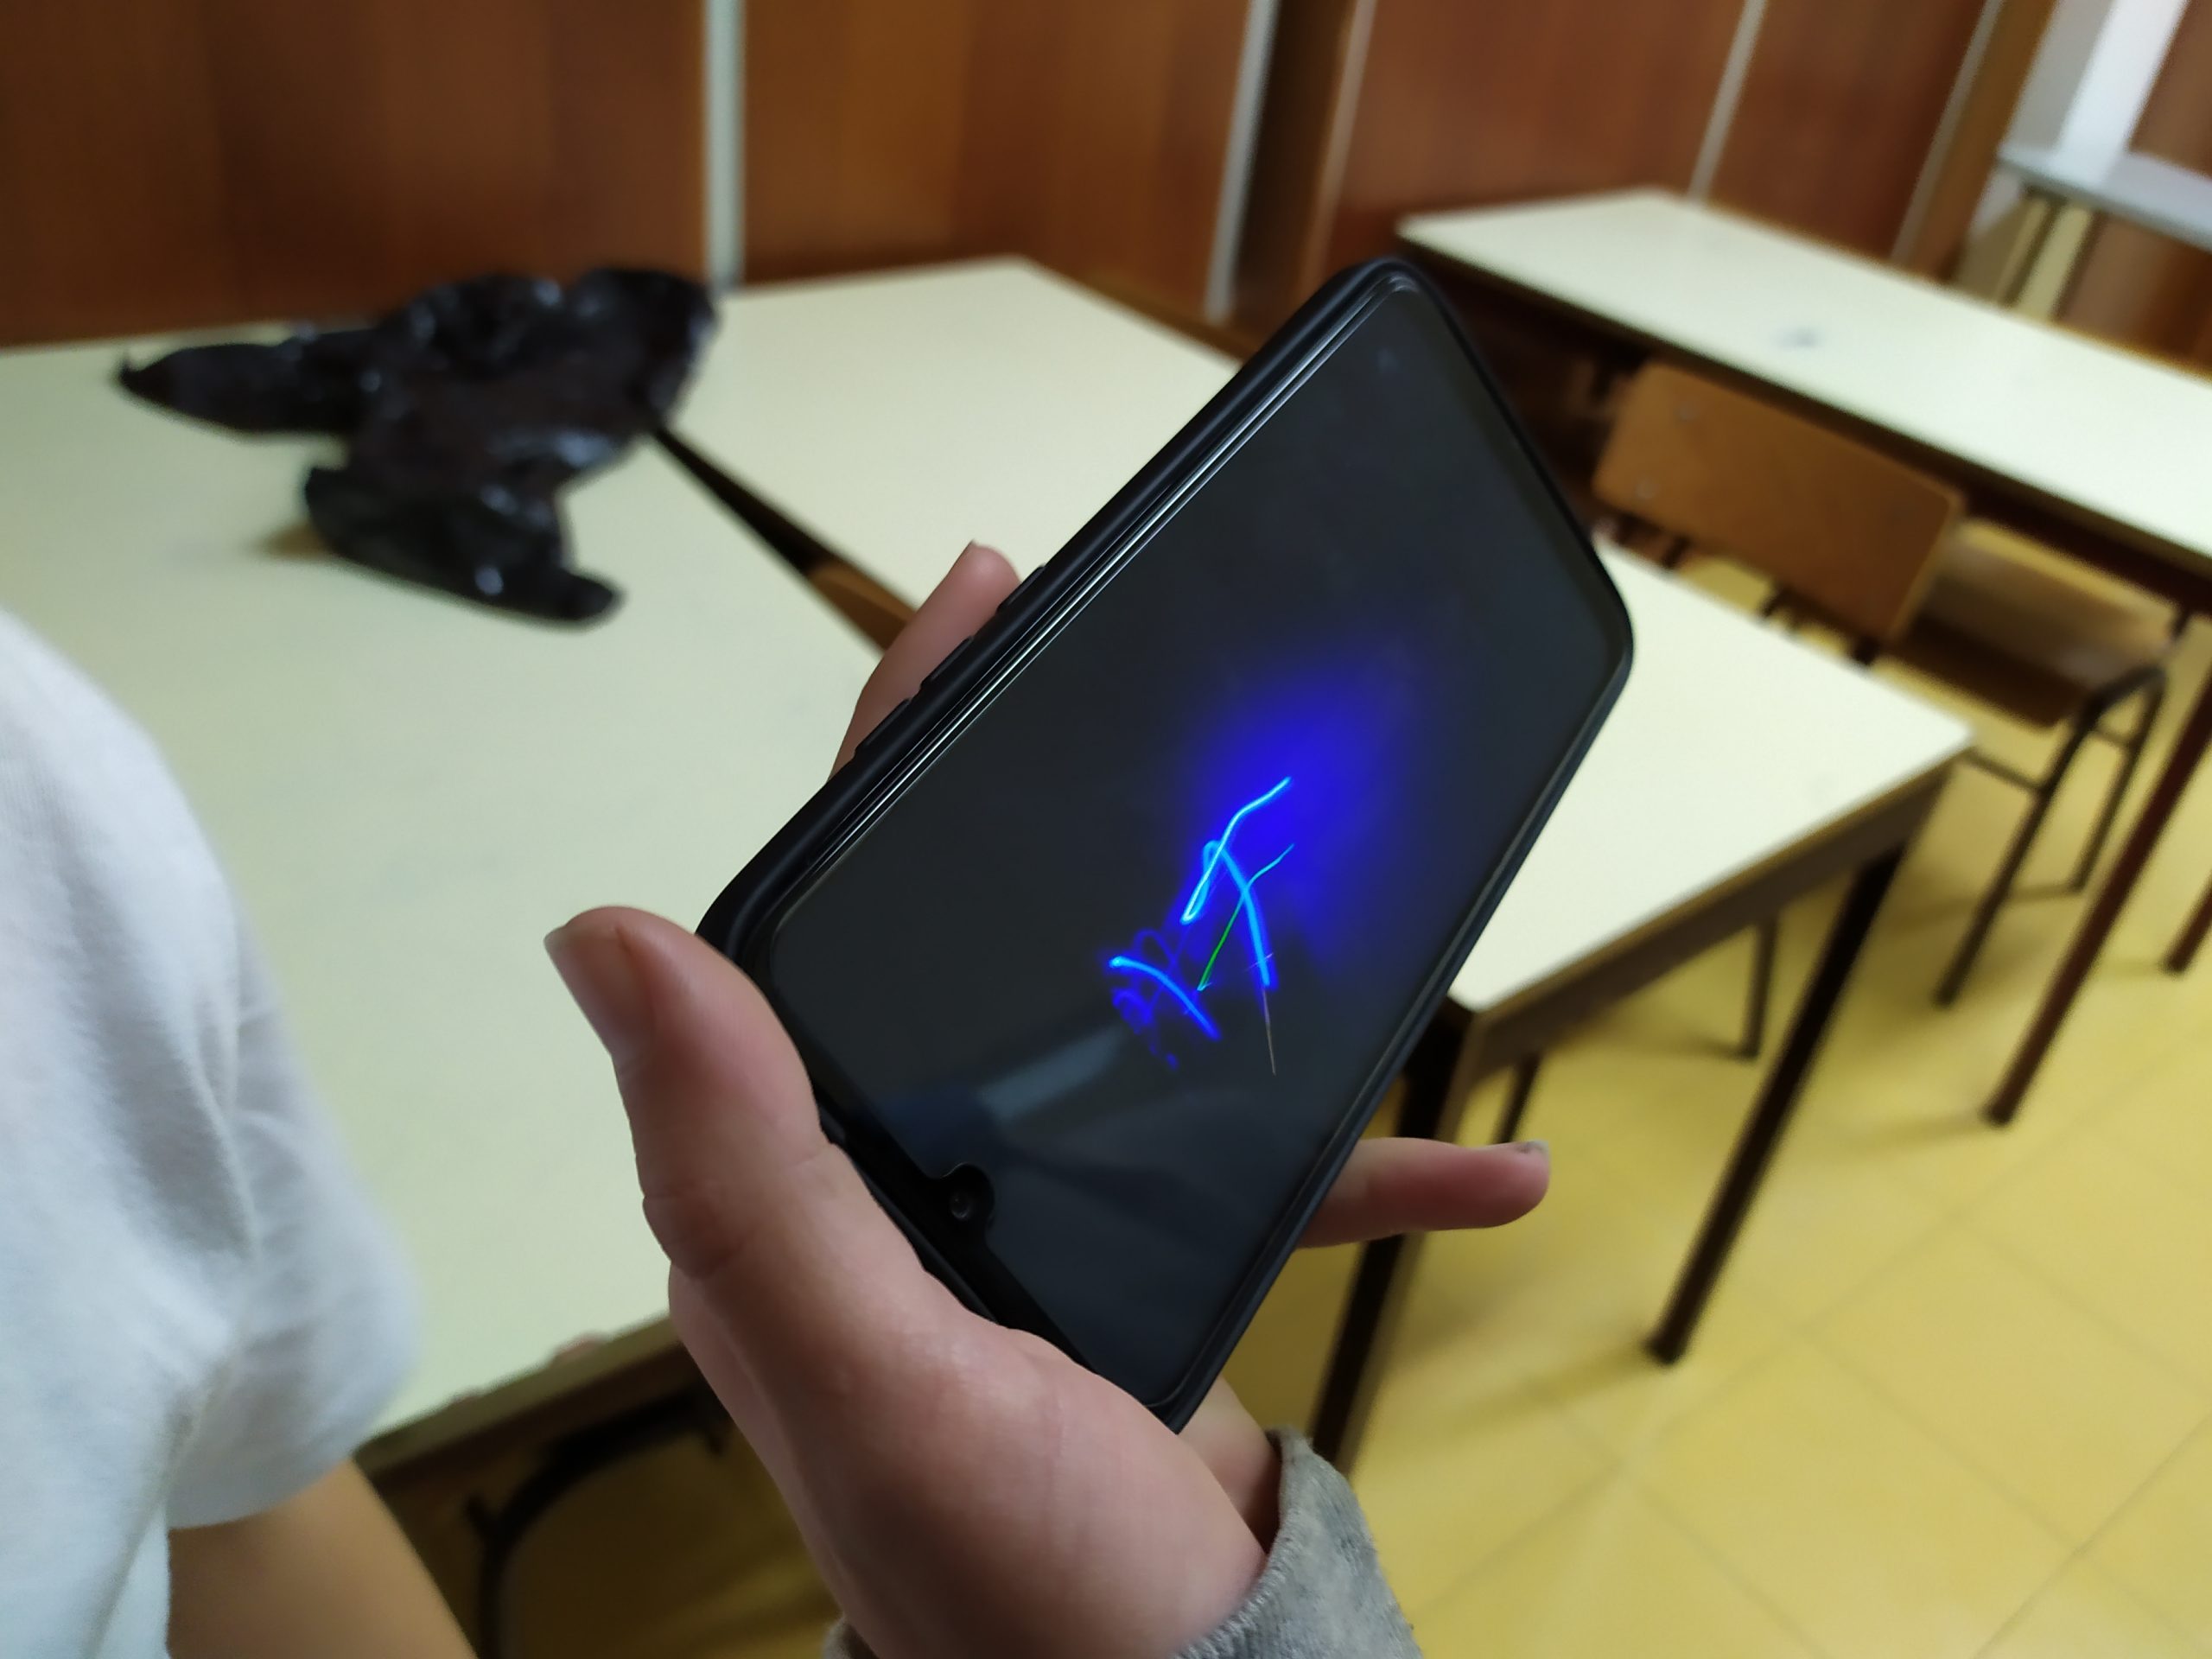
Note: attached photos are from a robotics club early test of this scenario.
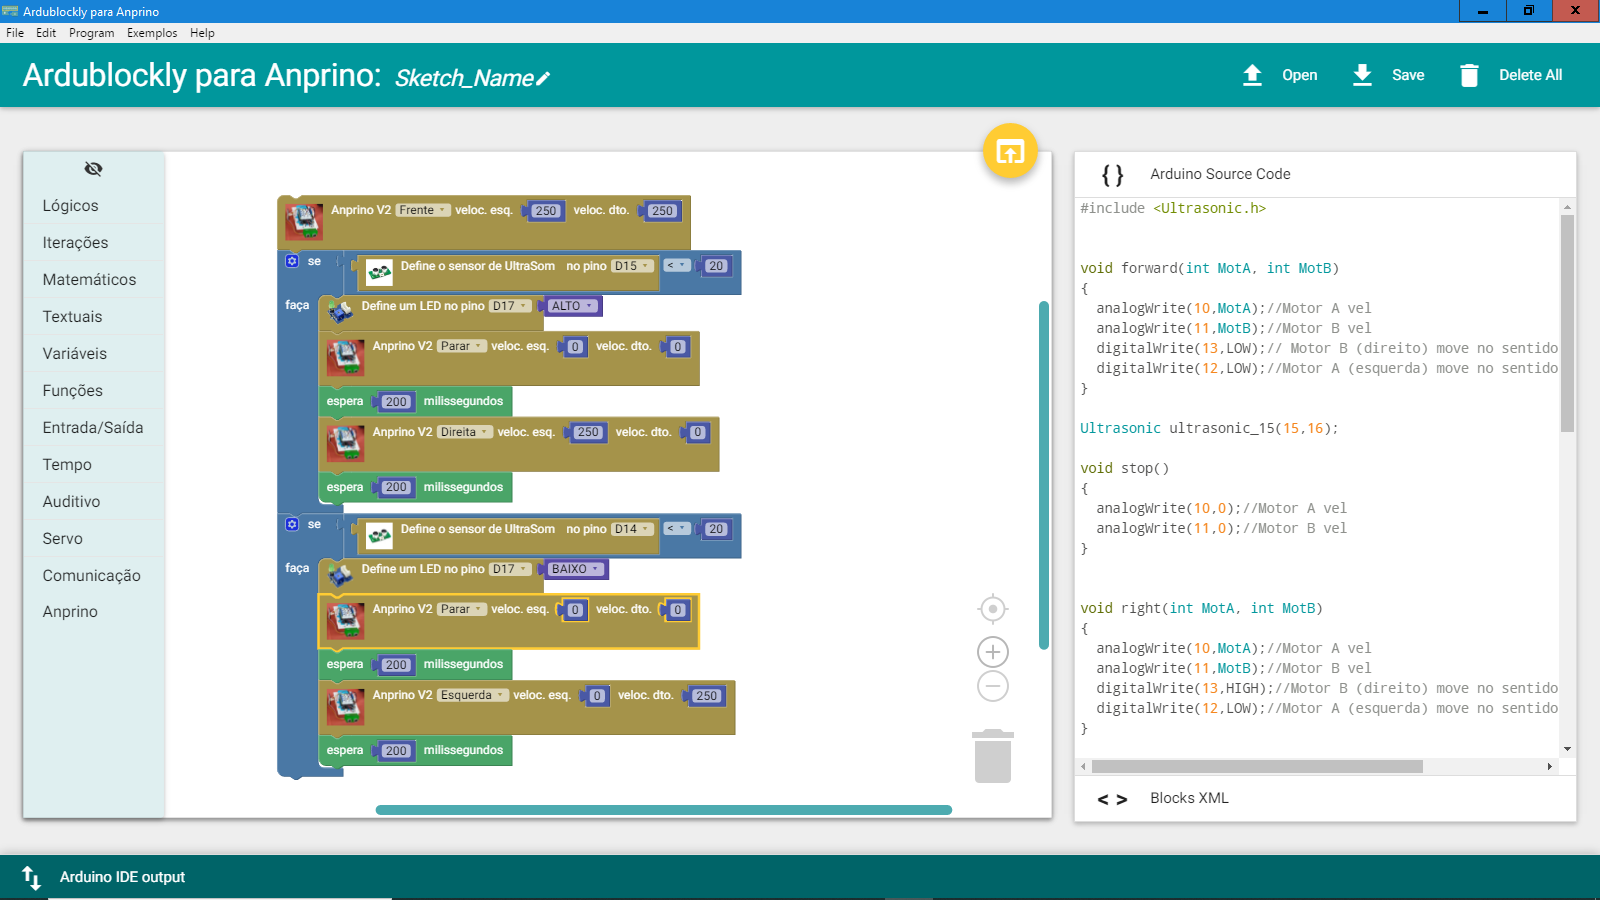

First steps with the Anprino robot, and how to code using Ardublockly para Anprino.
If necessary, assemble the Anprino robot;
Install on your computer the following software: Python, Arduino and Ardublockly para Anprino – a comprehensive package can be found here – Anprino Software.
Create your first program, learning how to make the robot move, and upload it to the robot.
Vídeo tutorial (in portuguese): Anprino 01.
Modern smartphones are also very powerful cameras. If we dive into the advanced camera settings, our knowledge of digital photography deepens, and we can create better images.
Run your smartphone camera app, look for the advanced settings and test them. Try out different exposure times, light settings or film sensitivity. With this, you’ll learn to unlock the potential of your phone.
Check the how-to video here:
Now that you know how to code the robot, and also about your phone camera settings, let's create a program to use the robot's lights, and in a dark room, photograph the moving robot using long exposure.
First, create a code that moves the robot while using LEDs. See here how:
Vídeo: Anprino 04.
Set up a dark room – any room that can be darkened. The less light, the better.
Mount your smartphone on a tripod, or use it handheld. Remember to access the manual mode on your camera app, and set it up for long exposure shots (hint: 1/2 s works fine).
Shut down the lights, connect the robot, shoot some photos, have fun and… get amazing results!
Having trouble? Let us know by completing the form below. We'll do our best to get your issues resolved quickly.
"*" indicates required fields