Bentwood Hat Lamps ( Aleutiiq, Supiaq, Sugpiaq, Unangax People) - SCOPES Digital Fabrication

Lesson Details

Age Ranges
Standards
3.MD.B4, Fab-Safety.1, Fab-Electronics.1, Fab-Modeling.1, Fab-Fabrication.1, Fab-Design.1, Fab-Safety.2, Fab-Modeling.2, Fab-Fabrication.2
Author

You need to login or register to bookmark/favorite this content.

Author

CITC Fab Lab
CITC Fab Lab
Informal educator
We are Cook Inlet Tribal Council’s Fabrication Lab. We are based out of Anchorage Alaska serving Alaska Native and American Indian students based in the Anchorage school district. We teach design, building, and fabrication with a cultural emphasis. Our different… Read More

Summary

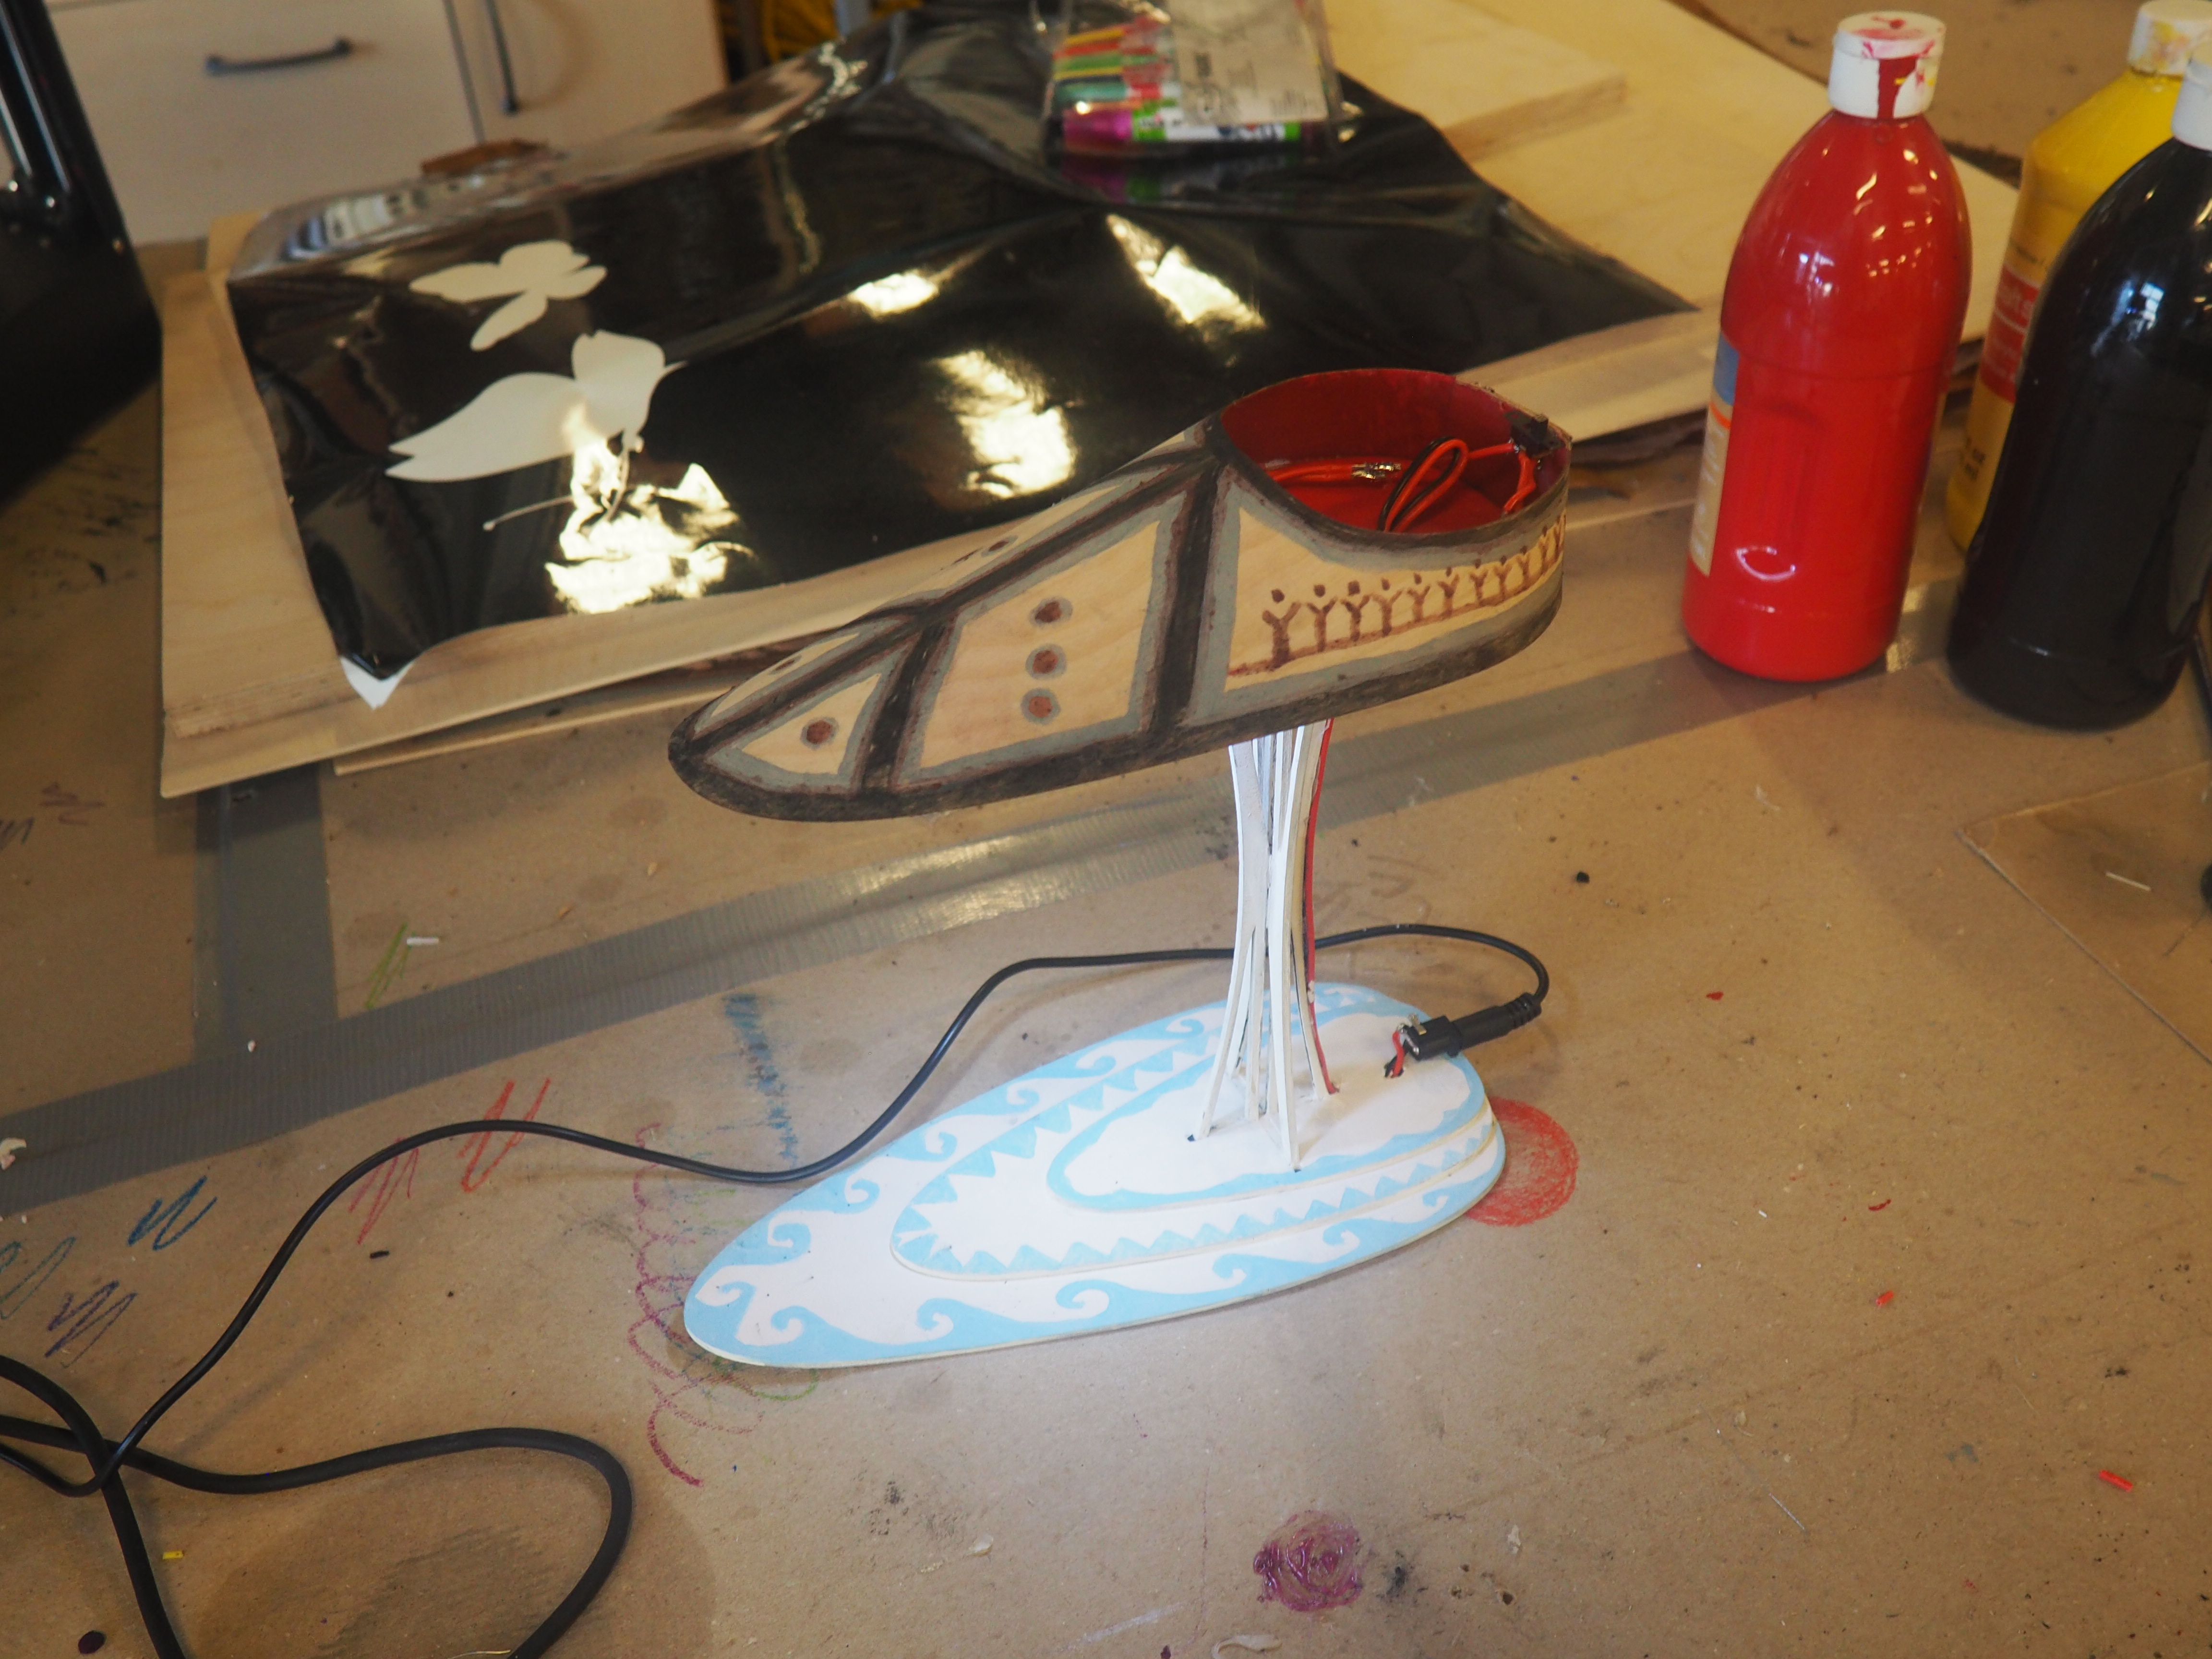
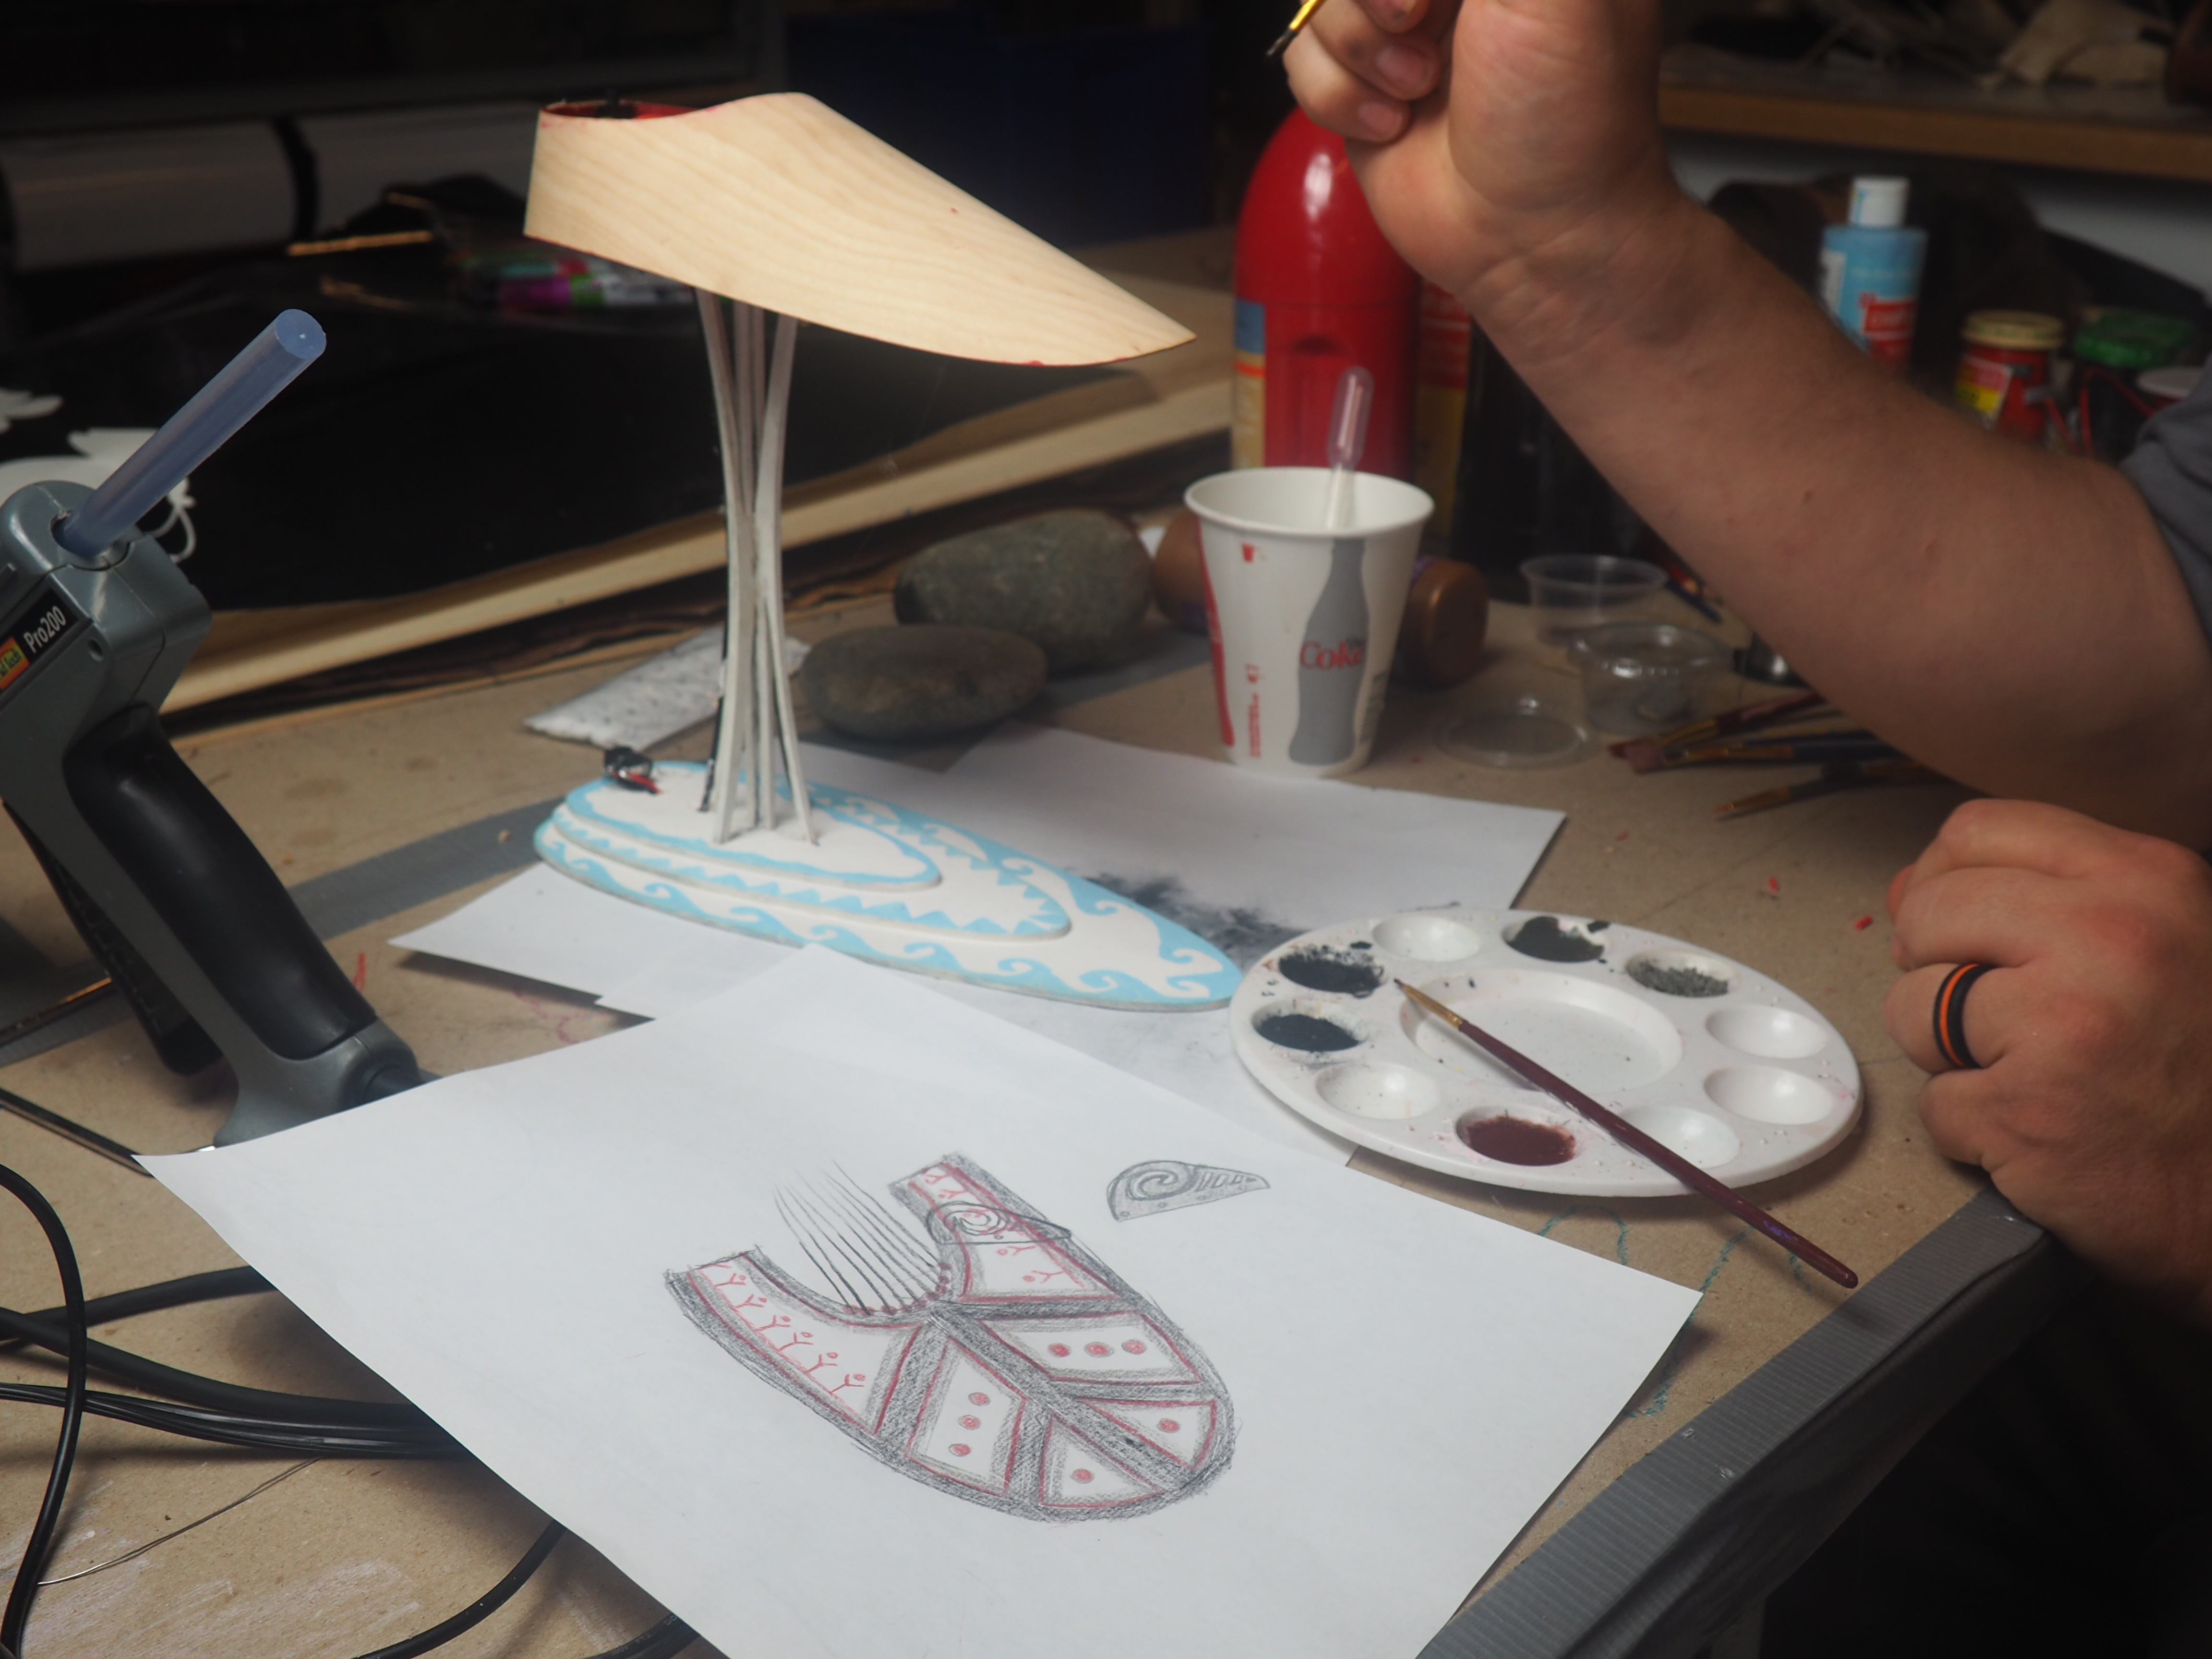
This lesson is about making a desk lamp that is topped with a Bentwood hat. A bentwood hat is the hunting visor of the Aleutiiq, Supiaq, Sugpiaq, Unangax people of the Aleutian island chain of Alaska. The bentwood hat helps keep glare out of your eyes while paddling in the ocean. The bentwood hat or visor would also hide the hunters eyes form the animals they were hunting. The hunters also believed that animals would give themselves to the hunter with the best decorated hat. Bentwood hats also told how experienced the person was, a new hunter hat a shorter hat, while an experienced hunter hat a longer hat, and a chief has a different fully enclosed hat. For more information visit https://alaska.si.edu/record.asp?id=18.


What You'll Need

Consumables:

  • One sheet of 12 x24 1/8 plywood
  • One piece of veneer 12 x 12
  • Paint – Acrylic or traditional ( charcoal, clay, ocher)
  • Wire ( two colors)
  • three way electronics switch
  • 5.5 x 2.1 mm power jack
  • 5v power supply that fits the power jack
  • 4 LEDs, i used super bright 5v LEDs ( you will have to update the laser file if you use different LED’s and change the power supply if they are not 5v.)
  • Solder
  • Electrical tape or heat shrink tubing
  • Fishing line – 10 to 20 lb test
  • Beads
  • Feathers
  • Super glue
  • Sand paper


  Tools:

  • Laser Cutter, scroll saw or Band saw
  • Soldering Iron
  • Wire Stripper
  • Hot Glue Gun
  • Paint brushes and pallette
  • Safety Glasses
  • Helping Hand
  • Heat gun
  • 1/16th inch drill bit
  • Drill


Lesson Materials

The Instructions

Laser Cut your parts!

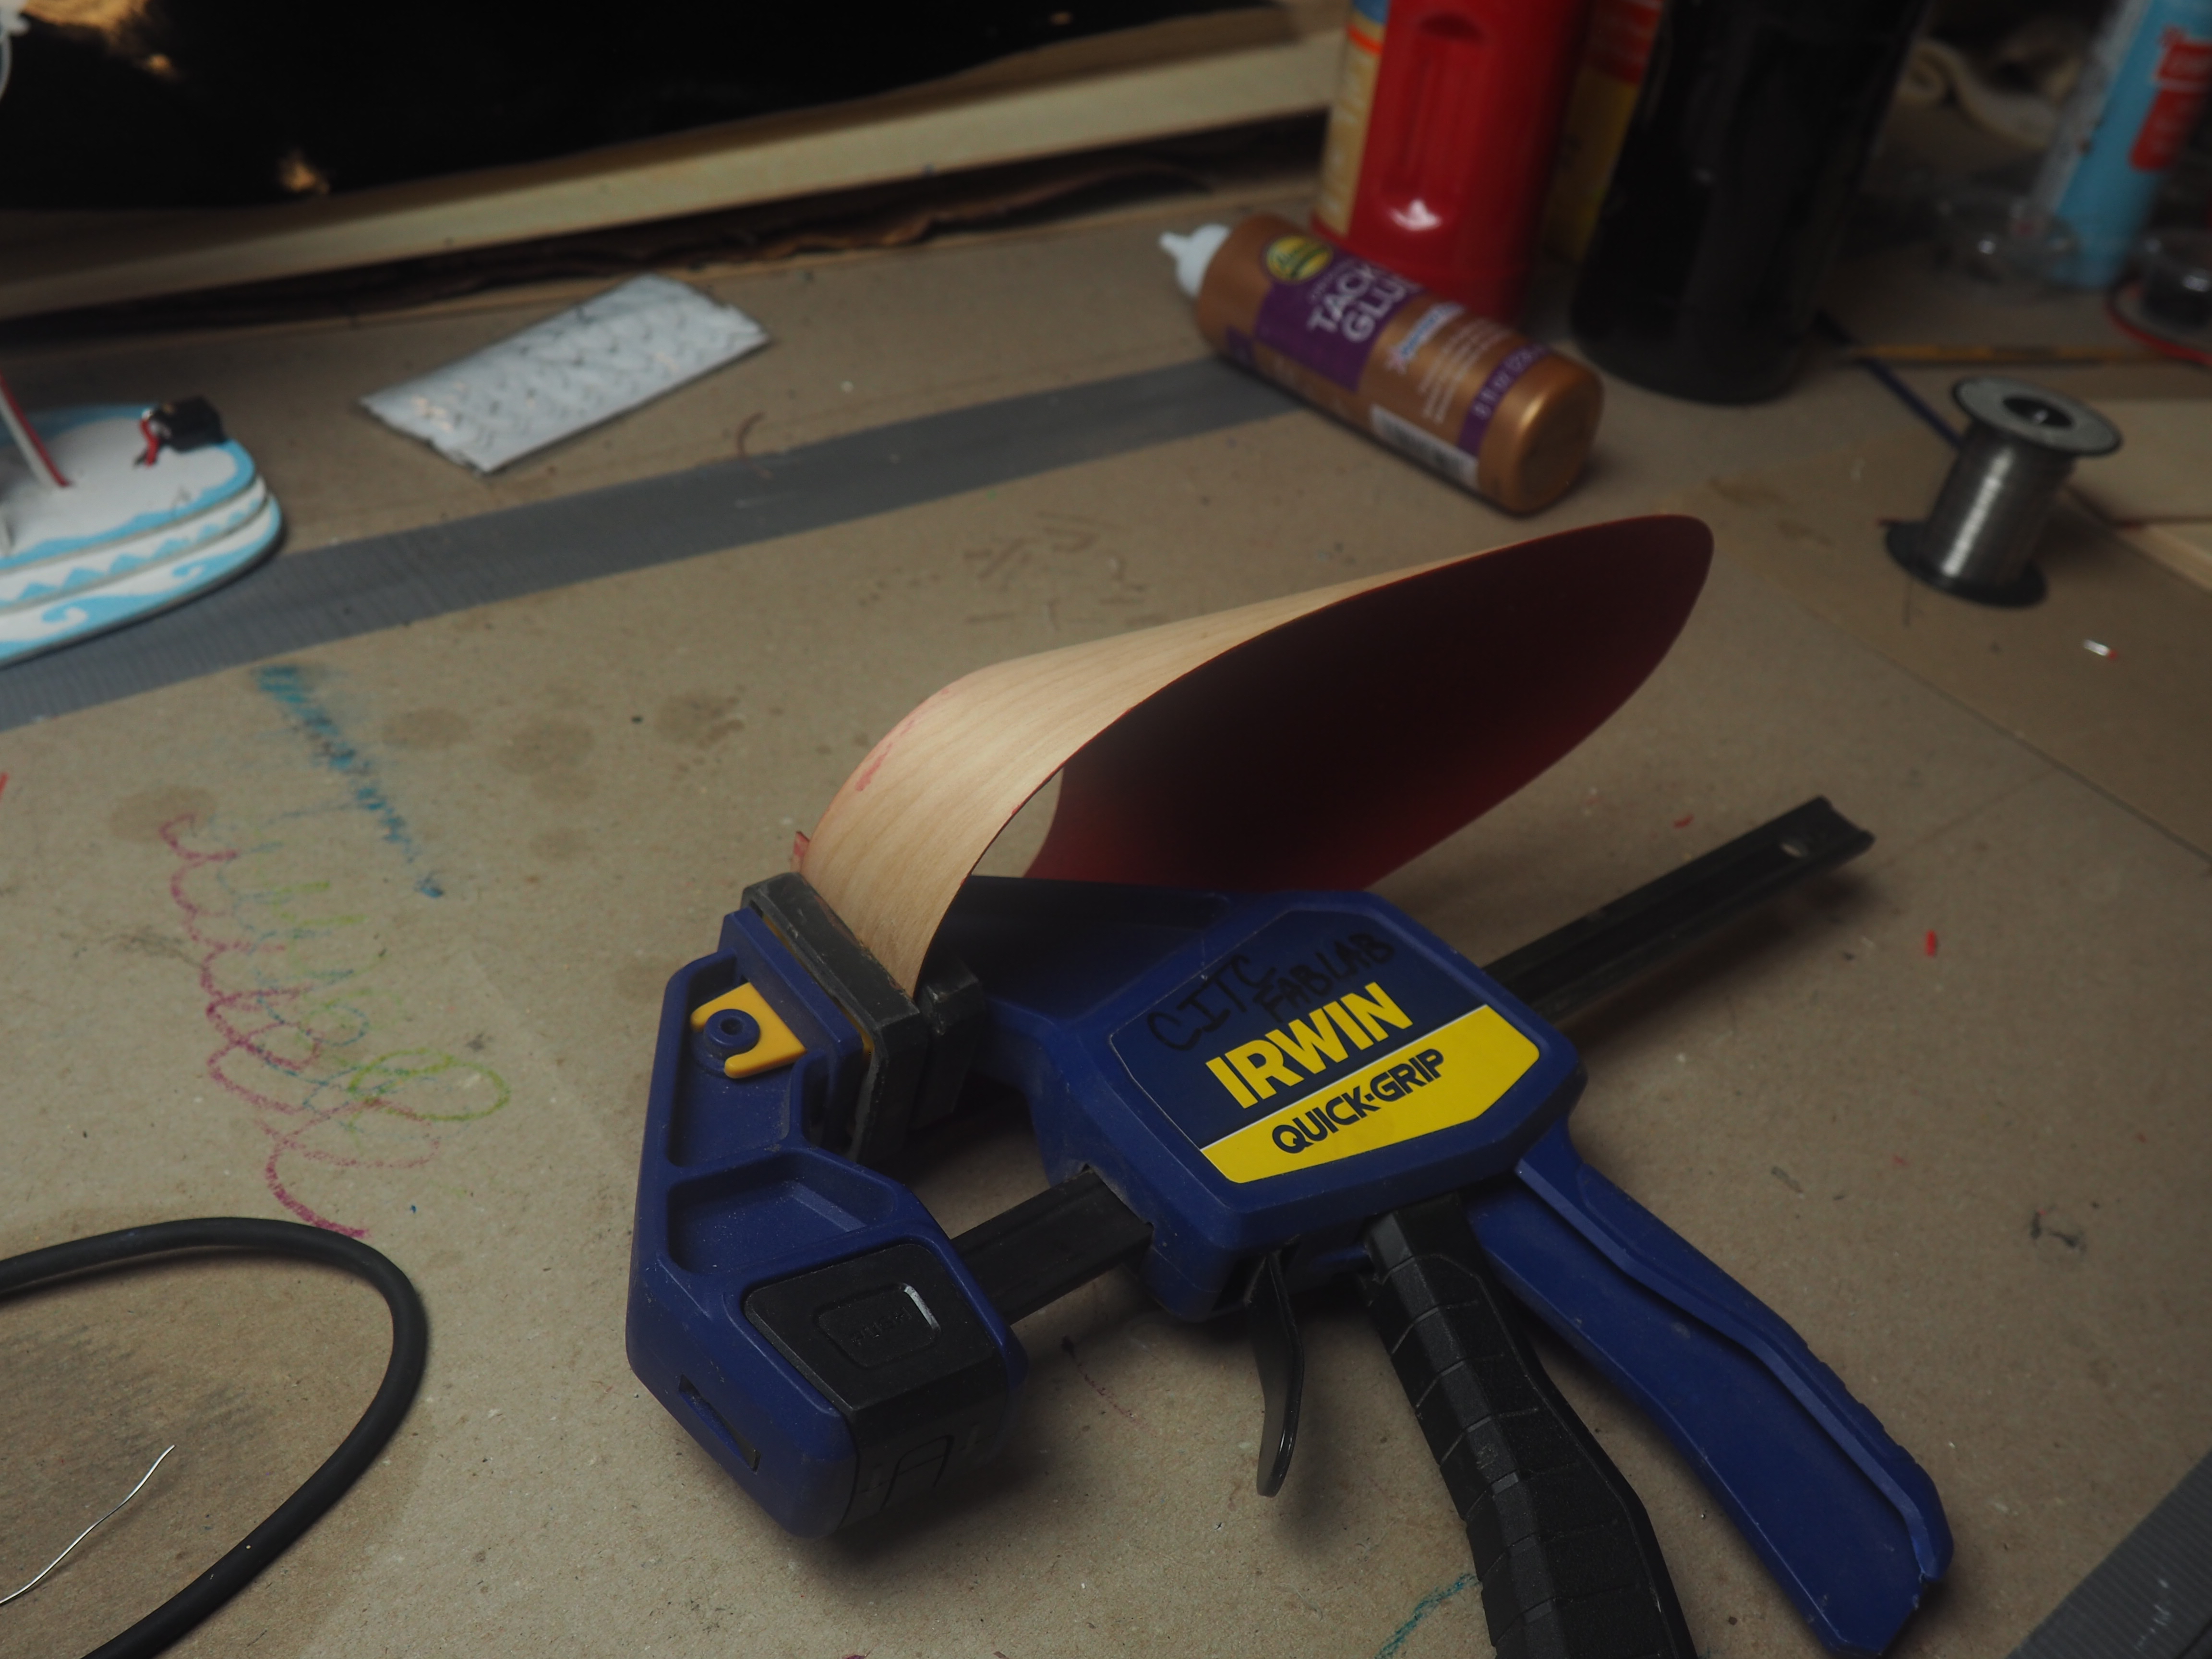
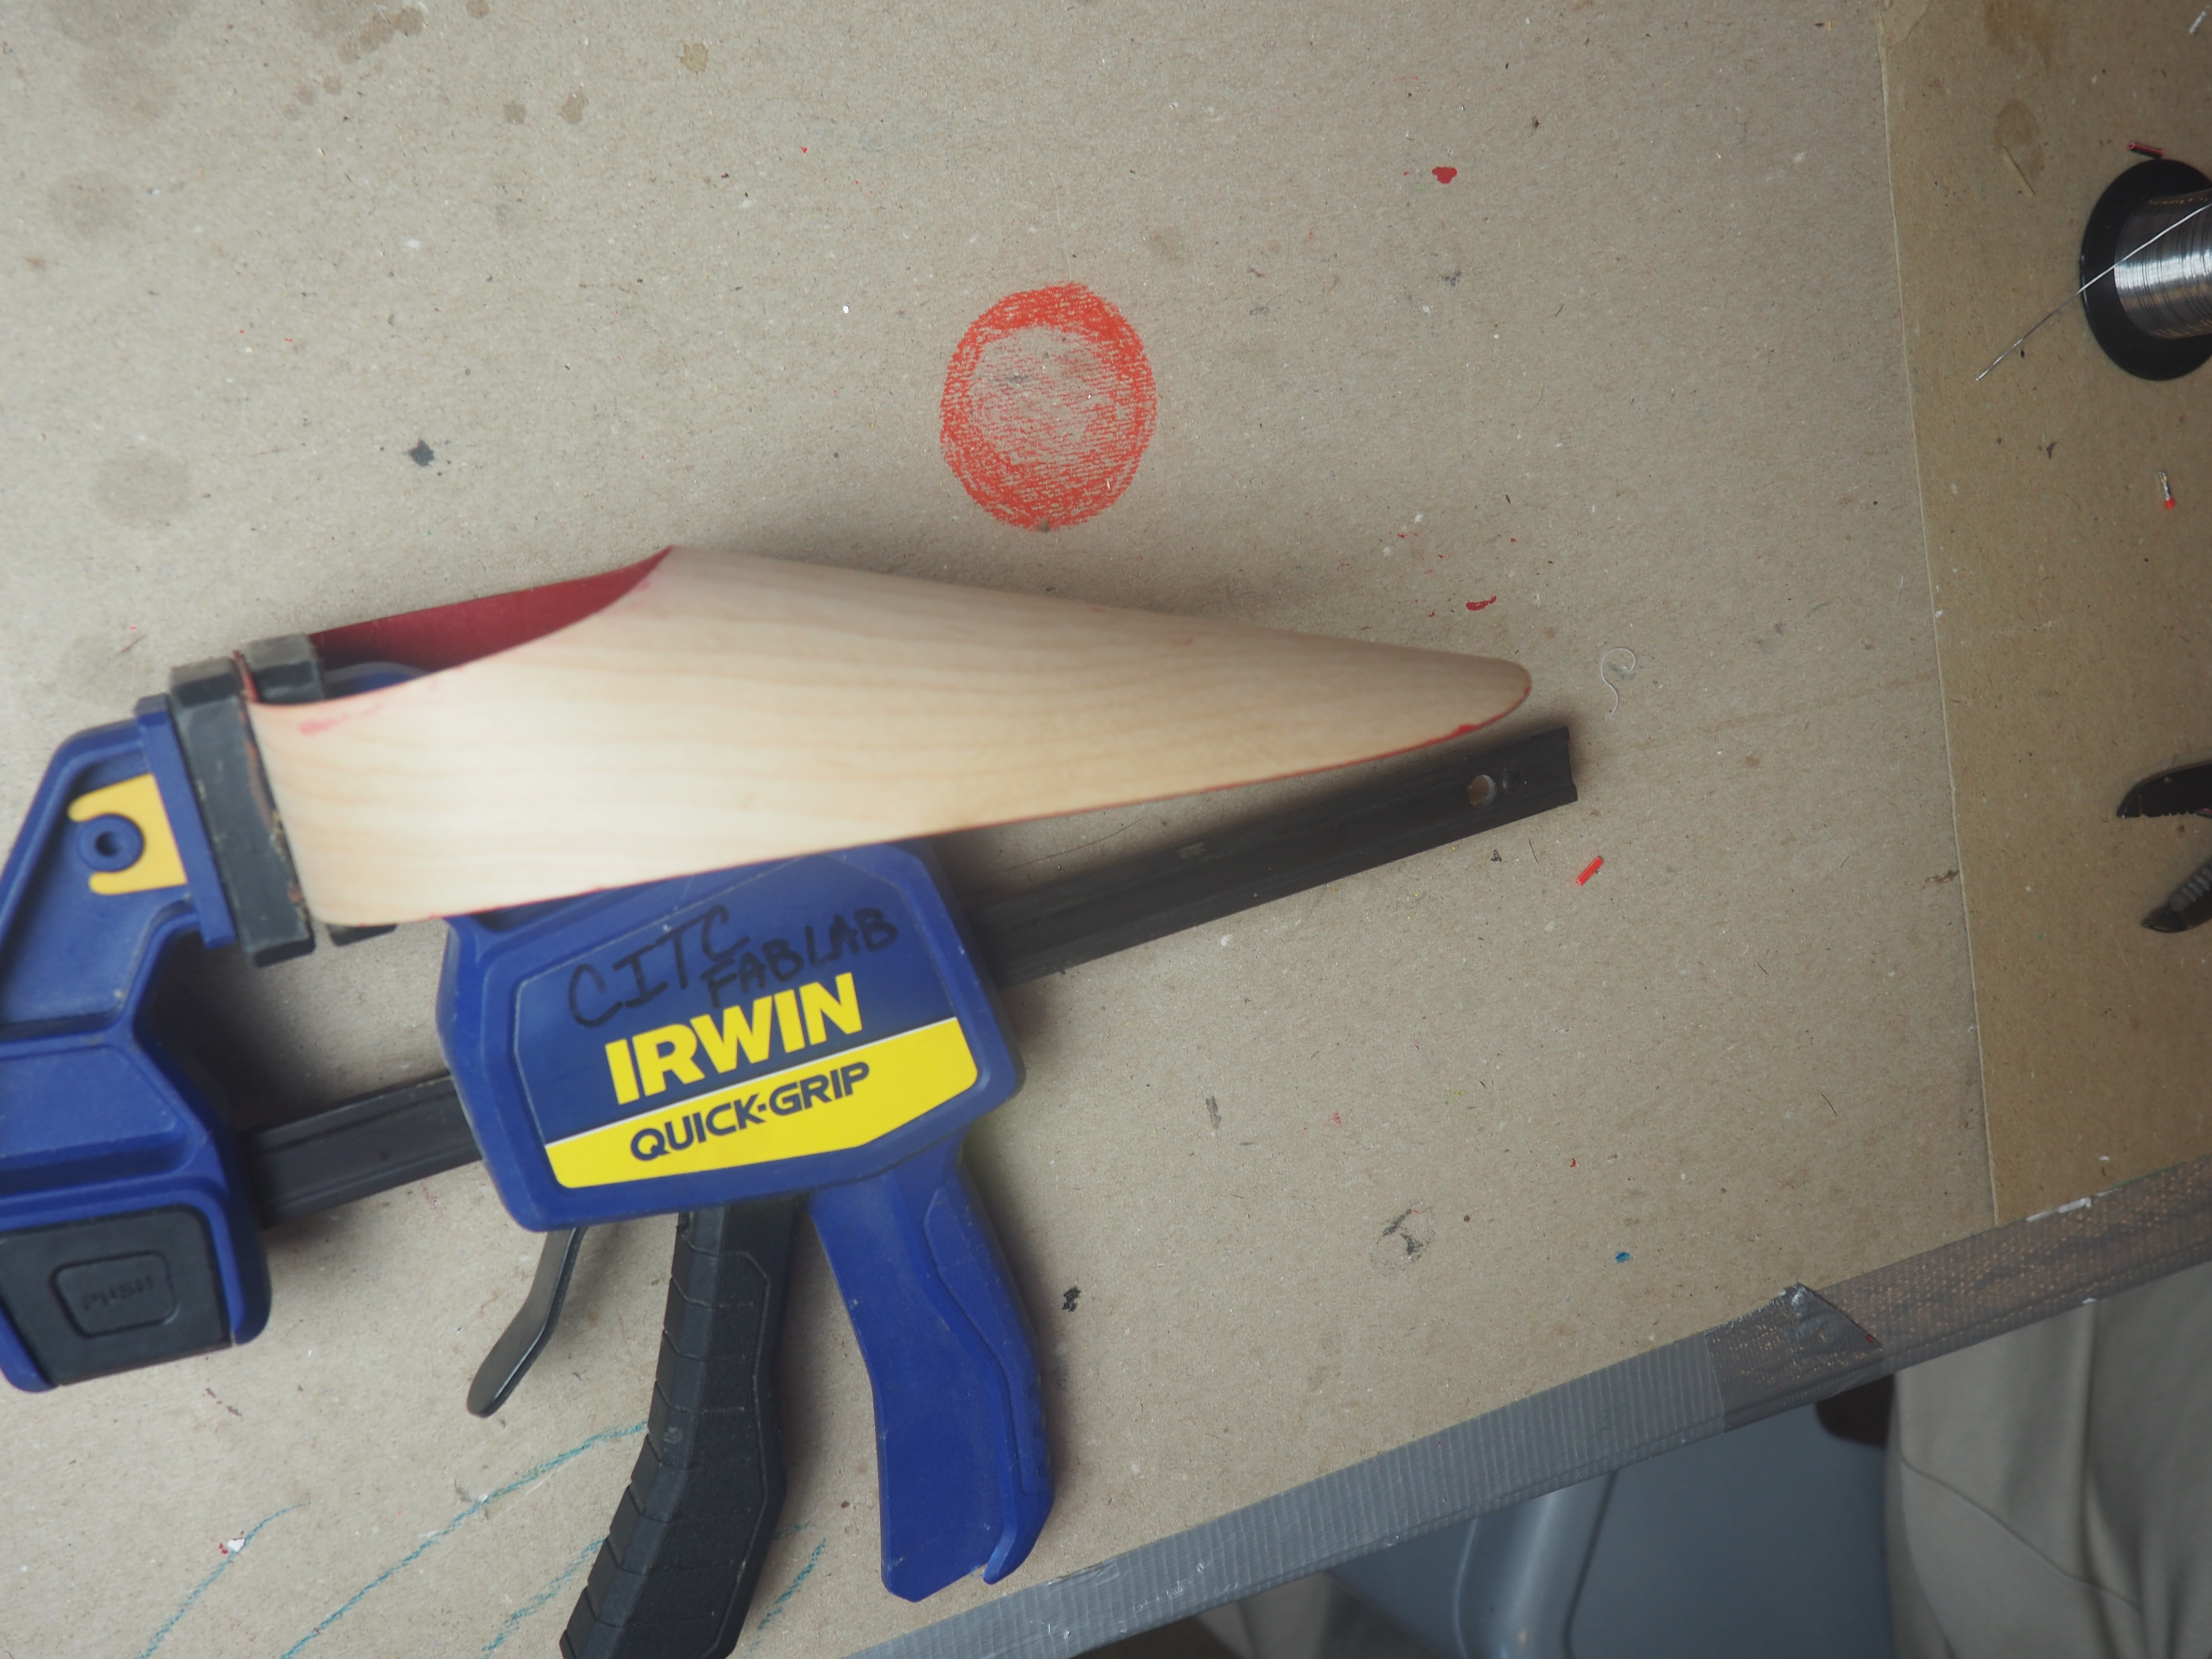
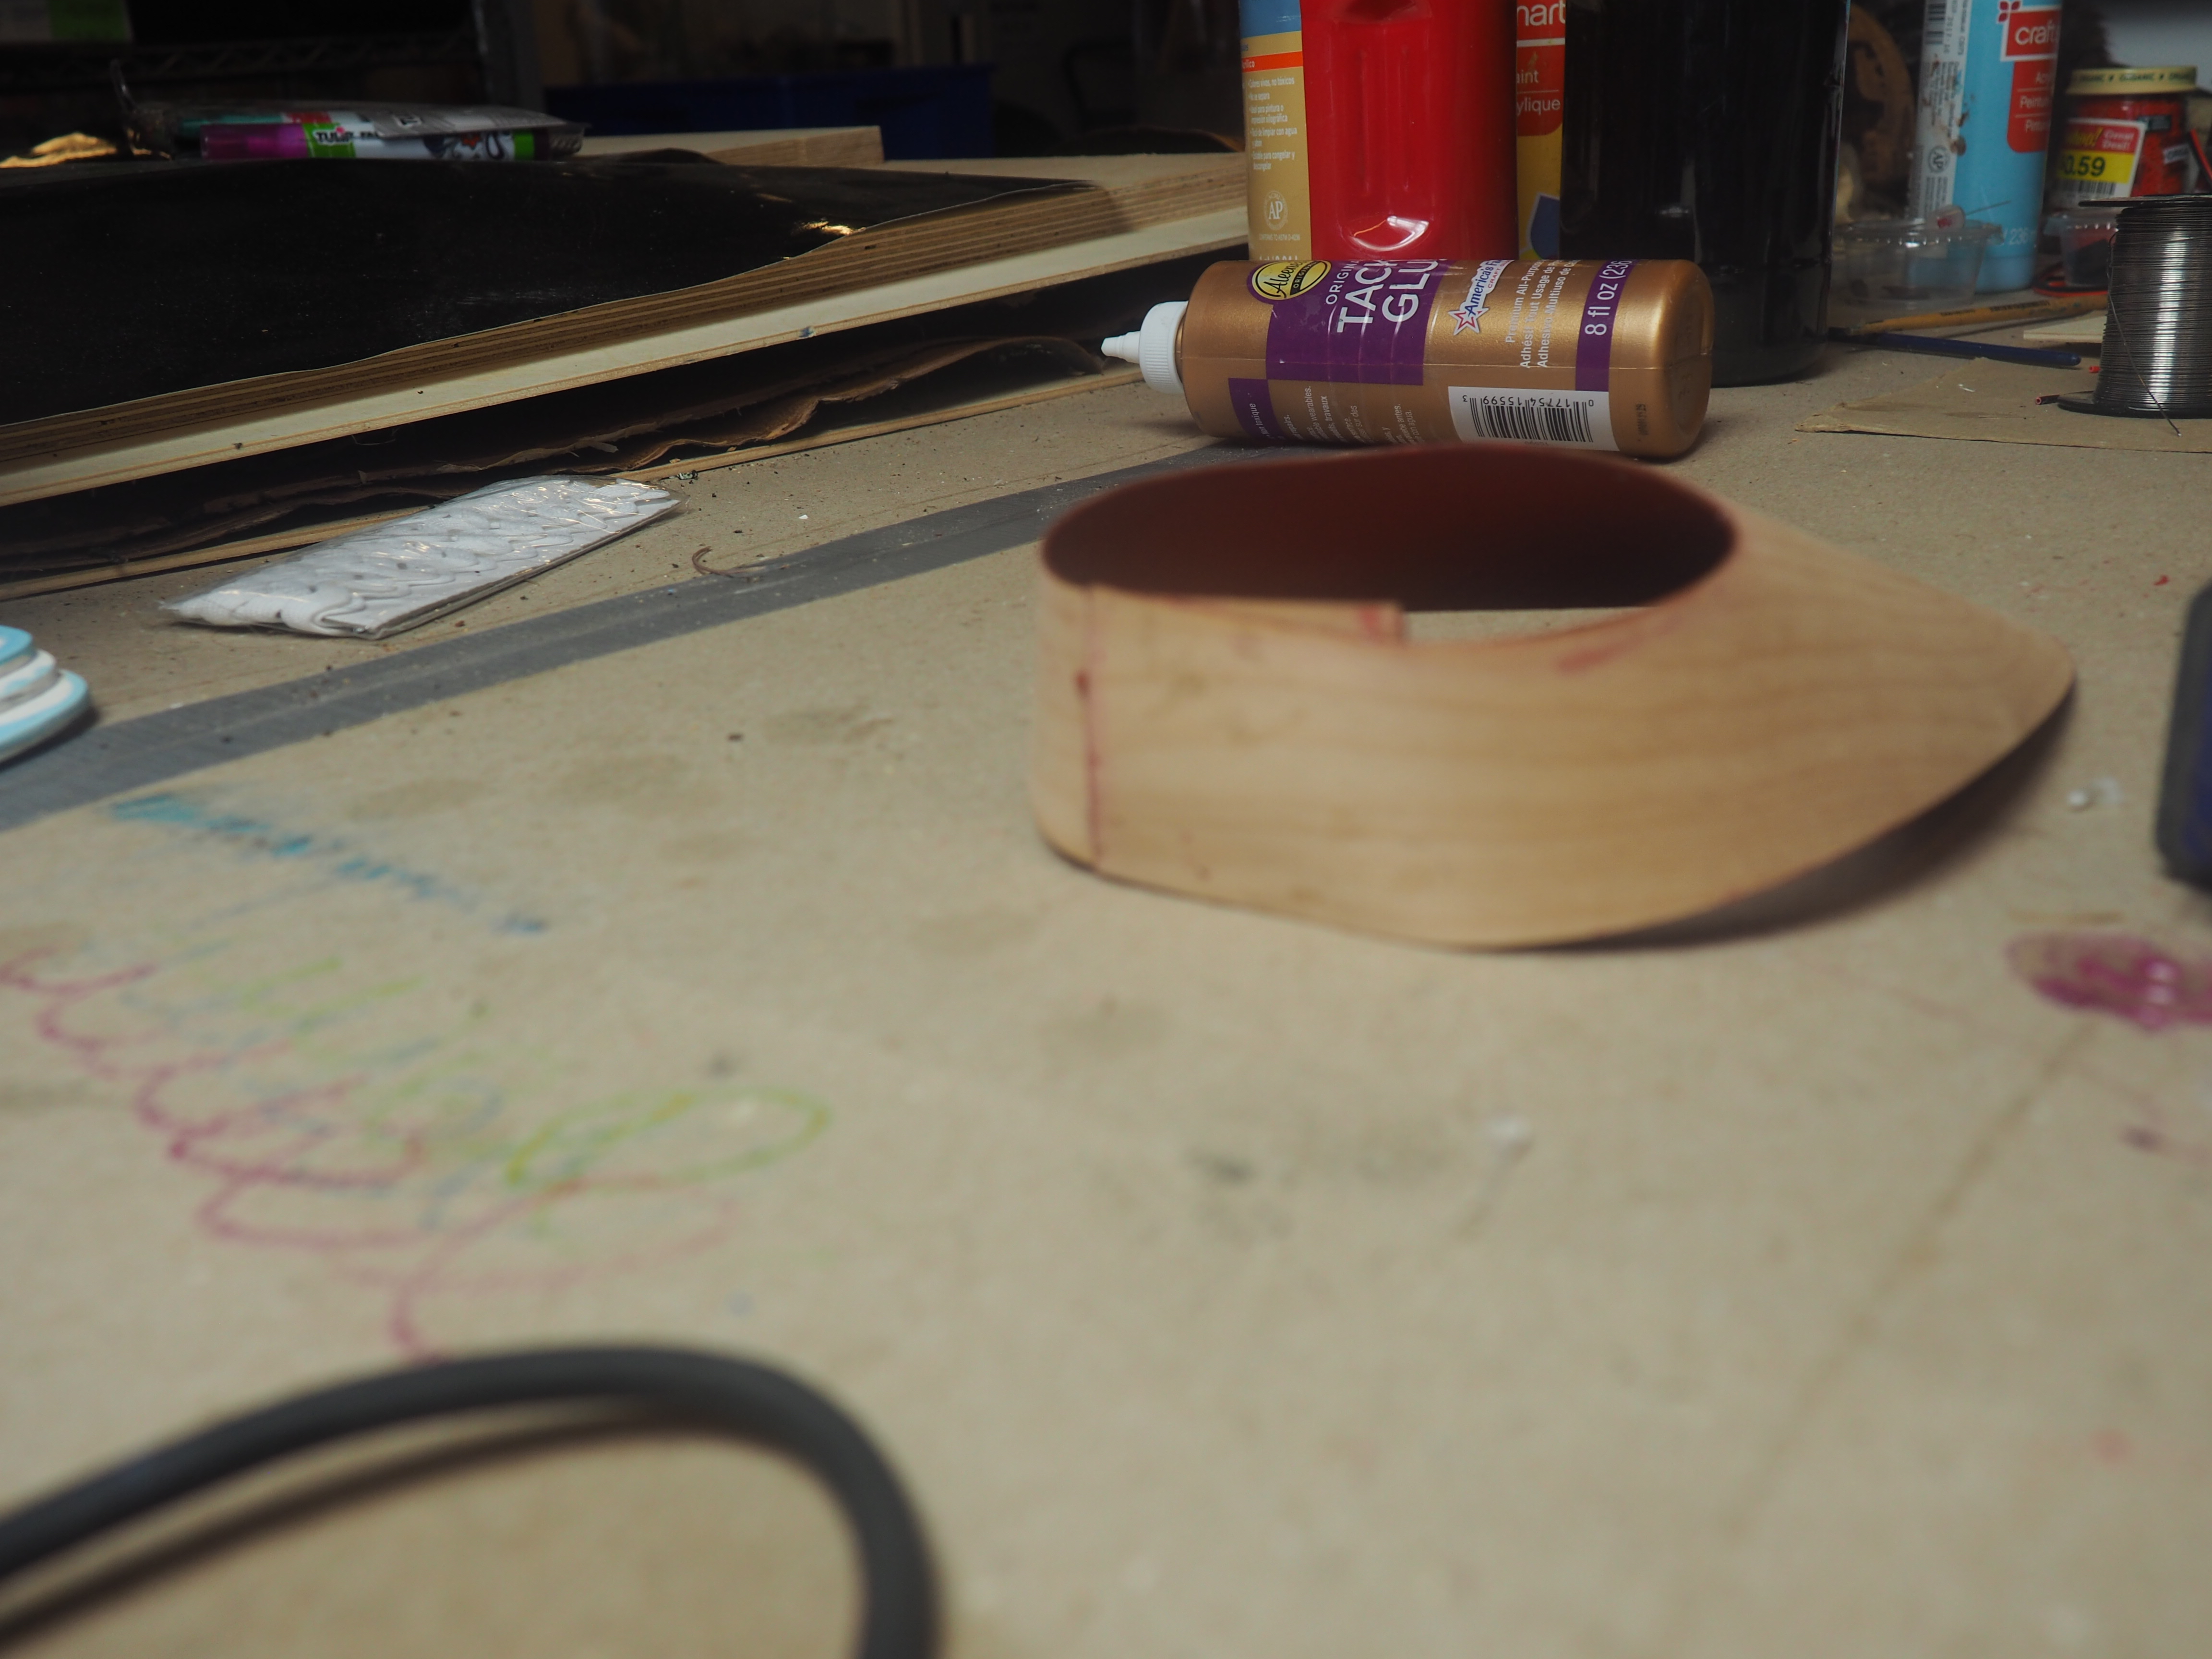
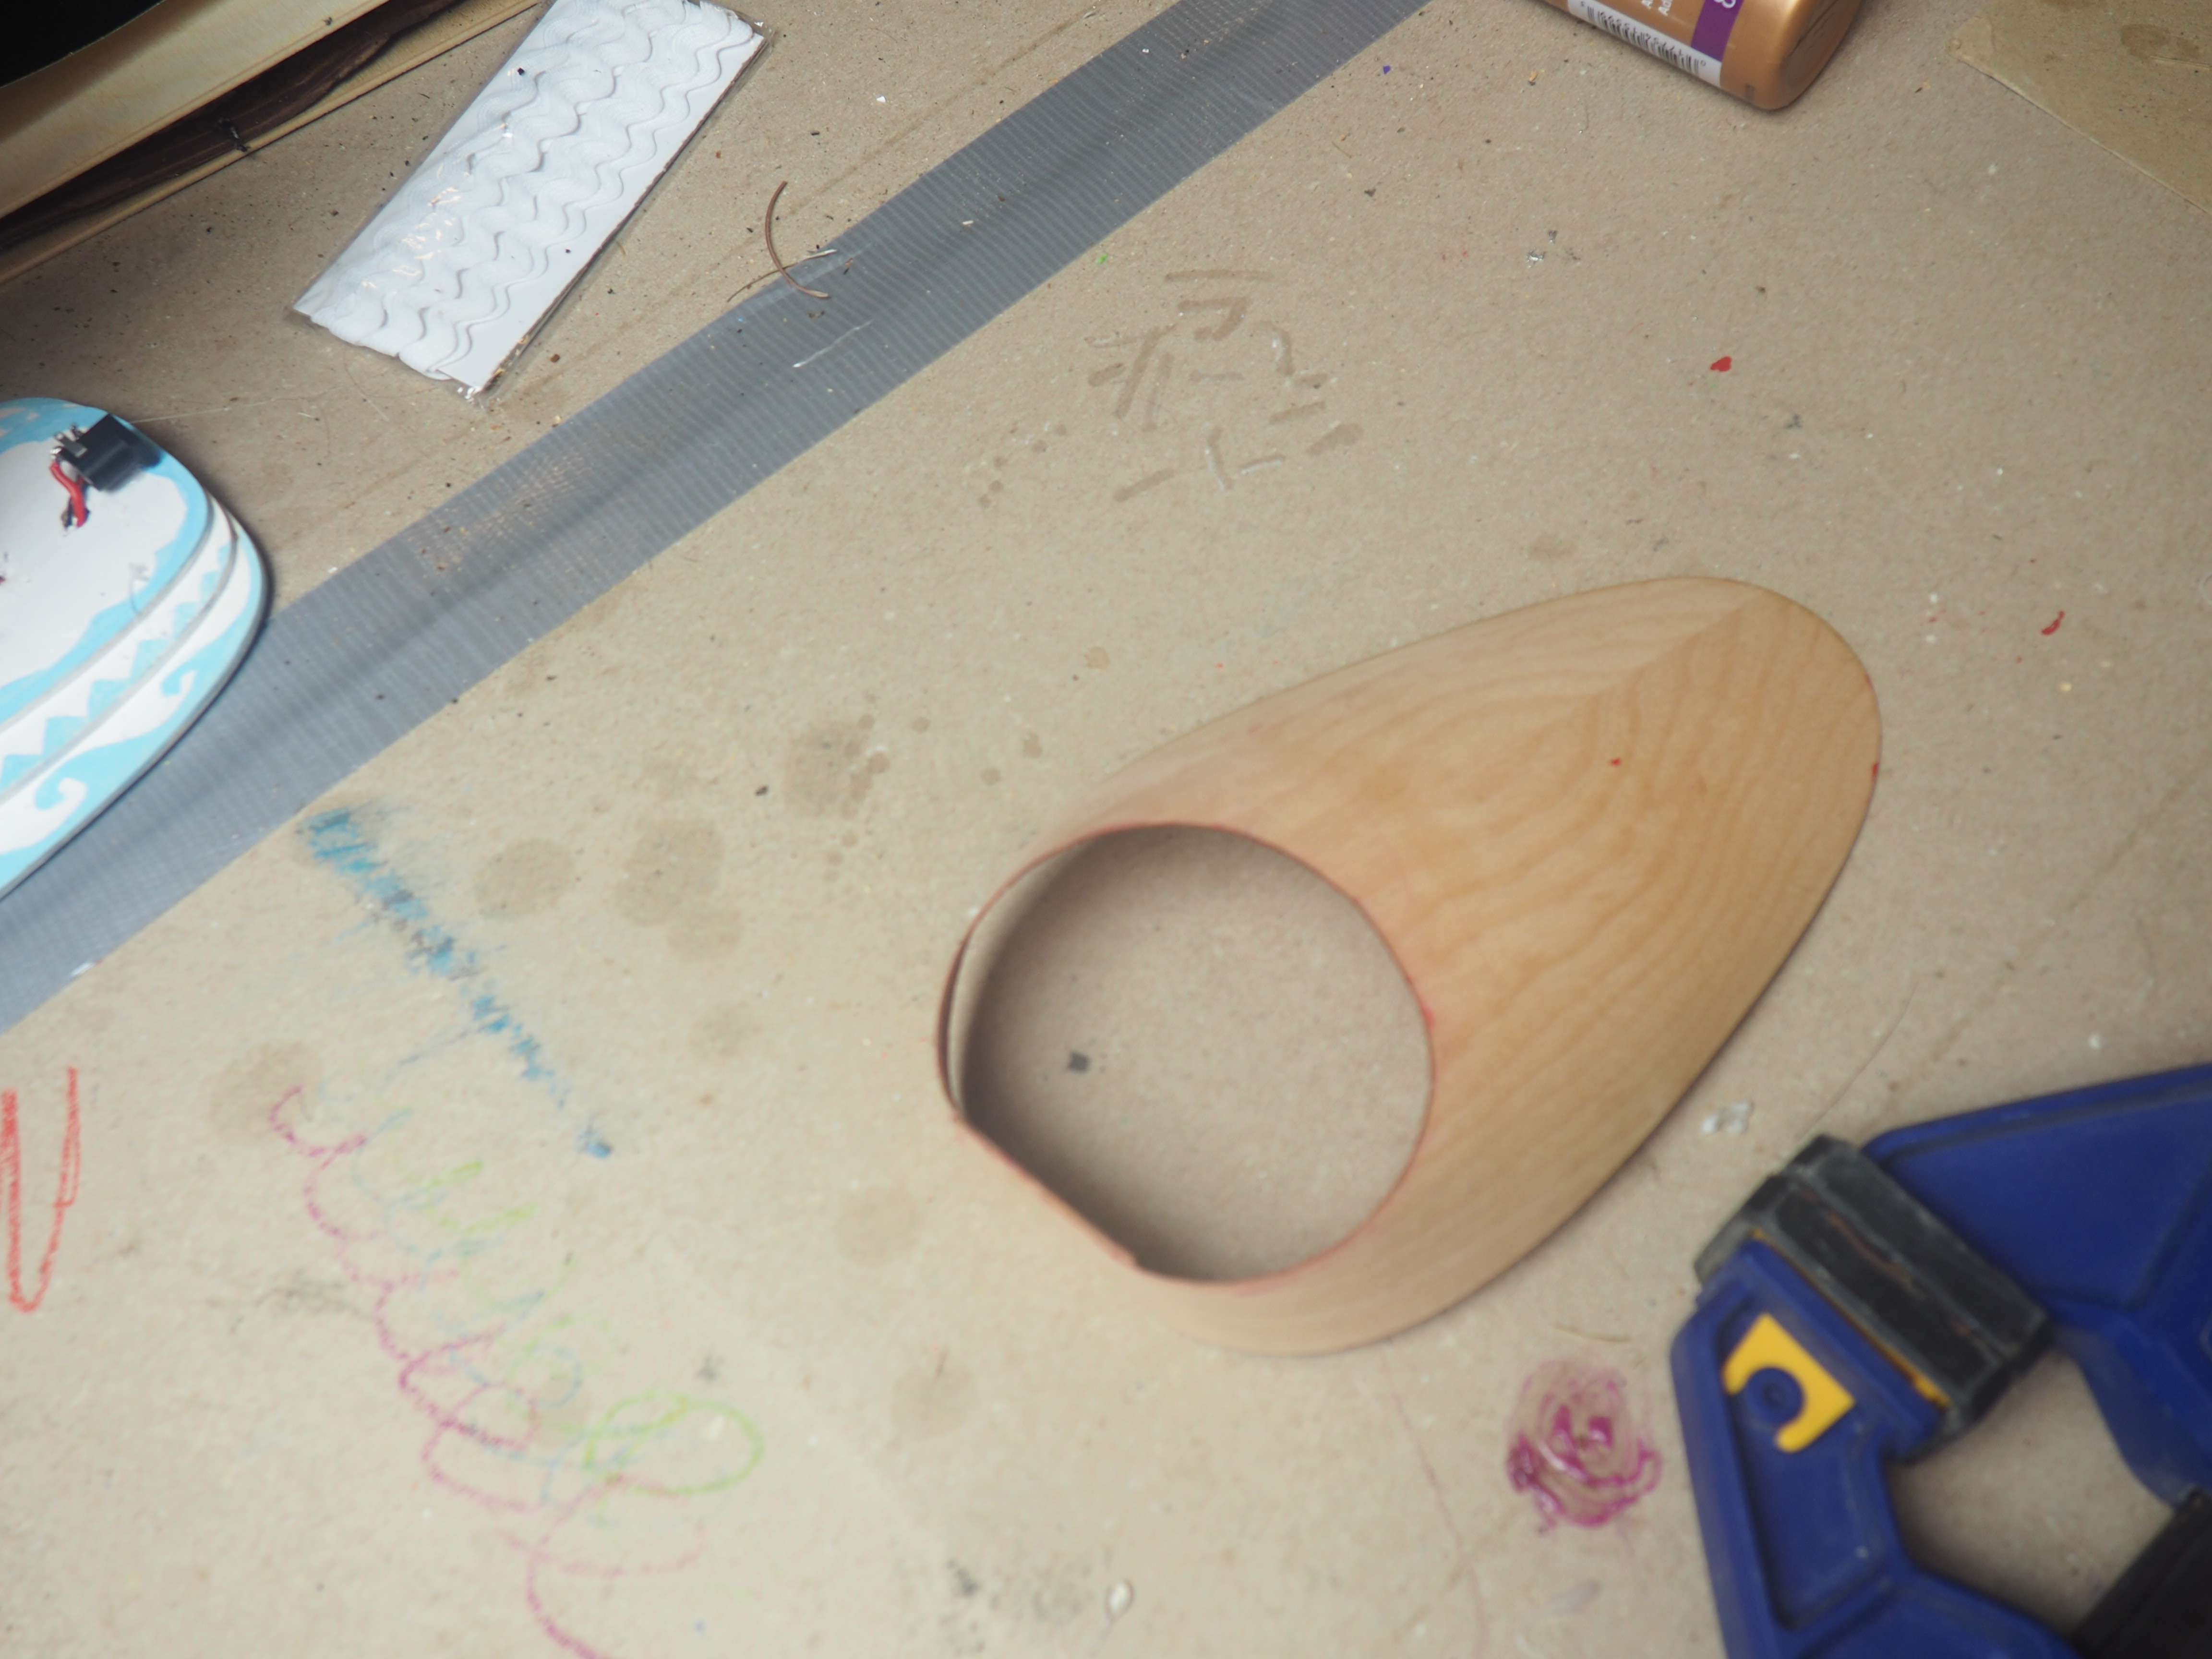
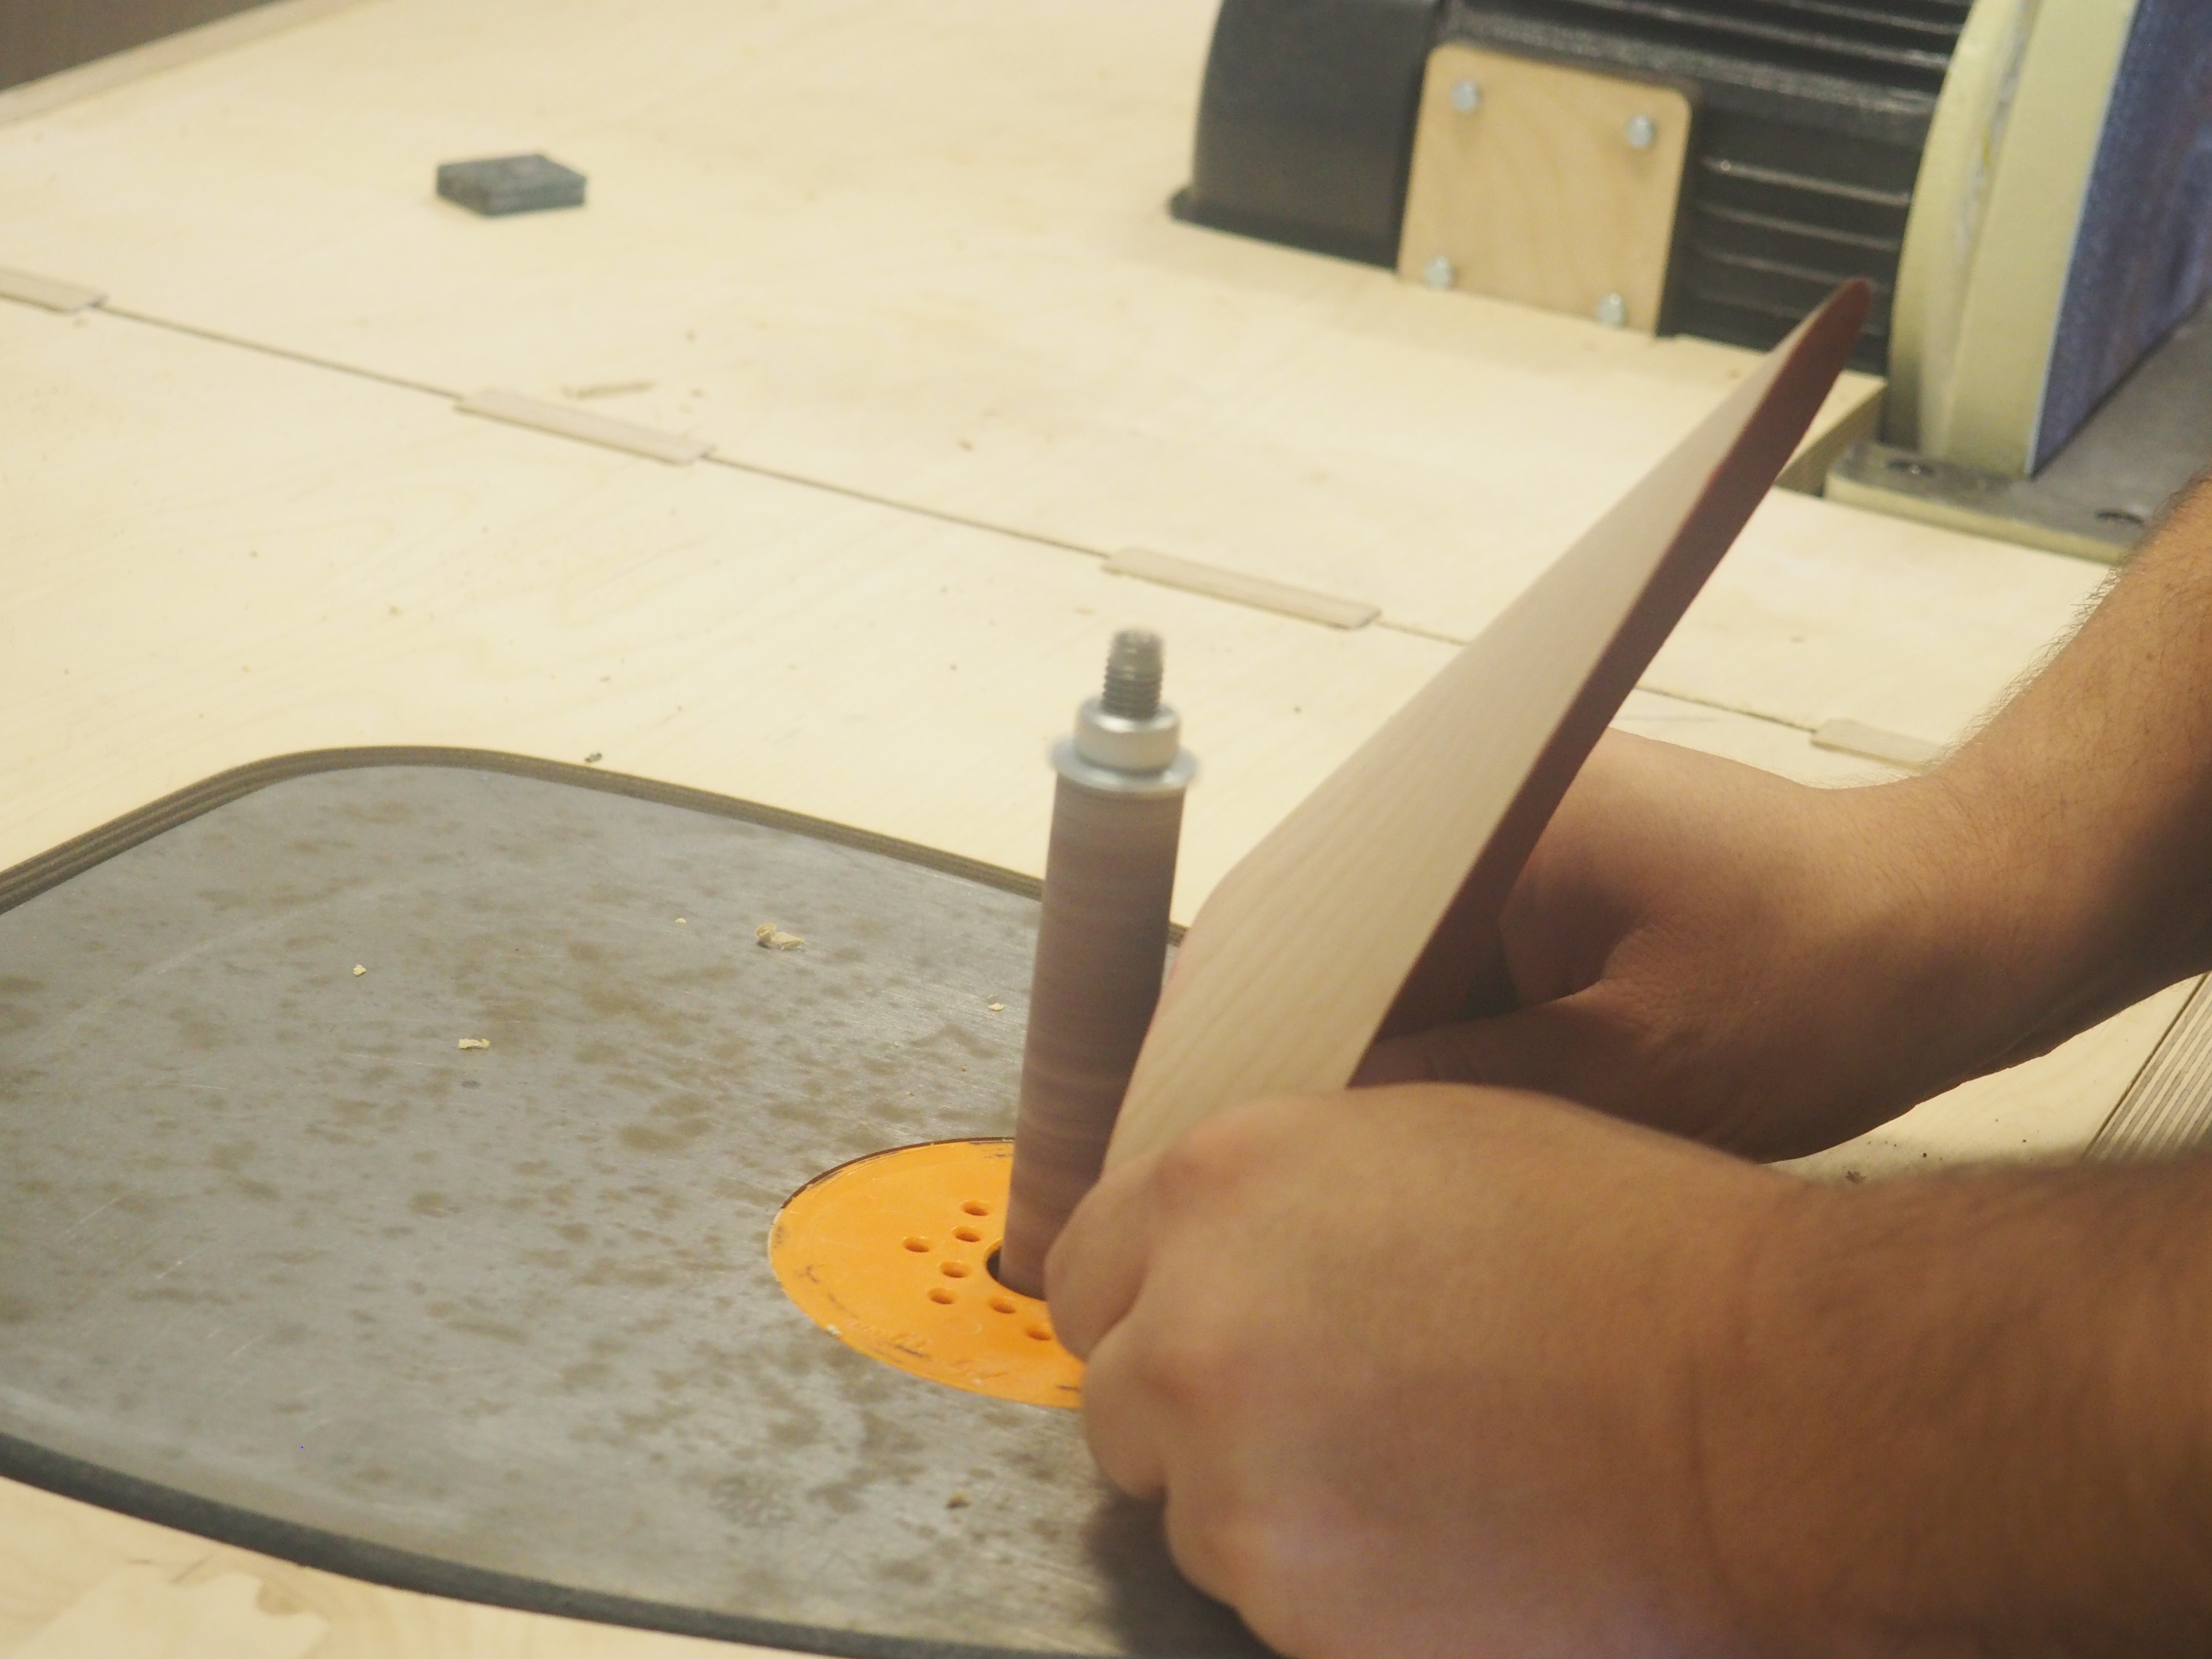
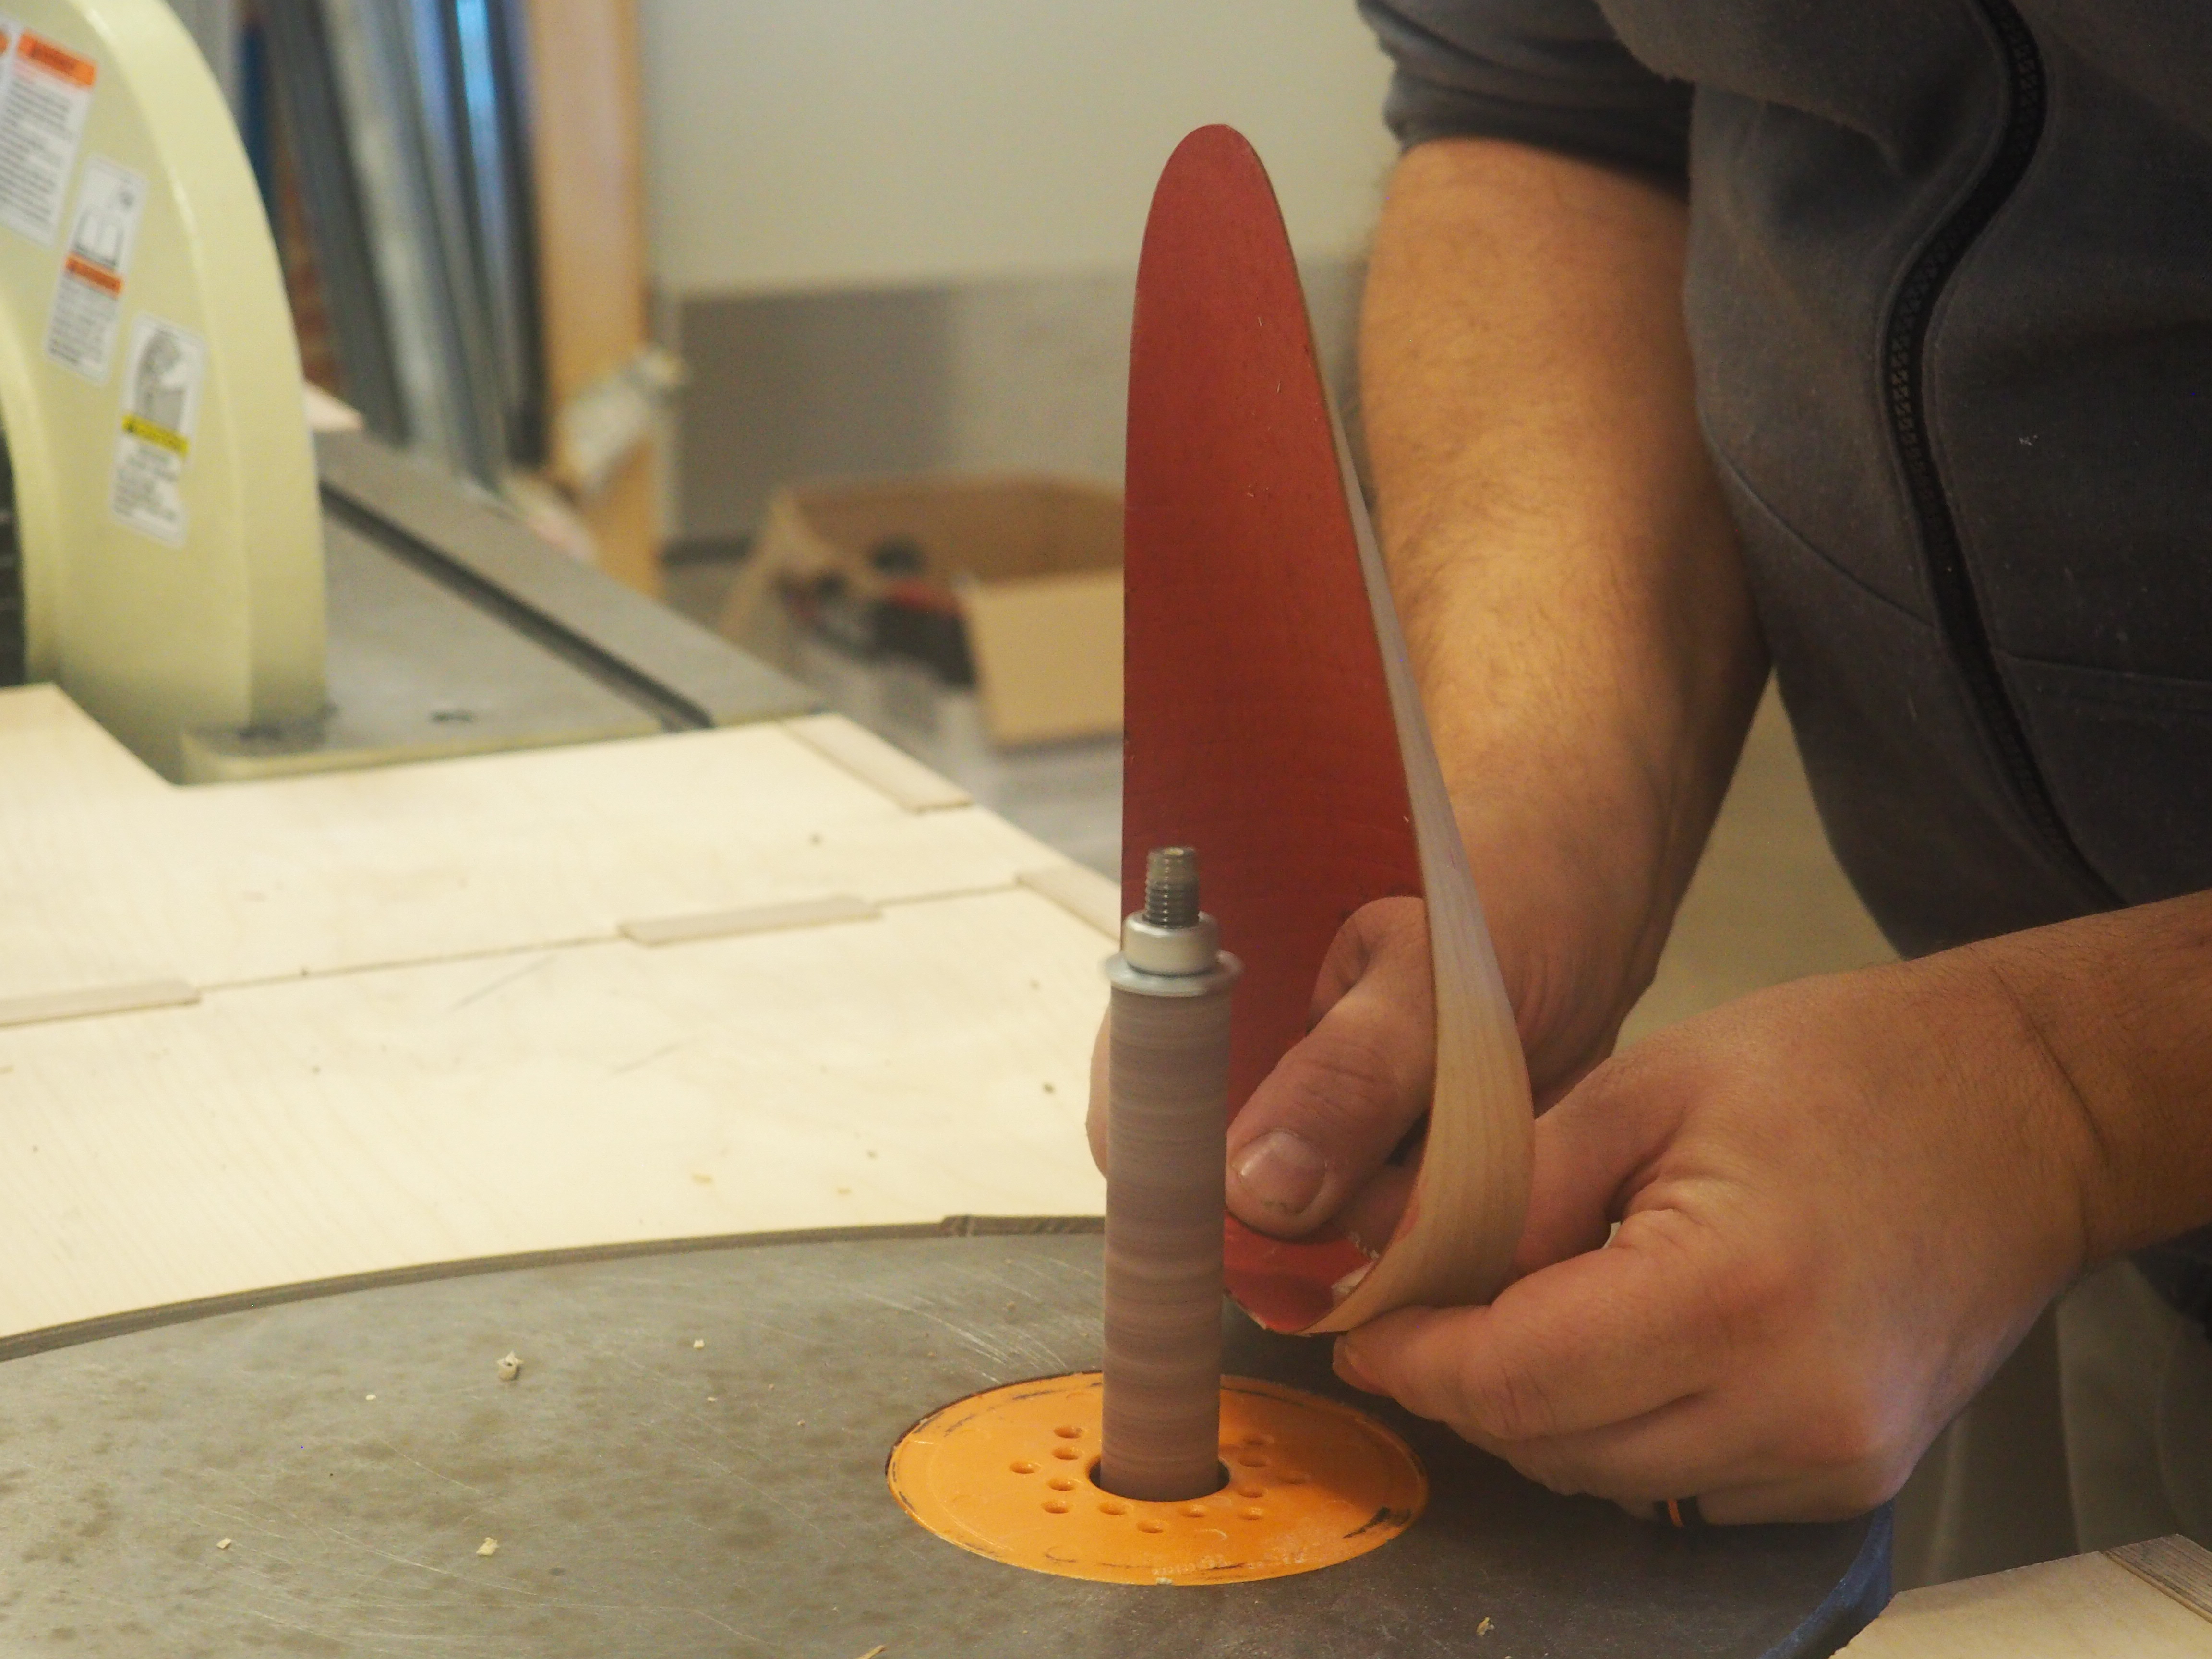
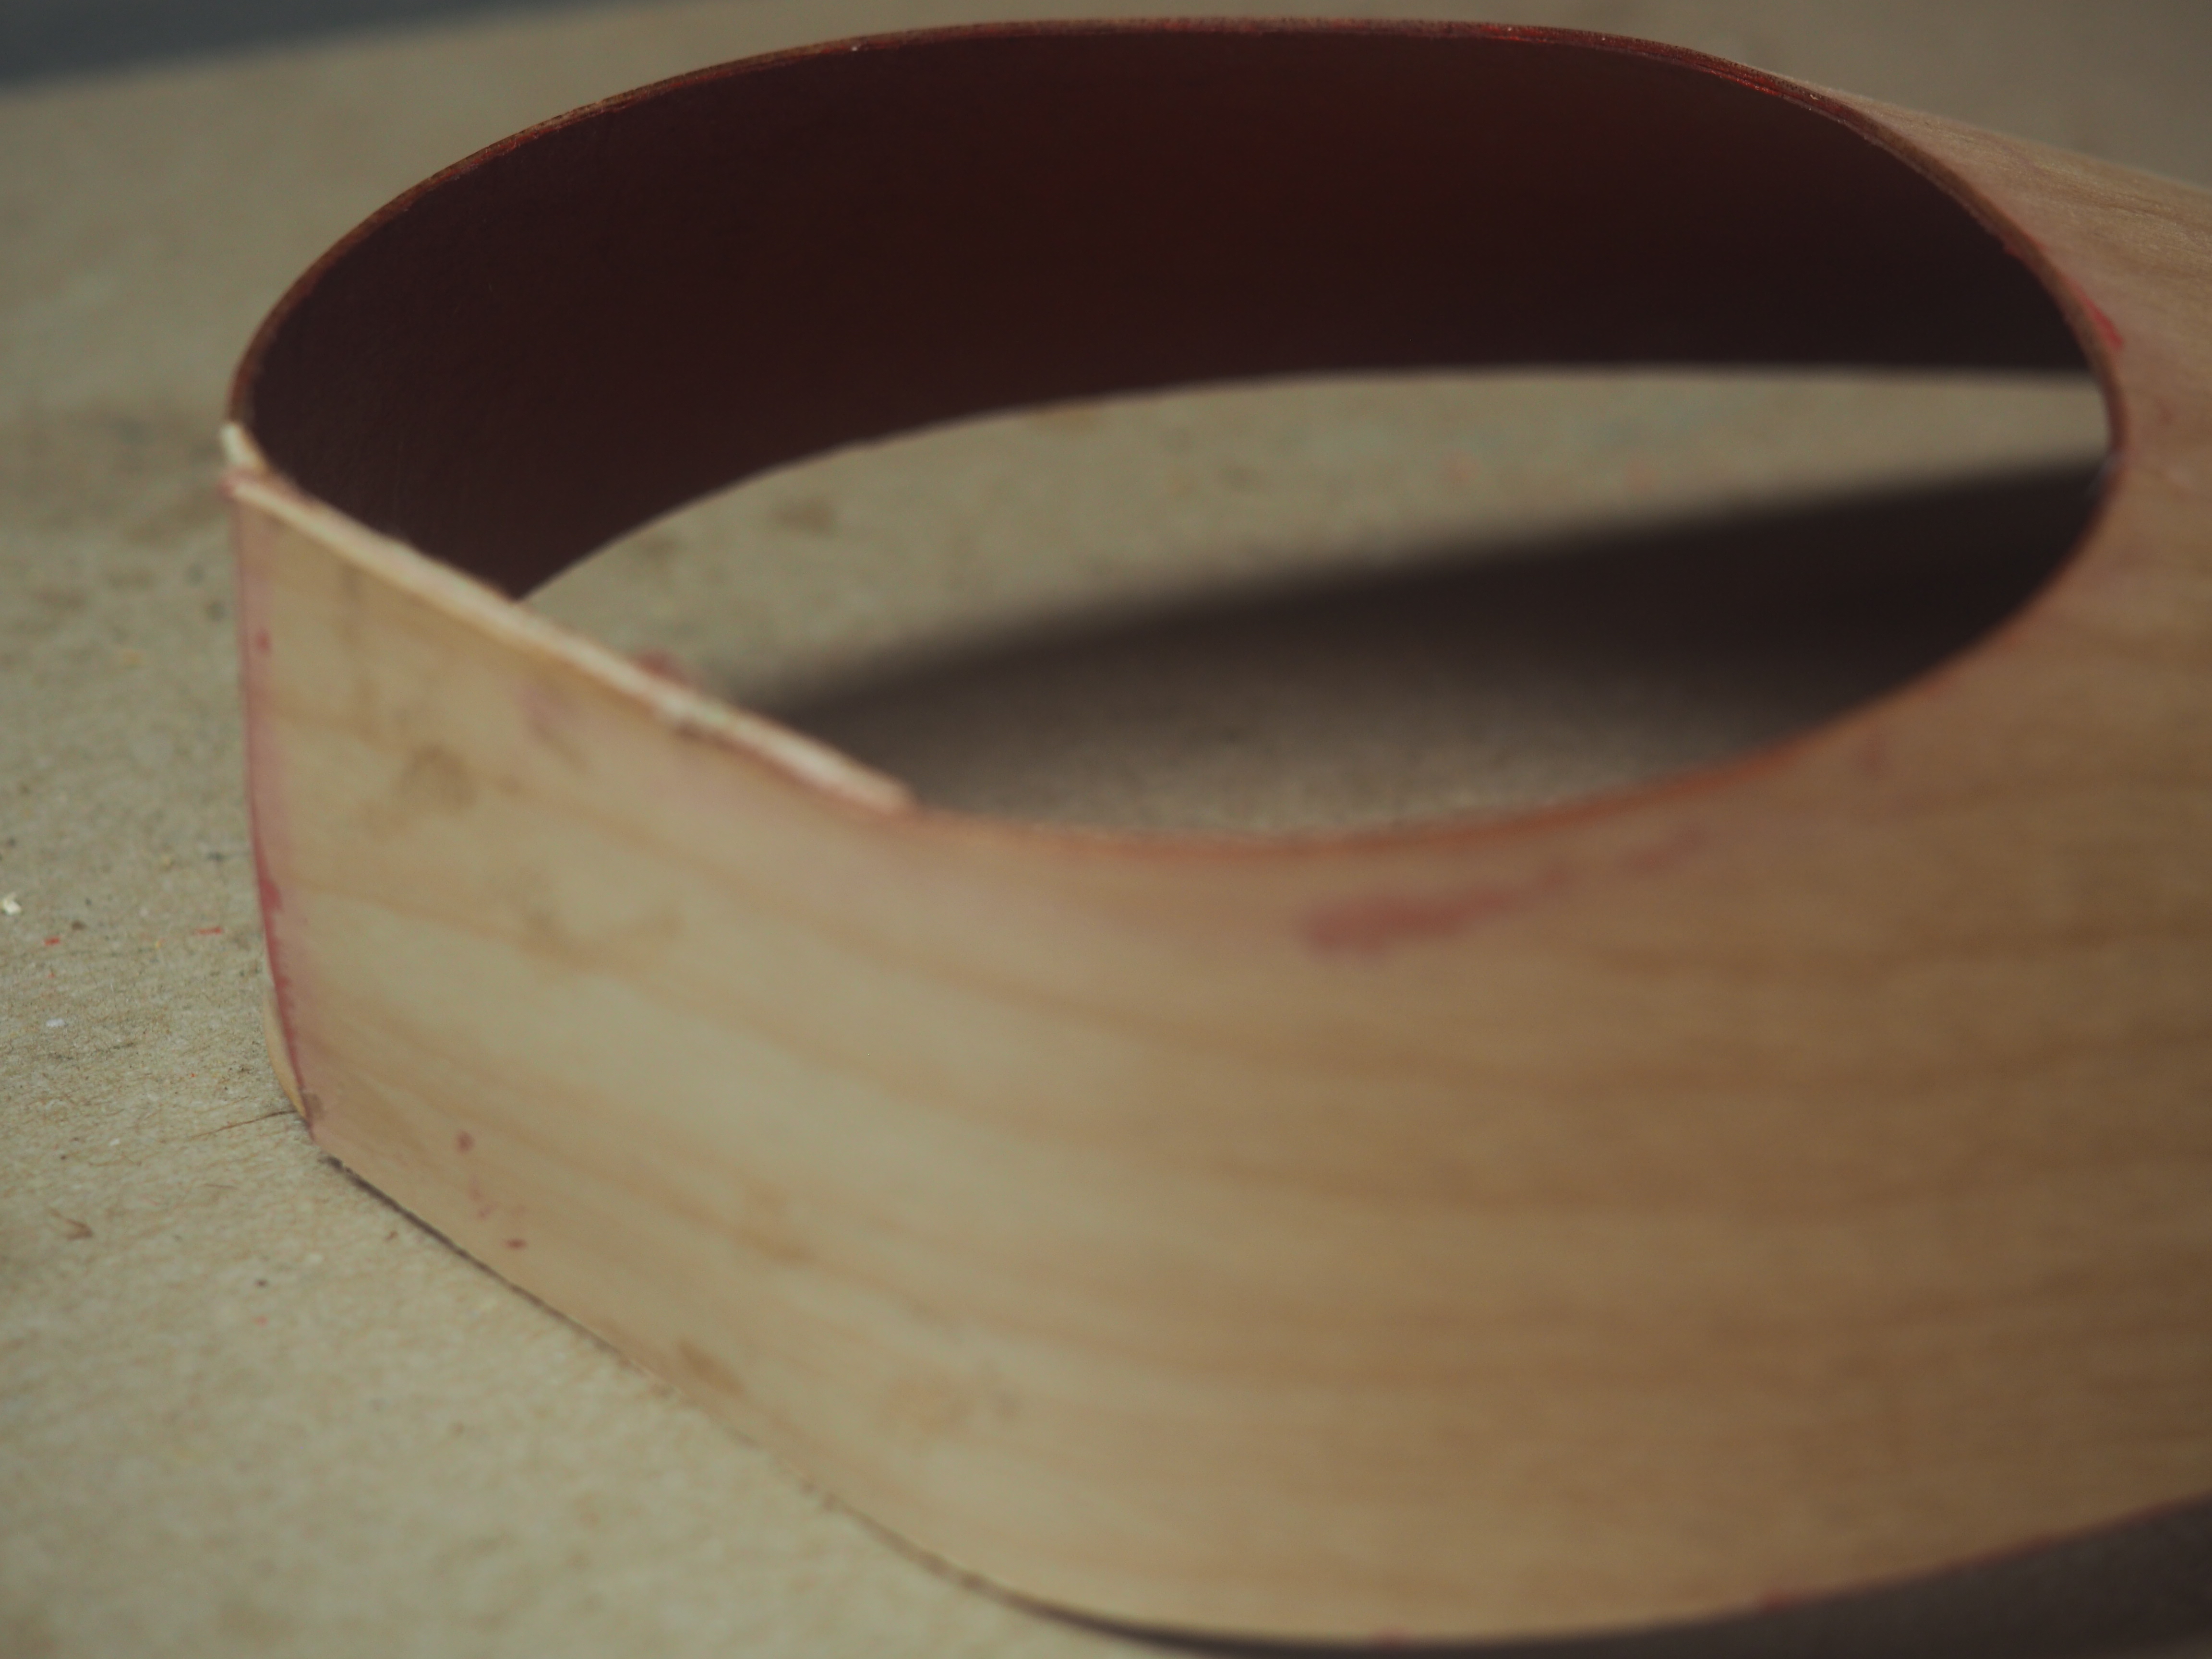
Use the attached file as is or adapt it to your suited purpose. Laser cut the lamp stand on the 24x12 1/8 plywood ( if you do not have a laser cutter you could cut them with a coping saw, scroll saw or band saw by printing the file and pasting it to the plywood.) Laser cut ( or using a saw) cut the veneer using the bentwood hat file provided.

  • Laser cut the lamp stand using the settings recommended for your machine for 1/8 inch plywood. When that has finished laser cut the veneer using the bentwood hat file. Make sure that the grain of the veneer is running horizontal with the hat. Imagine the hat is an arrow head, the grain should be going the direction the arrow is pointing, if the grain is running vertical to the arrow the hat might break when it is bent.


Prep the inside parts!

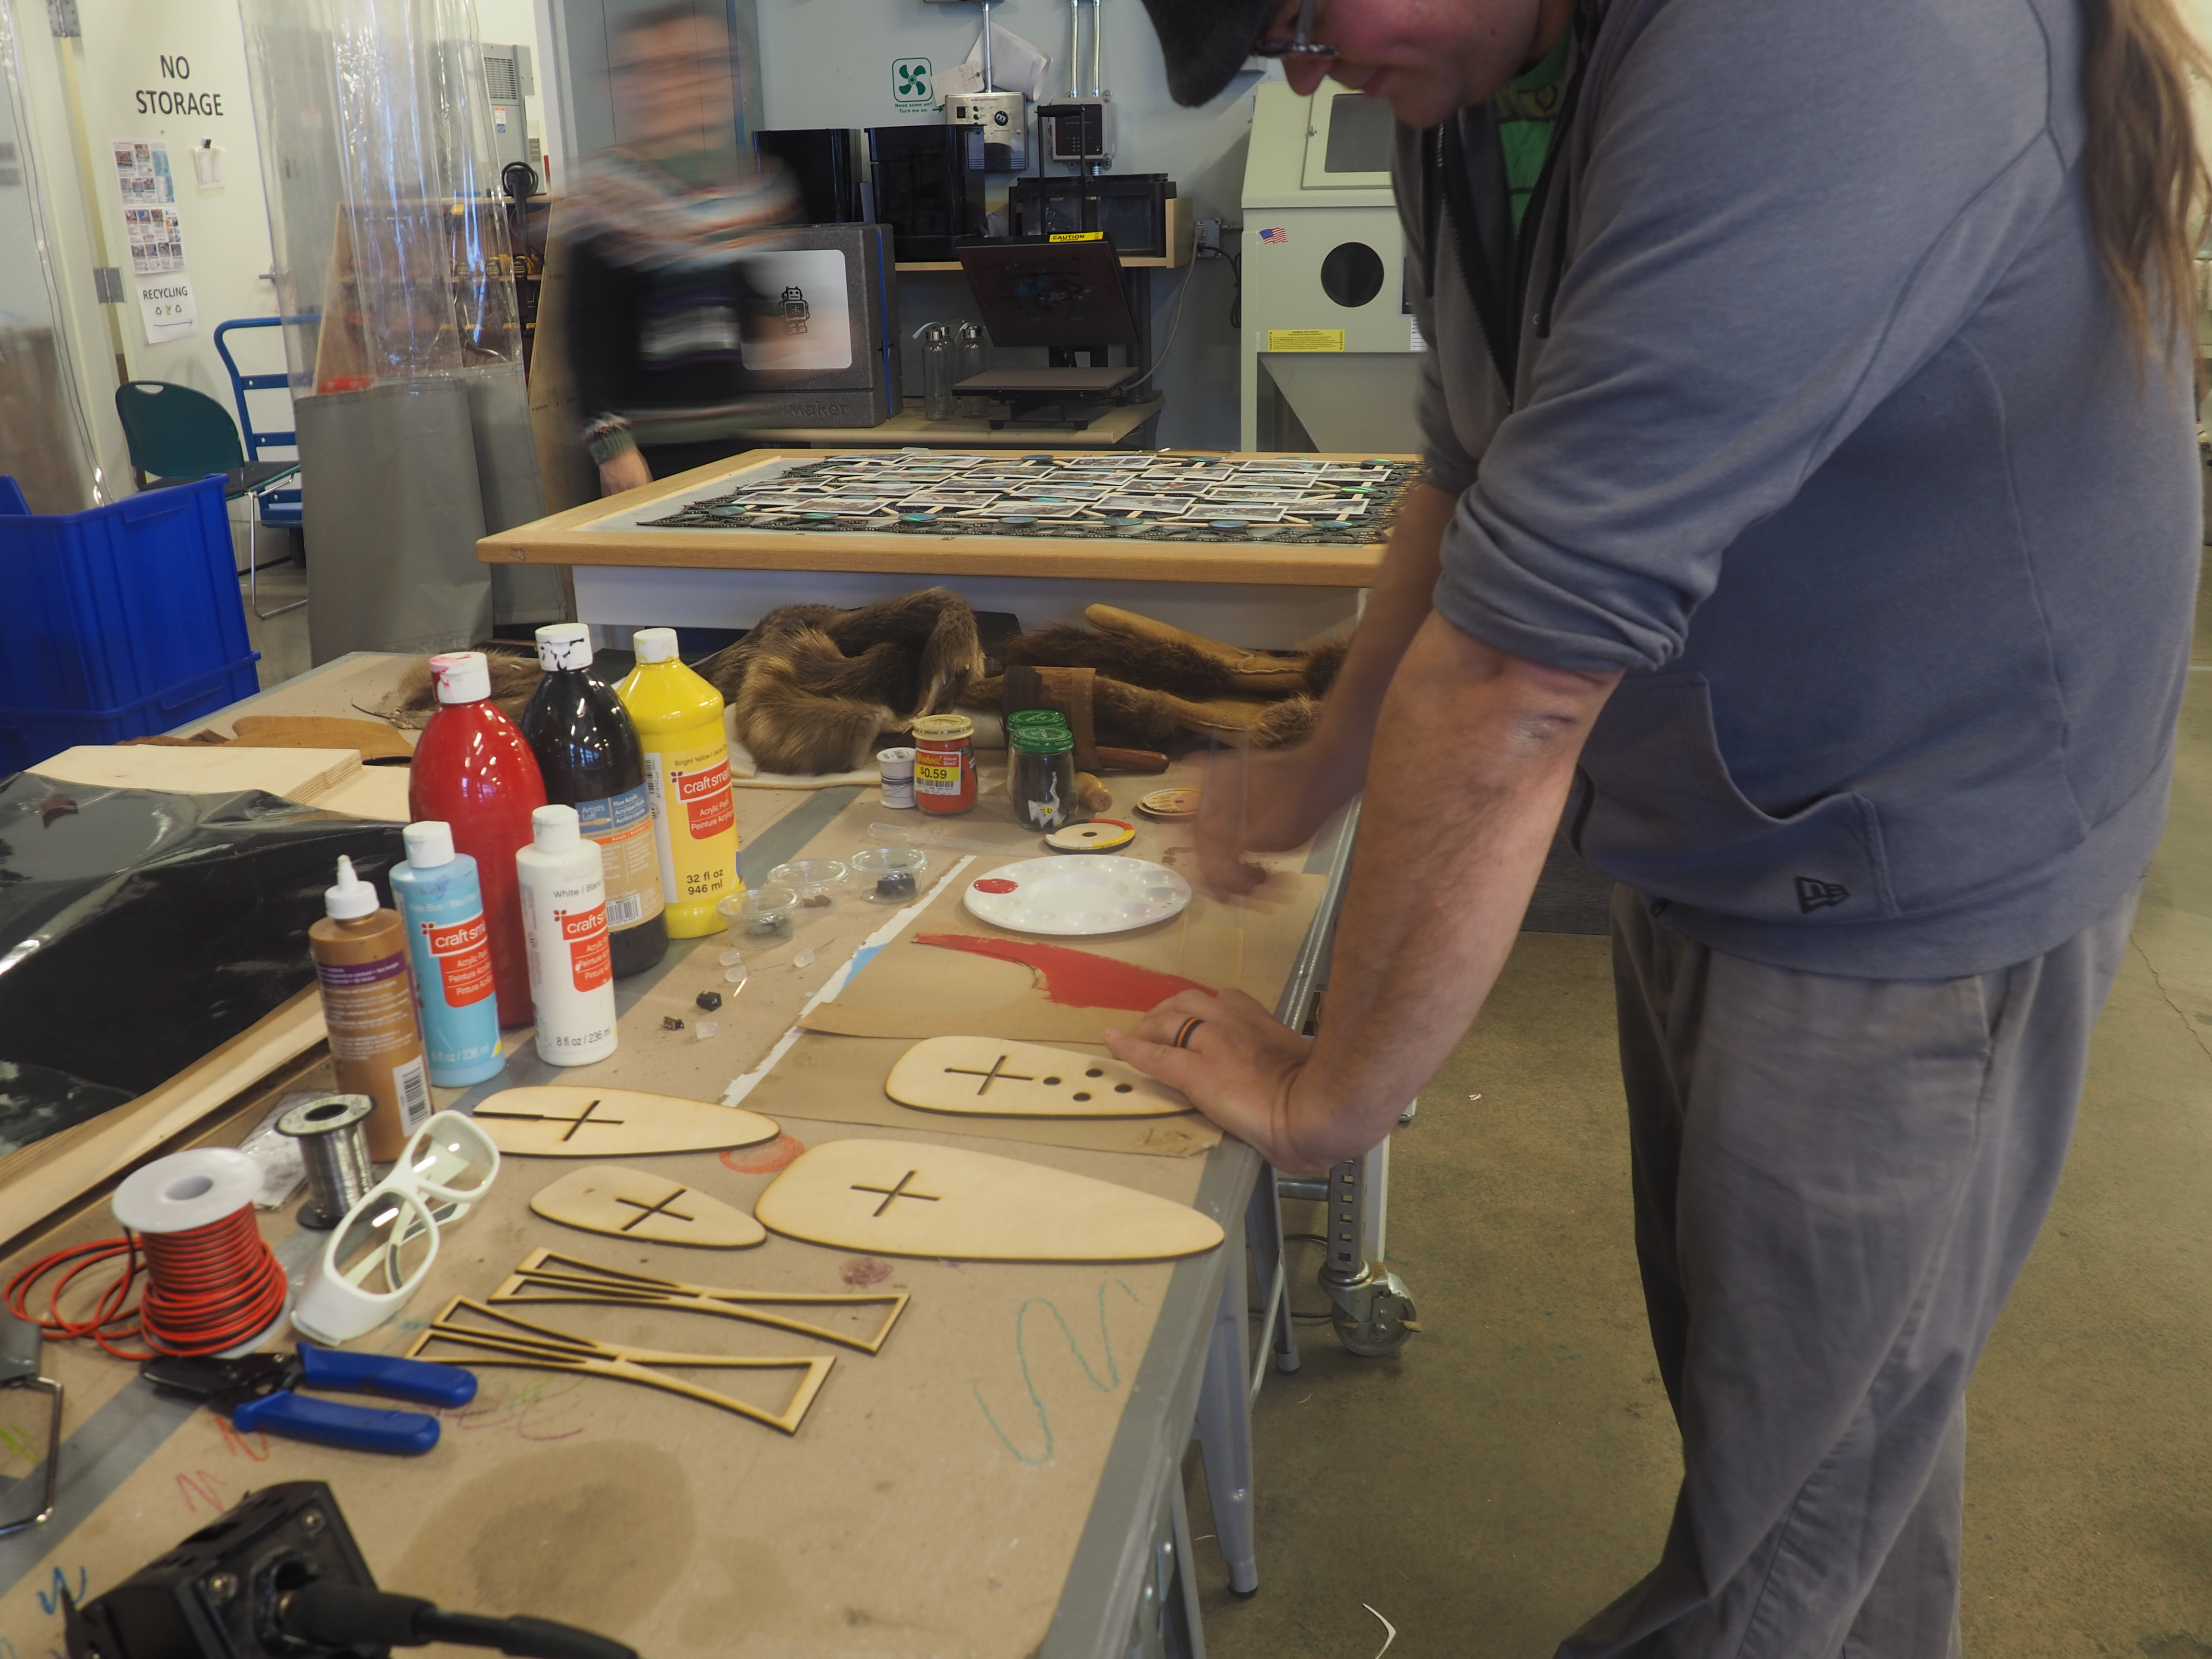
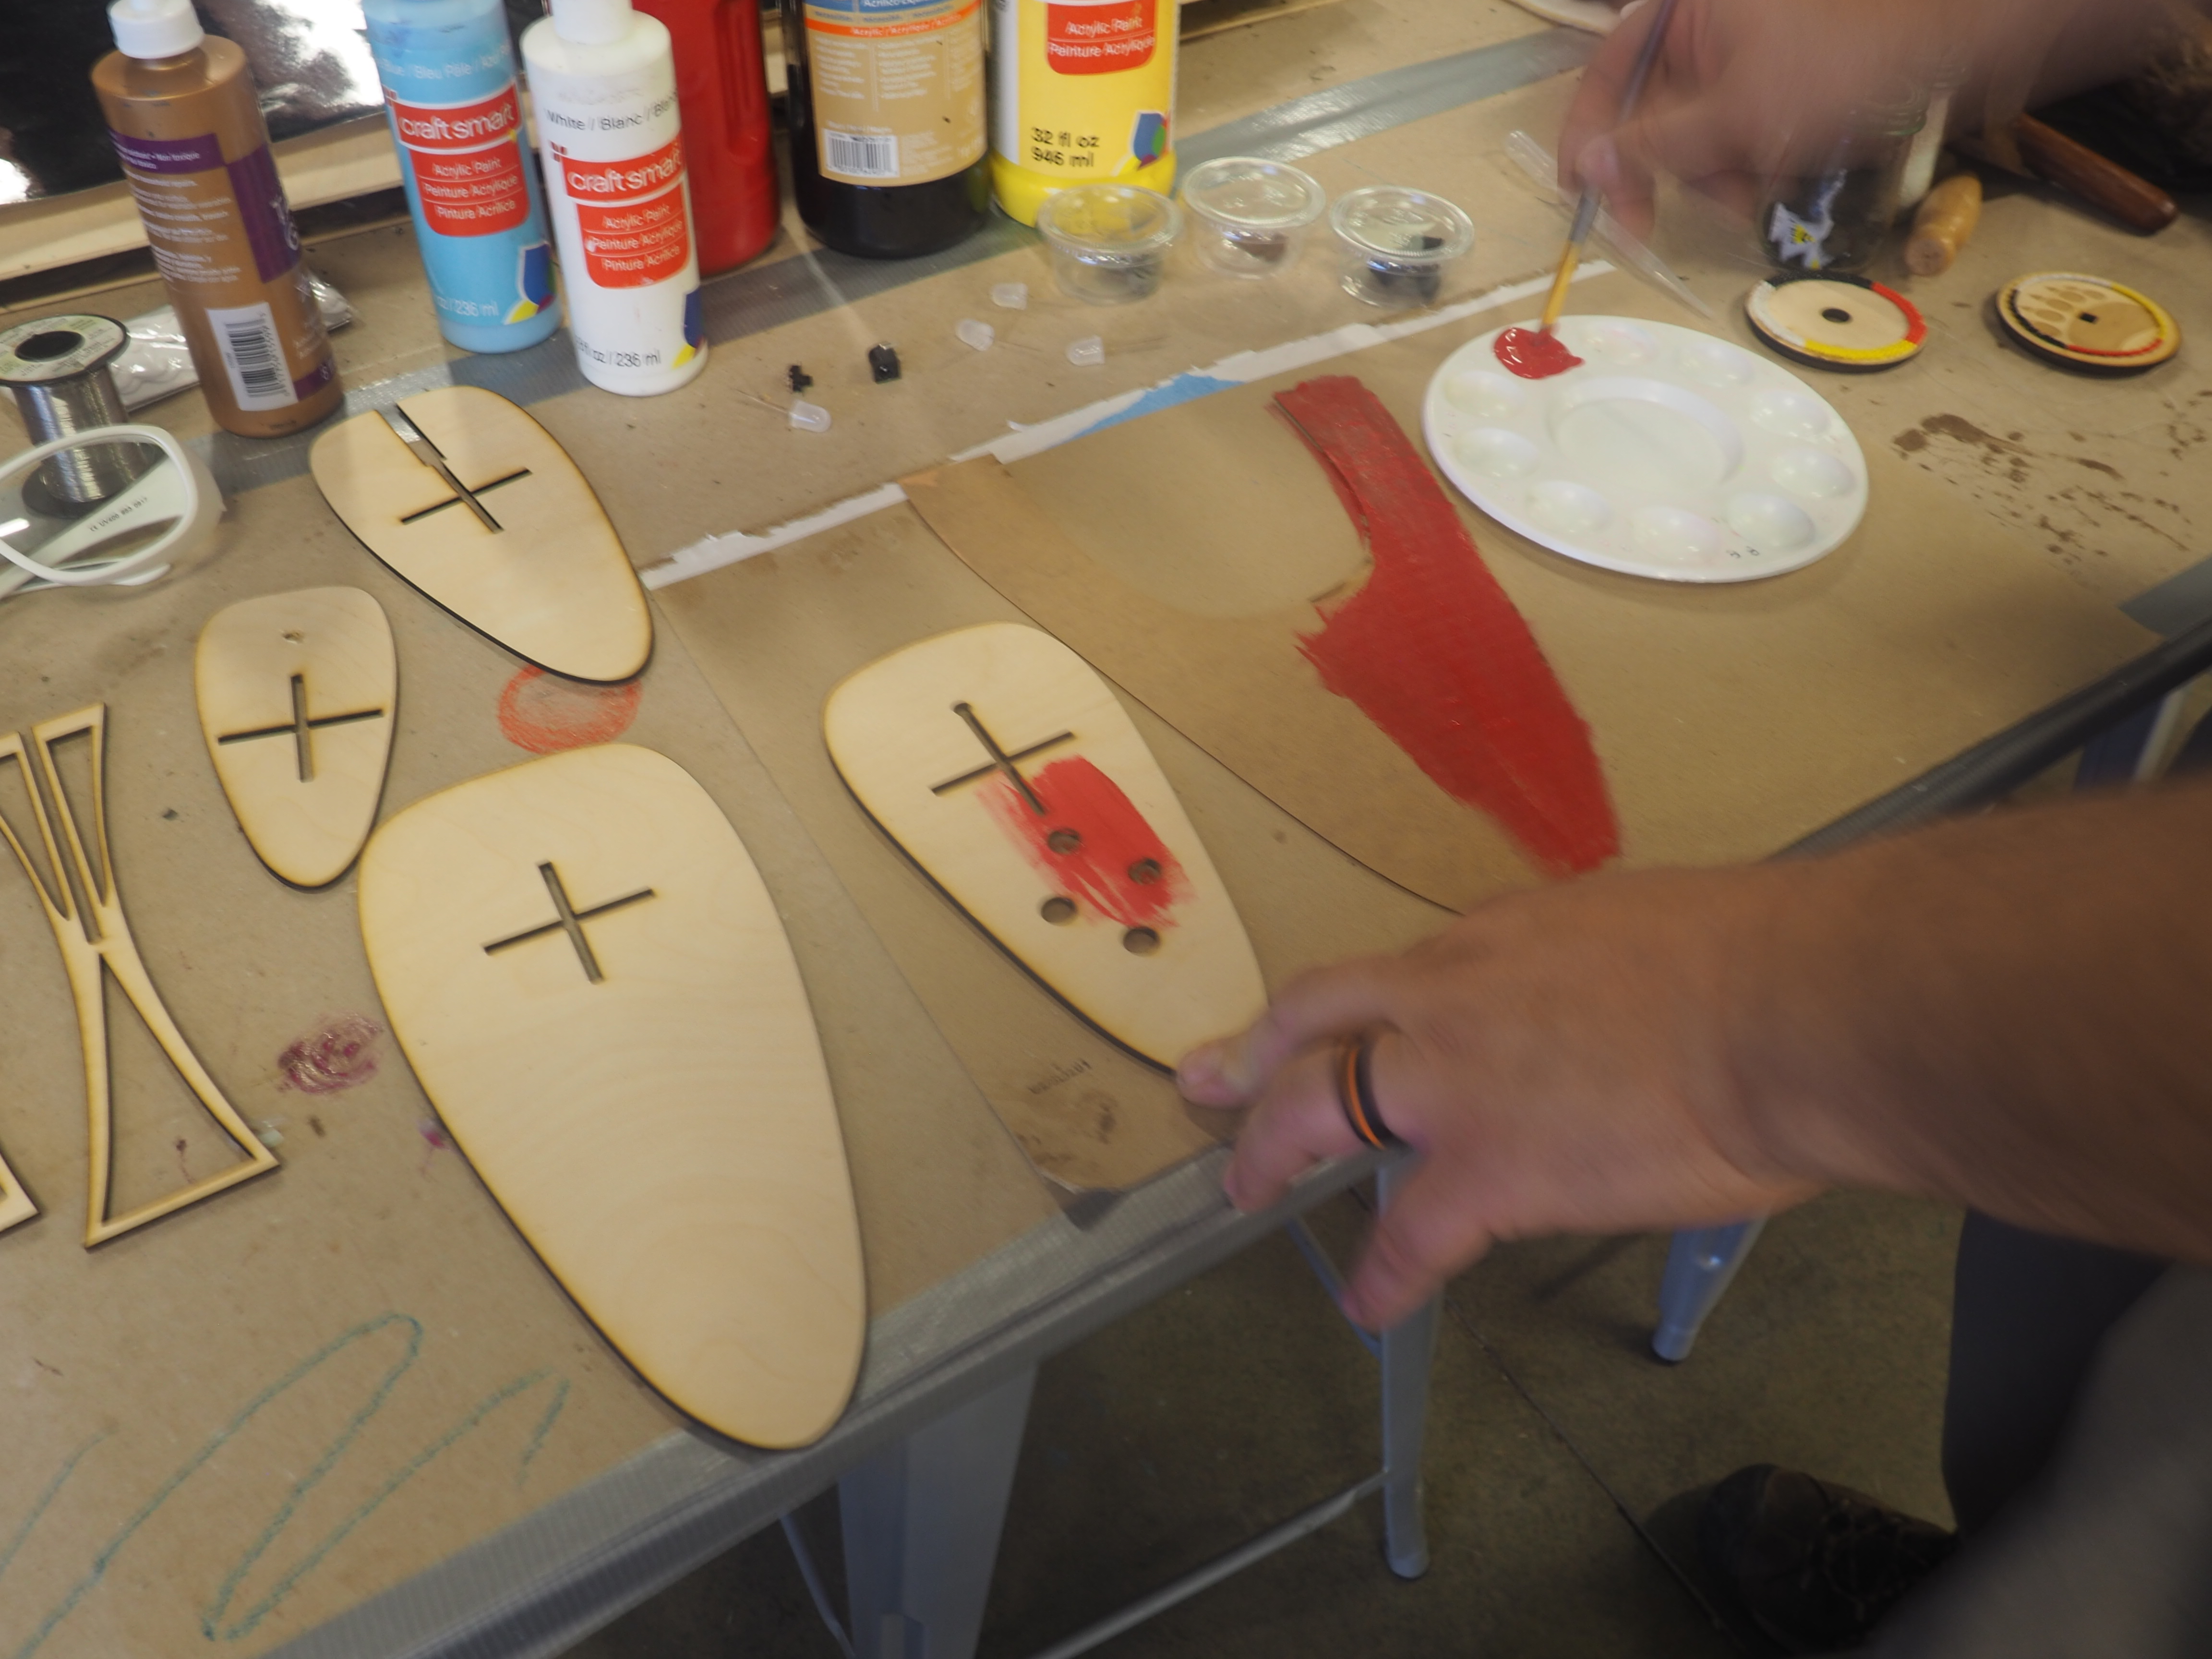
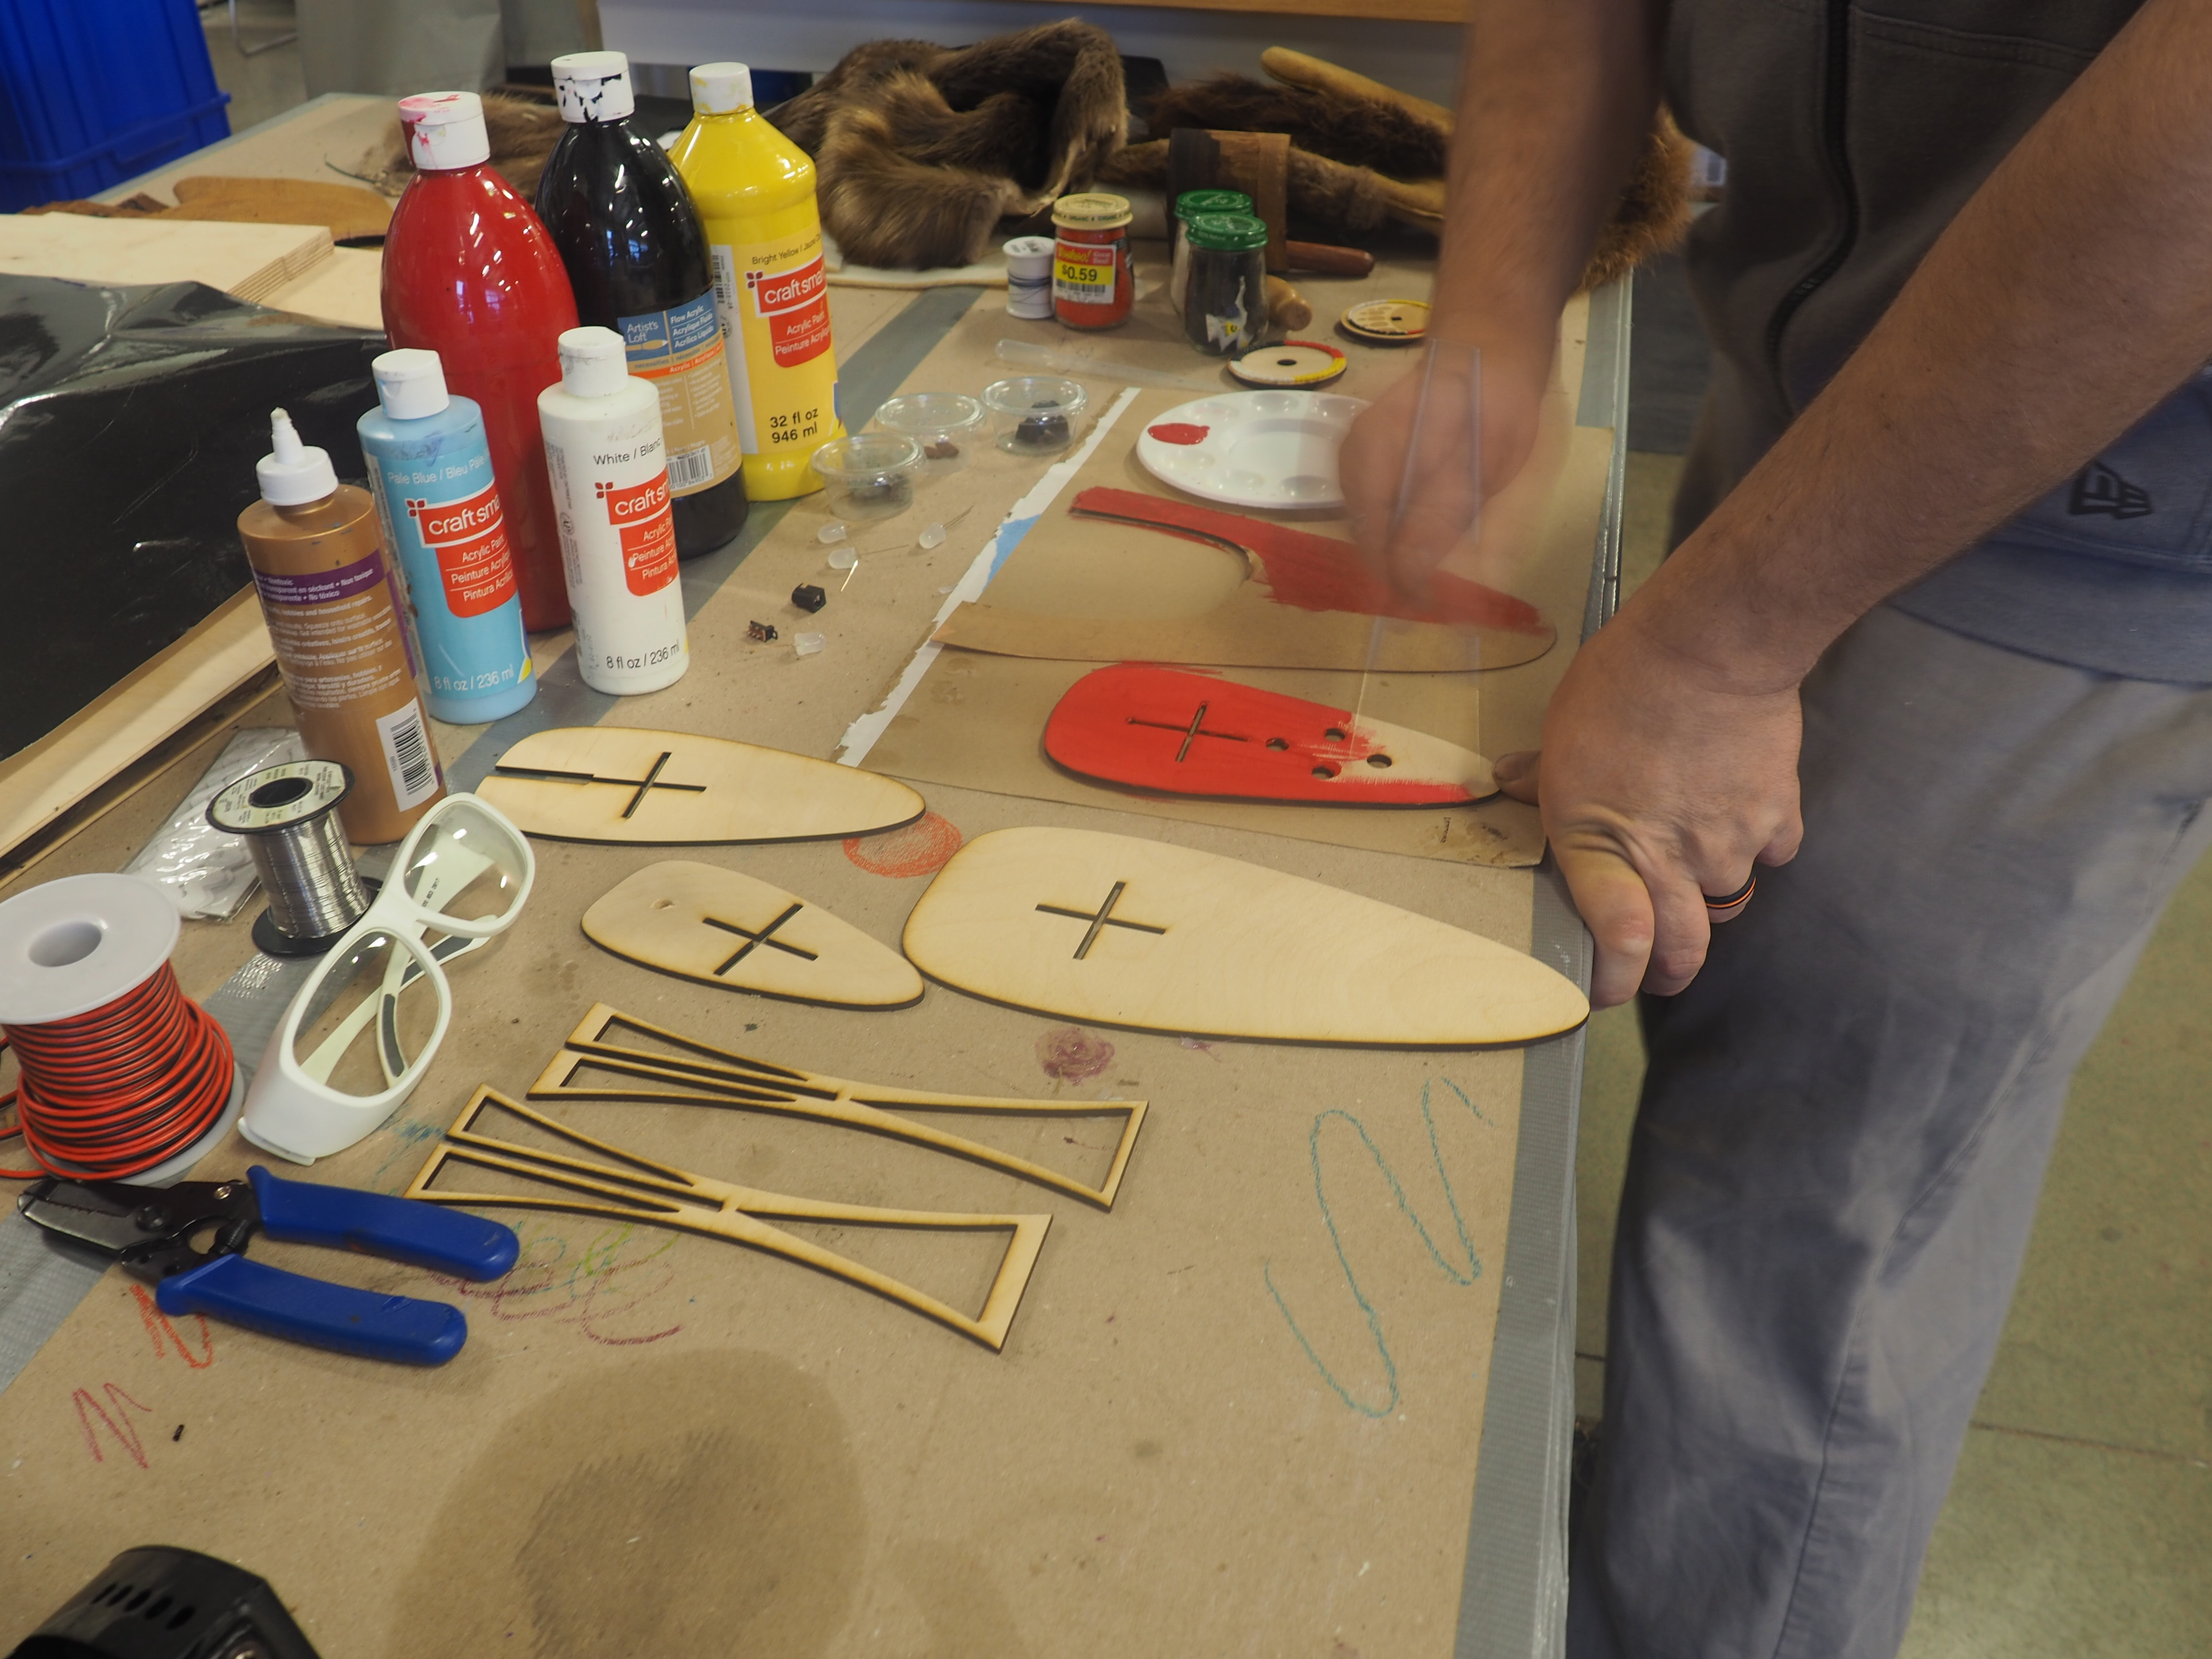
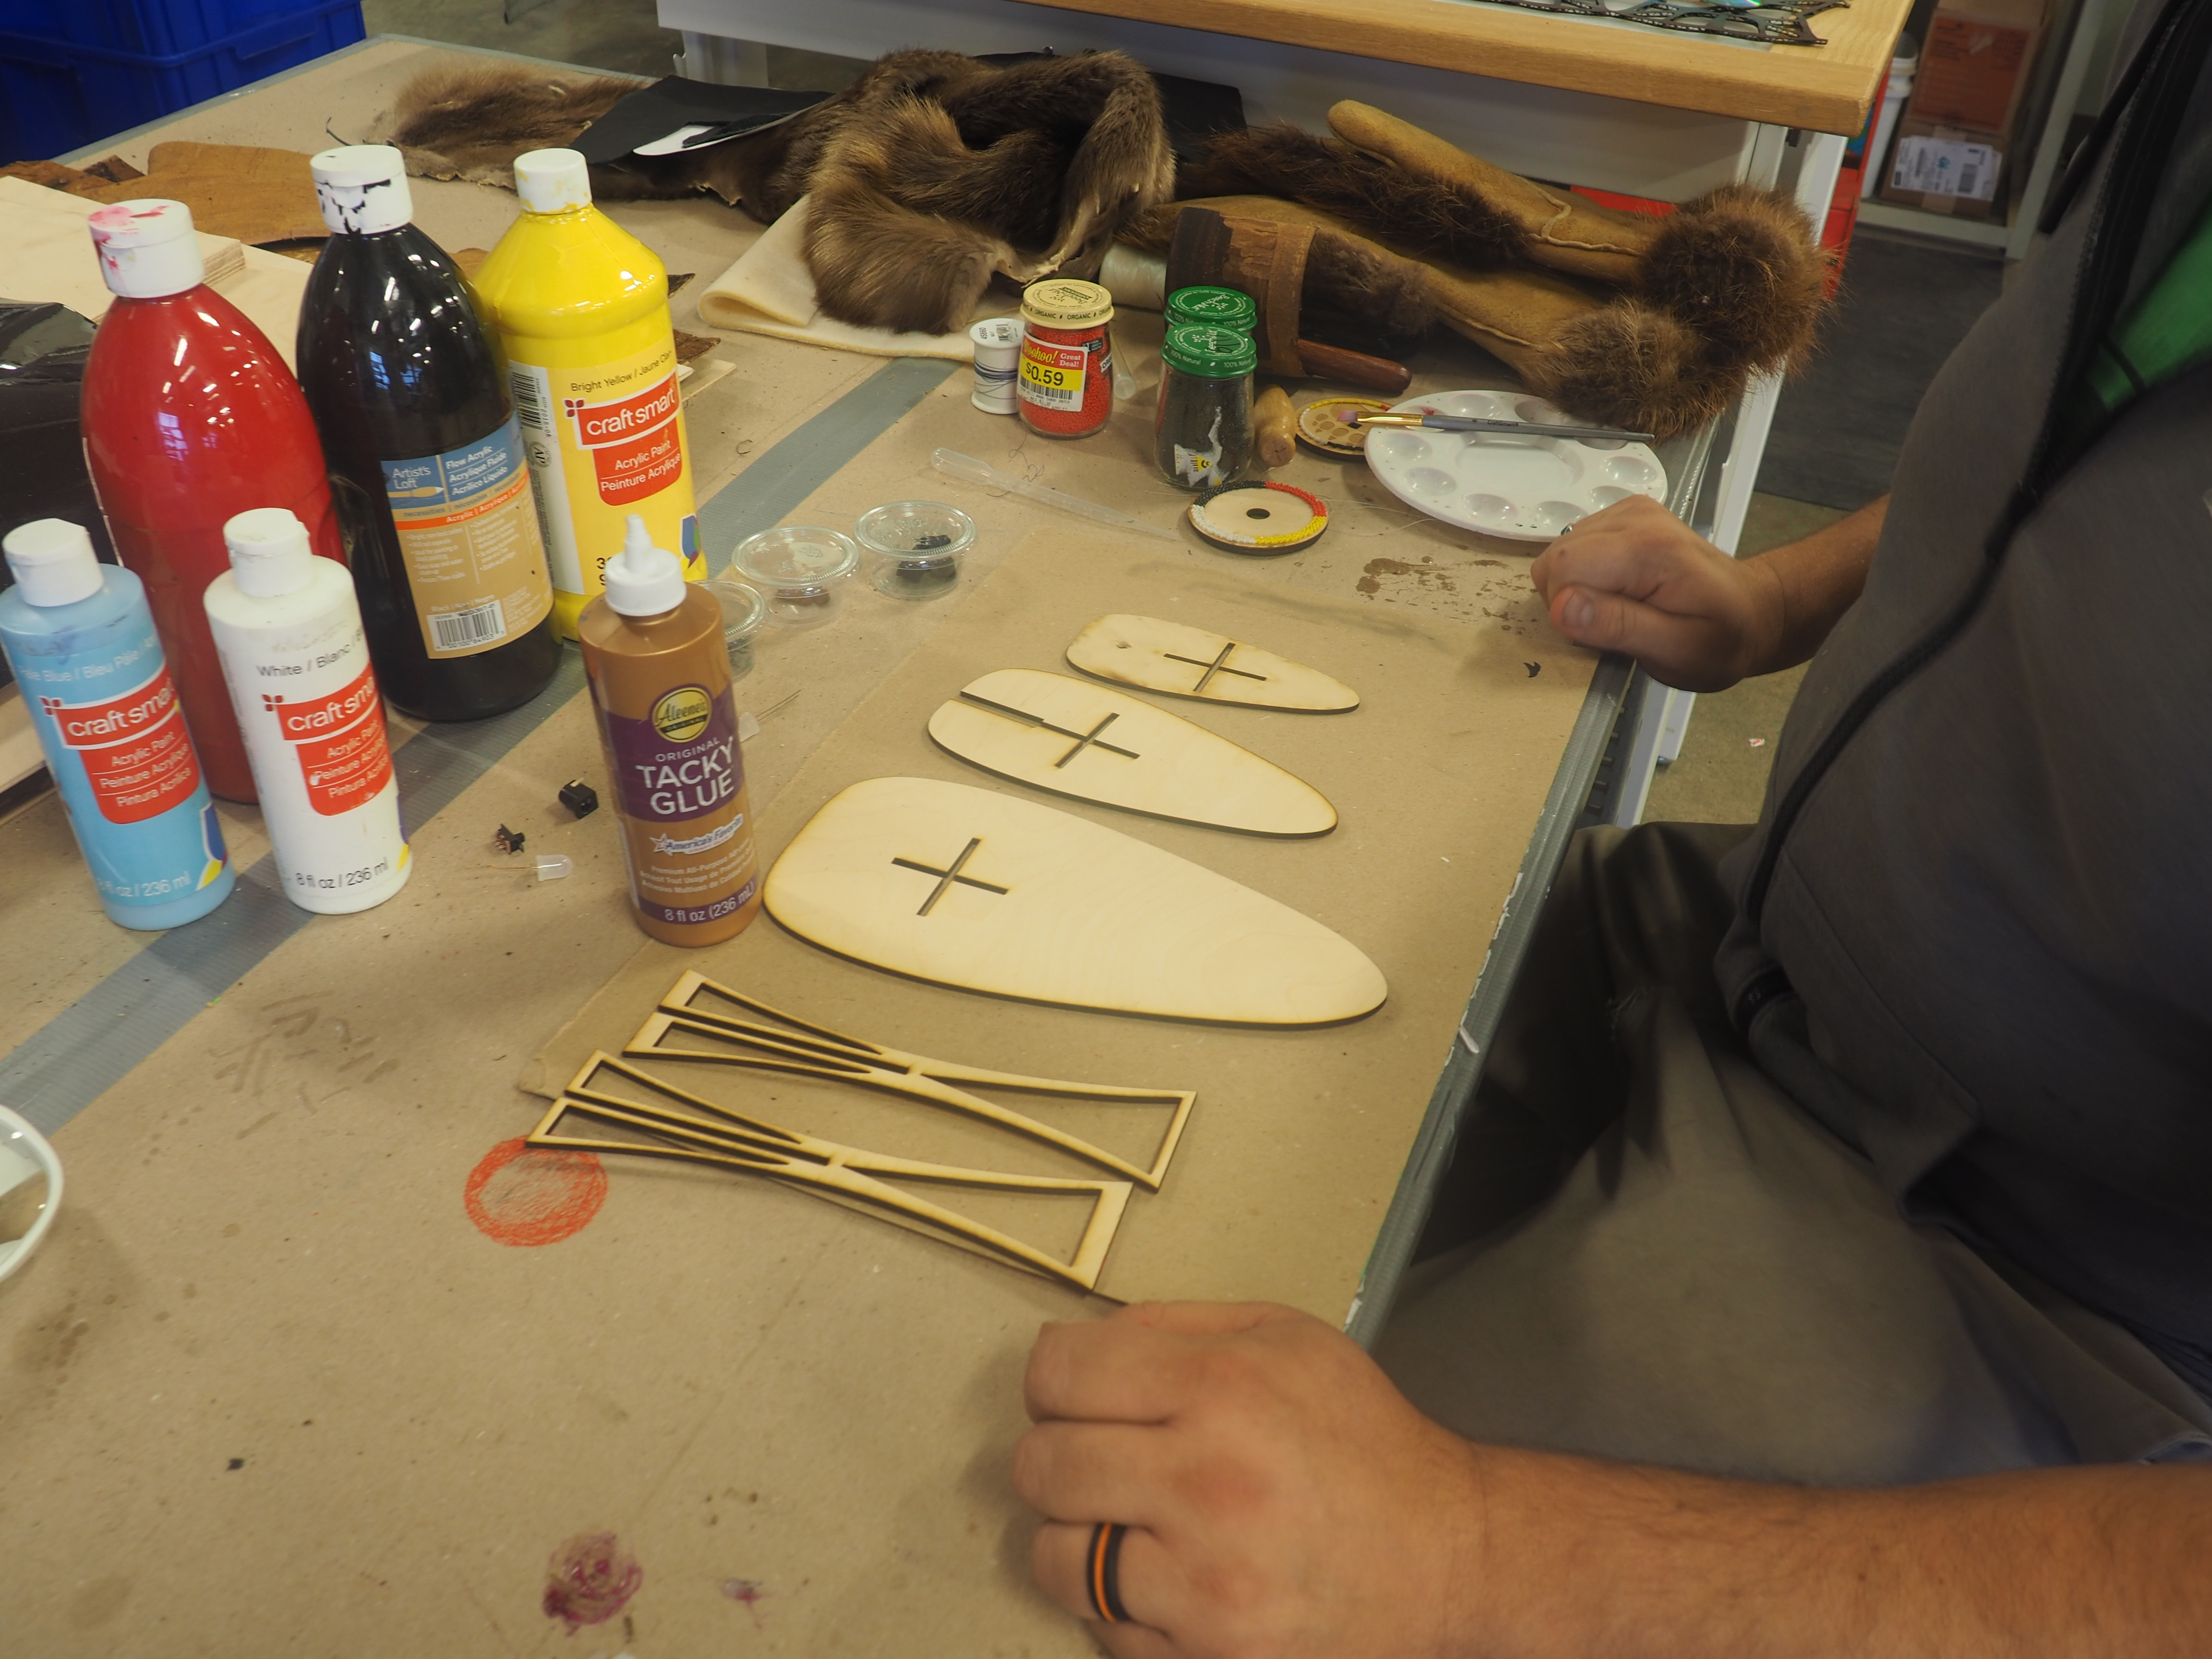
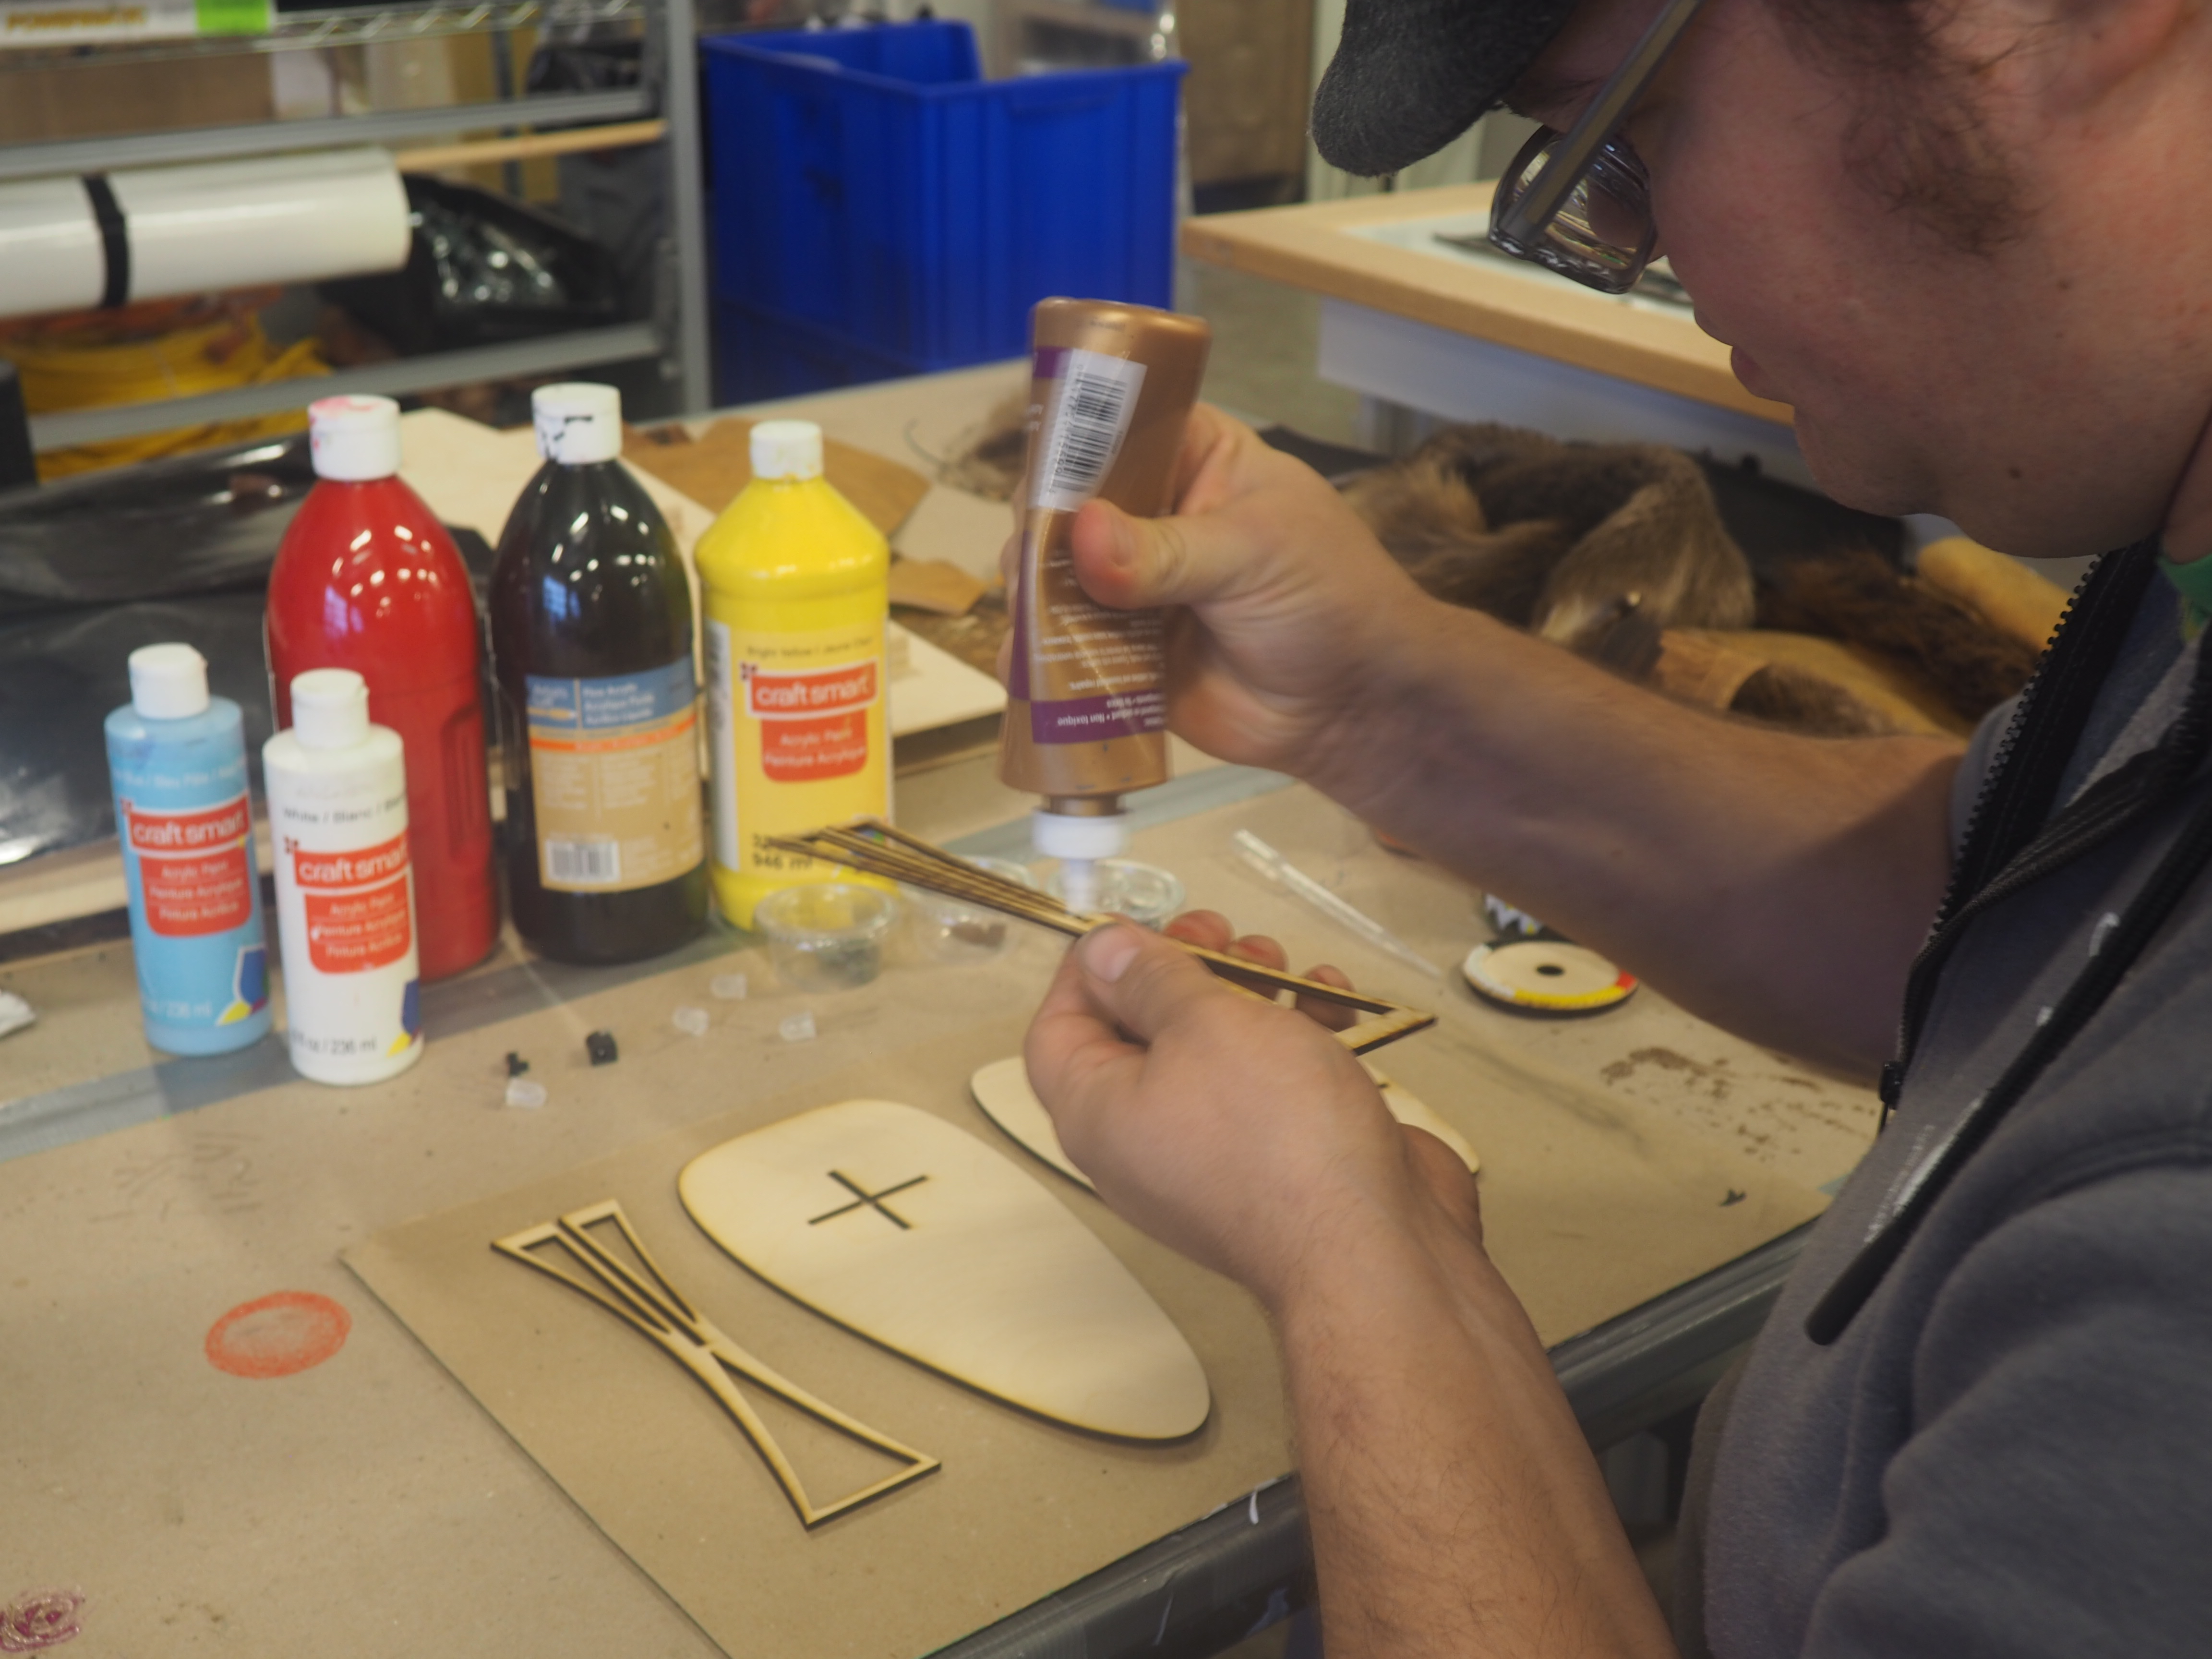
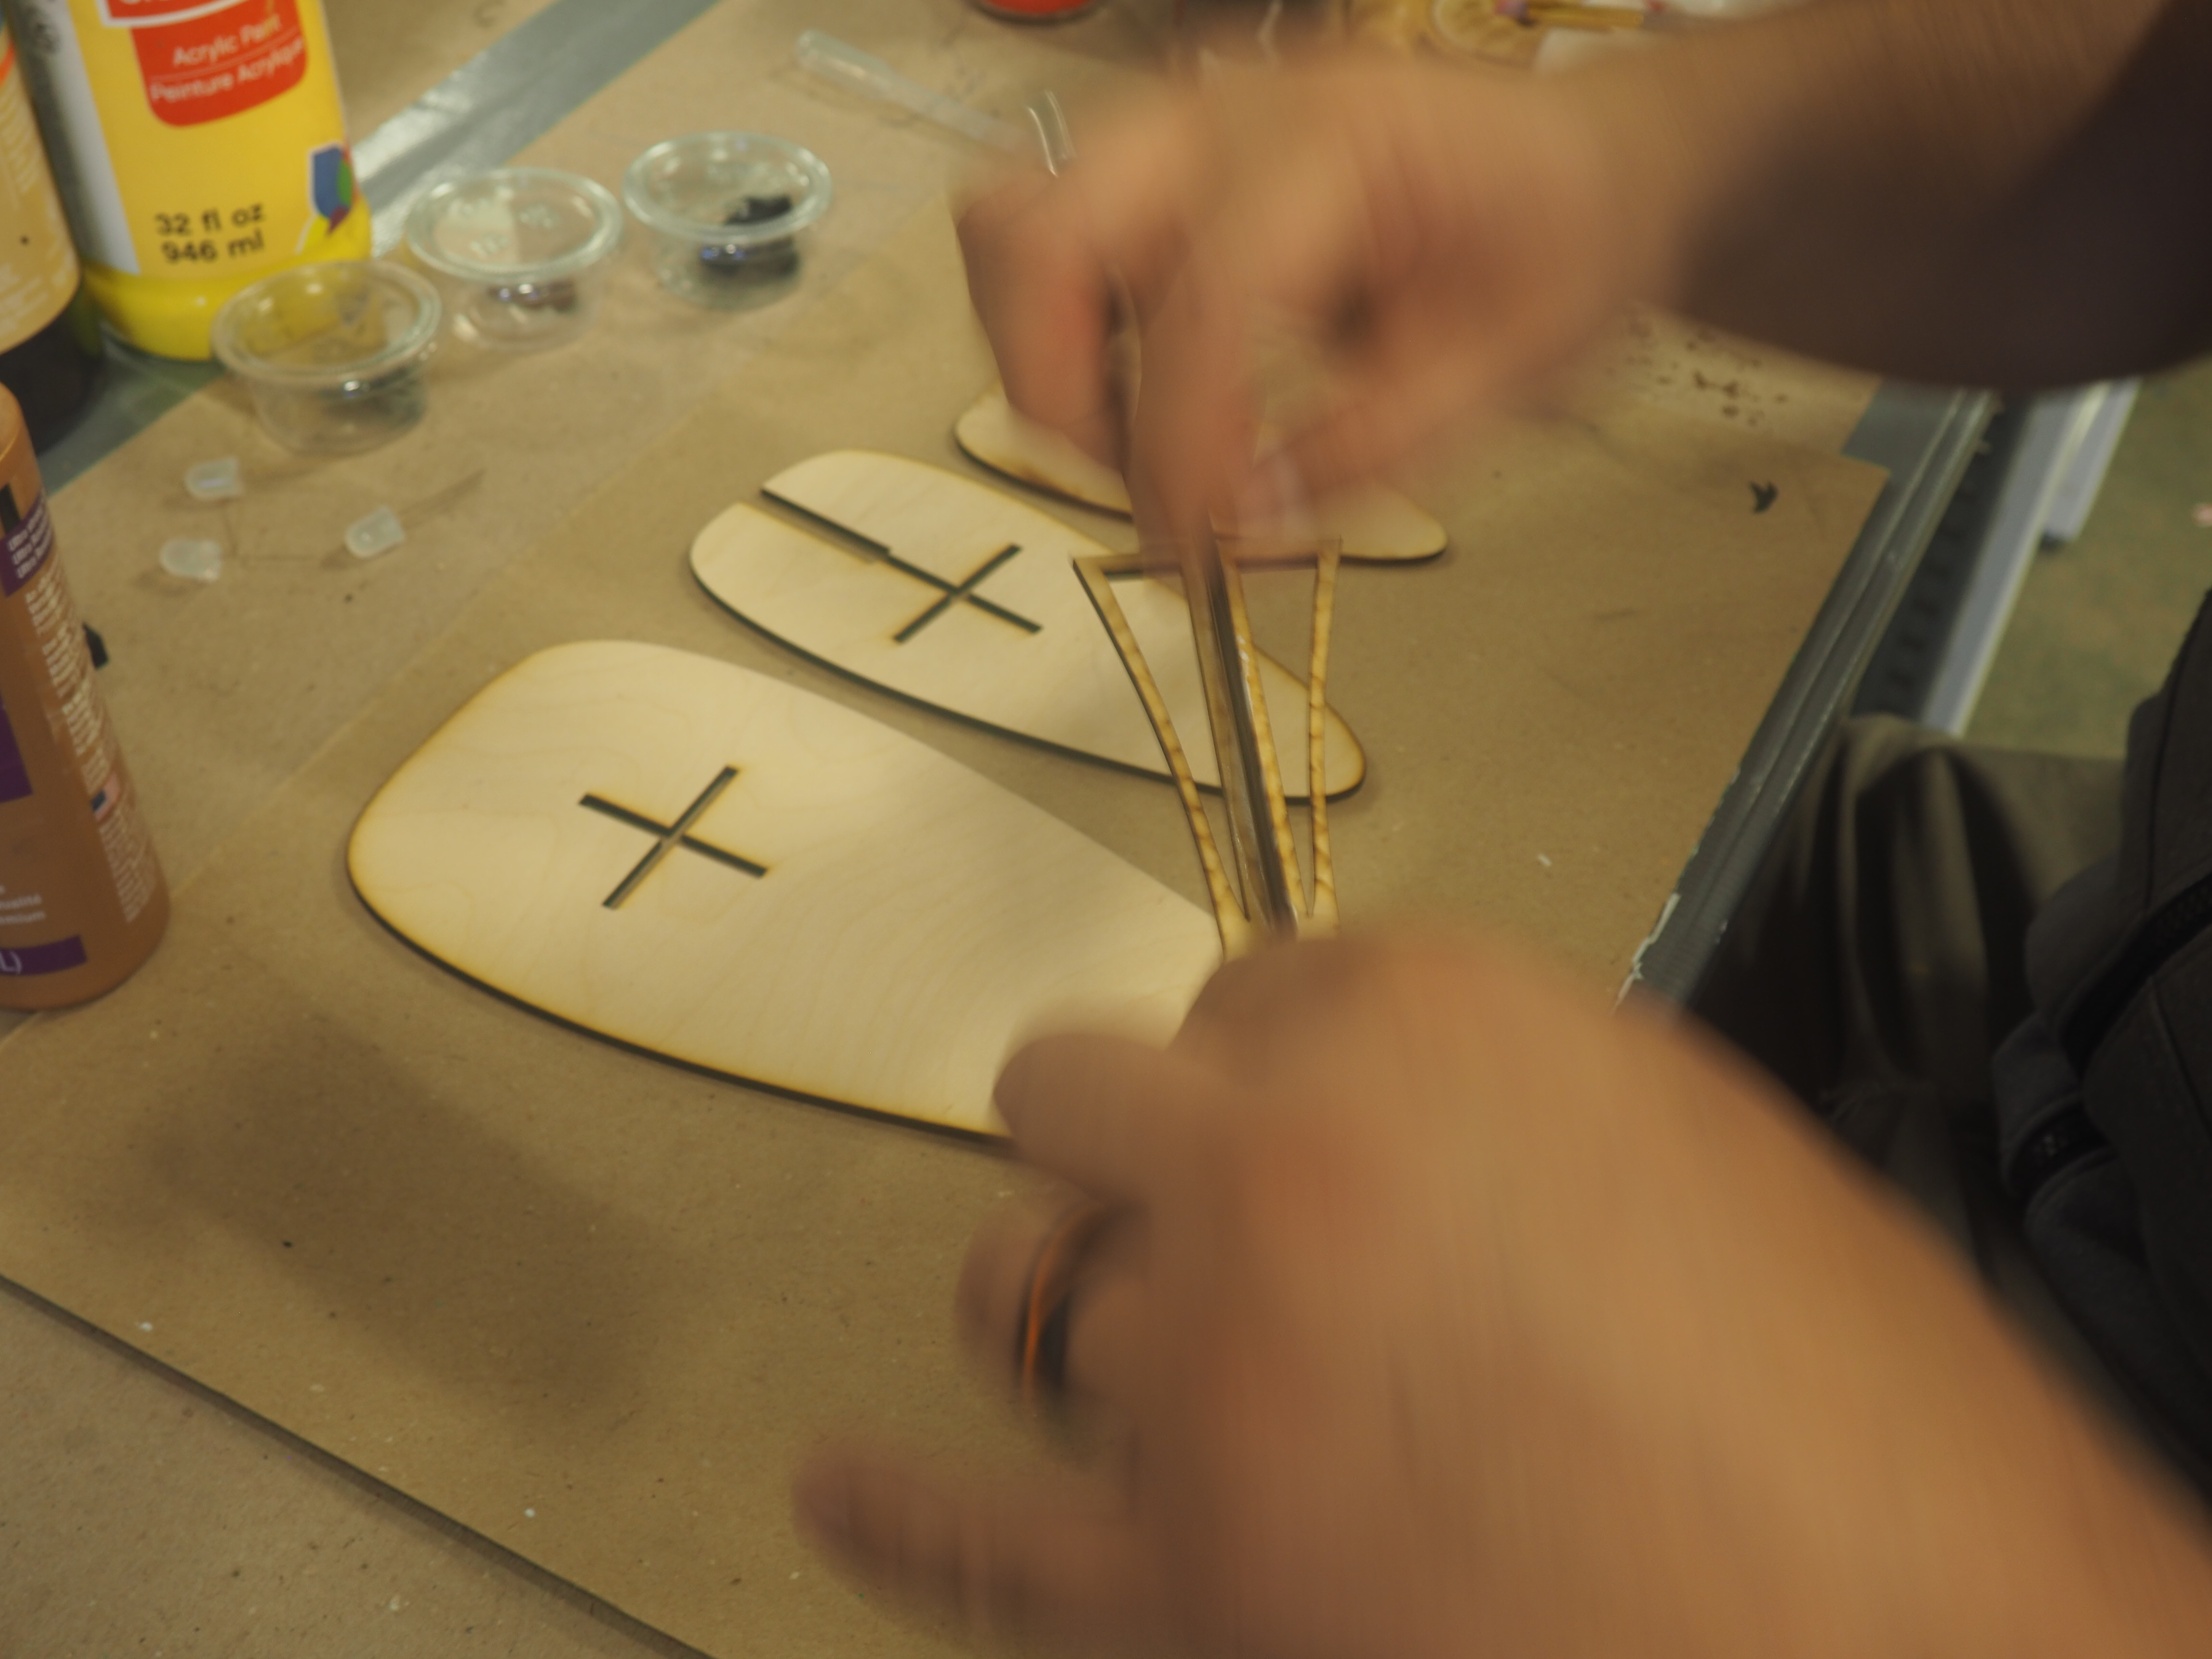
We need to prep the insides parts so when we put pieces together they are painted, this prevents having to paint hard to reach areas. You will need: Paint Paint brushes Tacky Glue Clamp

  • Paint the inside of the bentwood hat. Traditionally the inside of the hat is painted red with red ocher. If you are using traditional paint go to step 8 and follow the instructions on using traditional paint. You can paint this any color you want.


  •  Paint the LED base, this is the hat shaped laser cut piece with four holes. When this is dry flip it over and paint the other side.


  • When the bentwood hat is dry glue the last 1 inch of the outside of the hat and the last one inch of the inside hat on the other side. Bend these two together and clamp the joint. Set this aside to dry.


Construct the lamp stand!

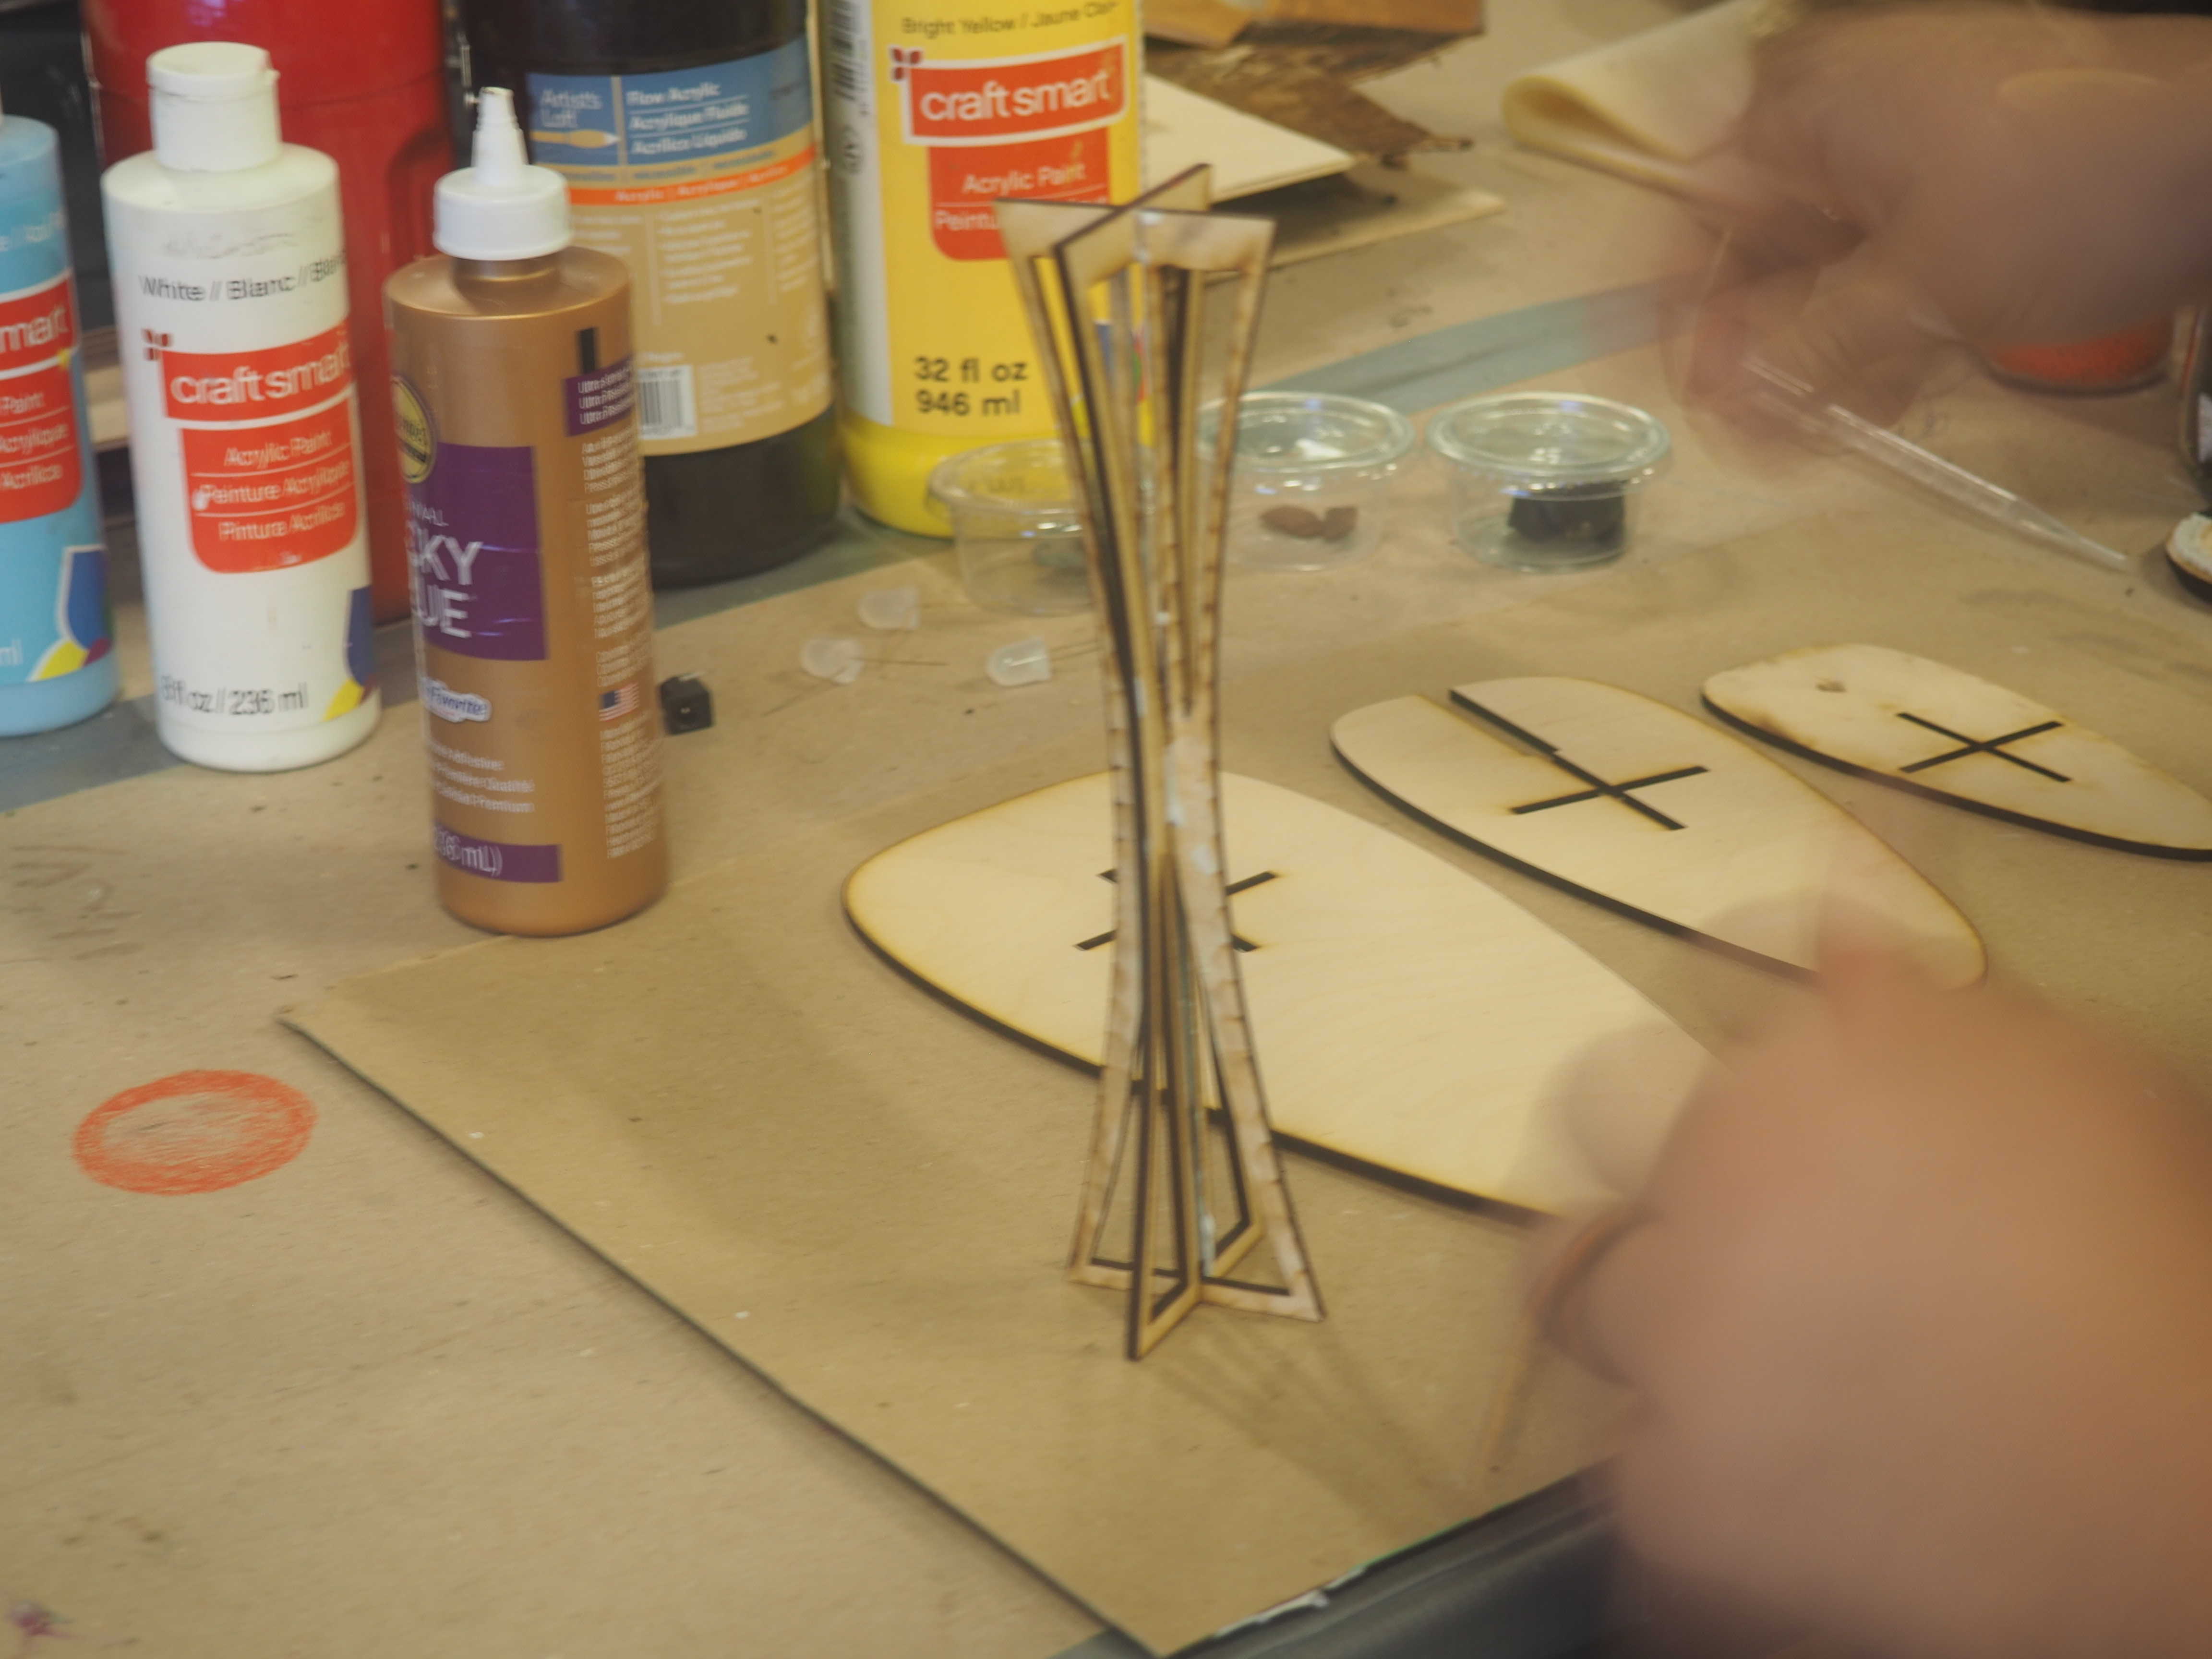
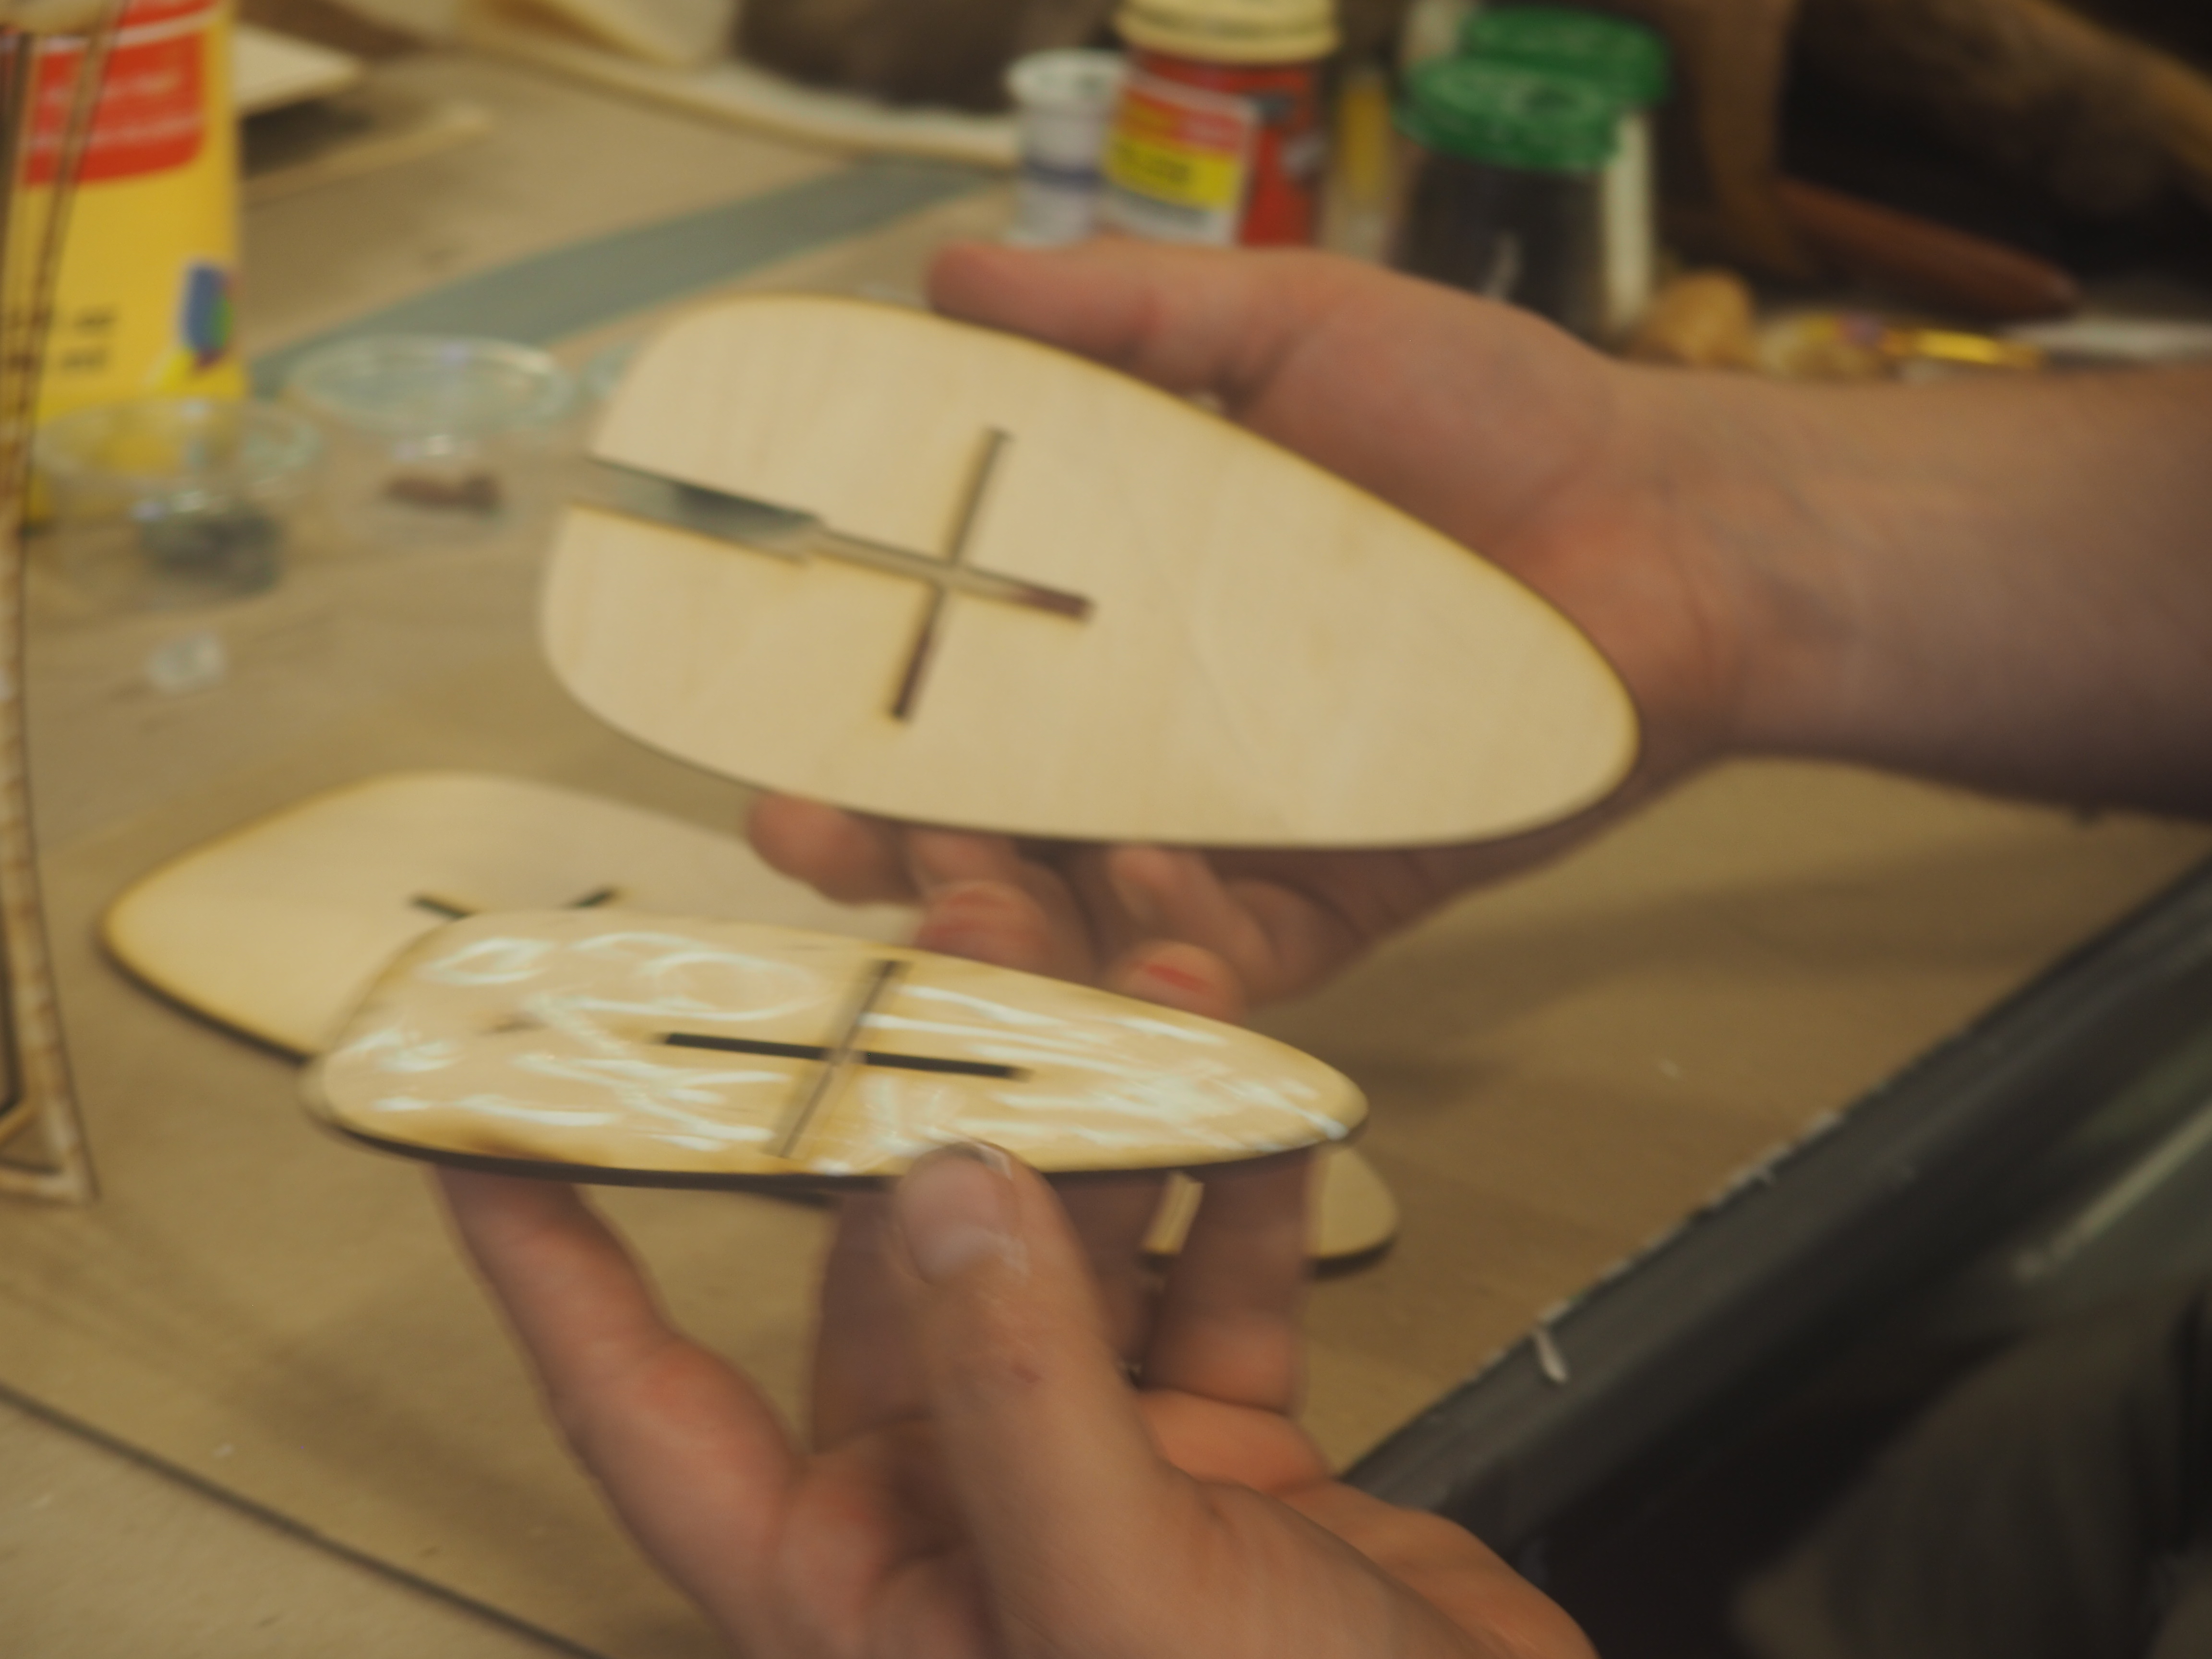
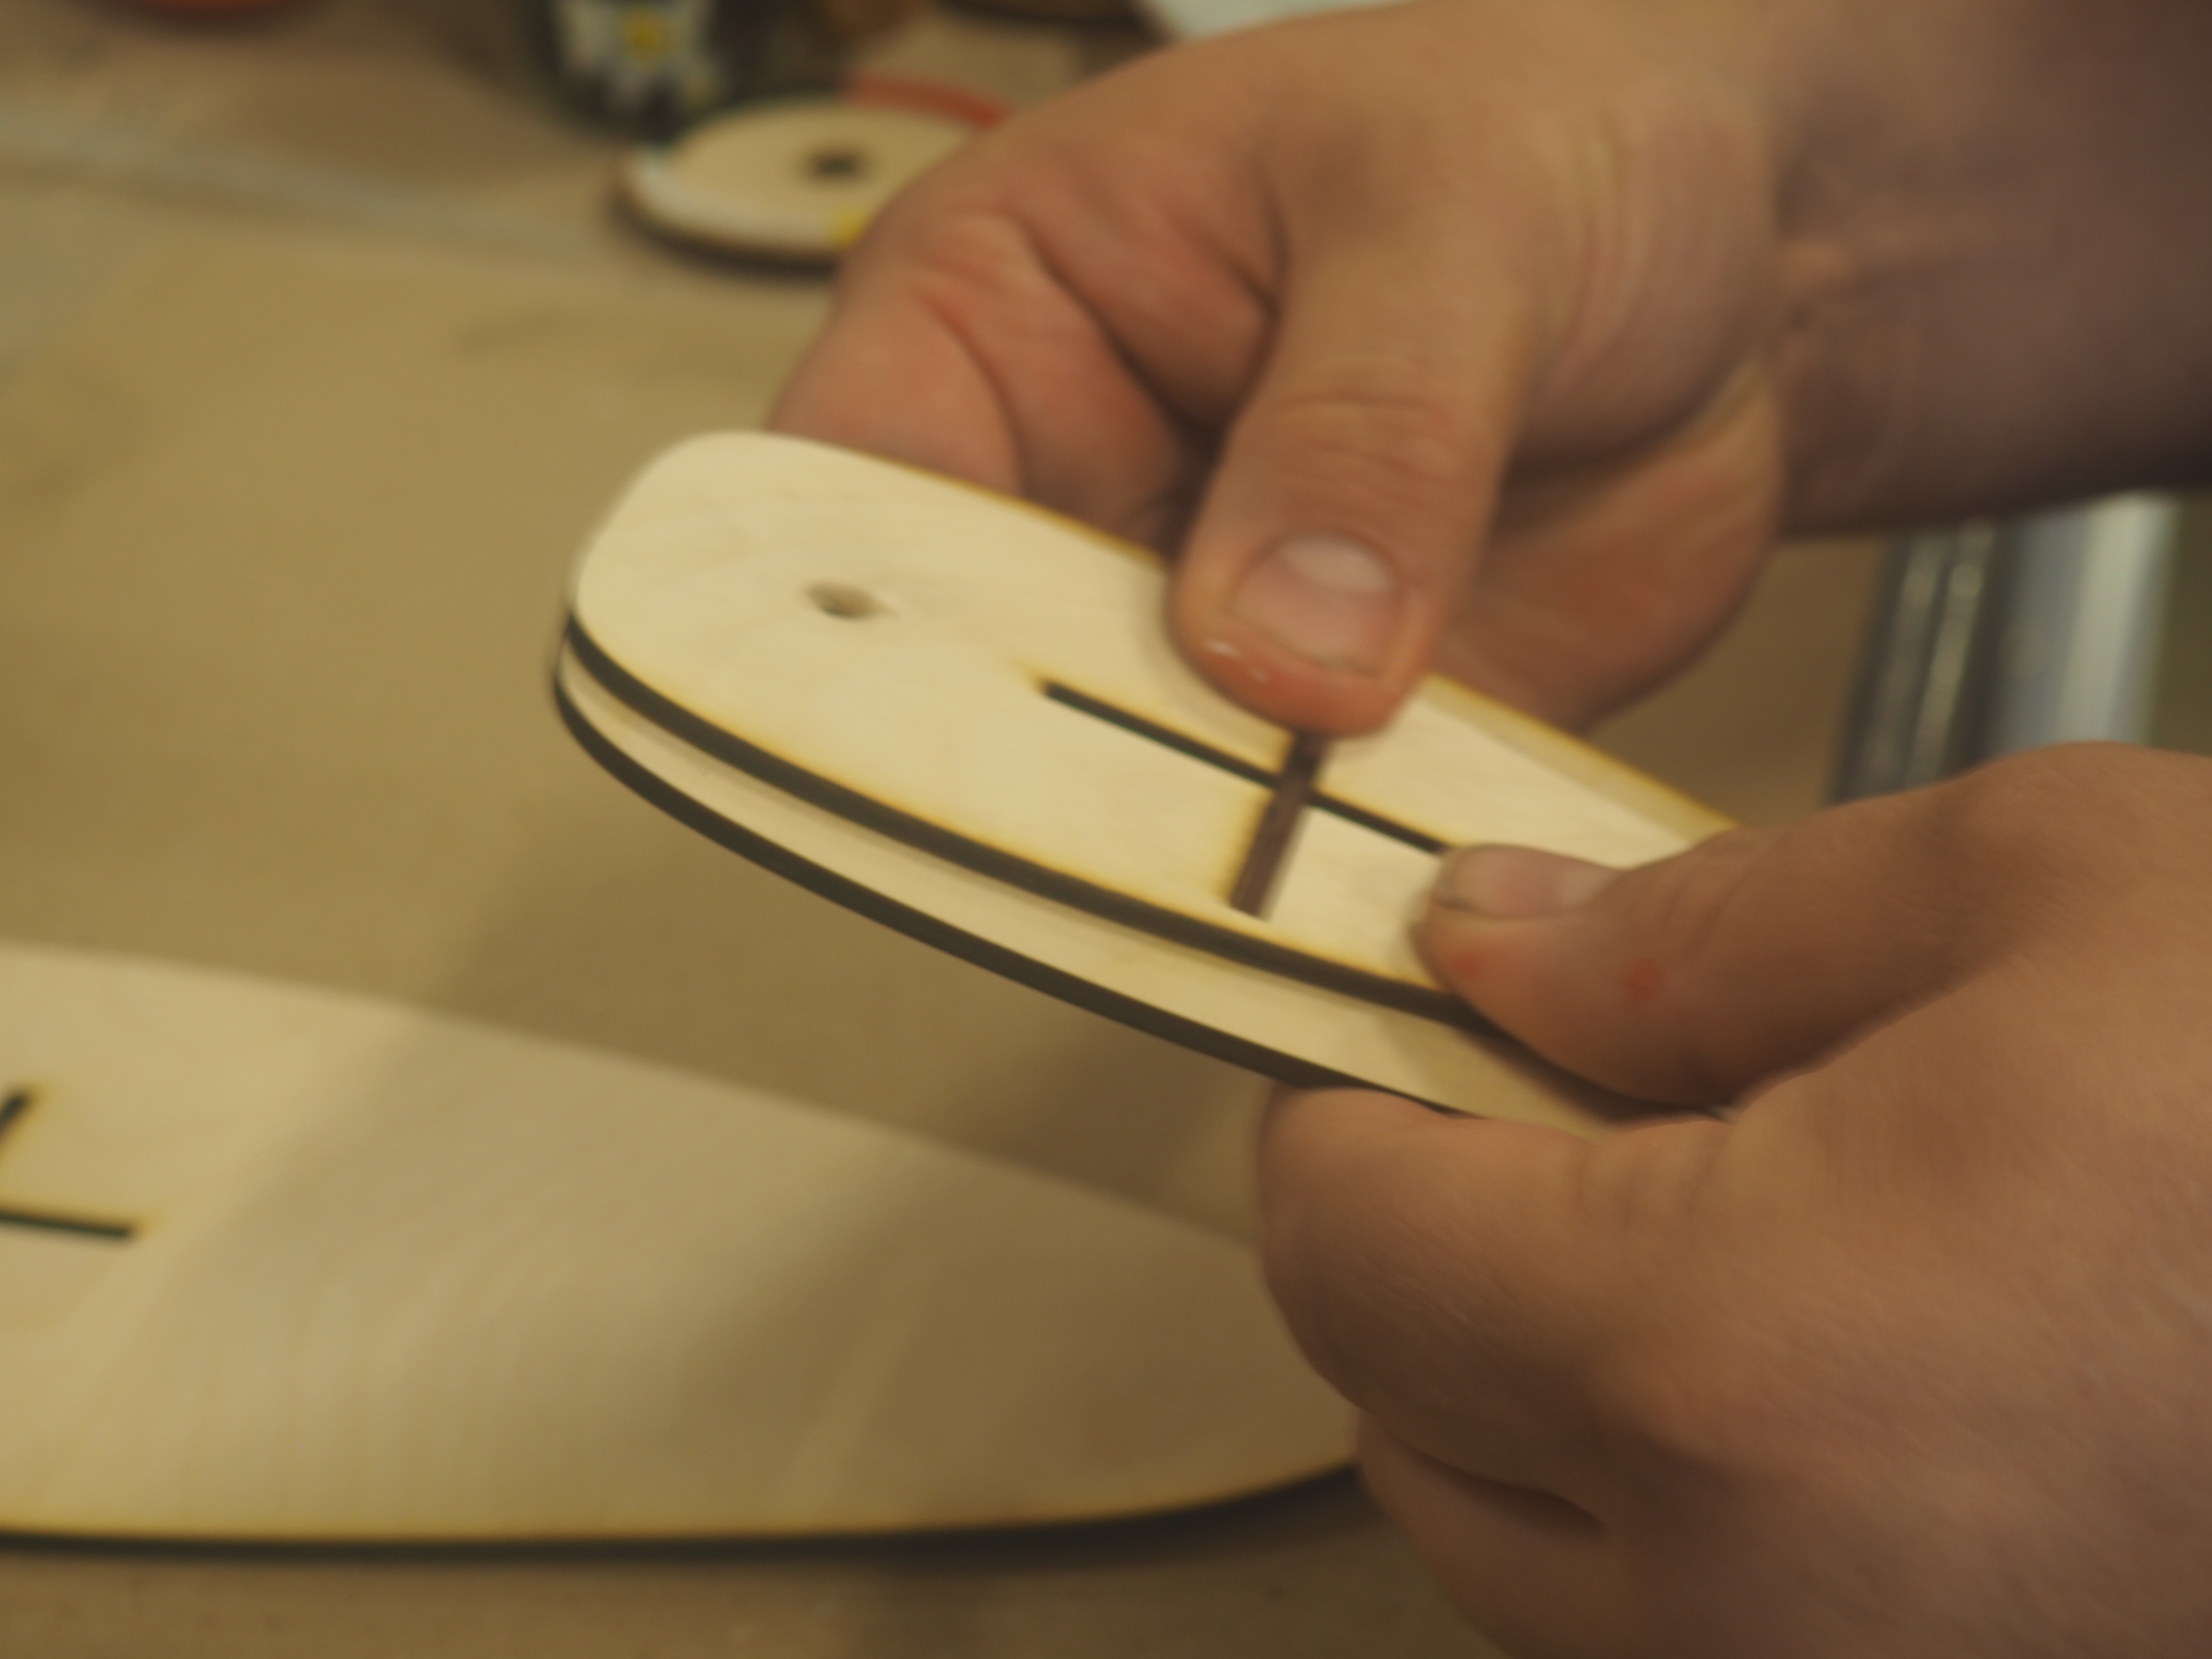
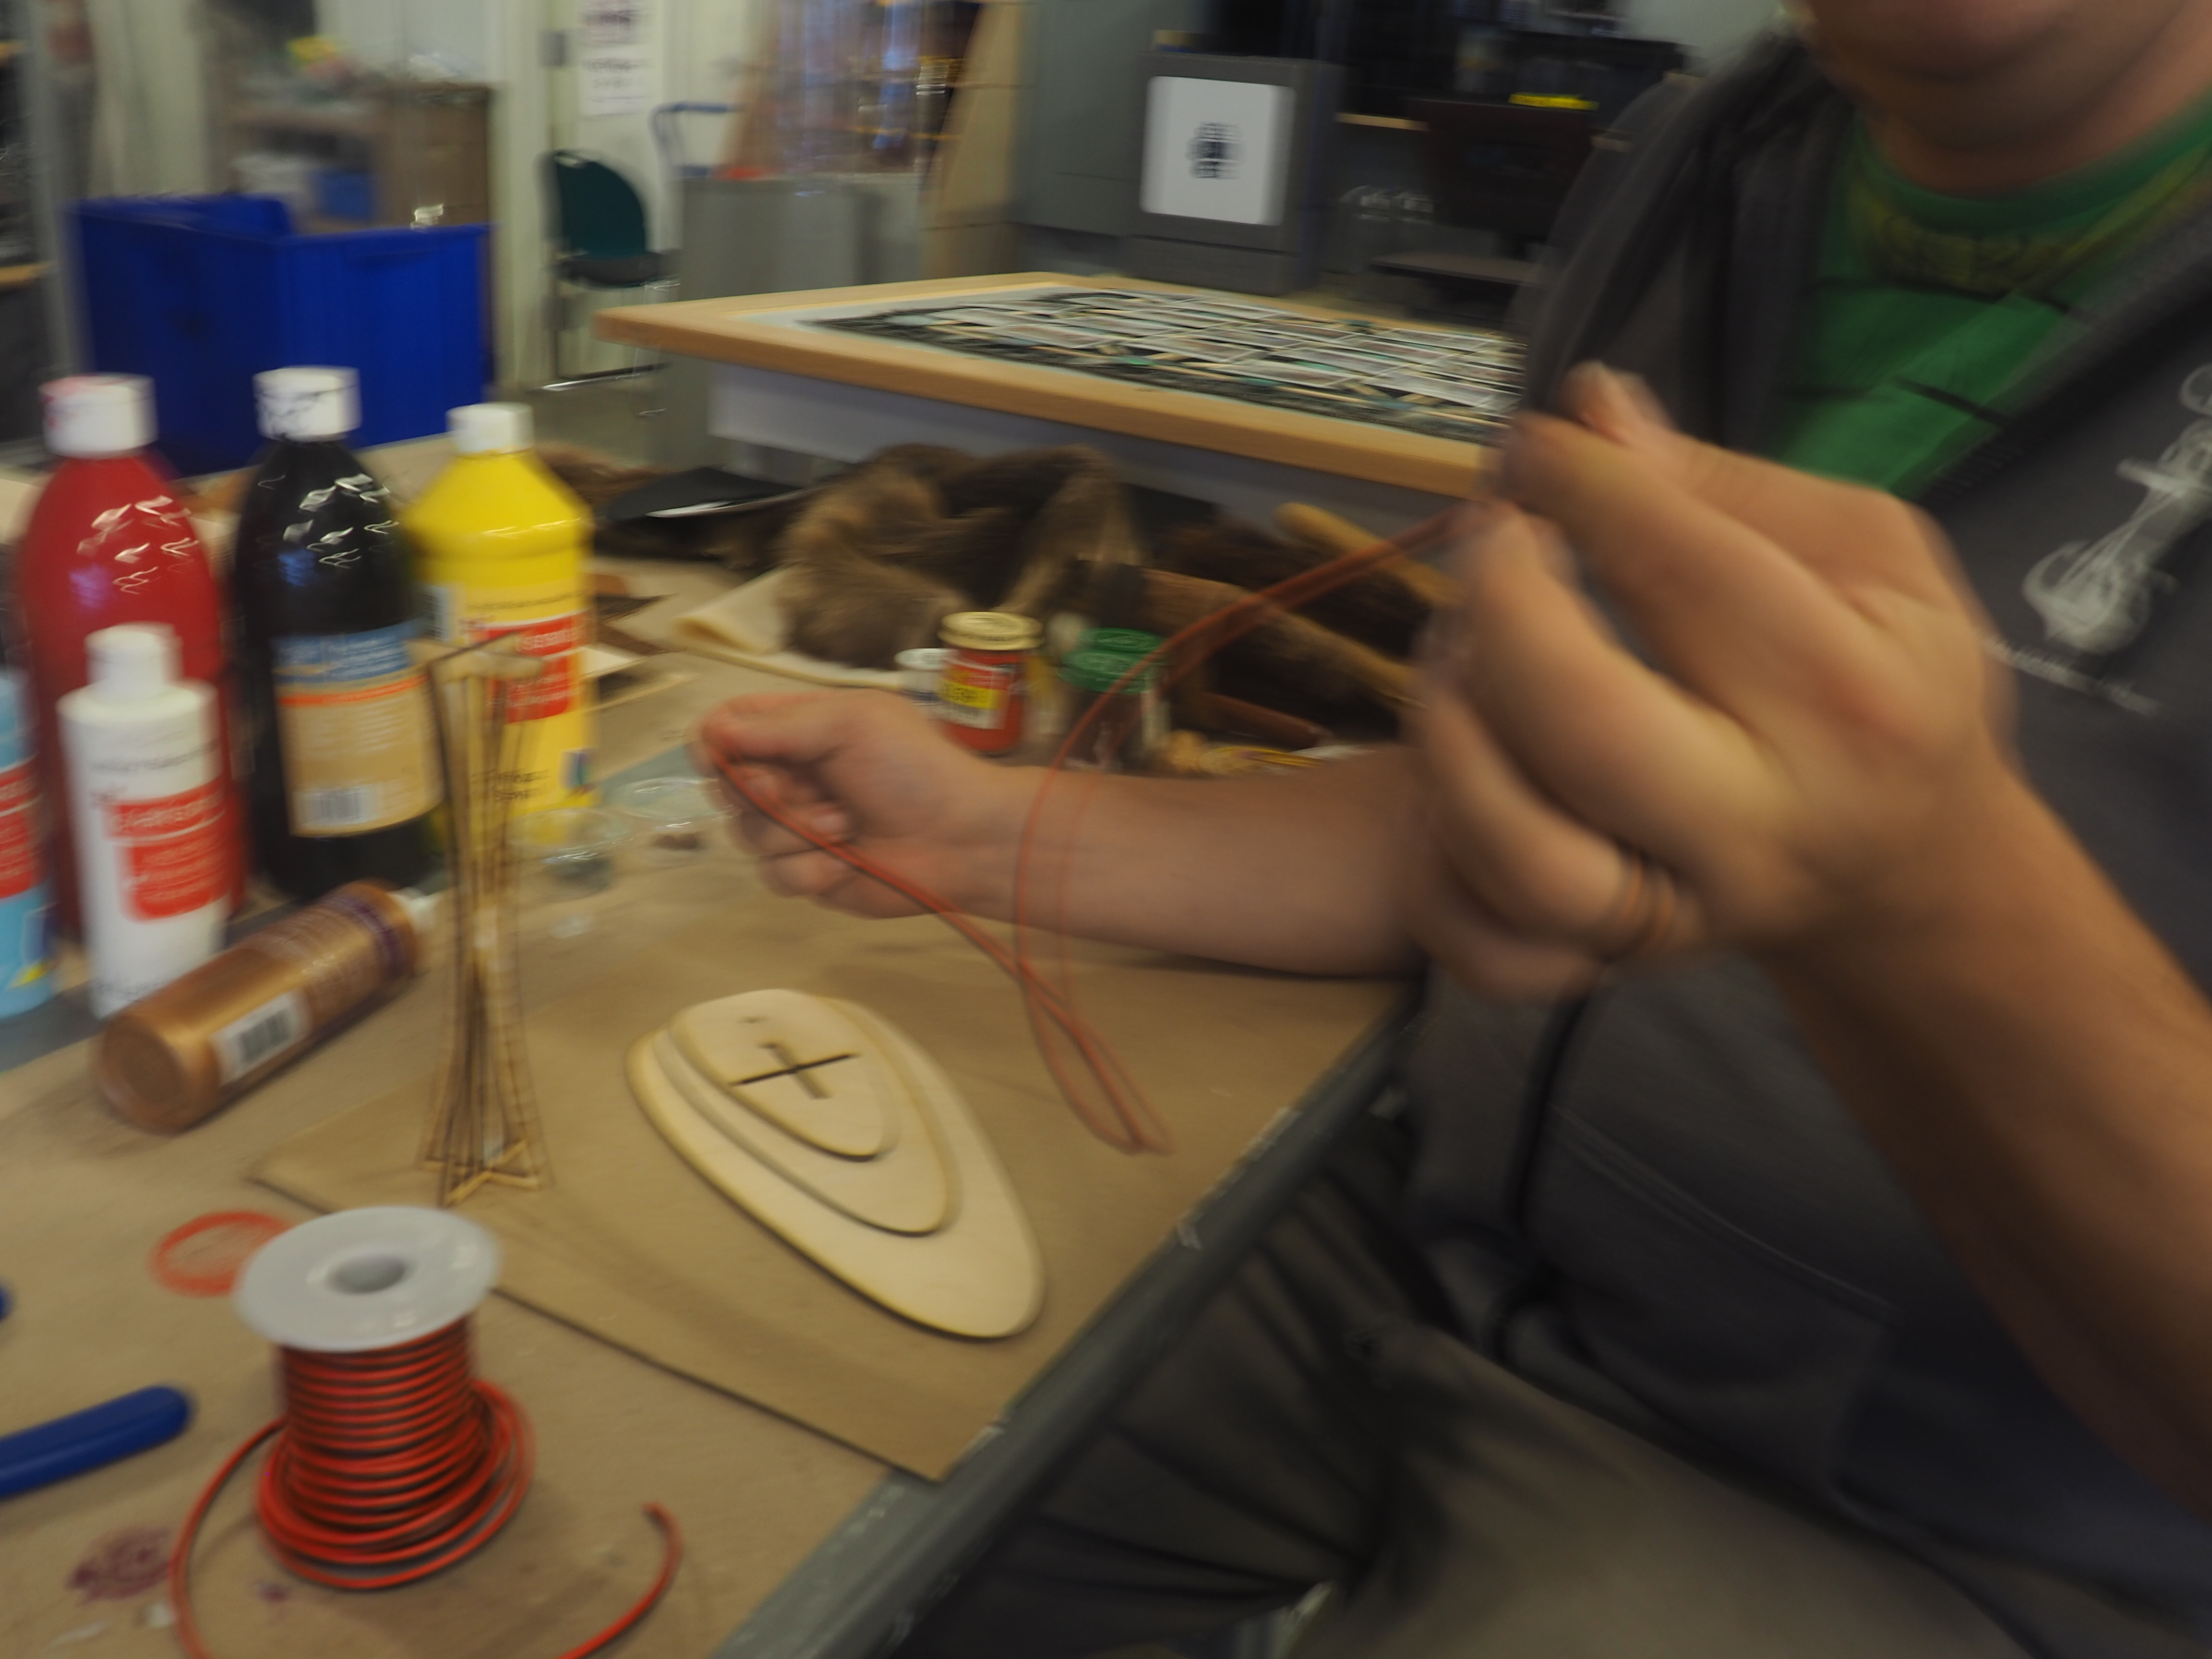
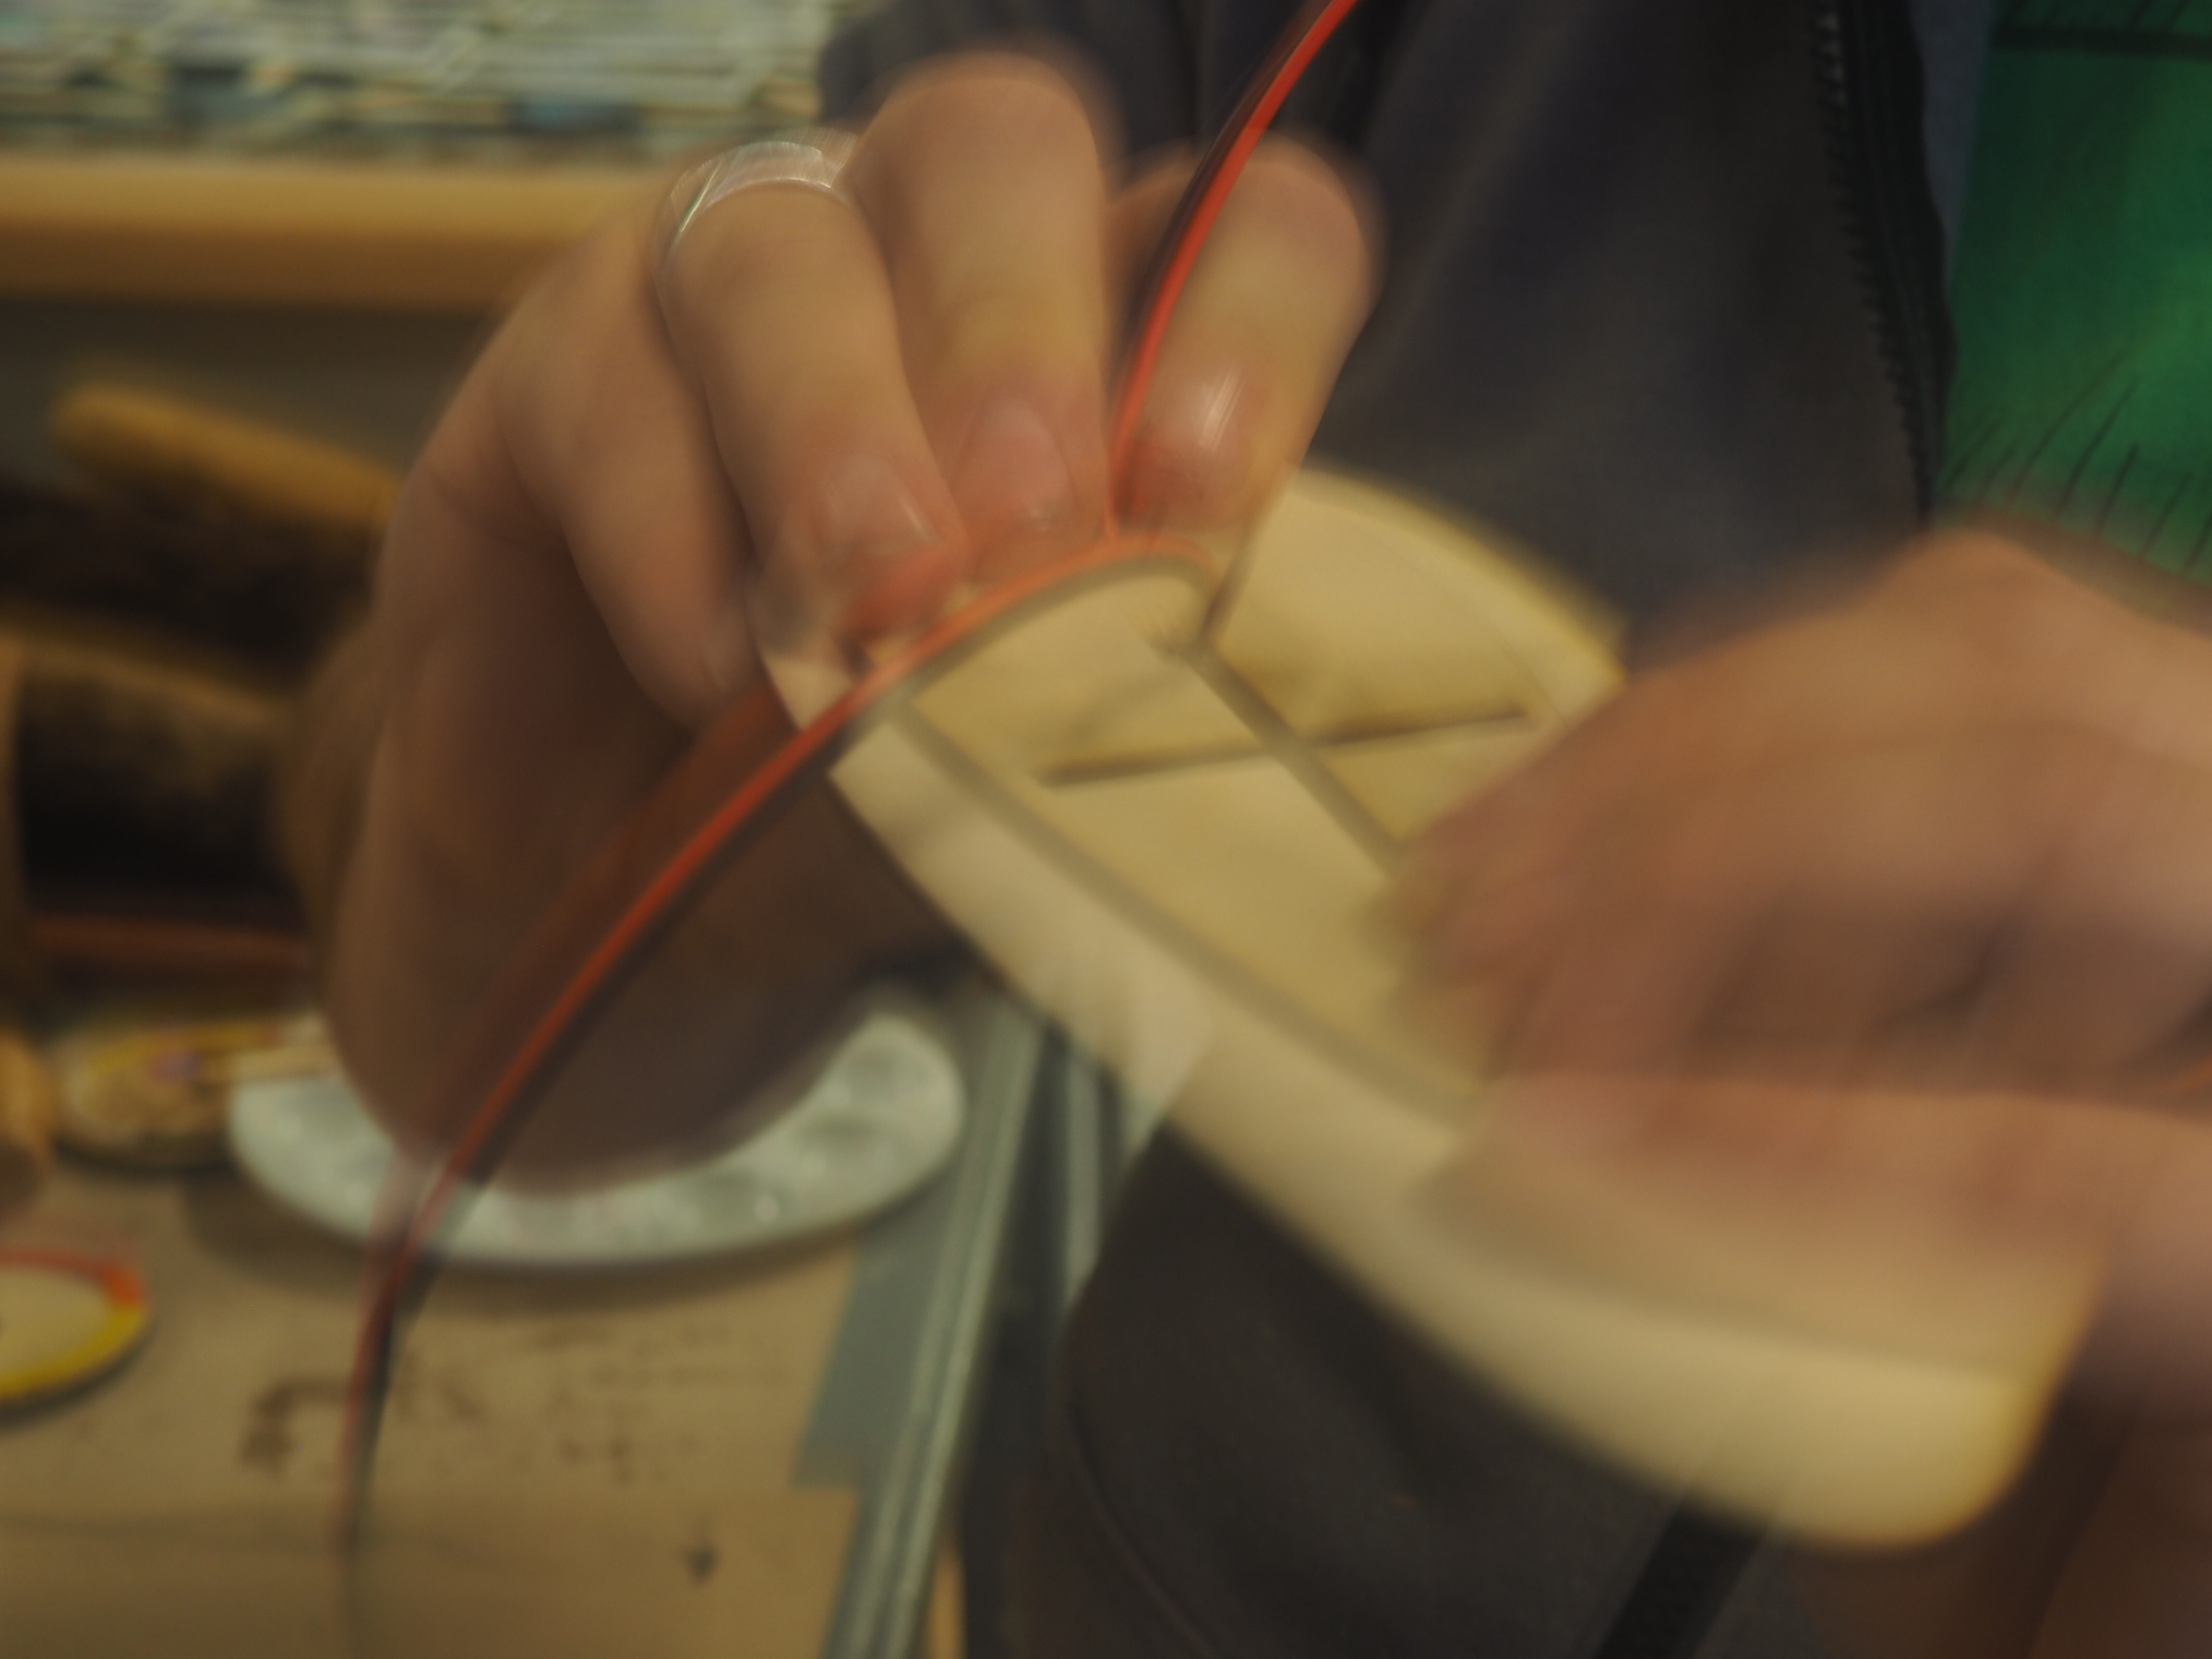
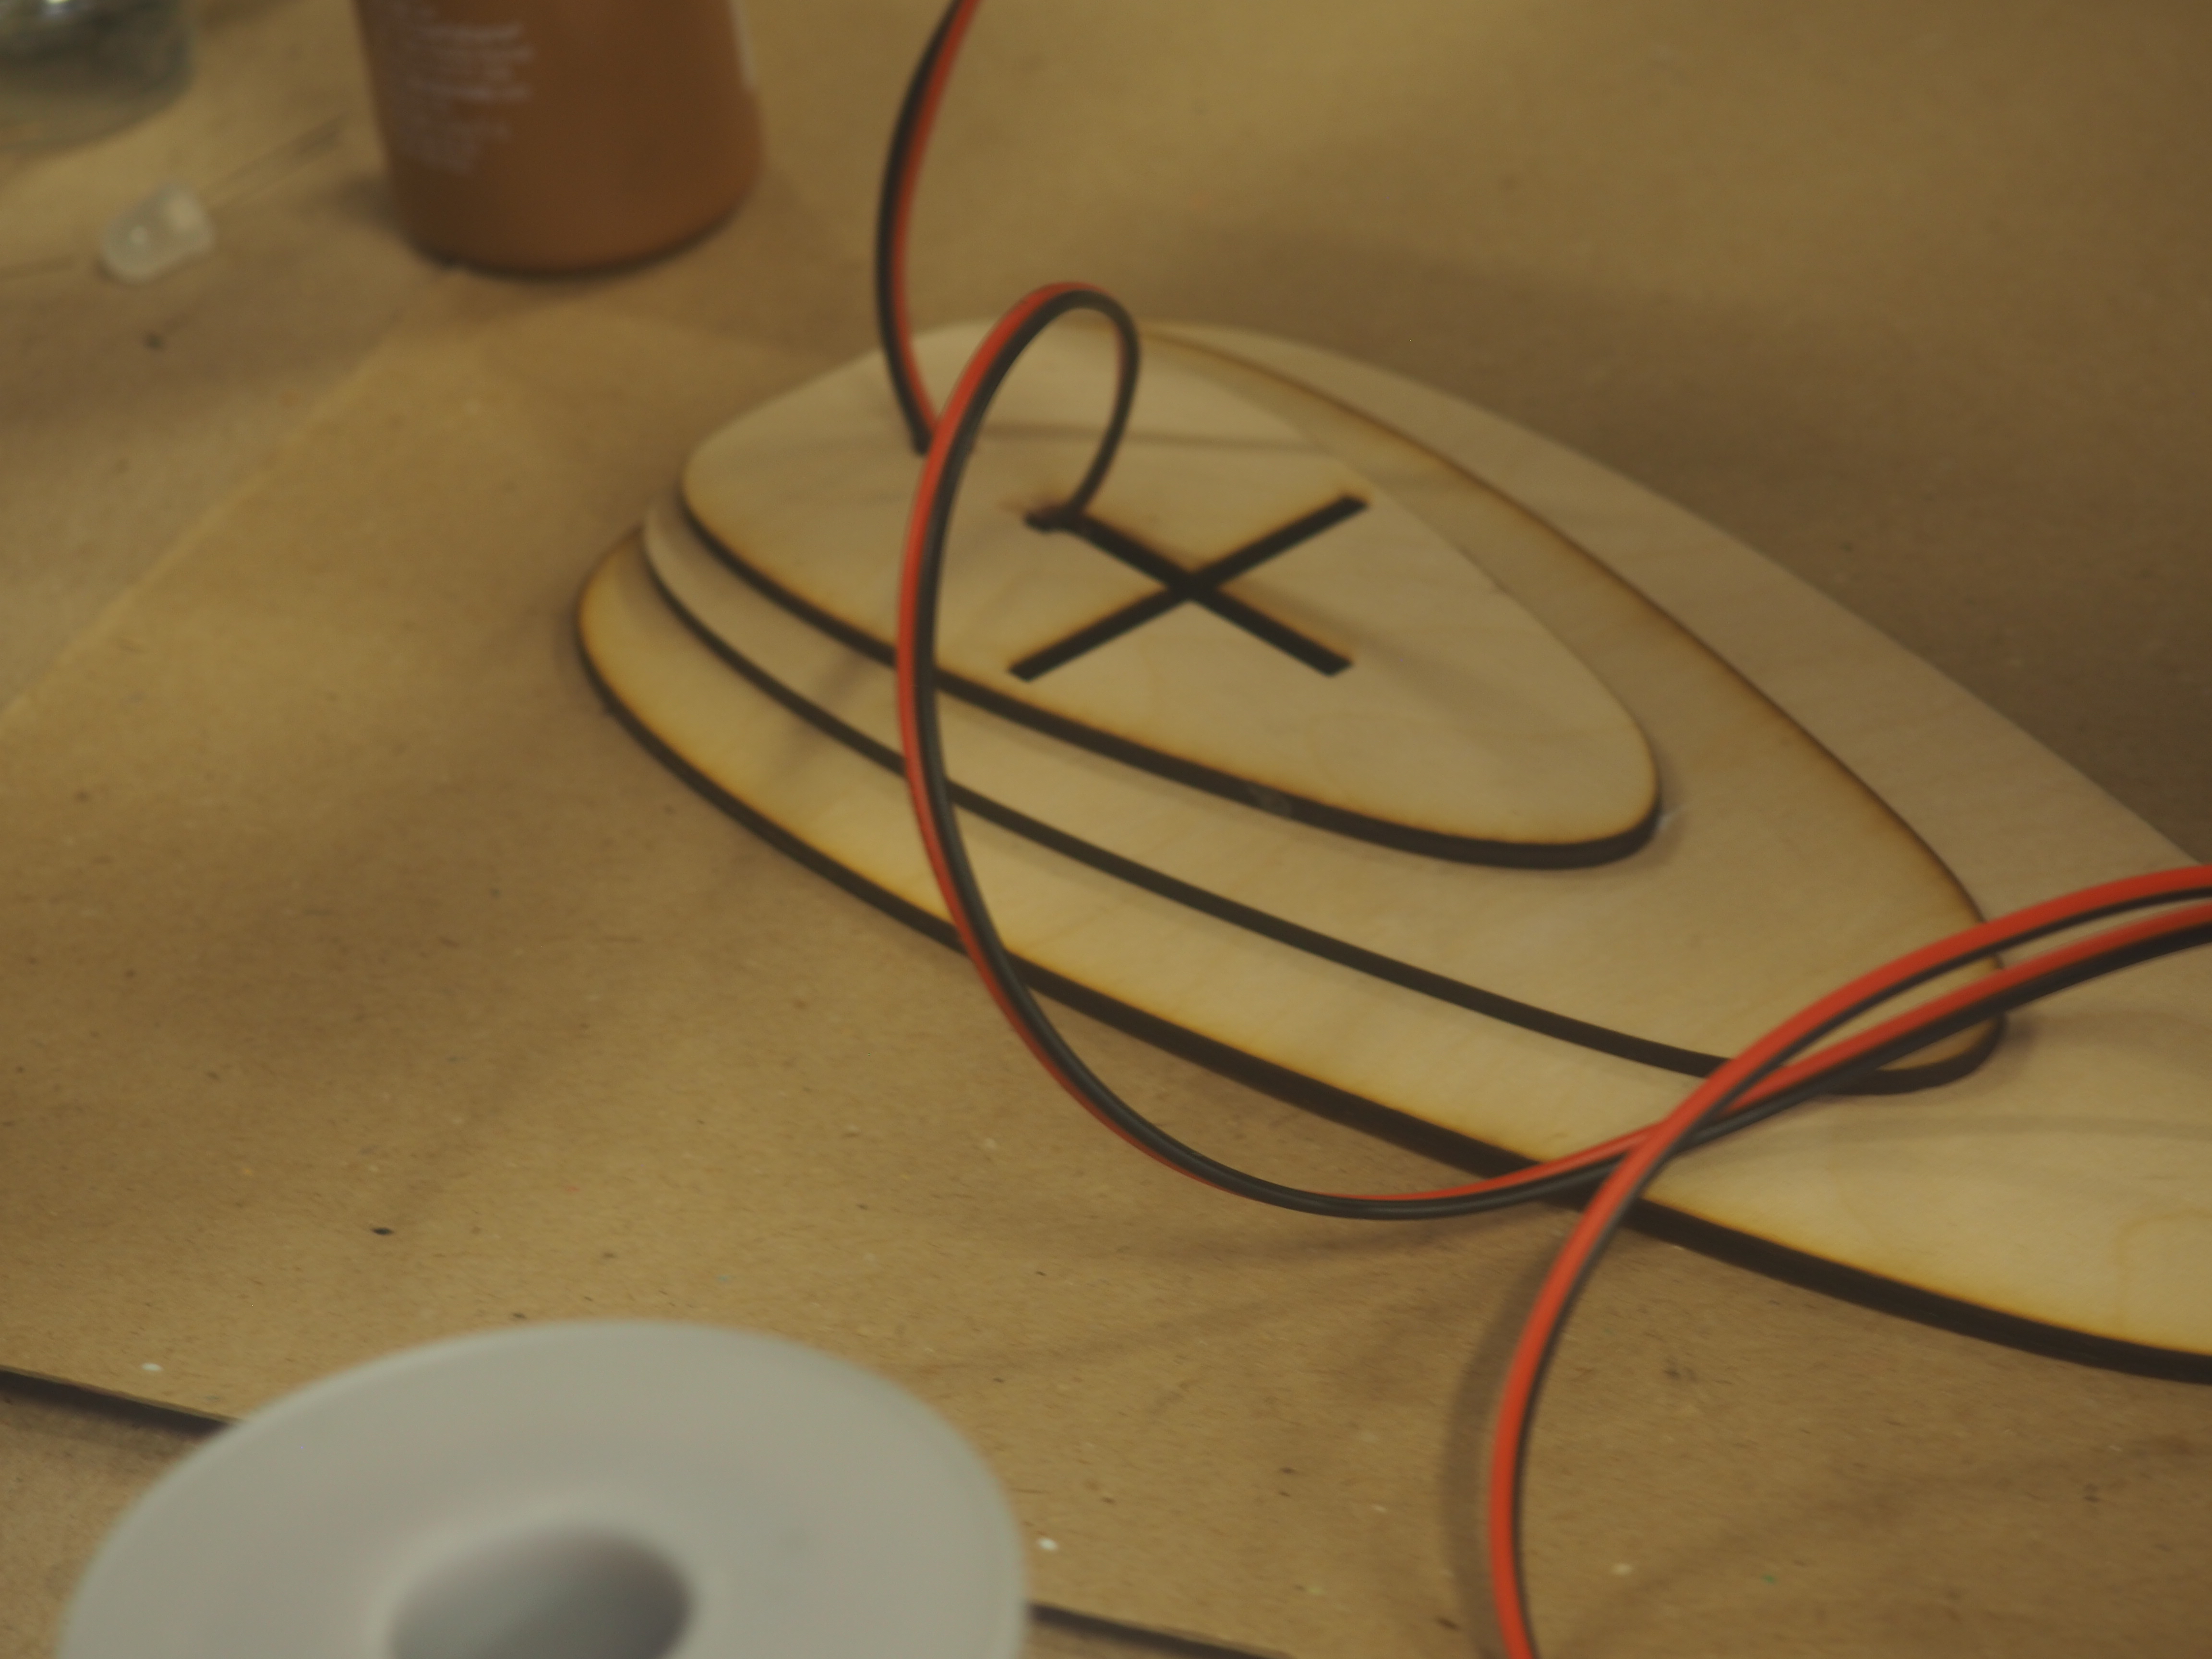
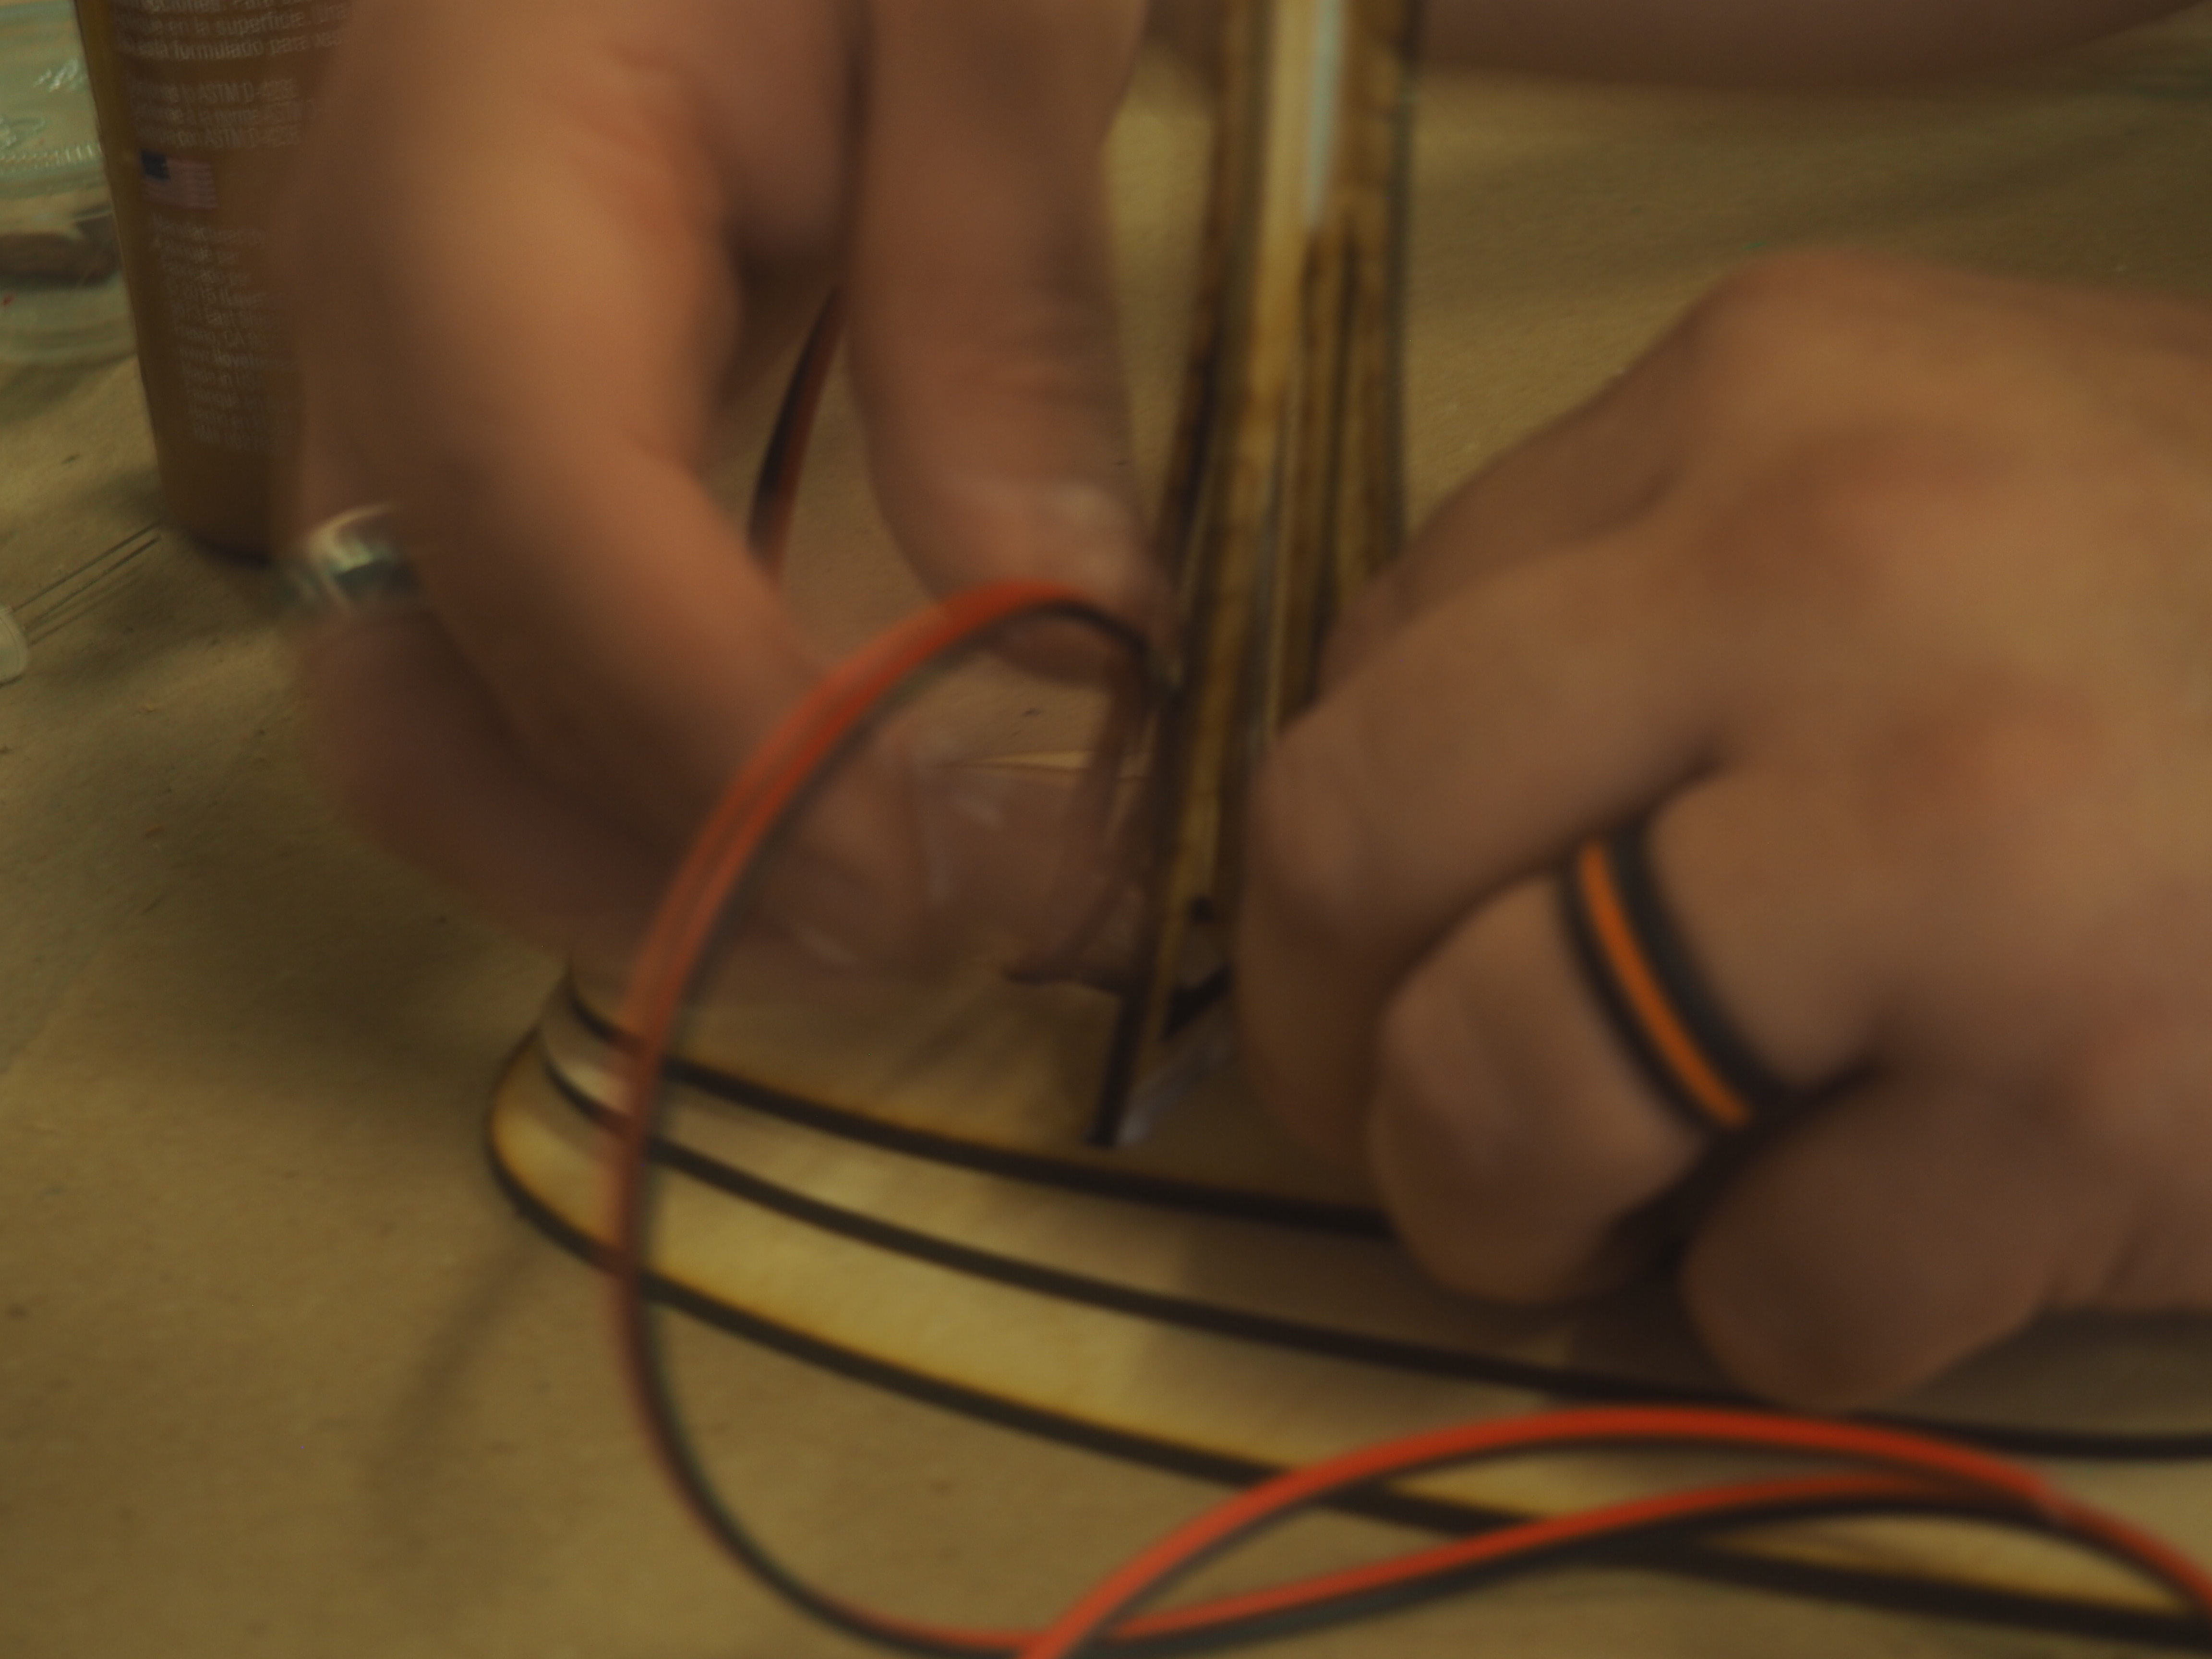
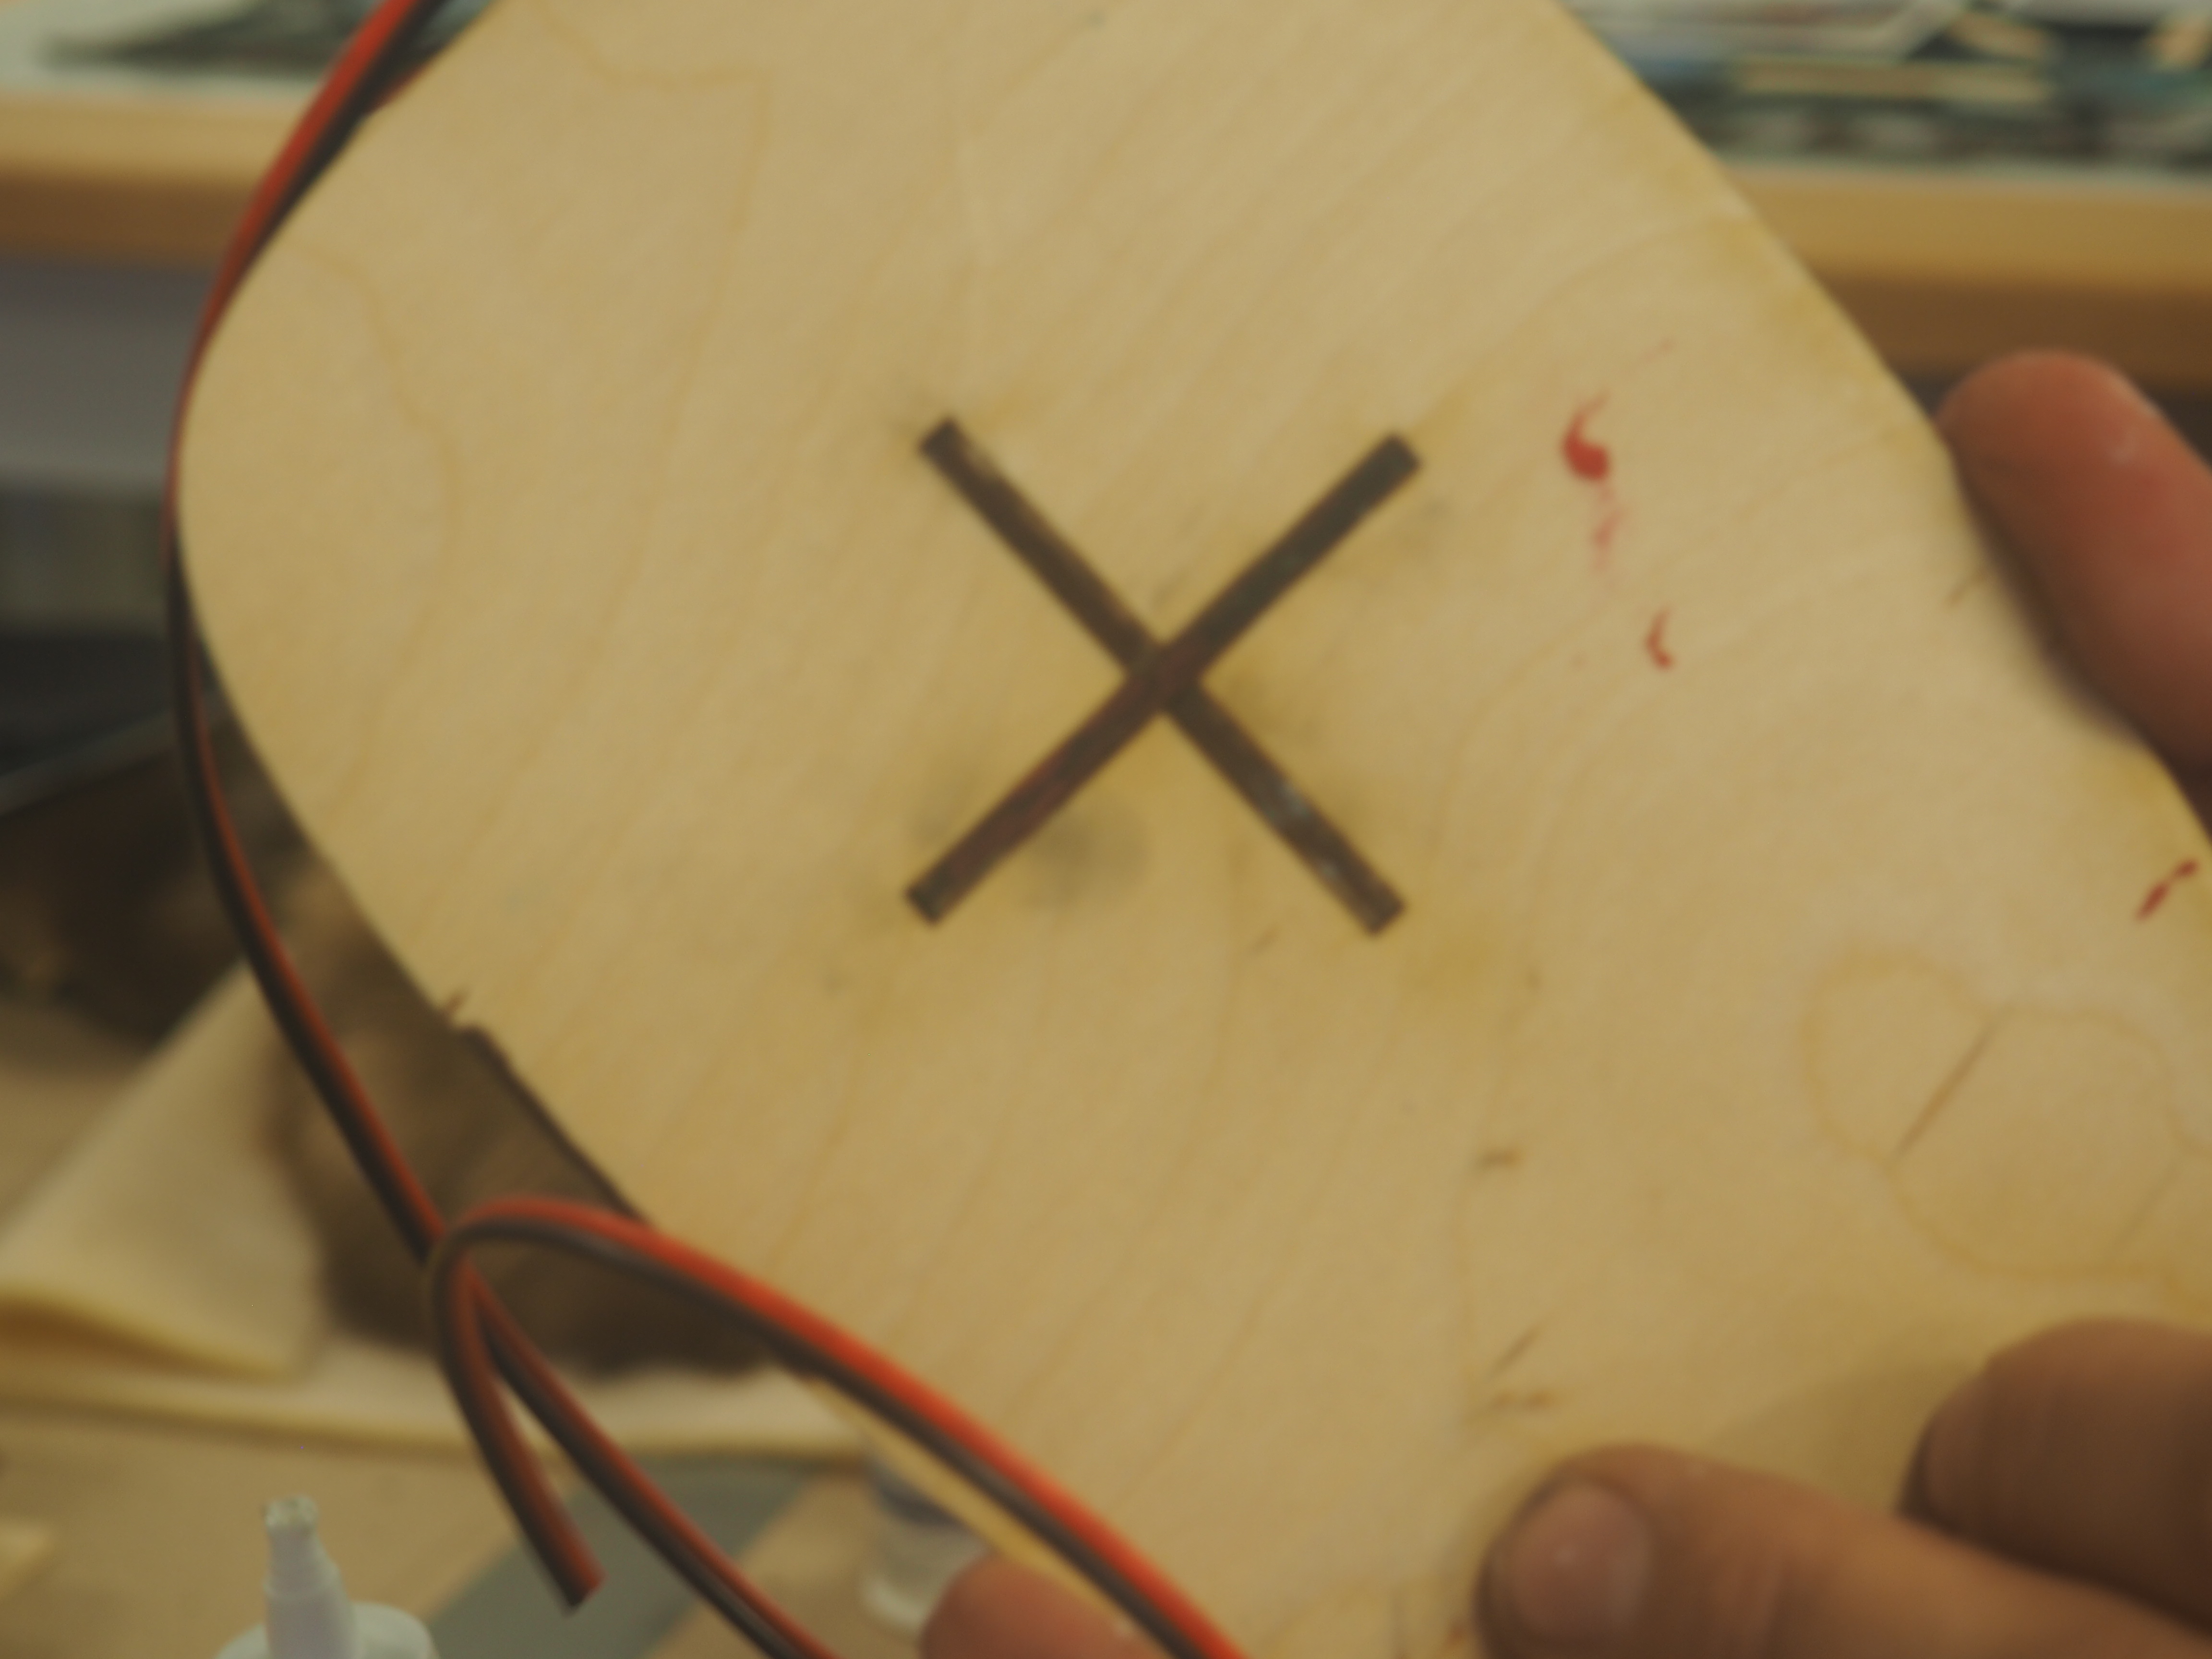
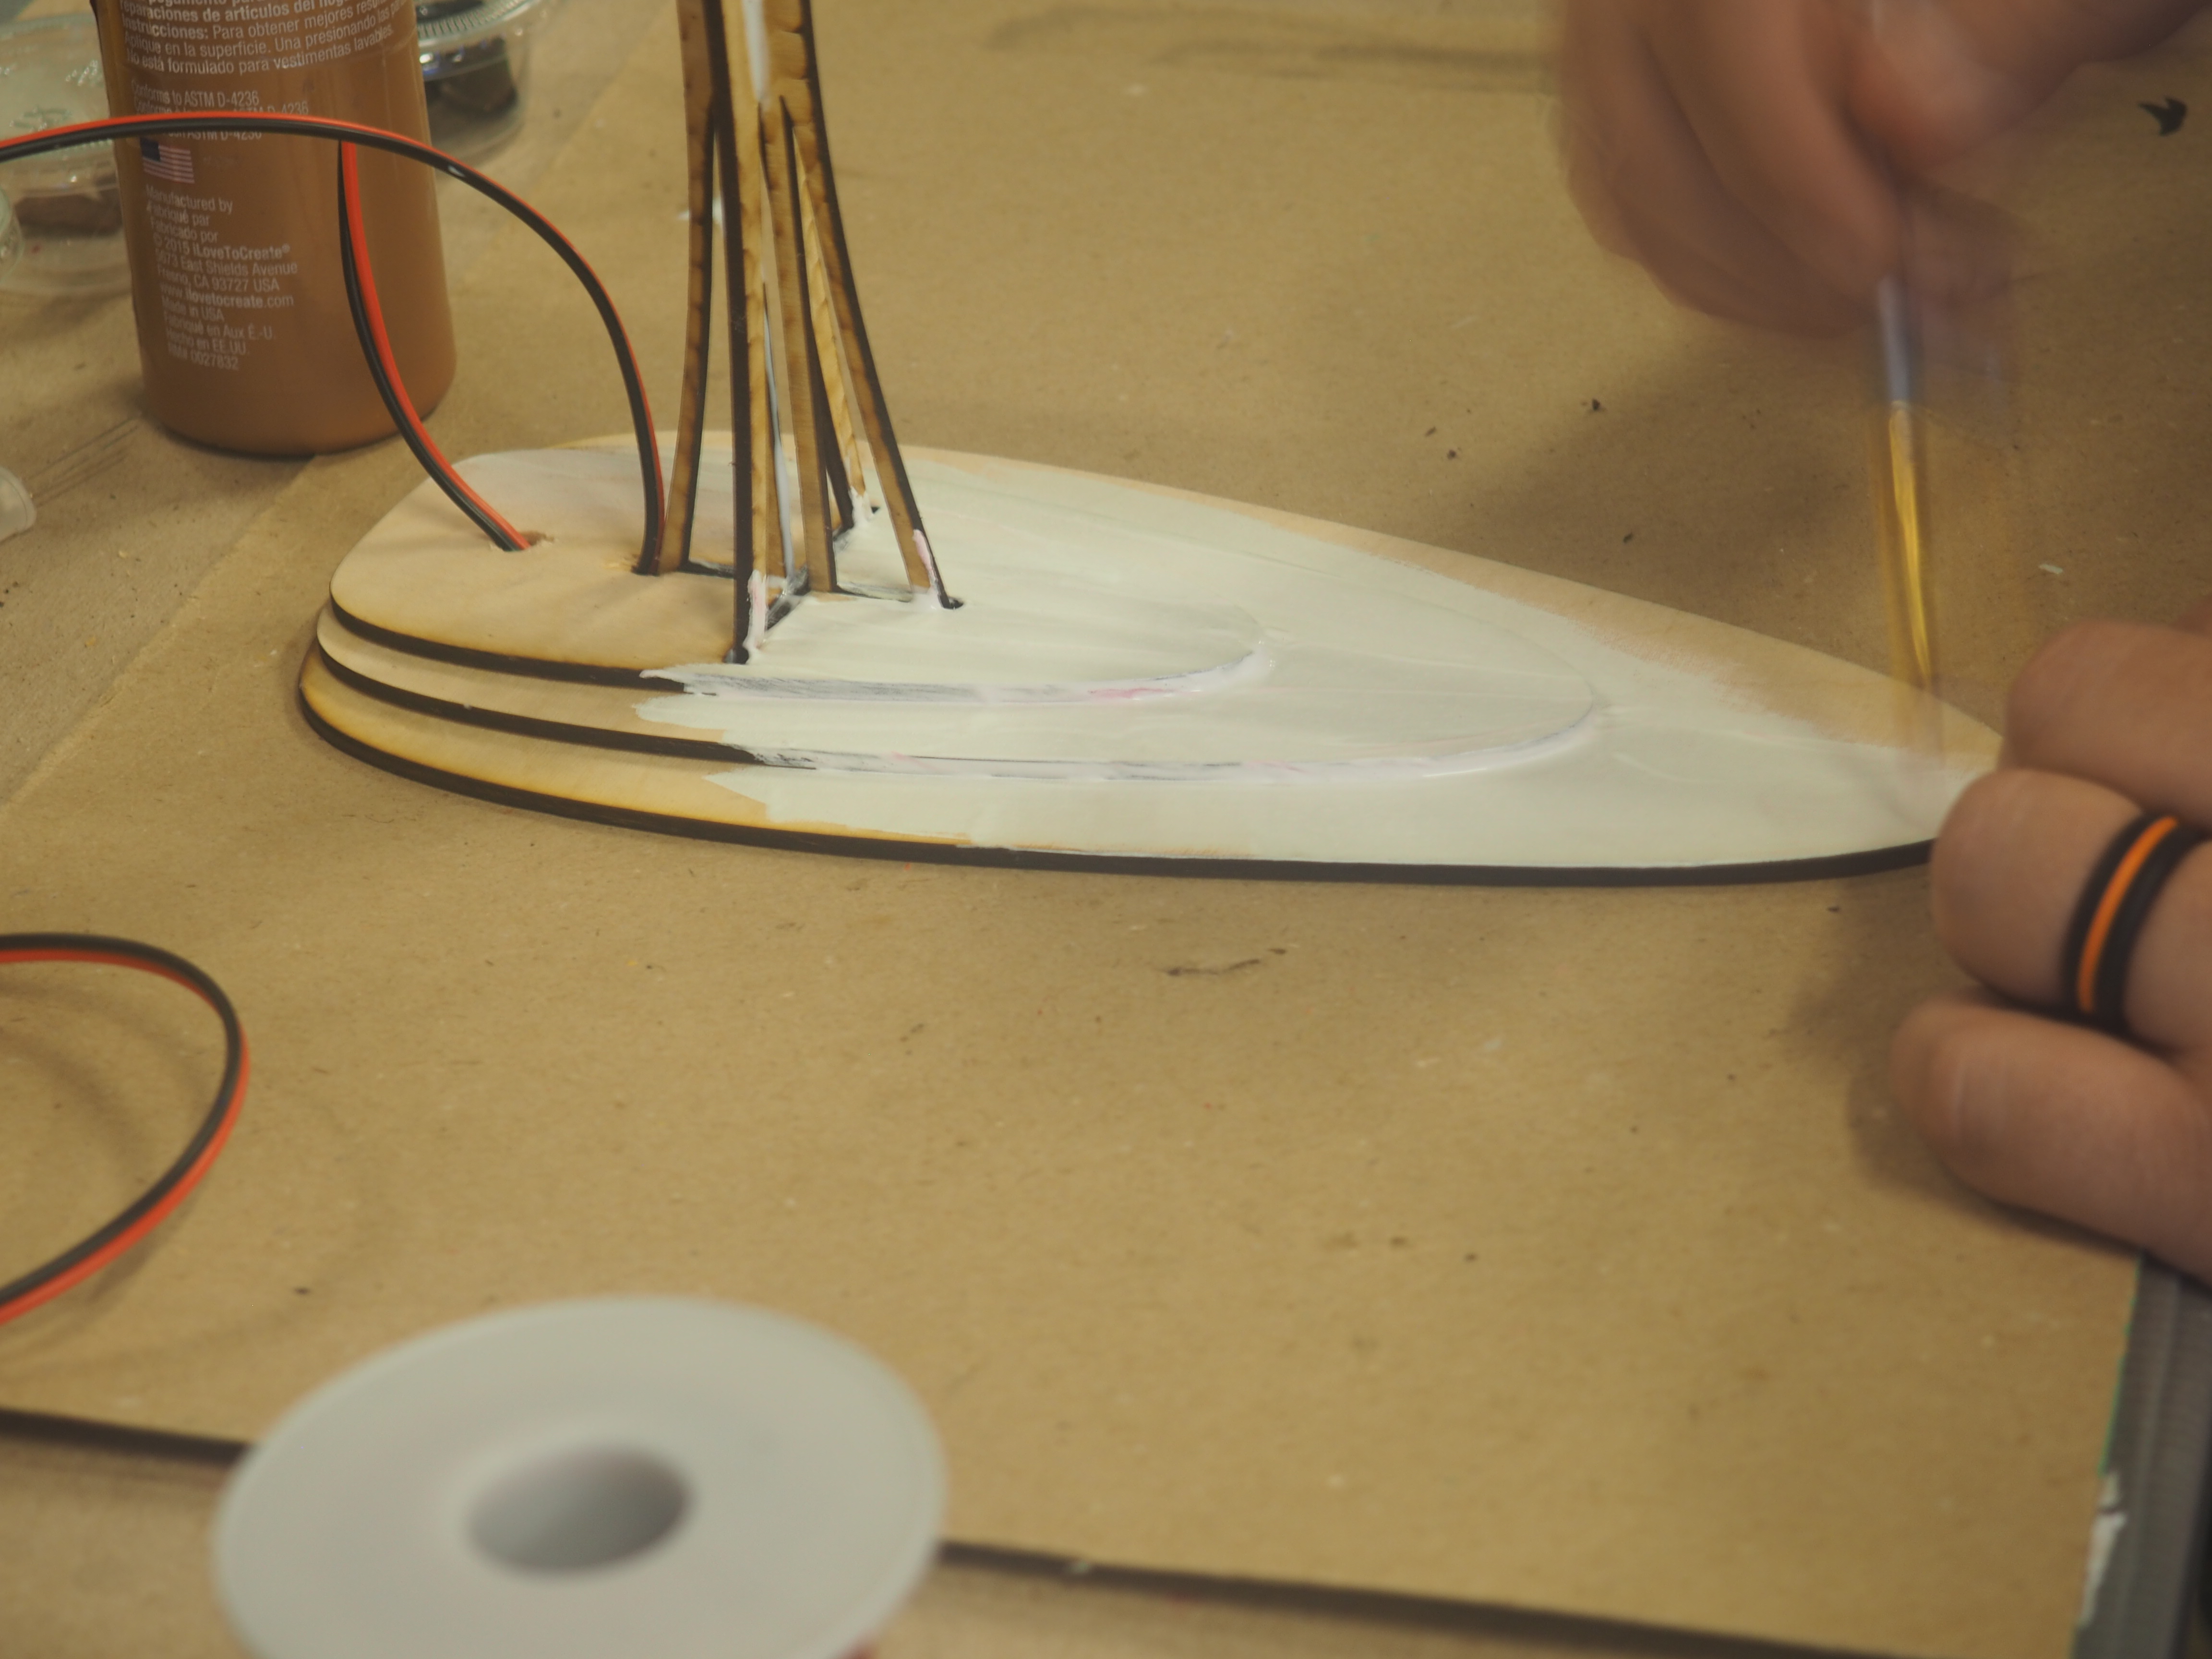
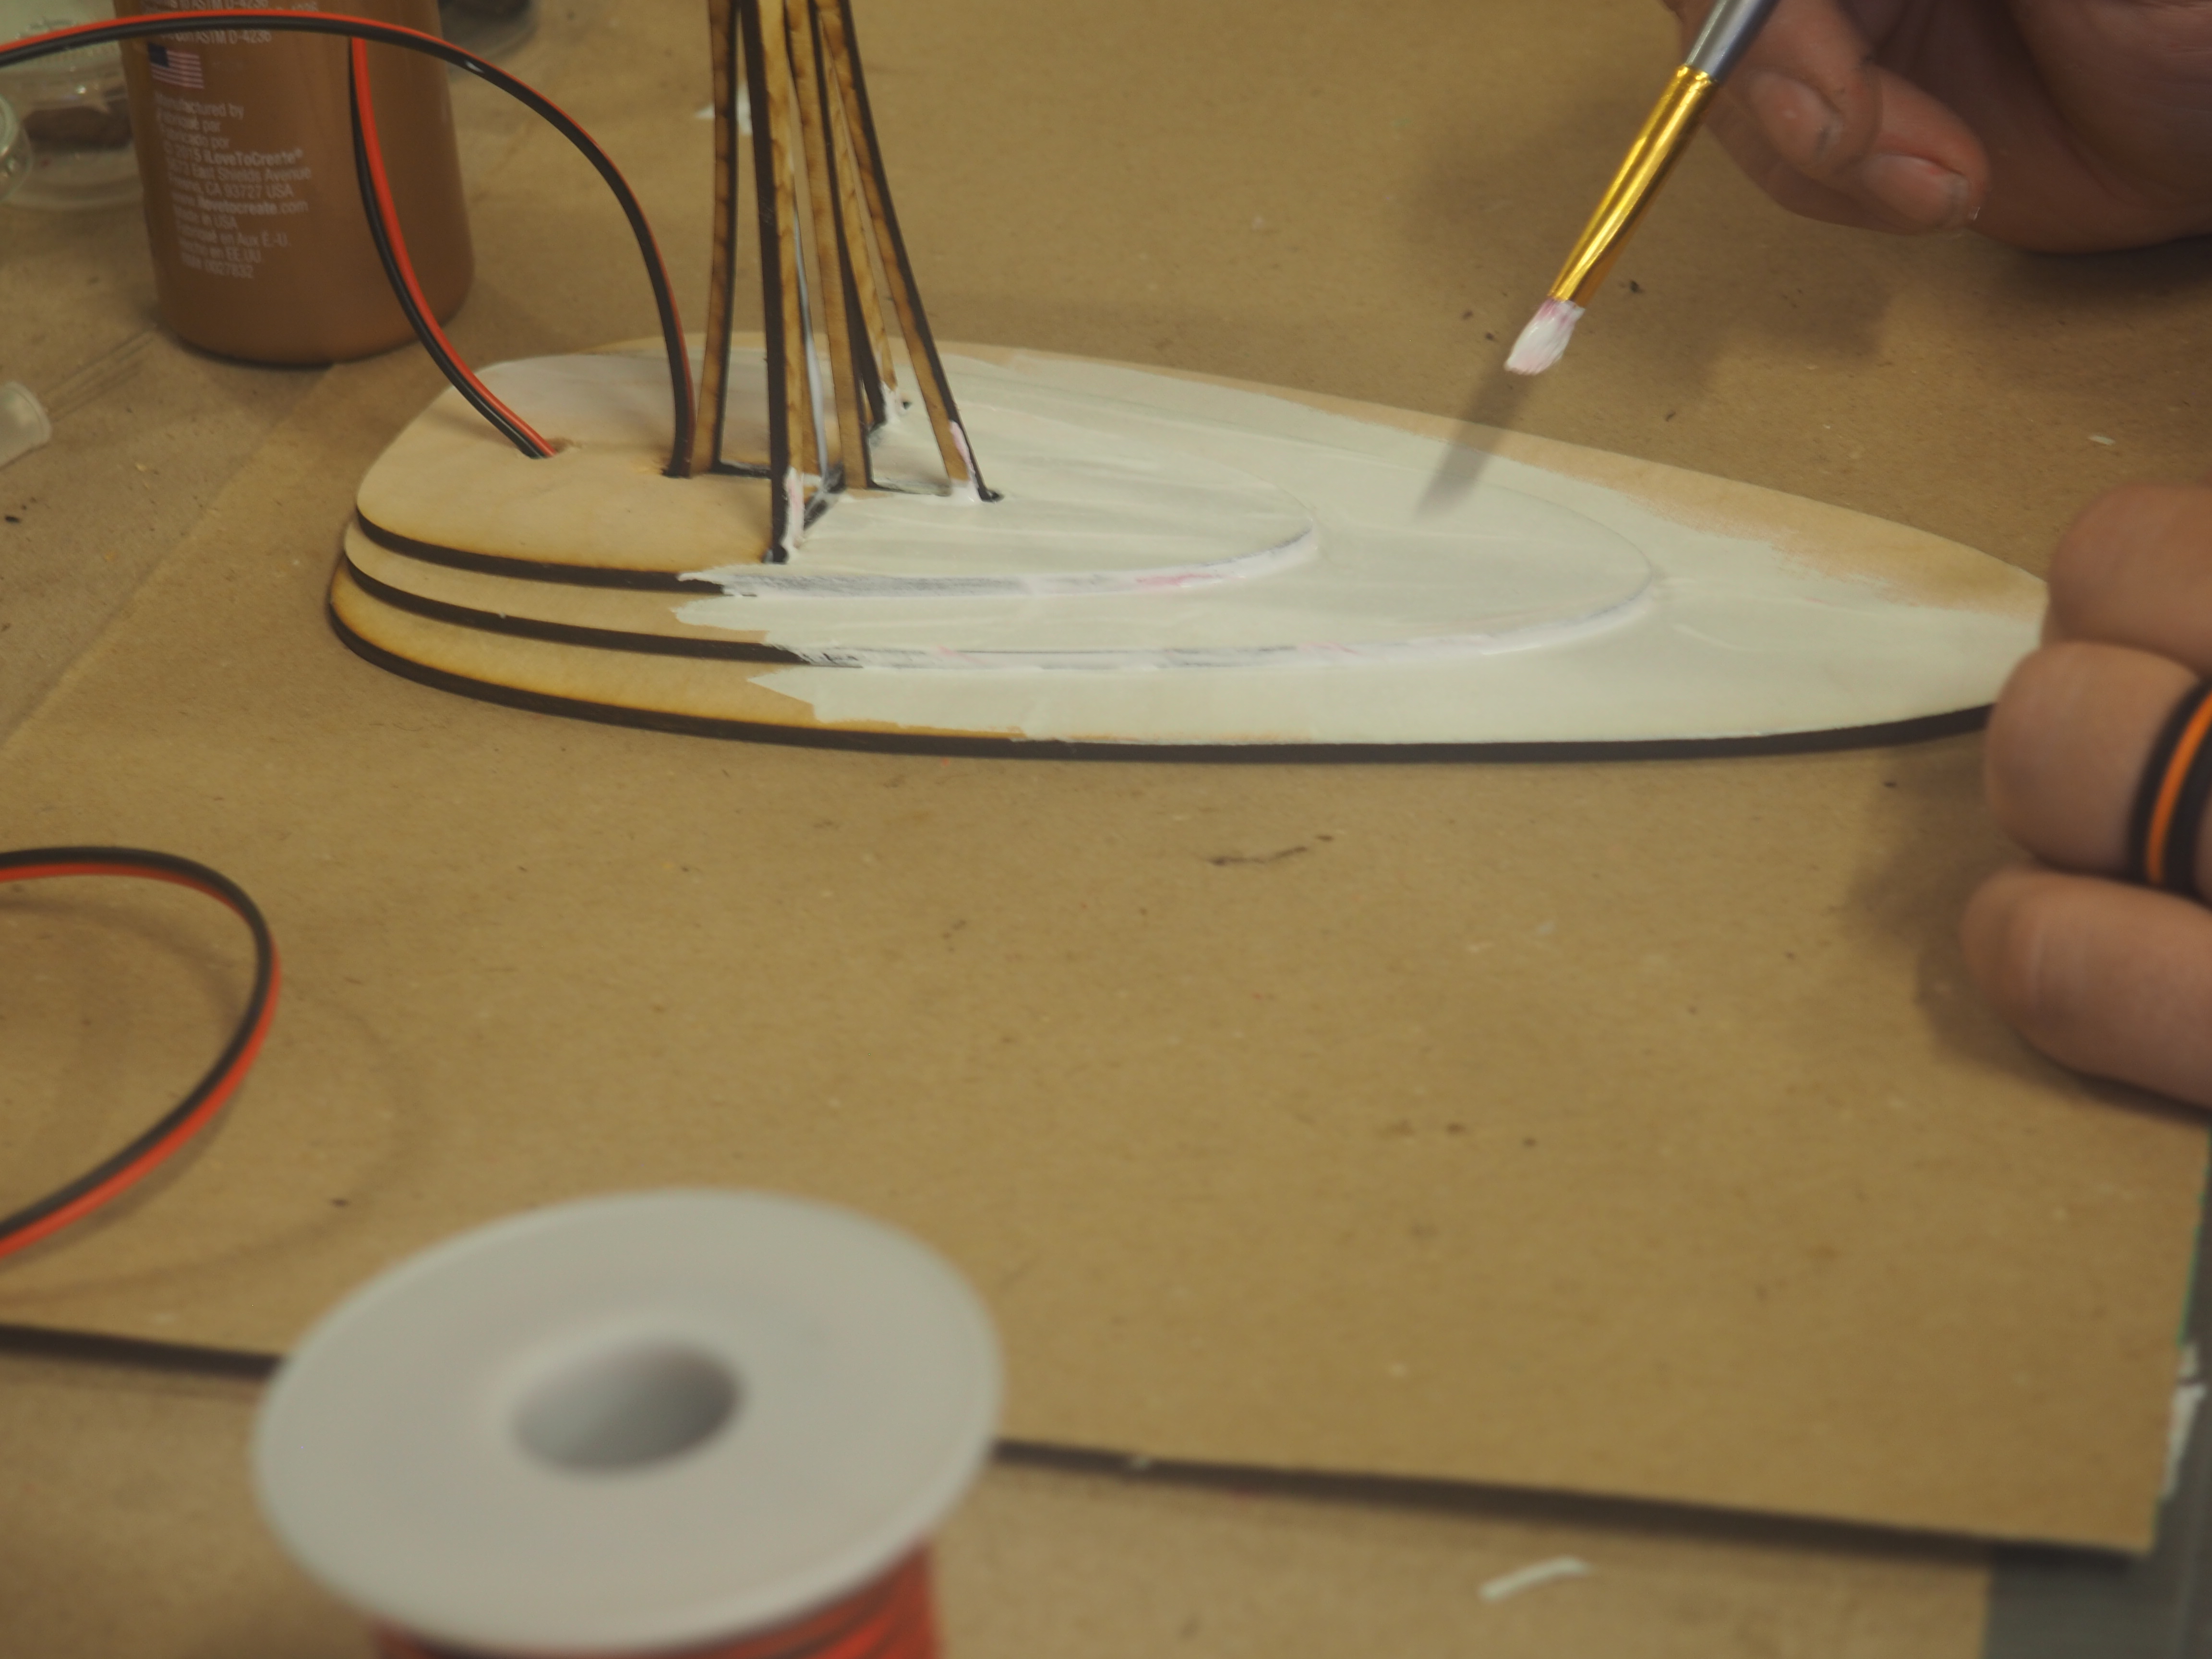
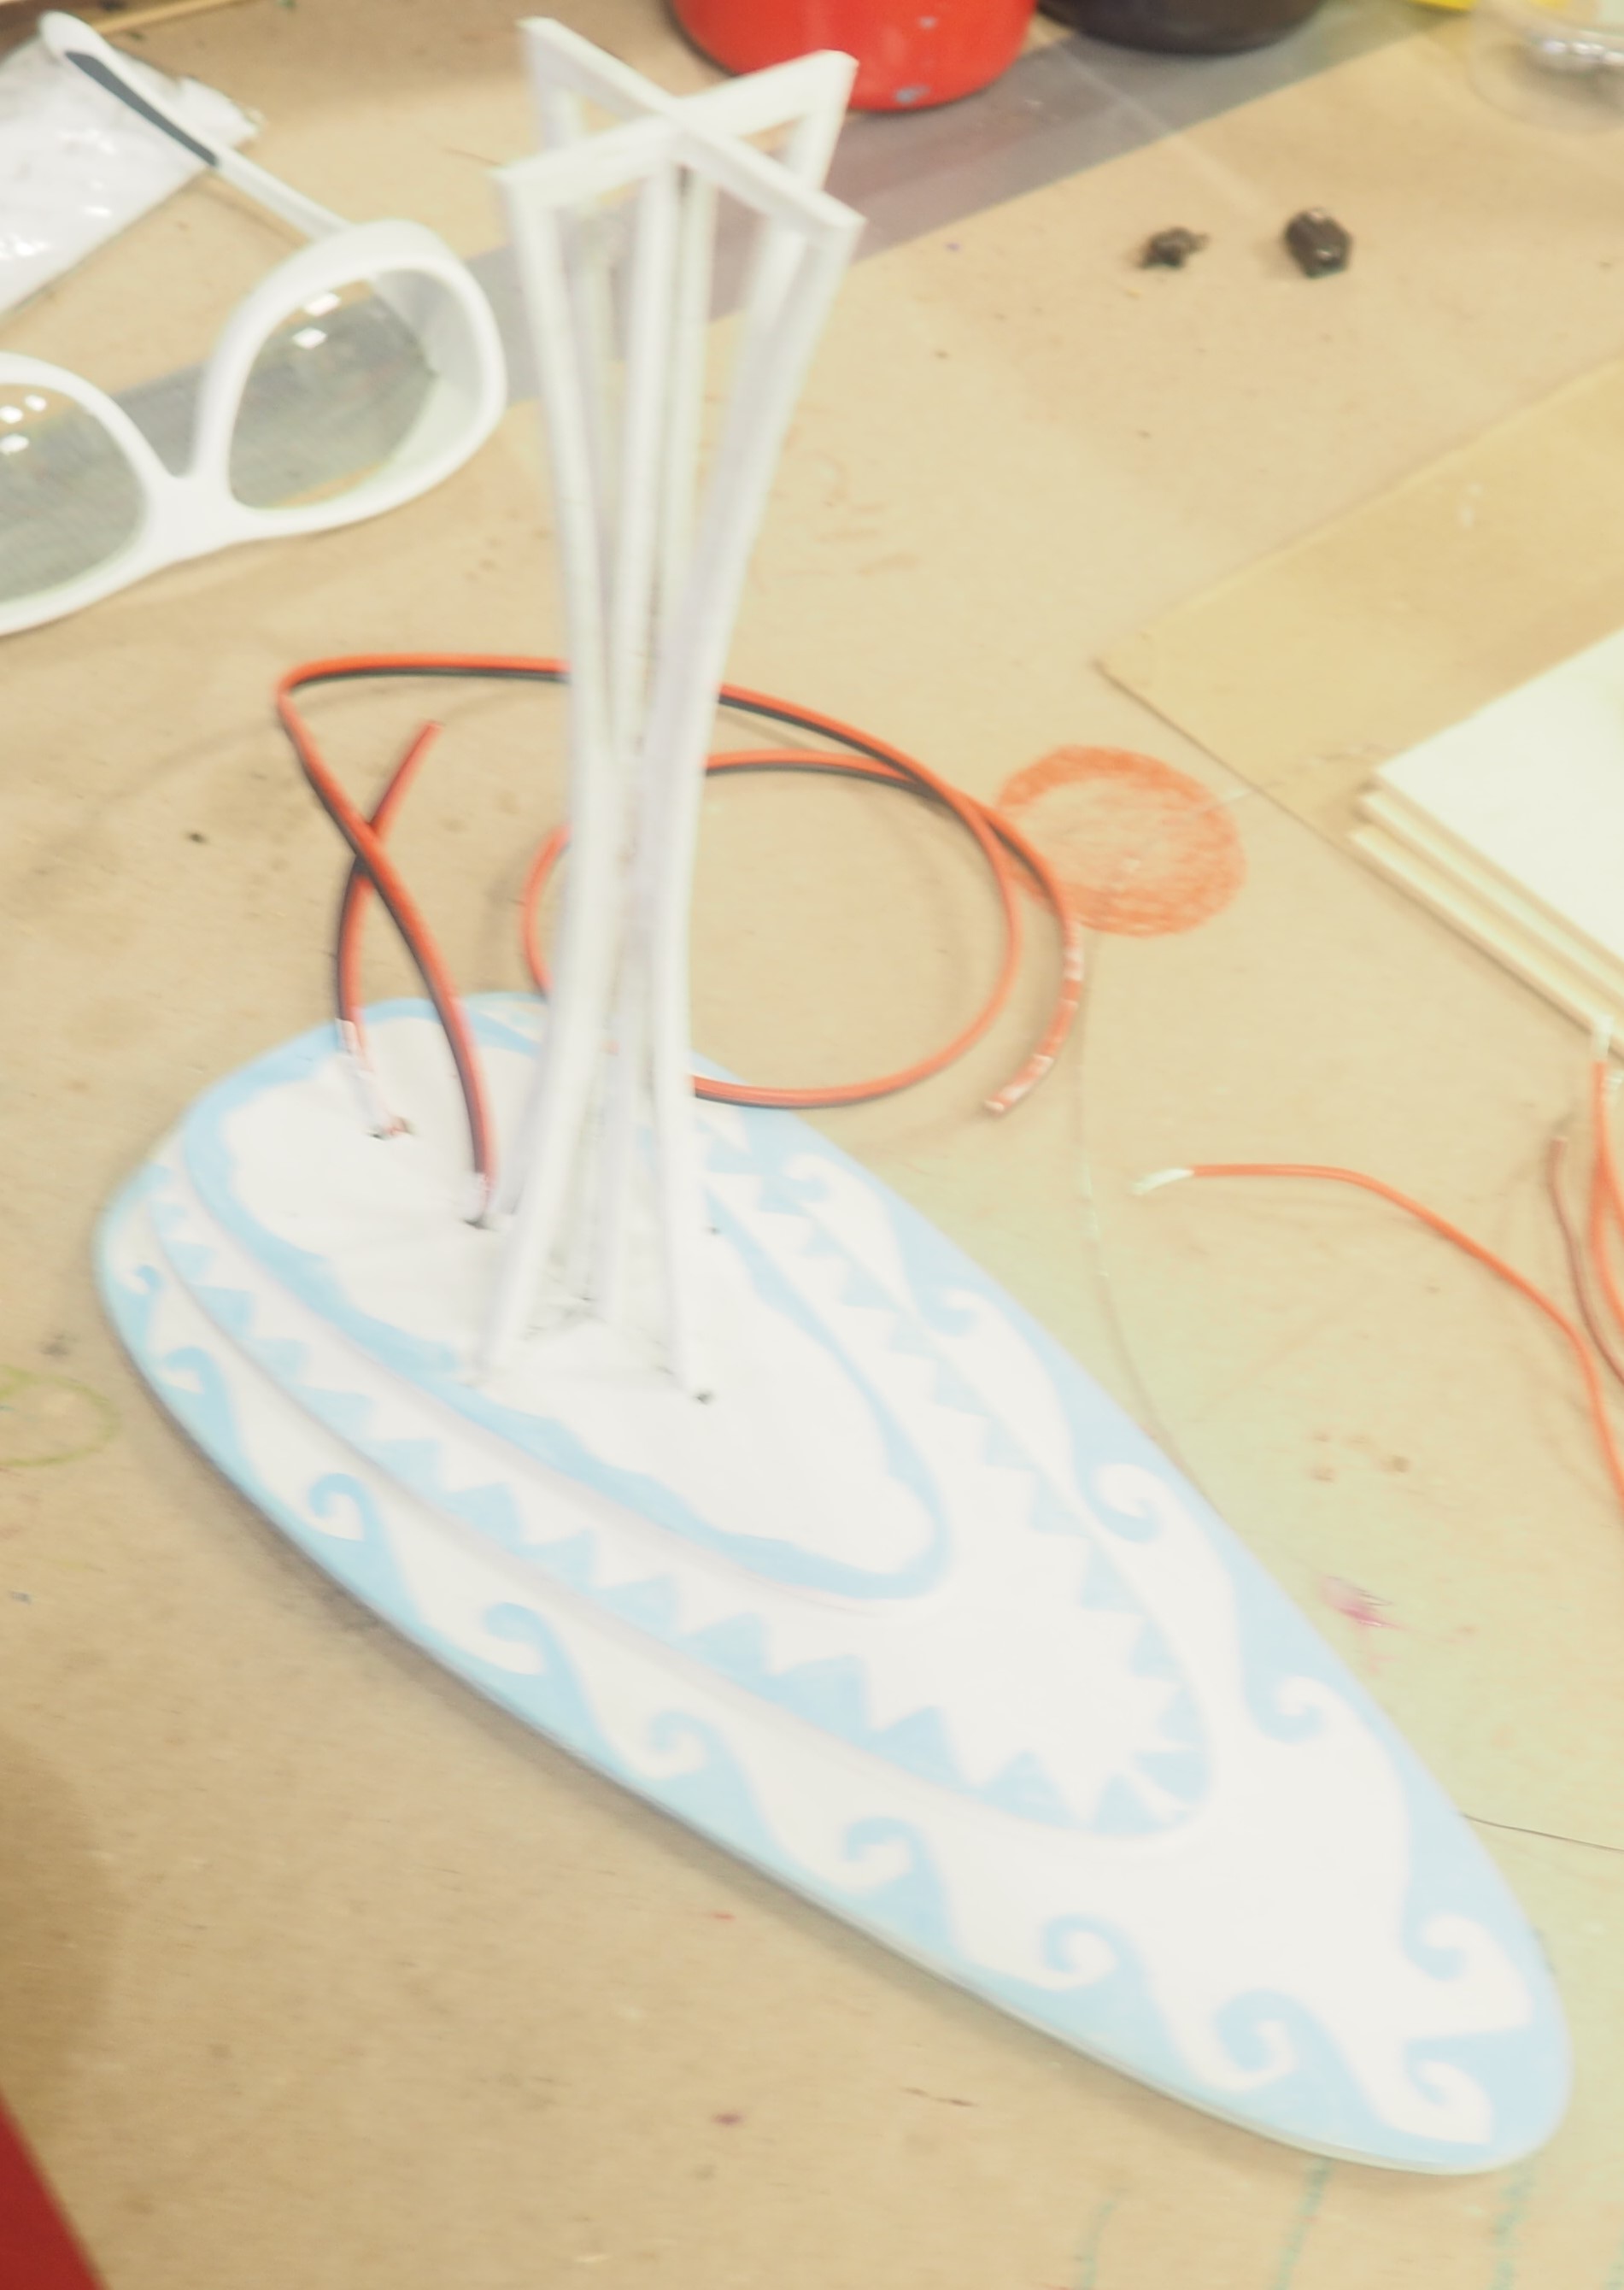
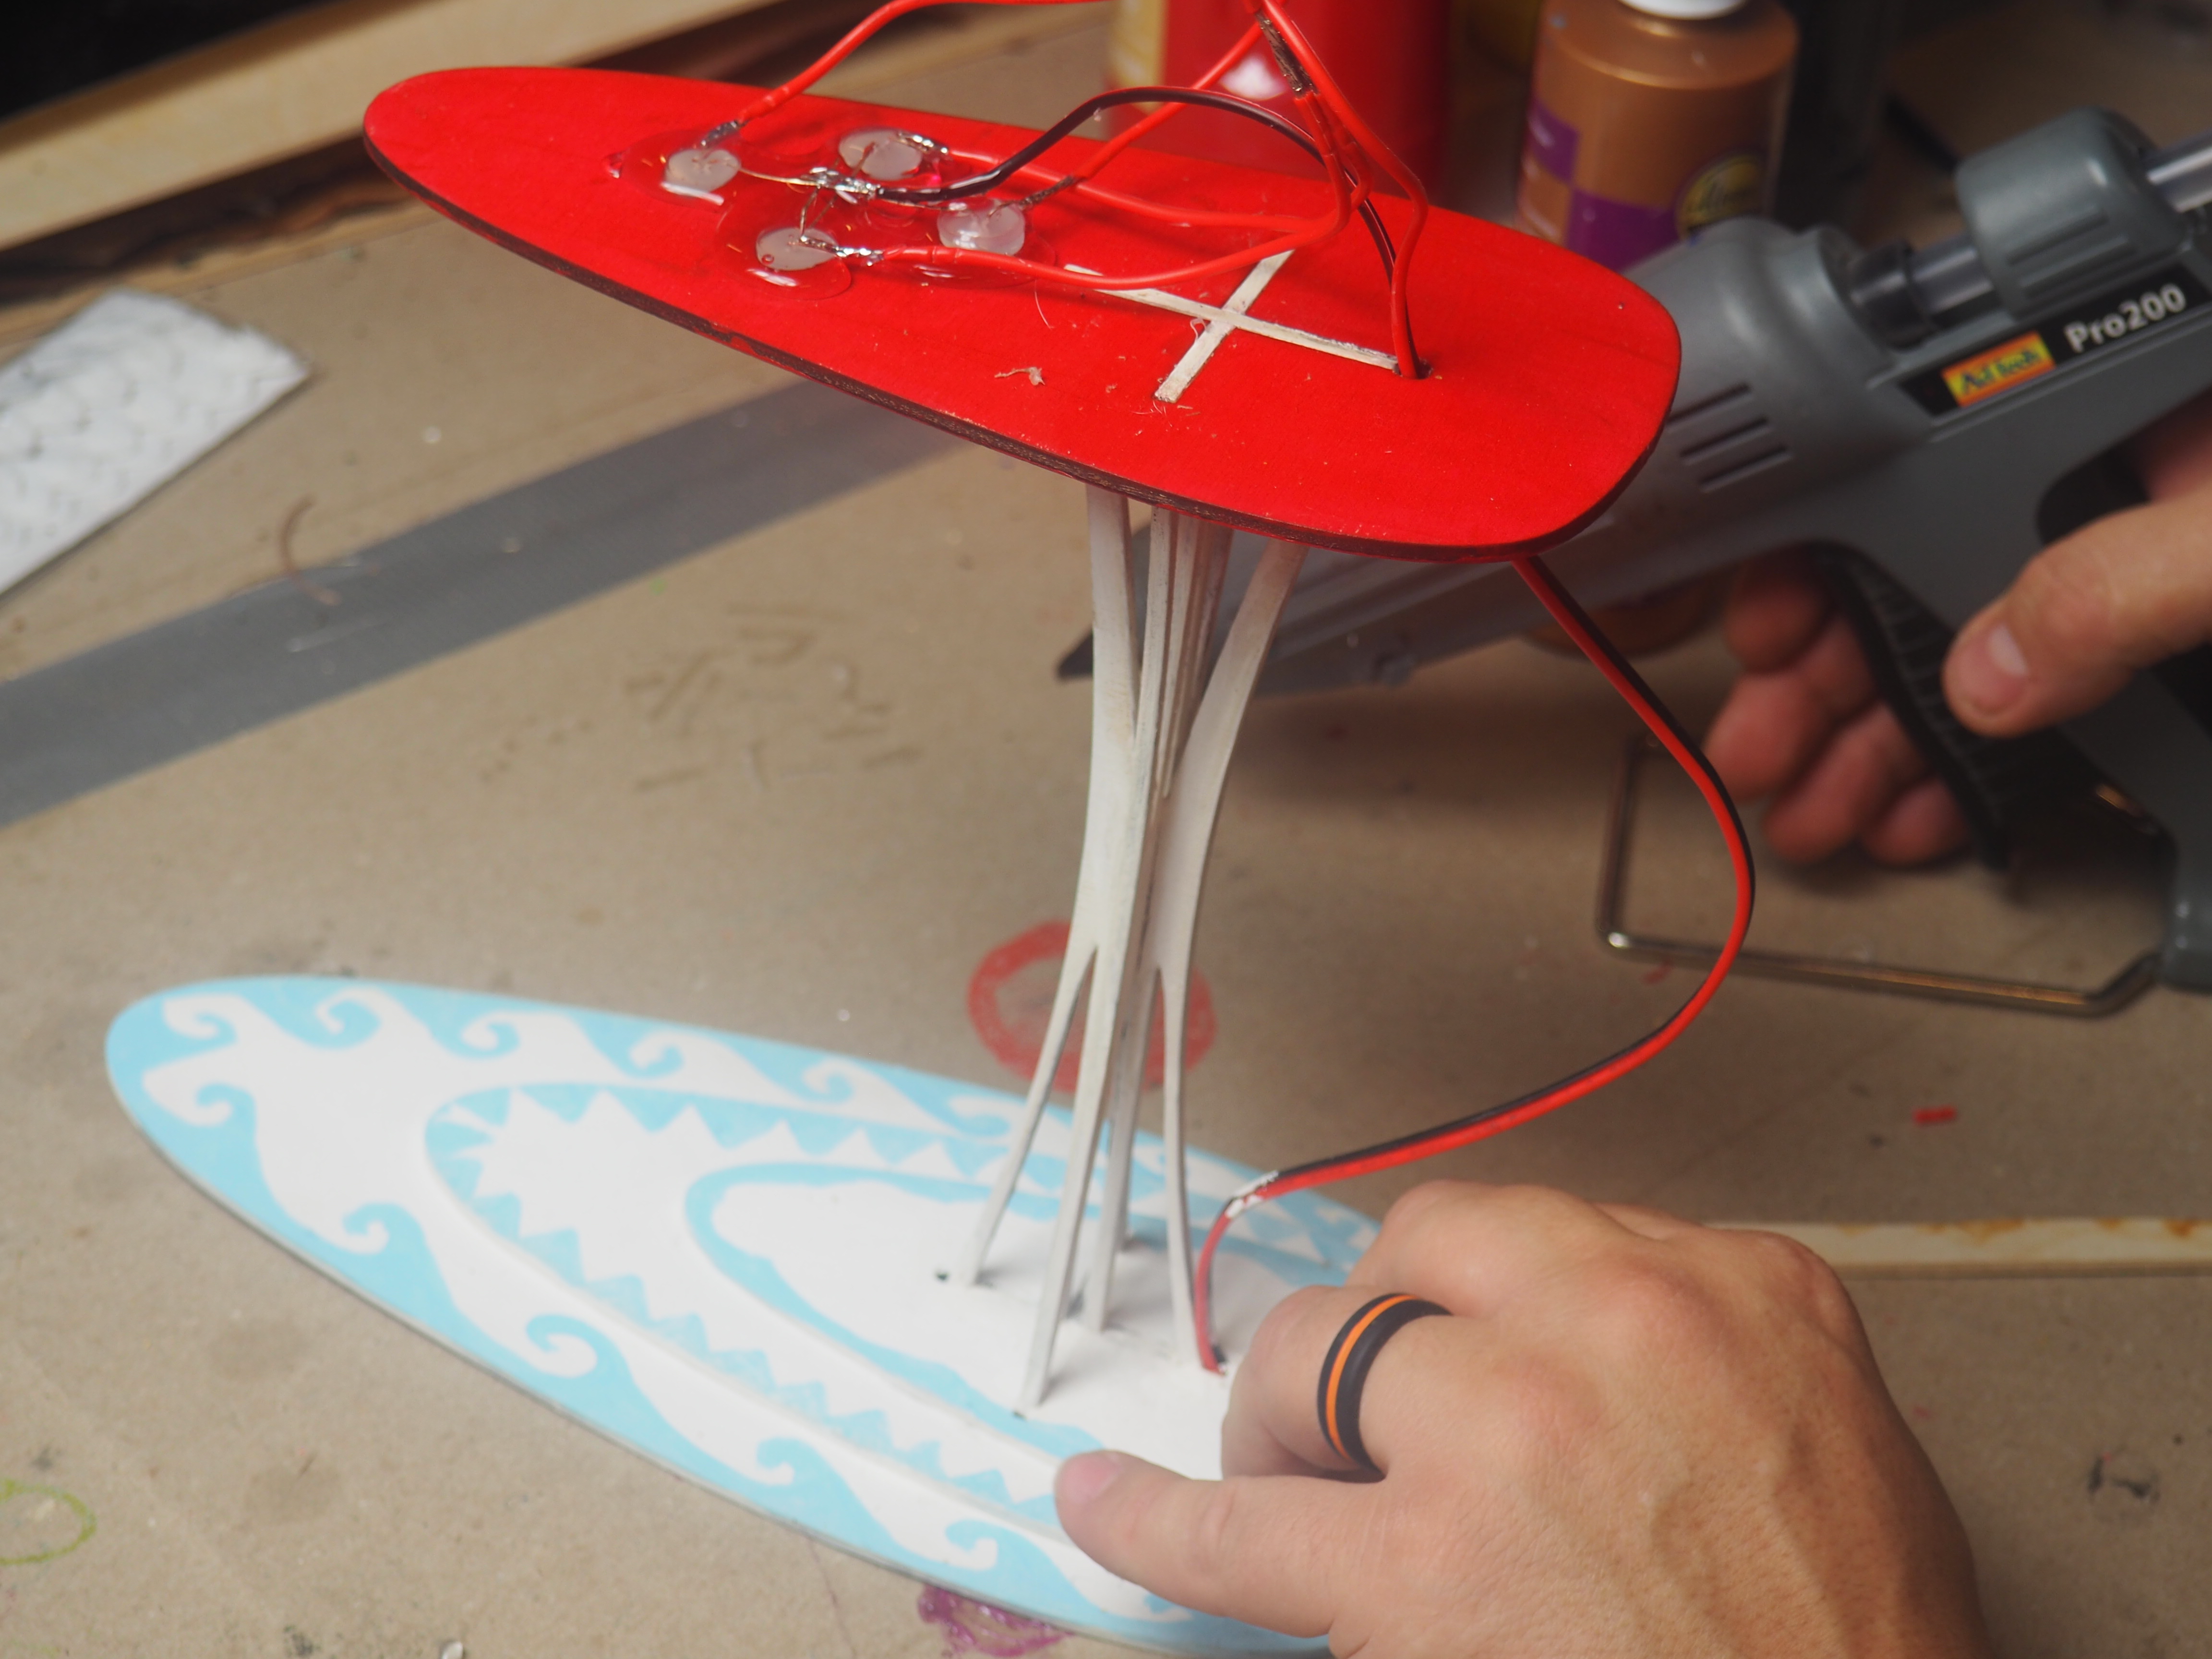
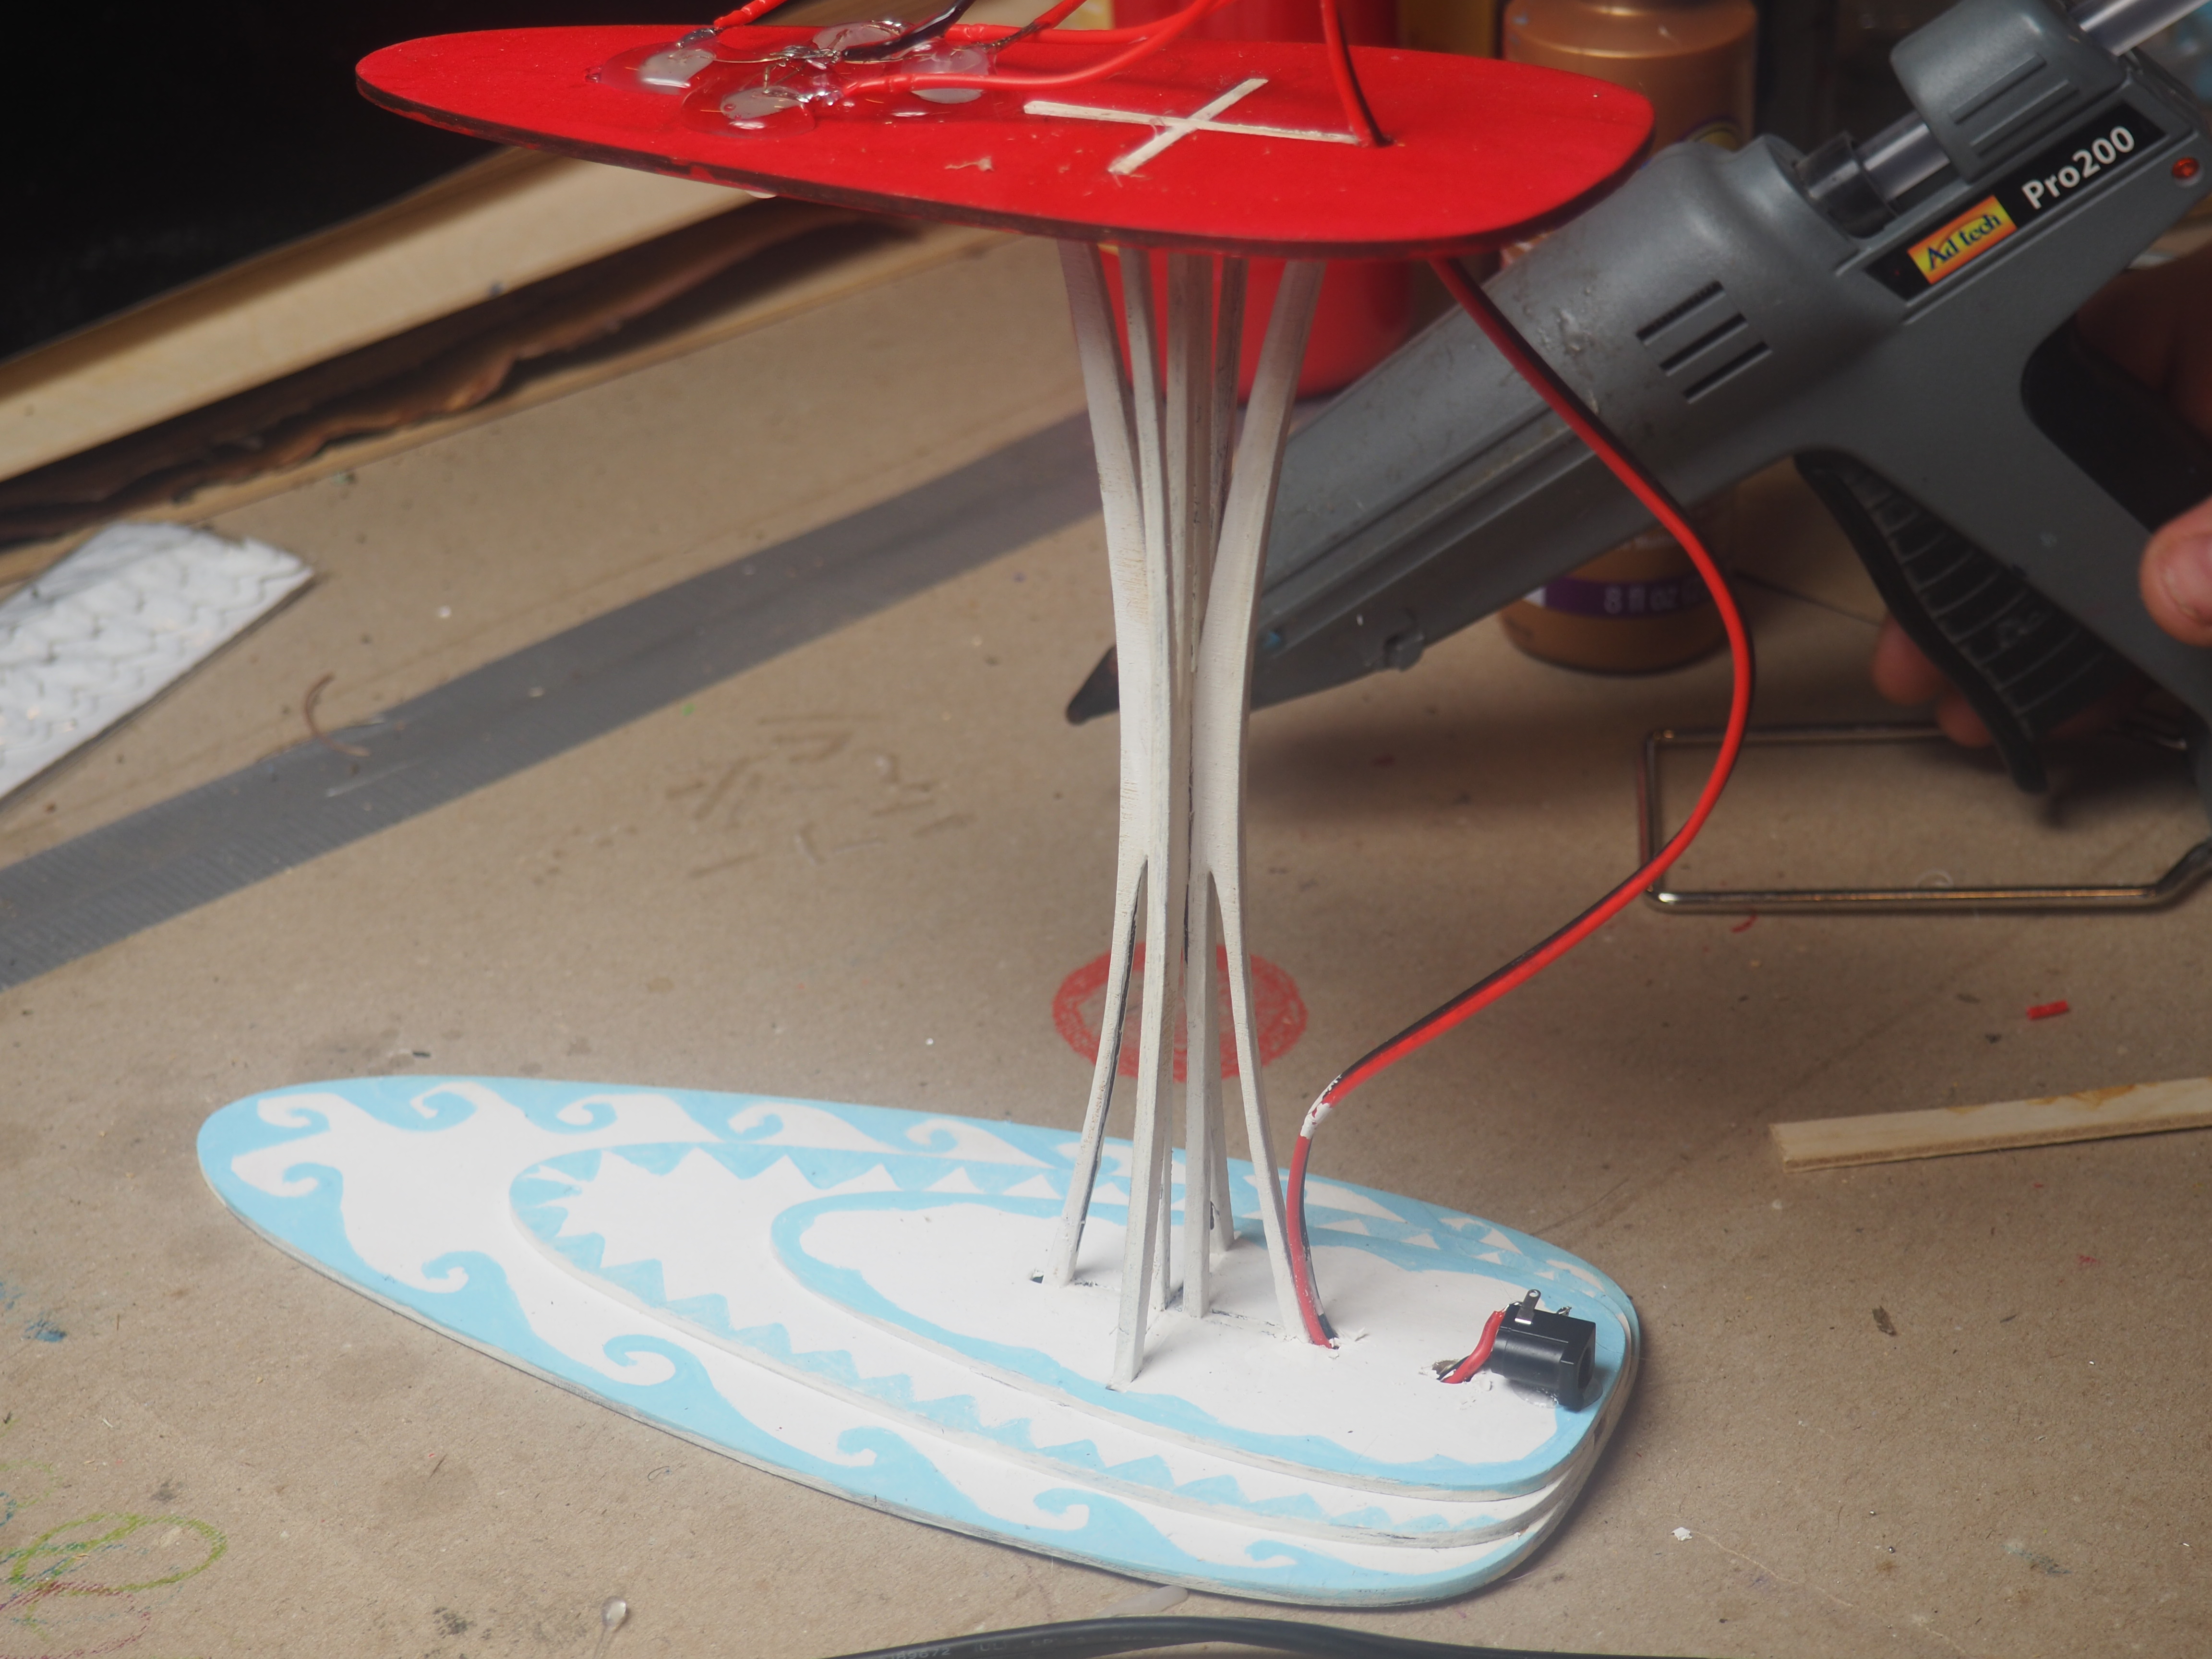
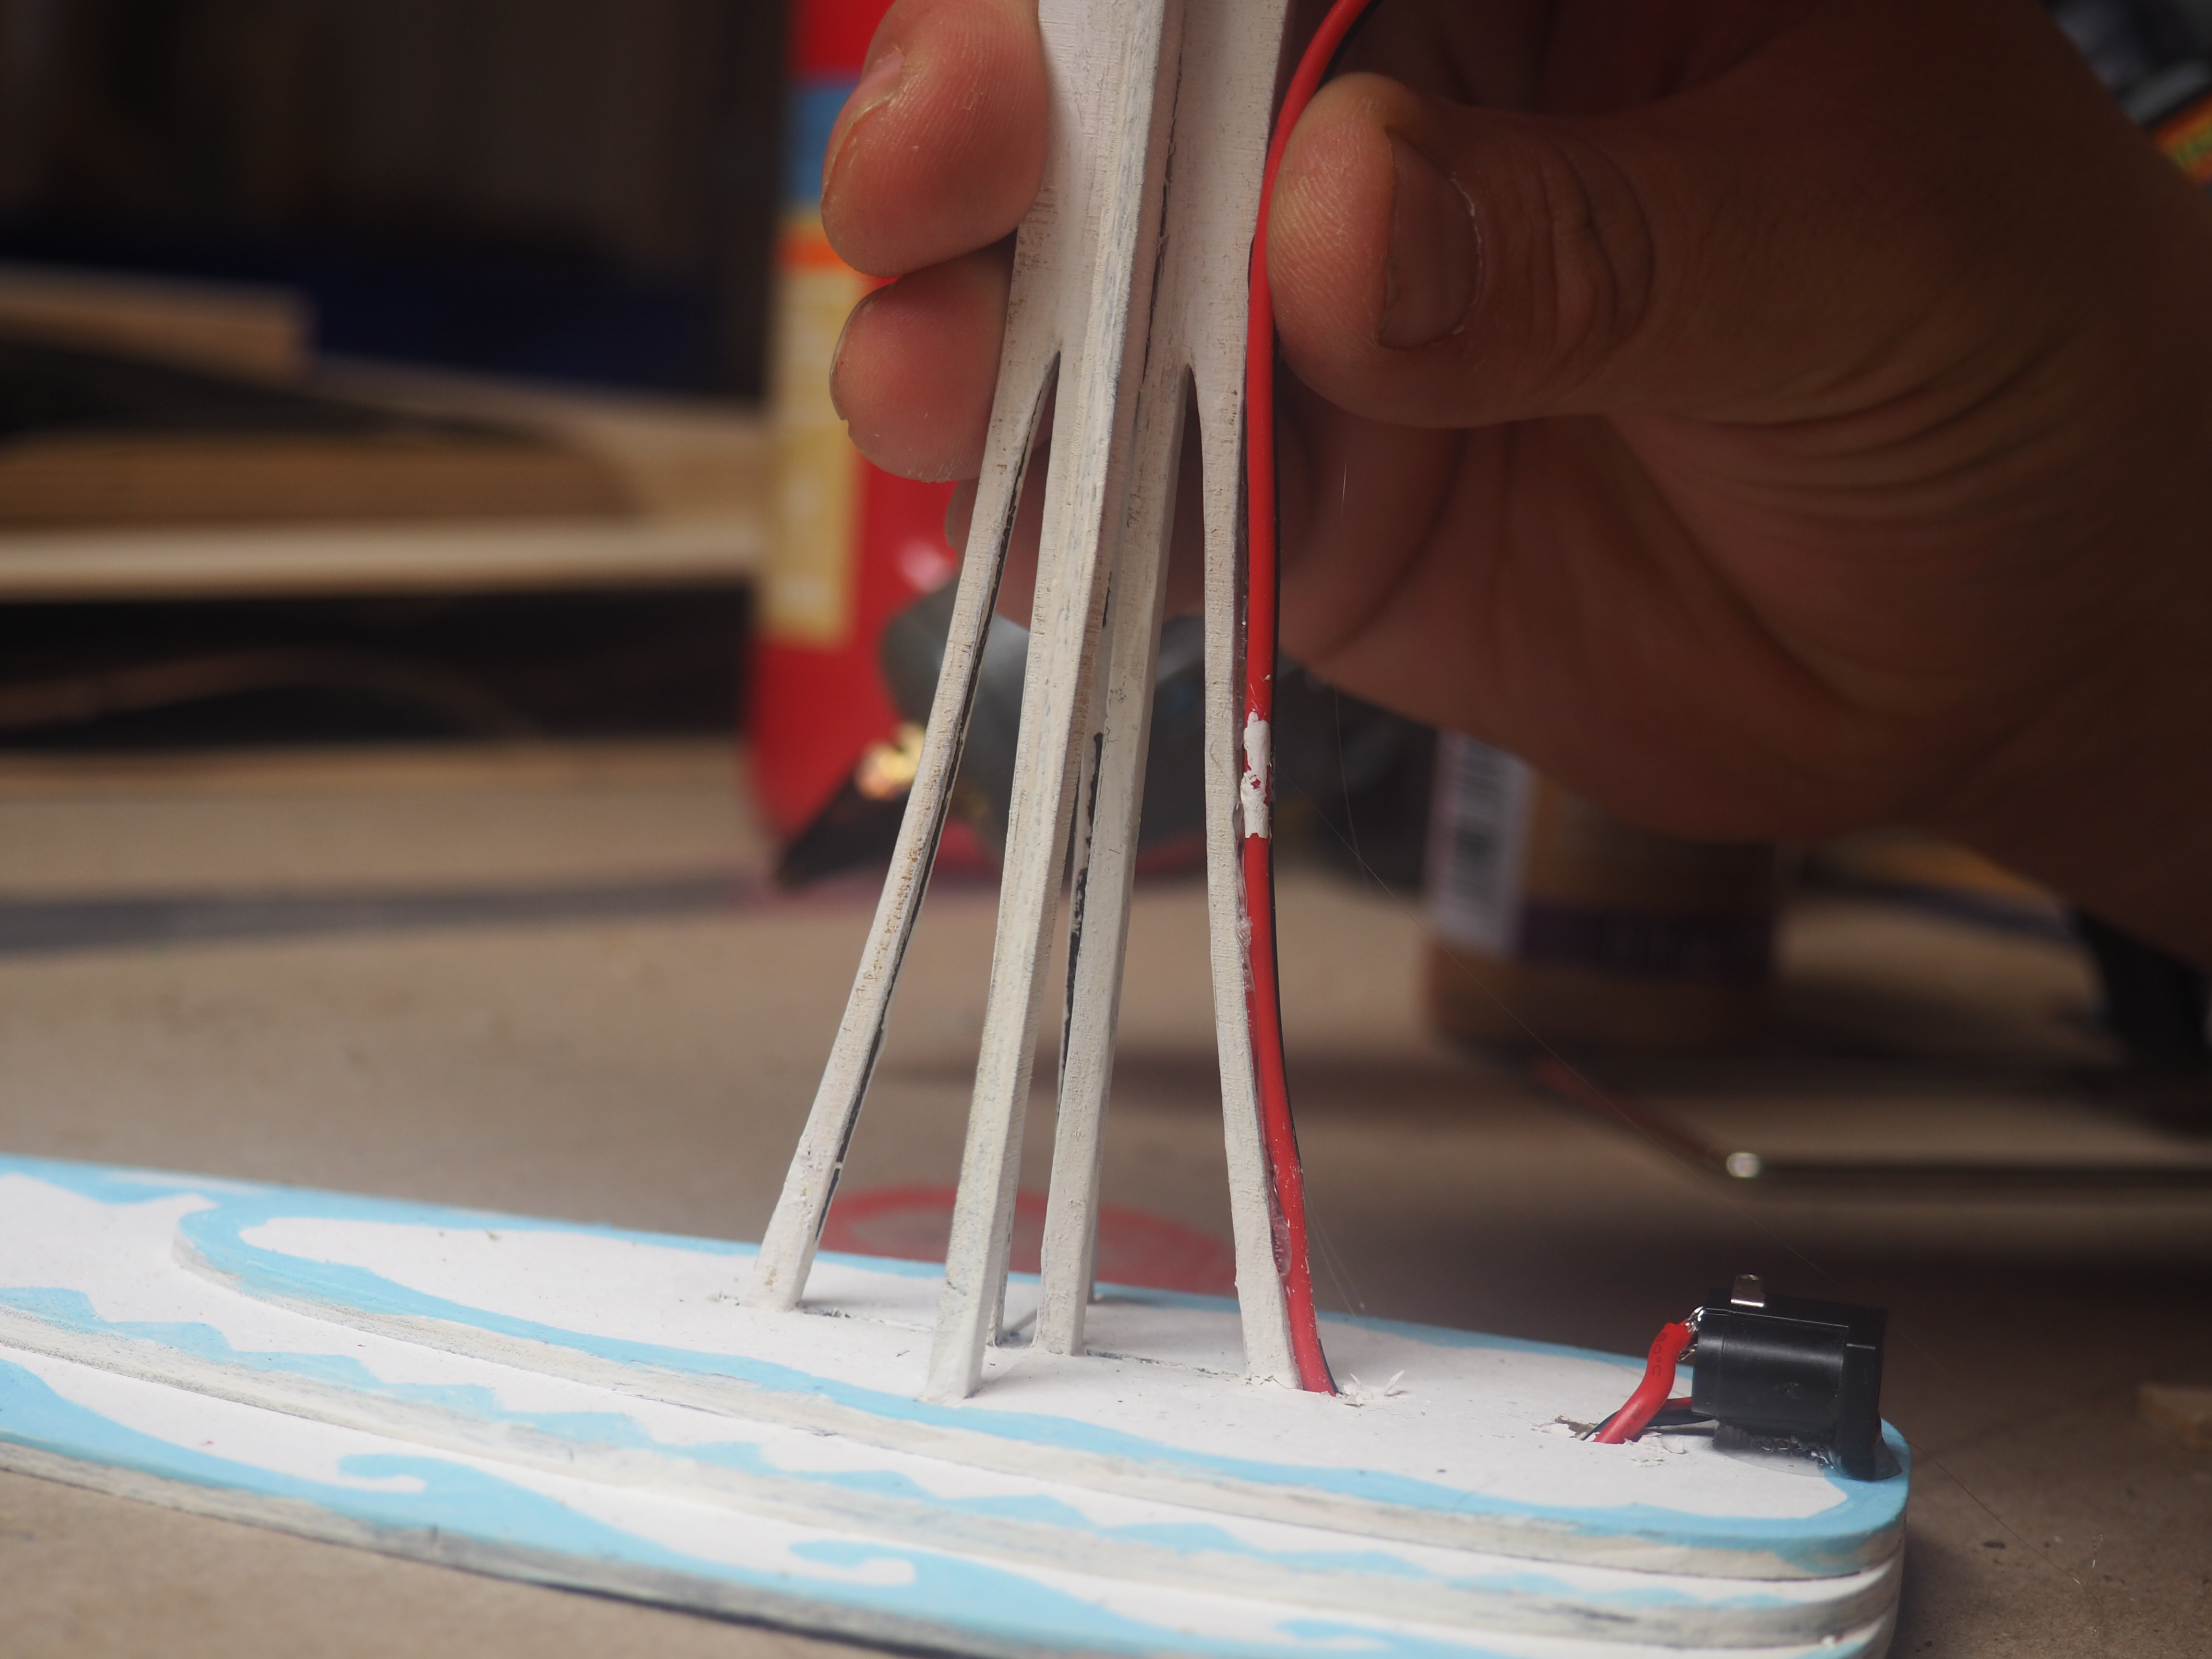
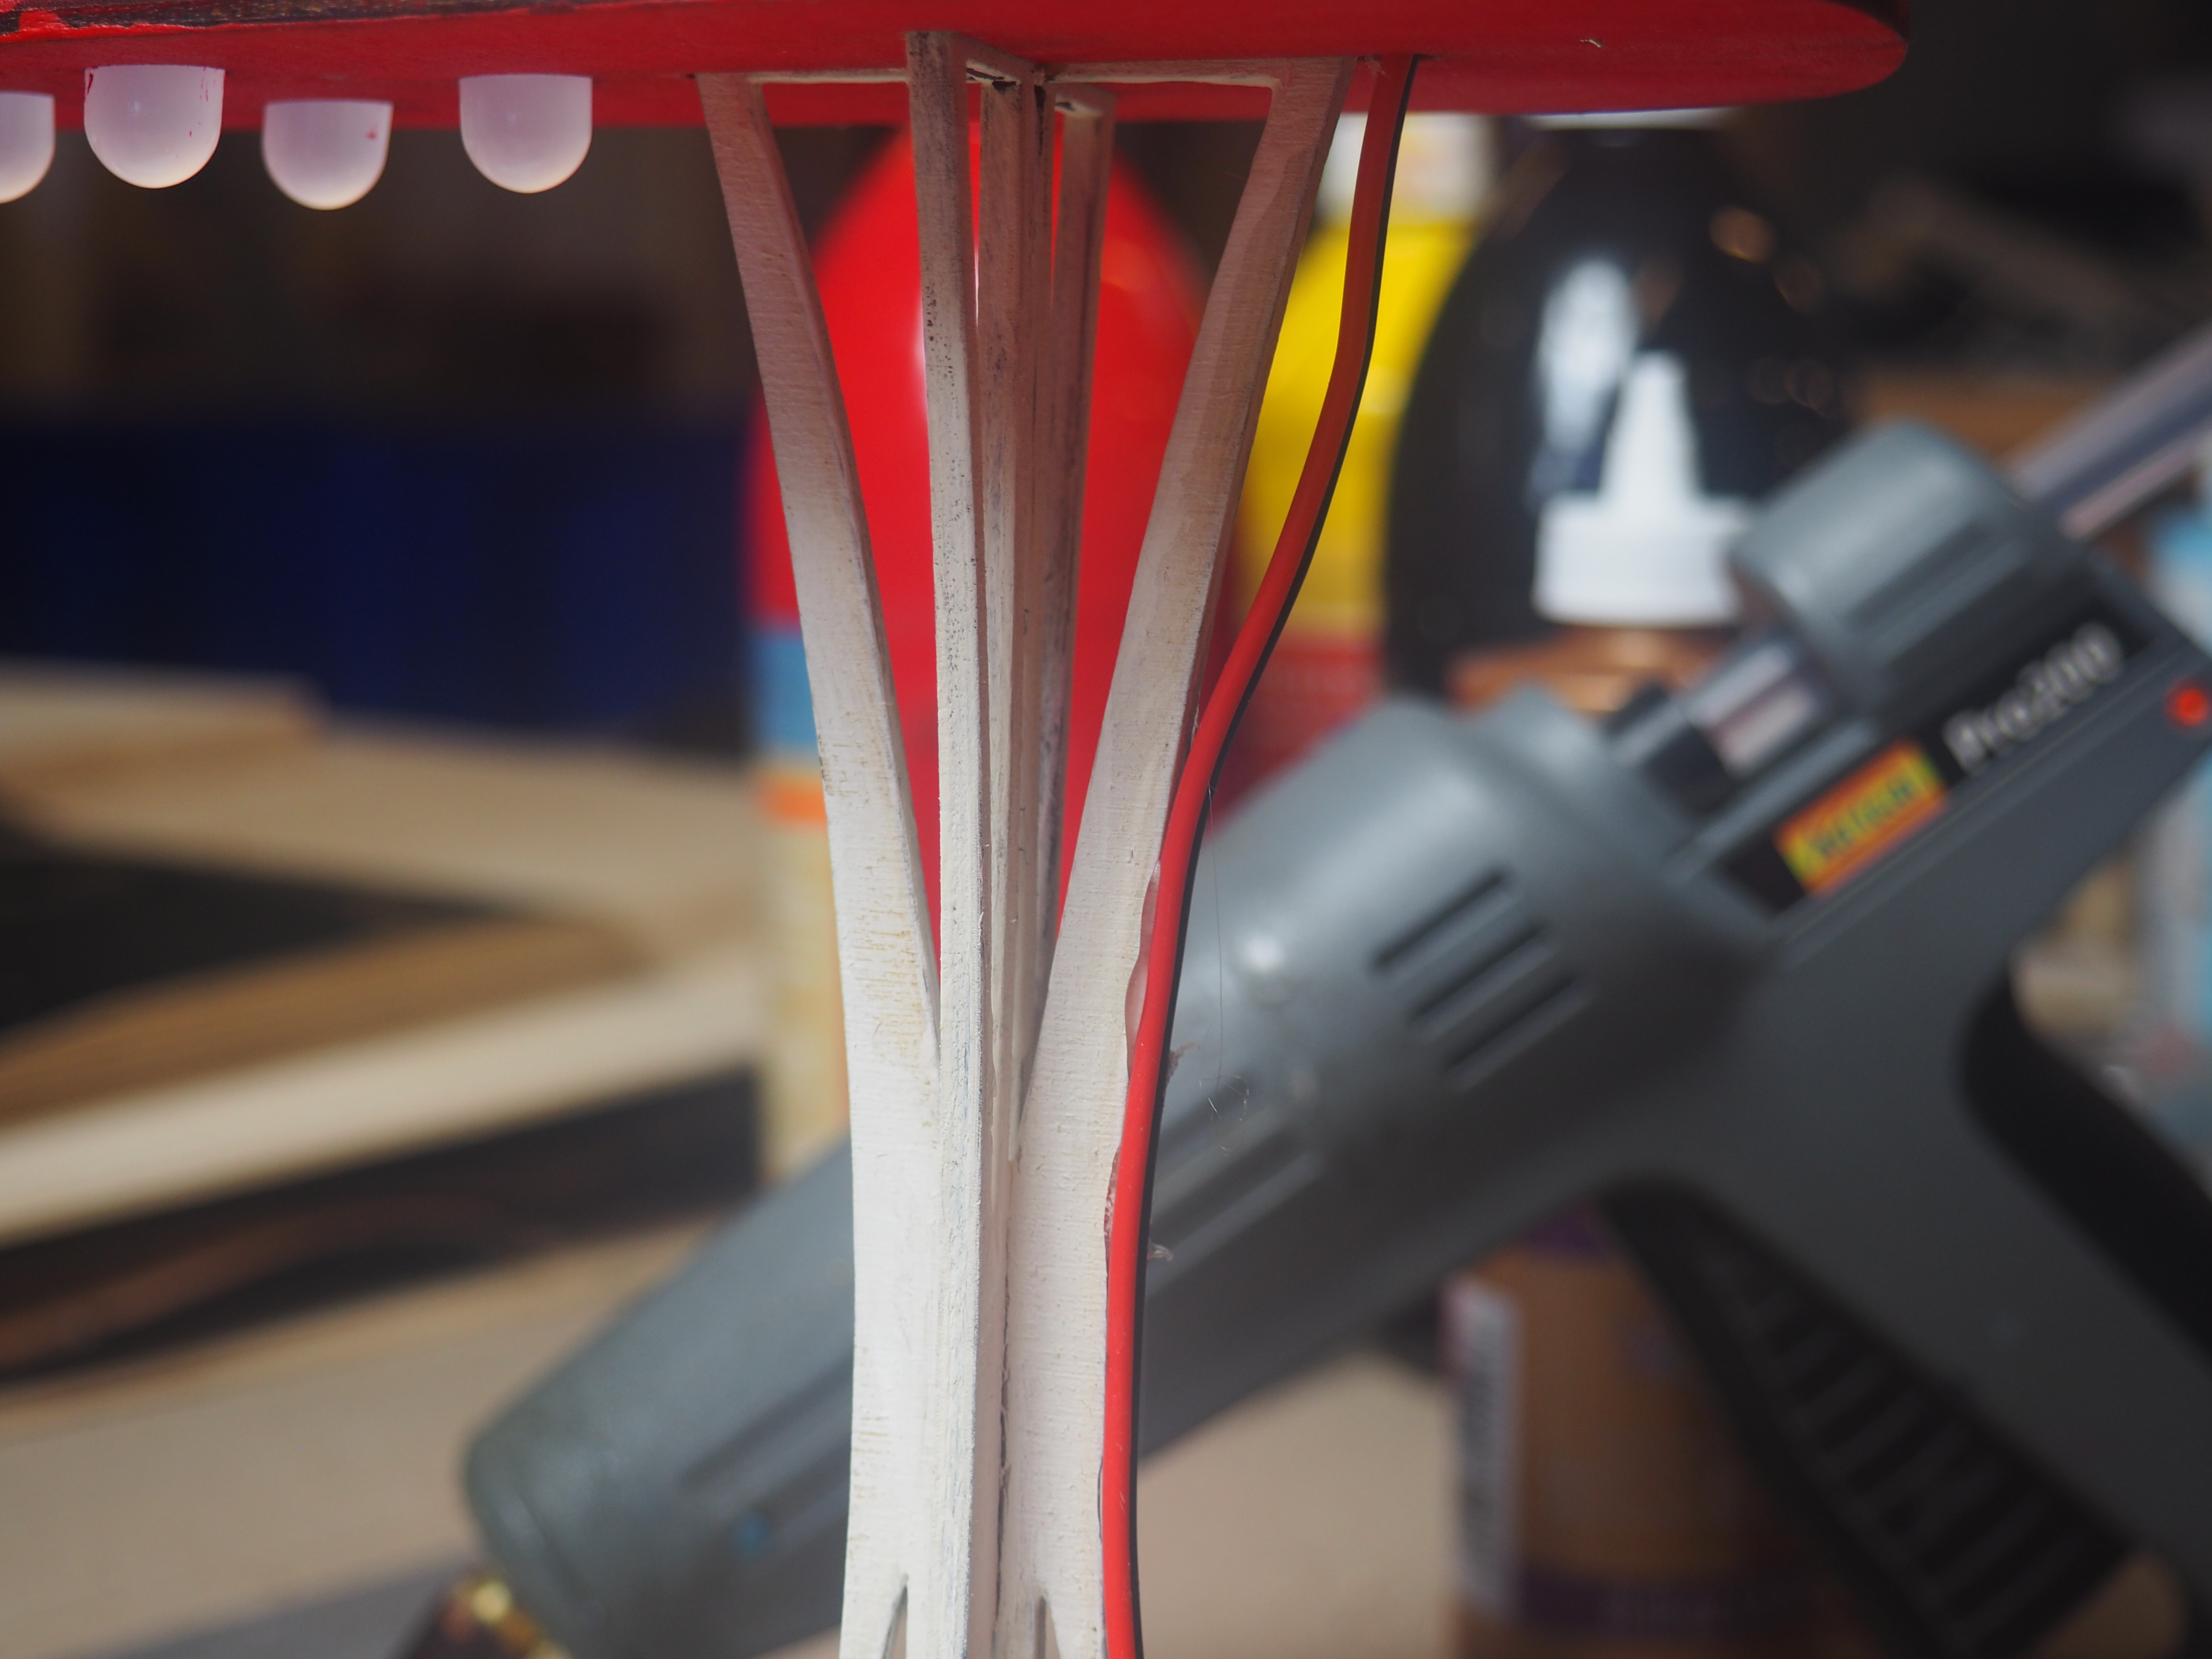
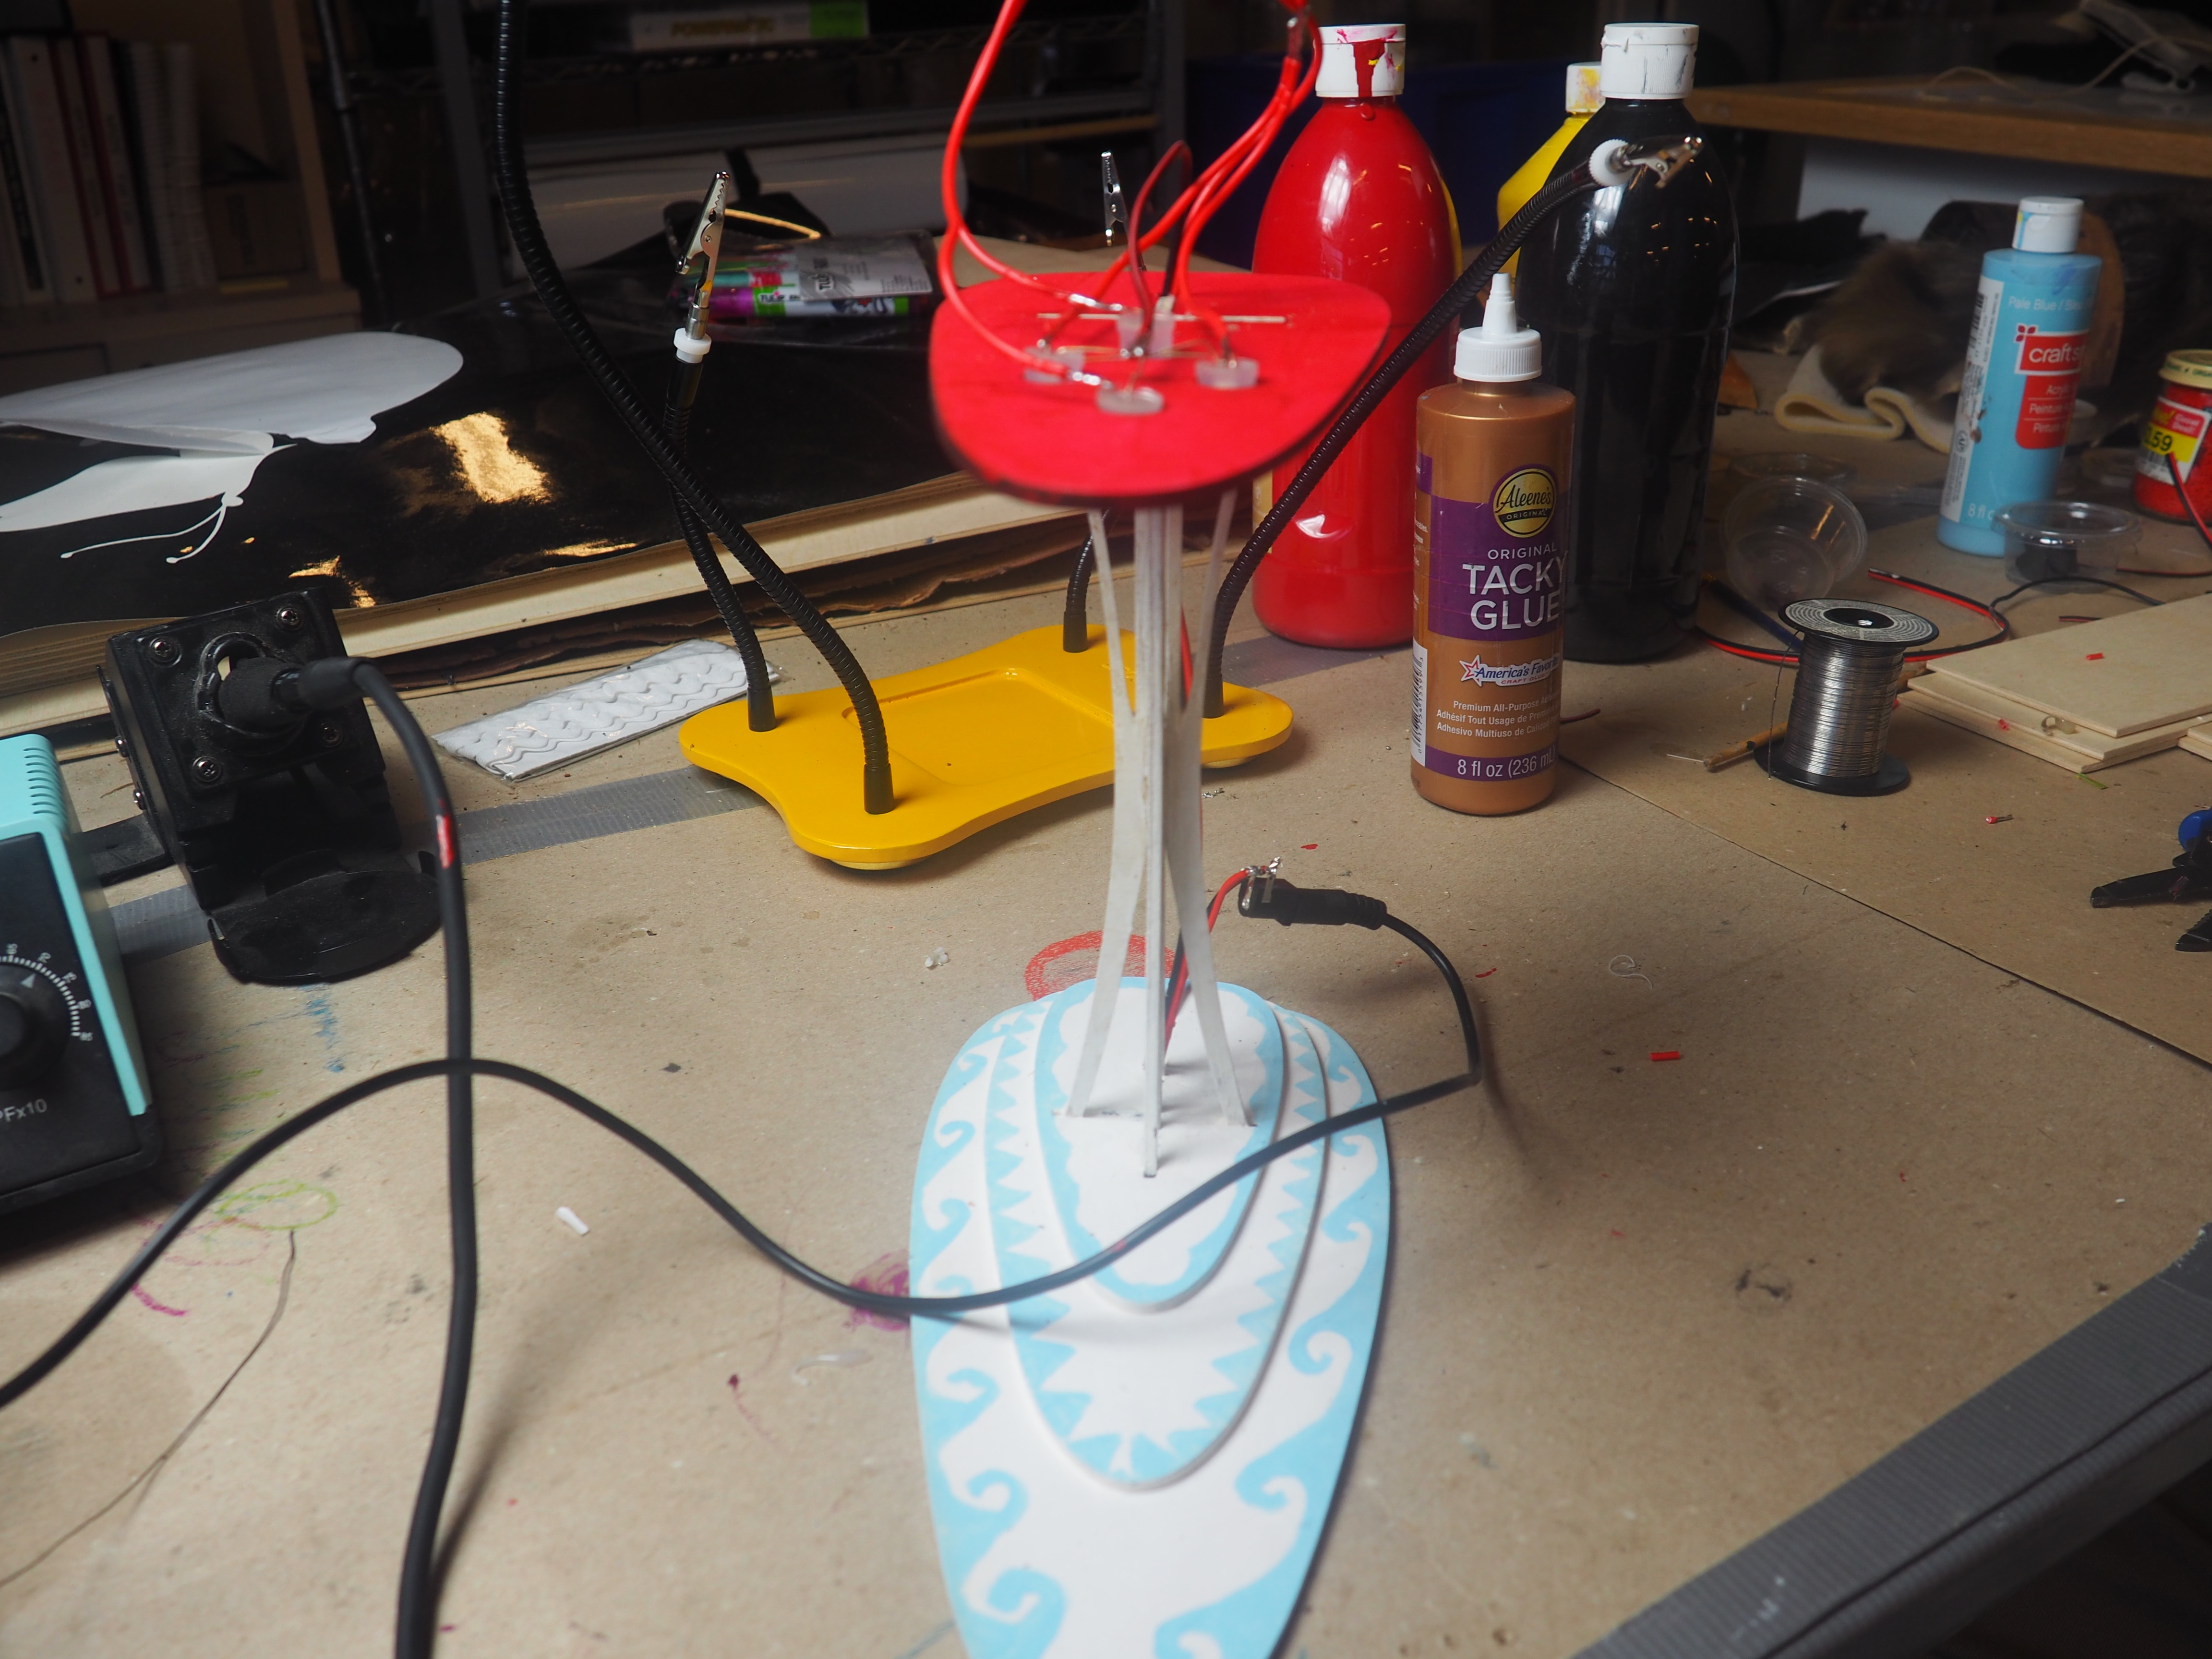
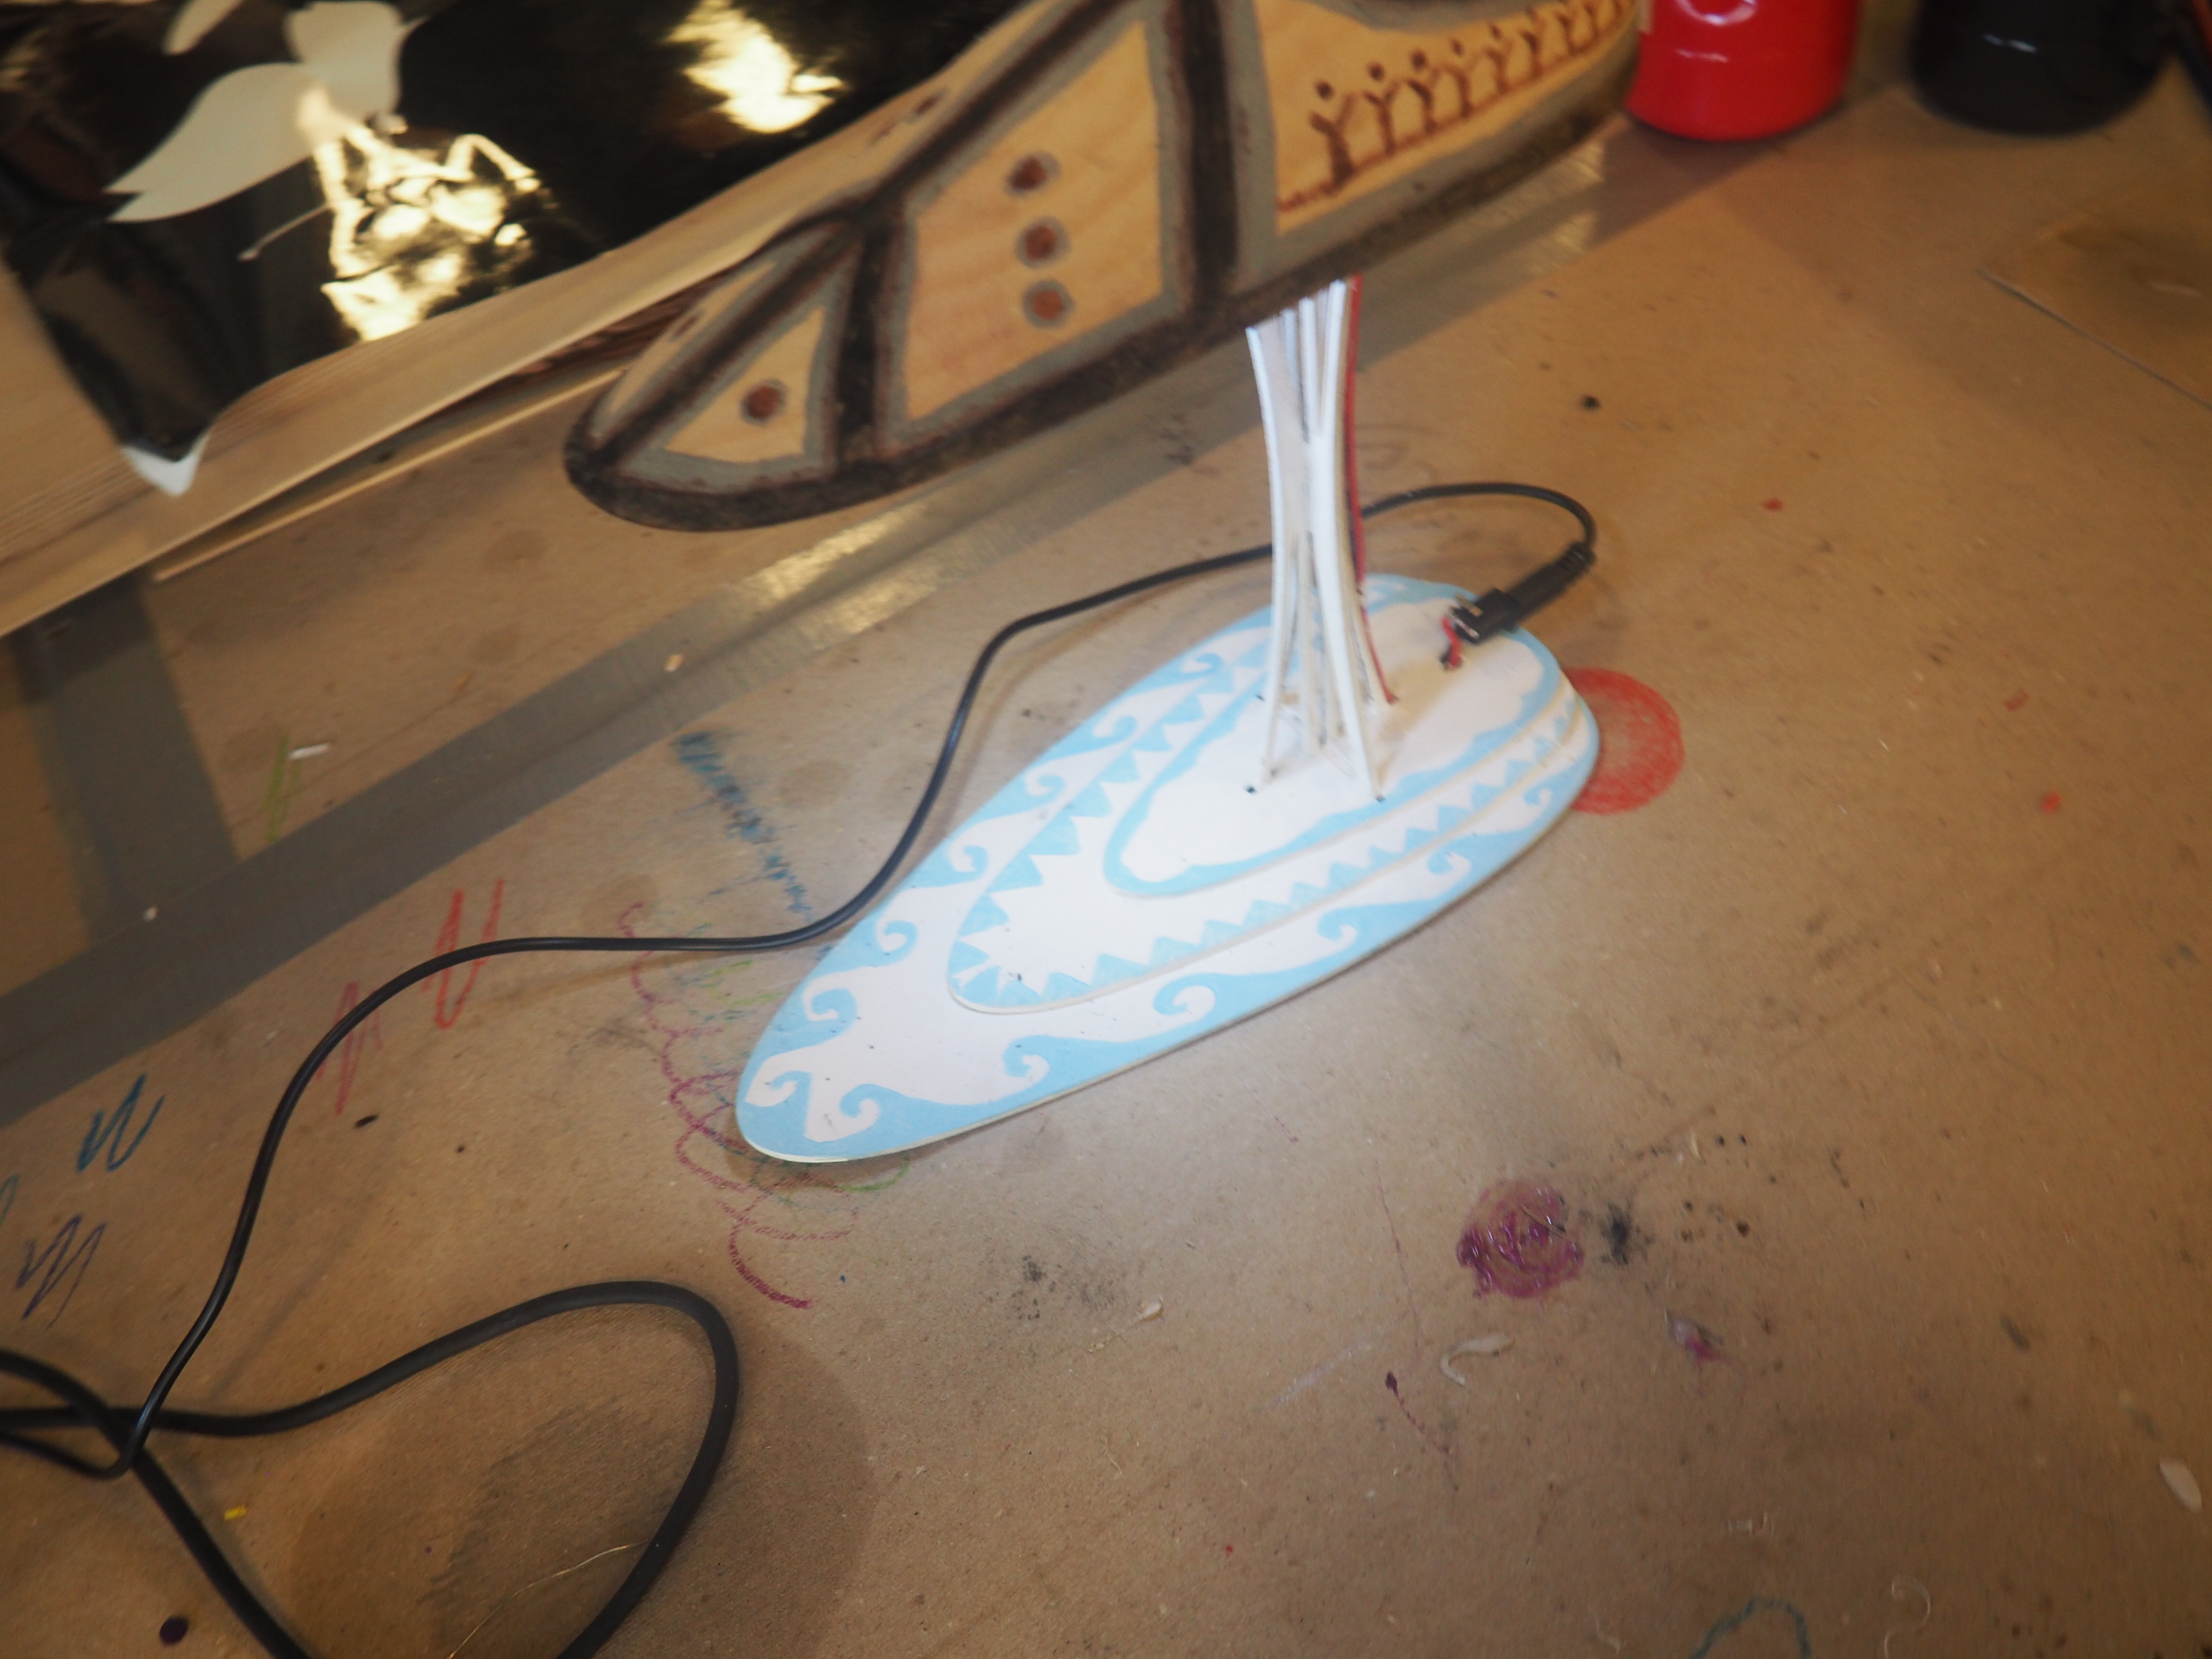
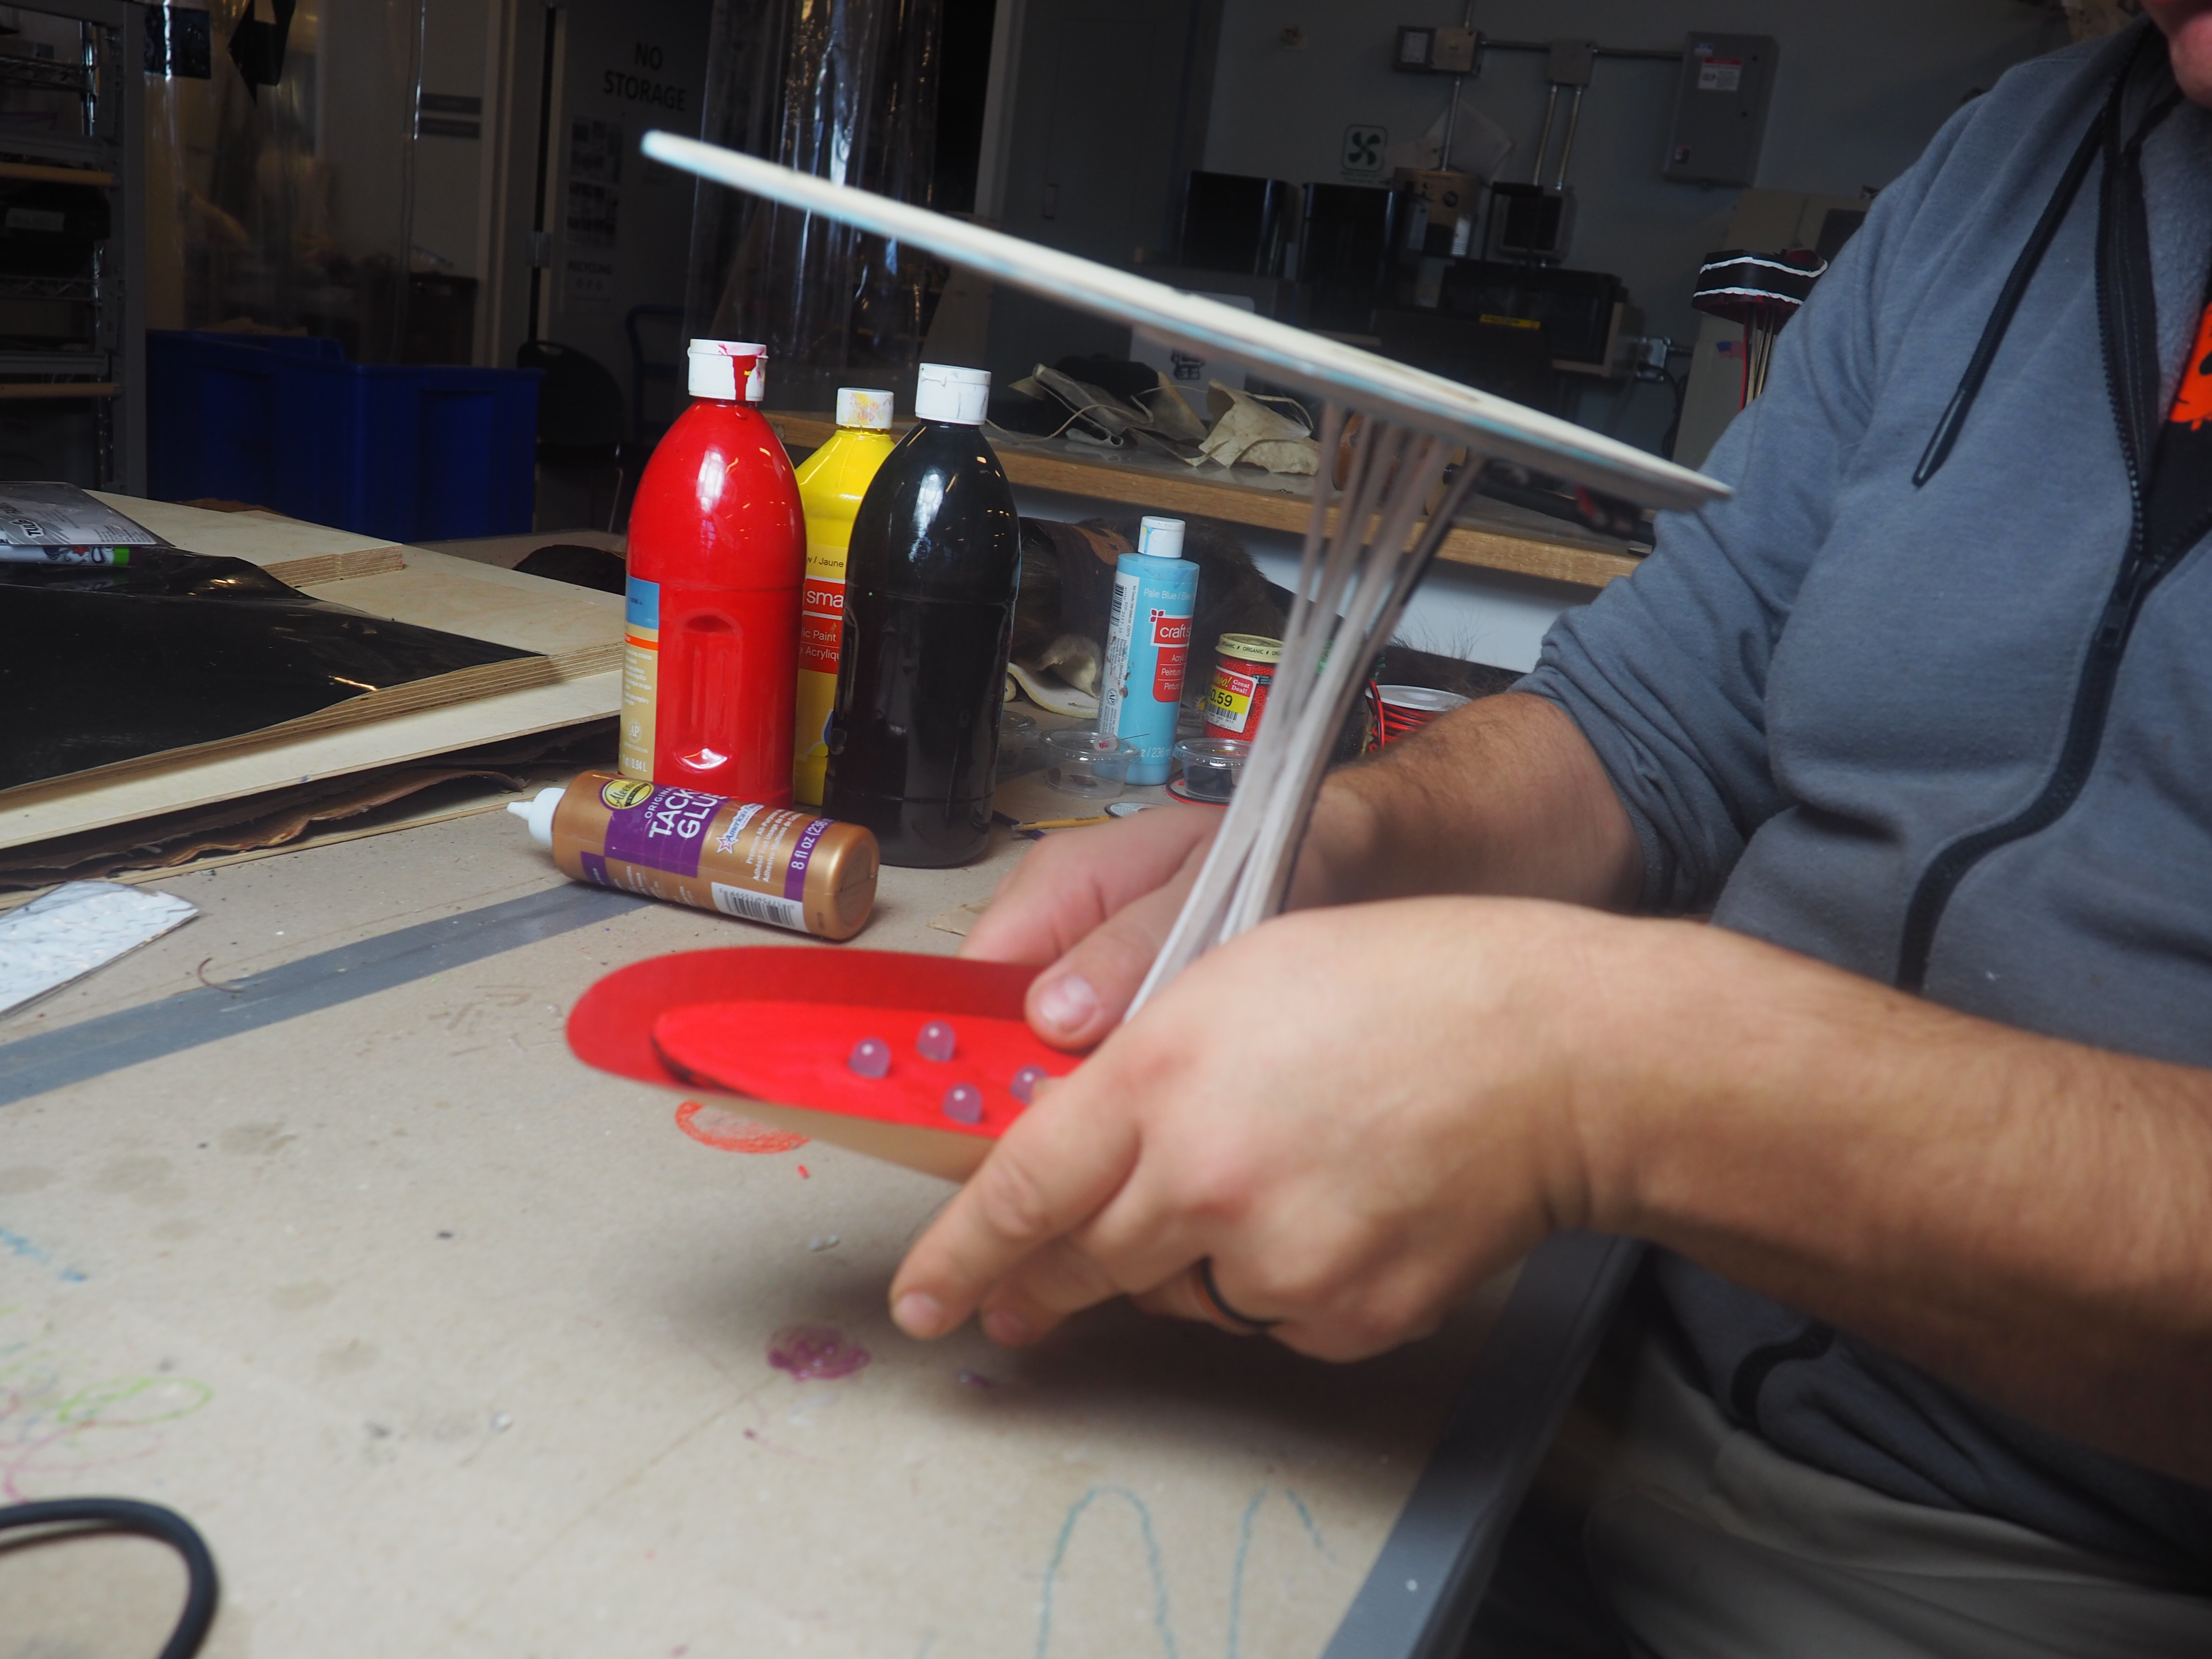
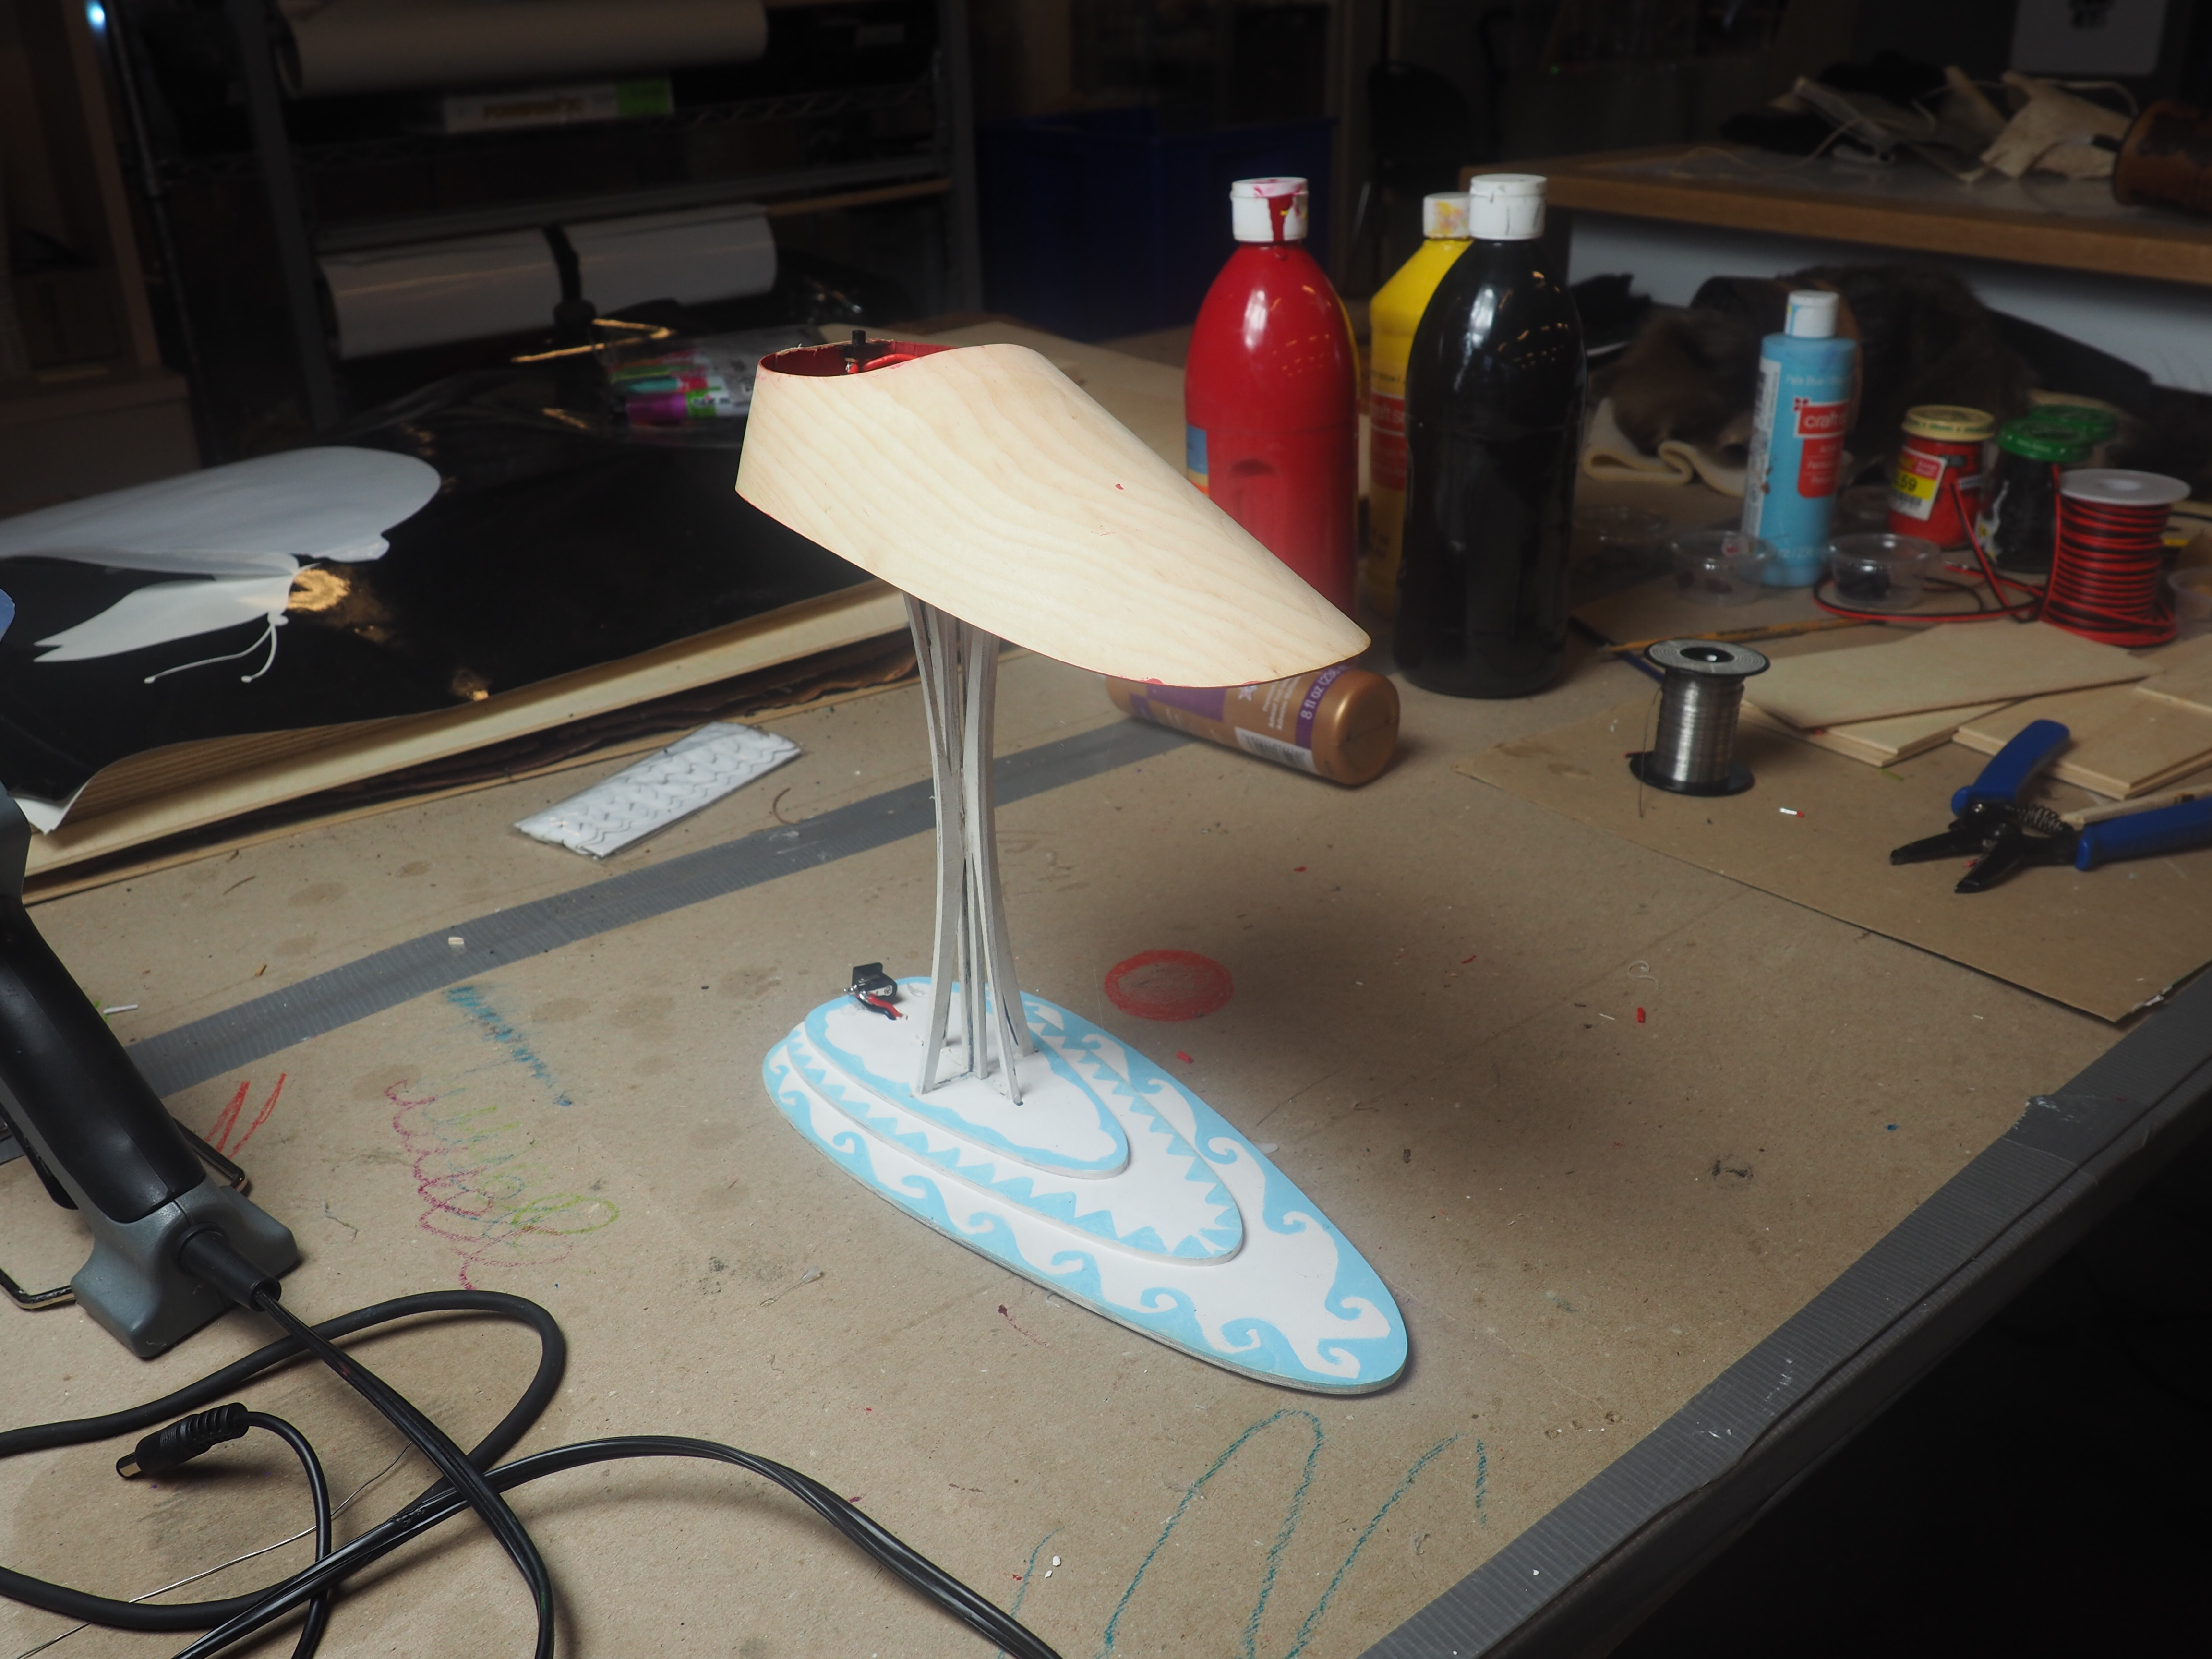
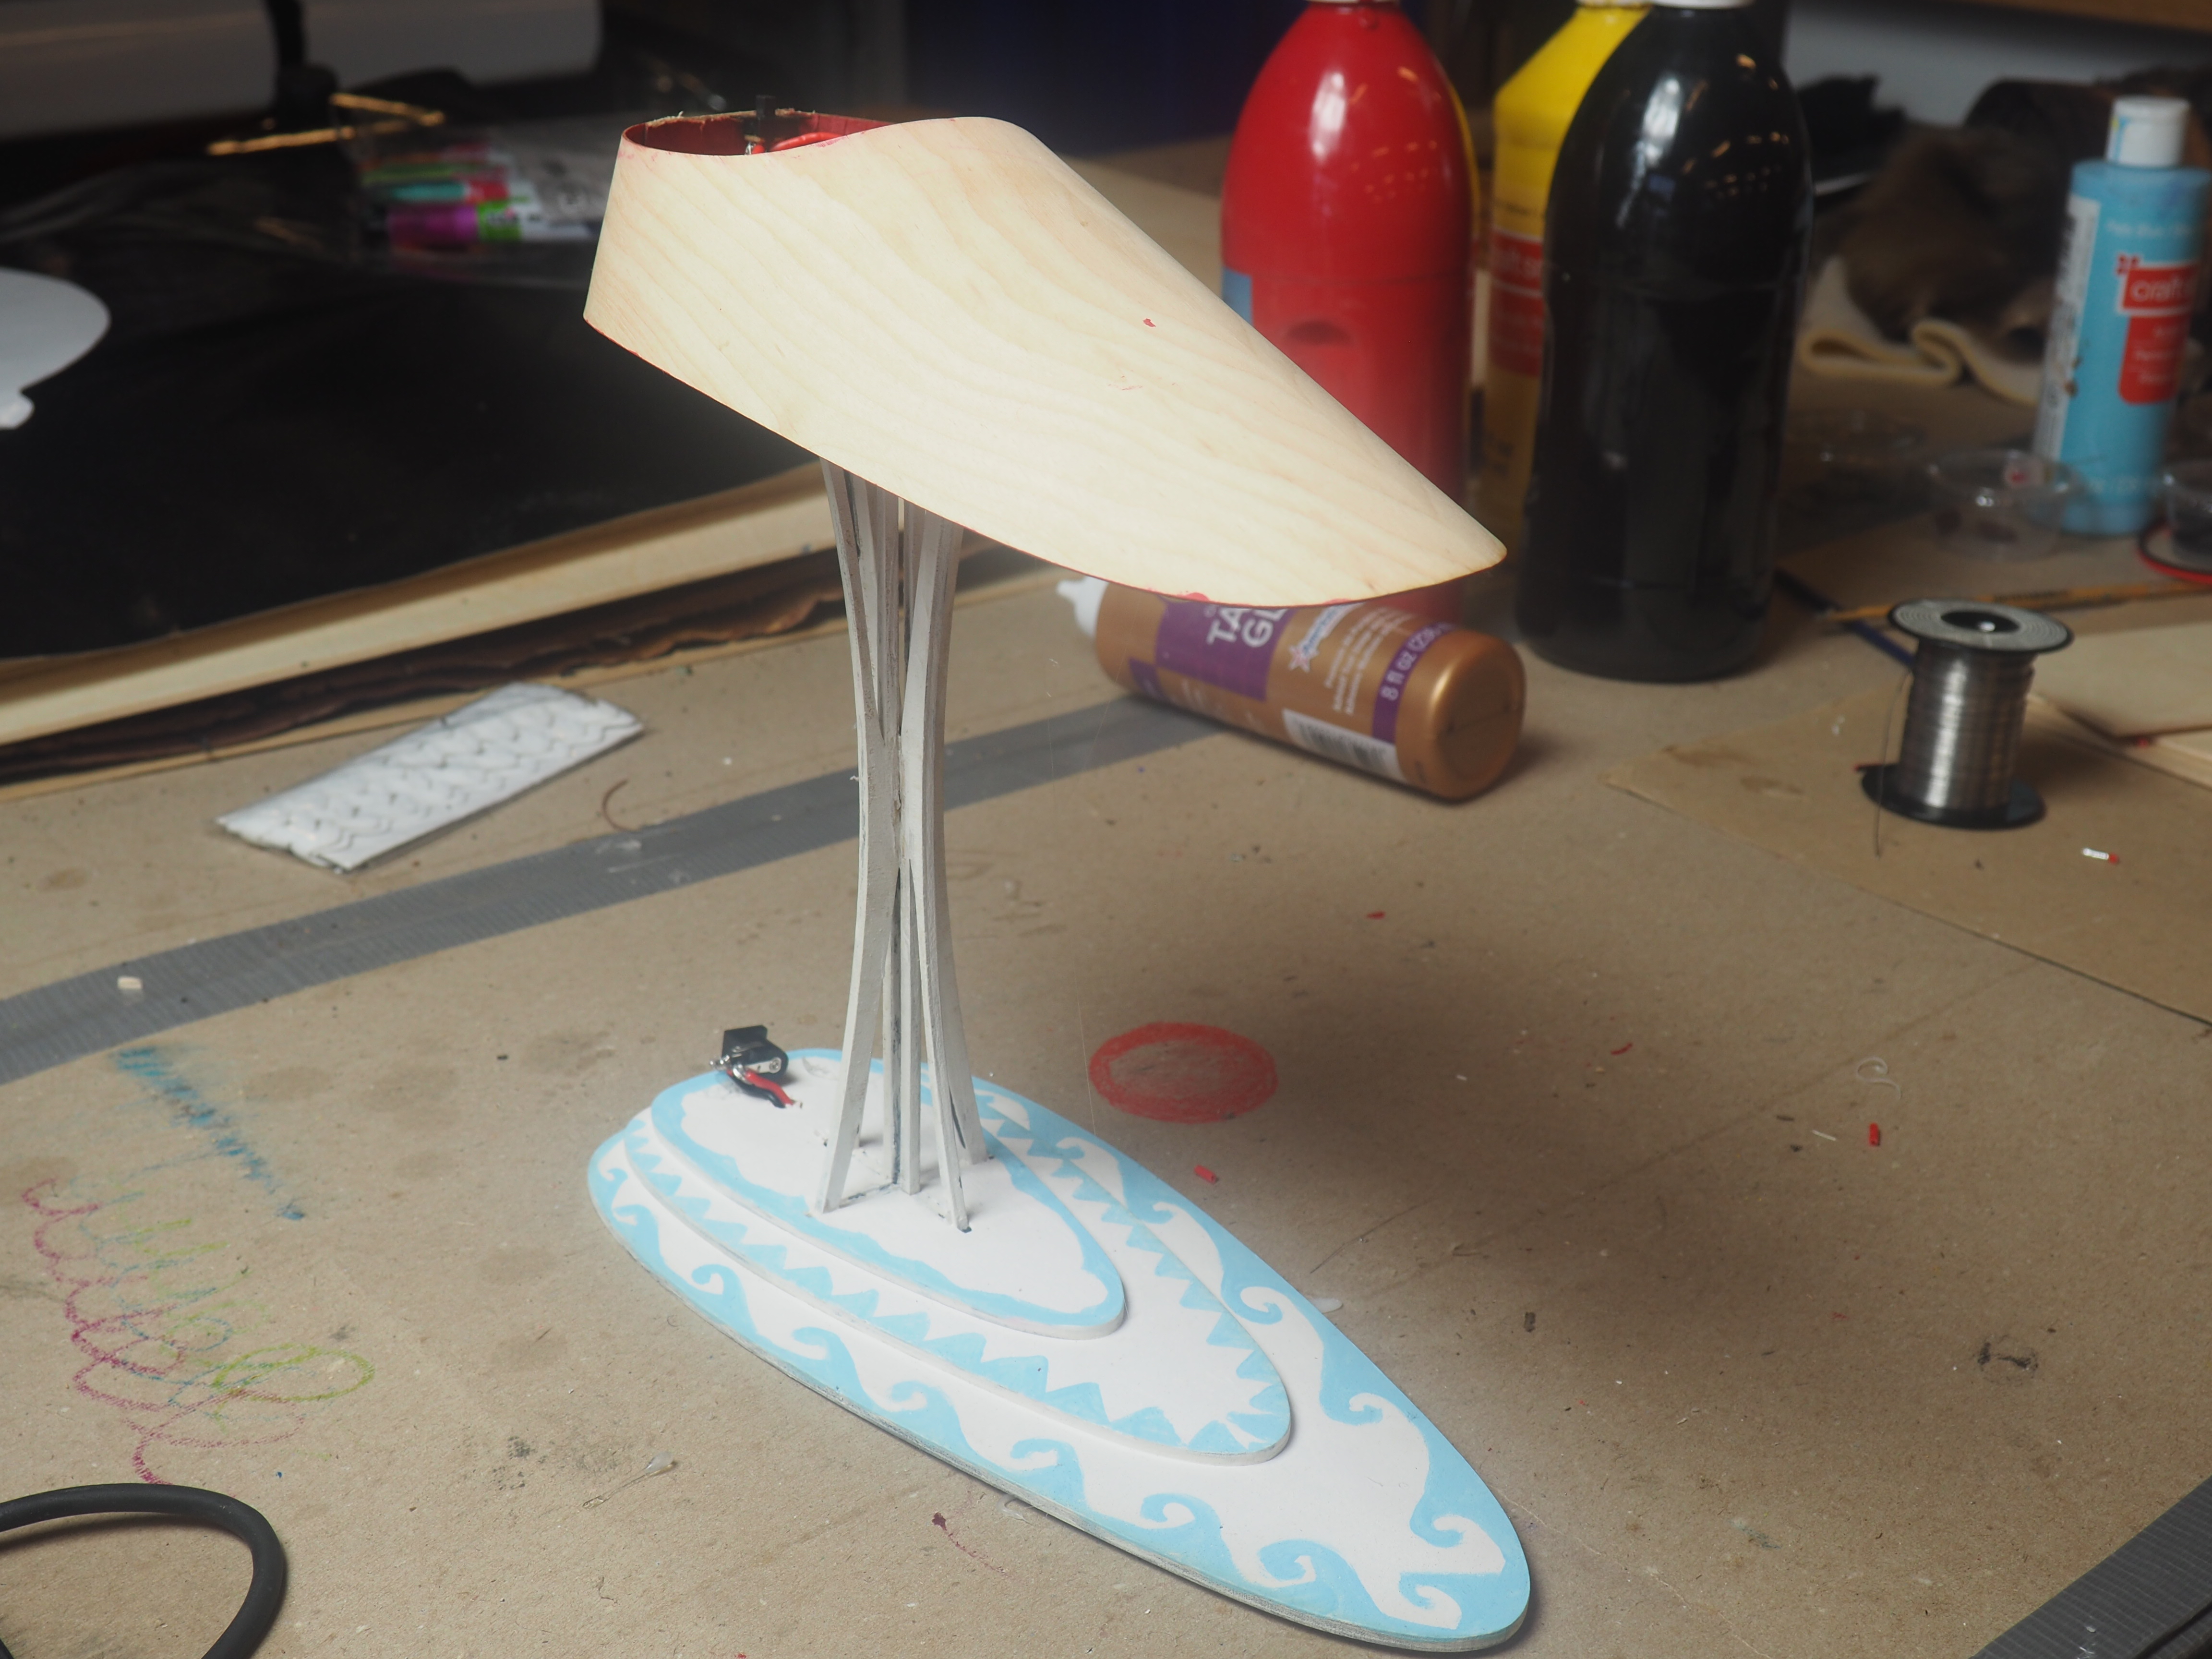
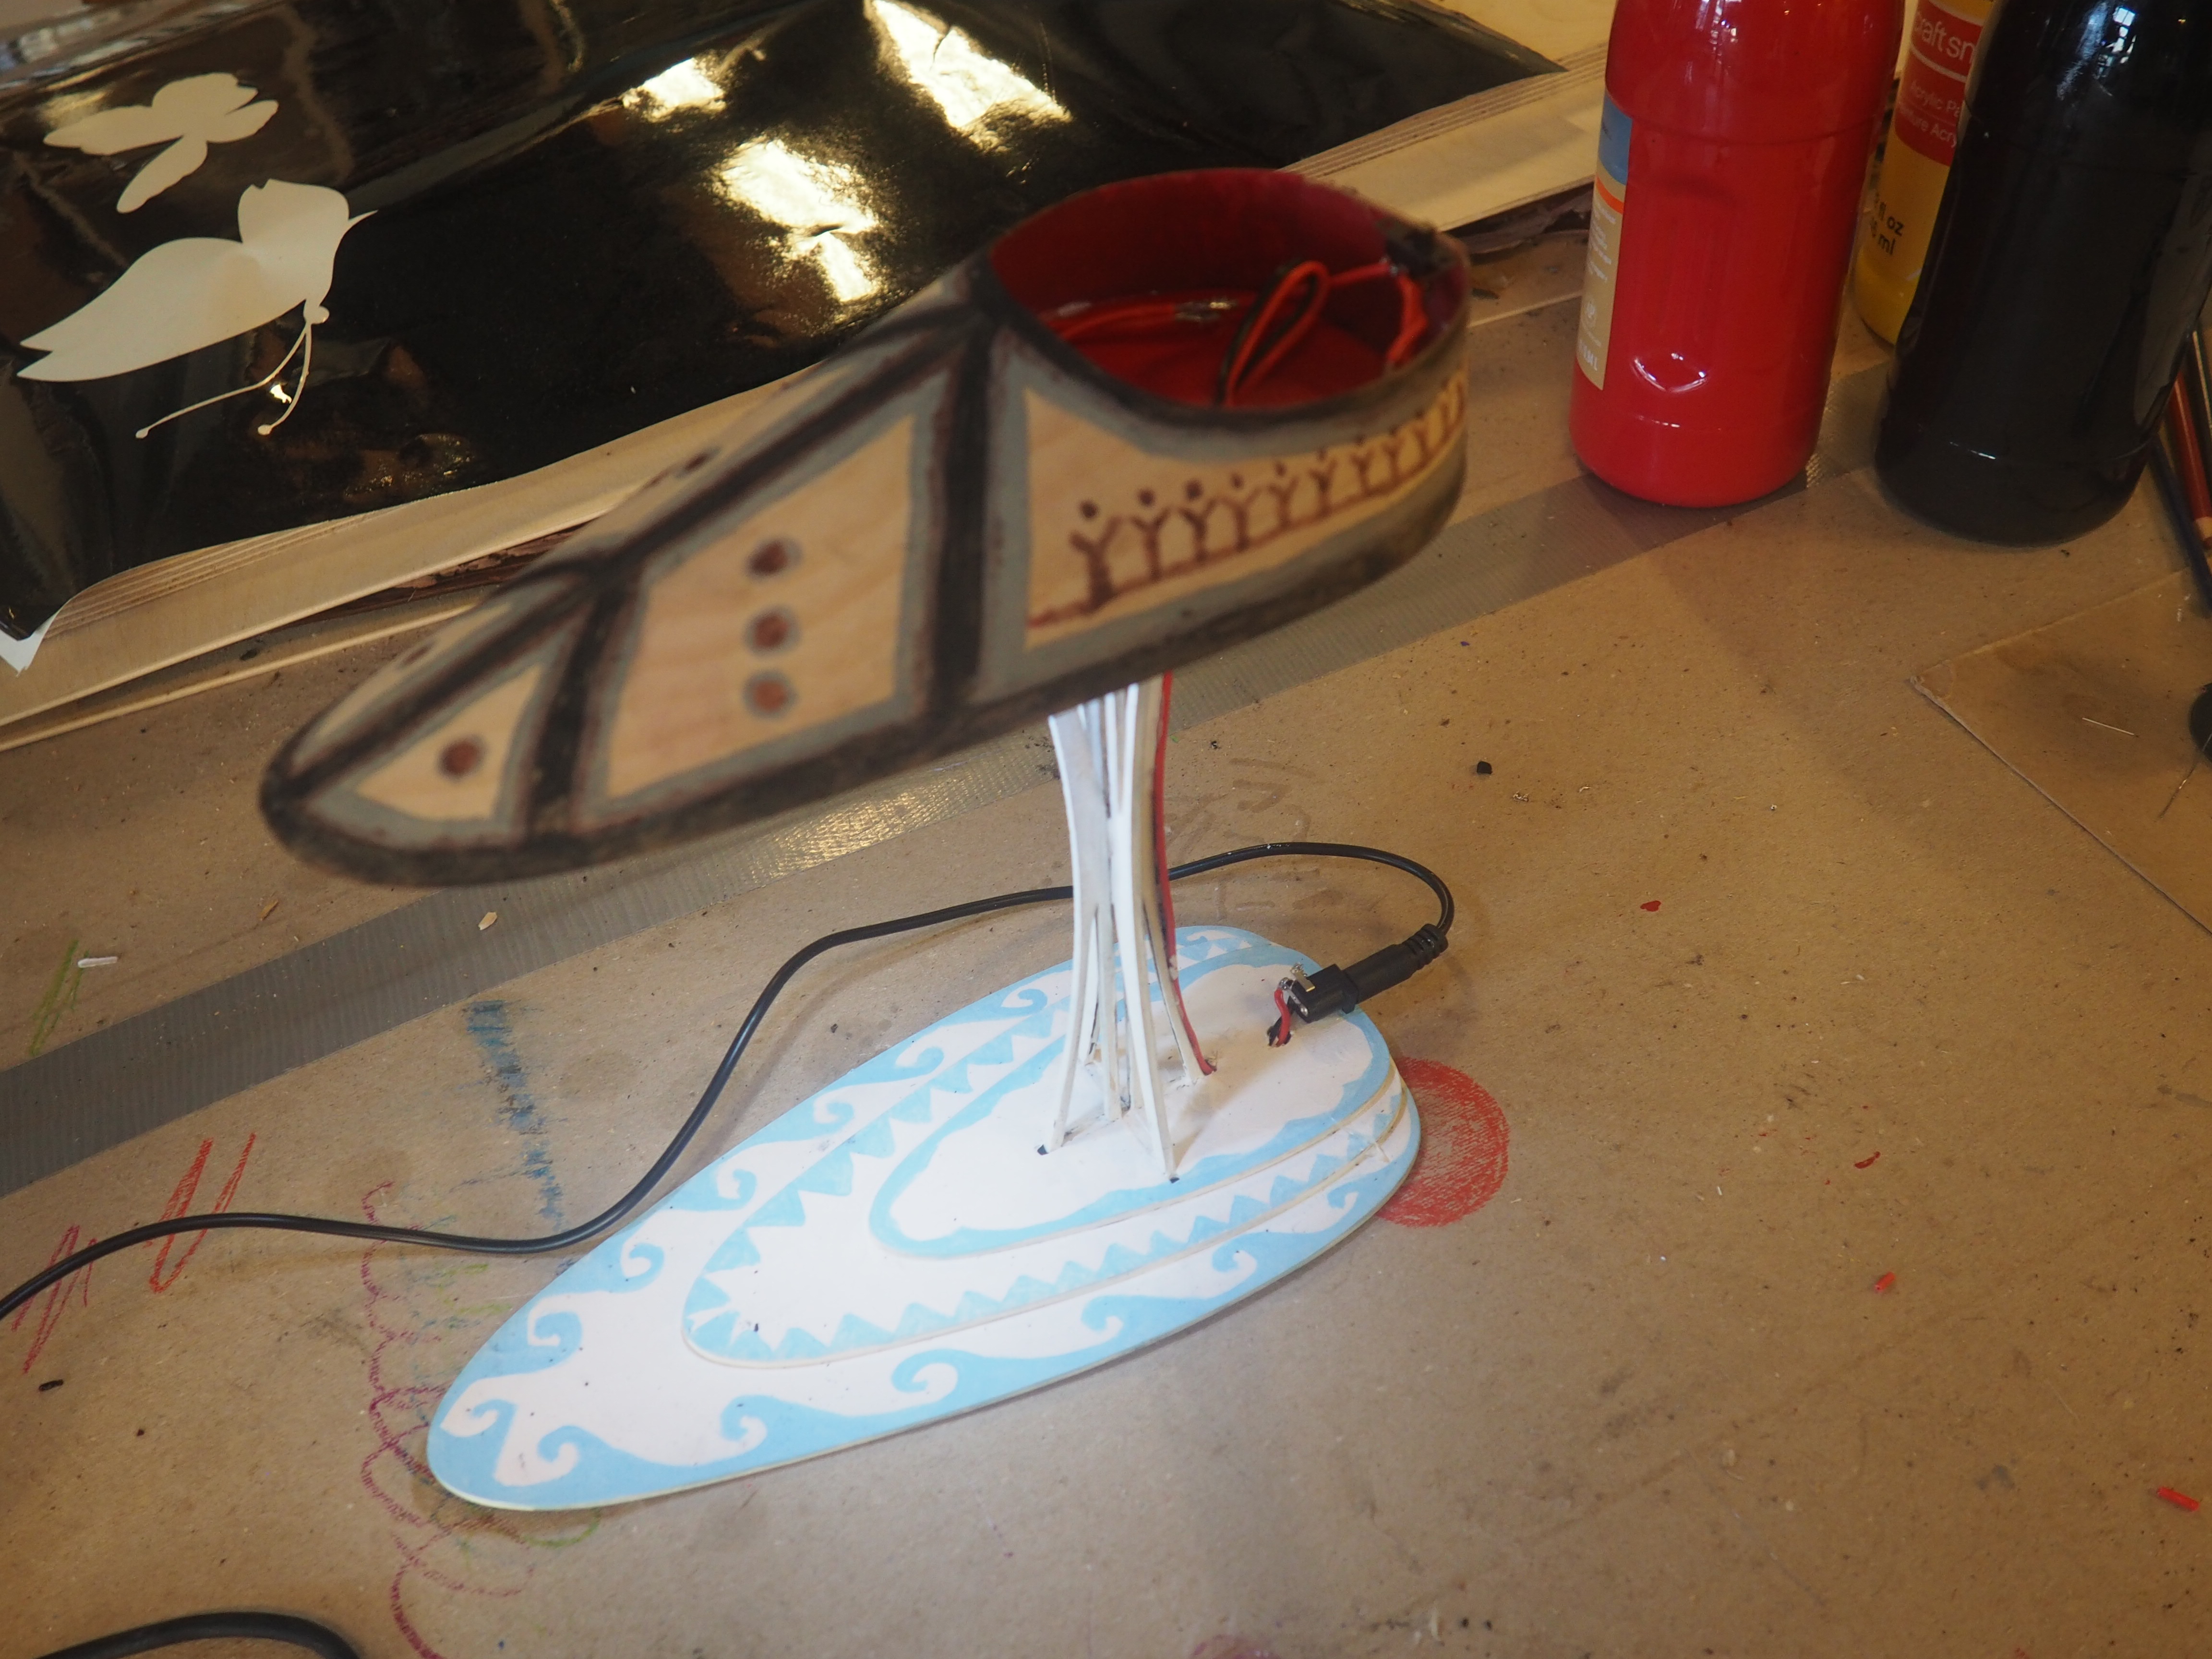
Using the other parts that have been laser cut you will begin to construct the base of the lamp. This set if instructions you will glue and paint the base of the stand. you will also be putting a set of wirse in to help hide them. You will need: laser cut lamp parts Glue ( Tacky glue works good) Paint Paint brushes 2 Wires measuring 14 inches

  • Glue the two stand pieces together, you only need to glue the inside slot of each part. They then slide together to form a t.


  • Glue the small base to the medium base push both wires through the hole at the t and through the channel in the medium board and back up through the hole. Pull about one to two inches of wire though .


  • Glue the bottom of the medium base. and stick it to the large base. Make sure all t’s align.


  • Glue the bottom of the stand, it is the base that is thicker, and slide it into the t slot so that the bottom is flush with the bottom plate.


  • Paint the base and the stand.


Wiring and Soldering the LED Circuit! Part 1

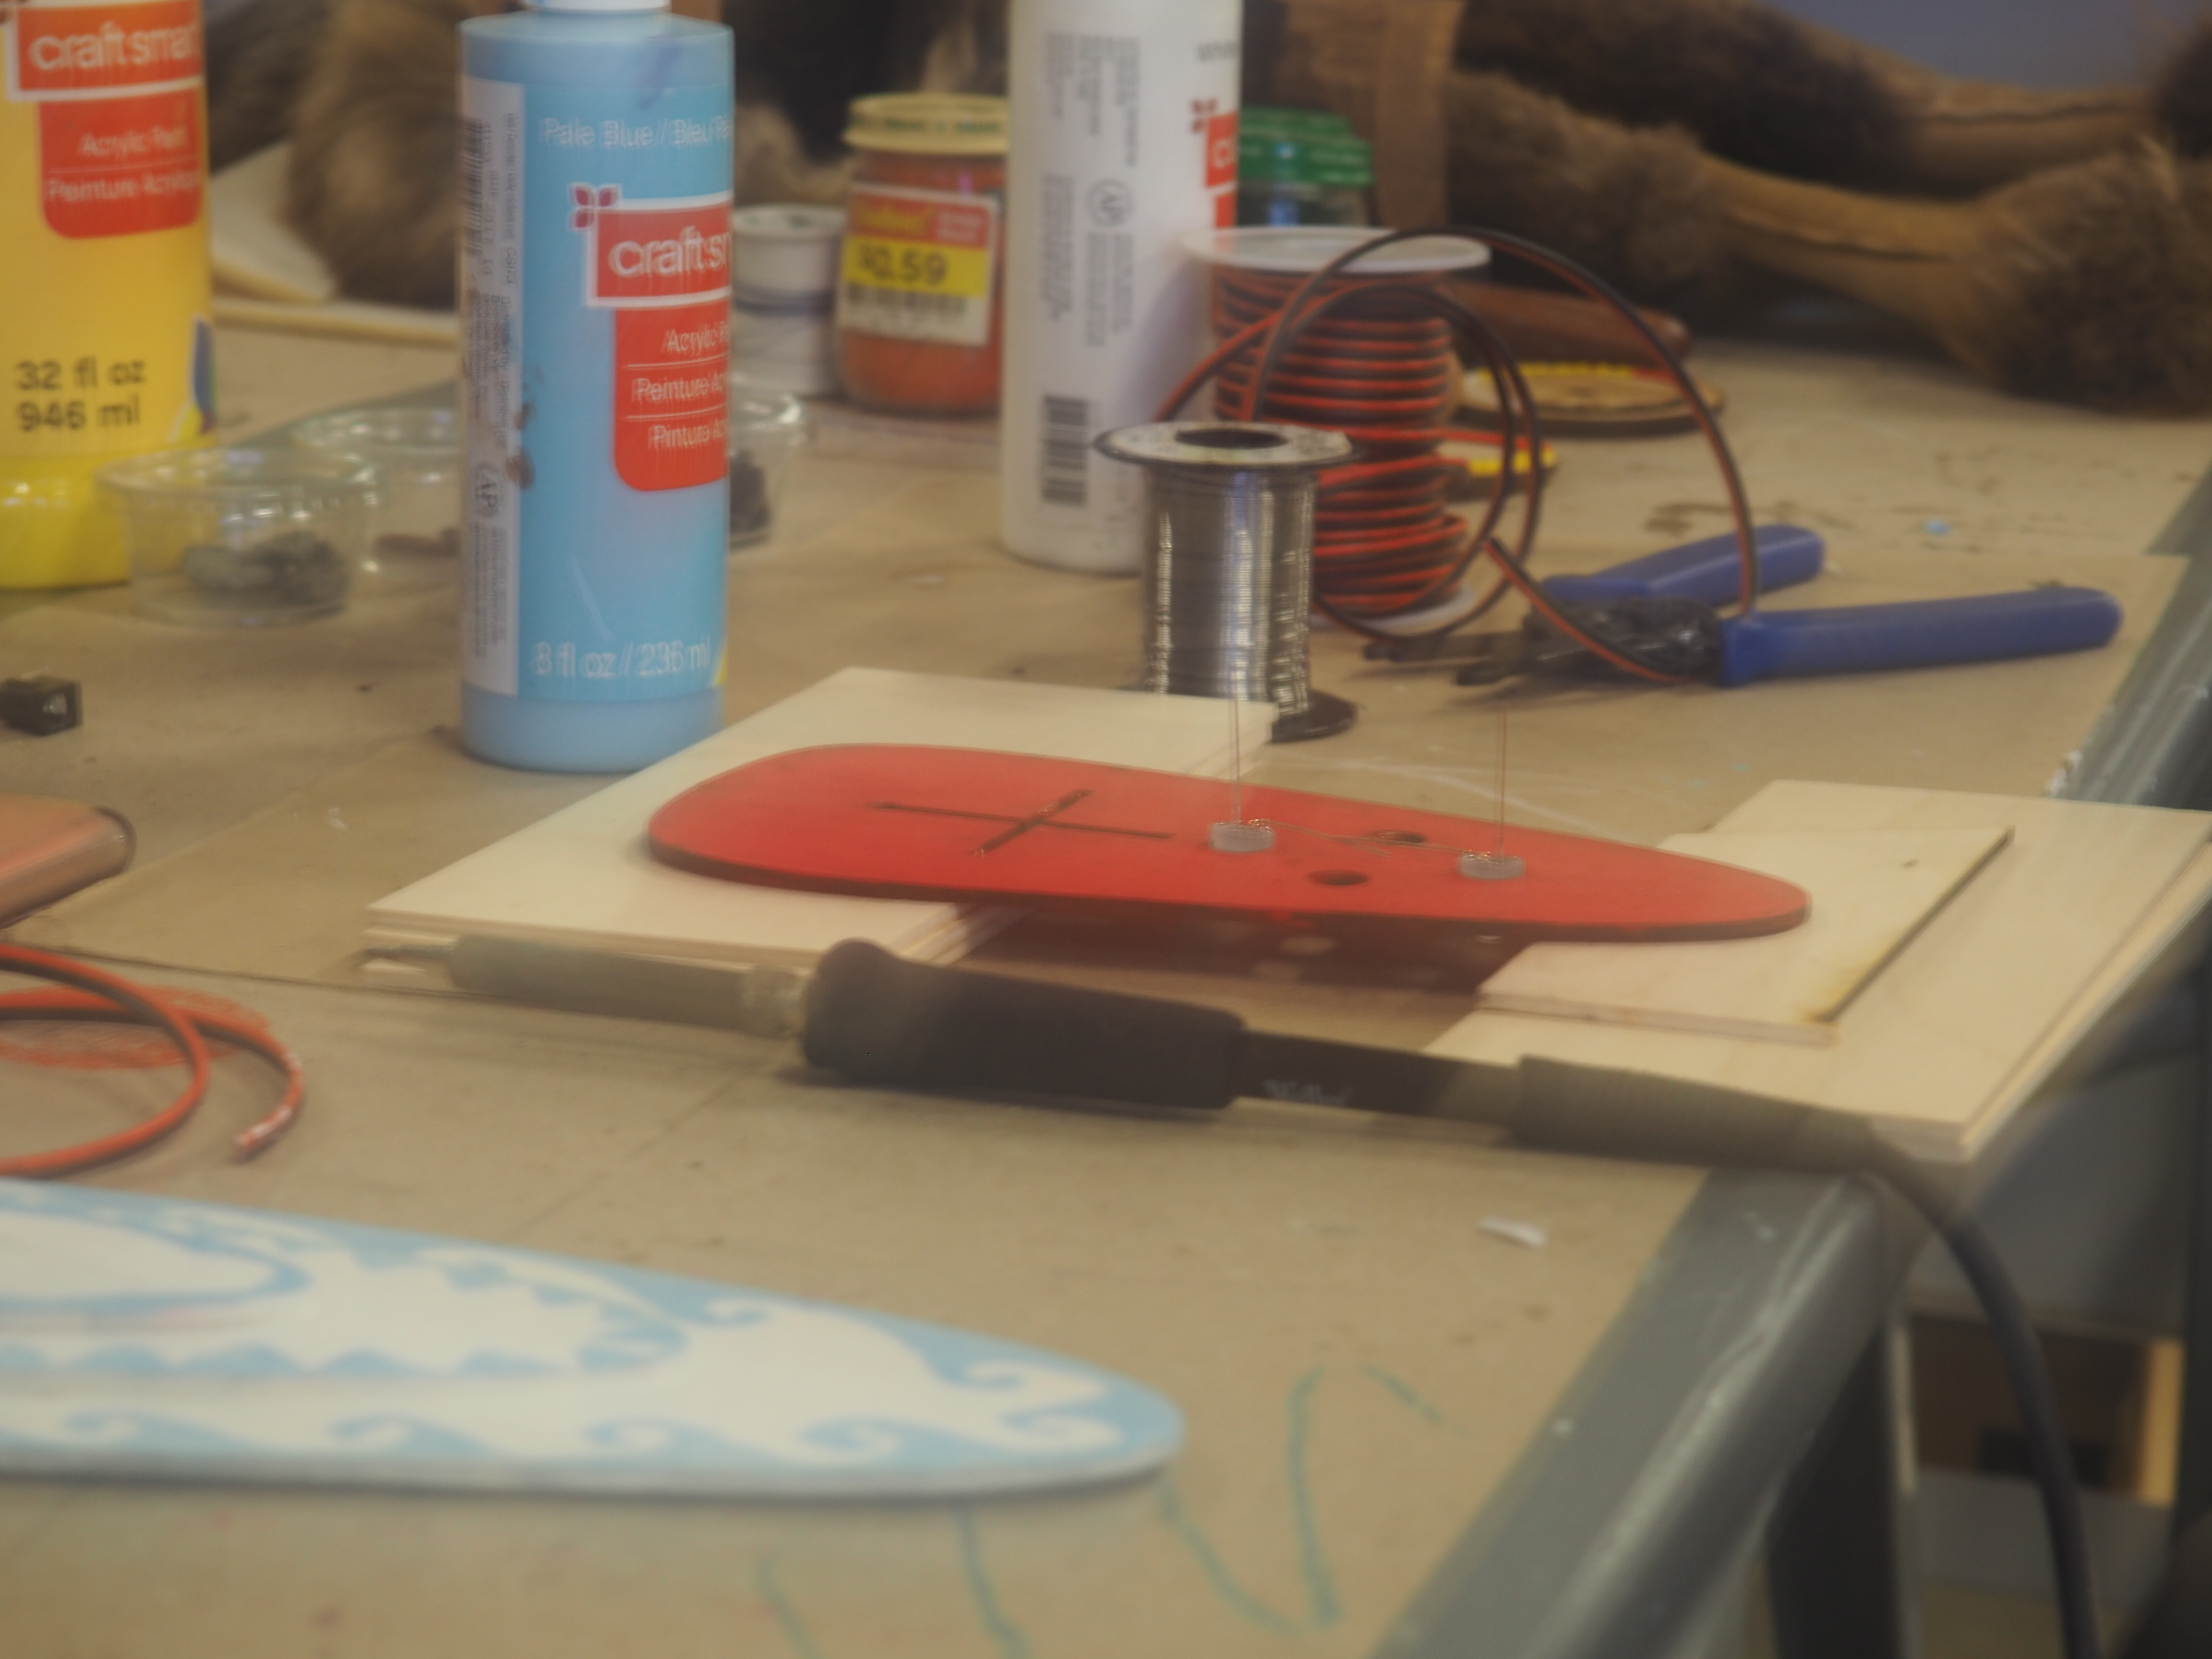
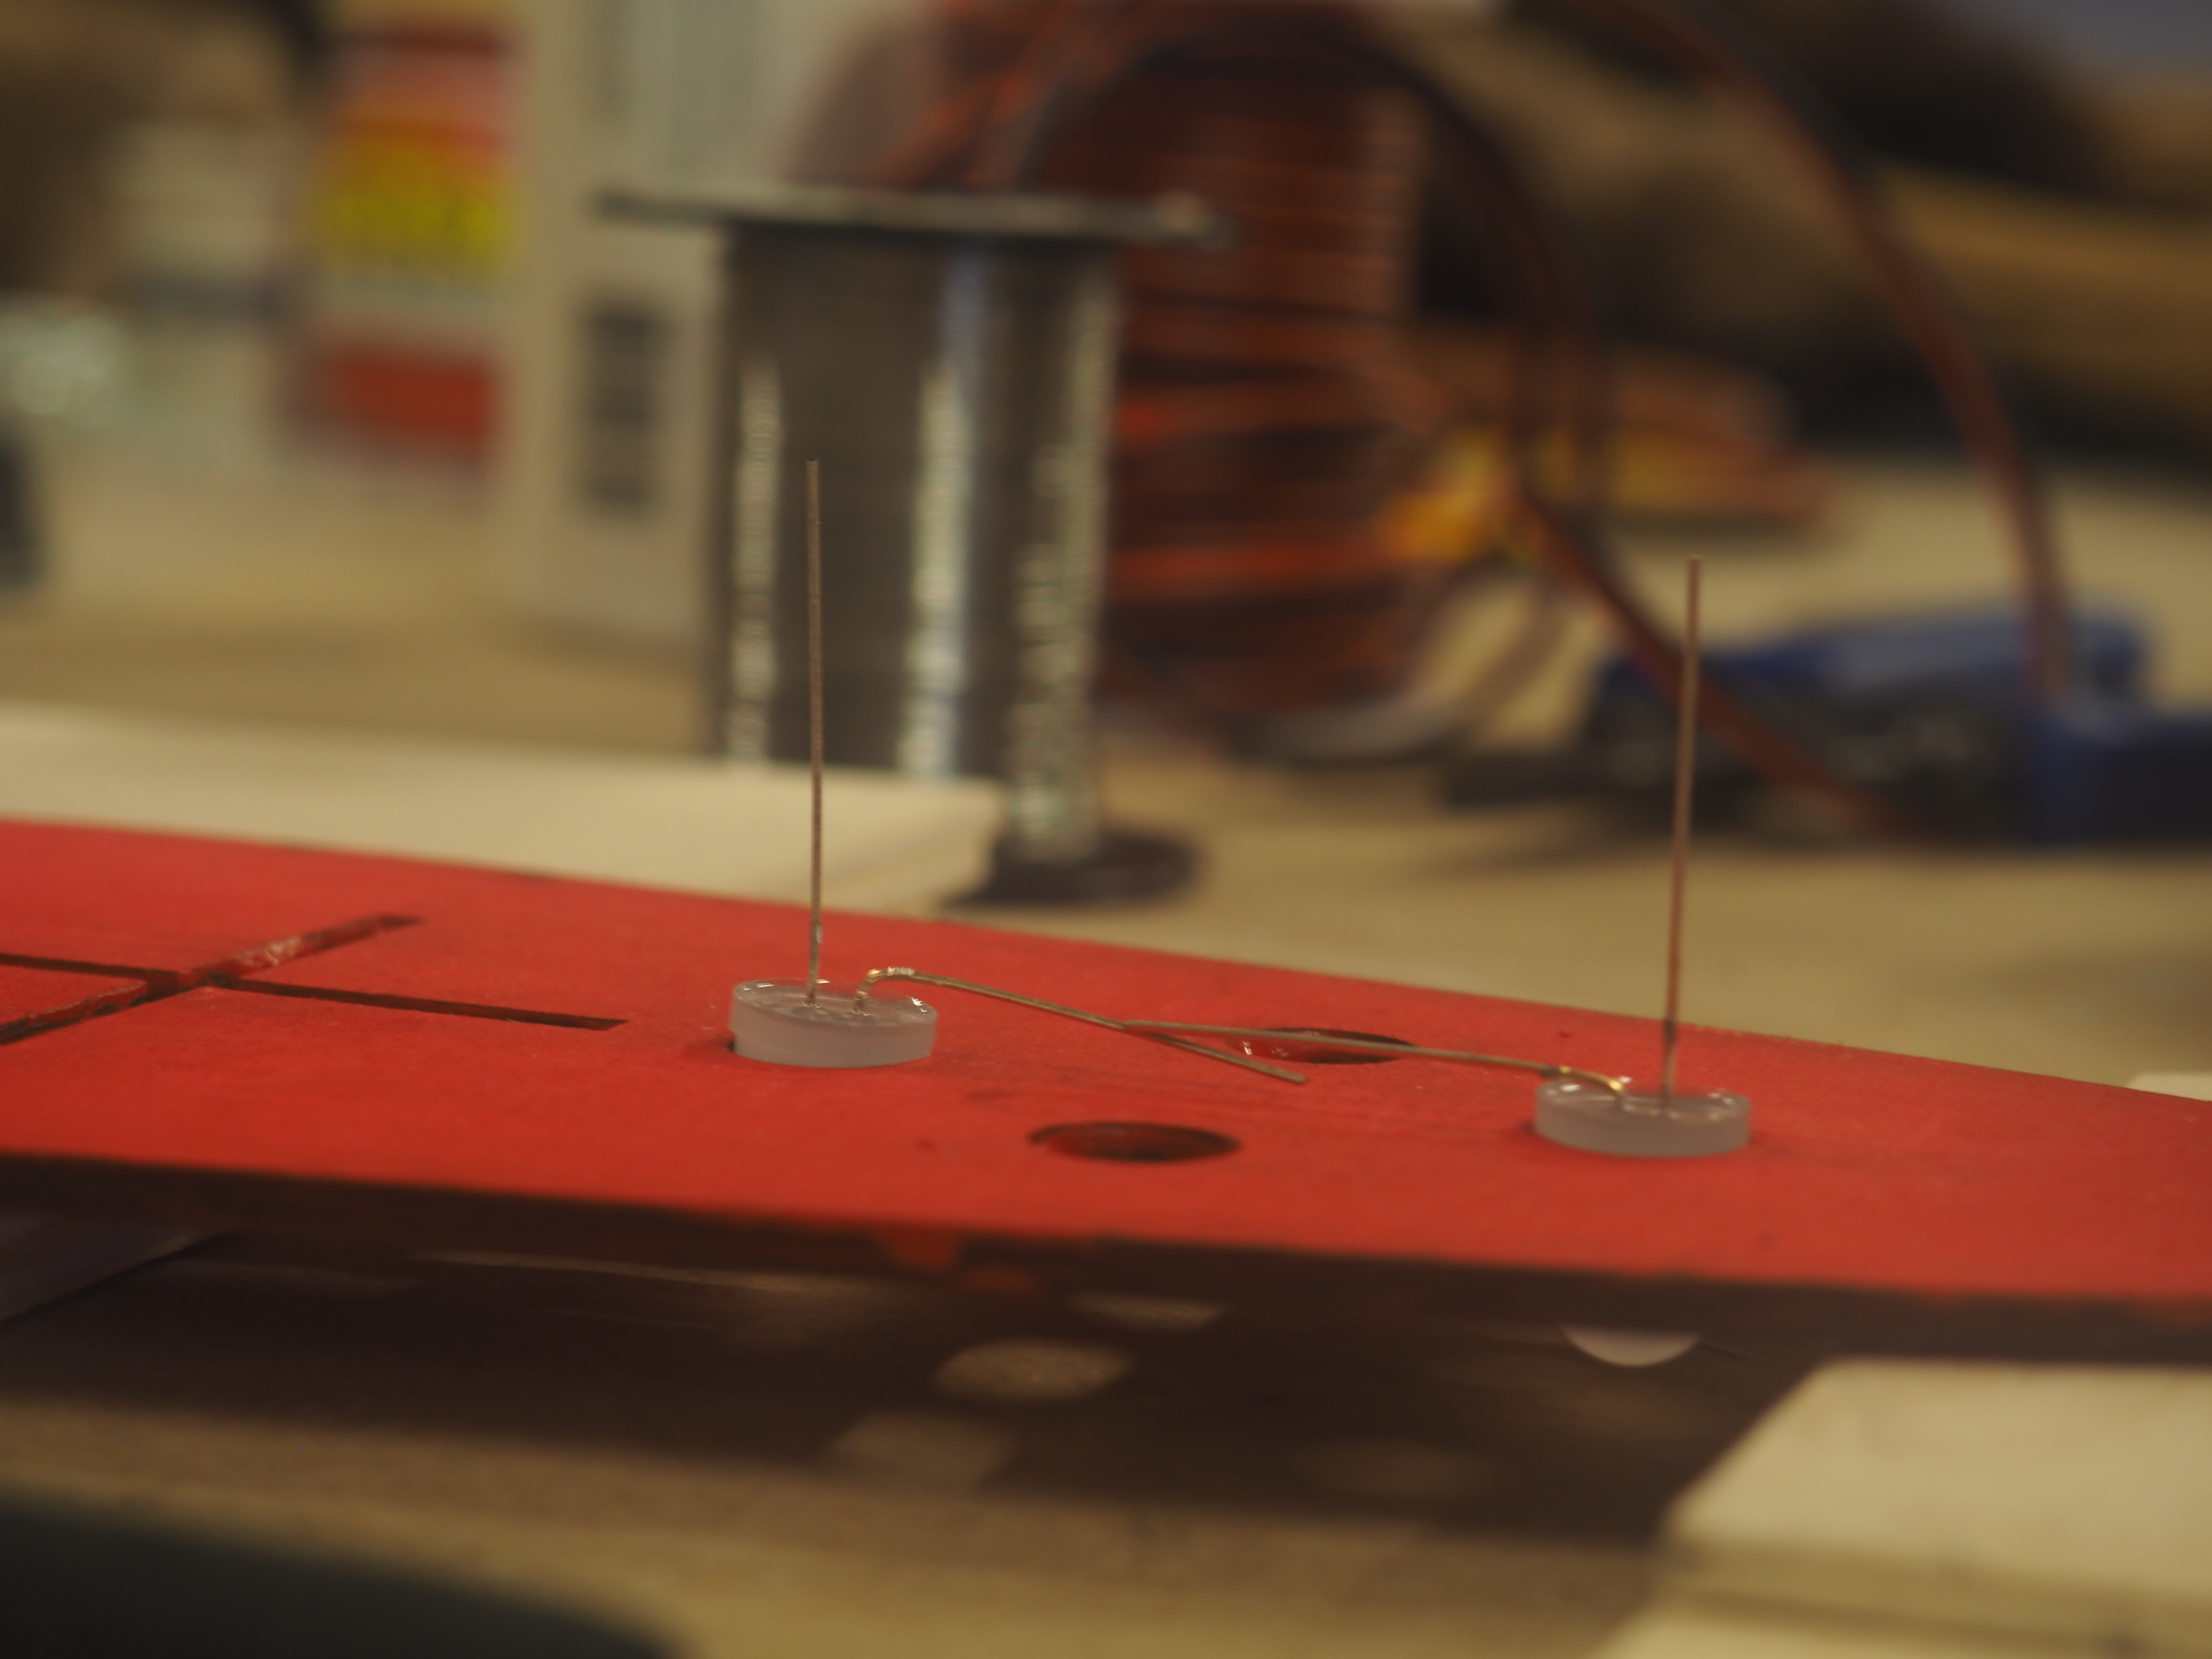
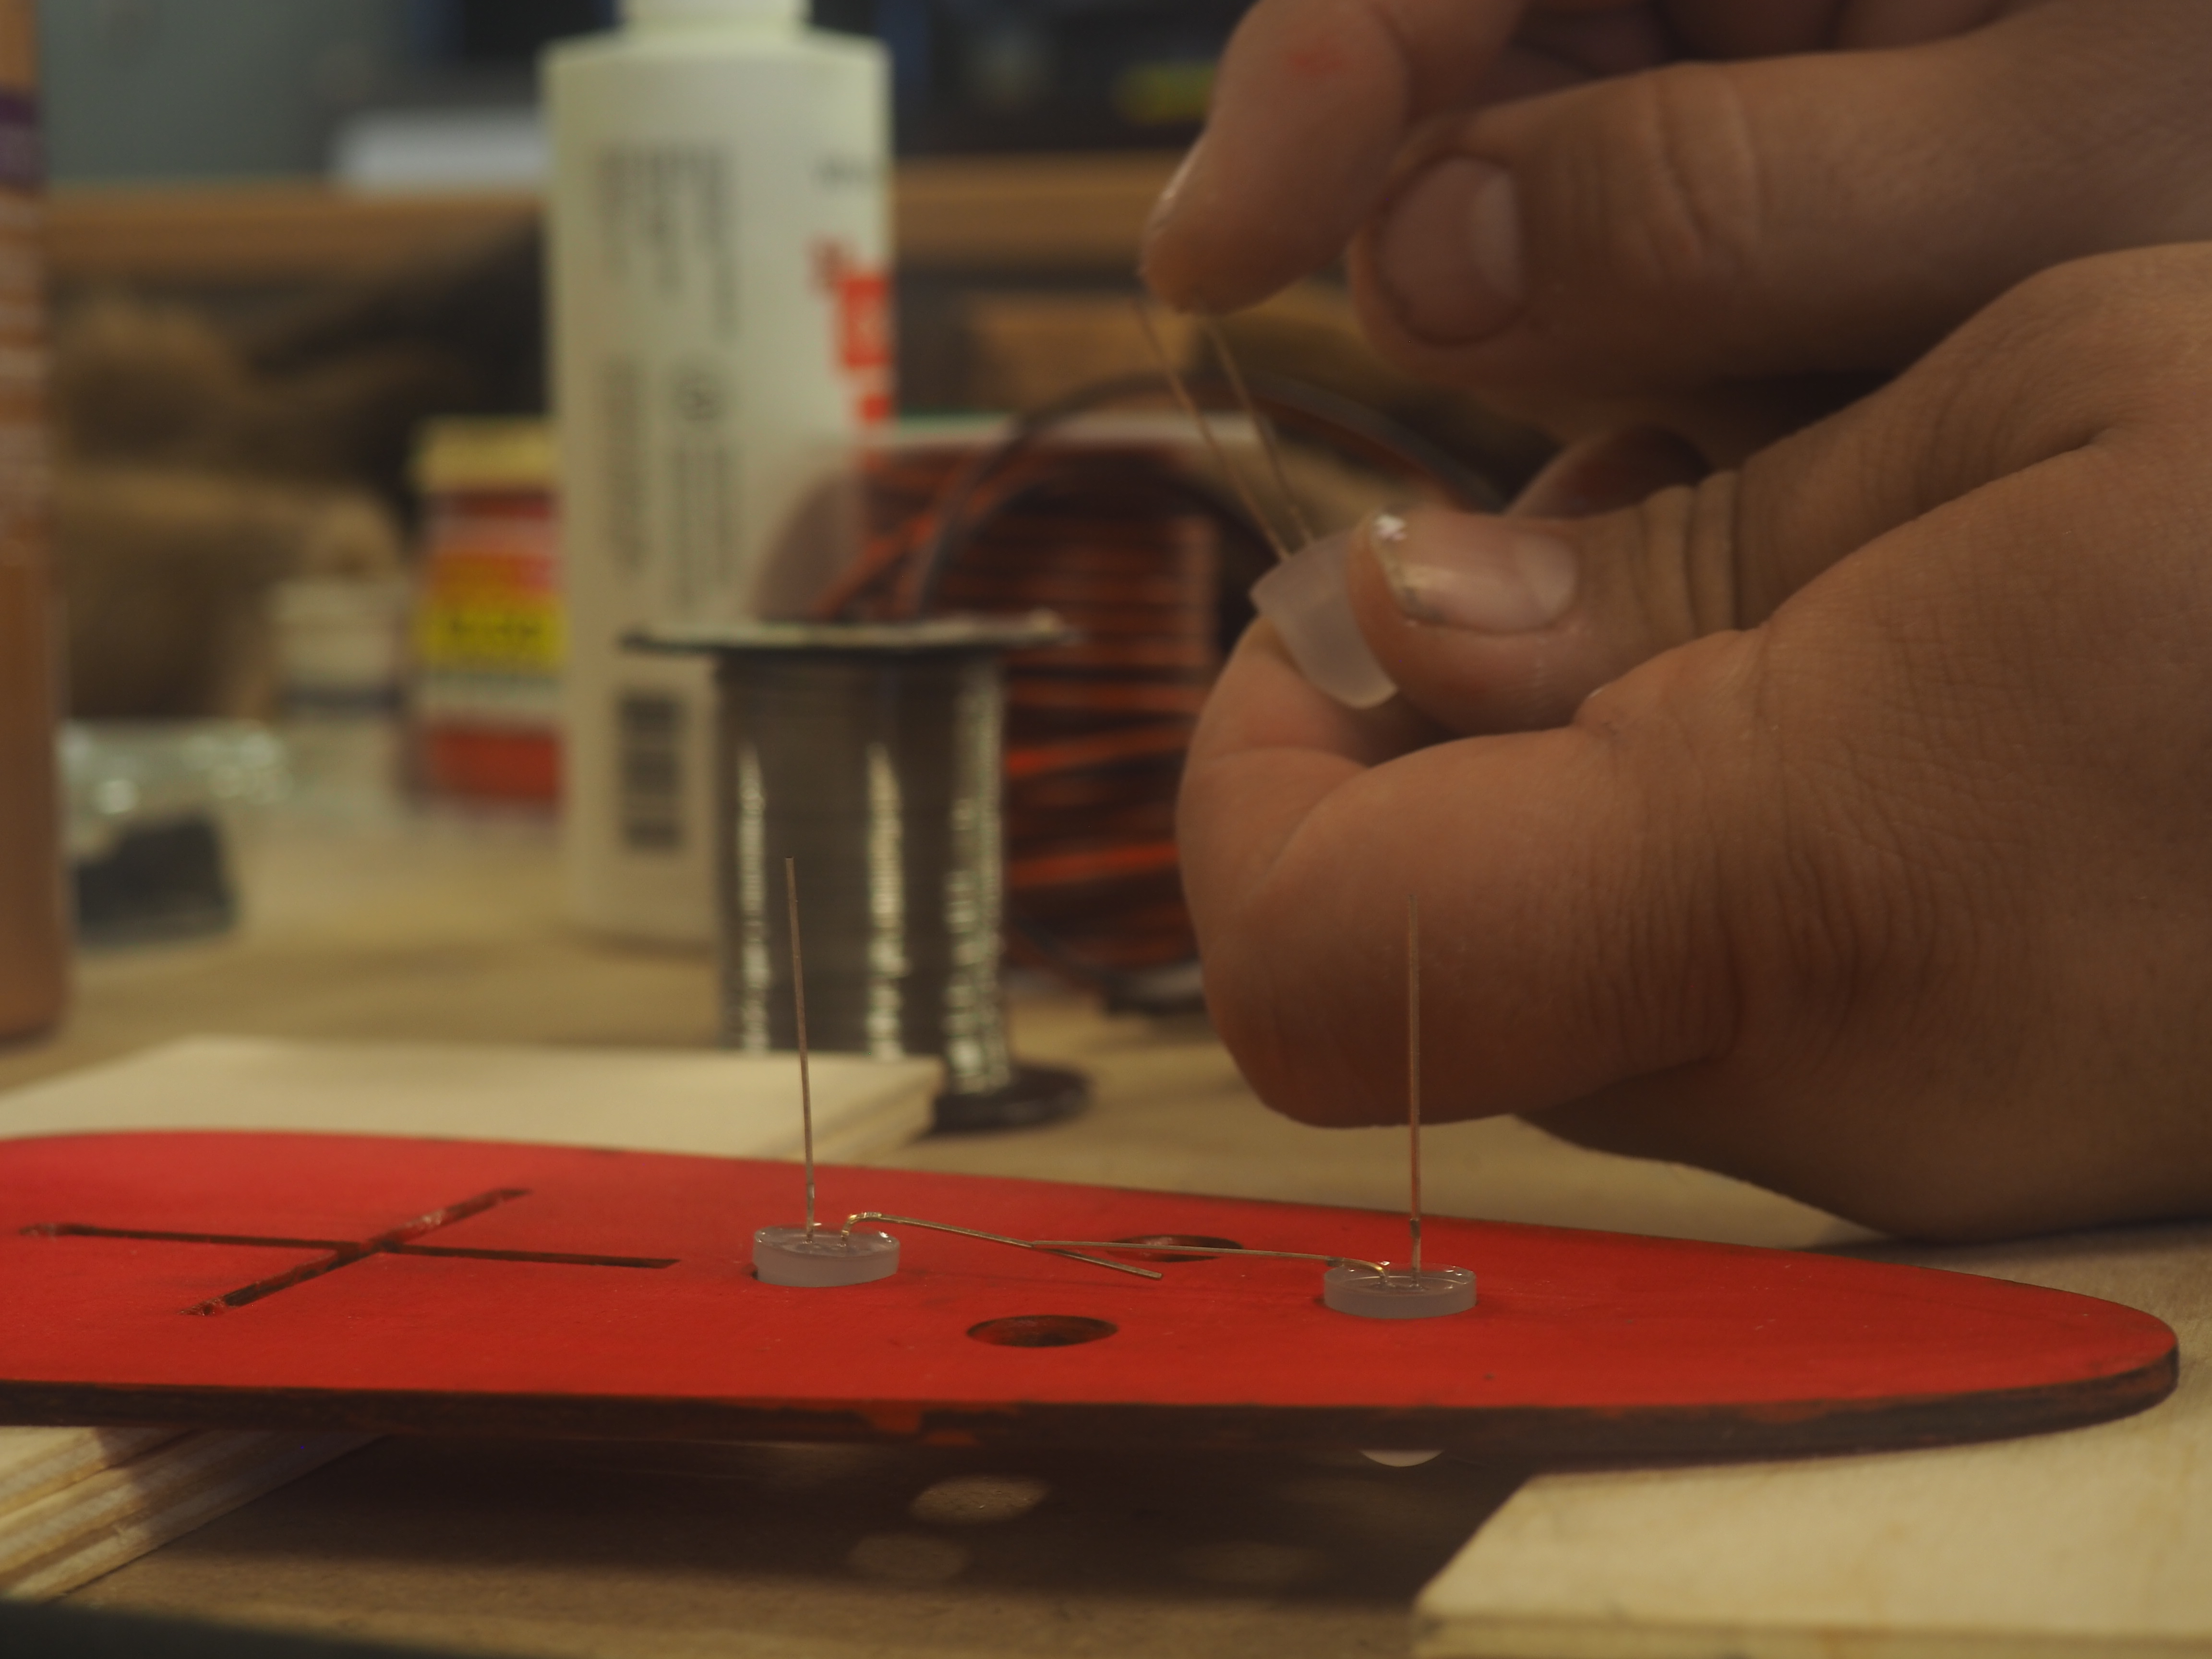
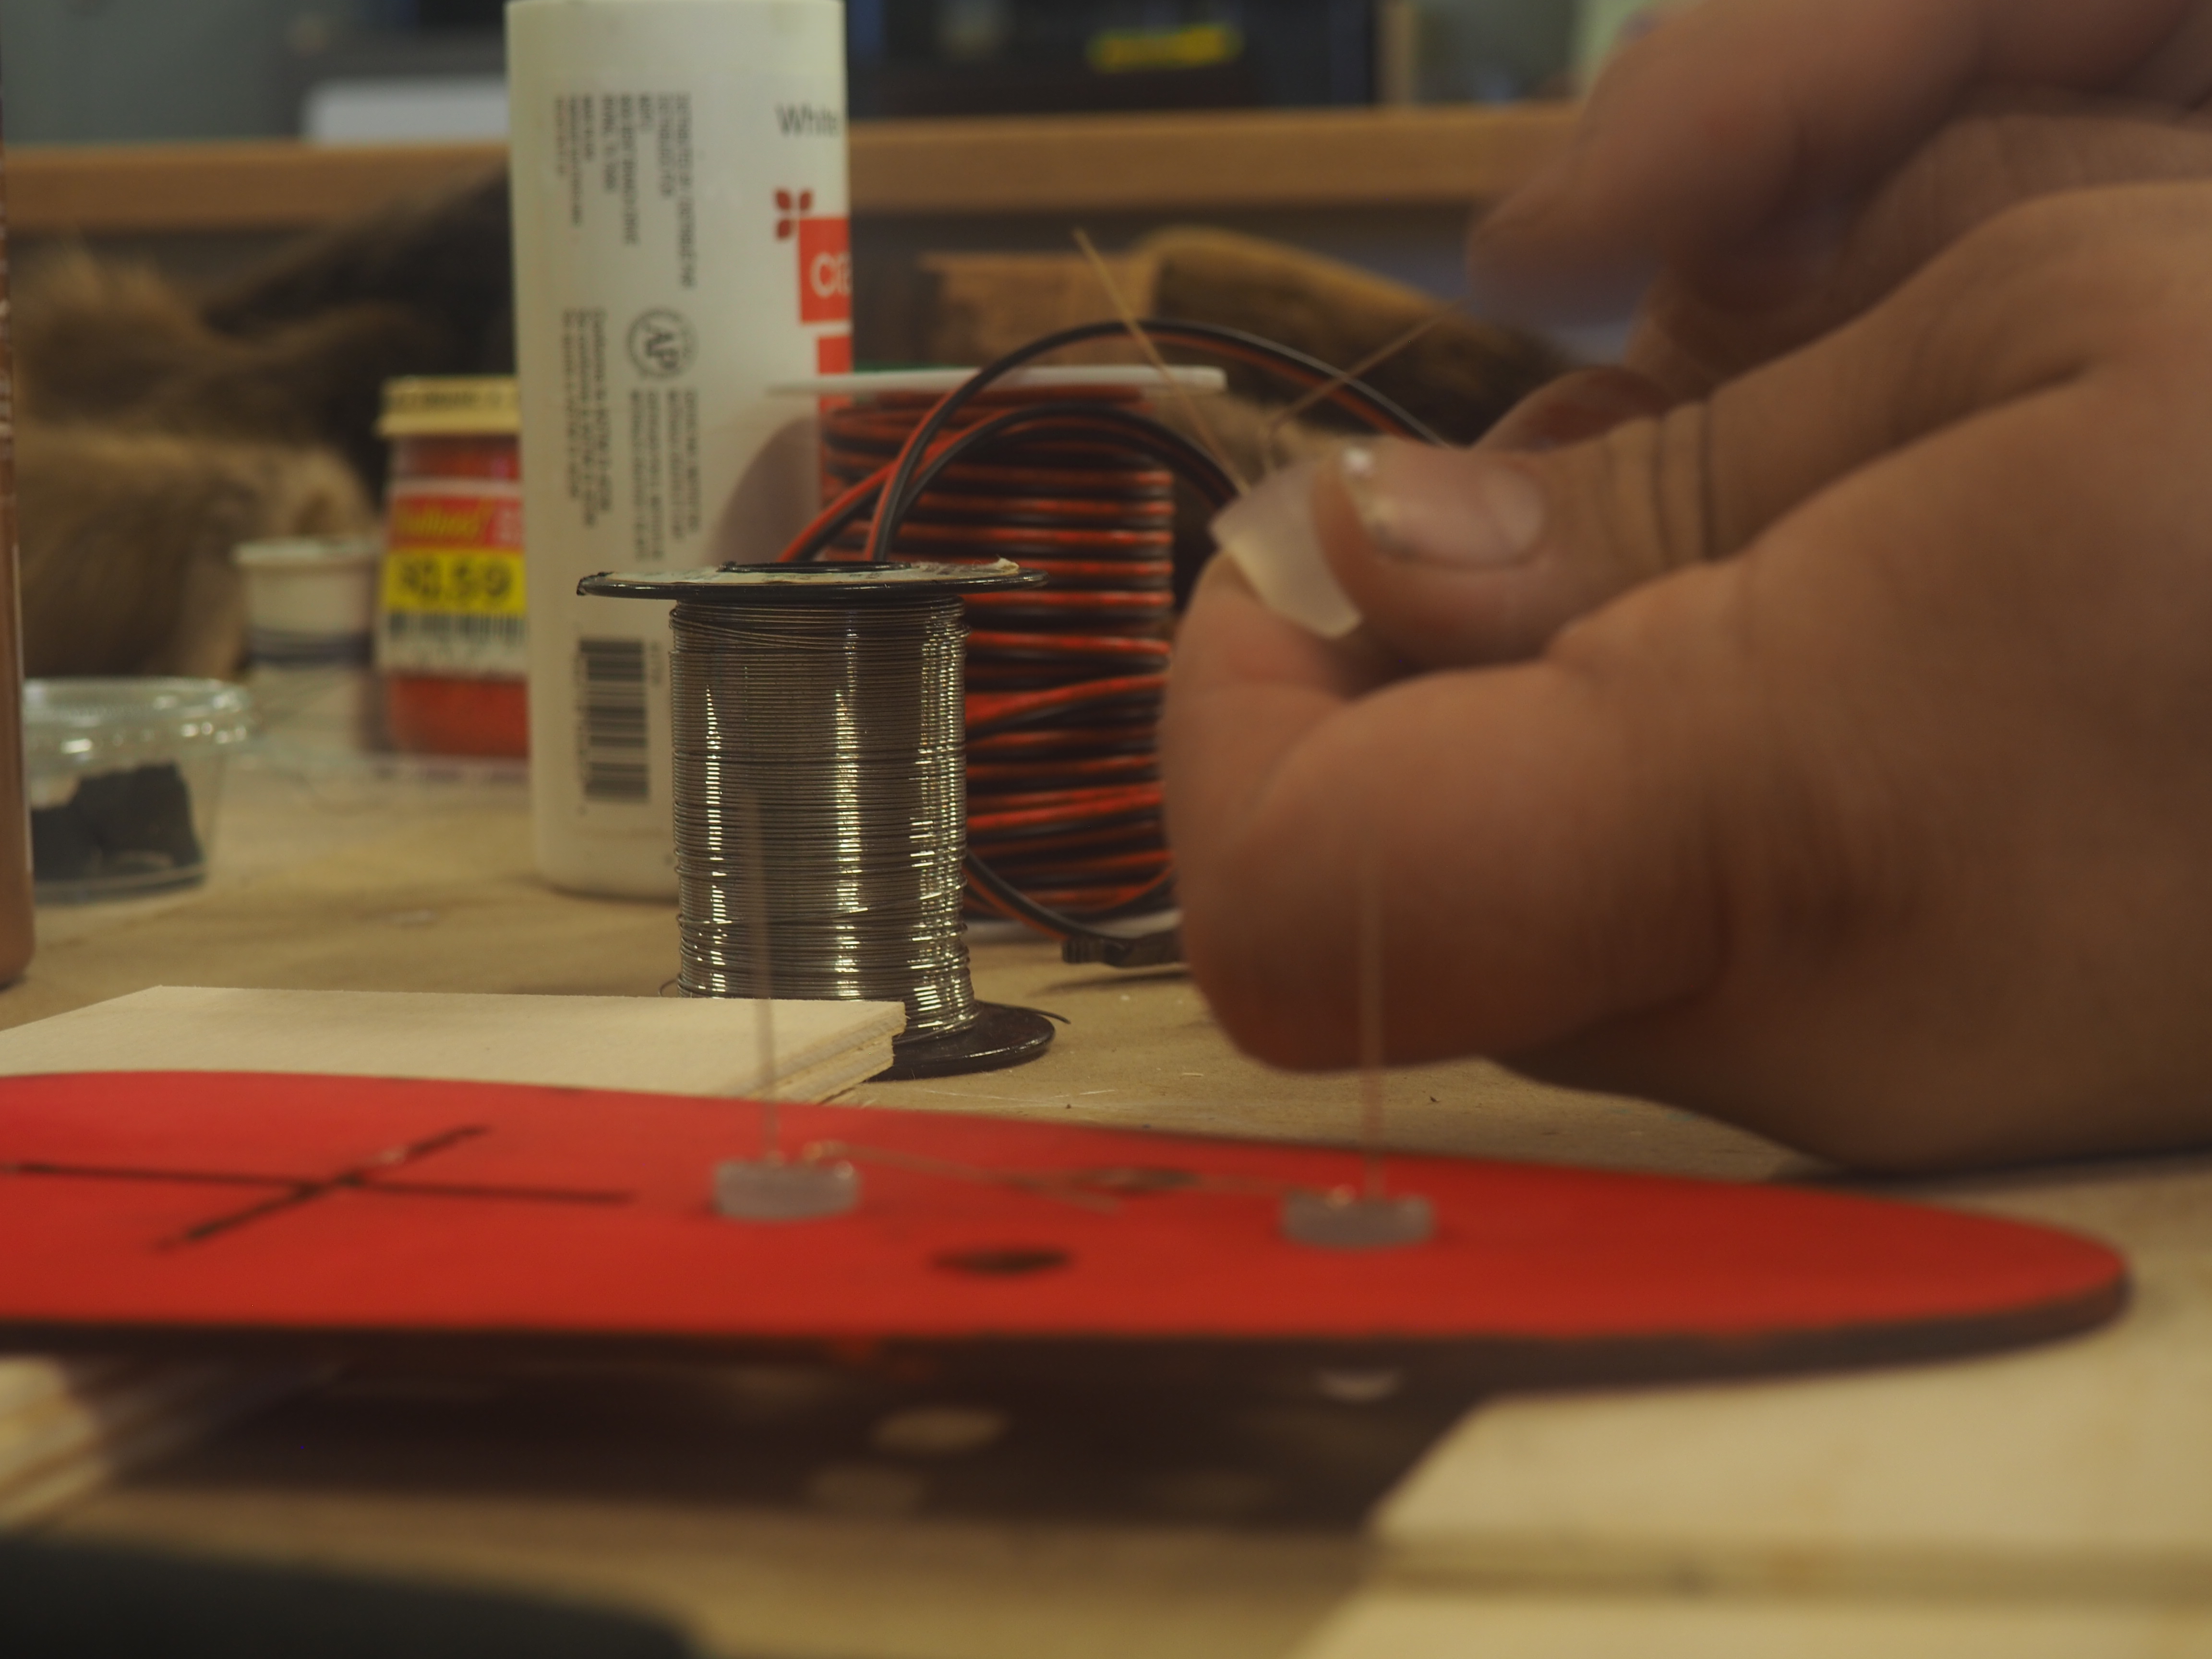
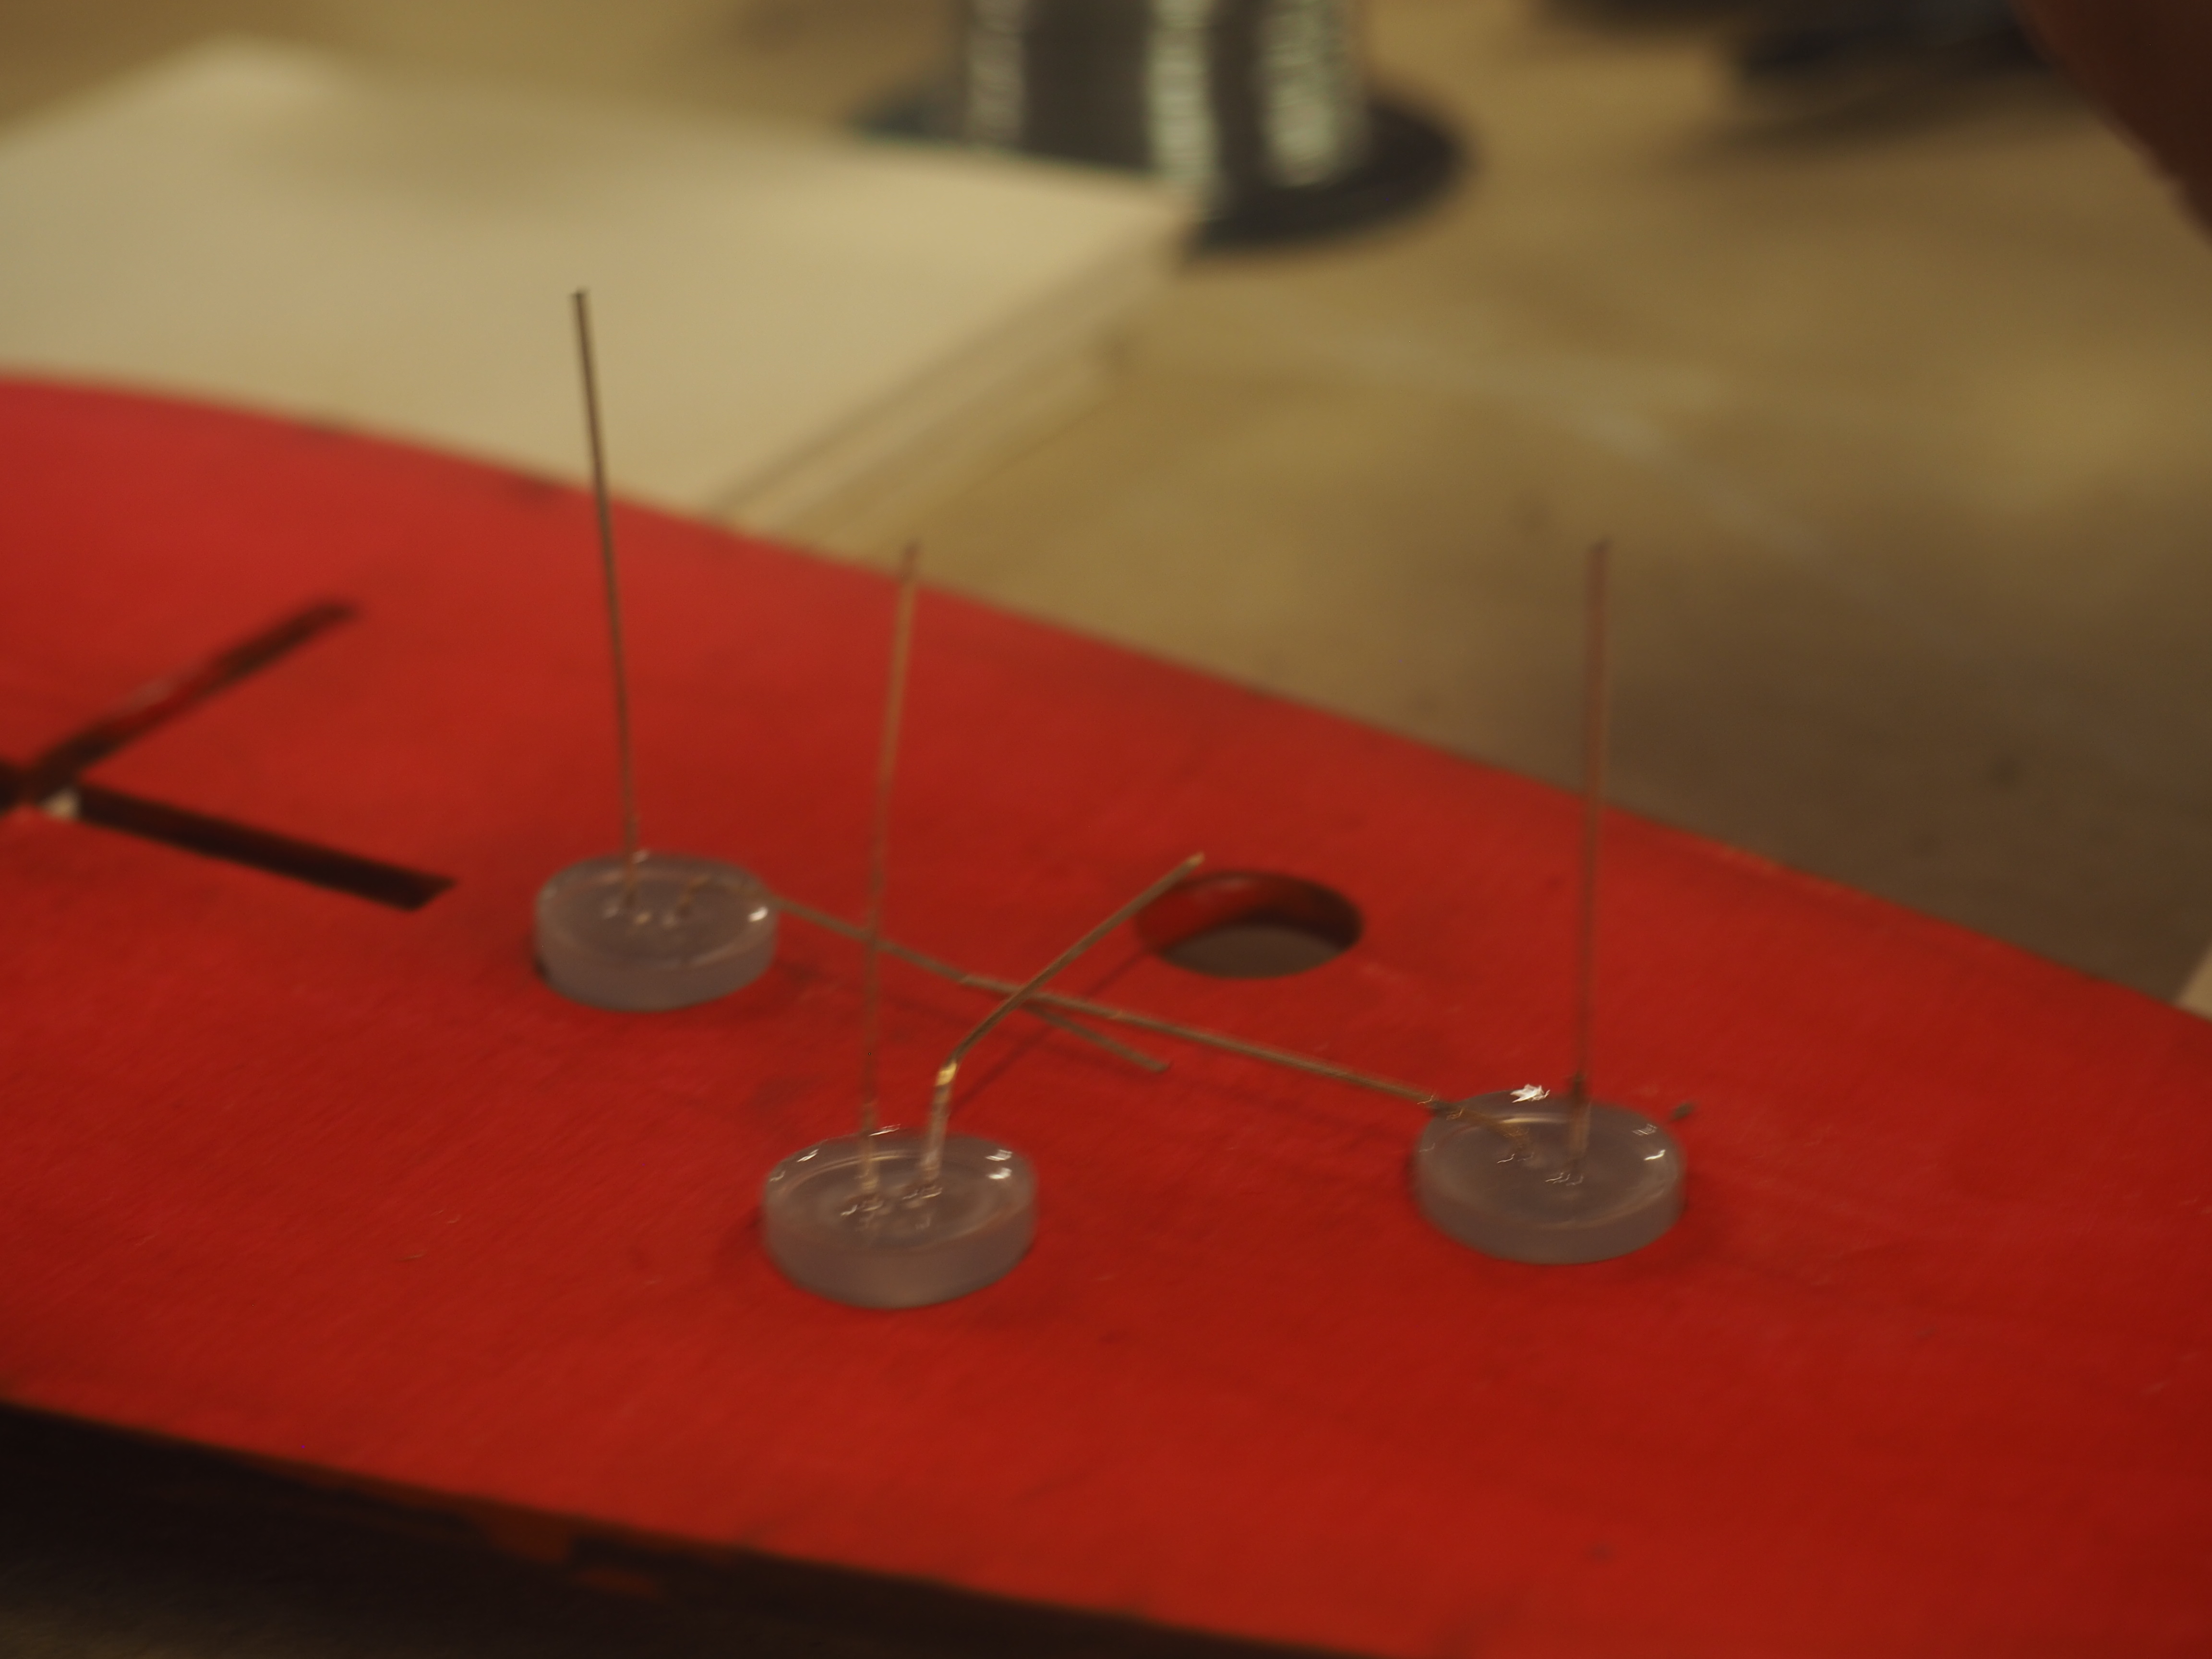
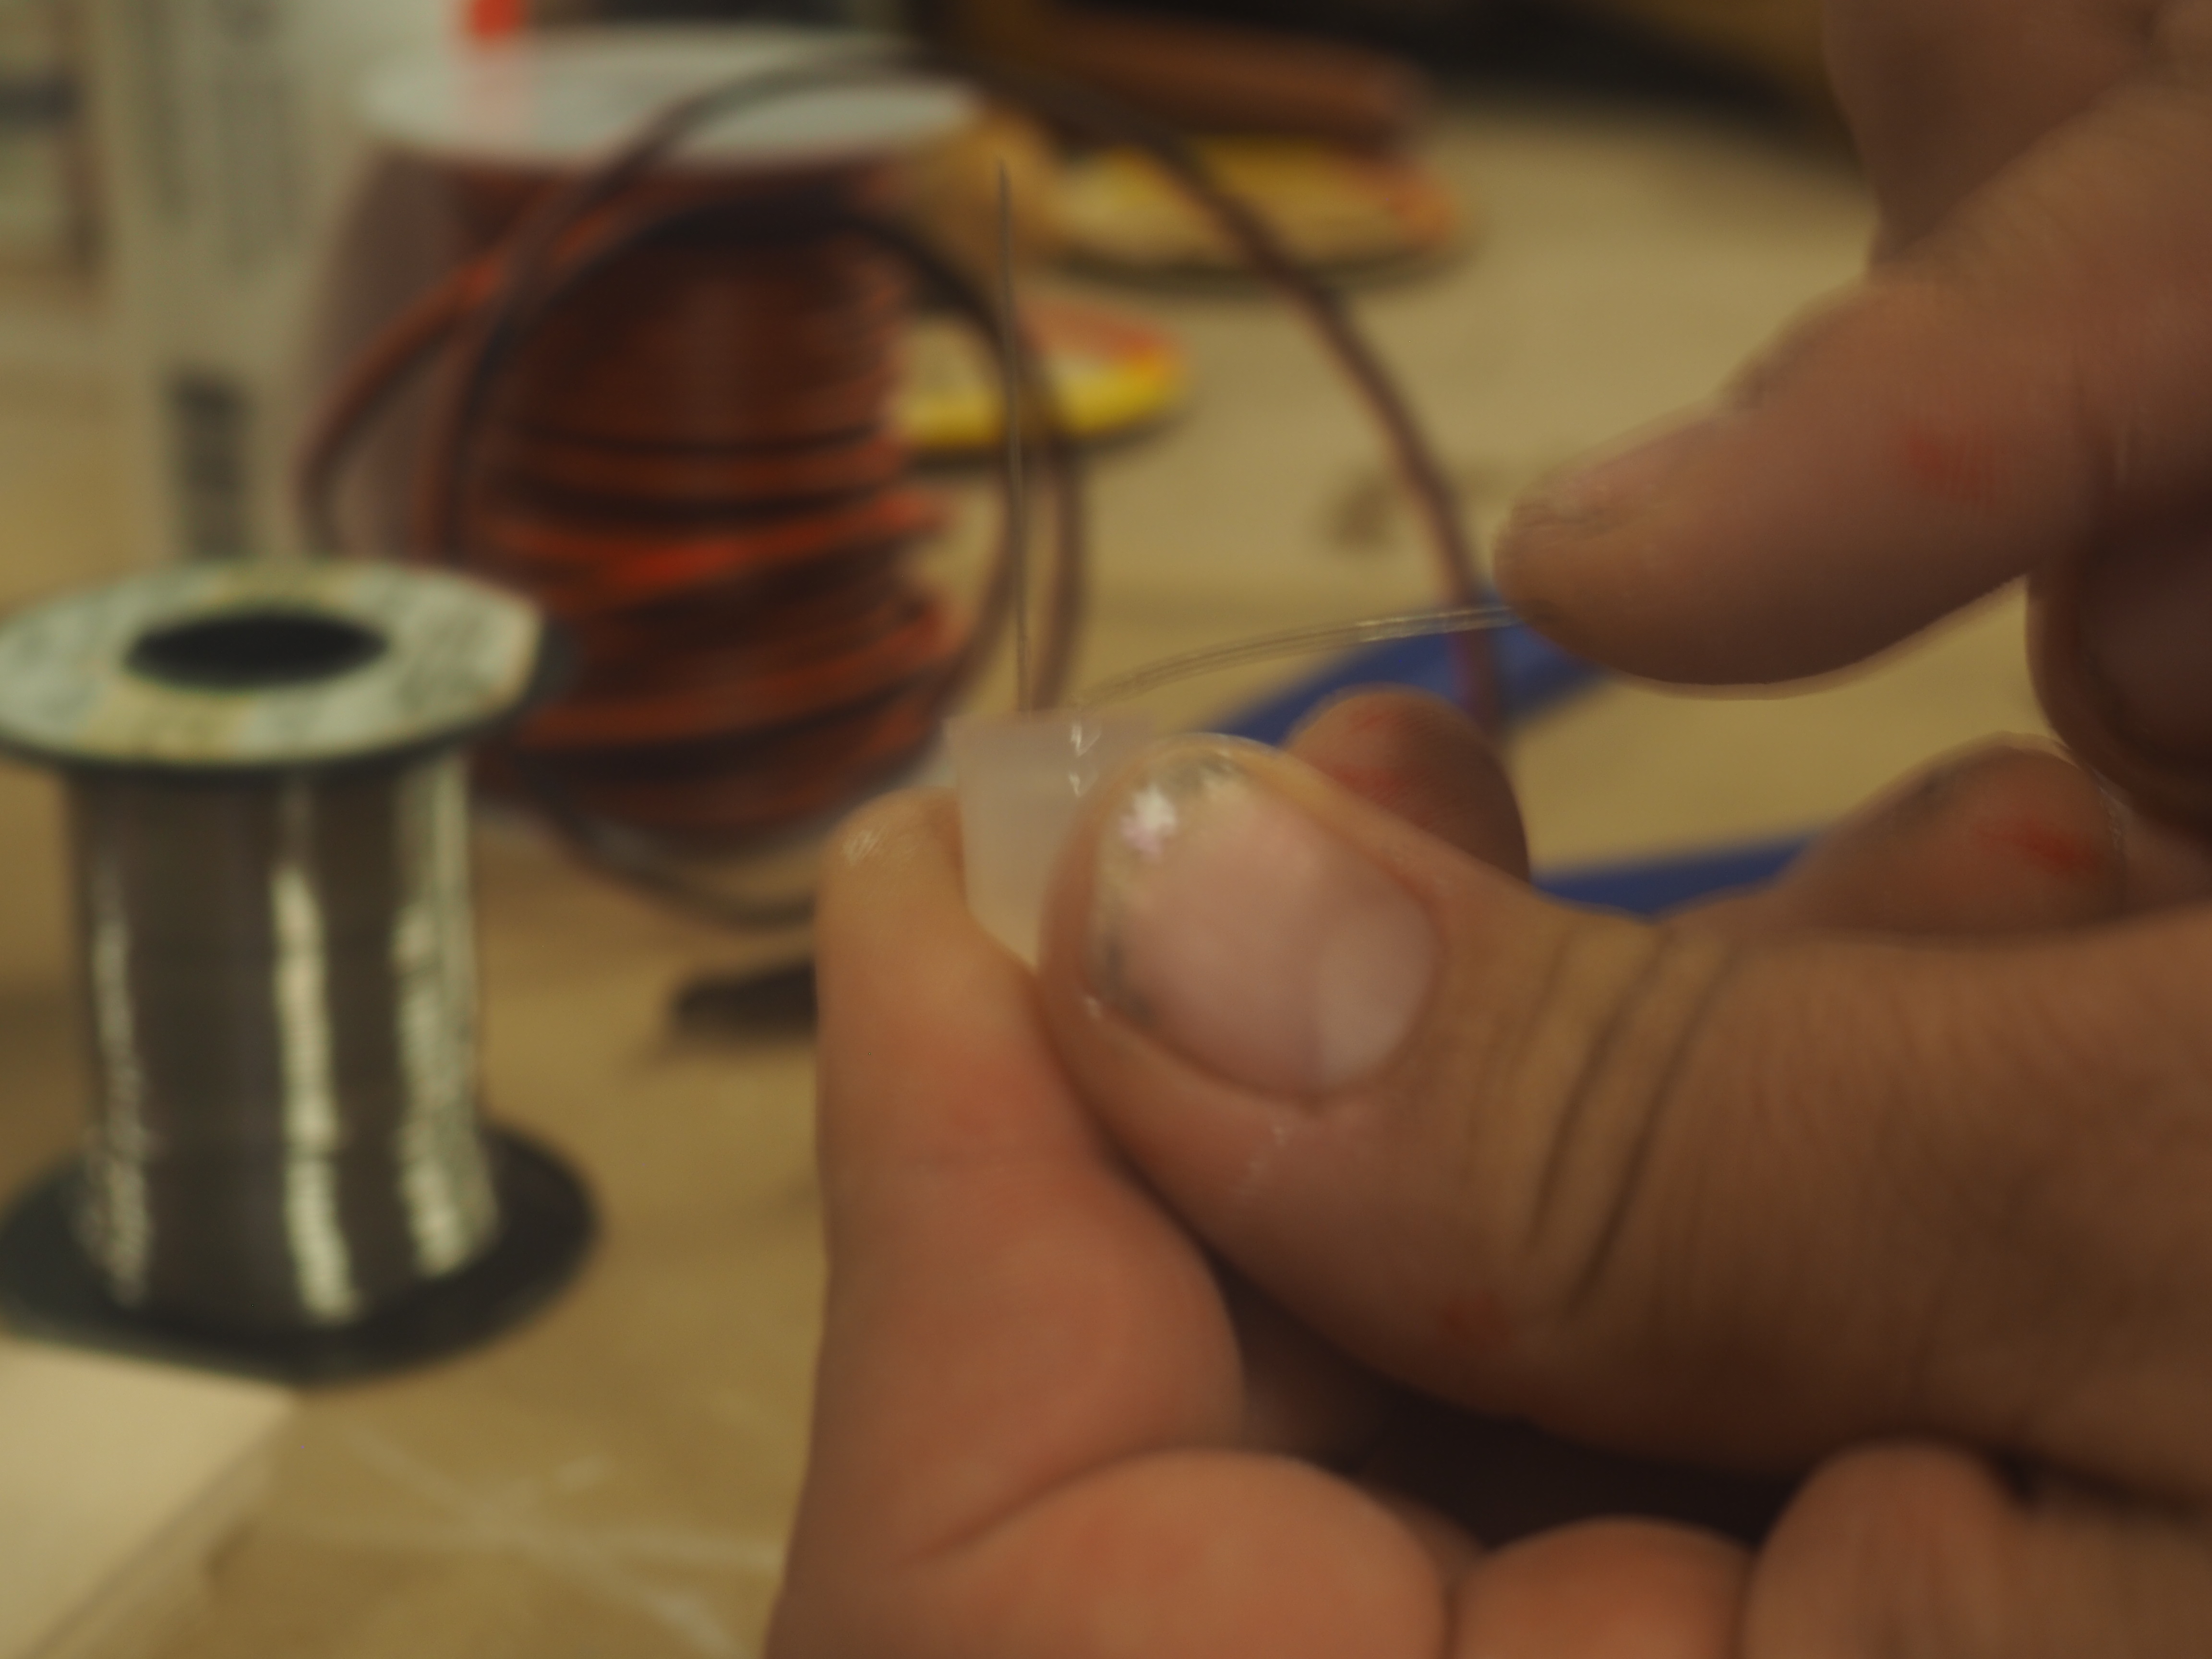
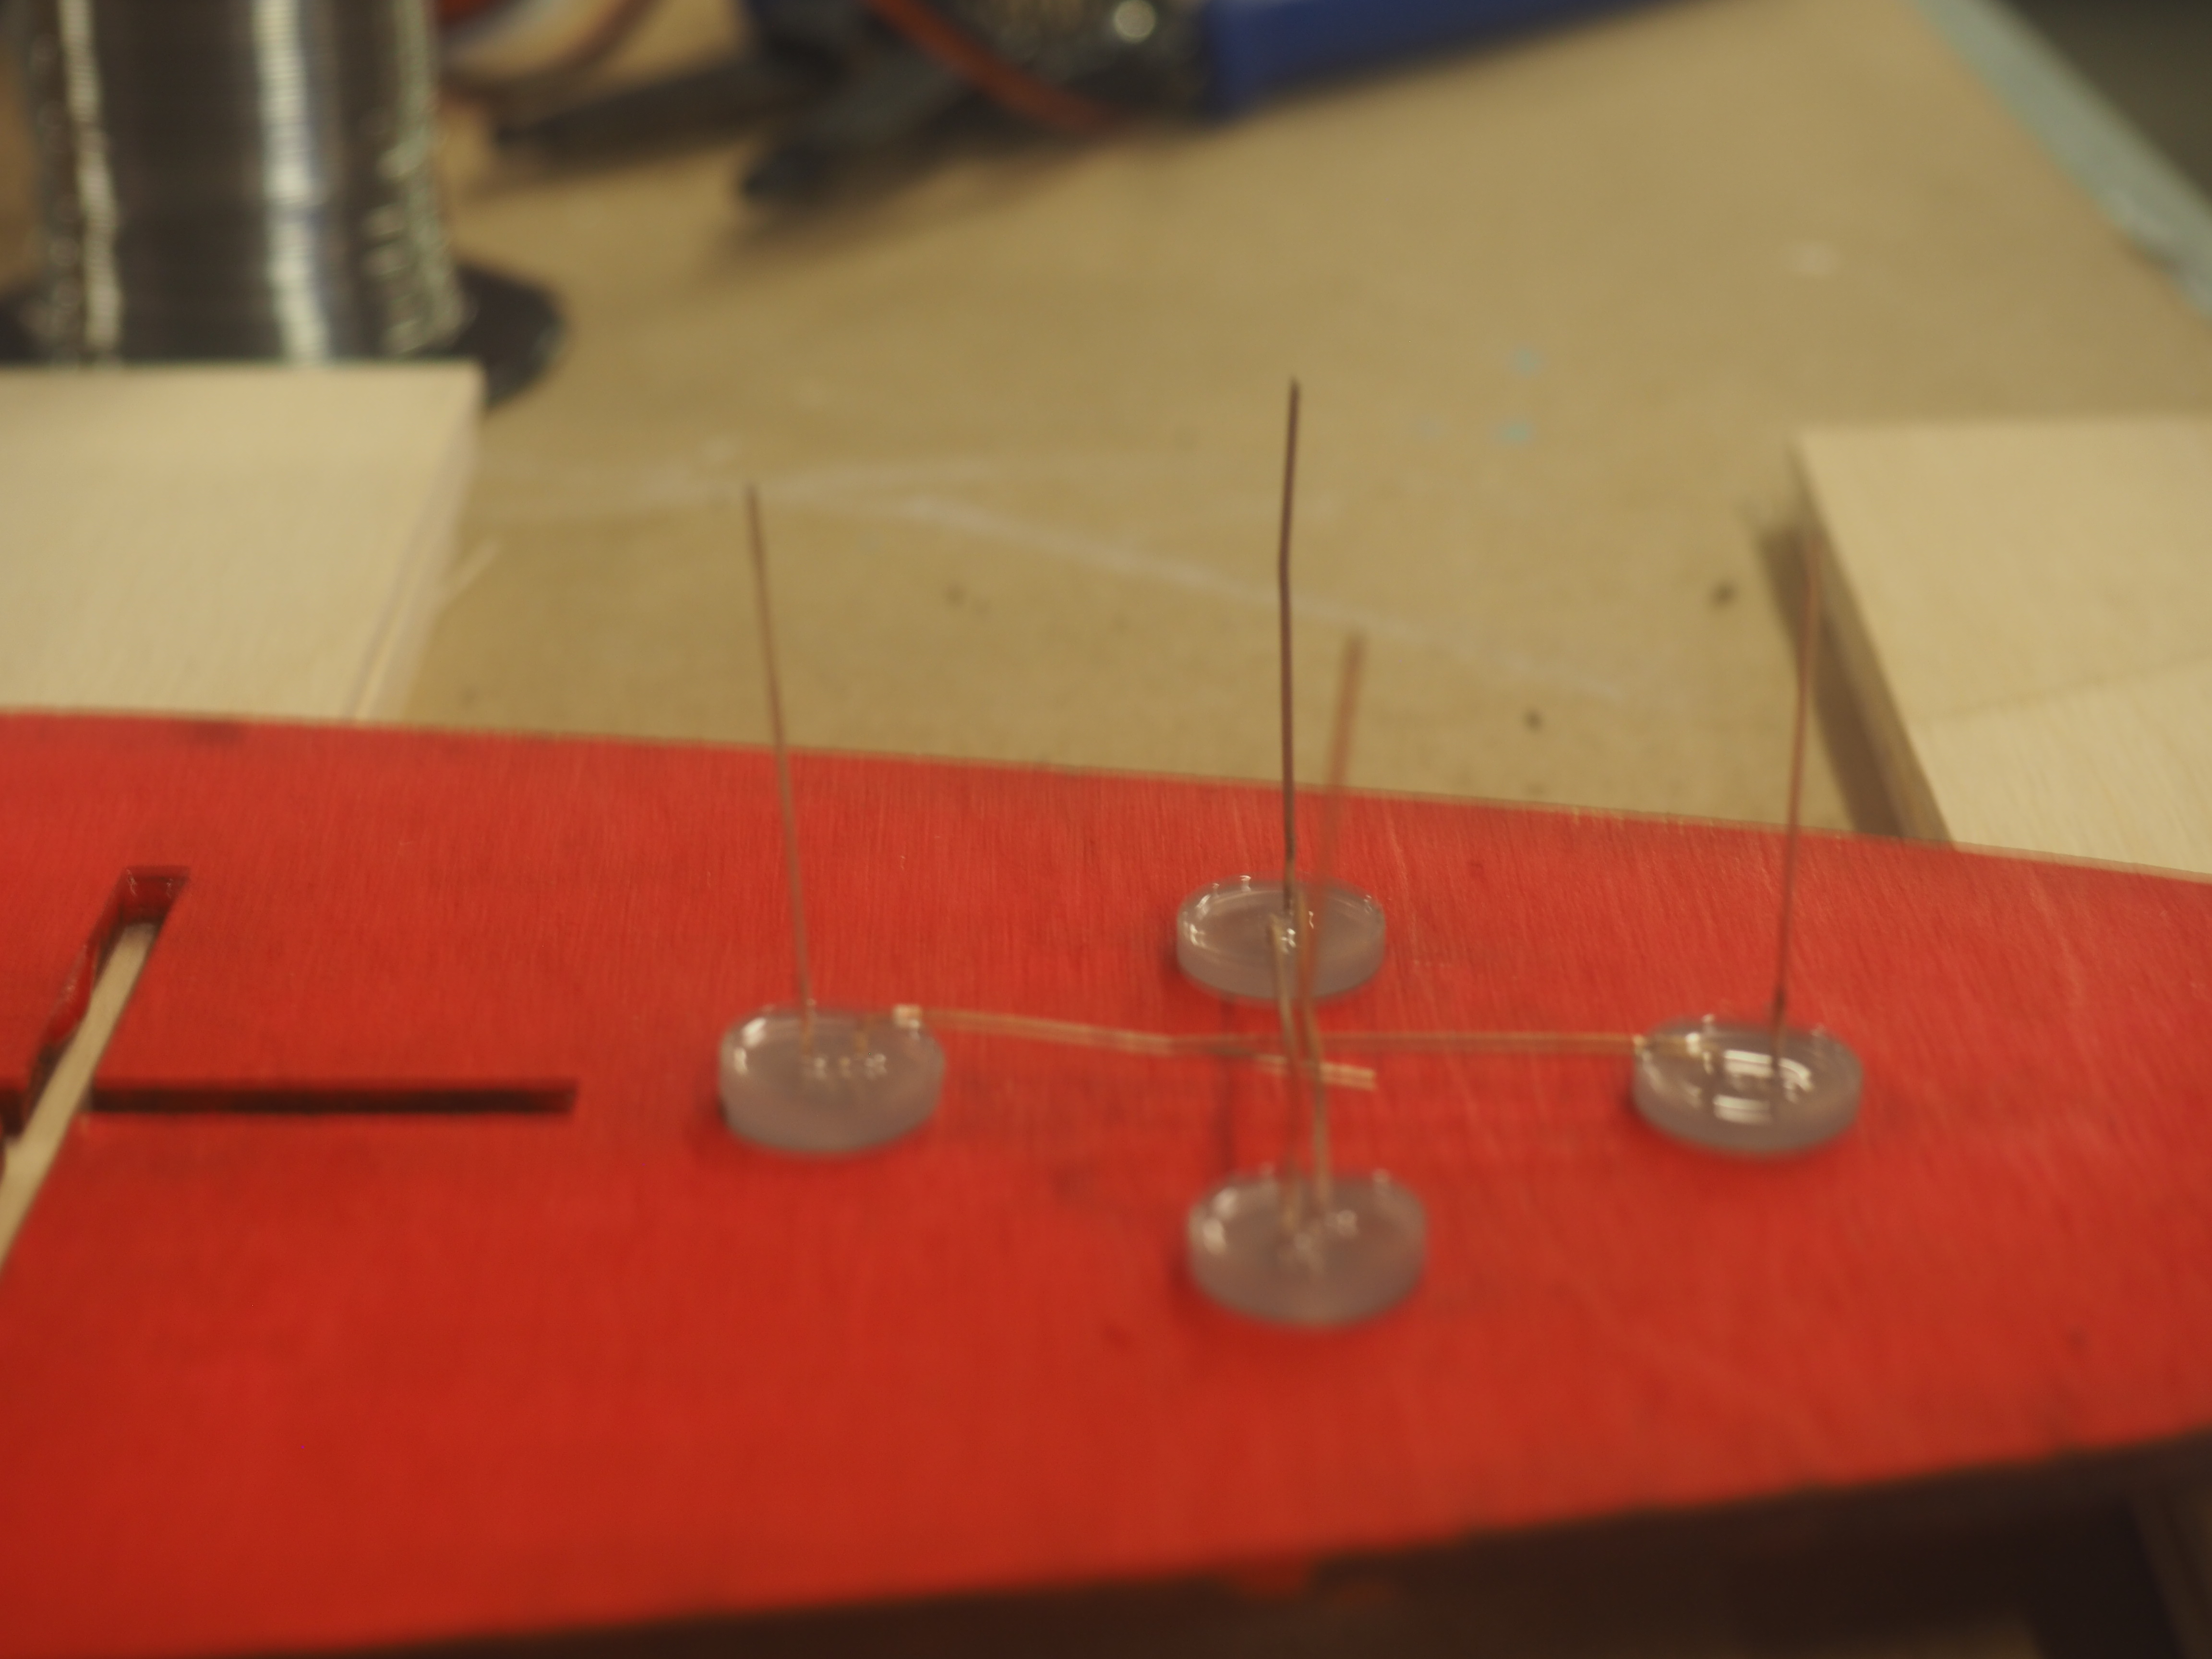
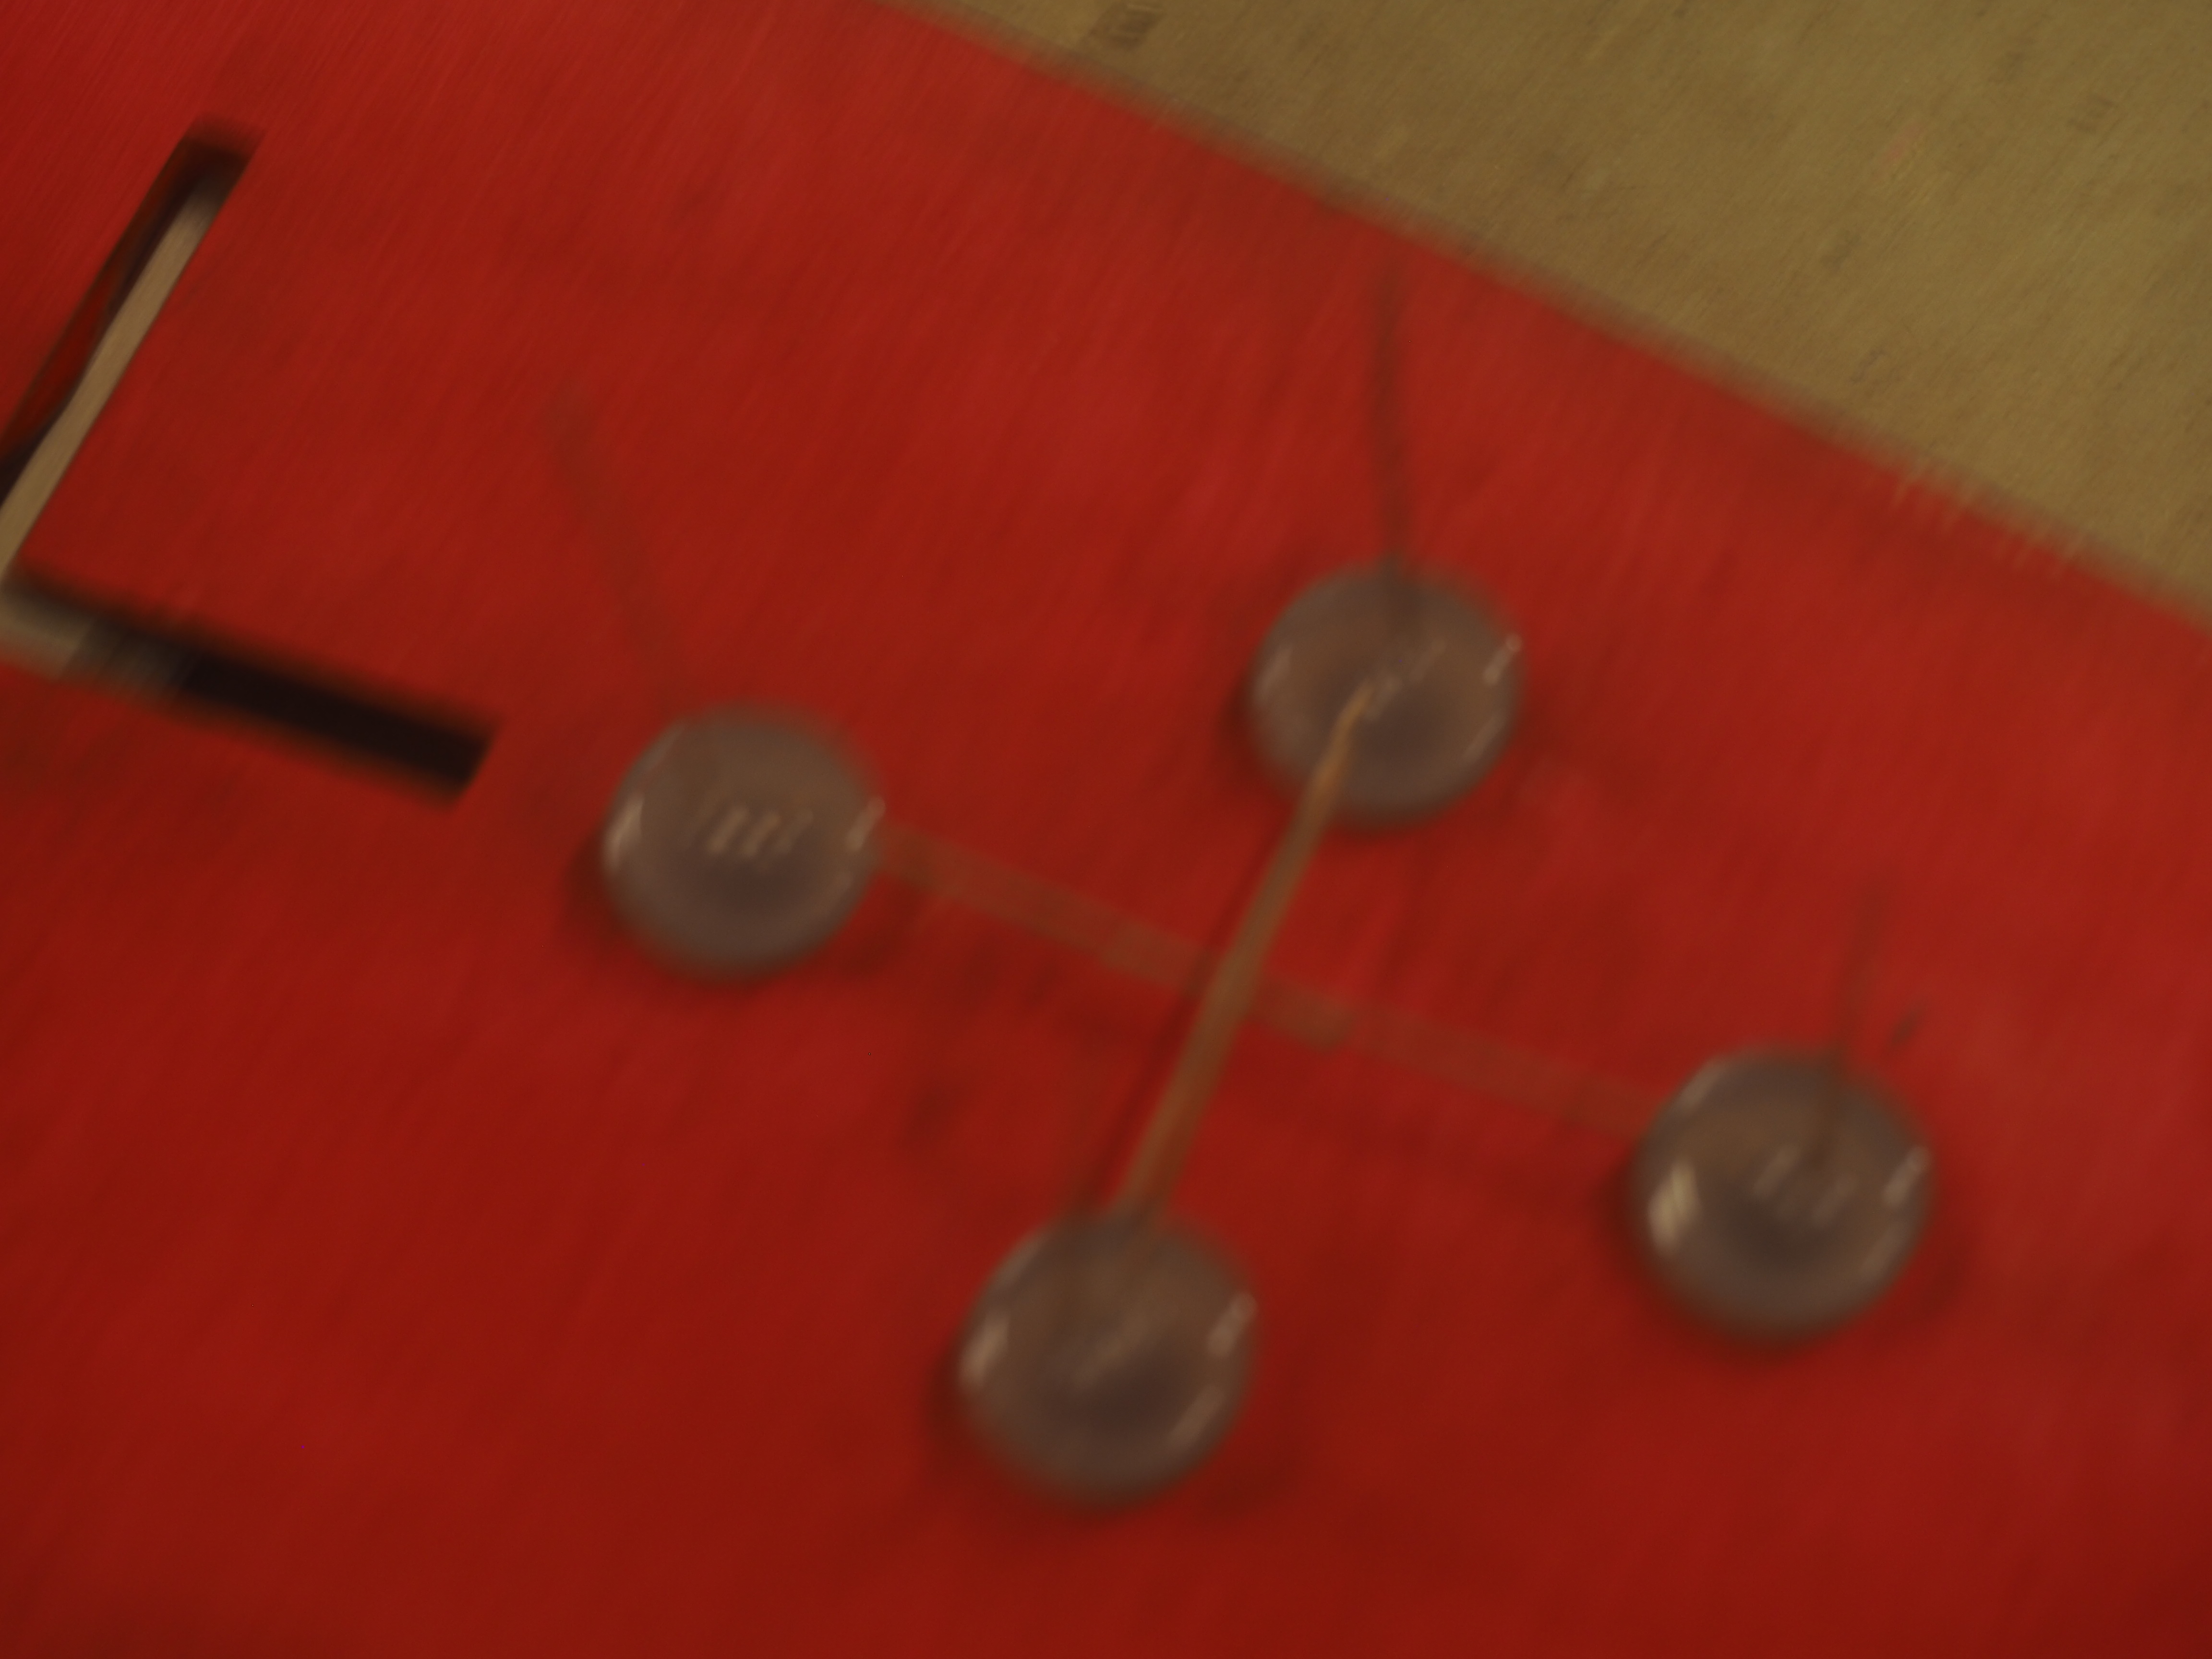
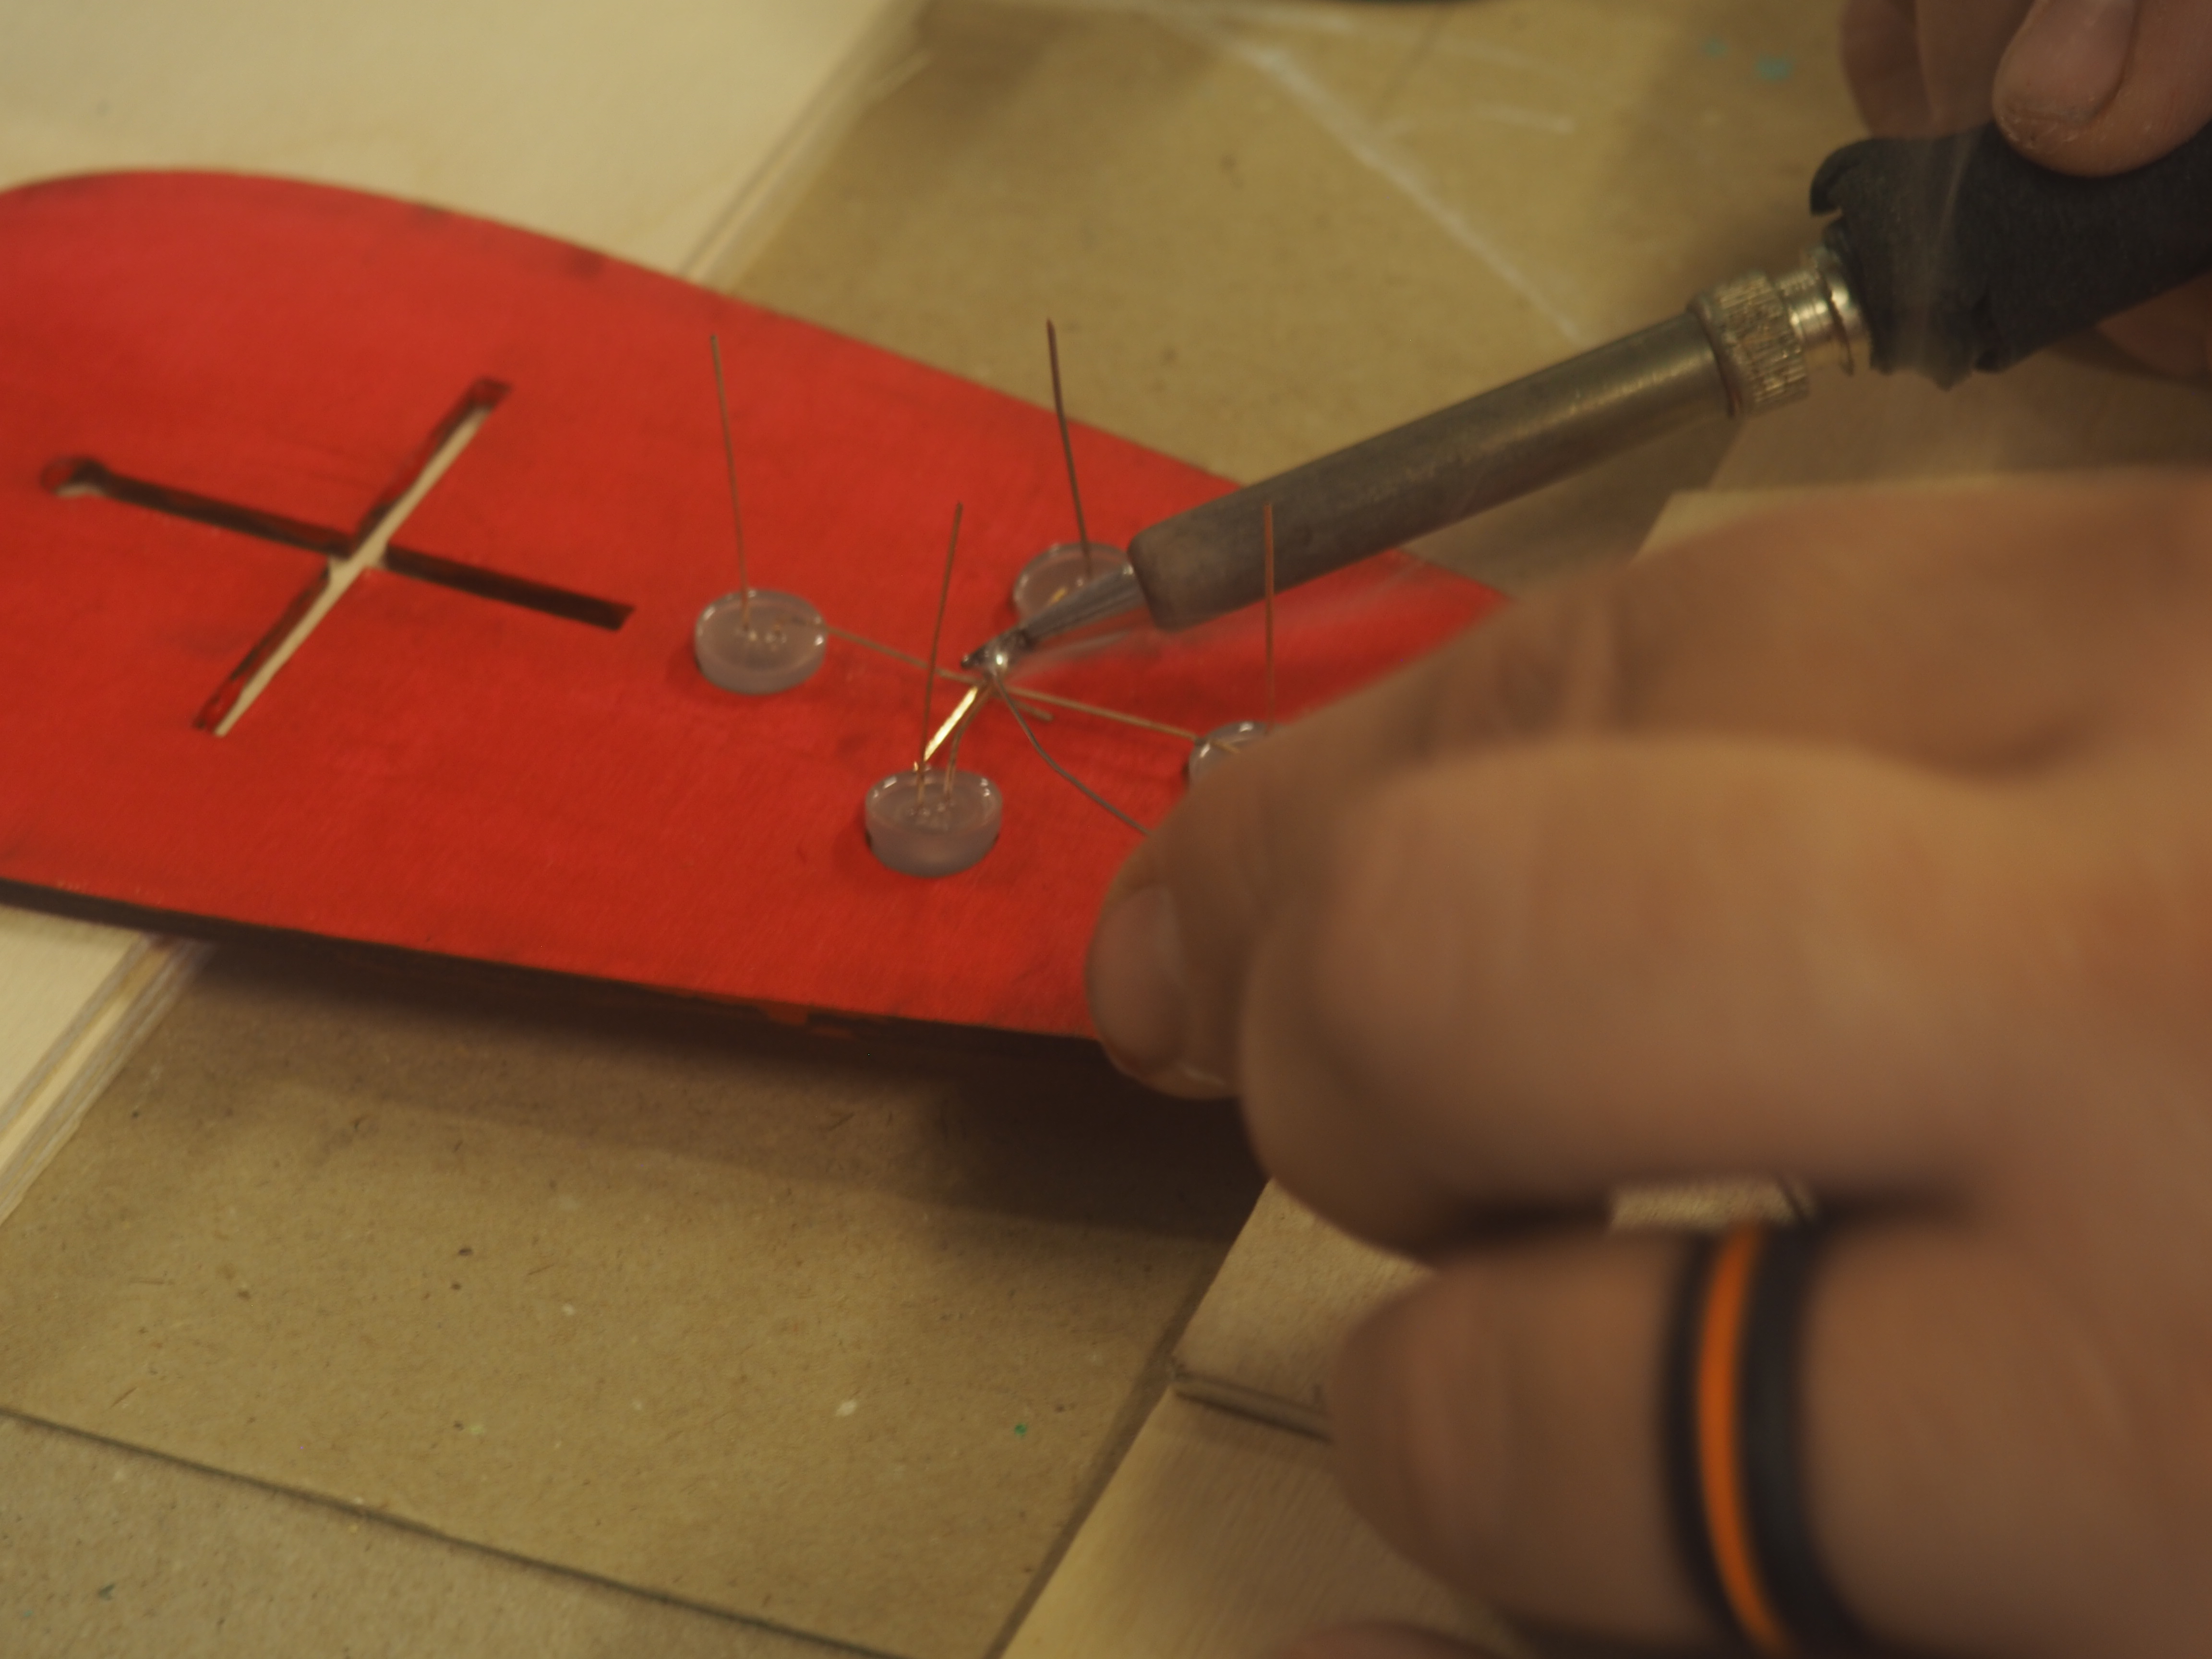
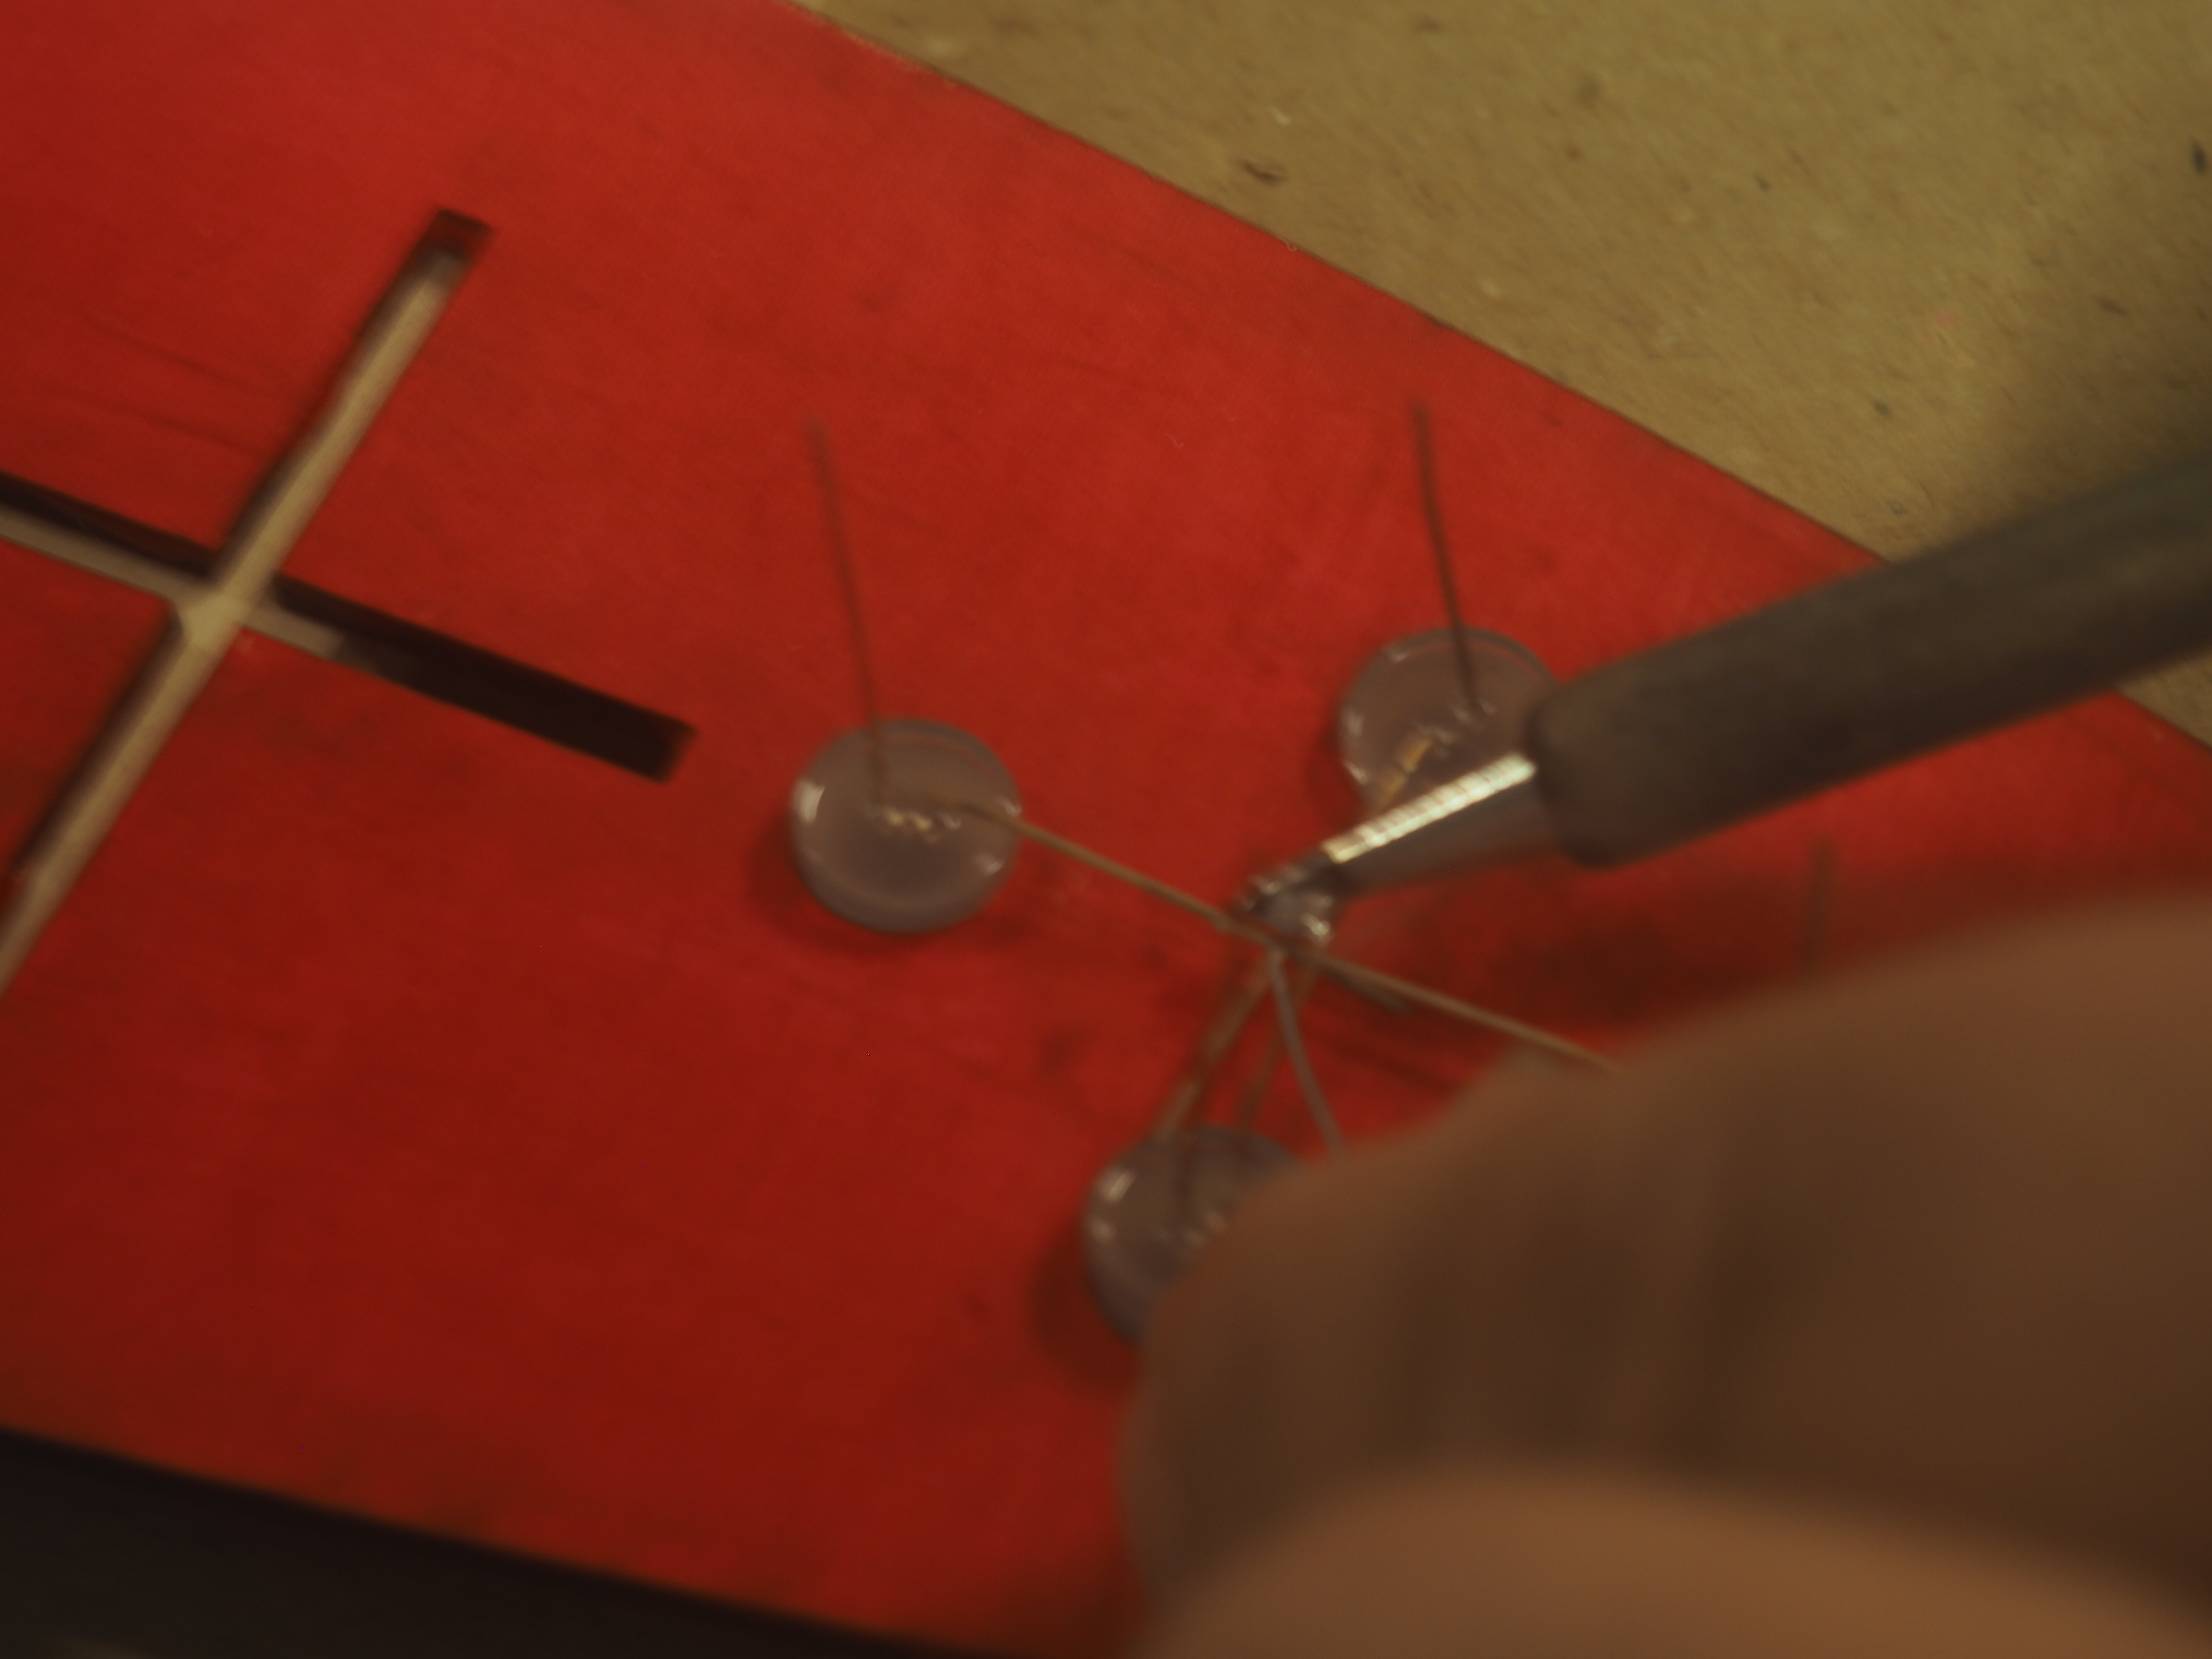
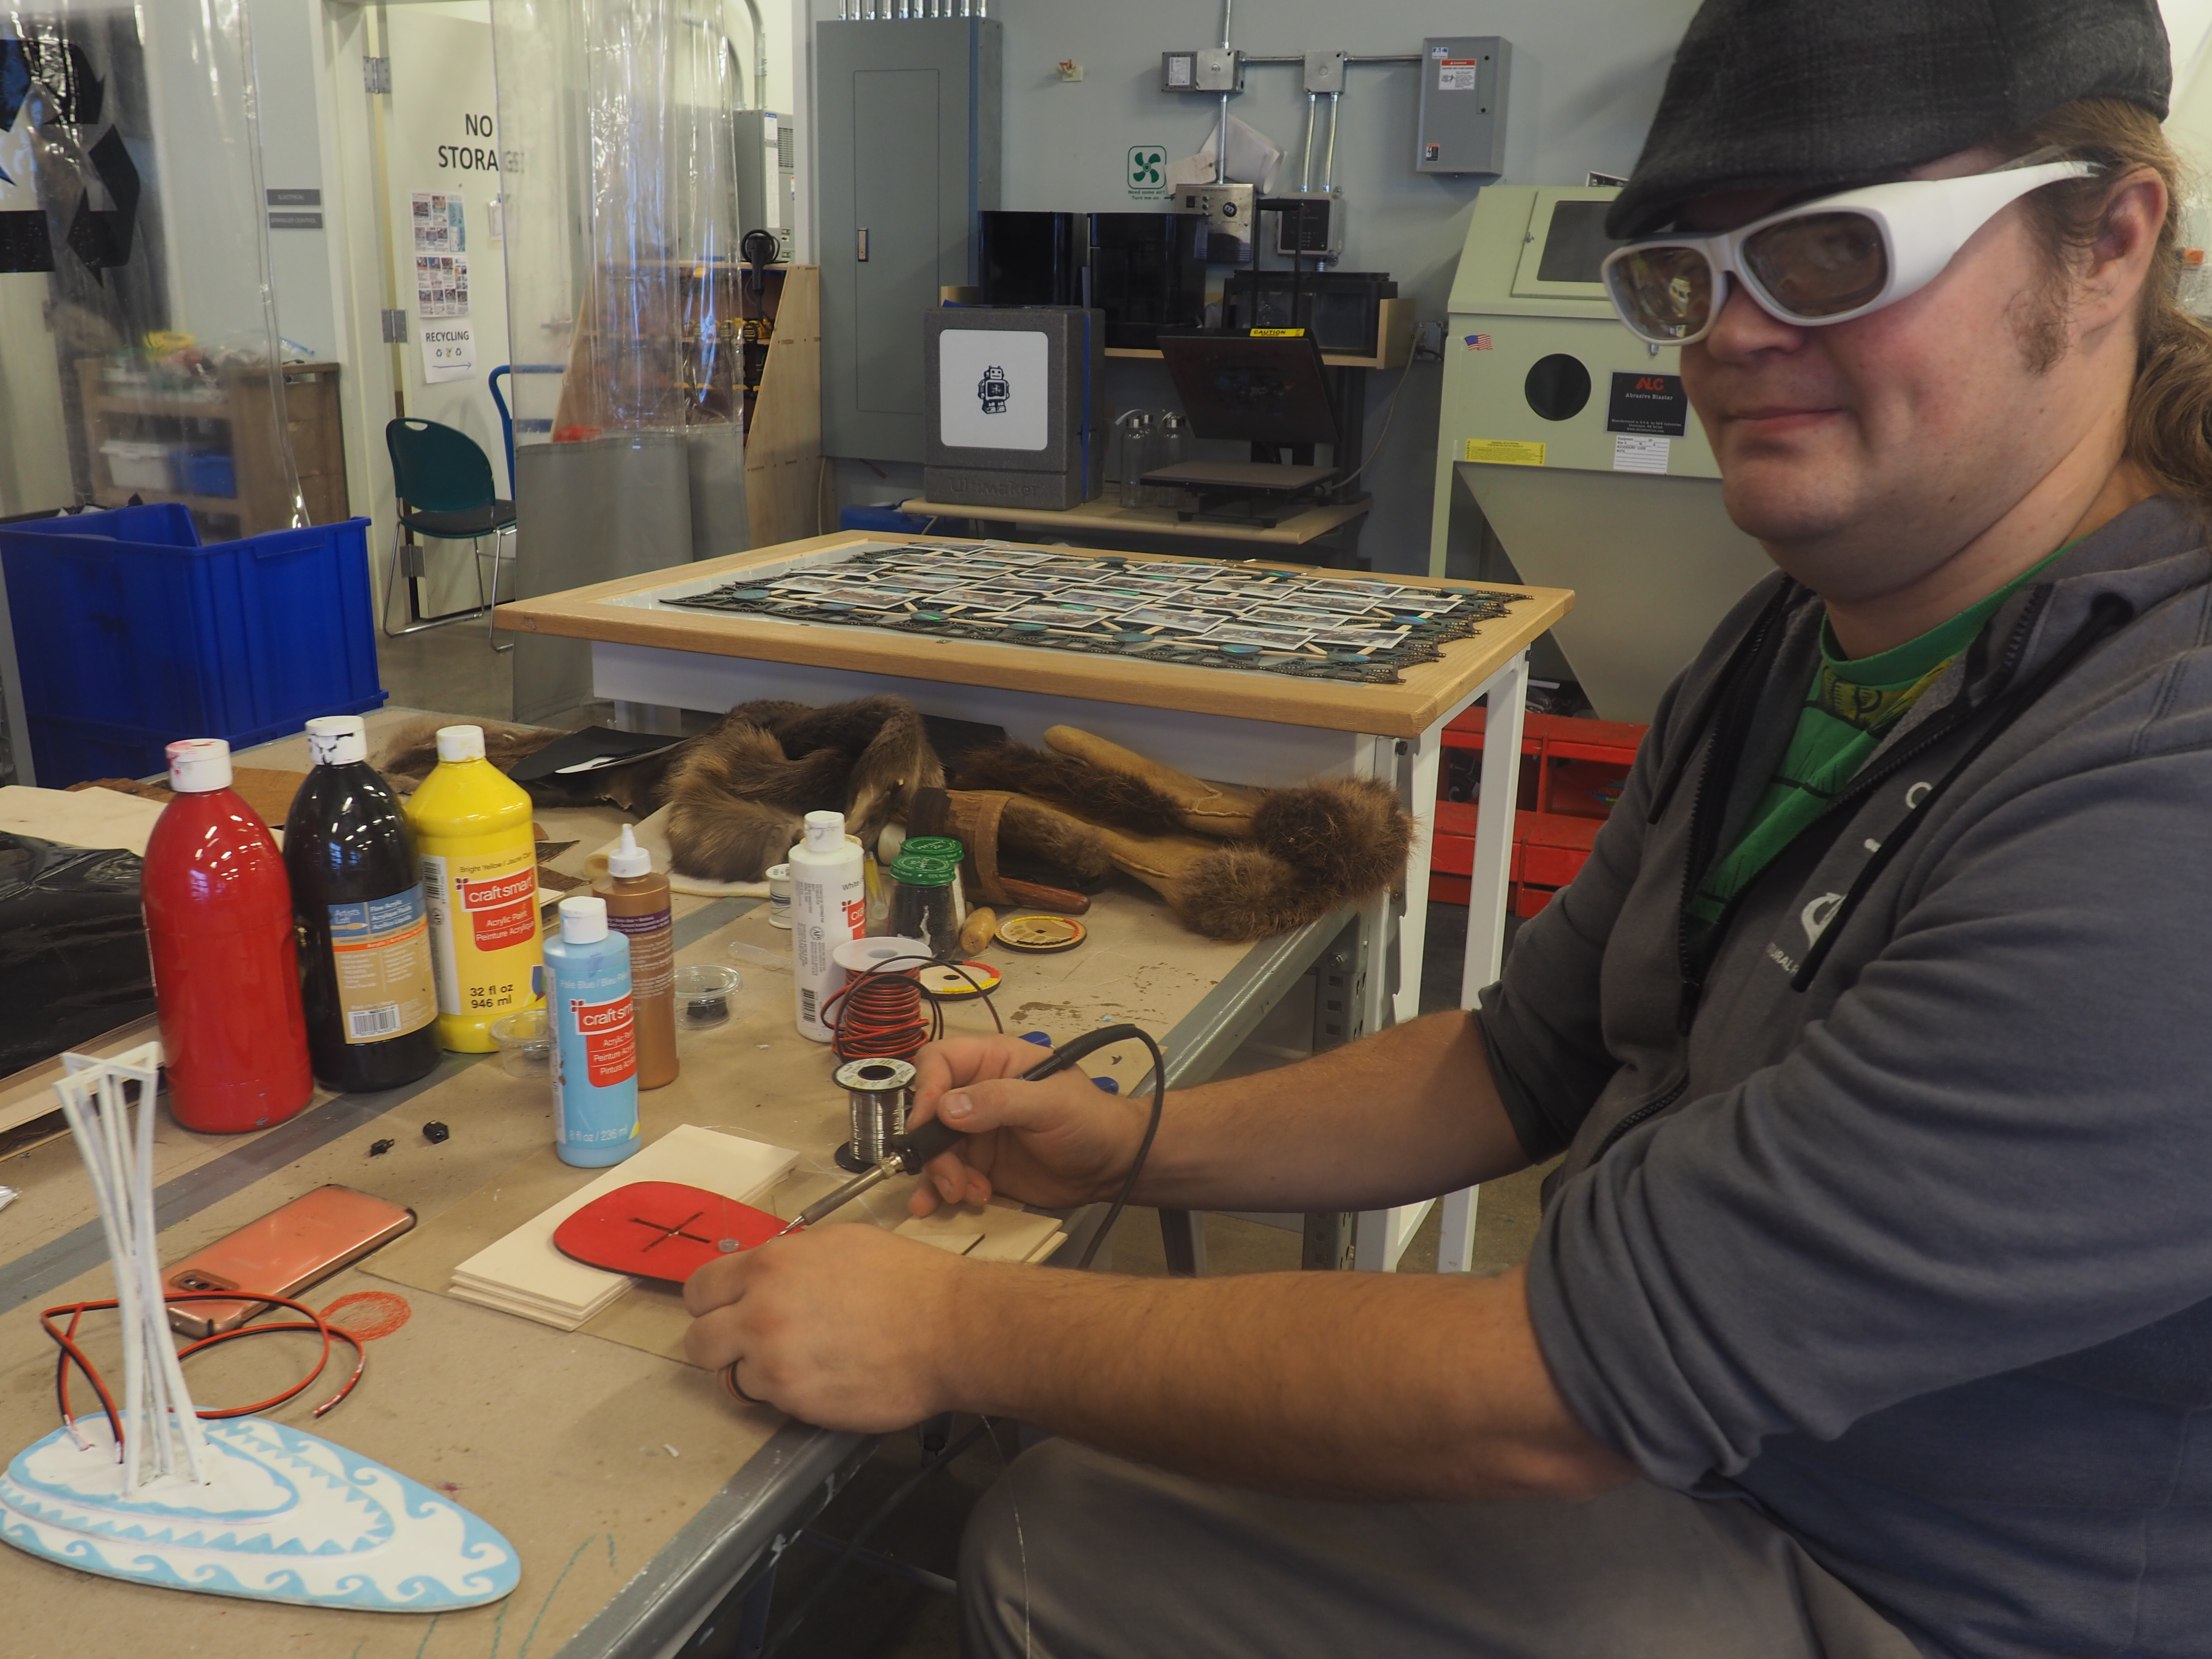
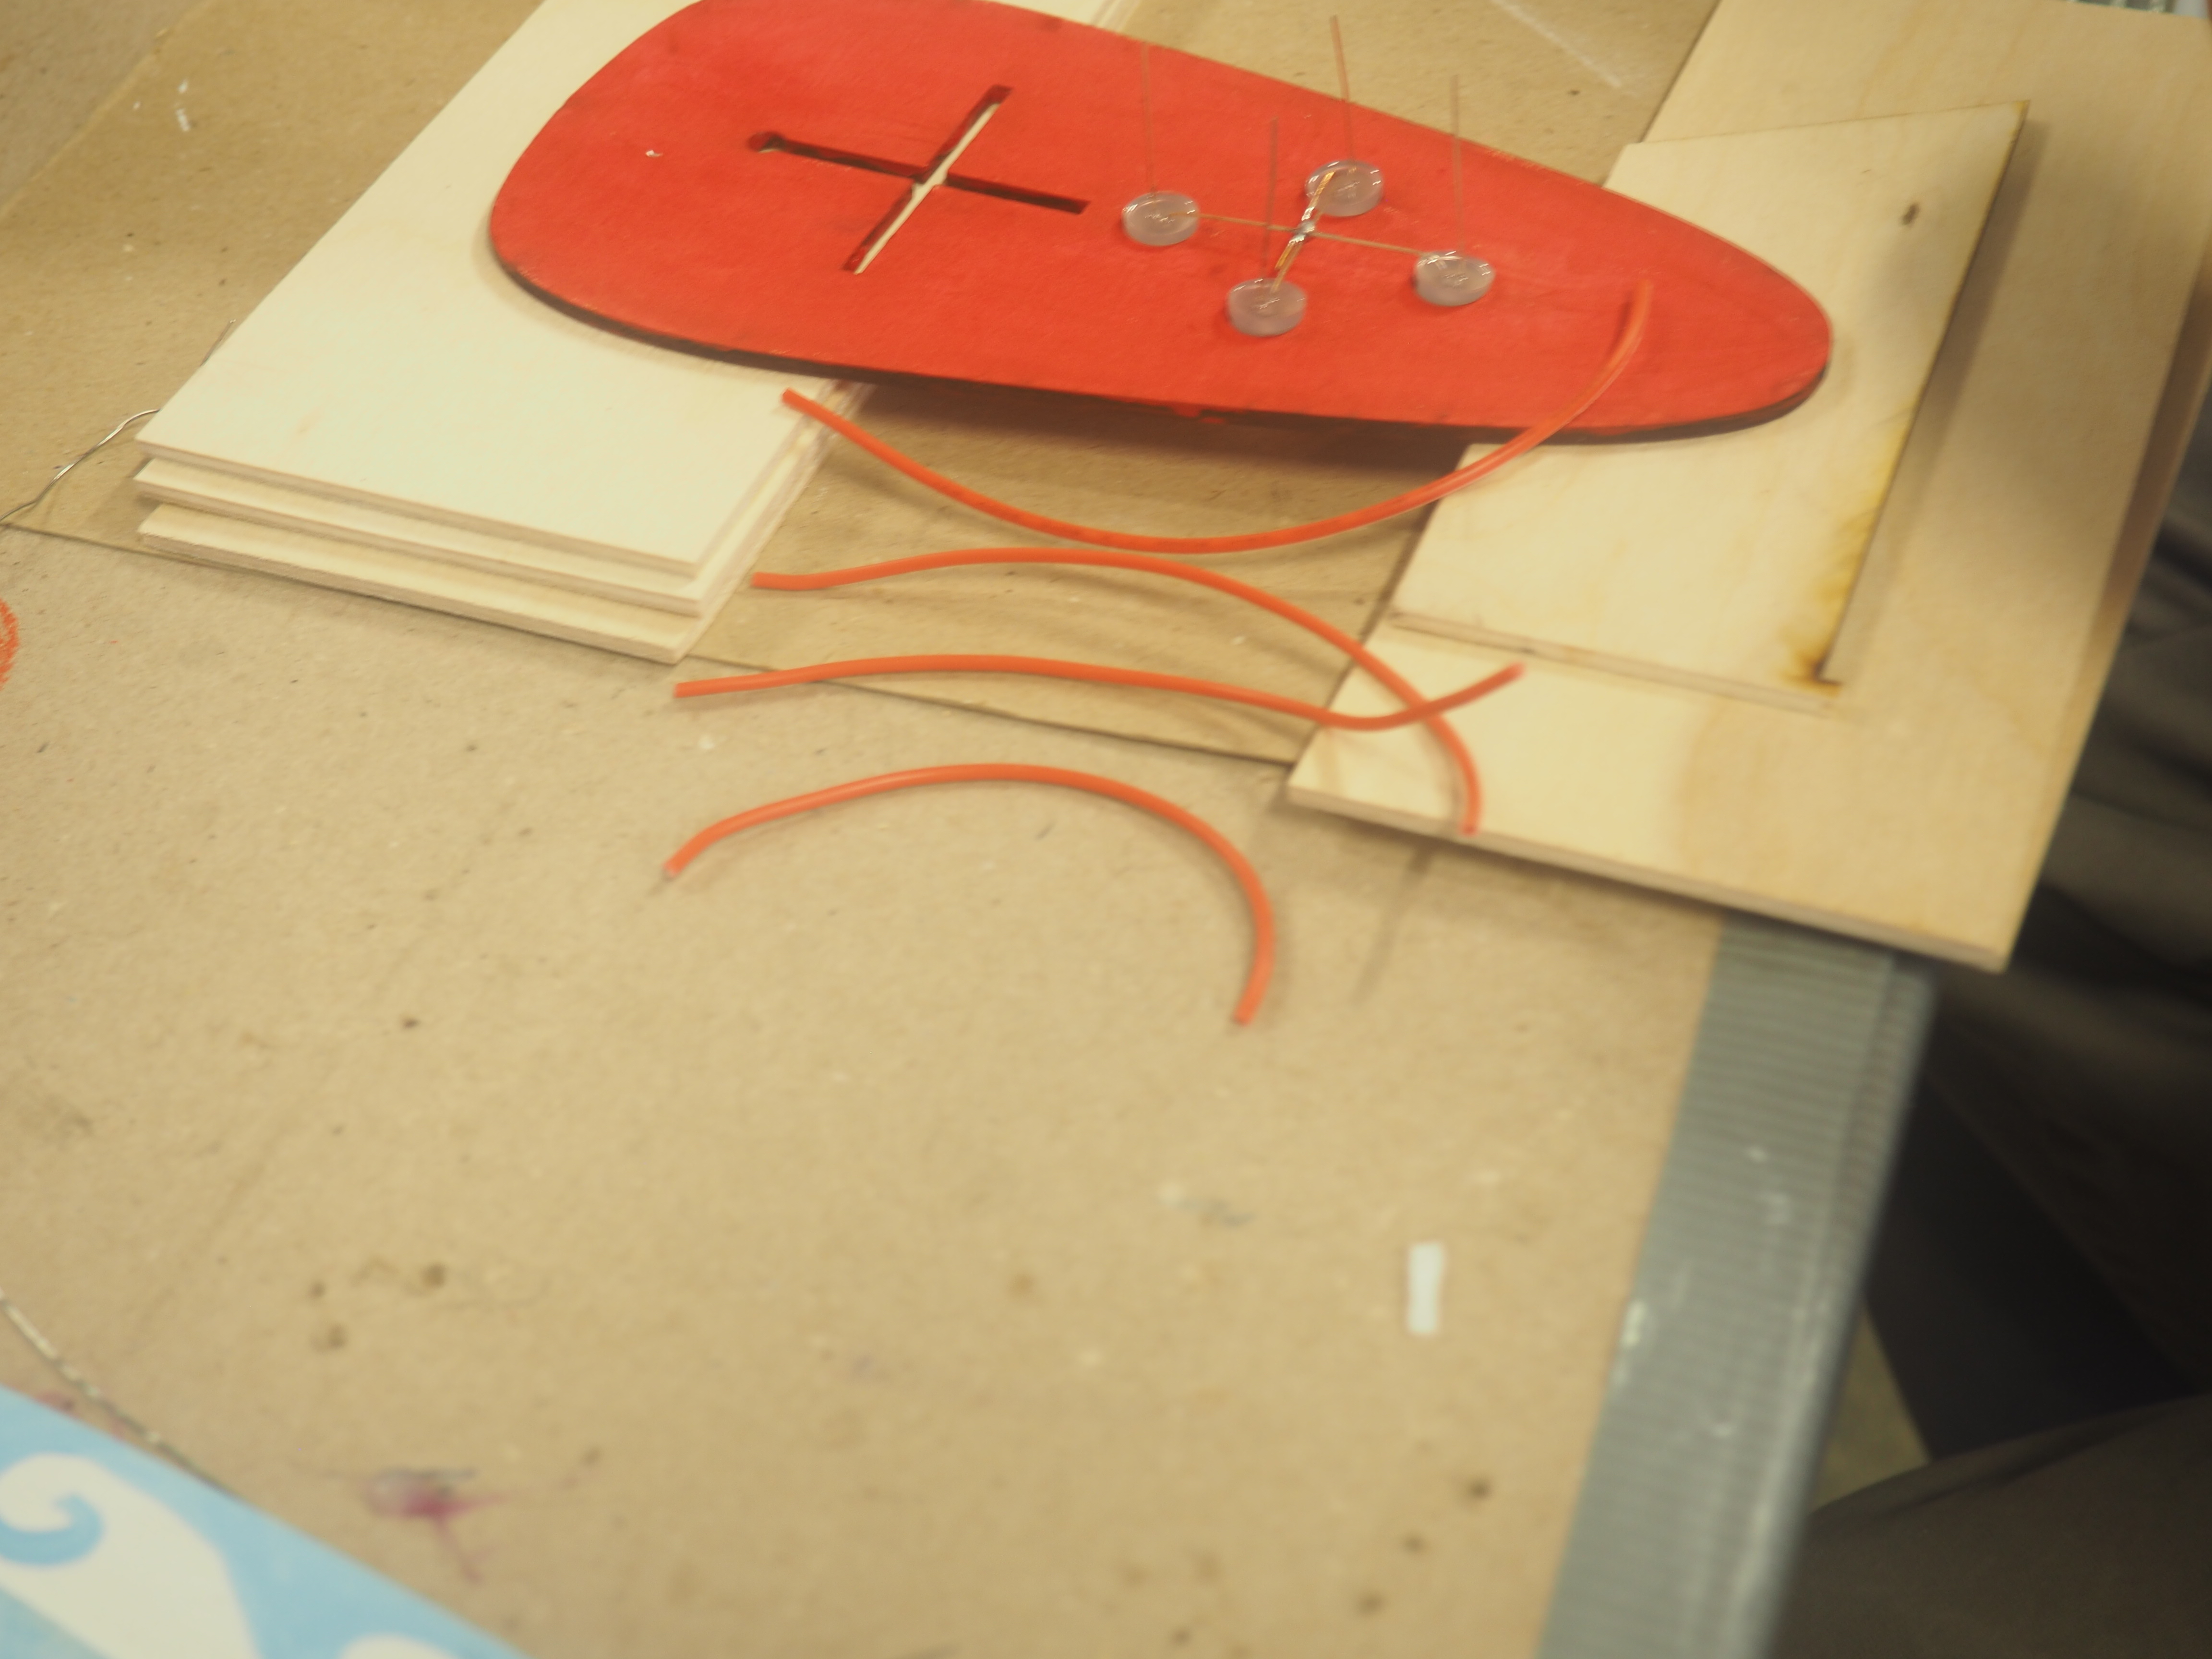
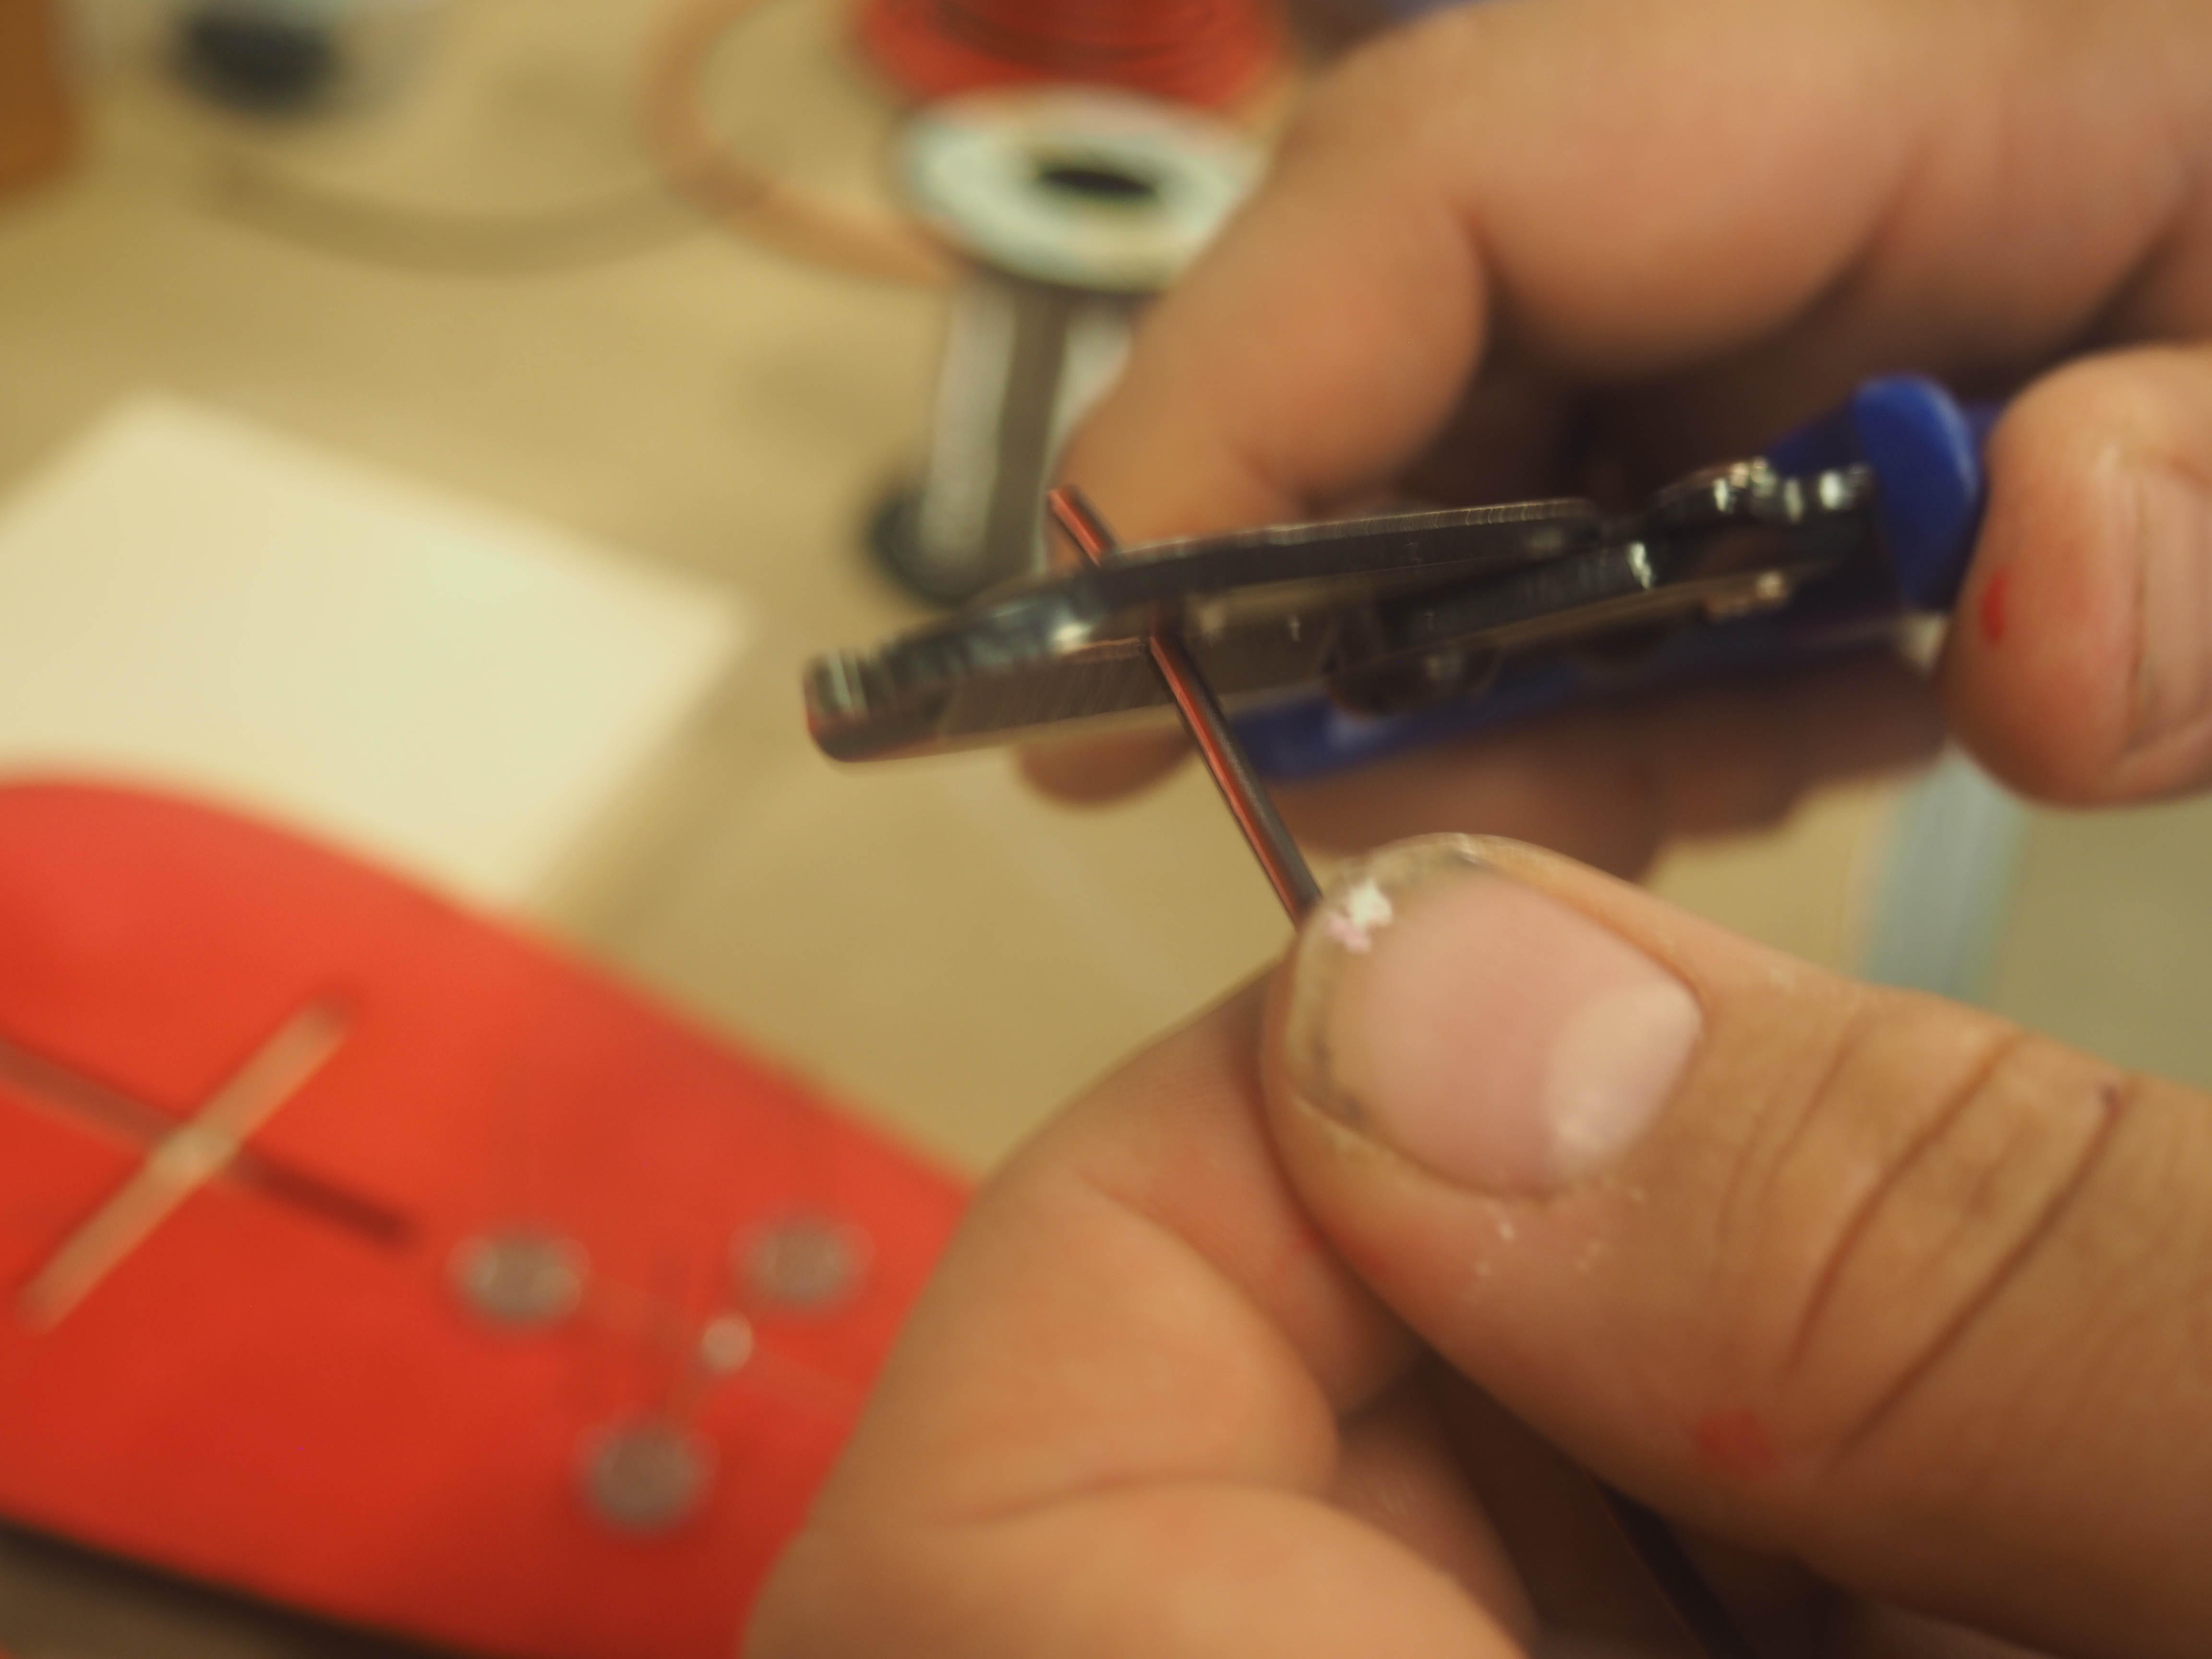
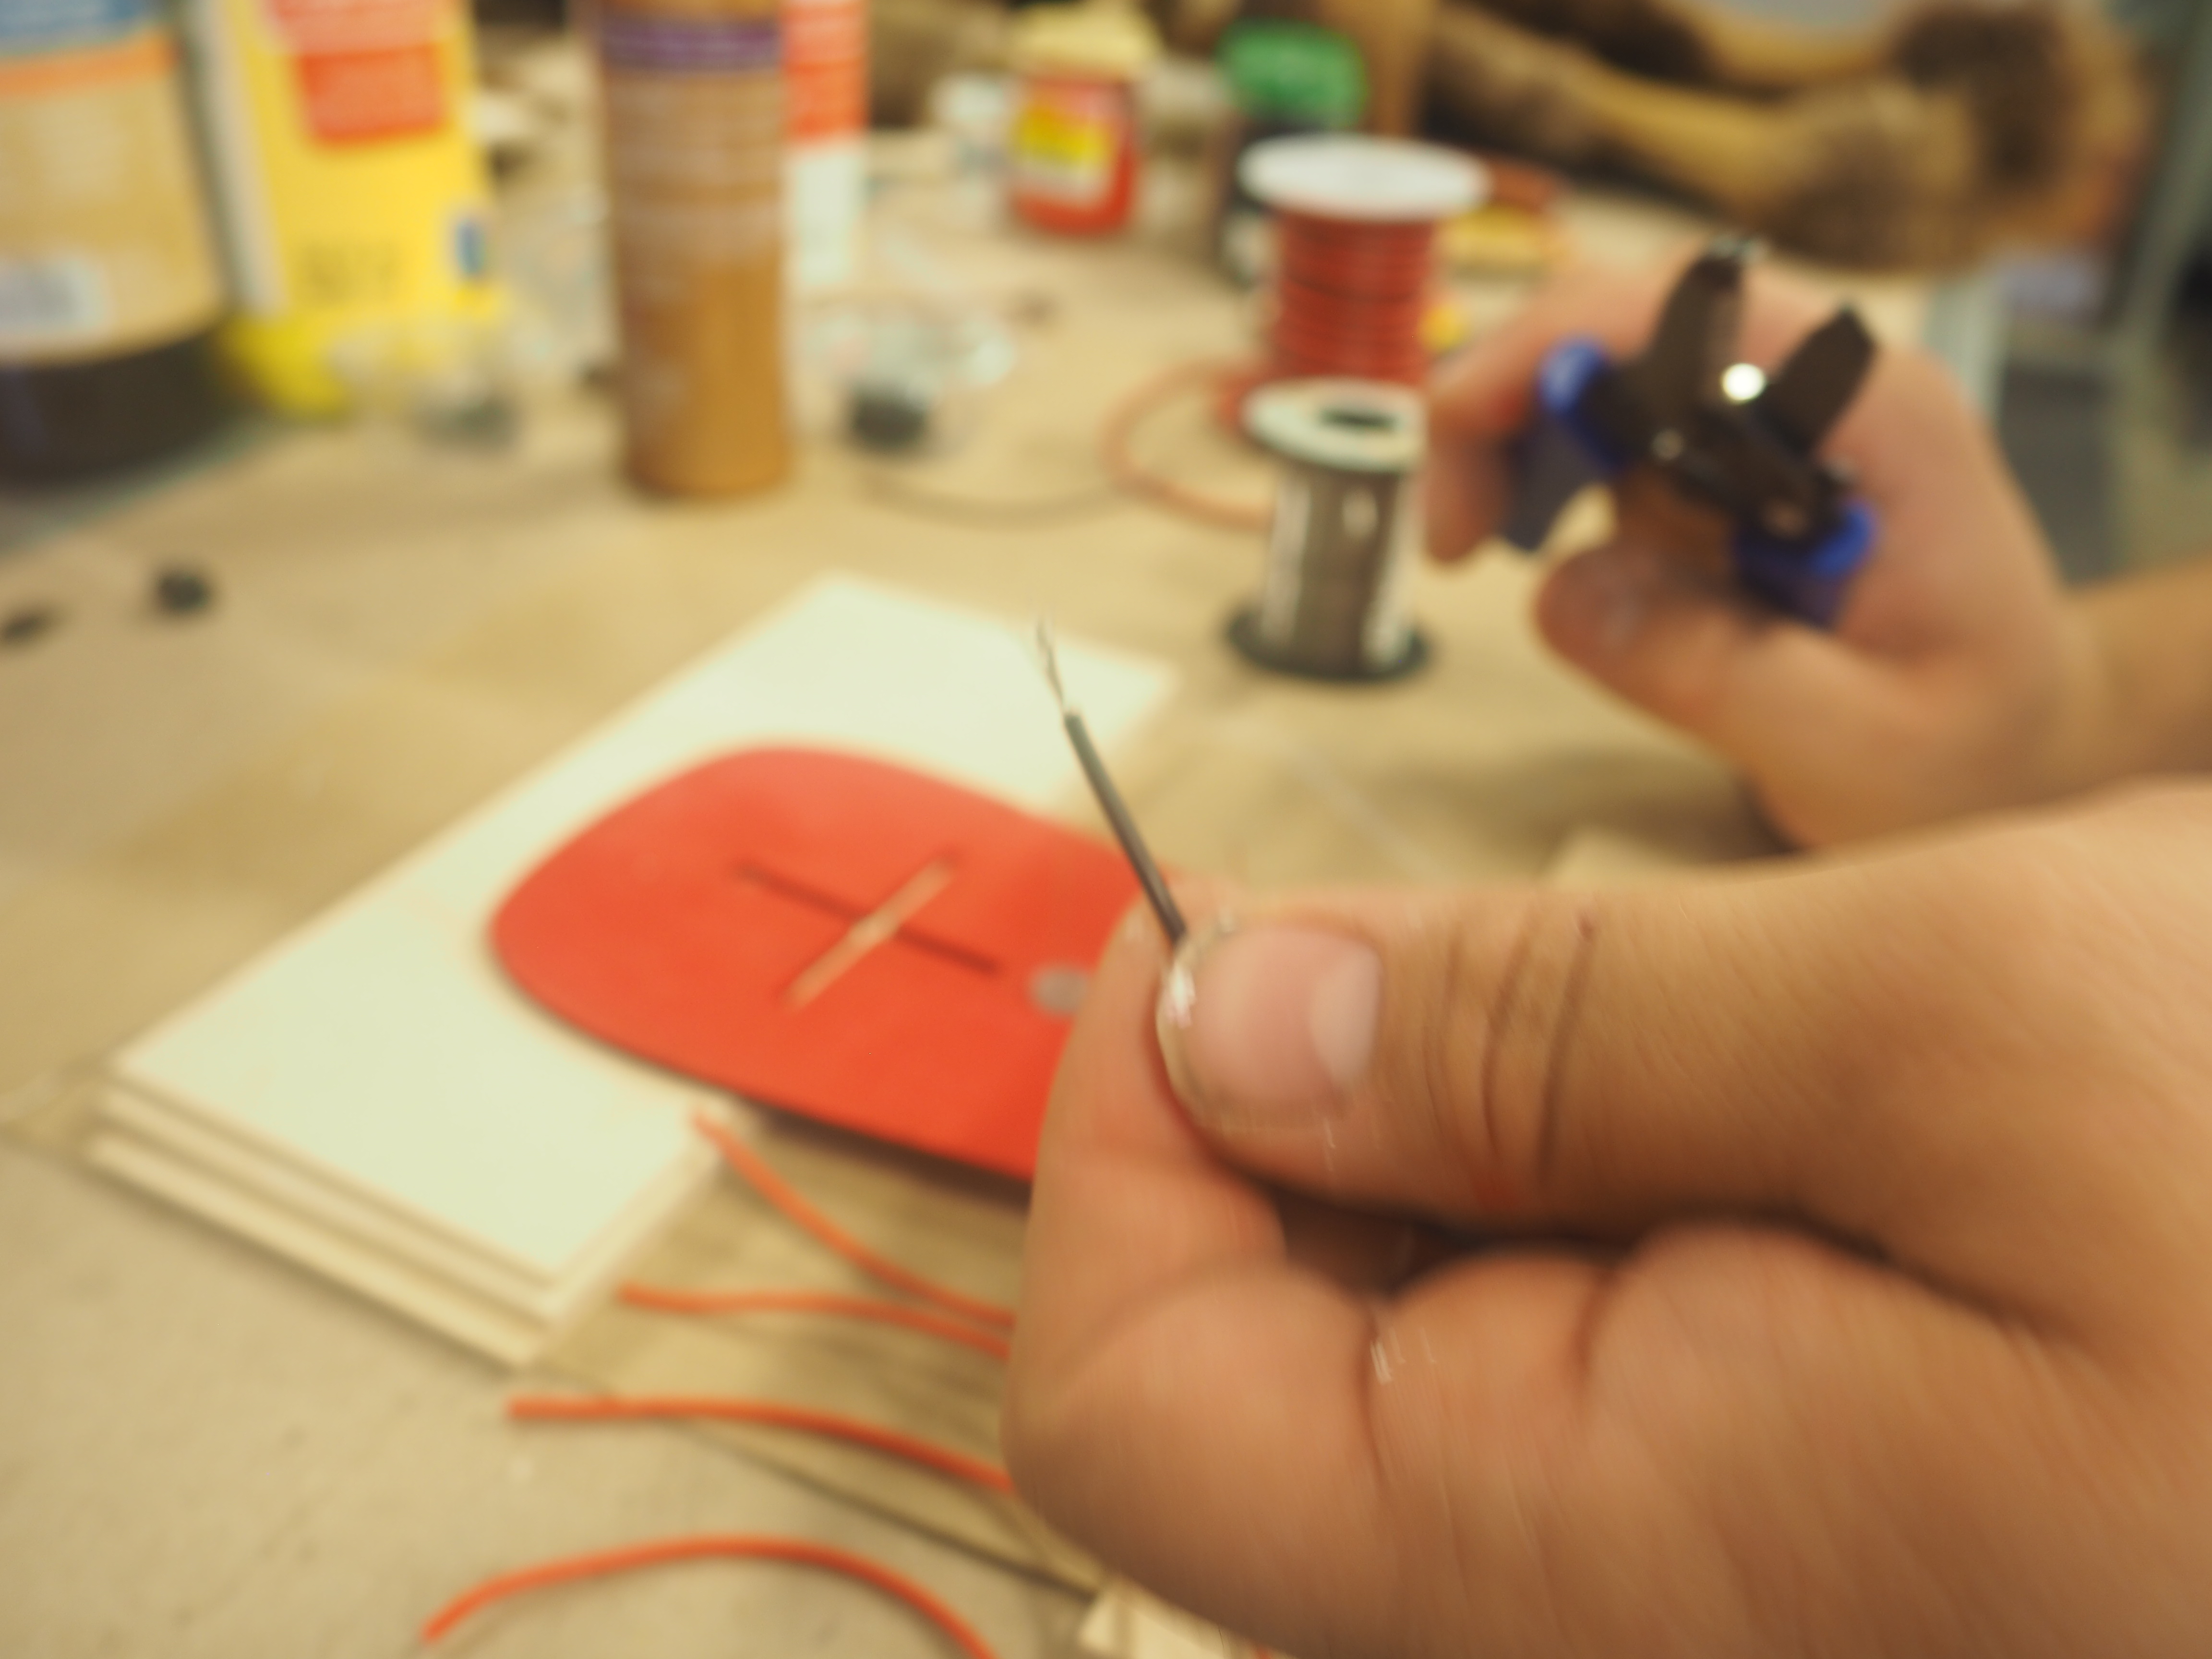
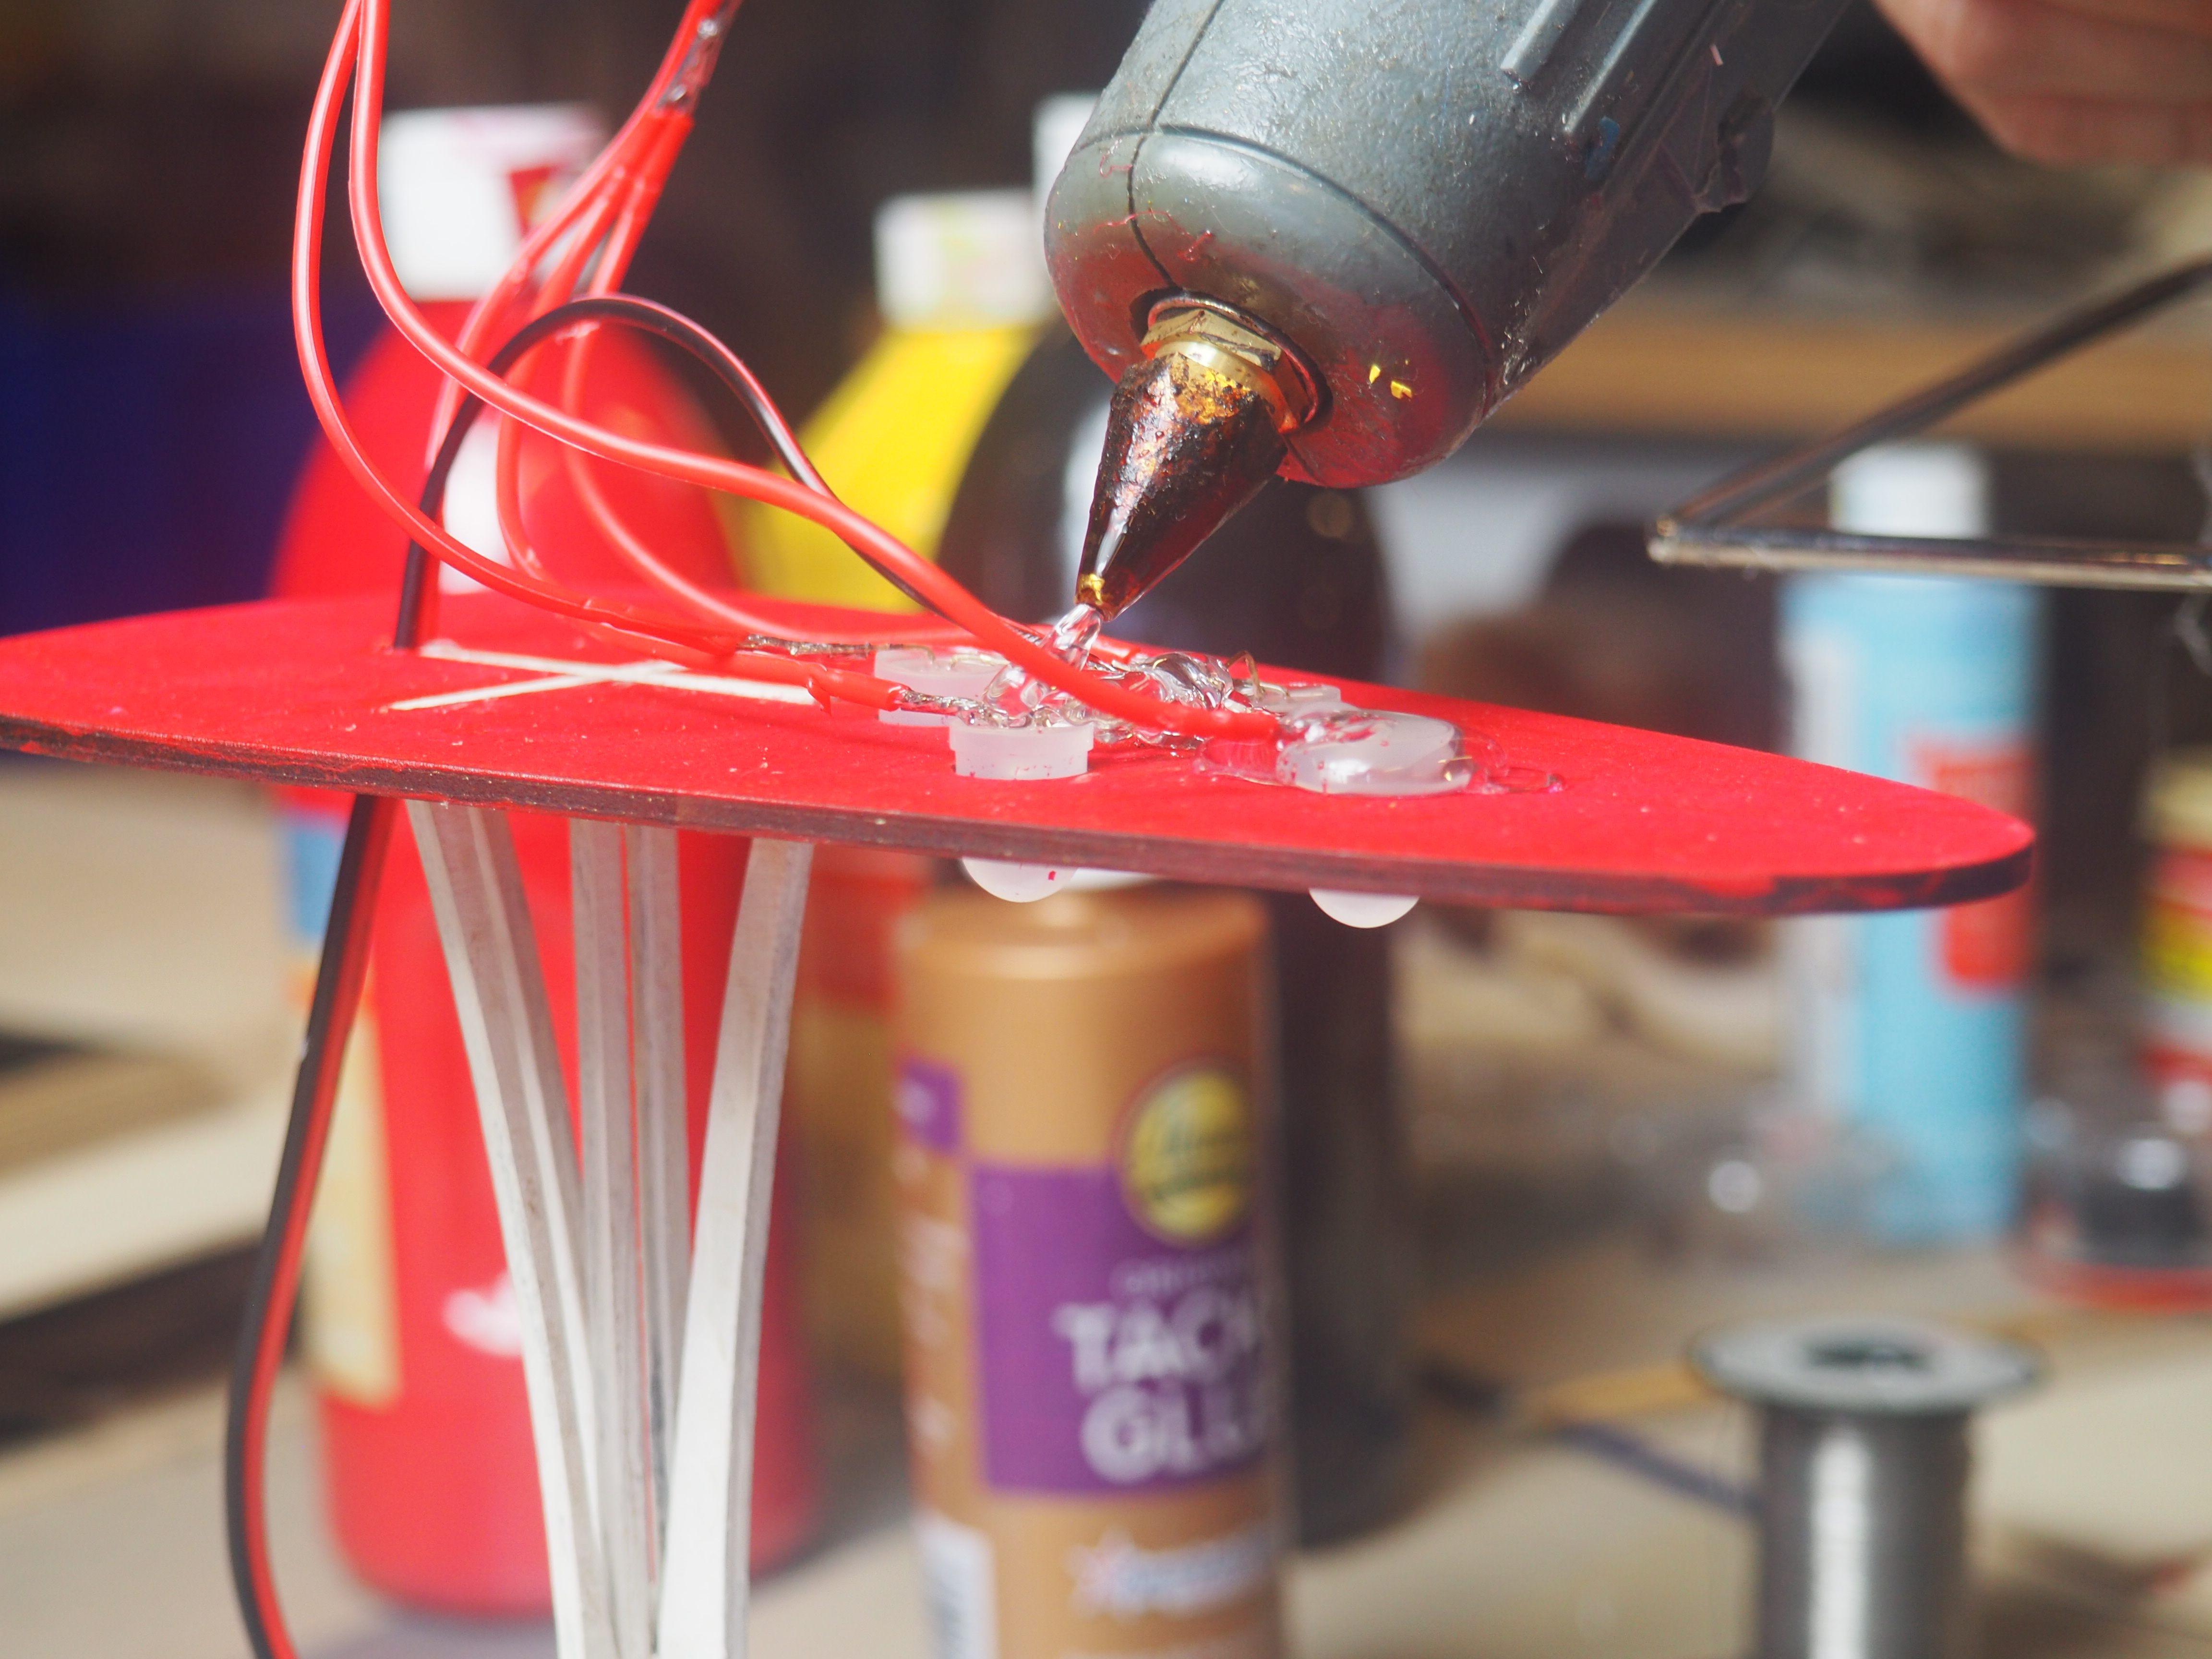
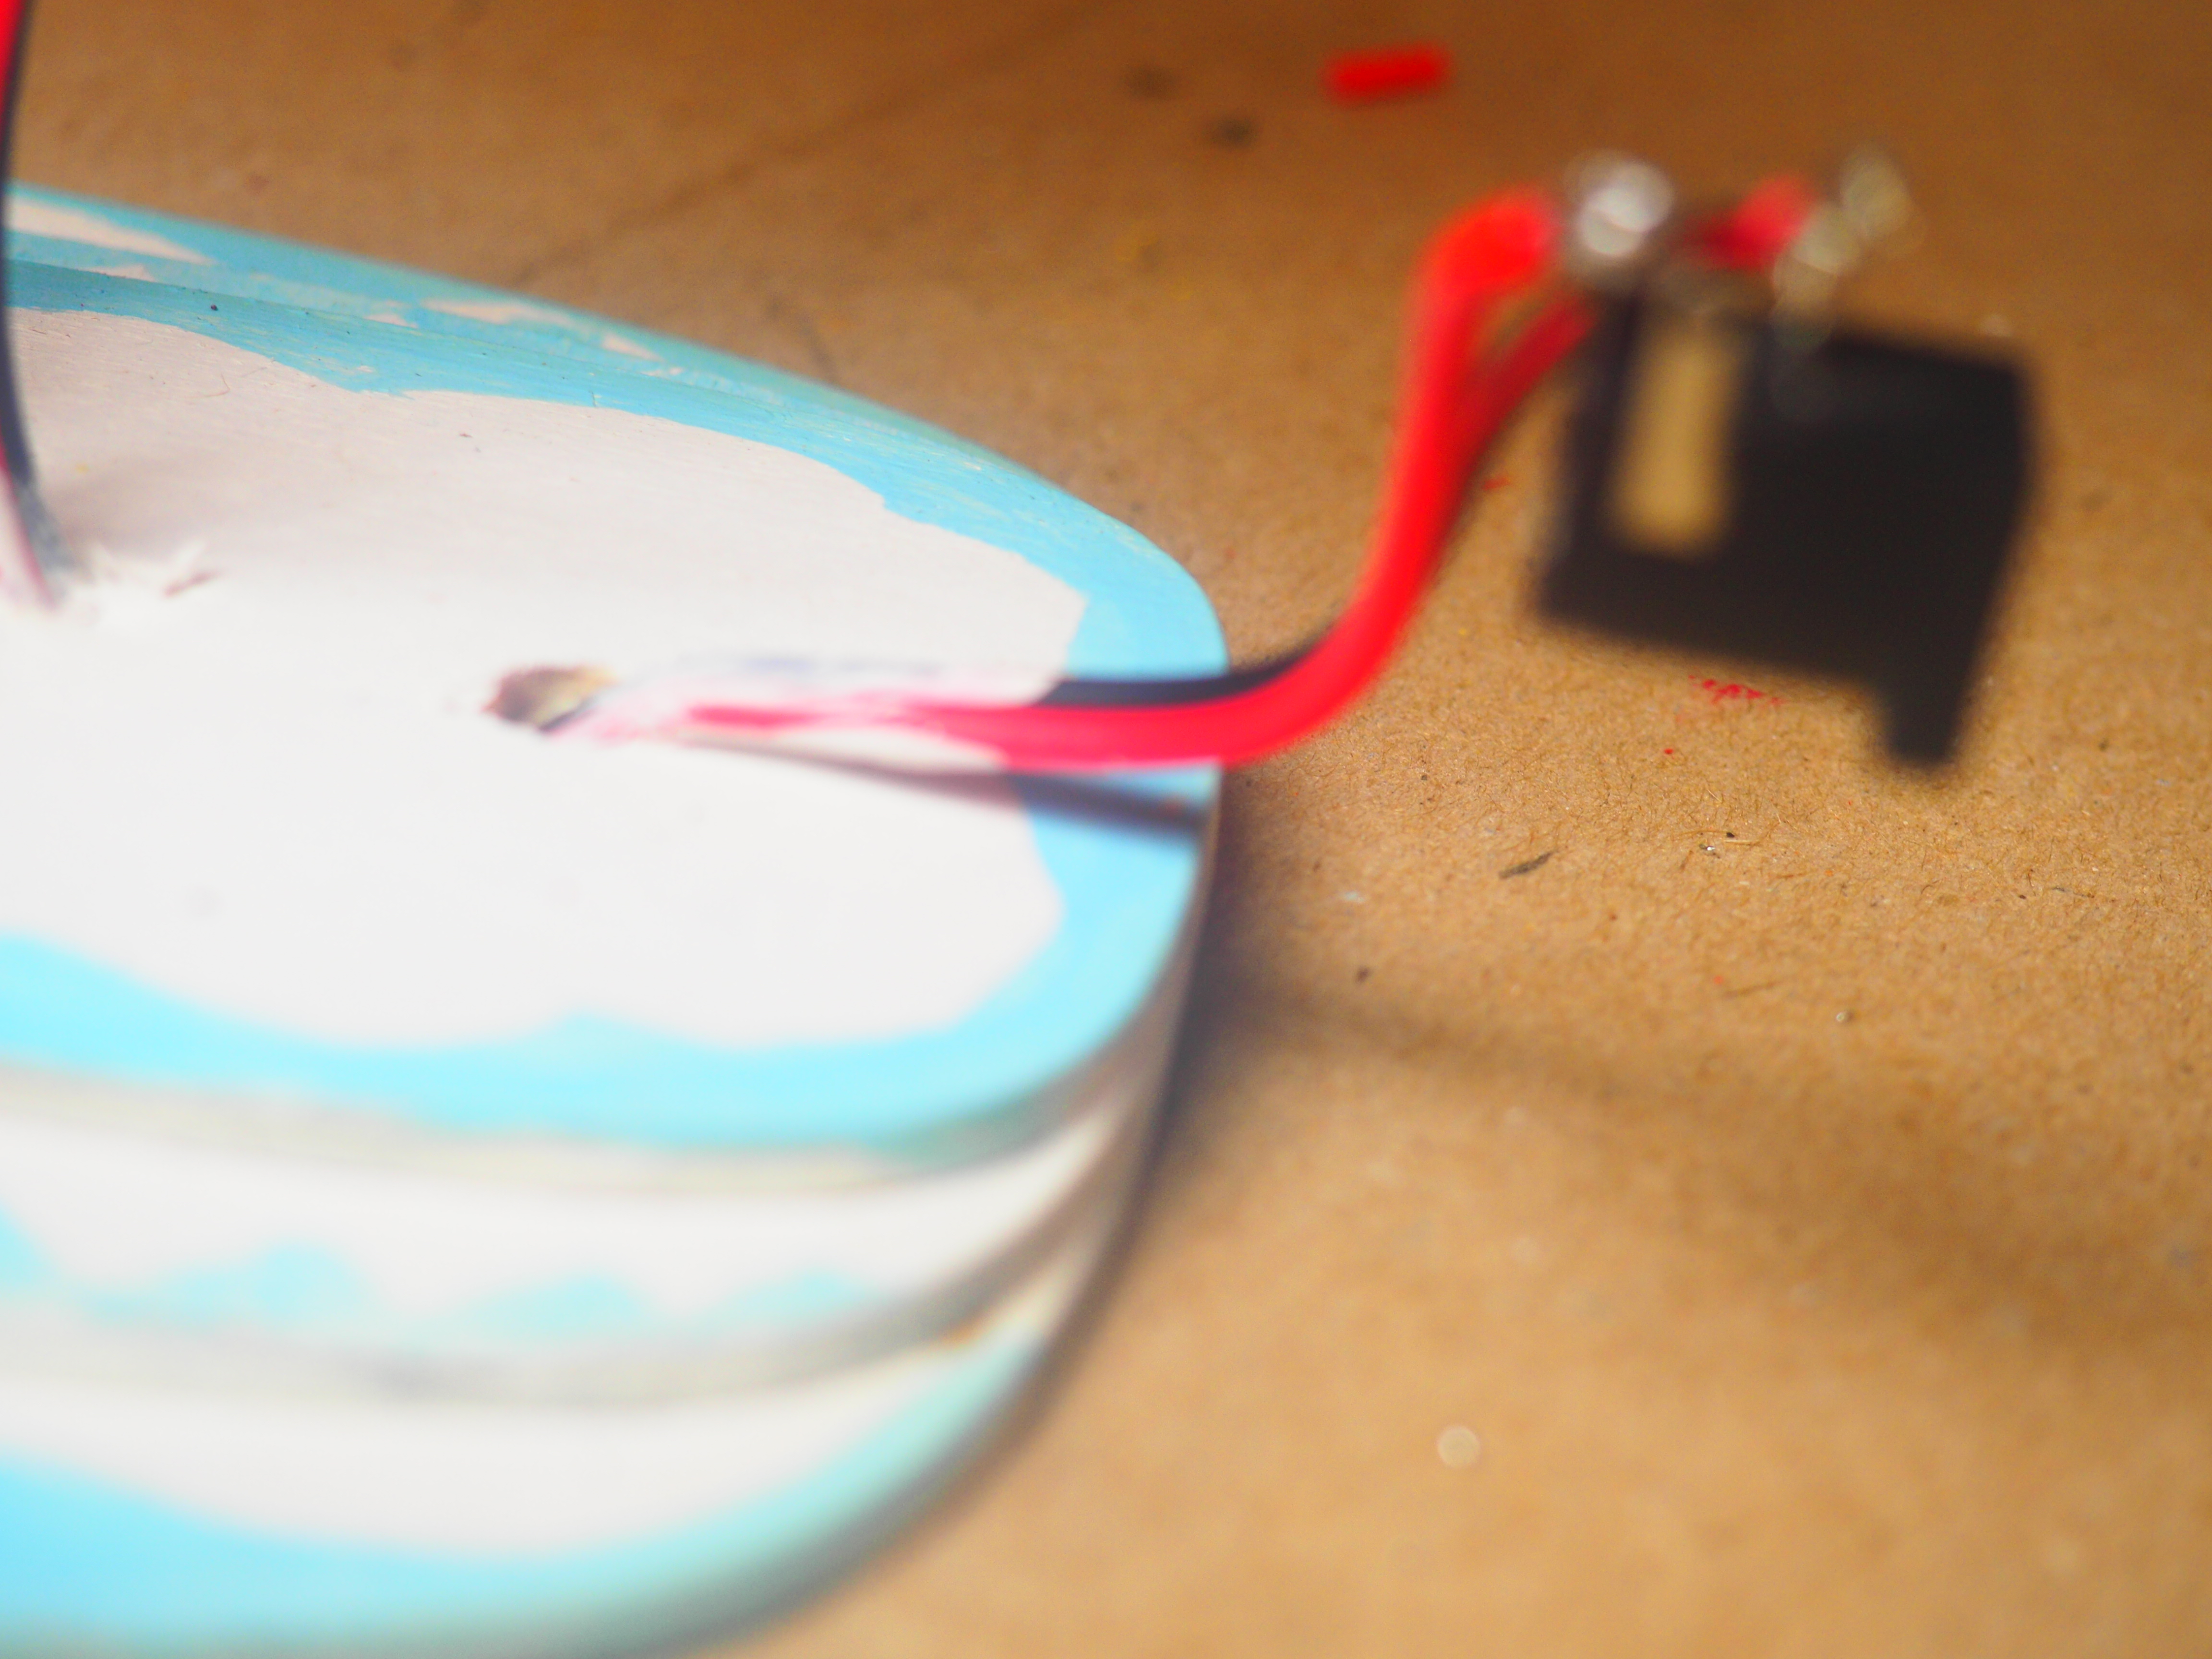
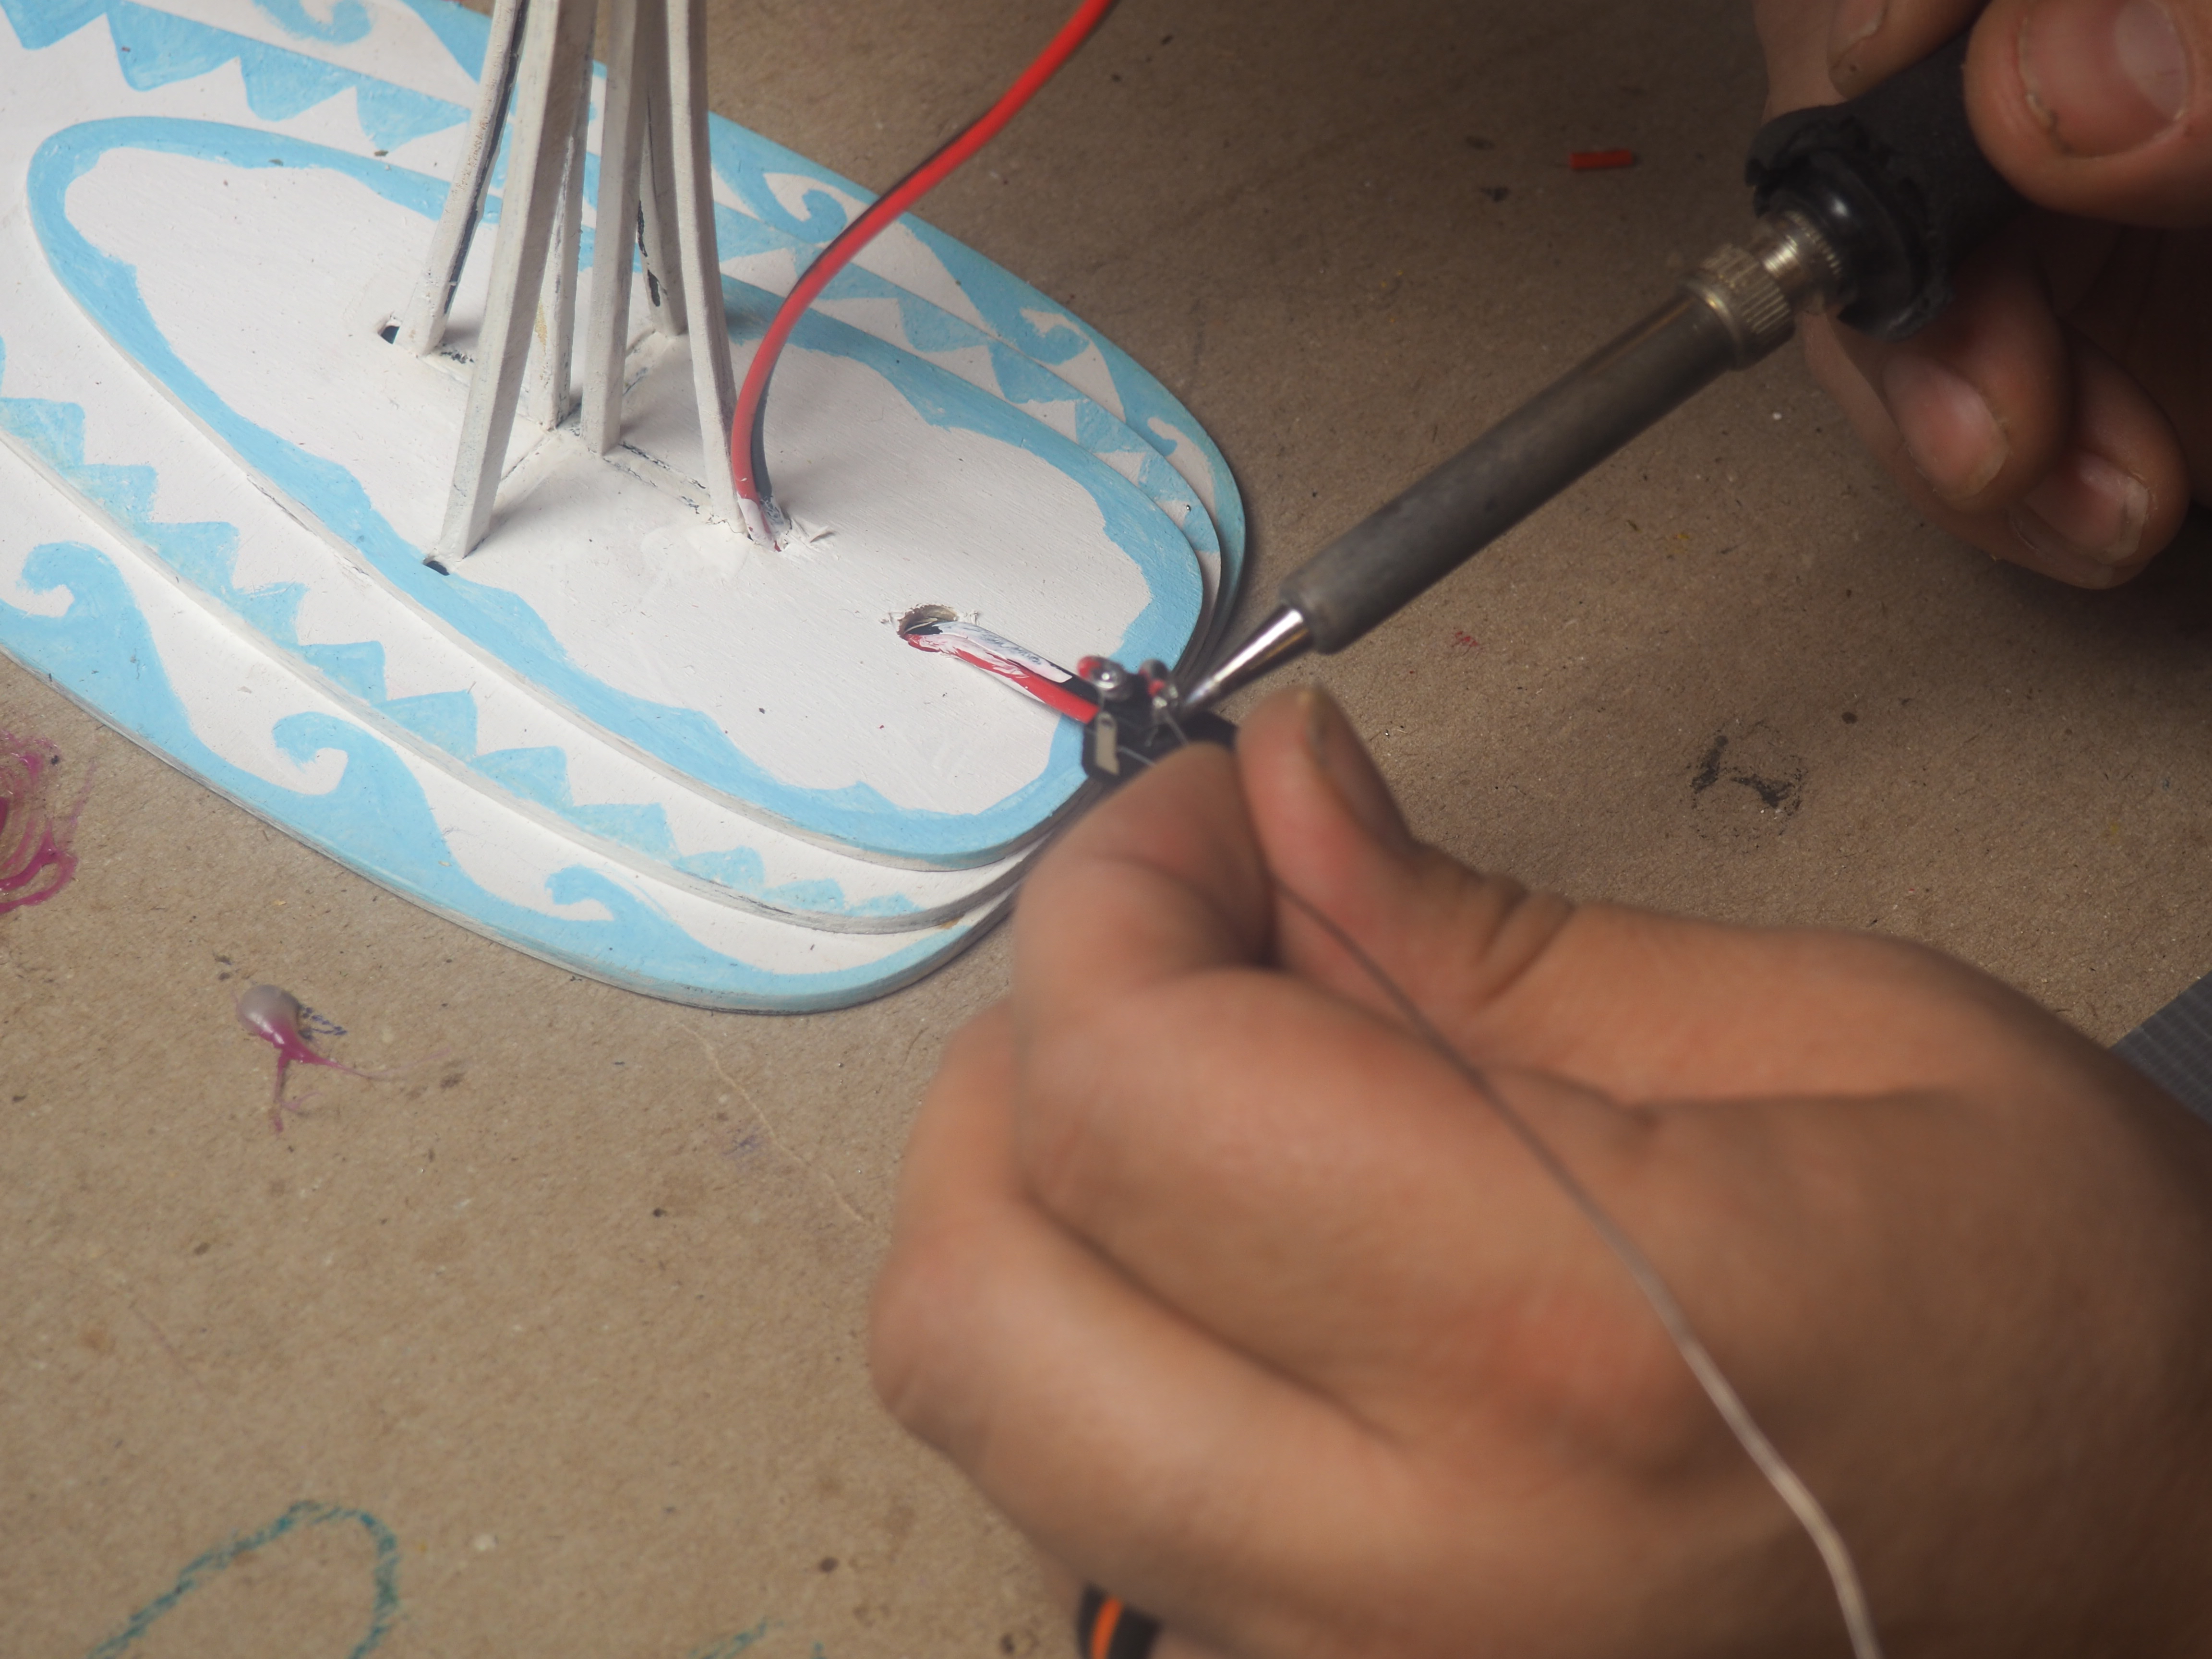
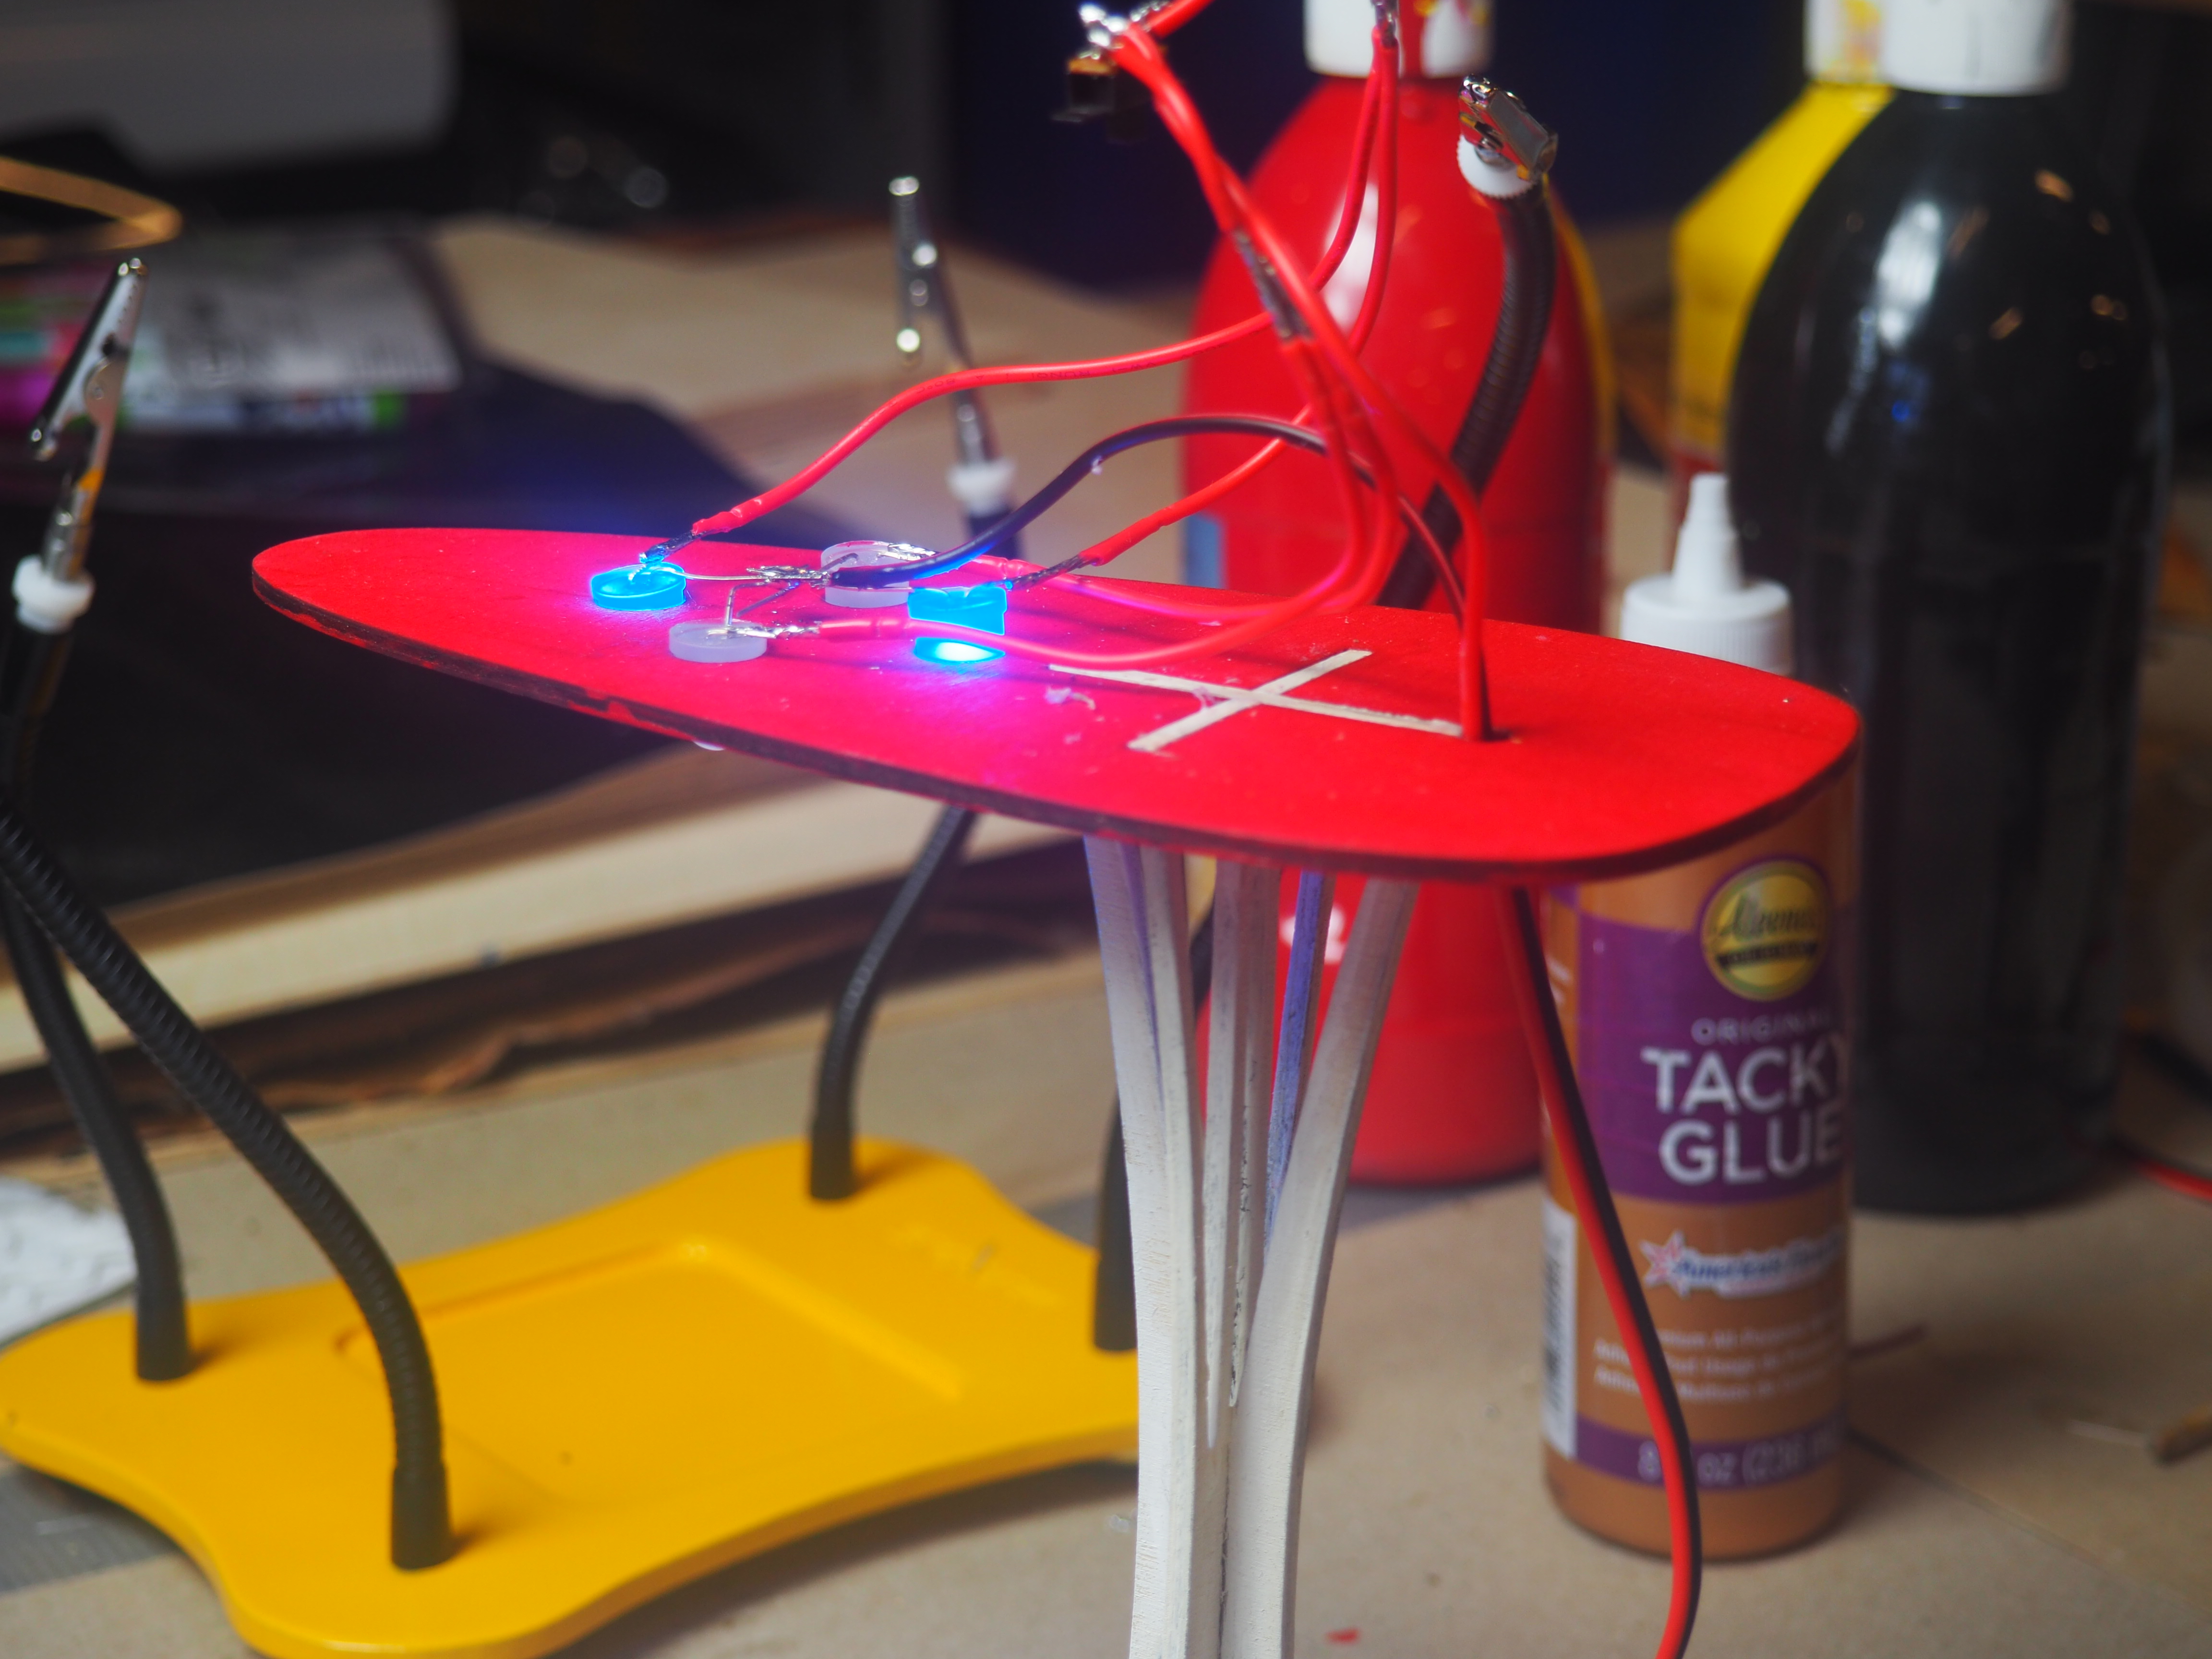
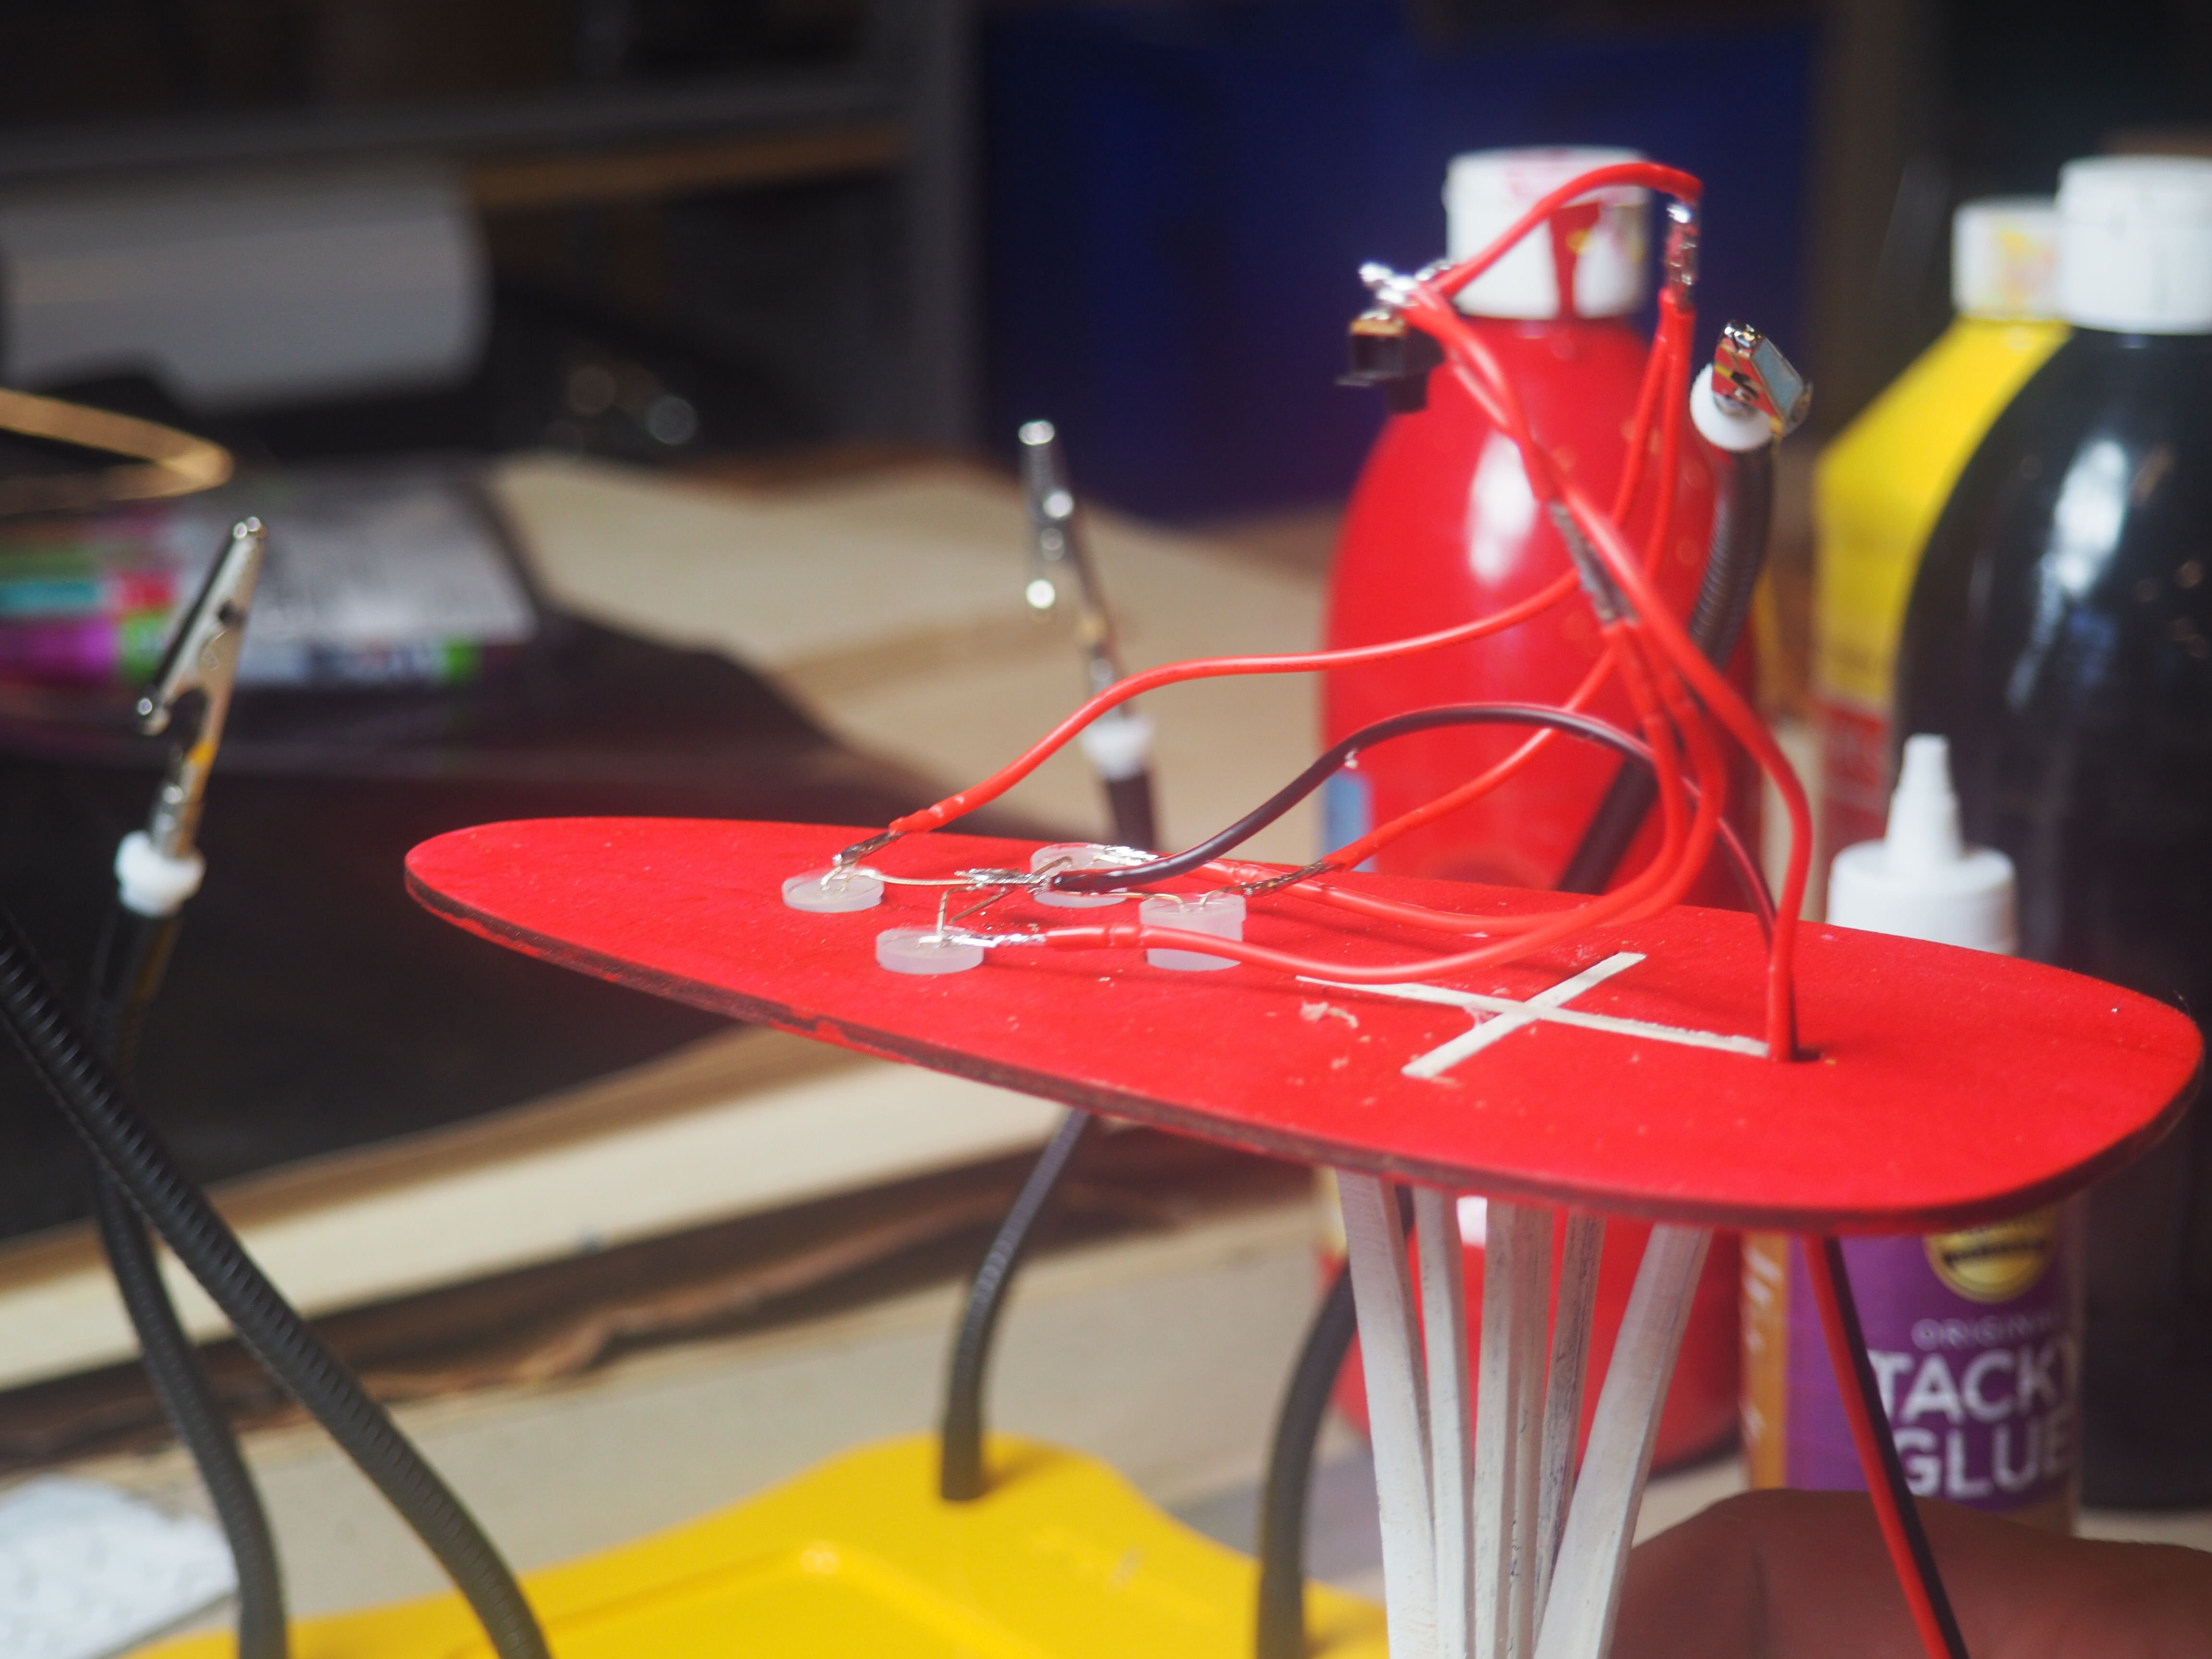
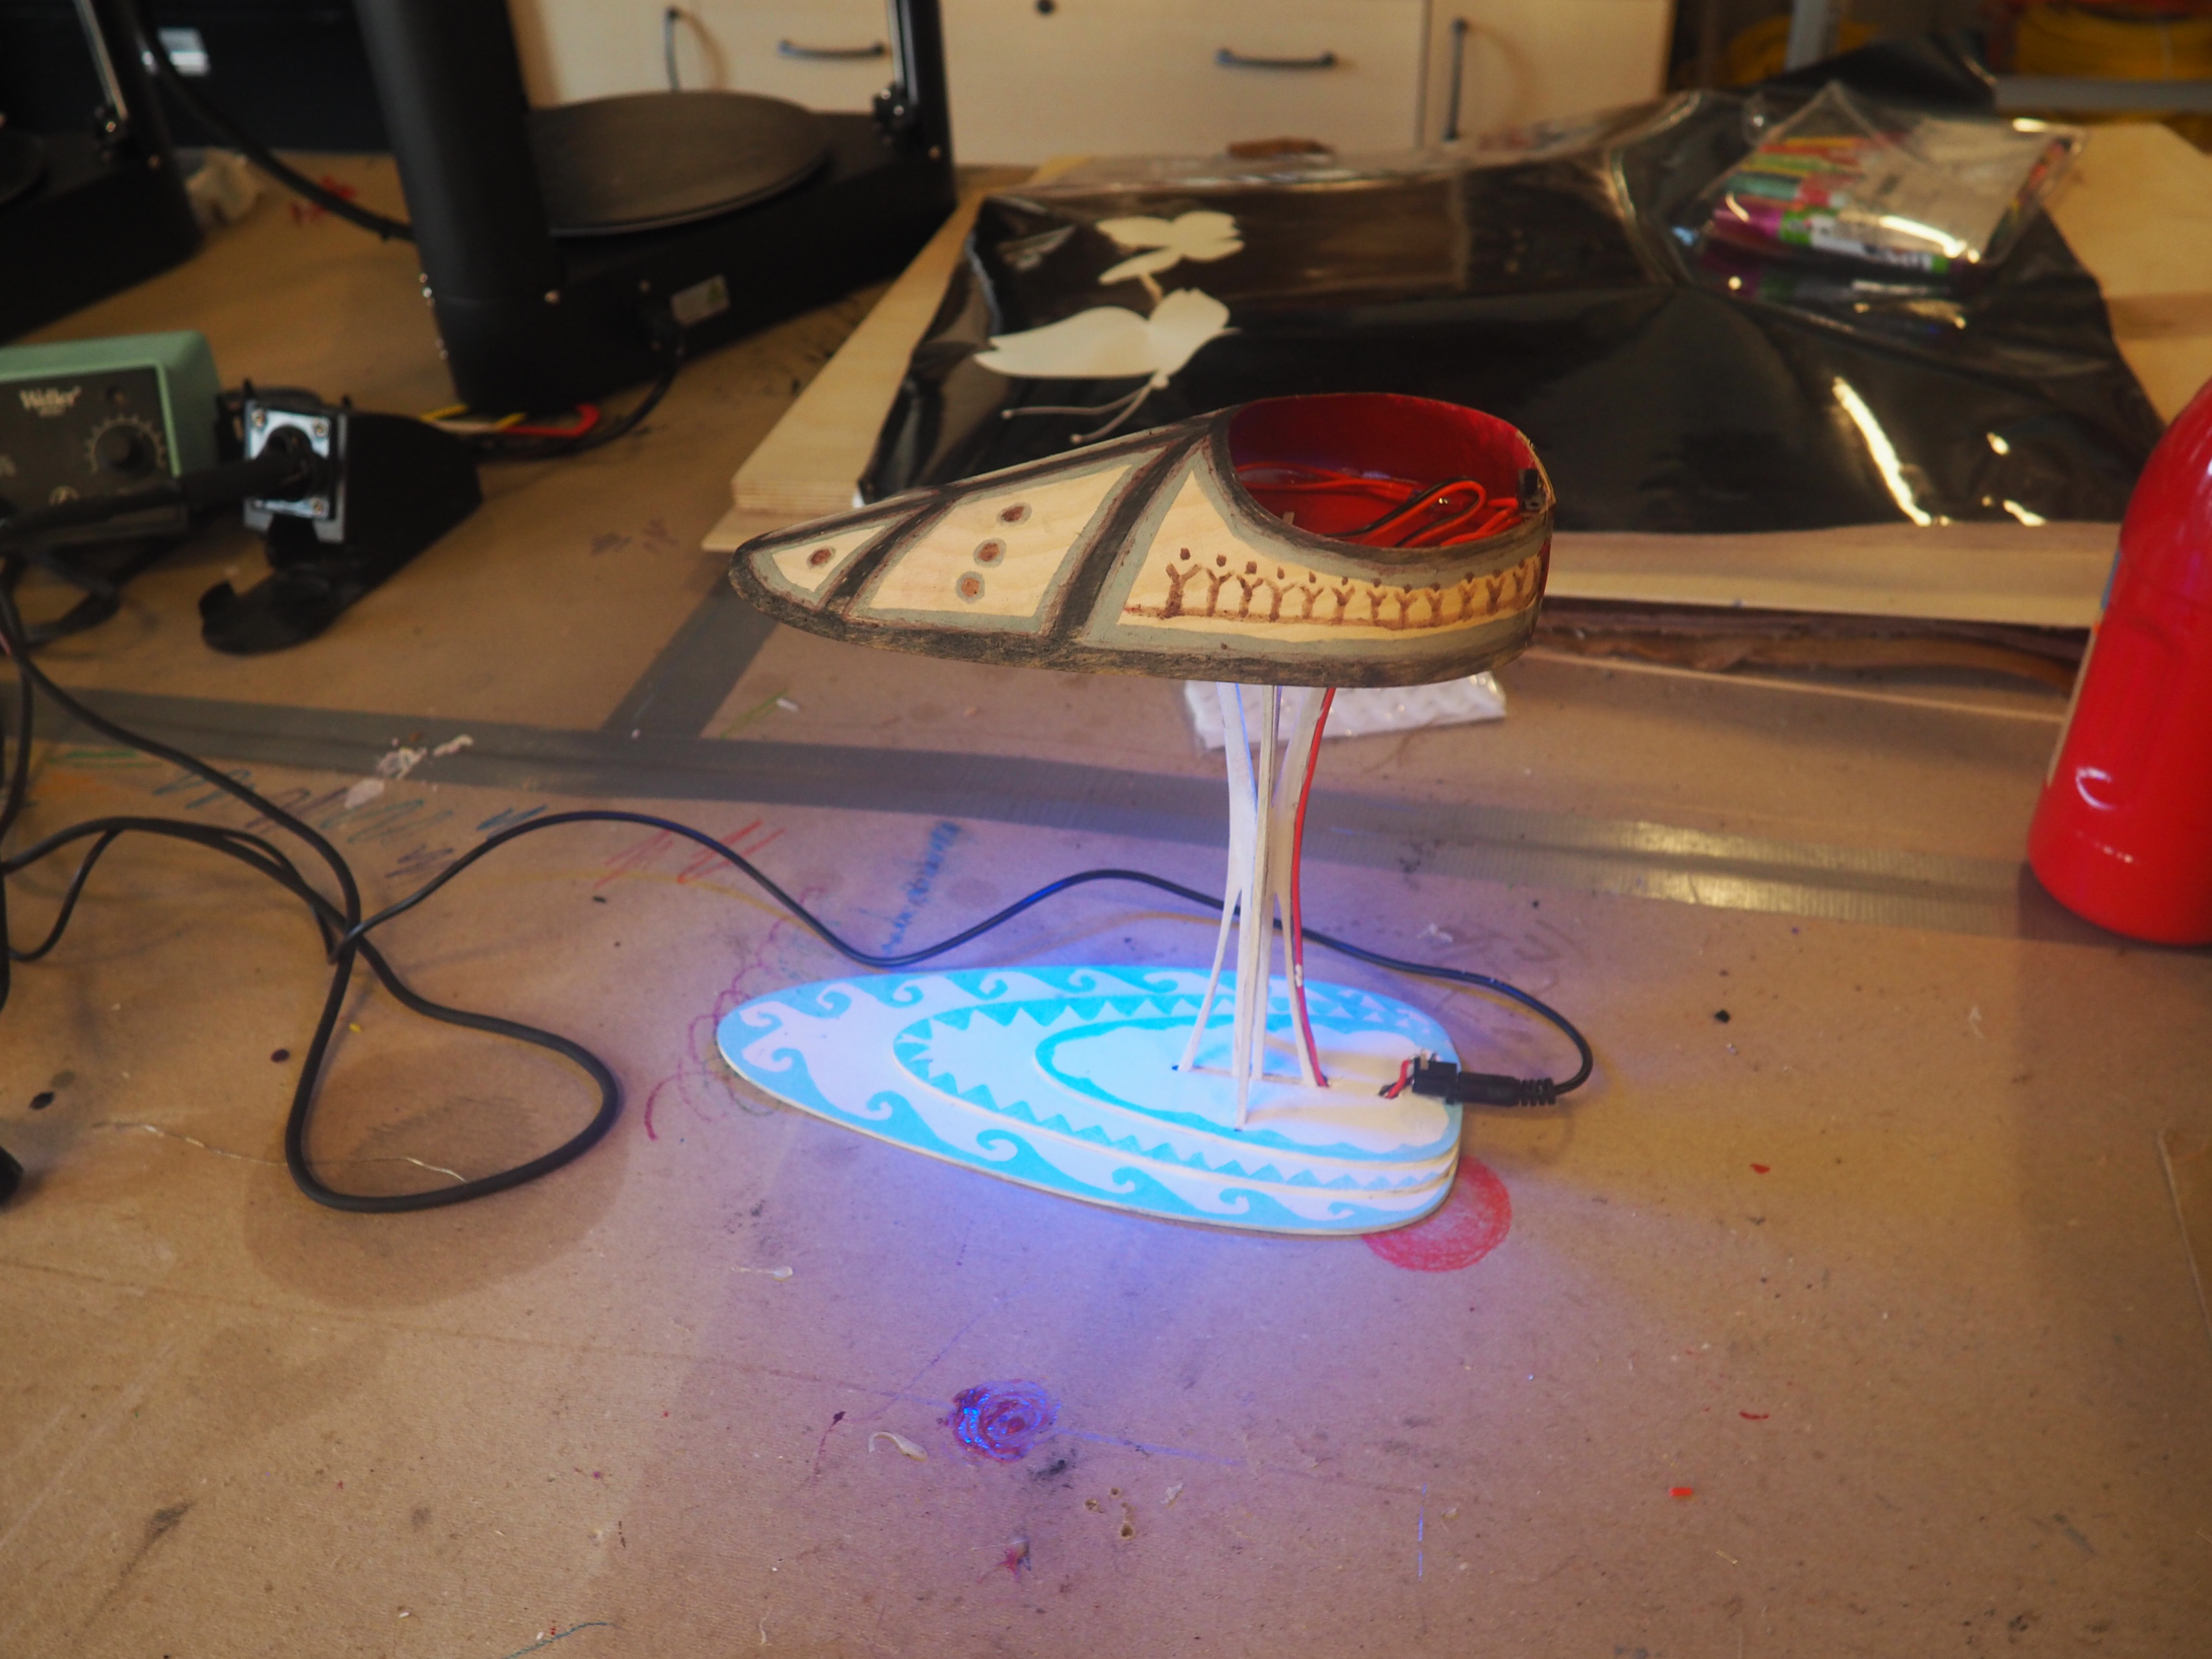
This step will be setting up the electronics for the lamp. You will need: Safety goggles Soldering Iron Well ventilated area or/and exhaust fan Solder 4 LED - this example used 2 blue 5v Ultrabright LEDs and 2 White 5v Ultrabright LEDs 4 wires 5 inches long 2 wires 2 inches long power jack three way switch Helping Hand electrical tape

  • Put on your Safety Goggles. Turn on your Soldering Iron. Make sure you are in a well ventilated area or are using an exhaust fan.


  • use scrap material to prop your LED base up so that you can set the LEDs into it and they will sit all the way in their holes. The set up used in this project is the two white LEDs across from each other and the two blue LEDs across from each other.


  • Bend the negative legs of the LEDs down to meet in the middle of the LEDs. The negative leg is the shorter of the two legs.


  • Solder the four negative legs together in the middle.


  • Cut four wires at 5 inches long, and two at 2 inches long. Strip both ends of the wires, strip about 1/2 an inch of the insulation off.


  • Tin one end of the five inch wires, this means add solder to the ends. Cut the positive legs of the LEDs to 1/2 inch, tin those ends. Solder the wires onto the LED legs.


  • Take the two blue led wires and twist the ends together with the two inch wire you cut. Use a helping hand to hold the wires together. Solder those wires together. Electrical tape, or use heat shrink tubing to cover the soldered connection. Do the same to the two wires that are connected to the white LEDs.


  • Take the end of one of the wires you just soldered the two wires to, push the end through one of the side terminals of the switch. Solder this connection. Push the other wire you soldered to through the other side terminal, solder this connection.


Glue the Lamp base the Stand!

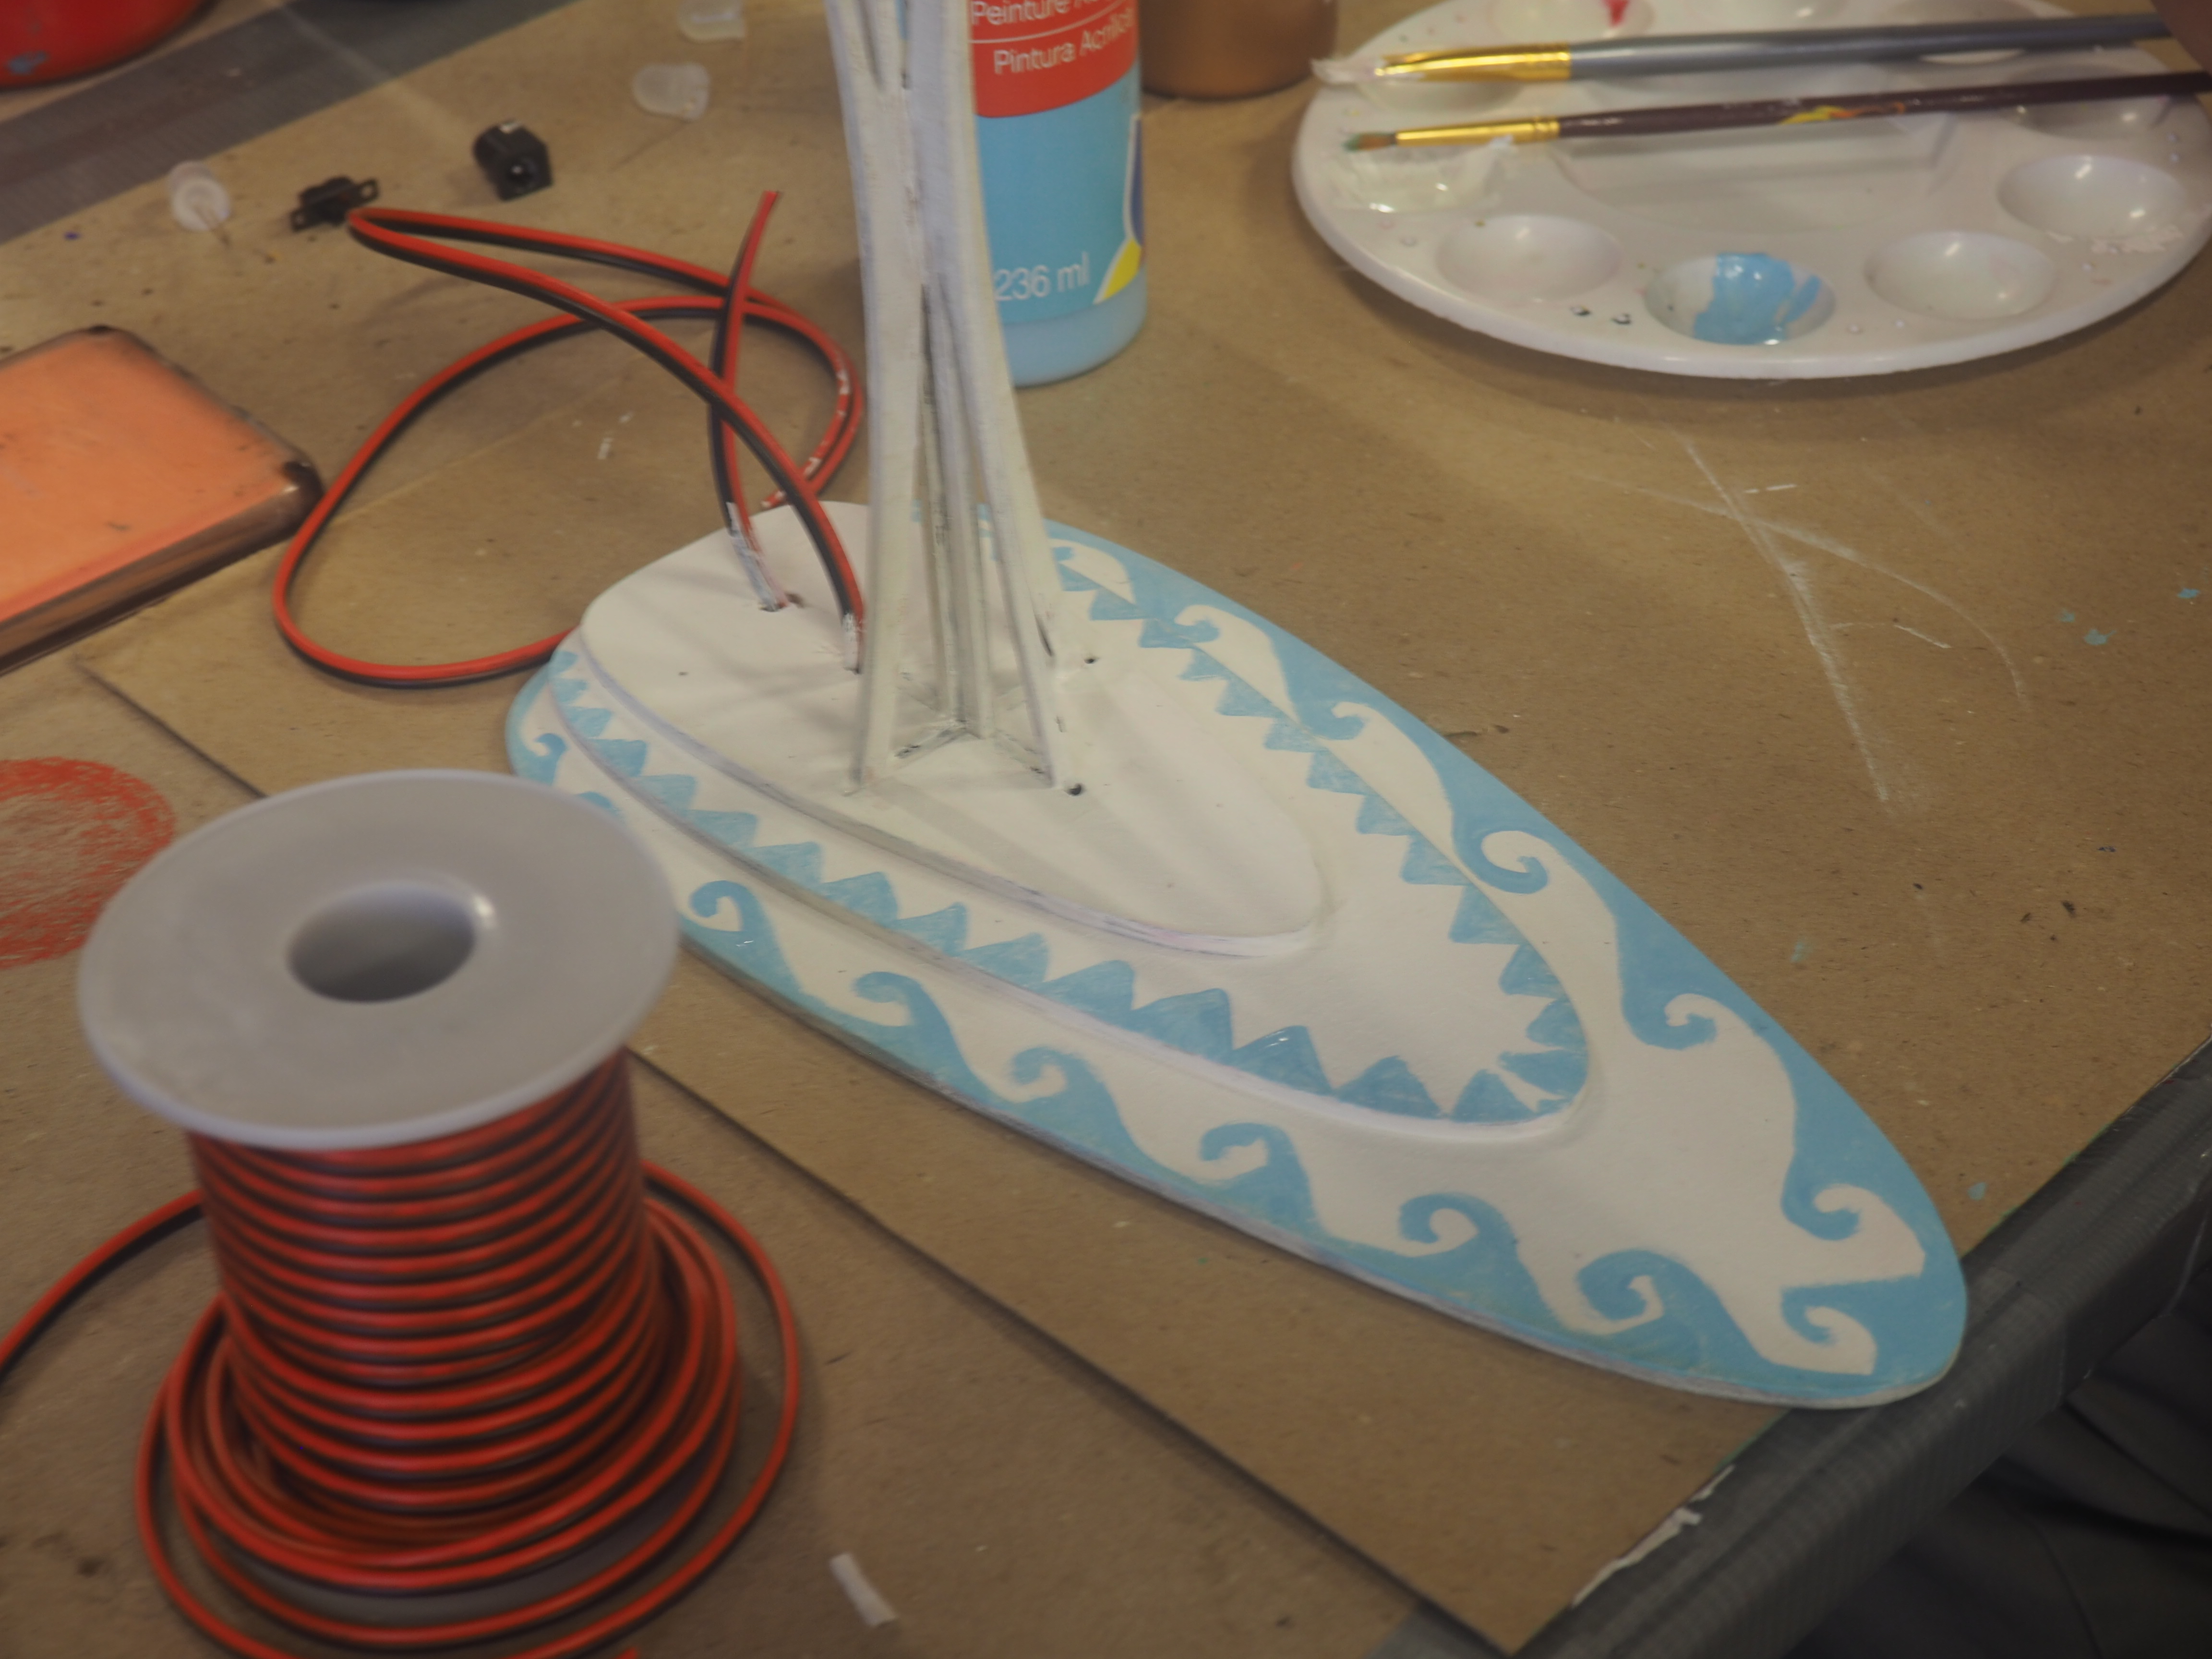
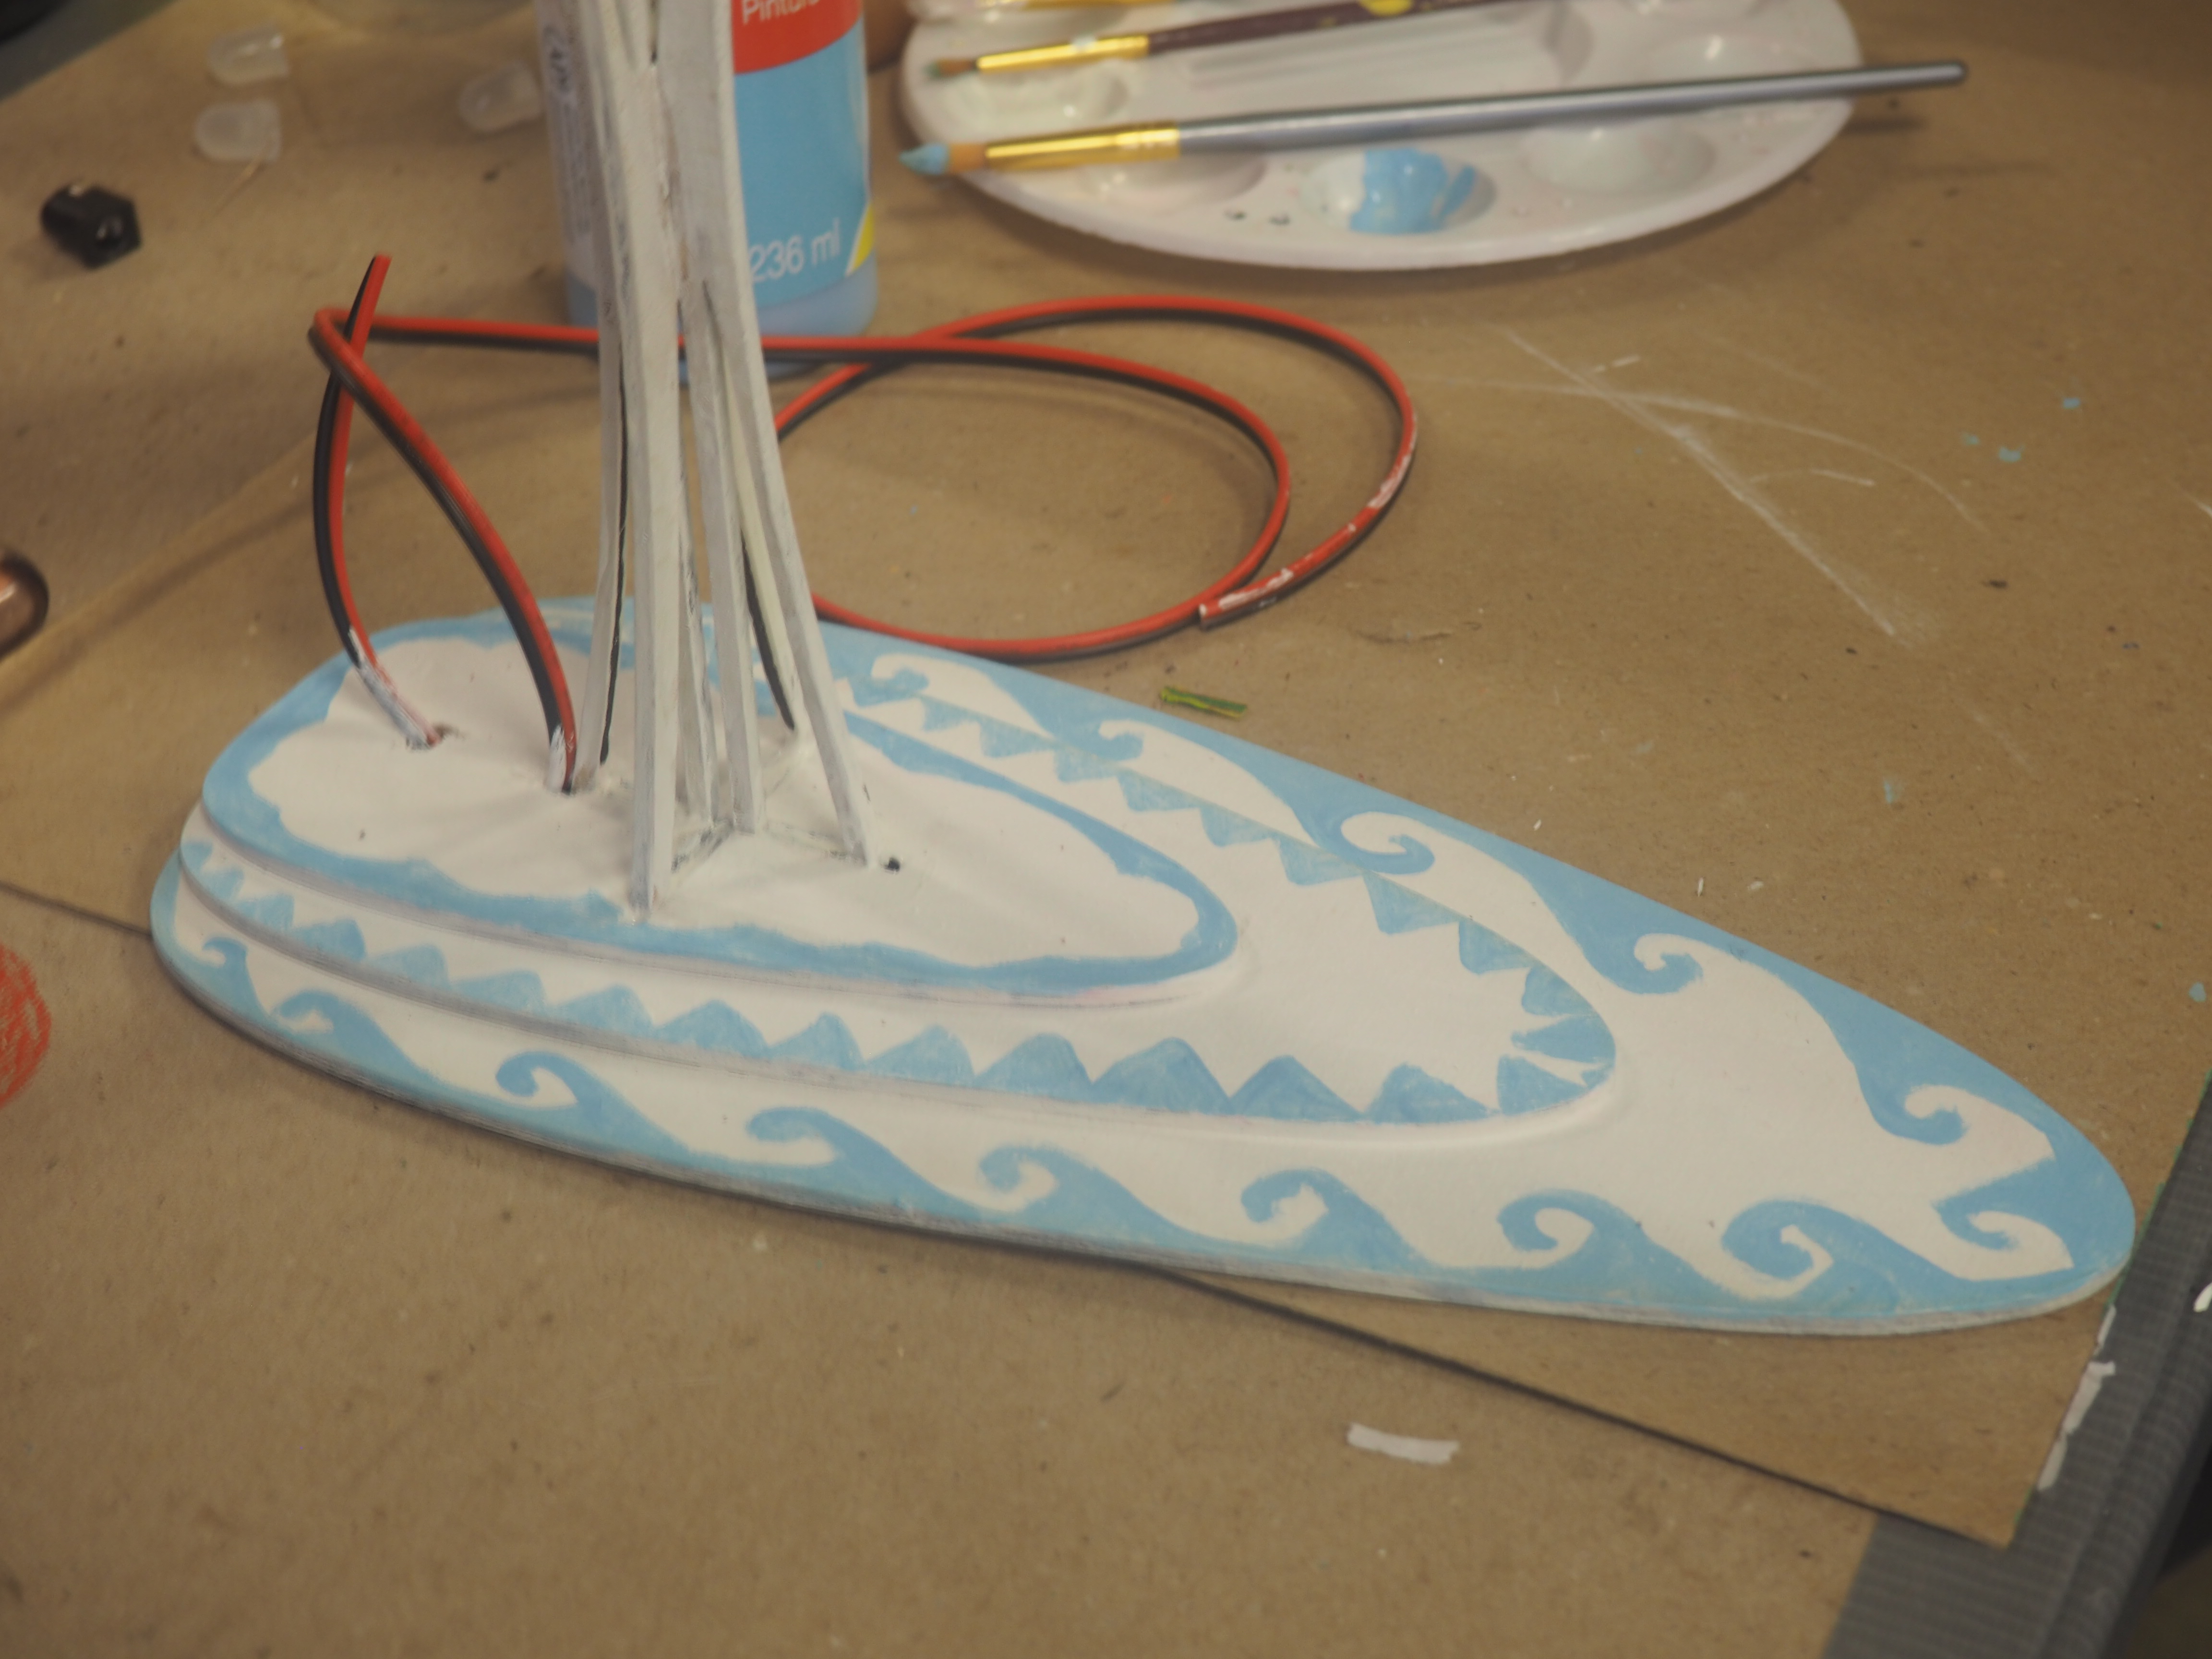
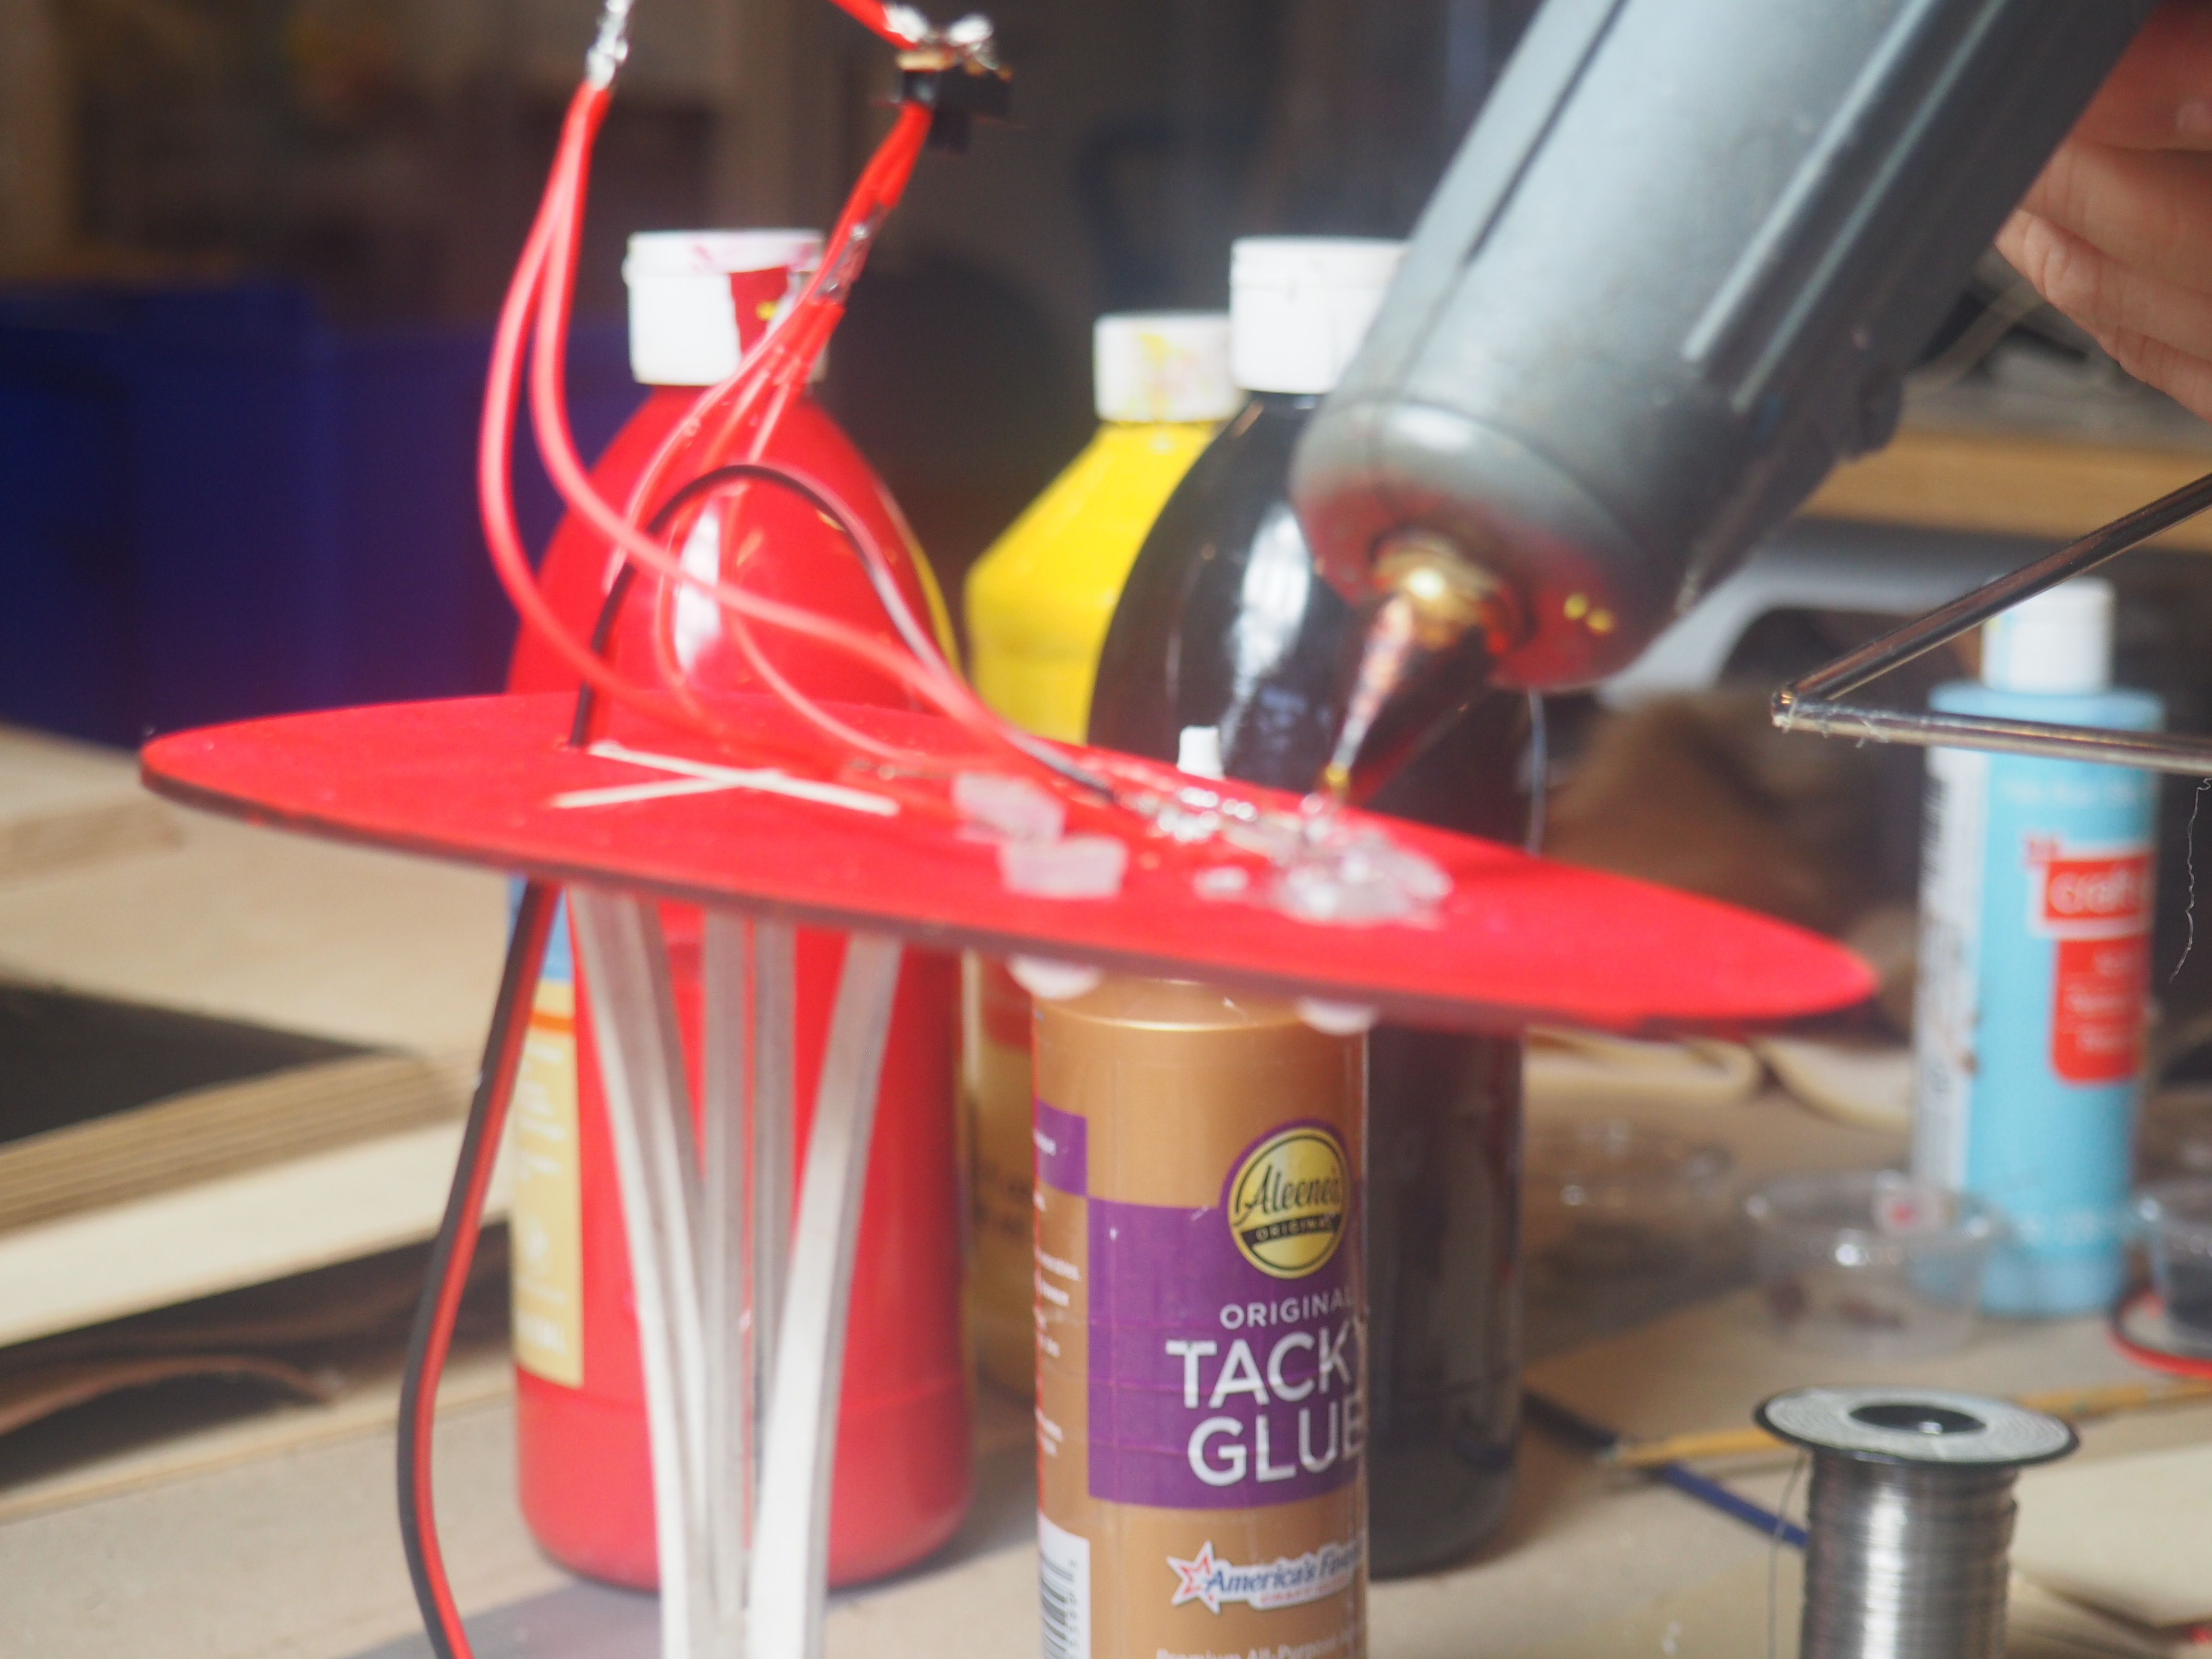
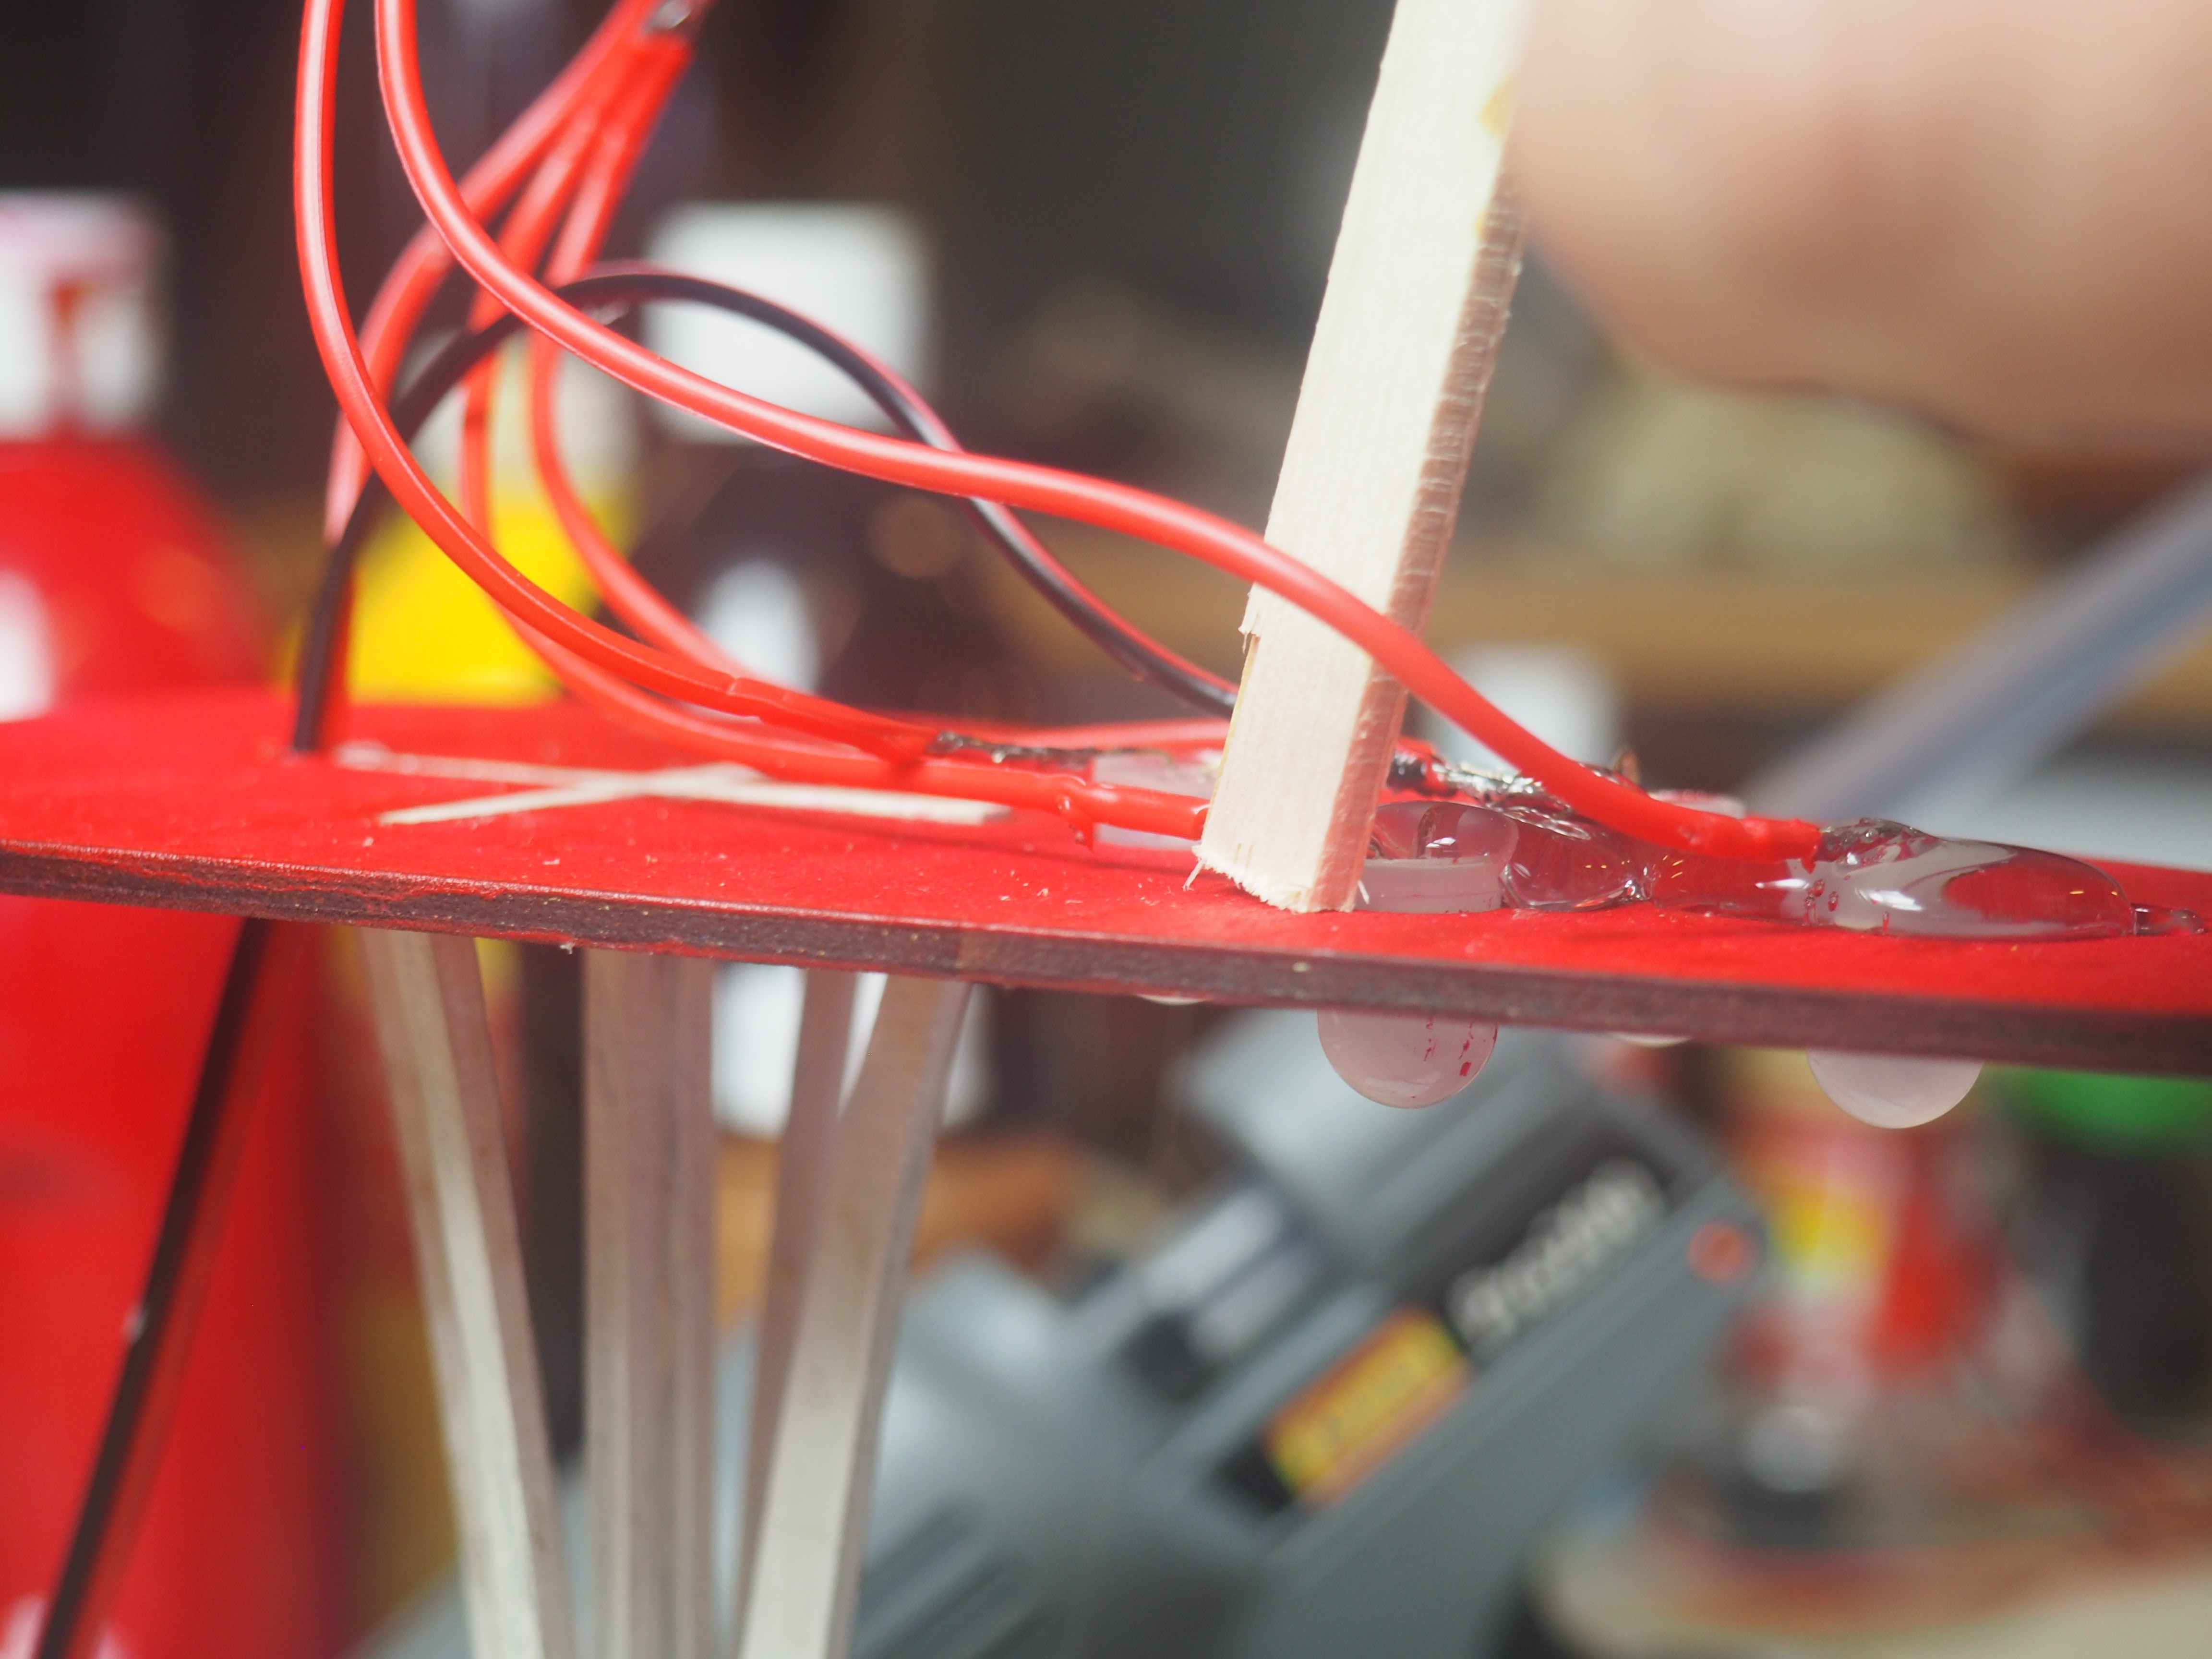
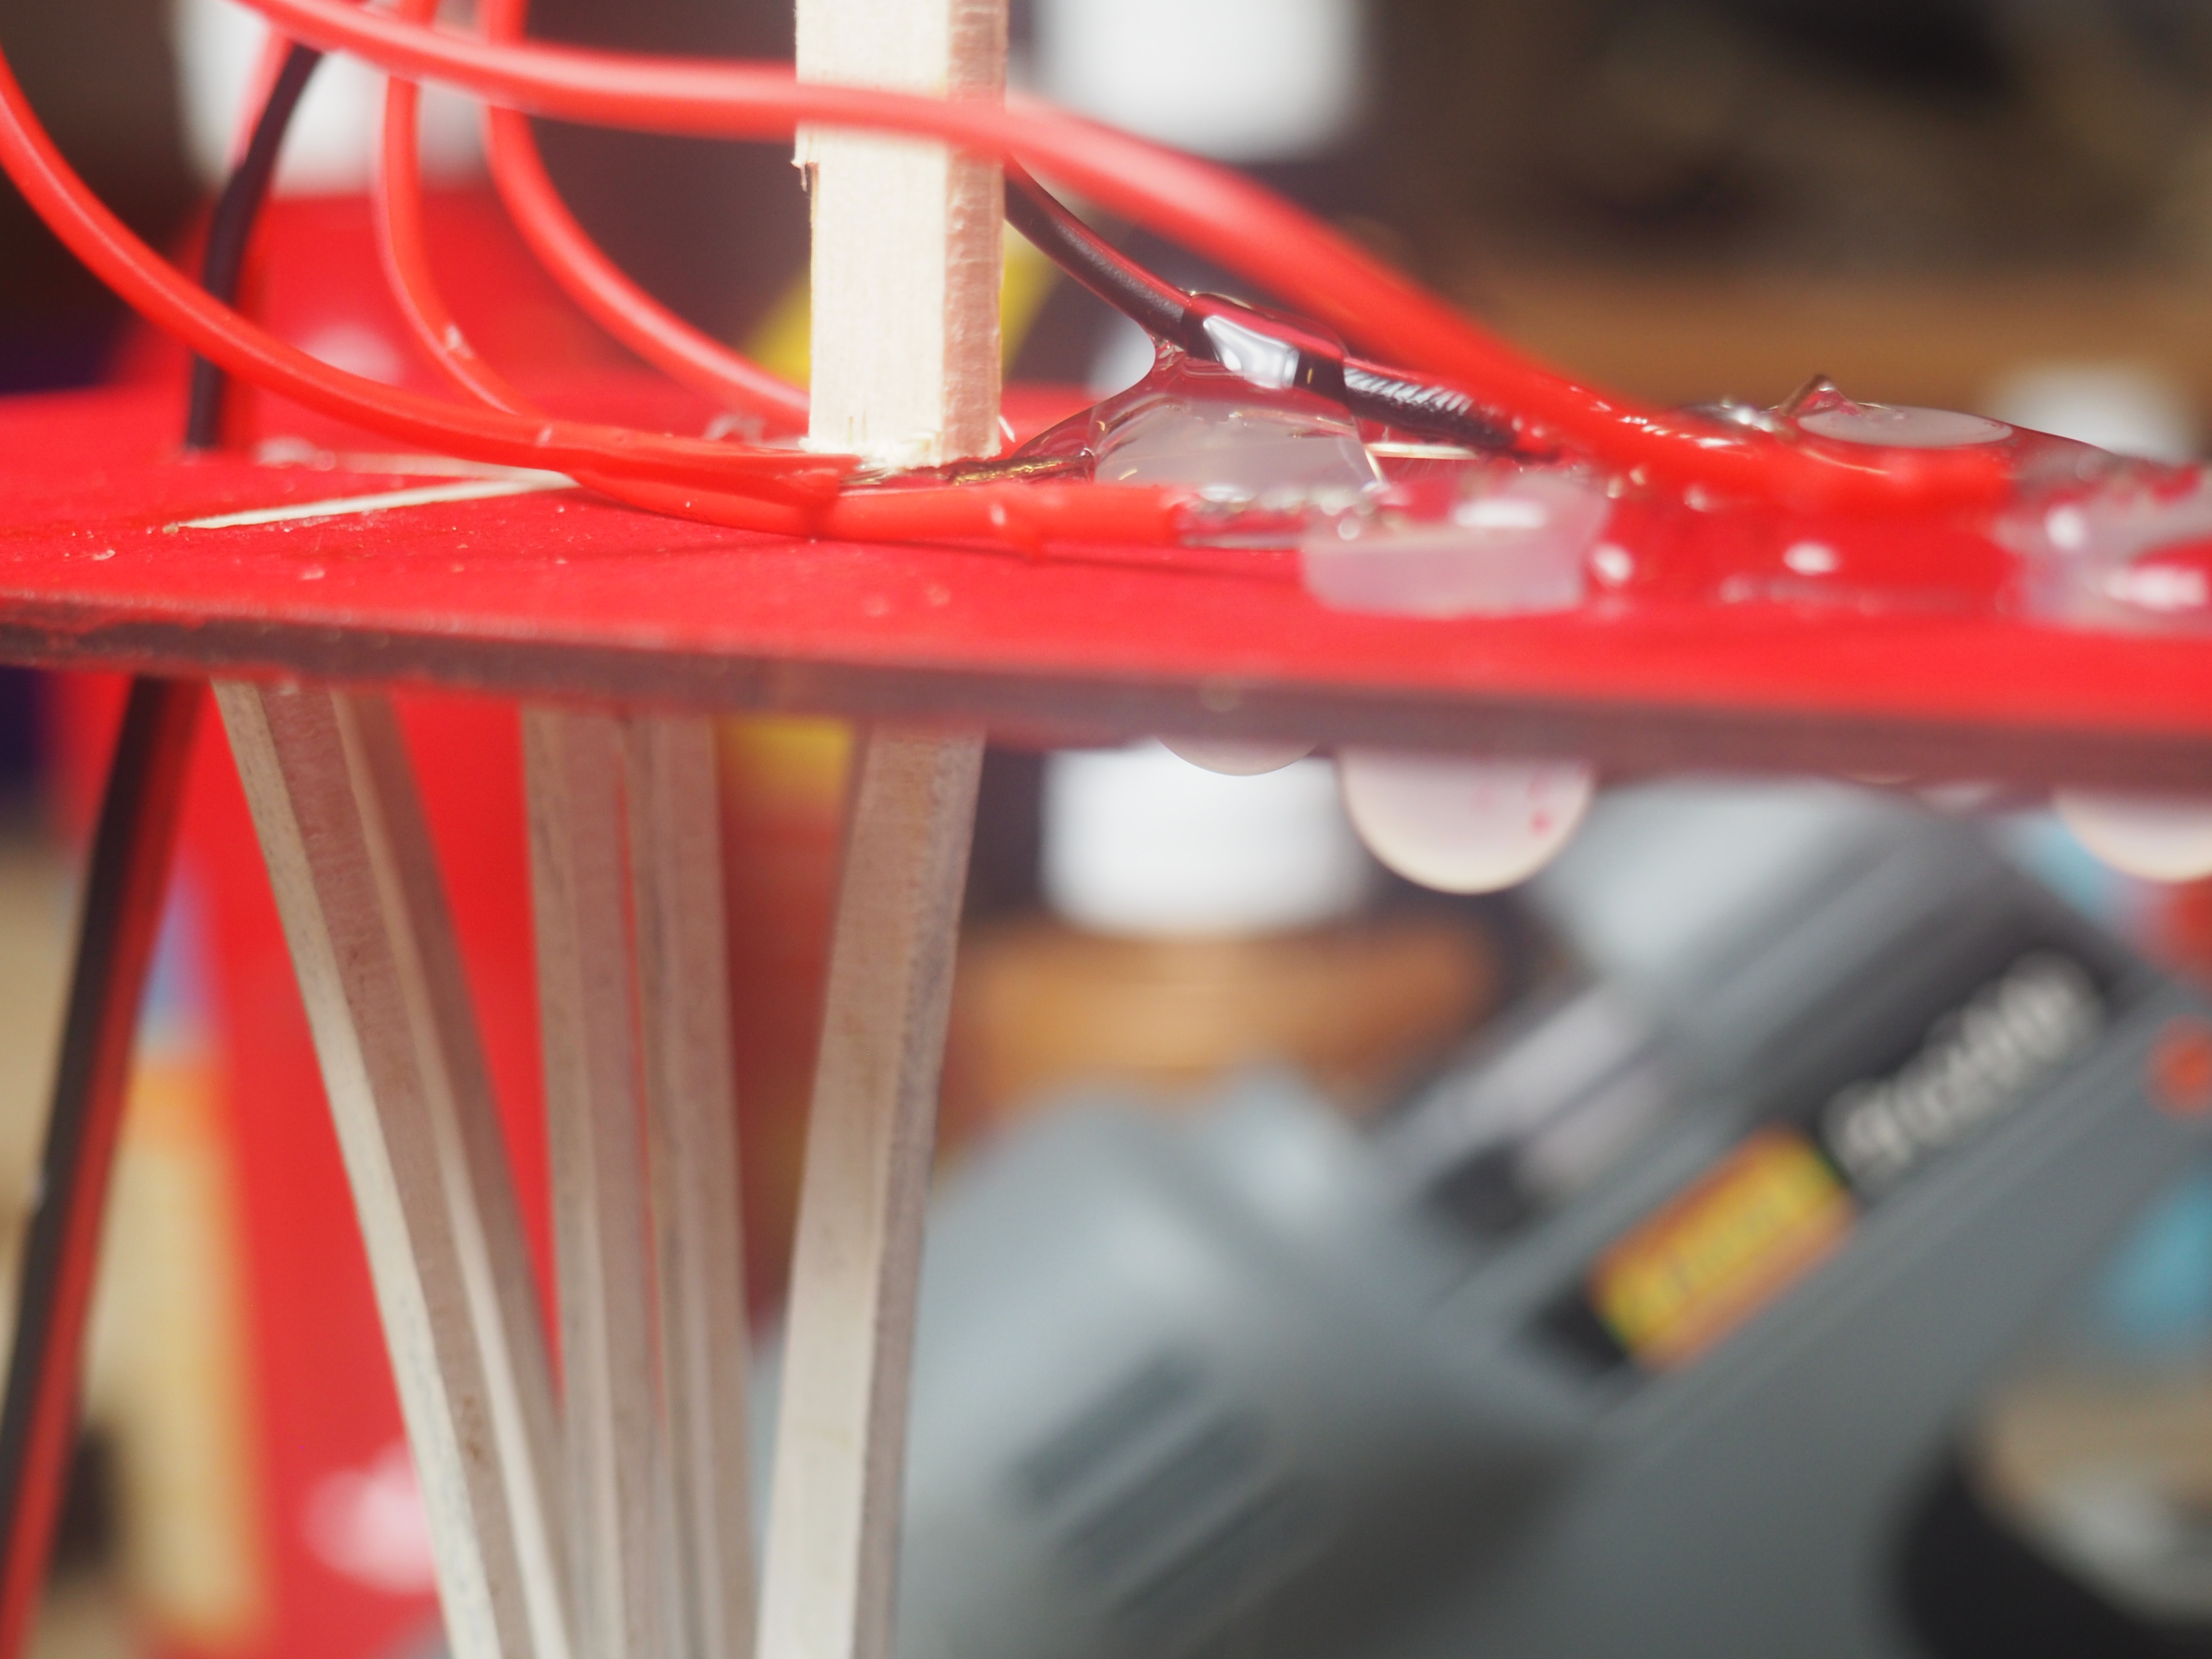
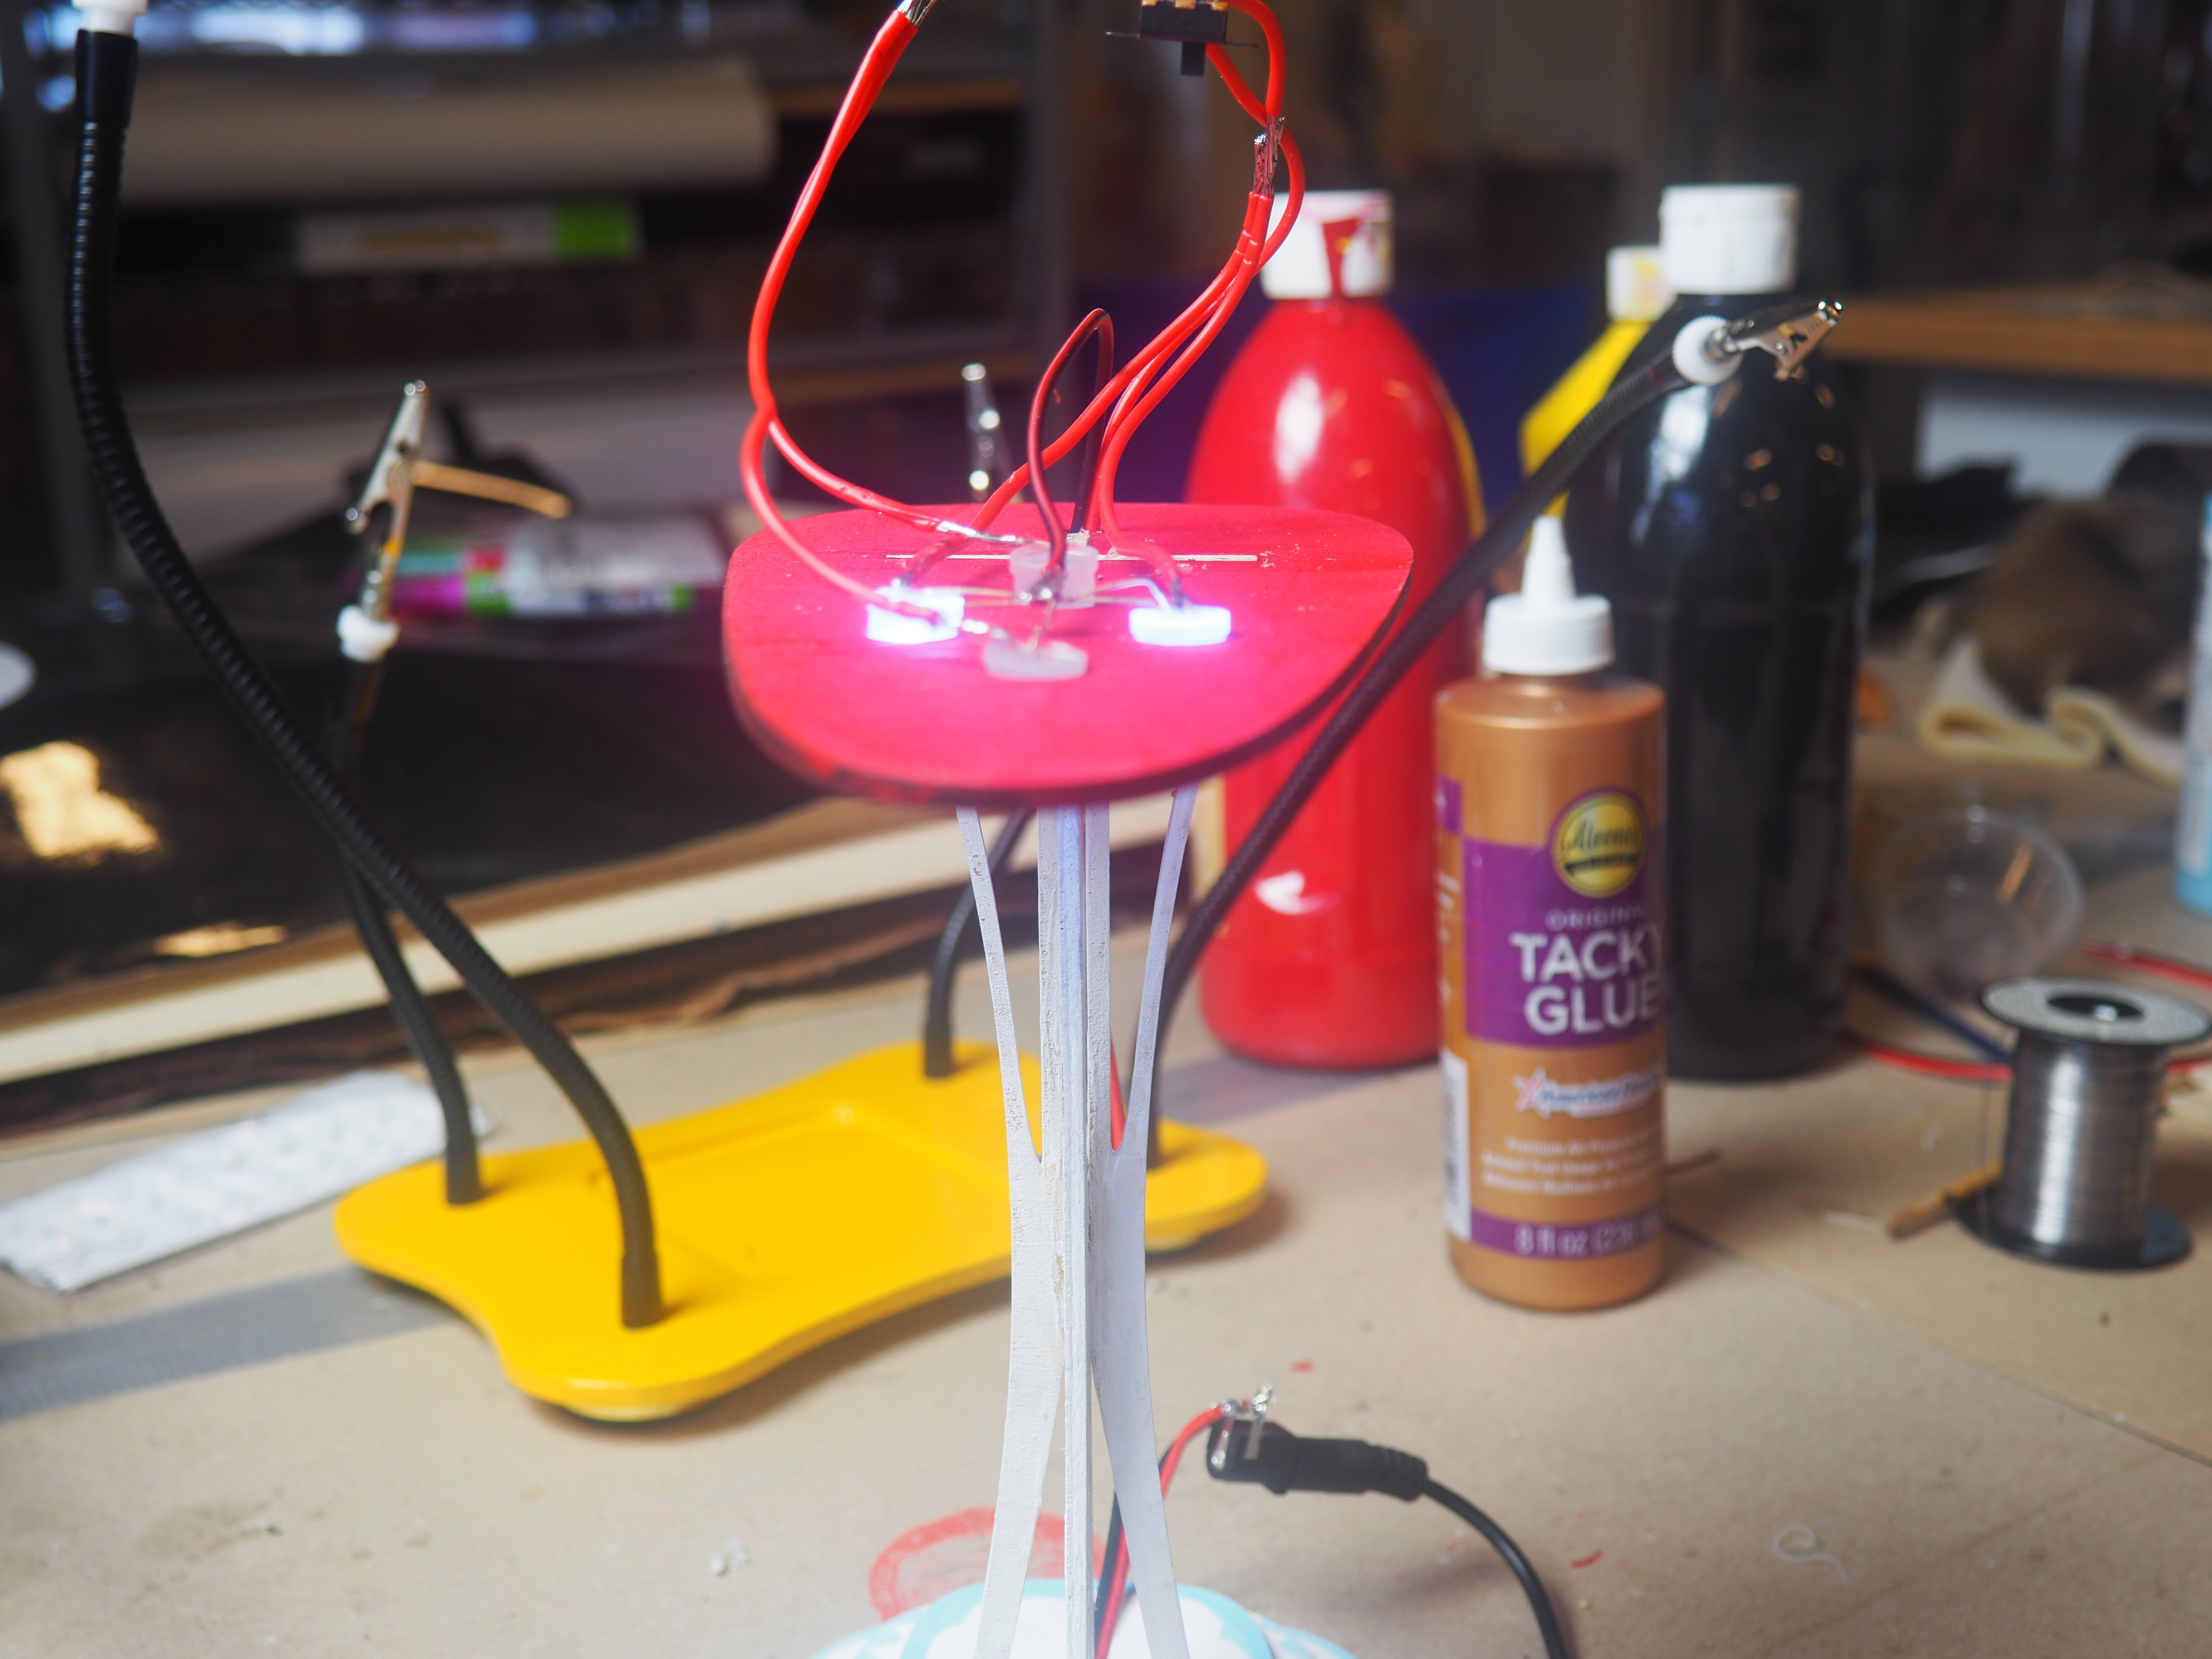
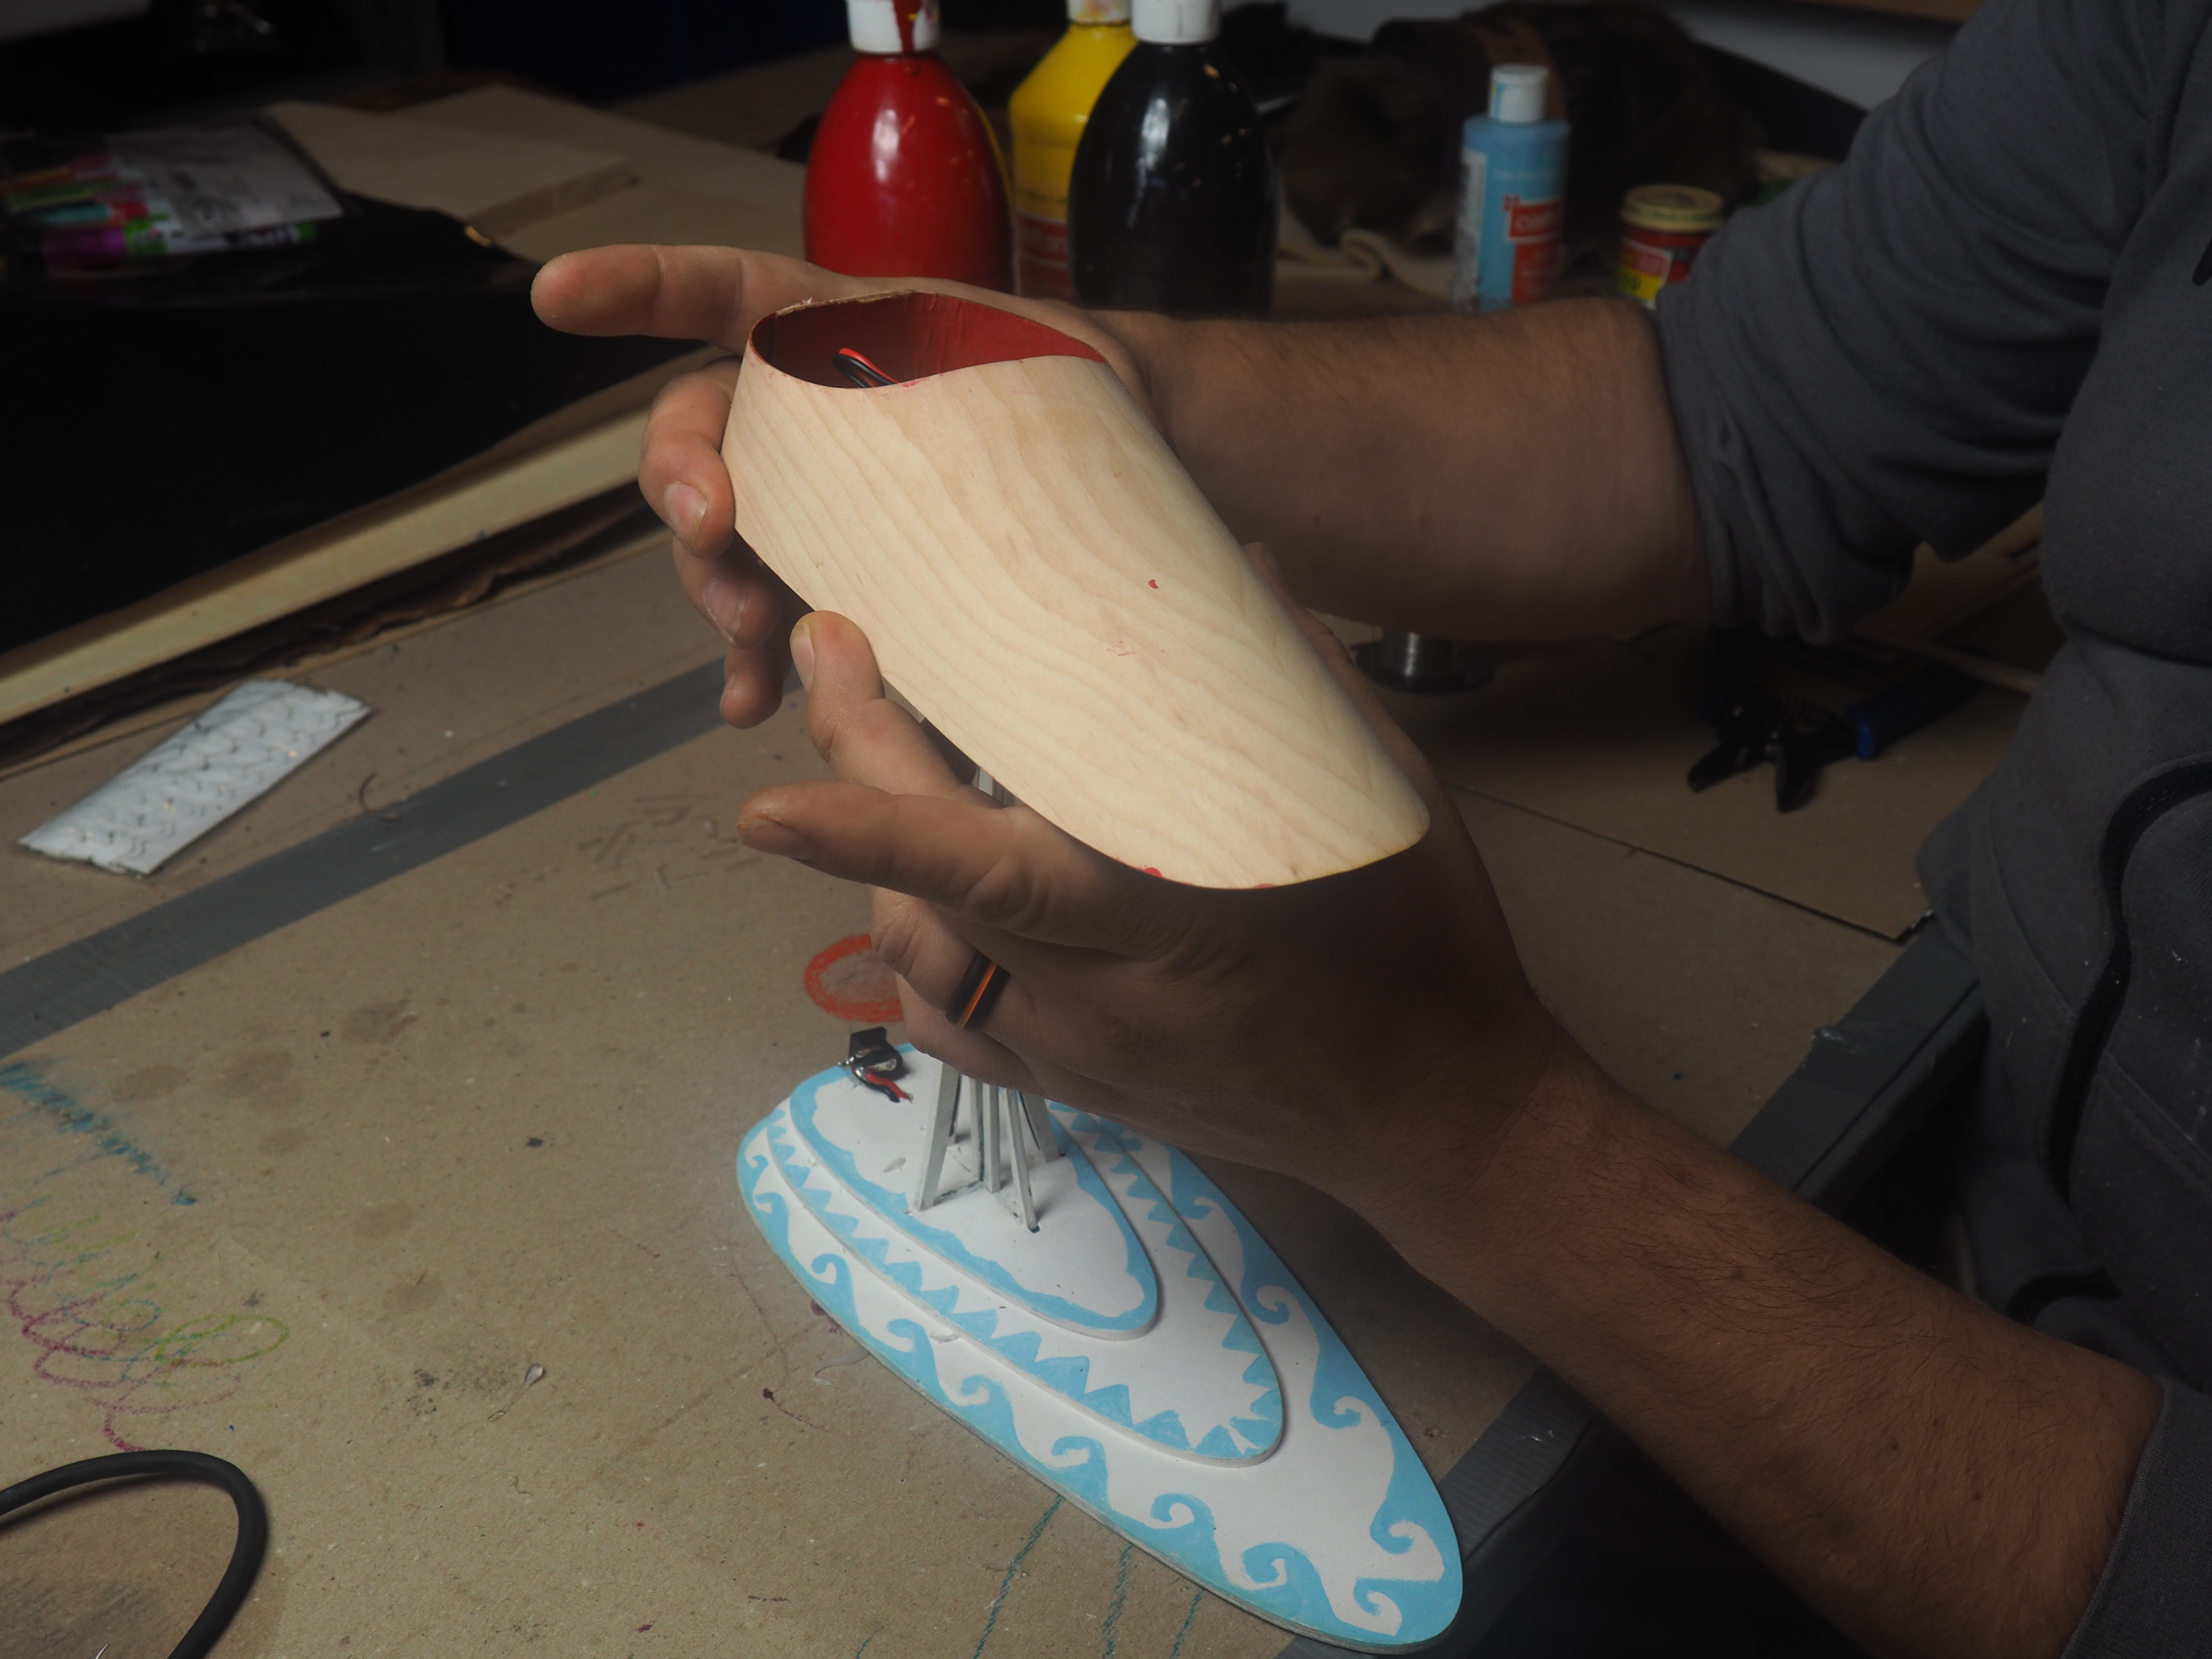
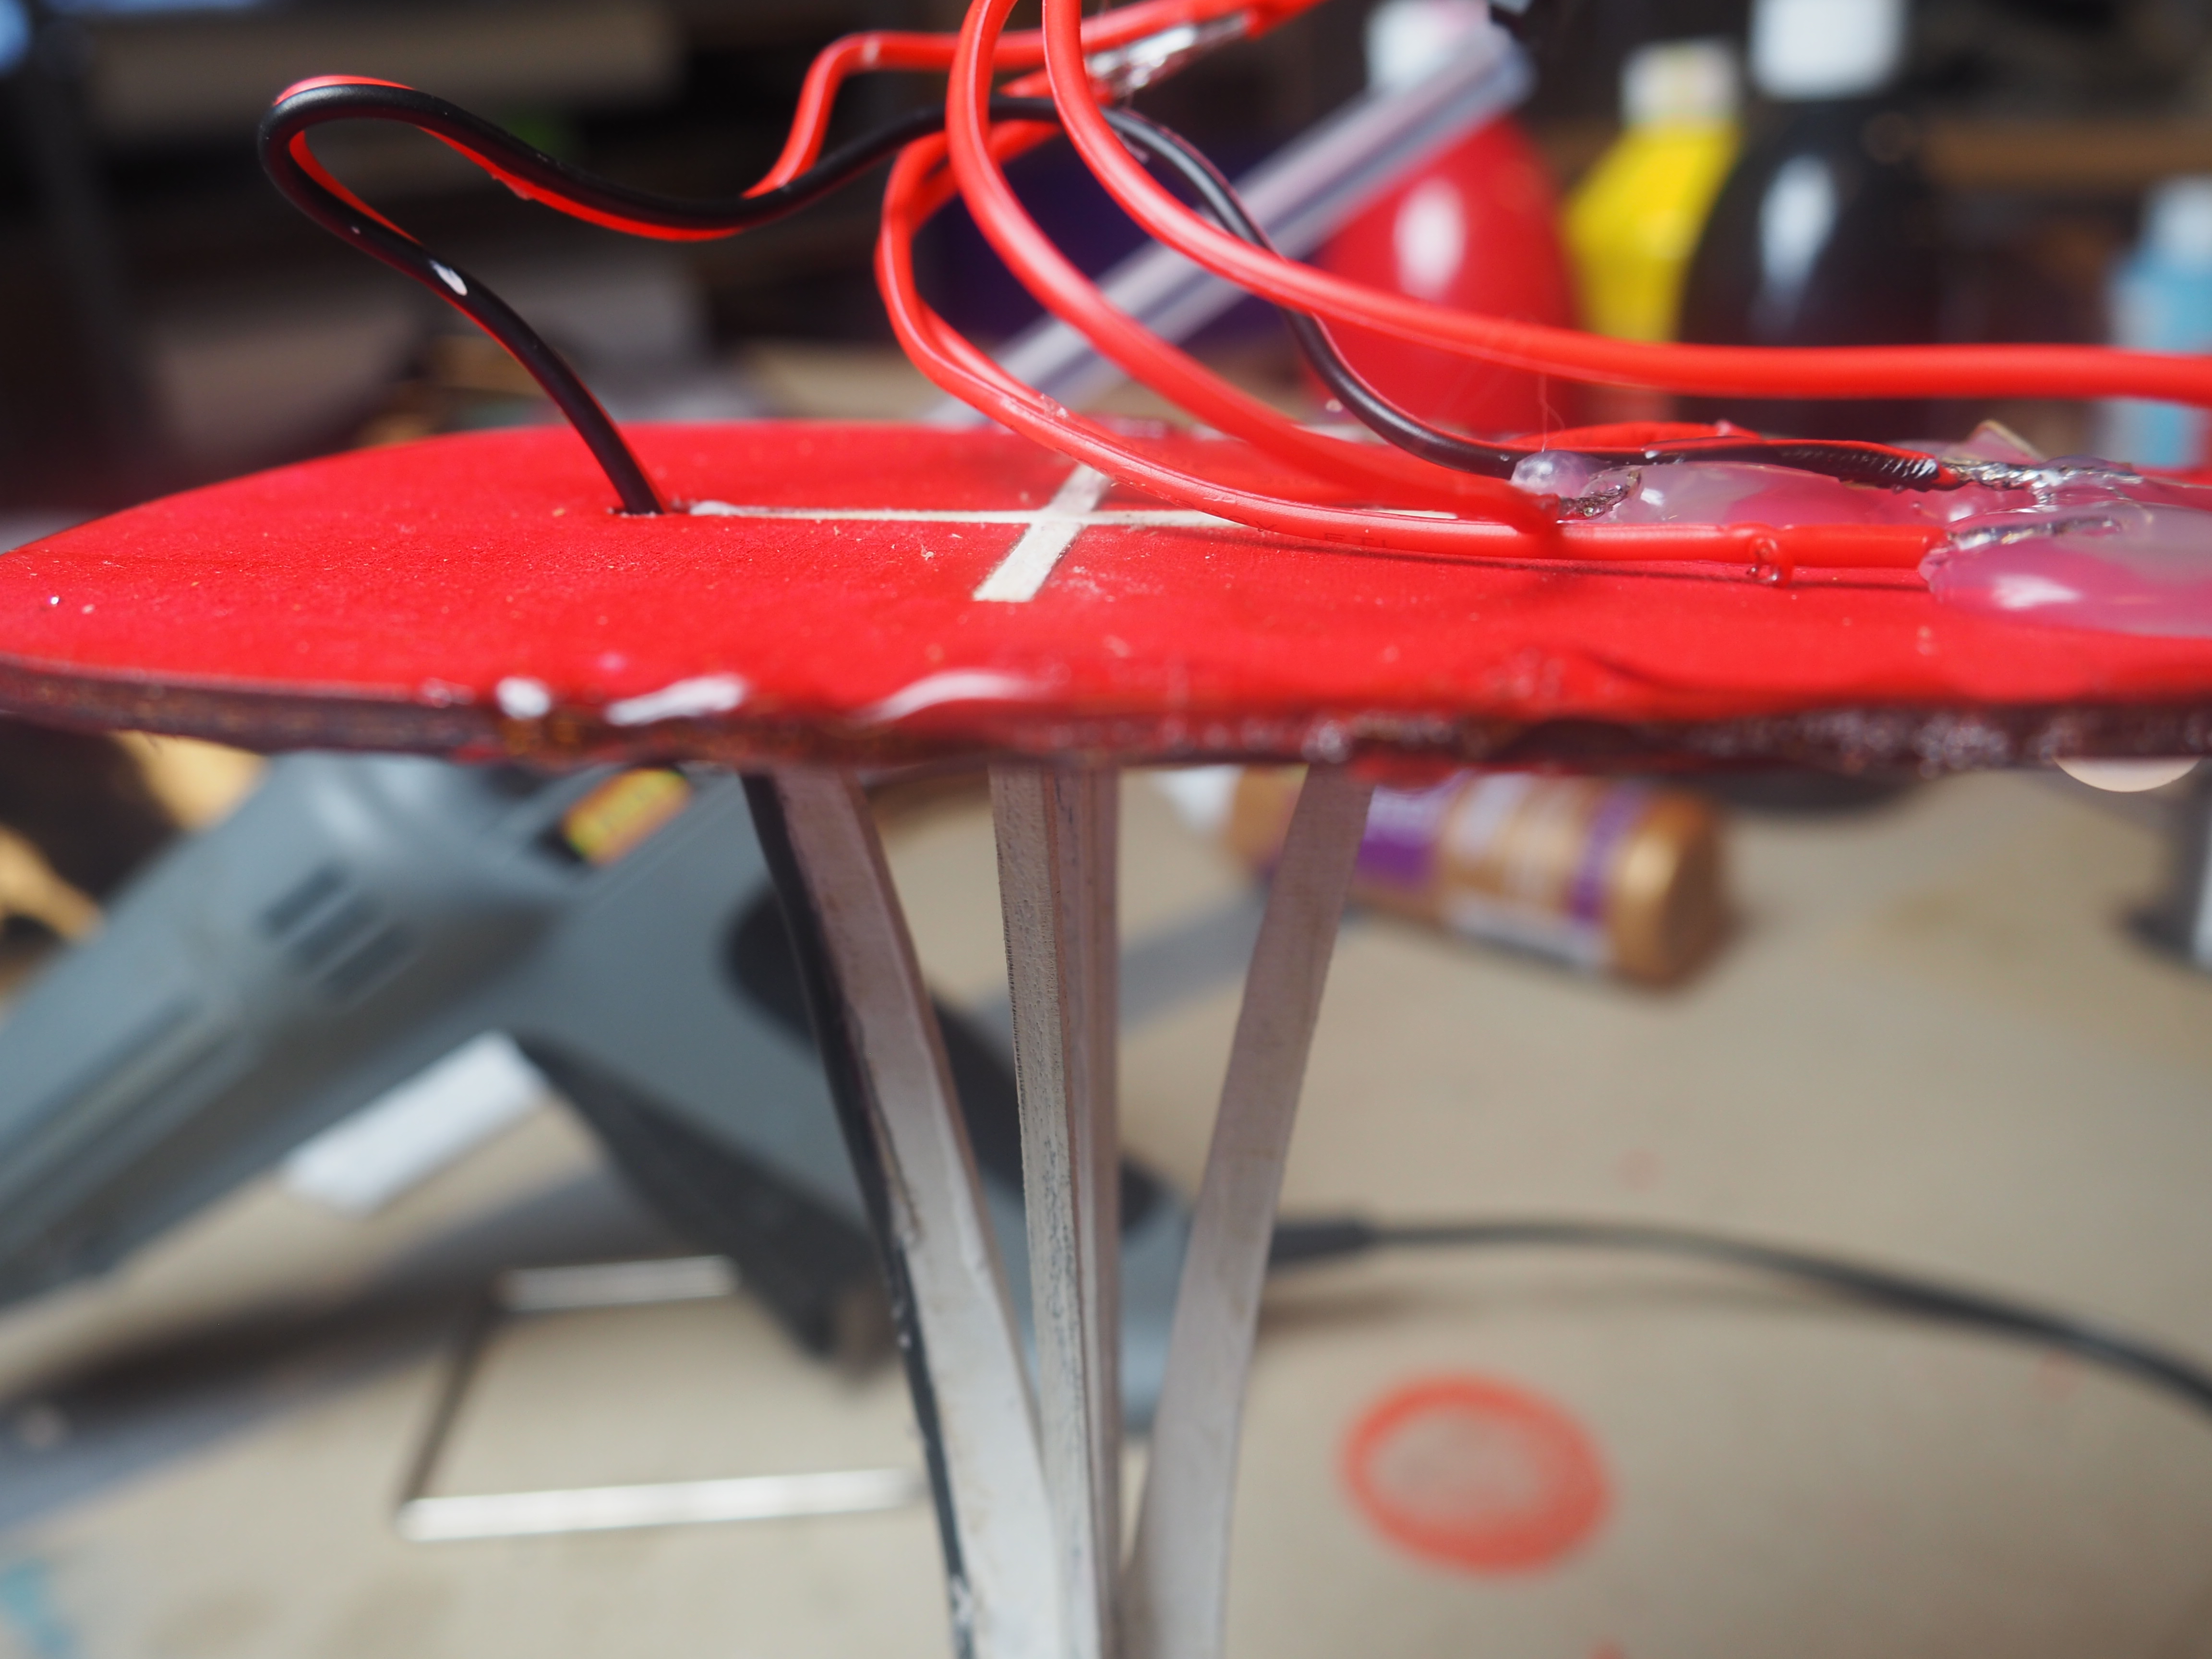
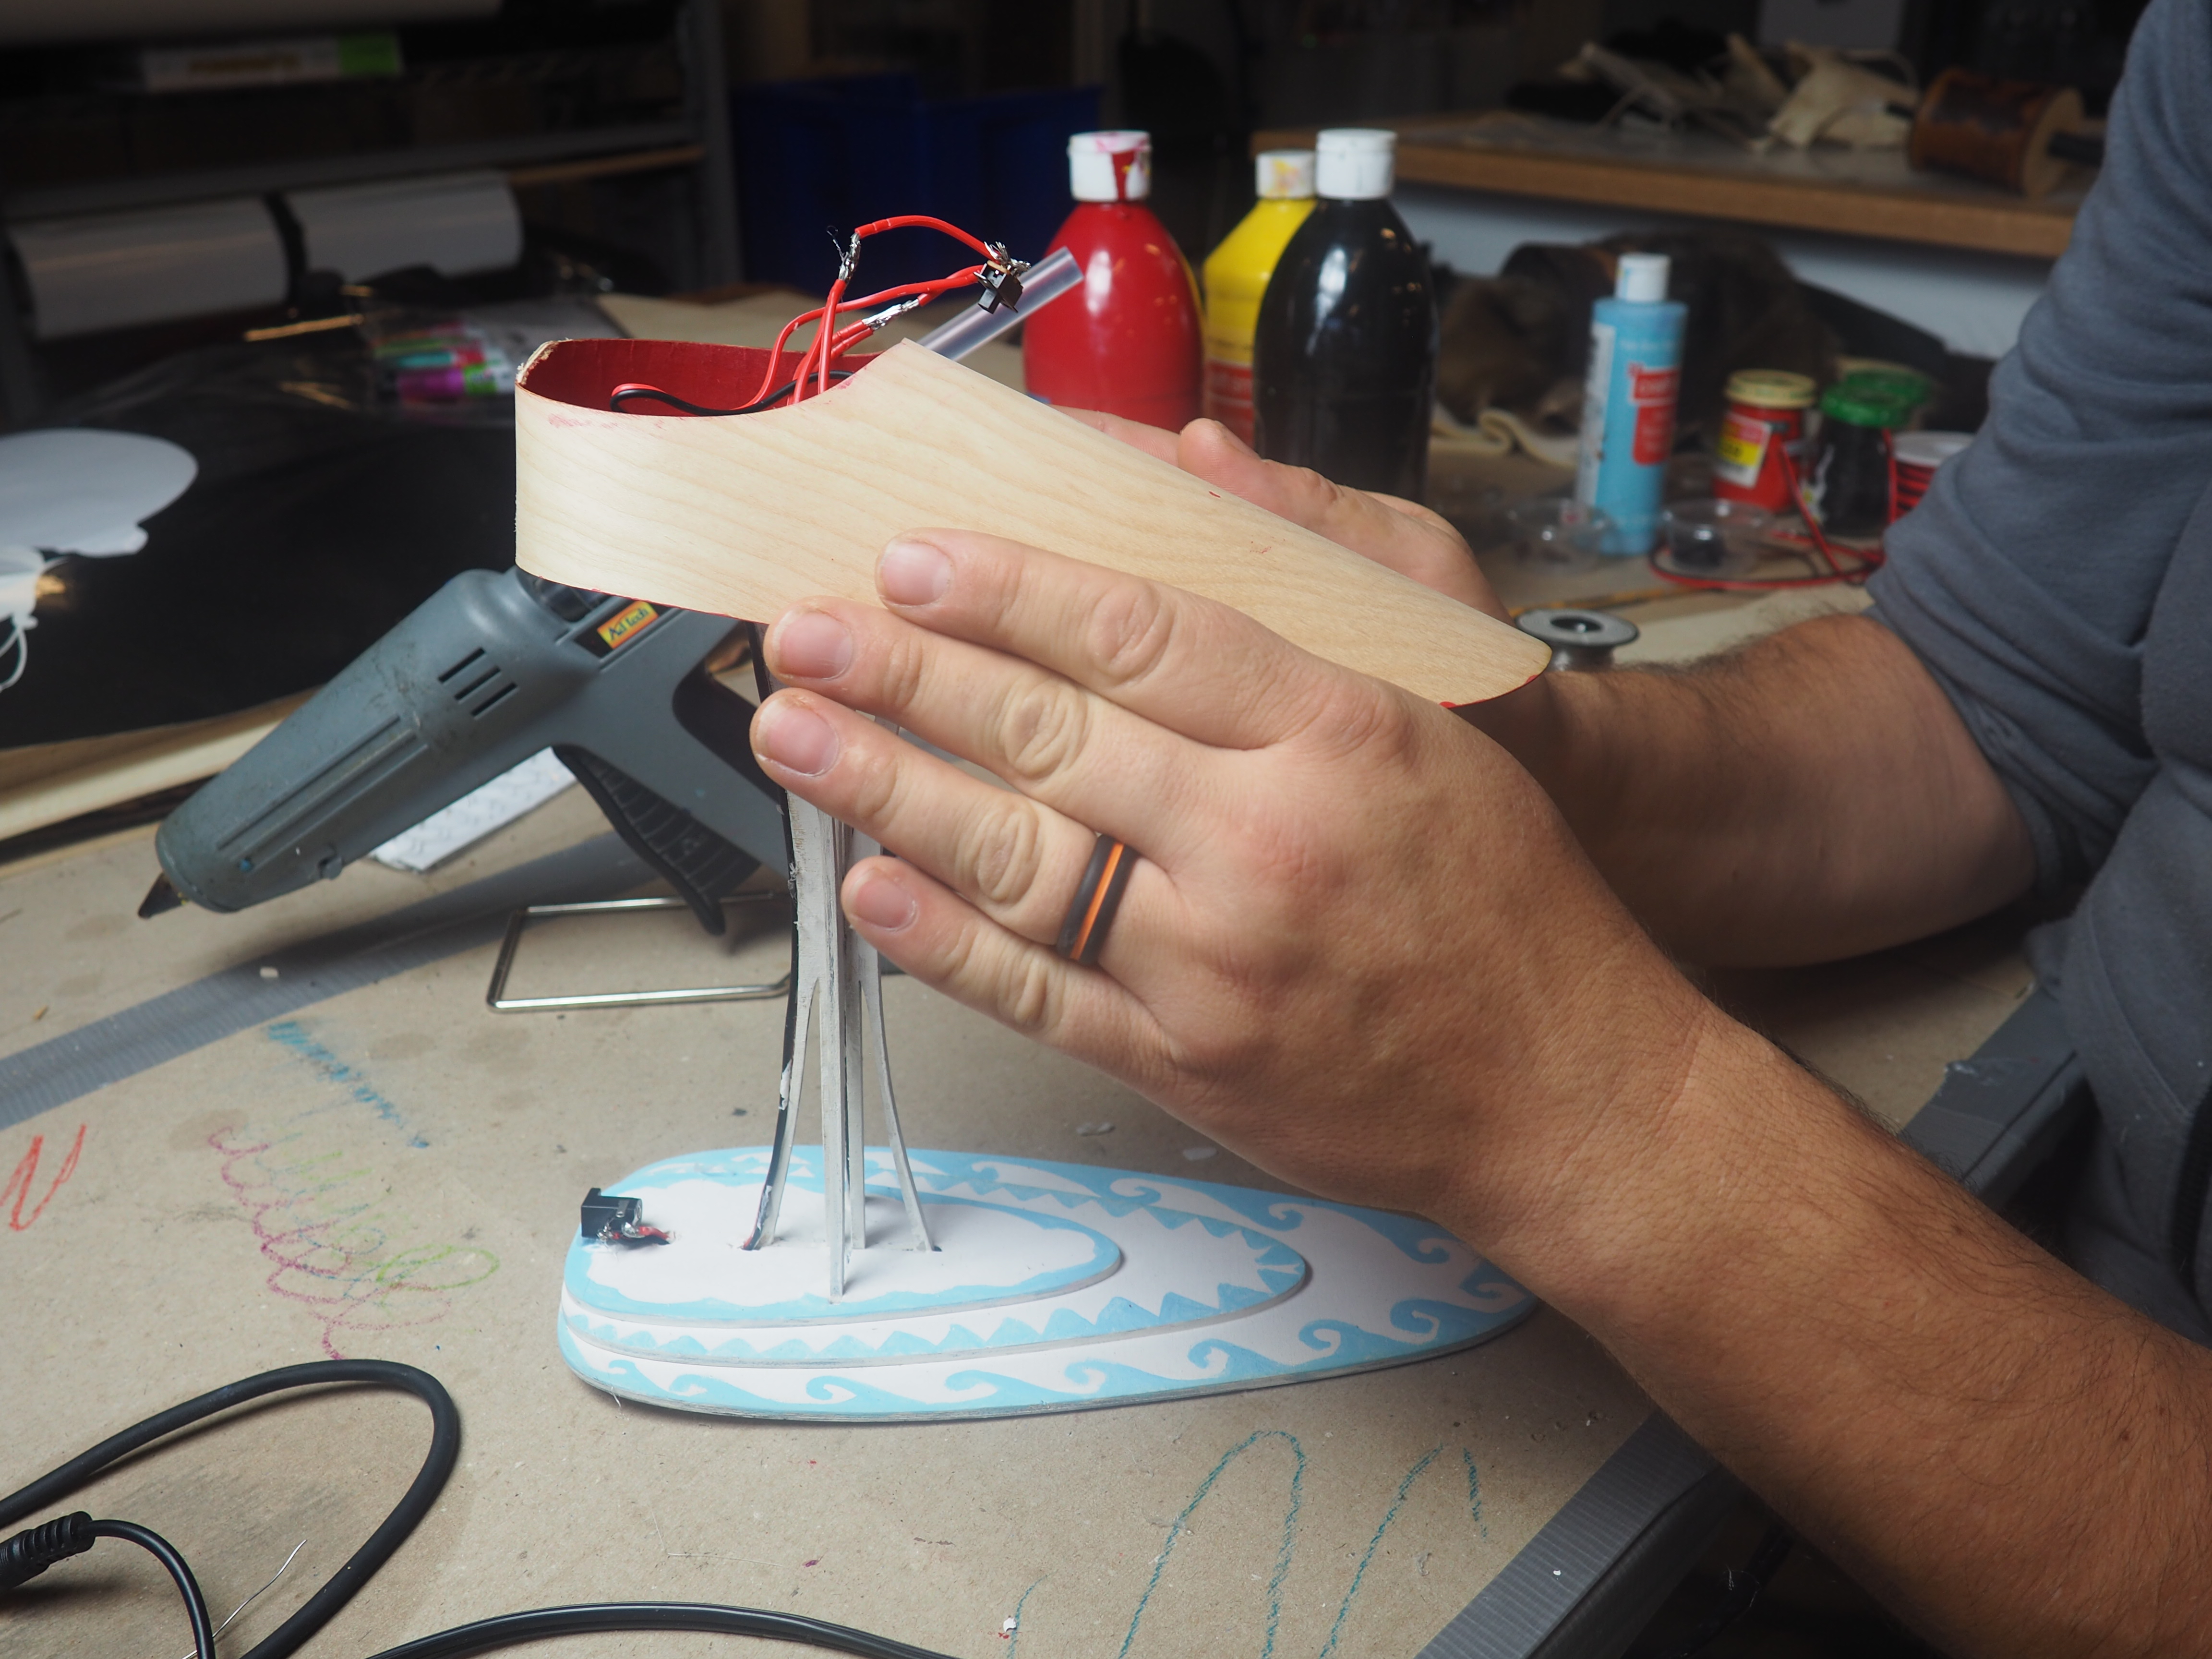
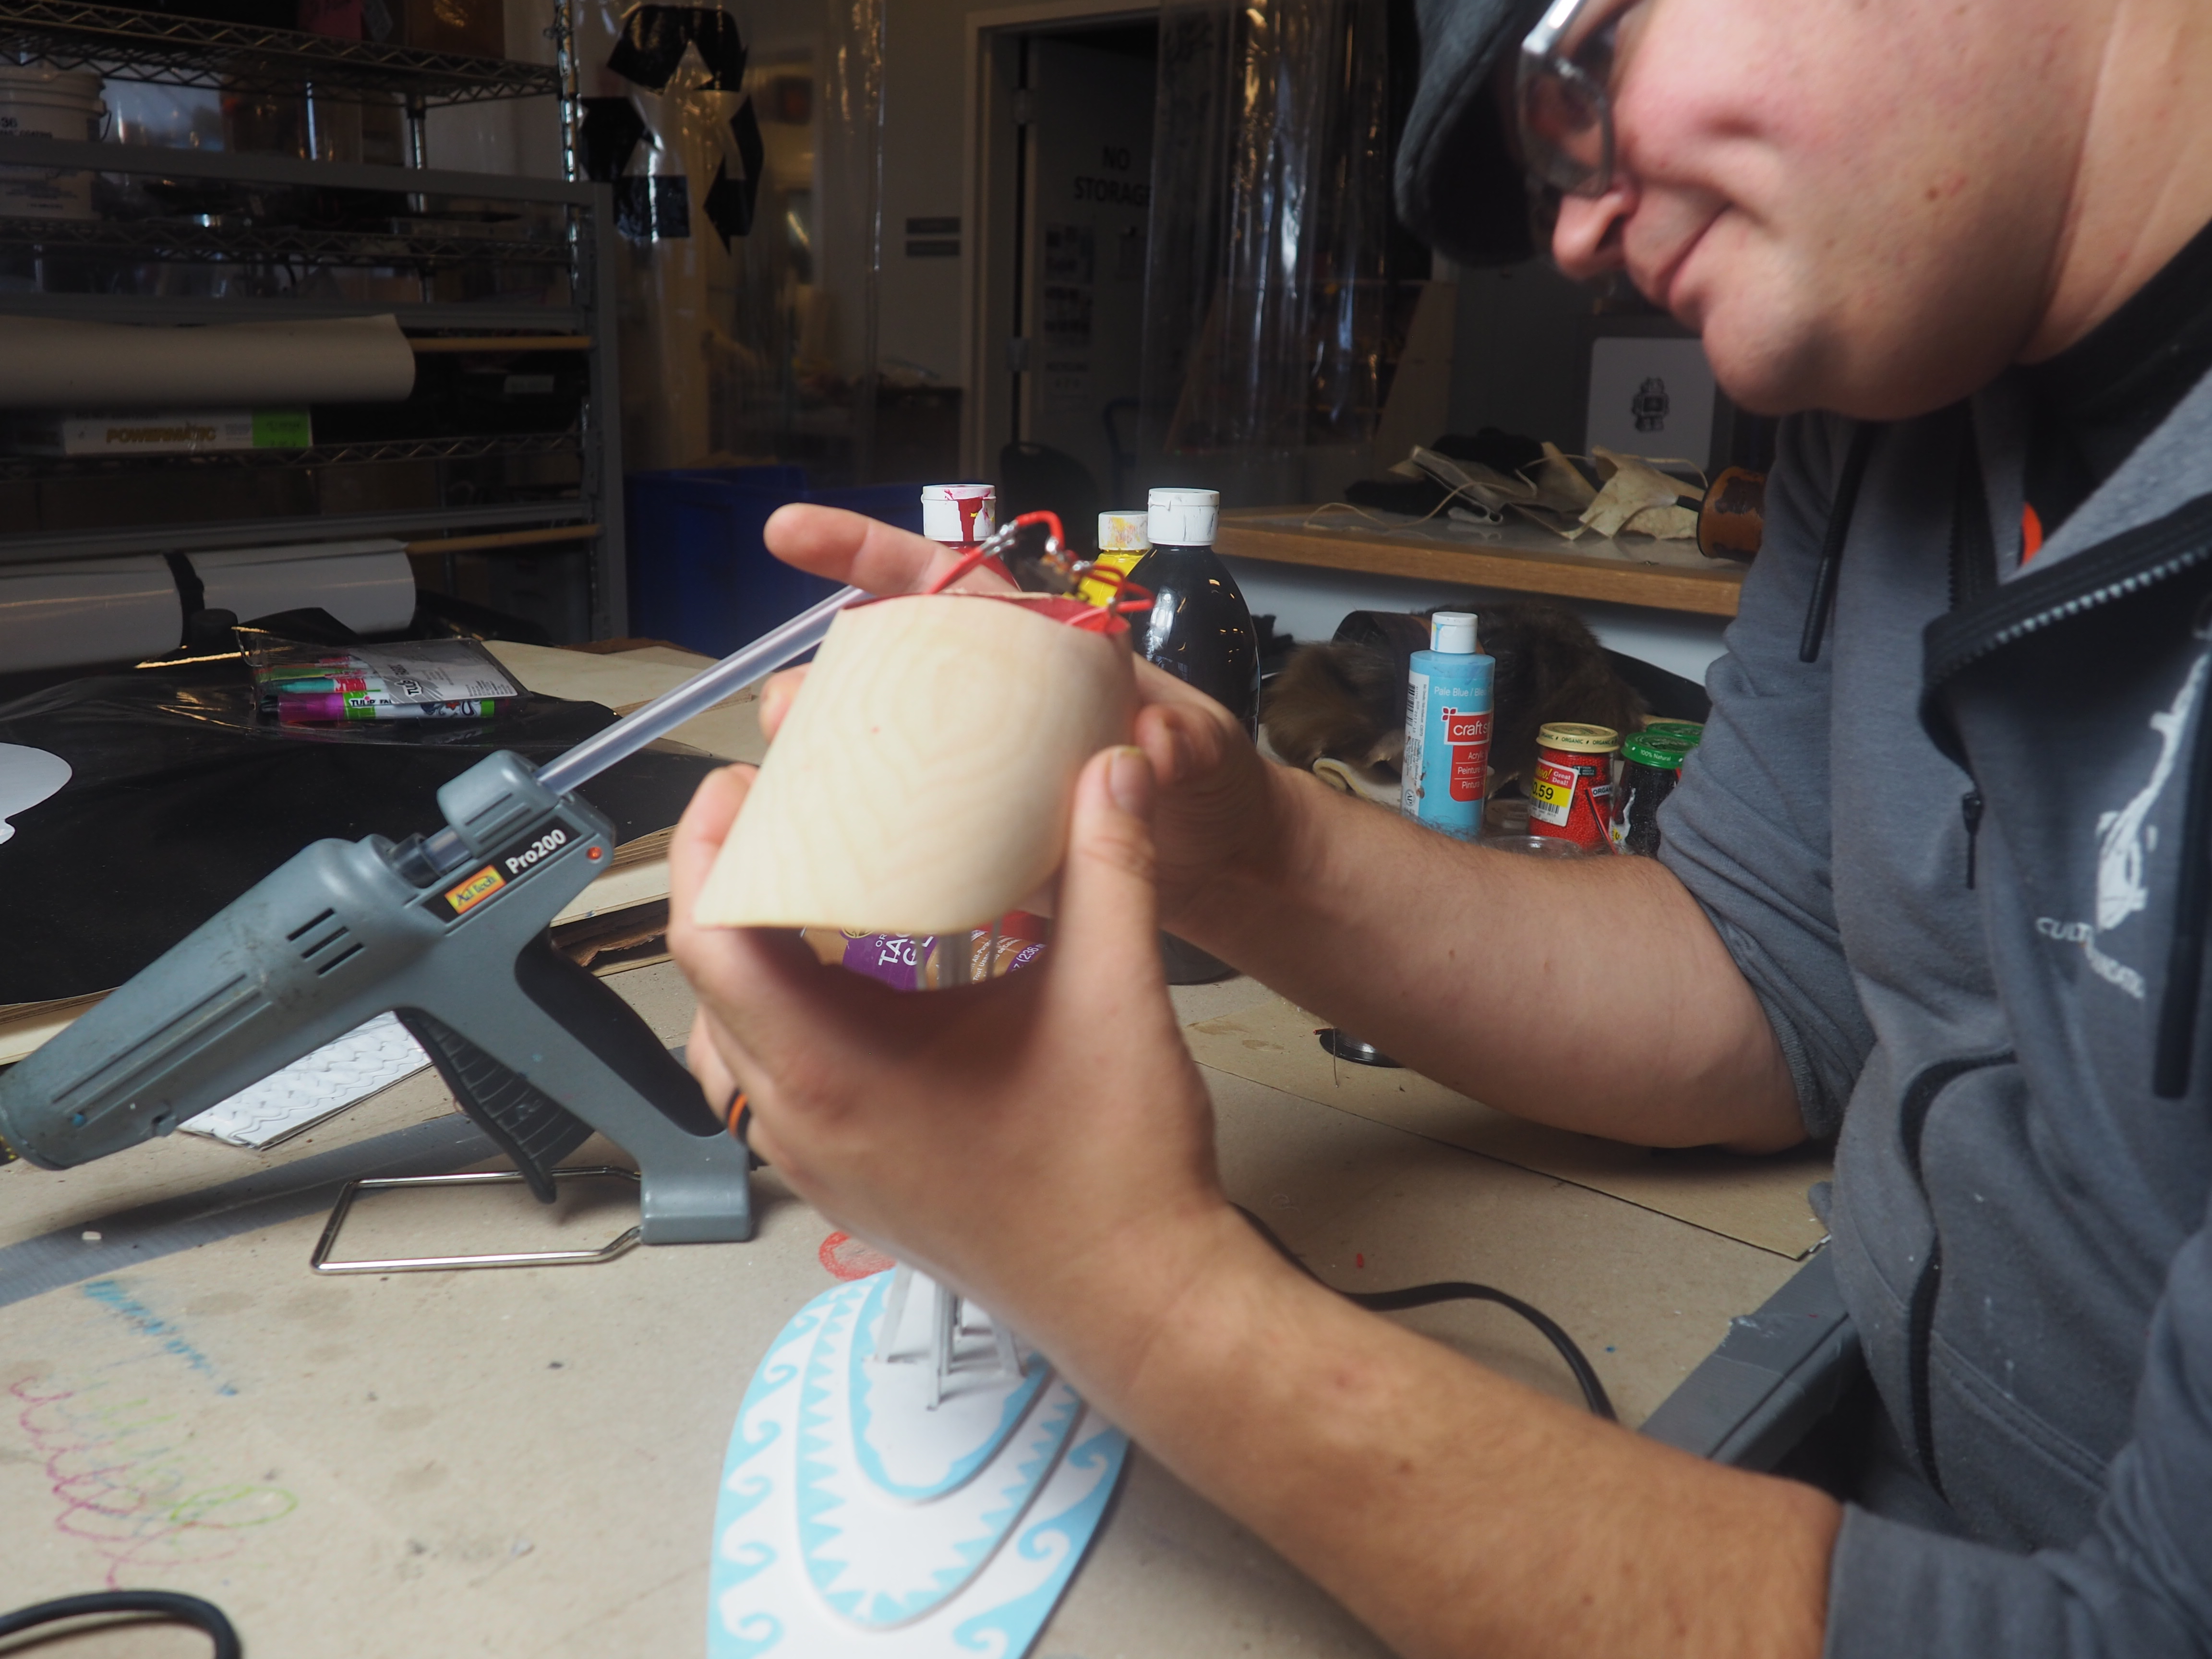
Gluing the LED lamp base onto the stand and attaching the wires to the stand. You will need: Tacky Glue Hot Glue

  • Glue the Lamp stand to the LED Base. Tacky glue works well so does hot glue.


  • Glue the LEDs down using a hot glue gun. Glue down wires that you can to avoid pulling or movement.


  • Use the hot glue gun to carefully attach the wires from the base of the lamp up the backside of the lamp, through the hole in the LED holder the wire should be flat against the stand.


Wiring and Soldering the LED Circuit! Part 2

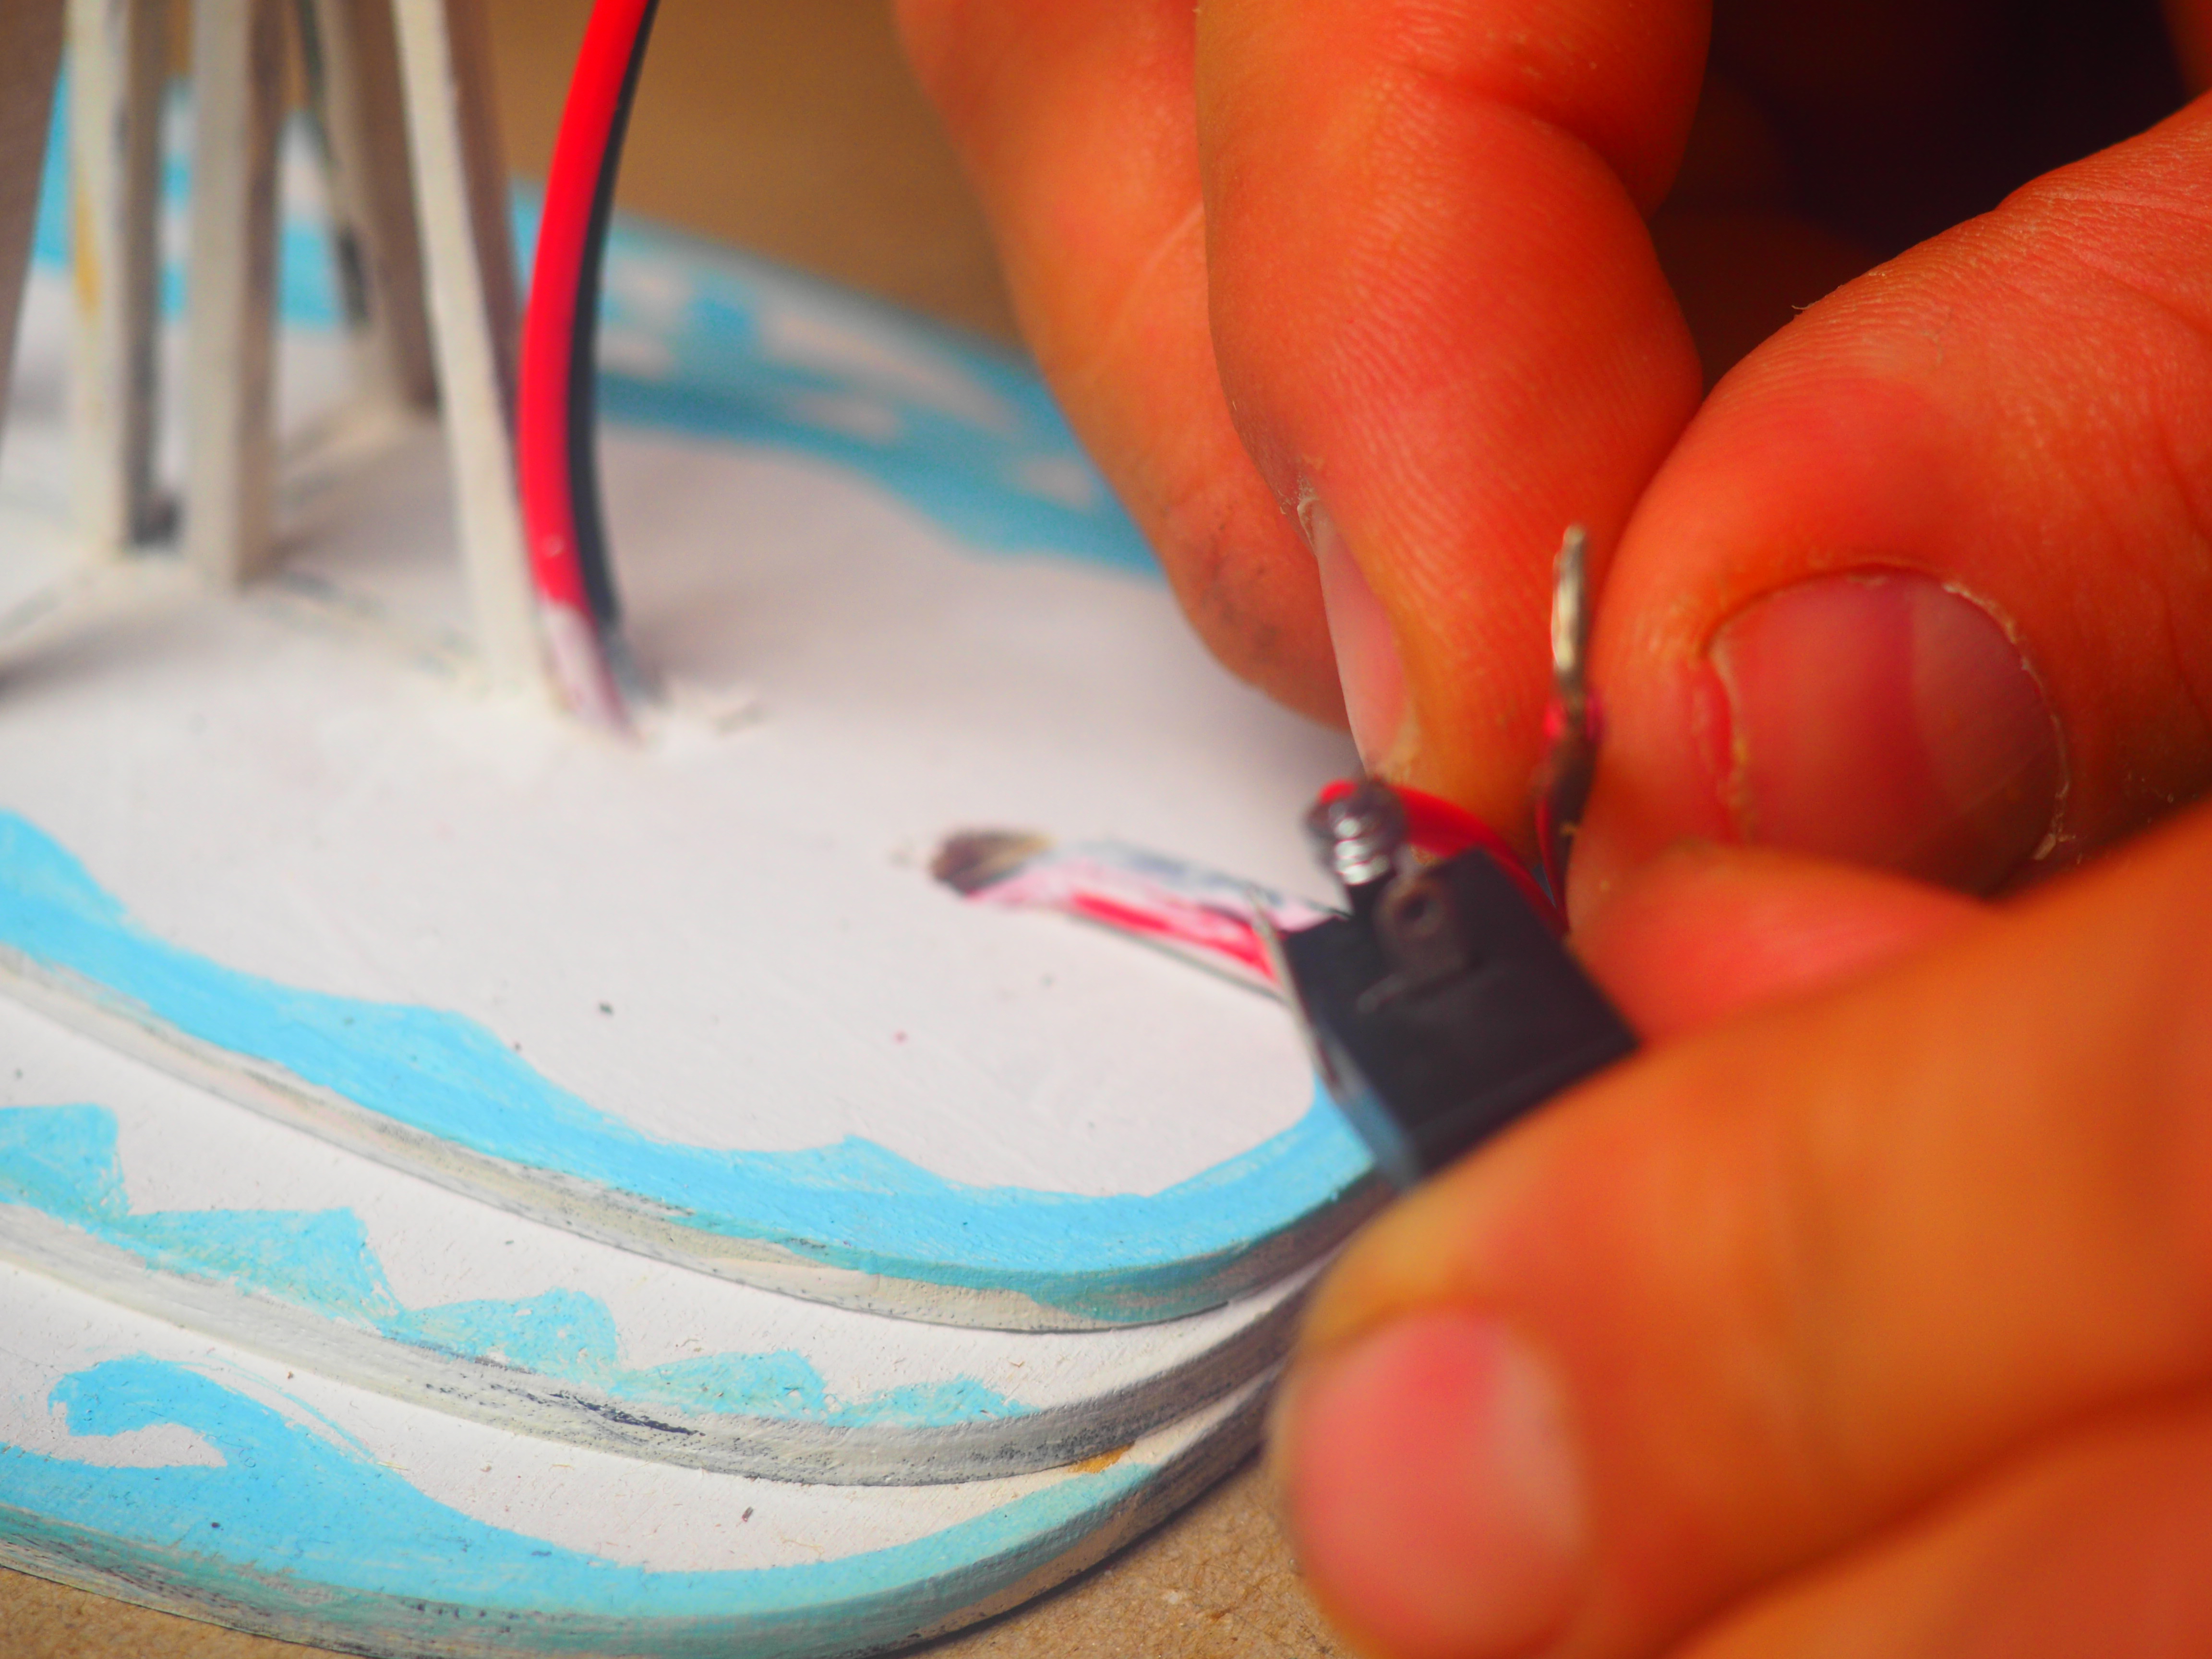
Finishing the wiring assembly. You will need: Solder Soldering Iron Safety Glasses Hot glue gun

  • Strip 1/2 inch of the ends of the wire at the base of the lamp as well as at the top where it comes out of the LED base.


  • On the base of the lamp connect the power plug solder the positive wire to the end terminal of the plug. The solder the negative wire to the inside terminal of the plug.


  • Hot glue the plug onto the base of your lamp.


  • Strip 1/2 inch of the positive wire and negative wire at the top of the lamp. Solder the negative to the center of the negative legs of the LEDs. Solder the positive into the middle terminal of the switch.


  • Plug in your power supply, make sure both sets of lights work by using the switch. If they do not troubleshoot your project looking at connections and looking where shorts or poor connections are.


Making the Bentwood Hat

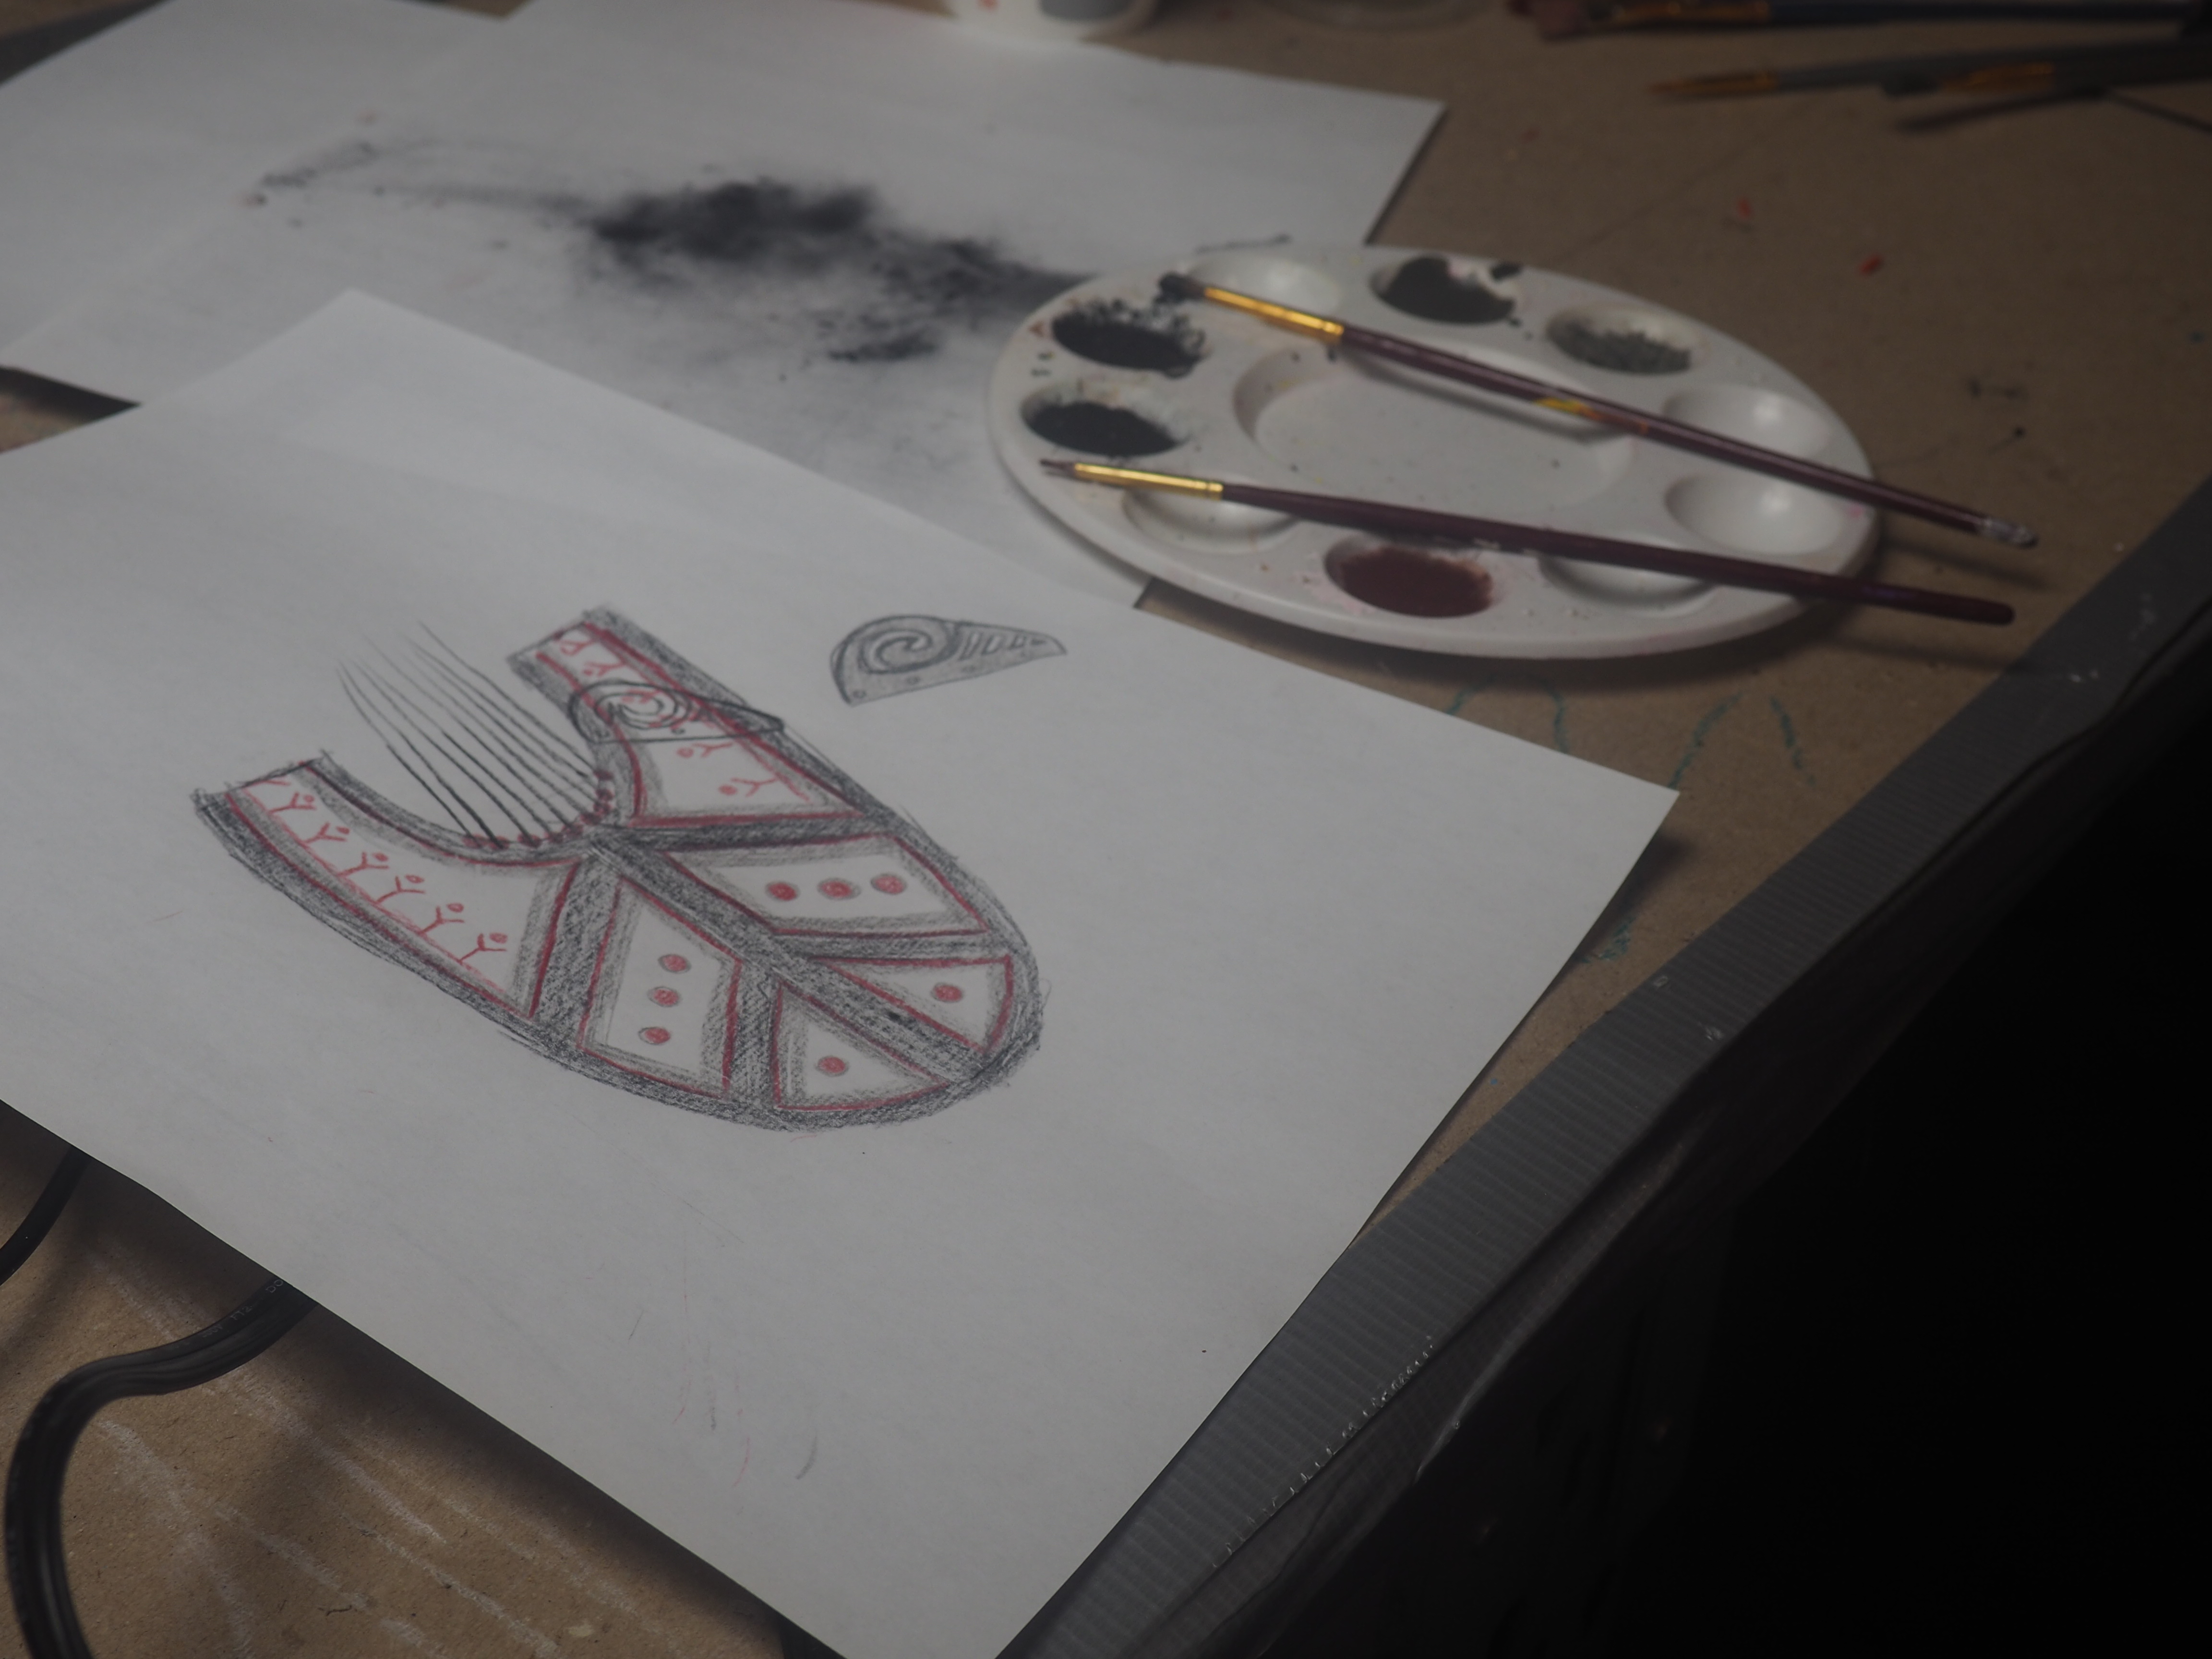
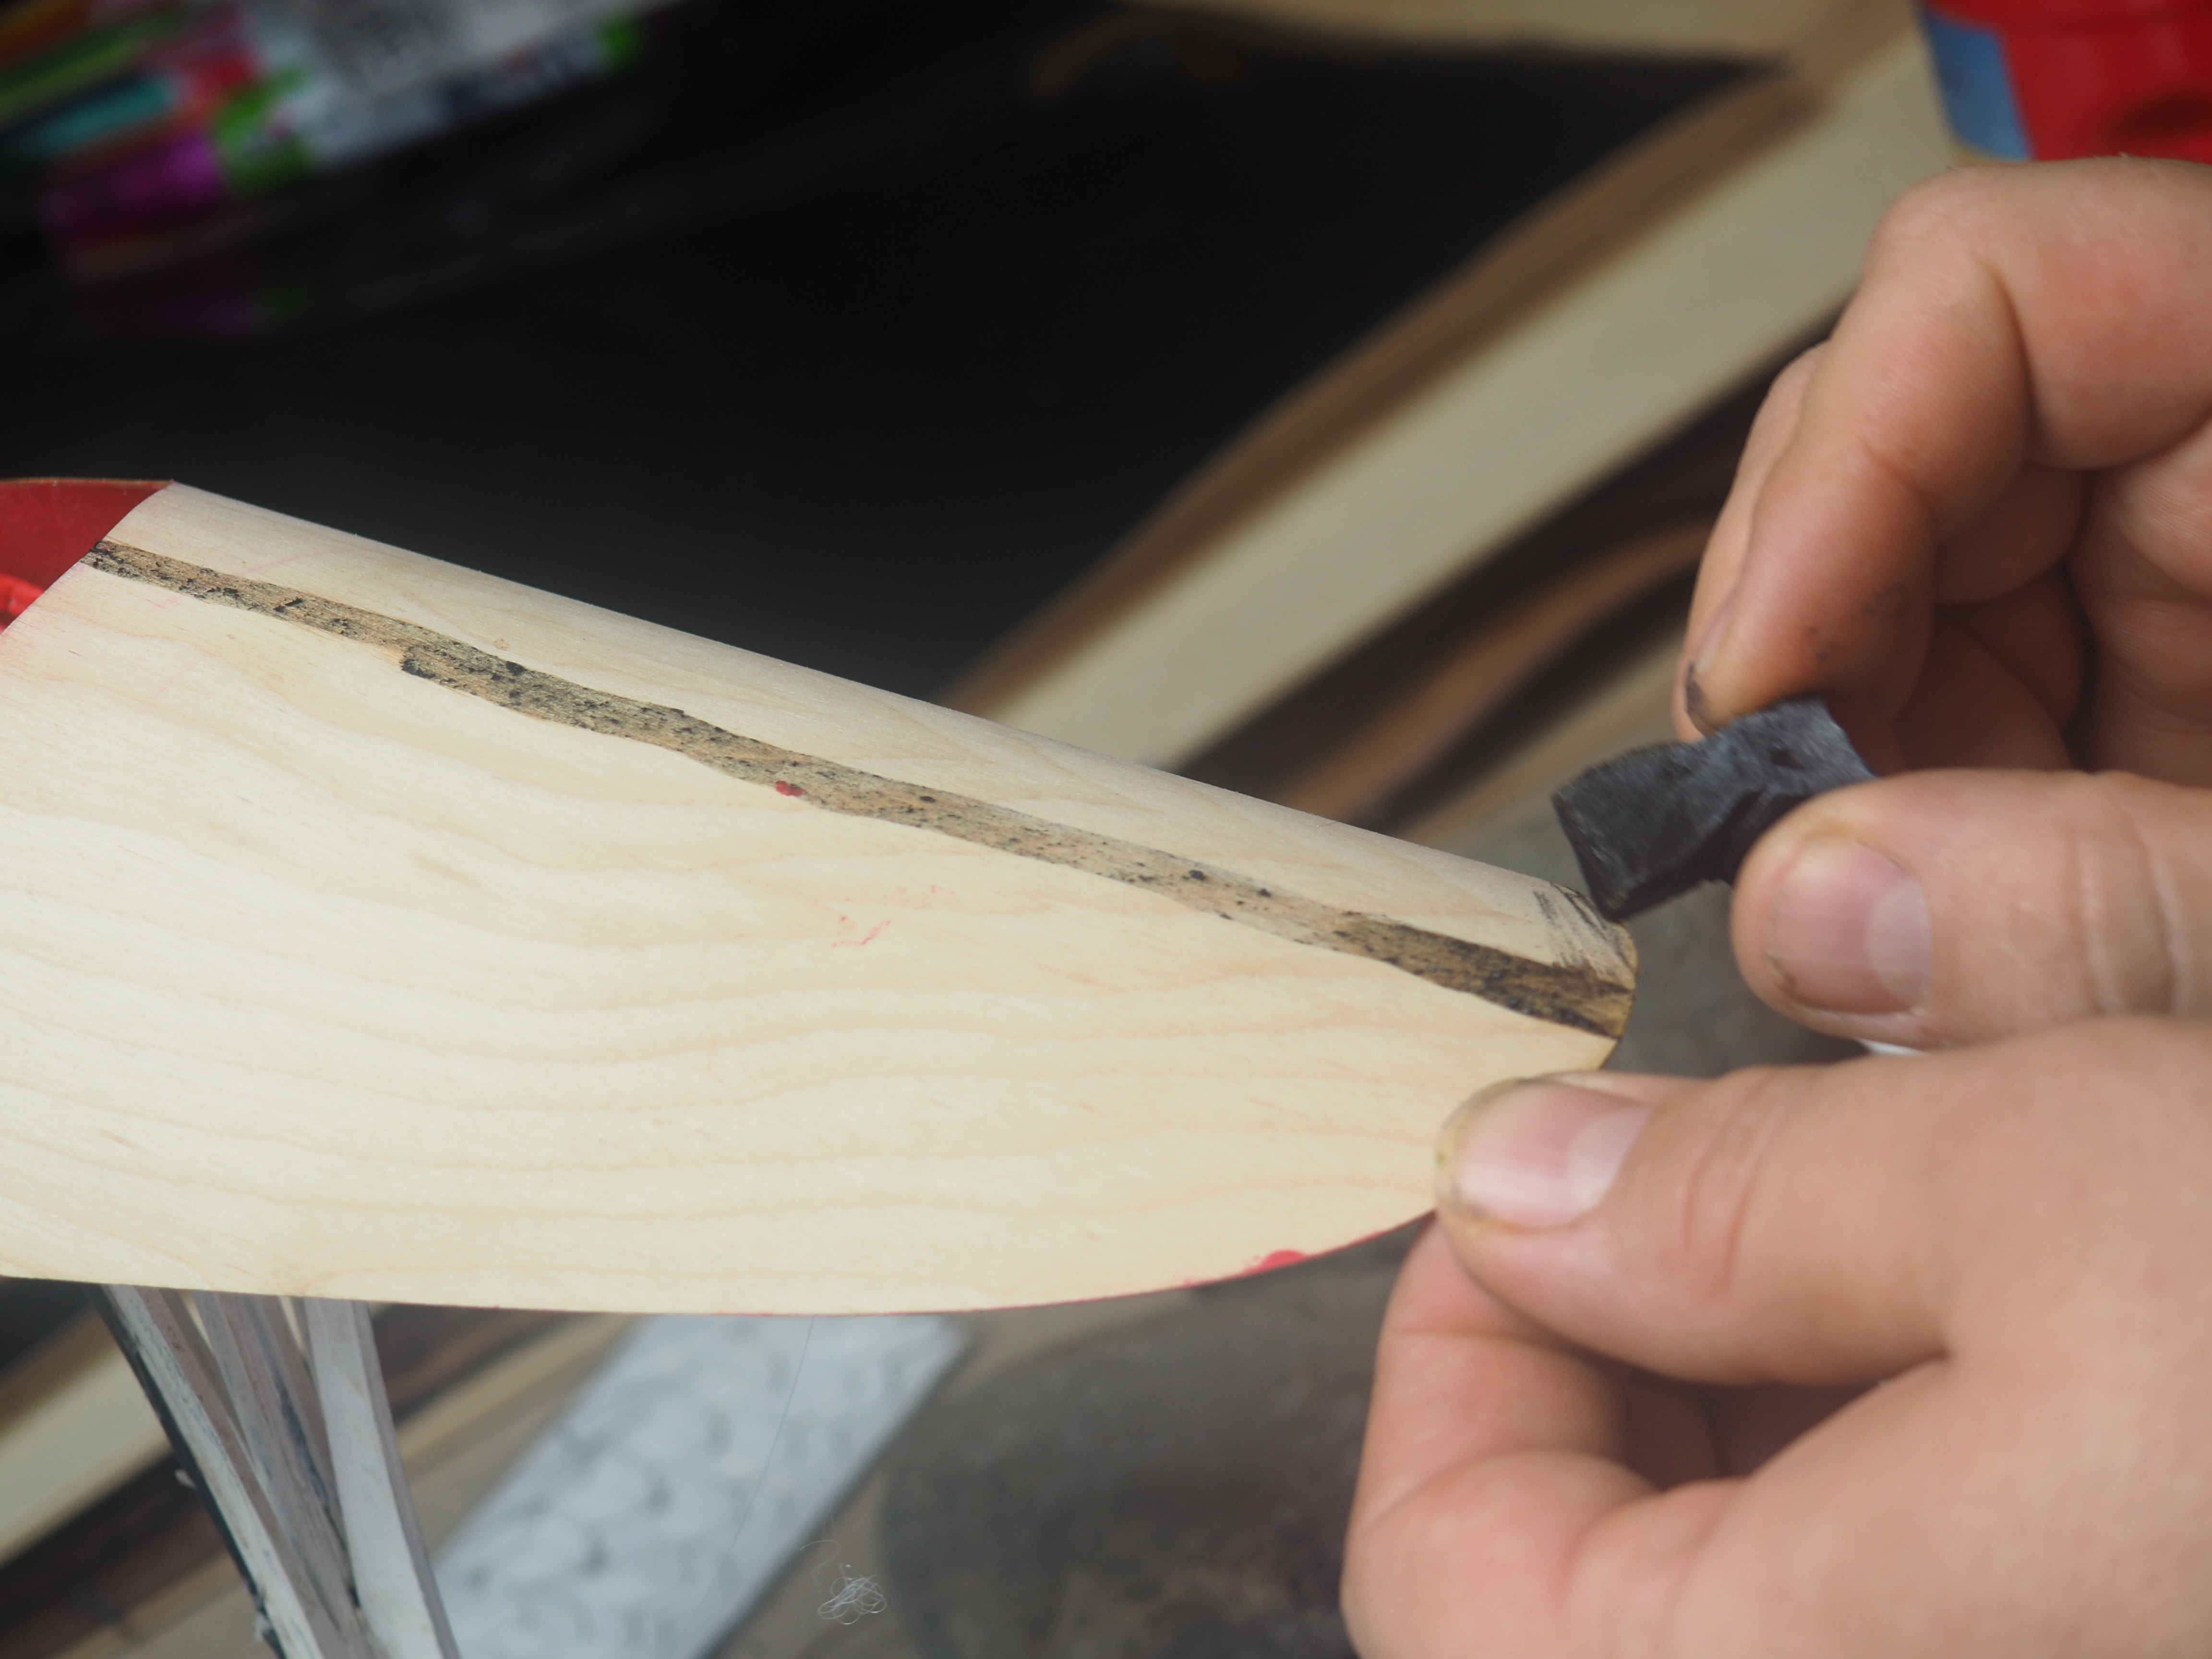
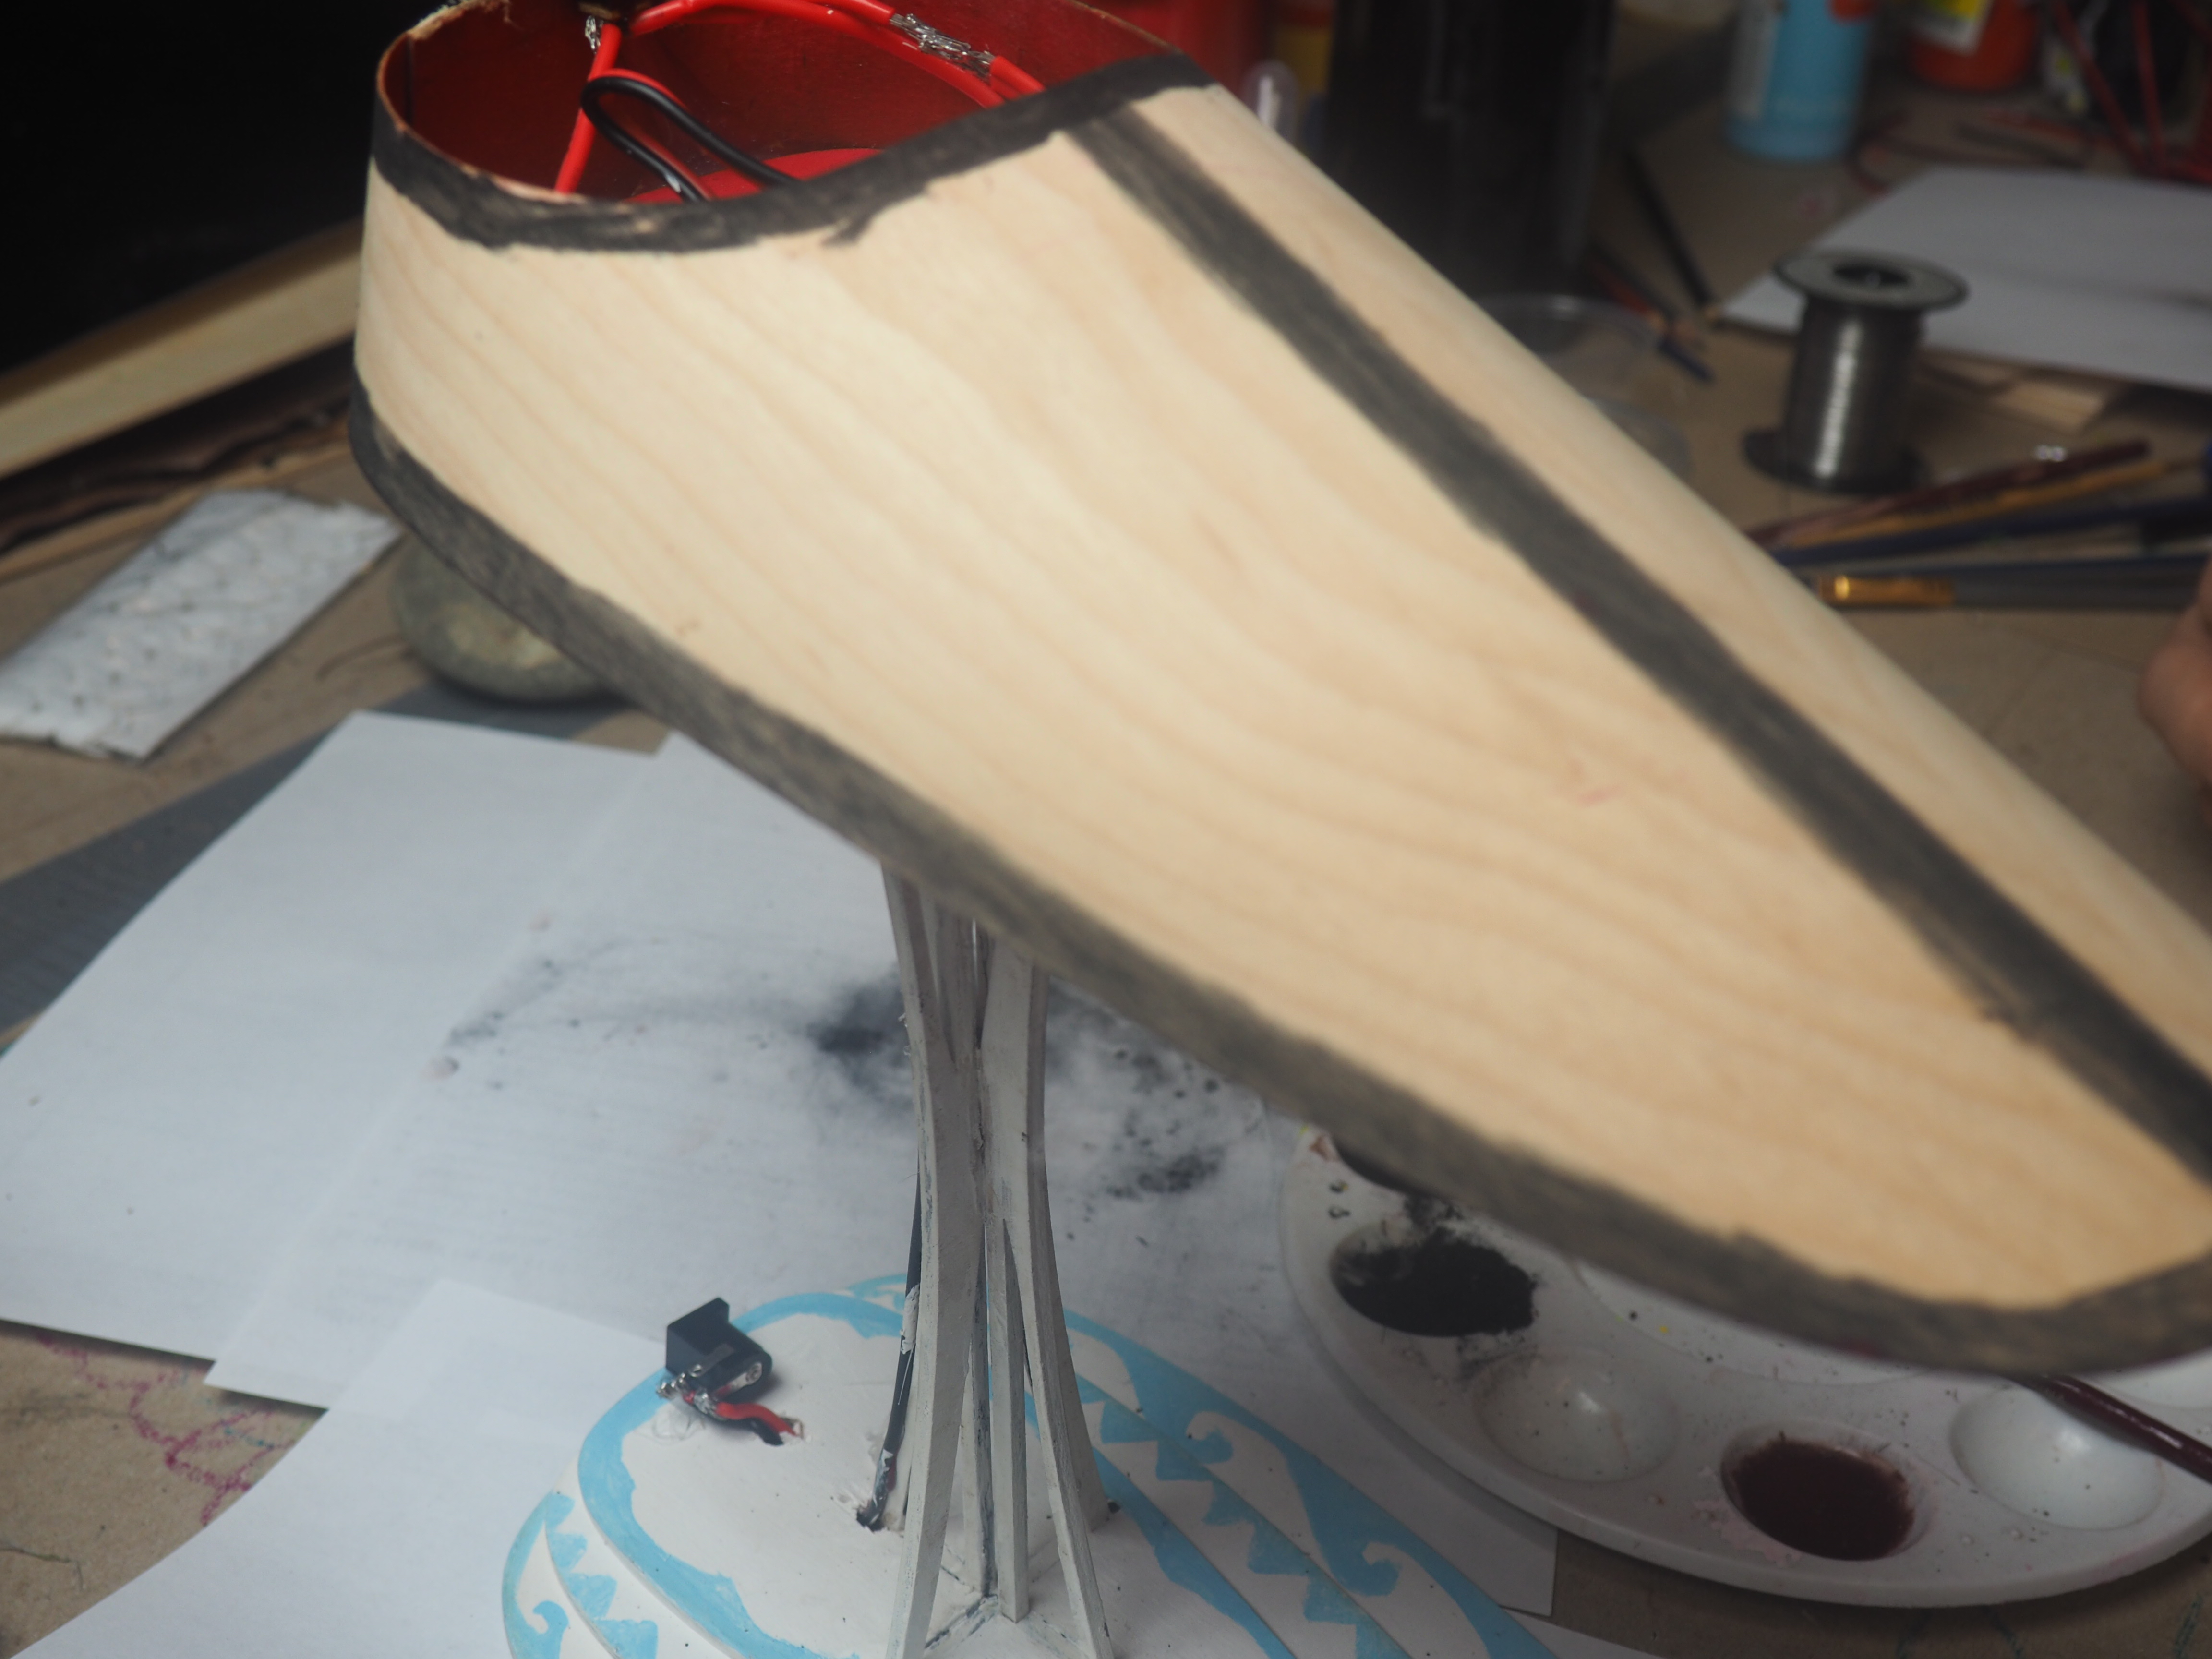
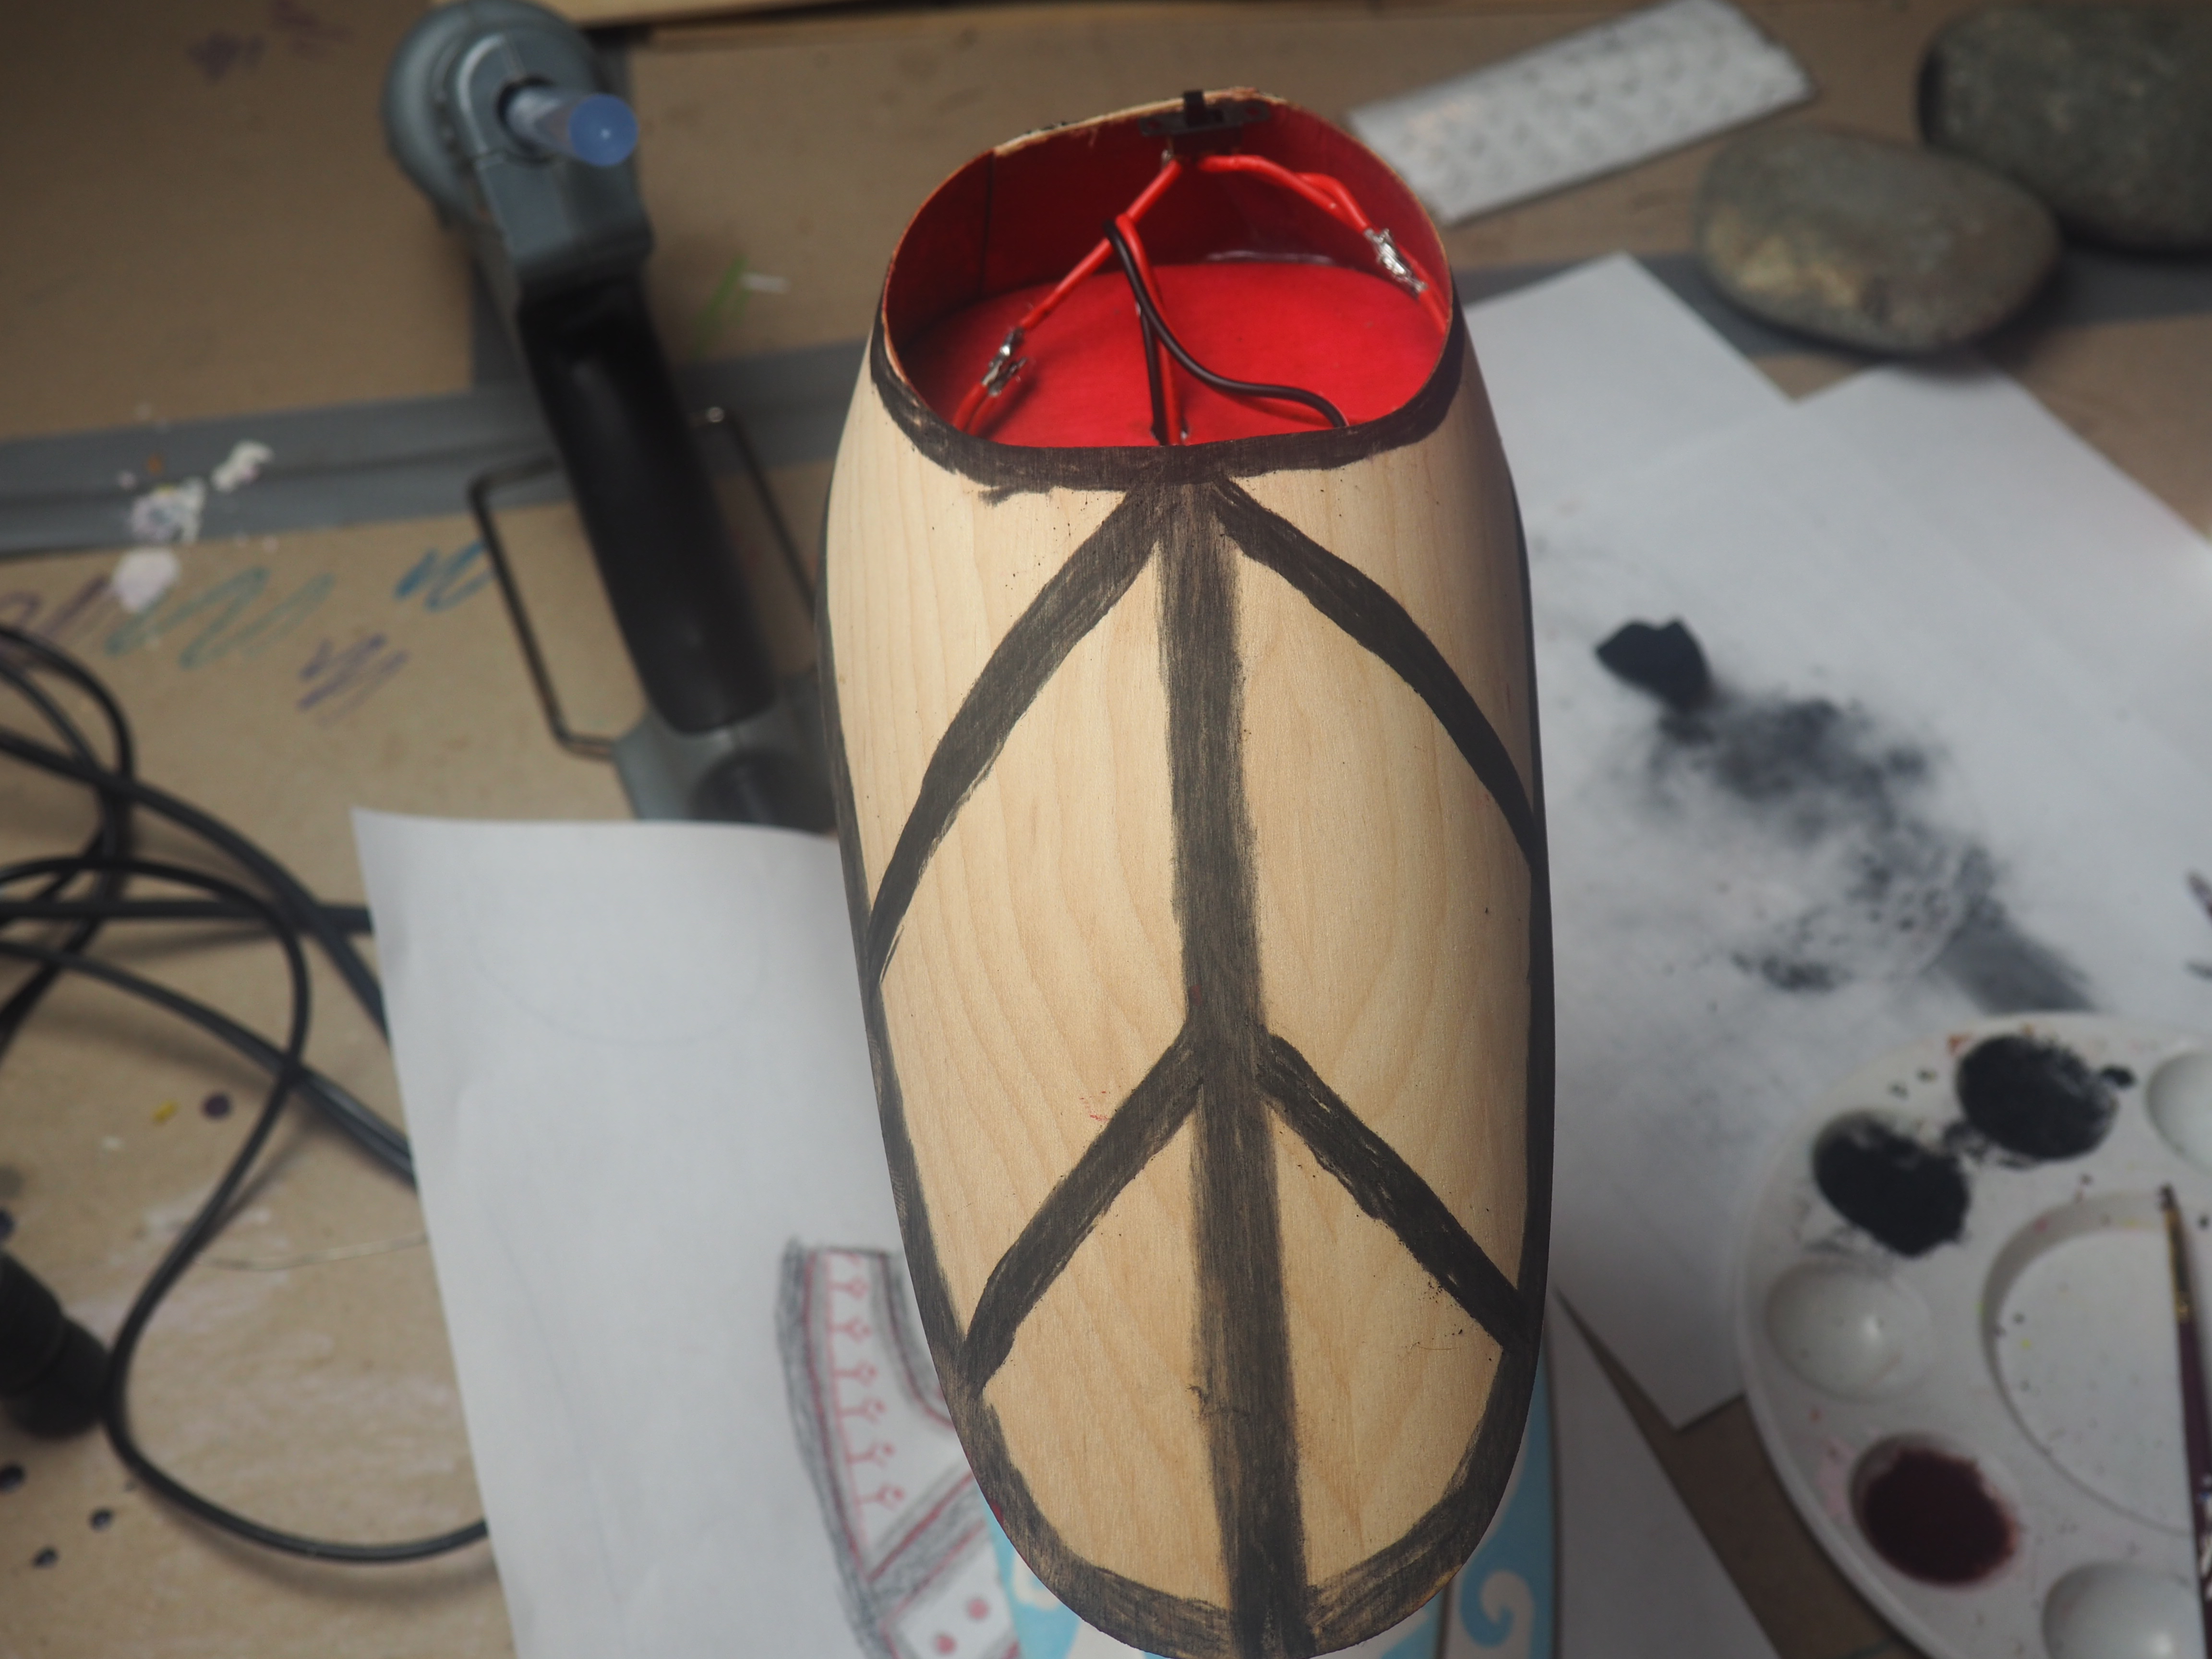
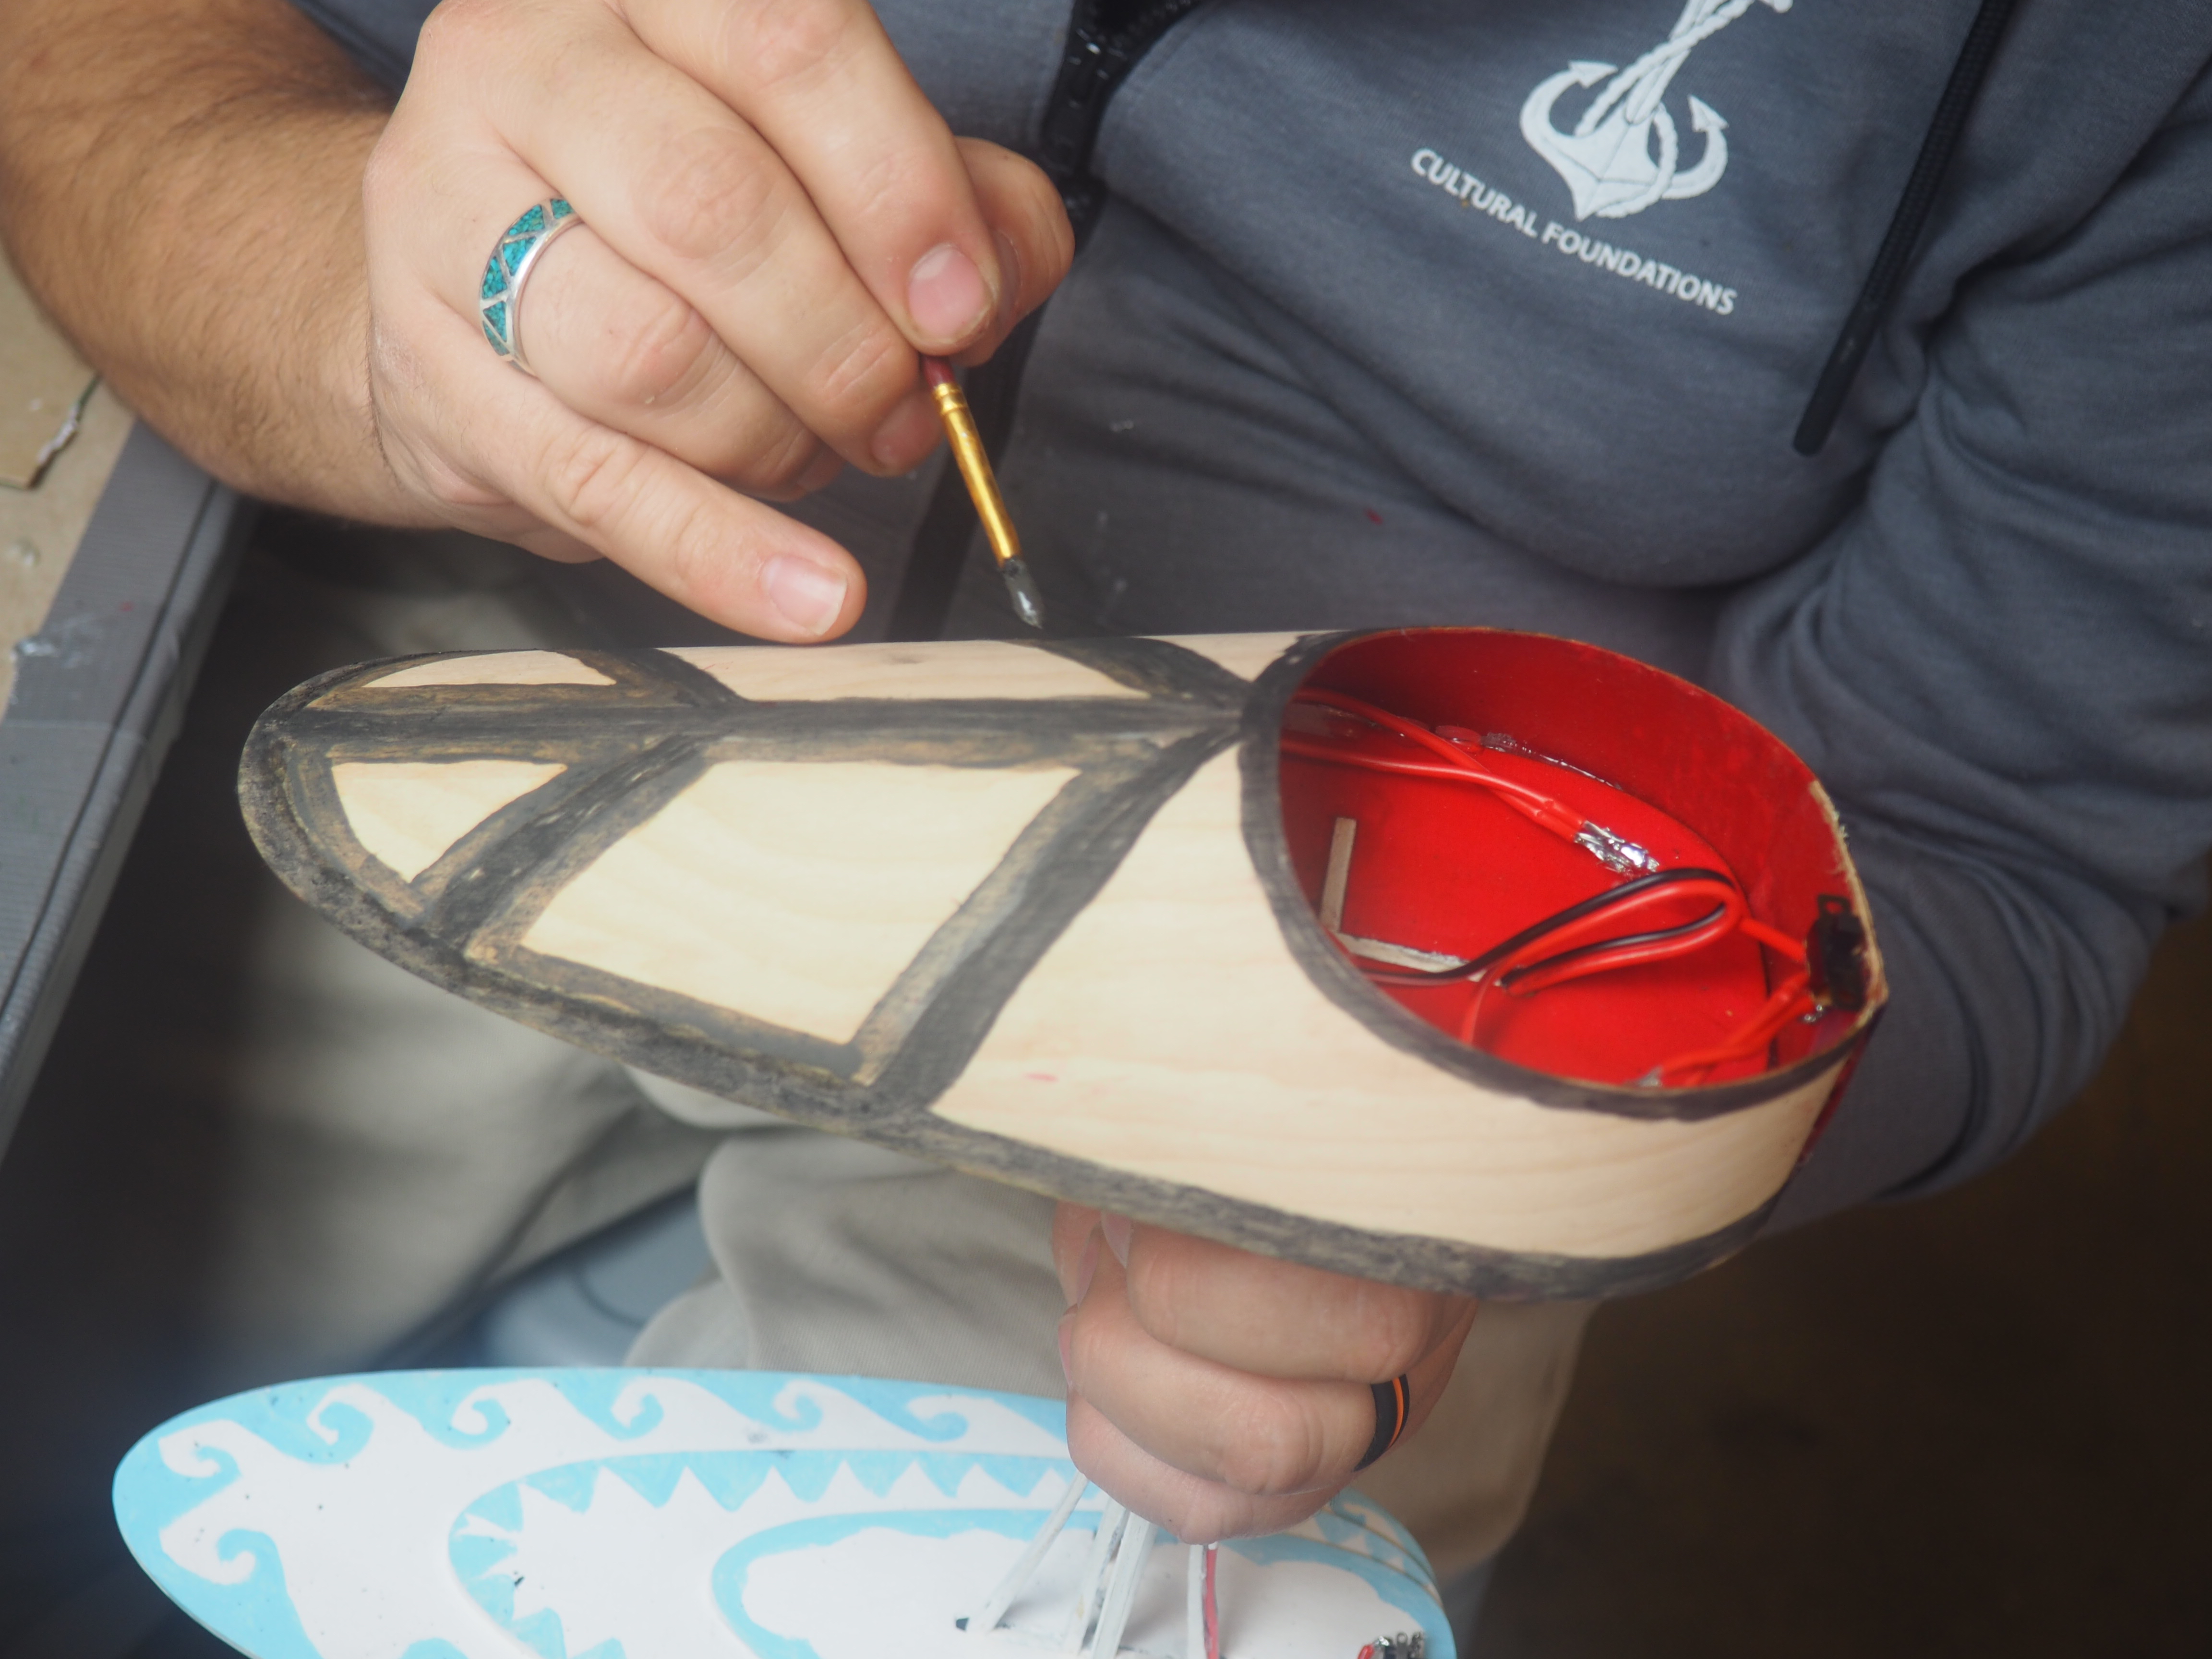
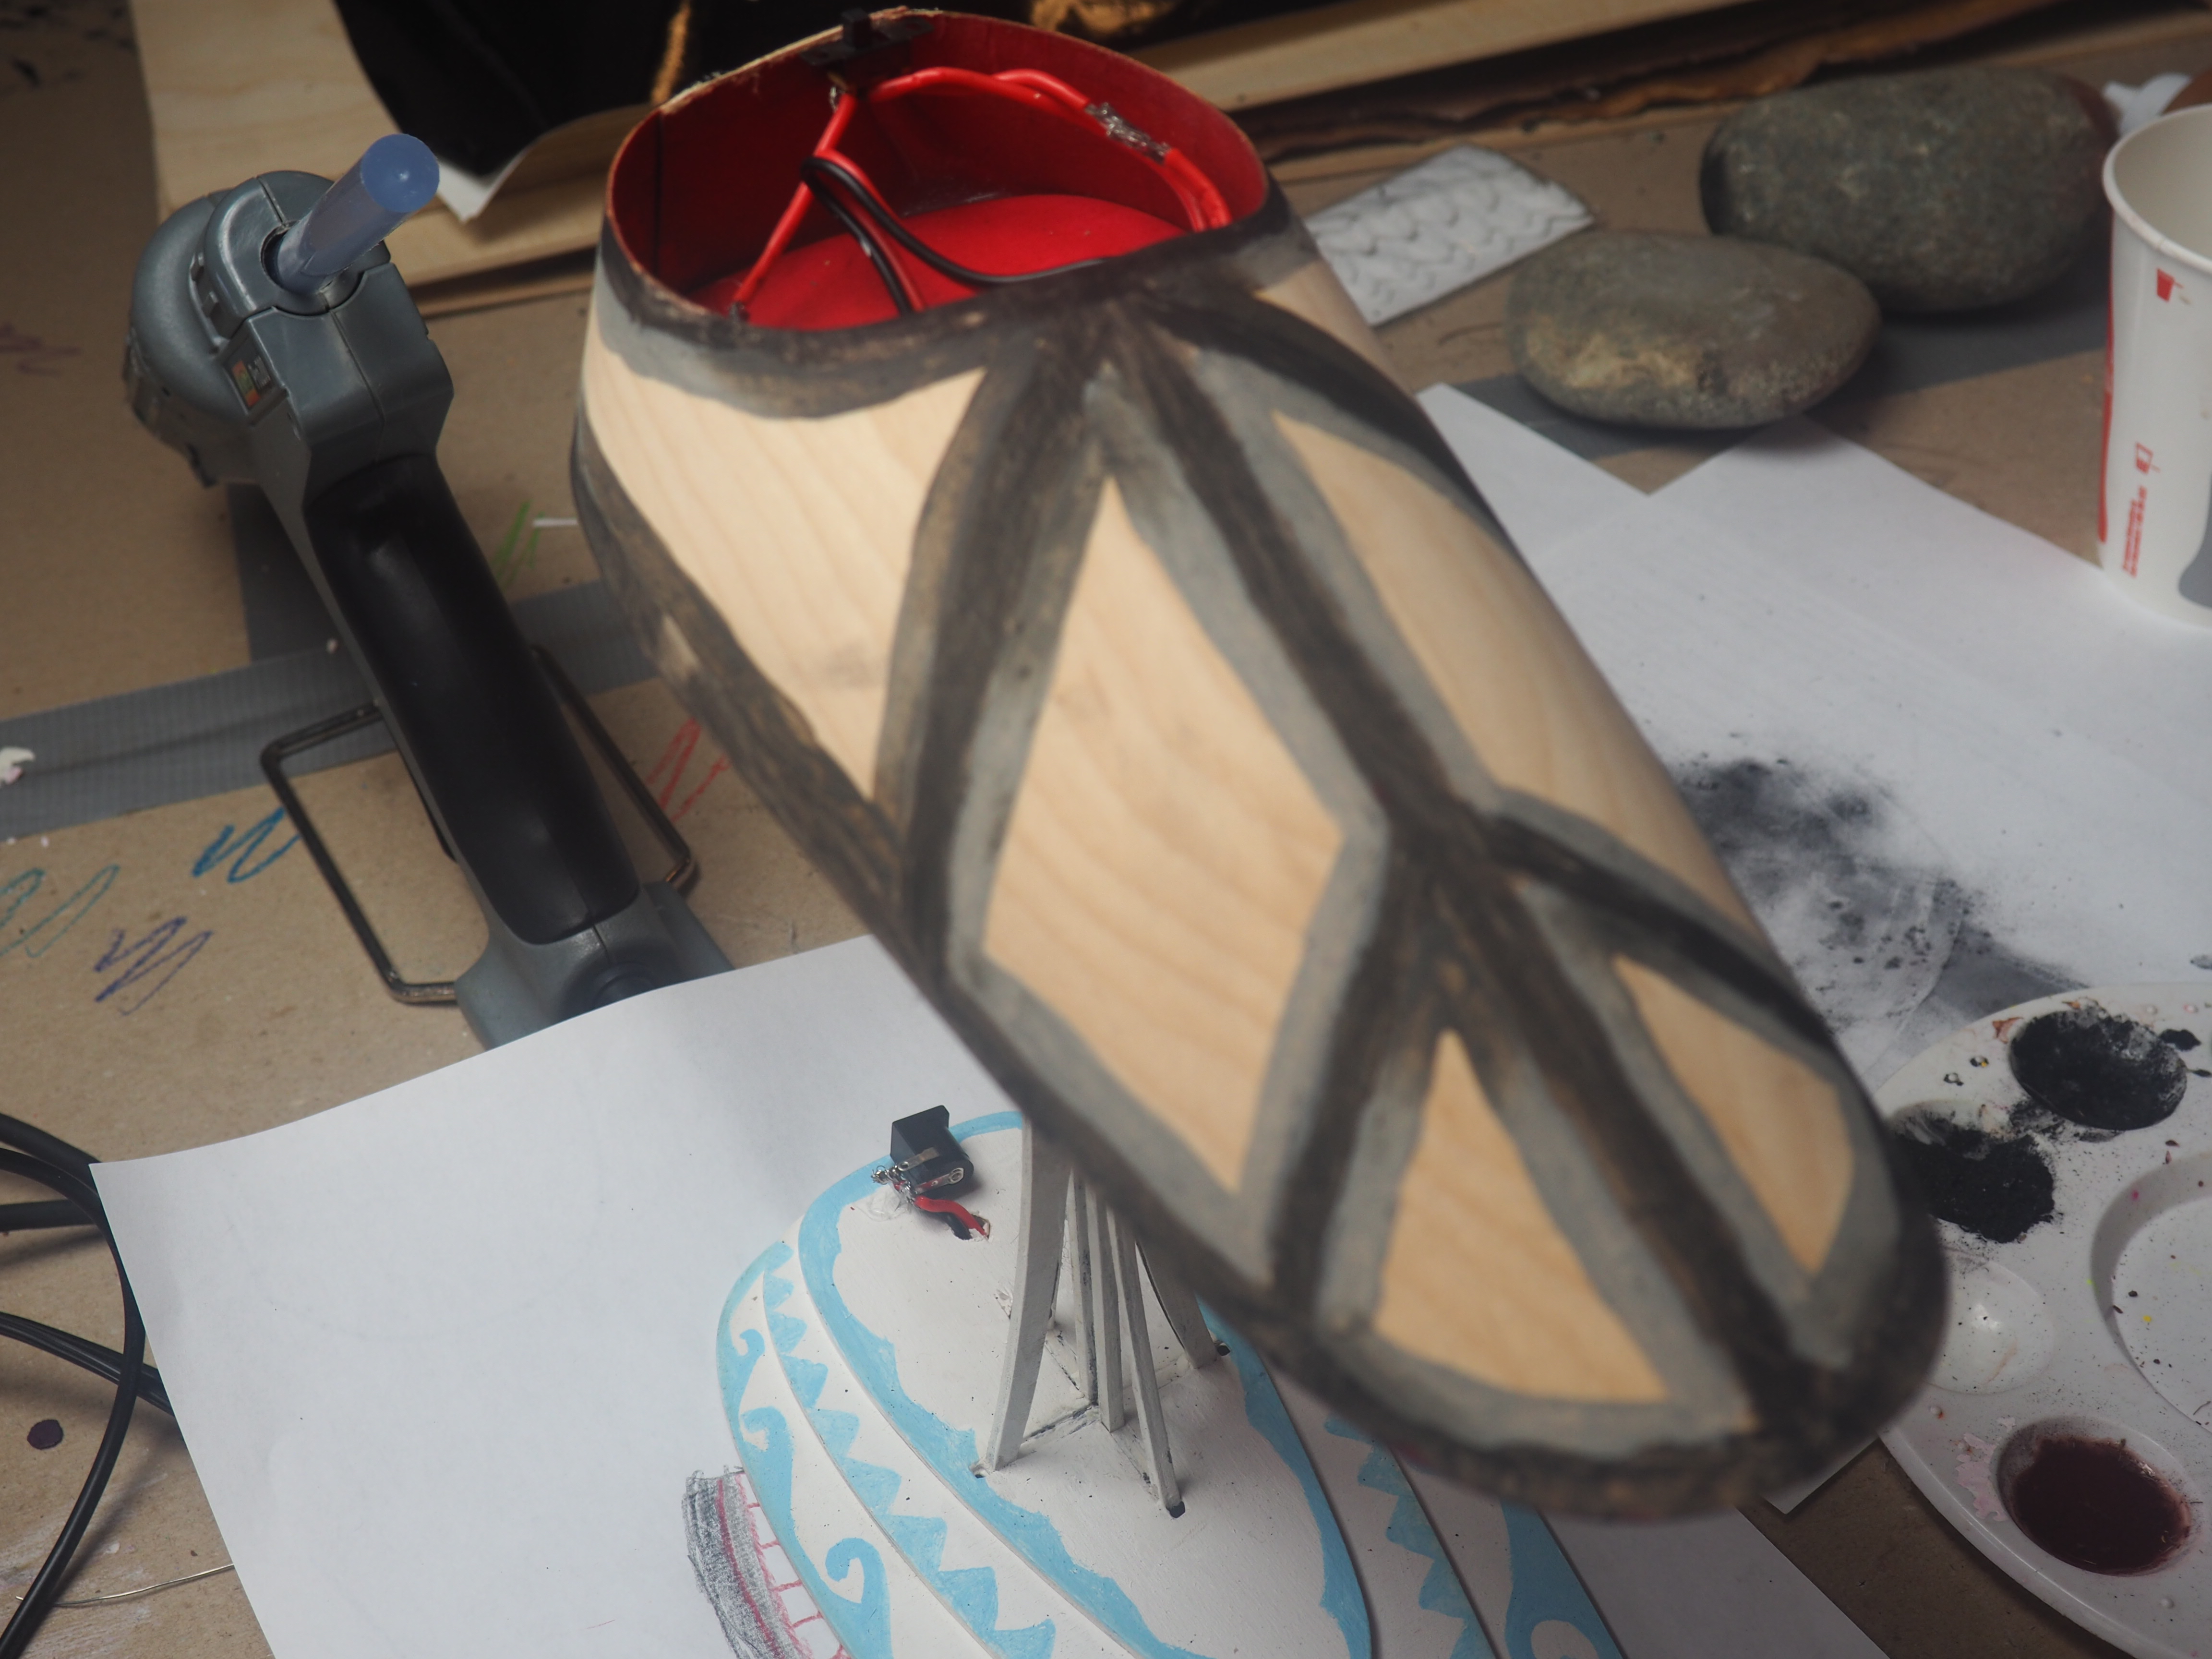
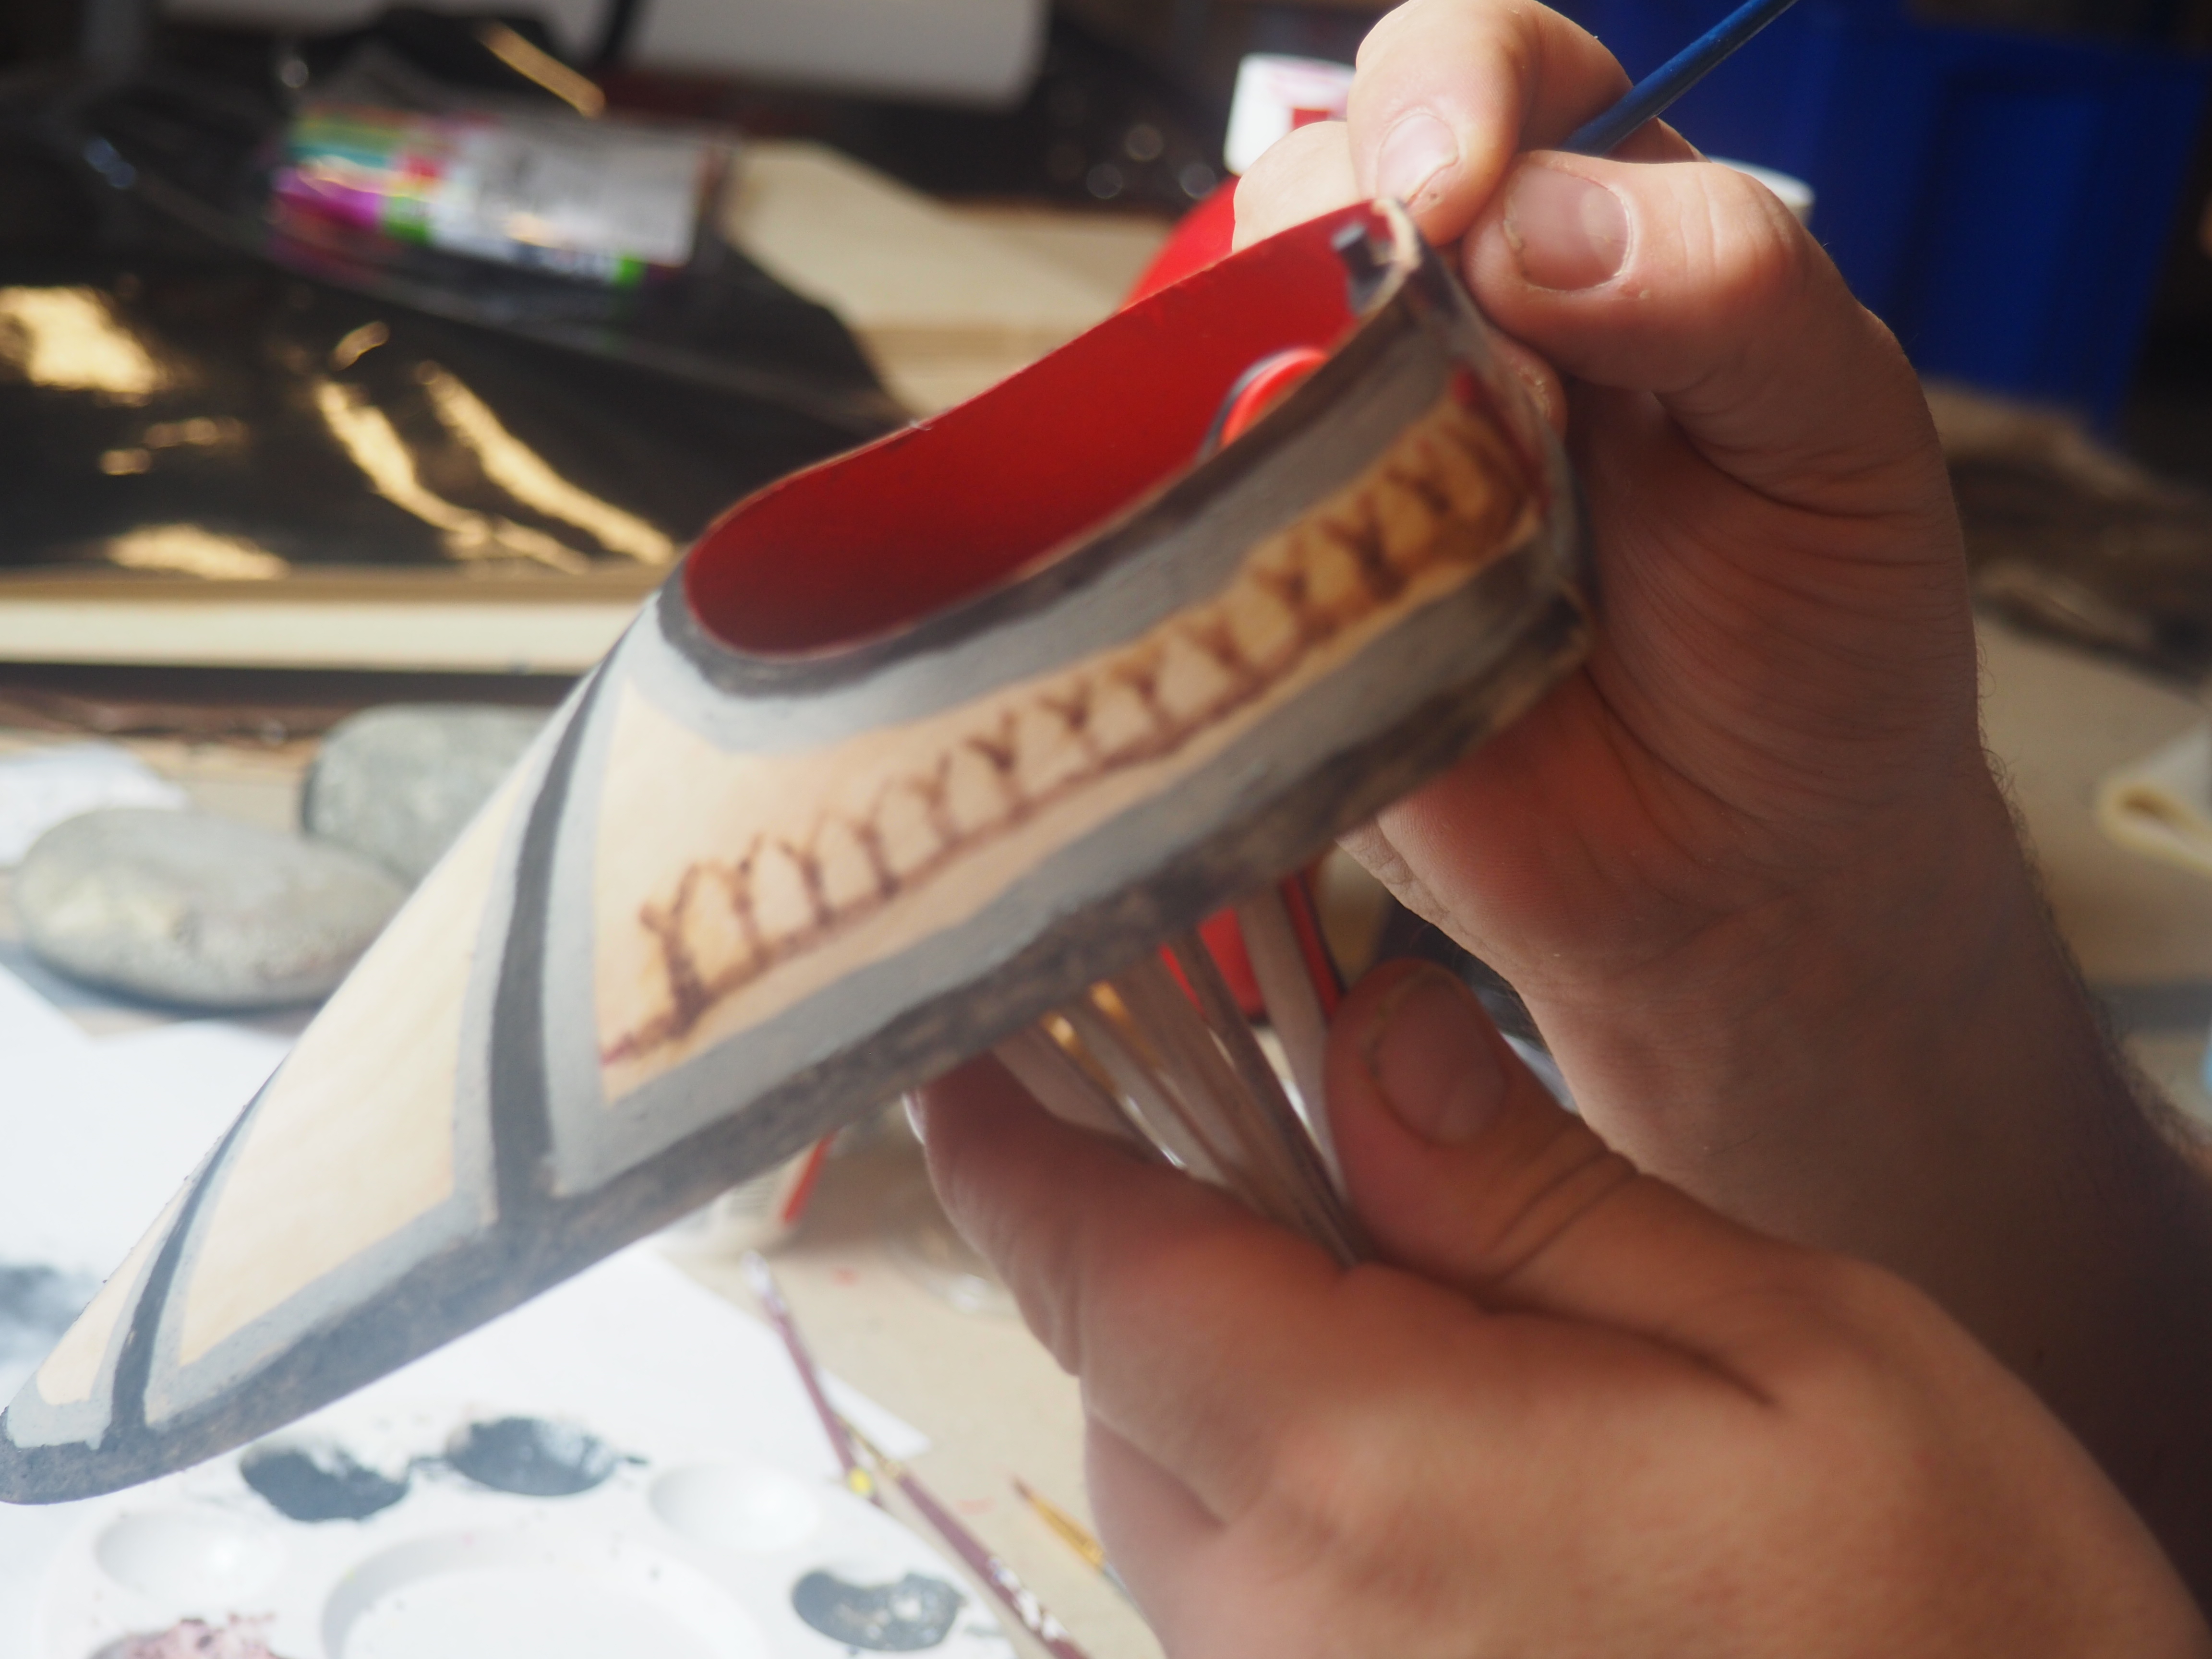
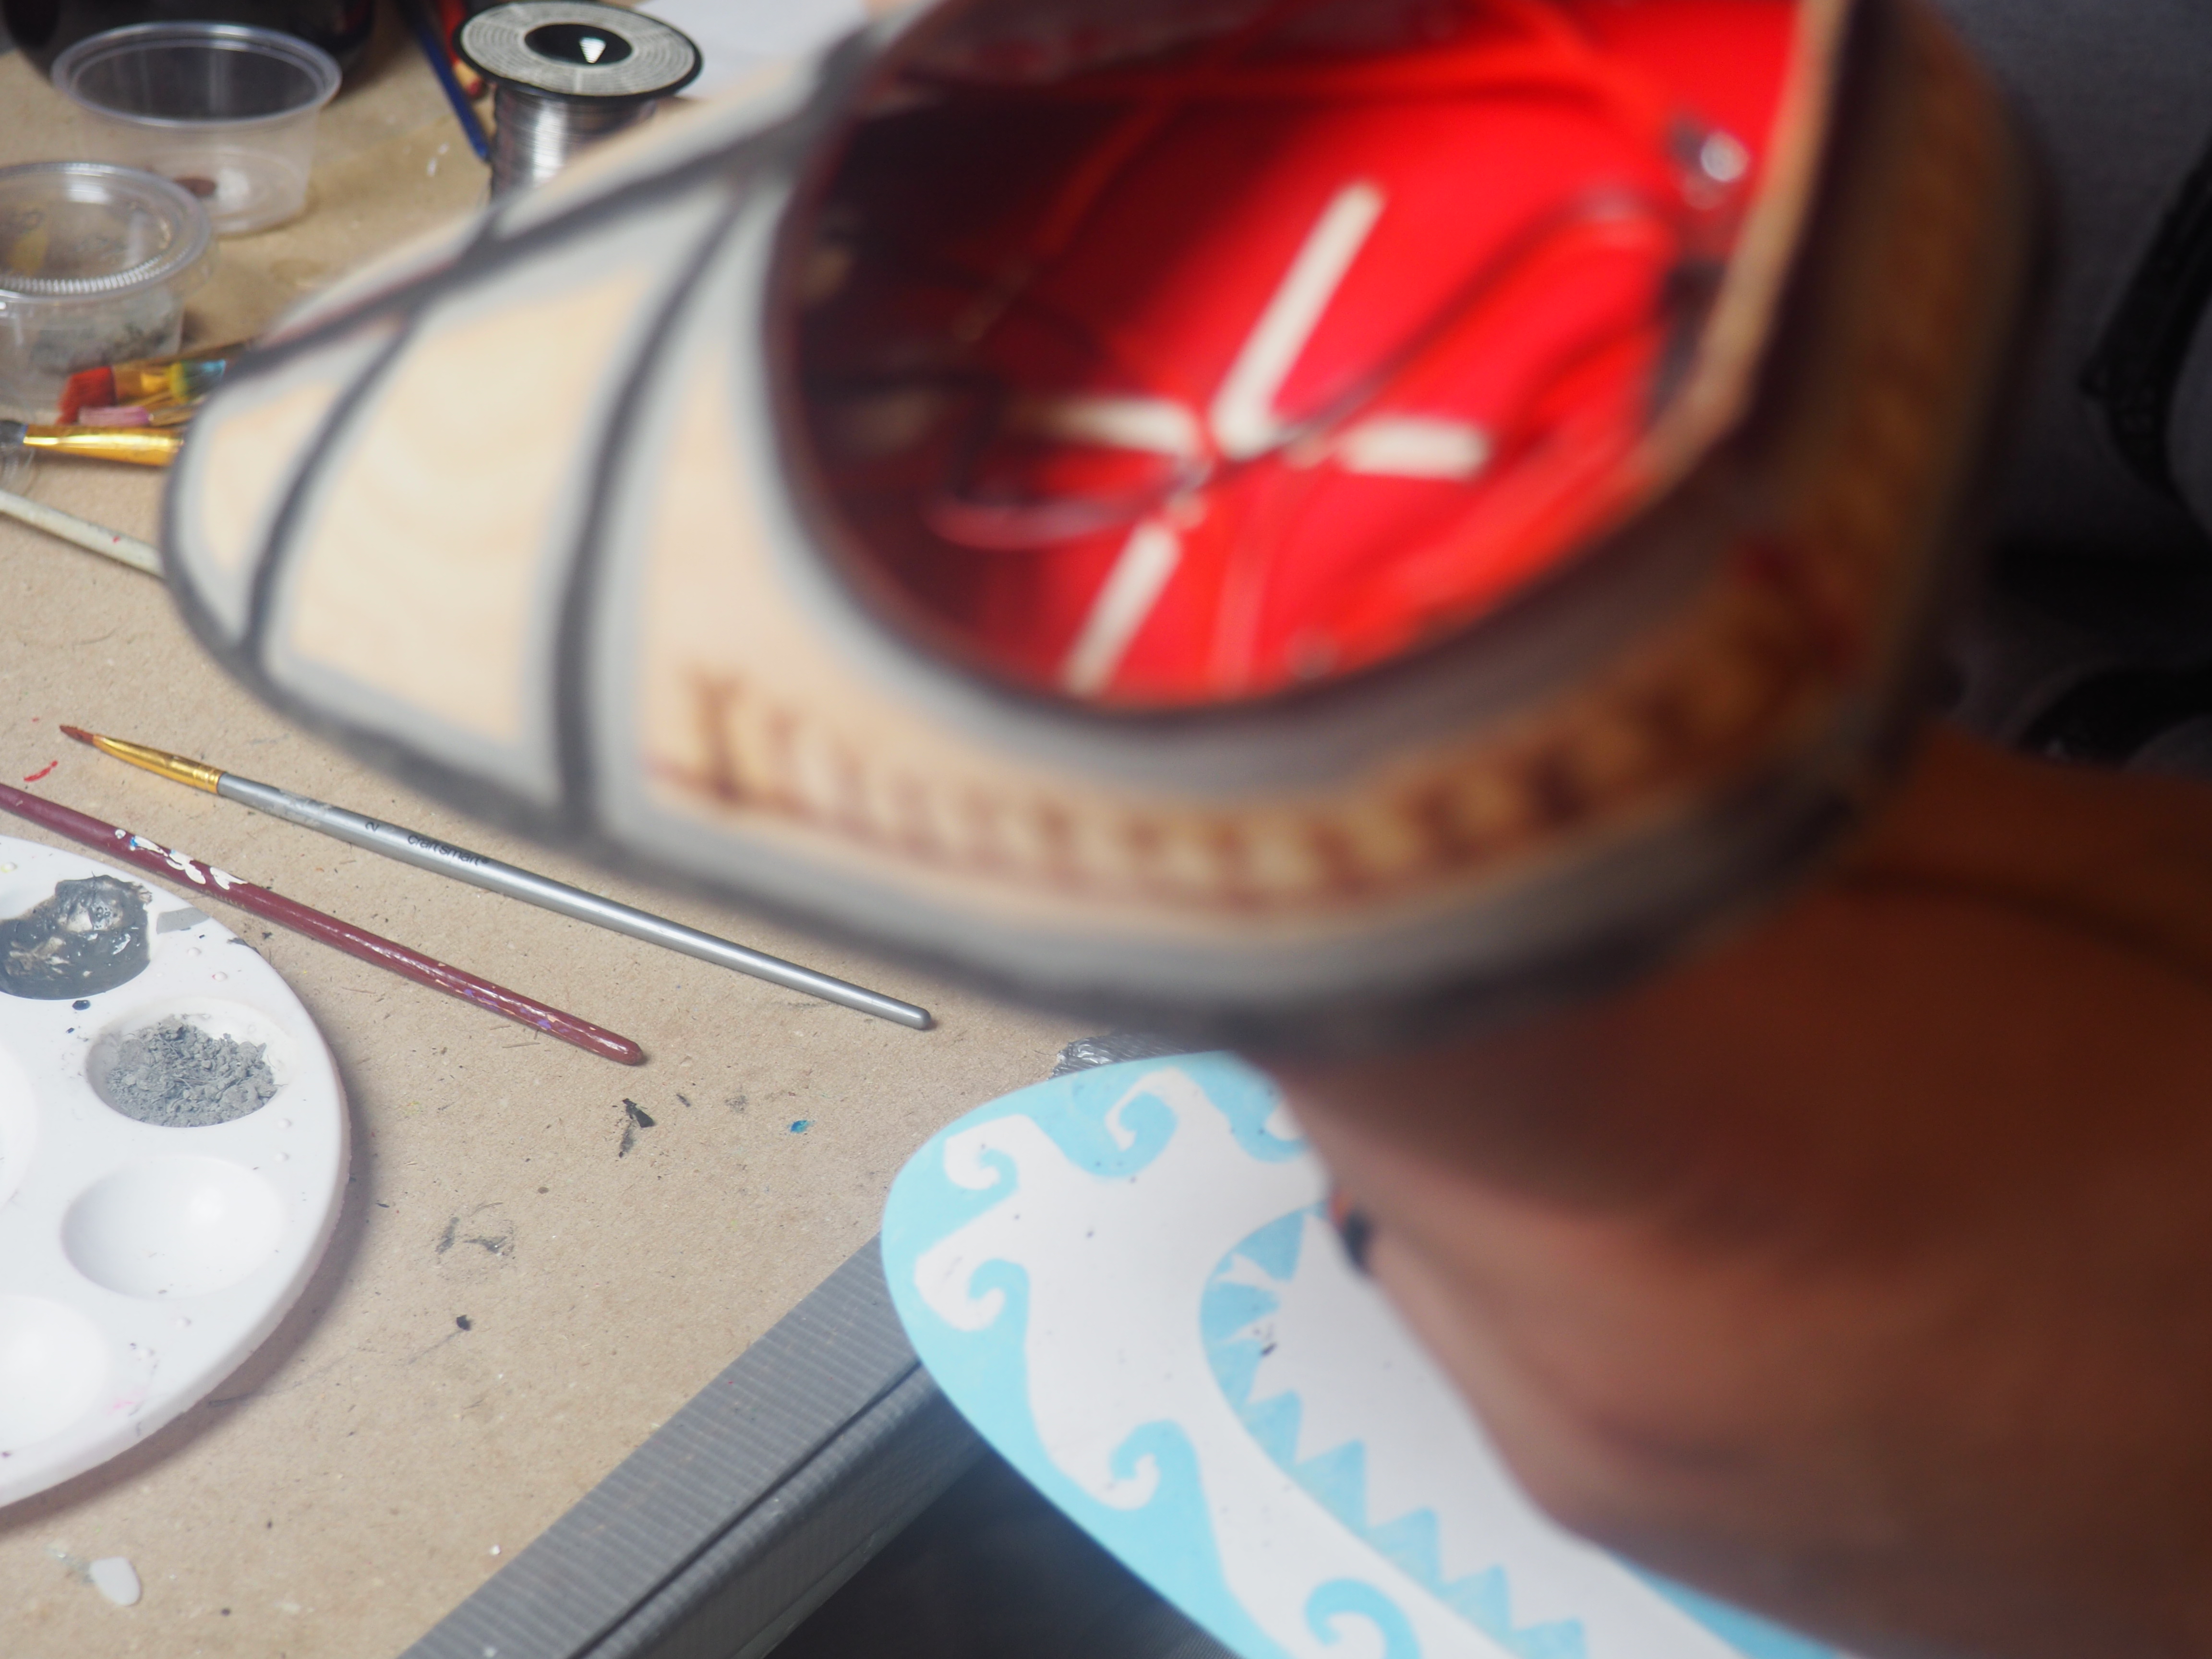
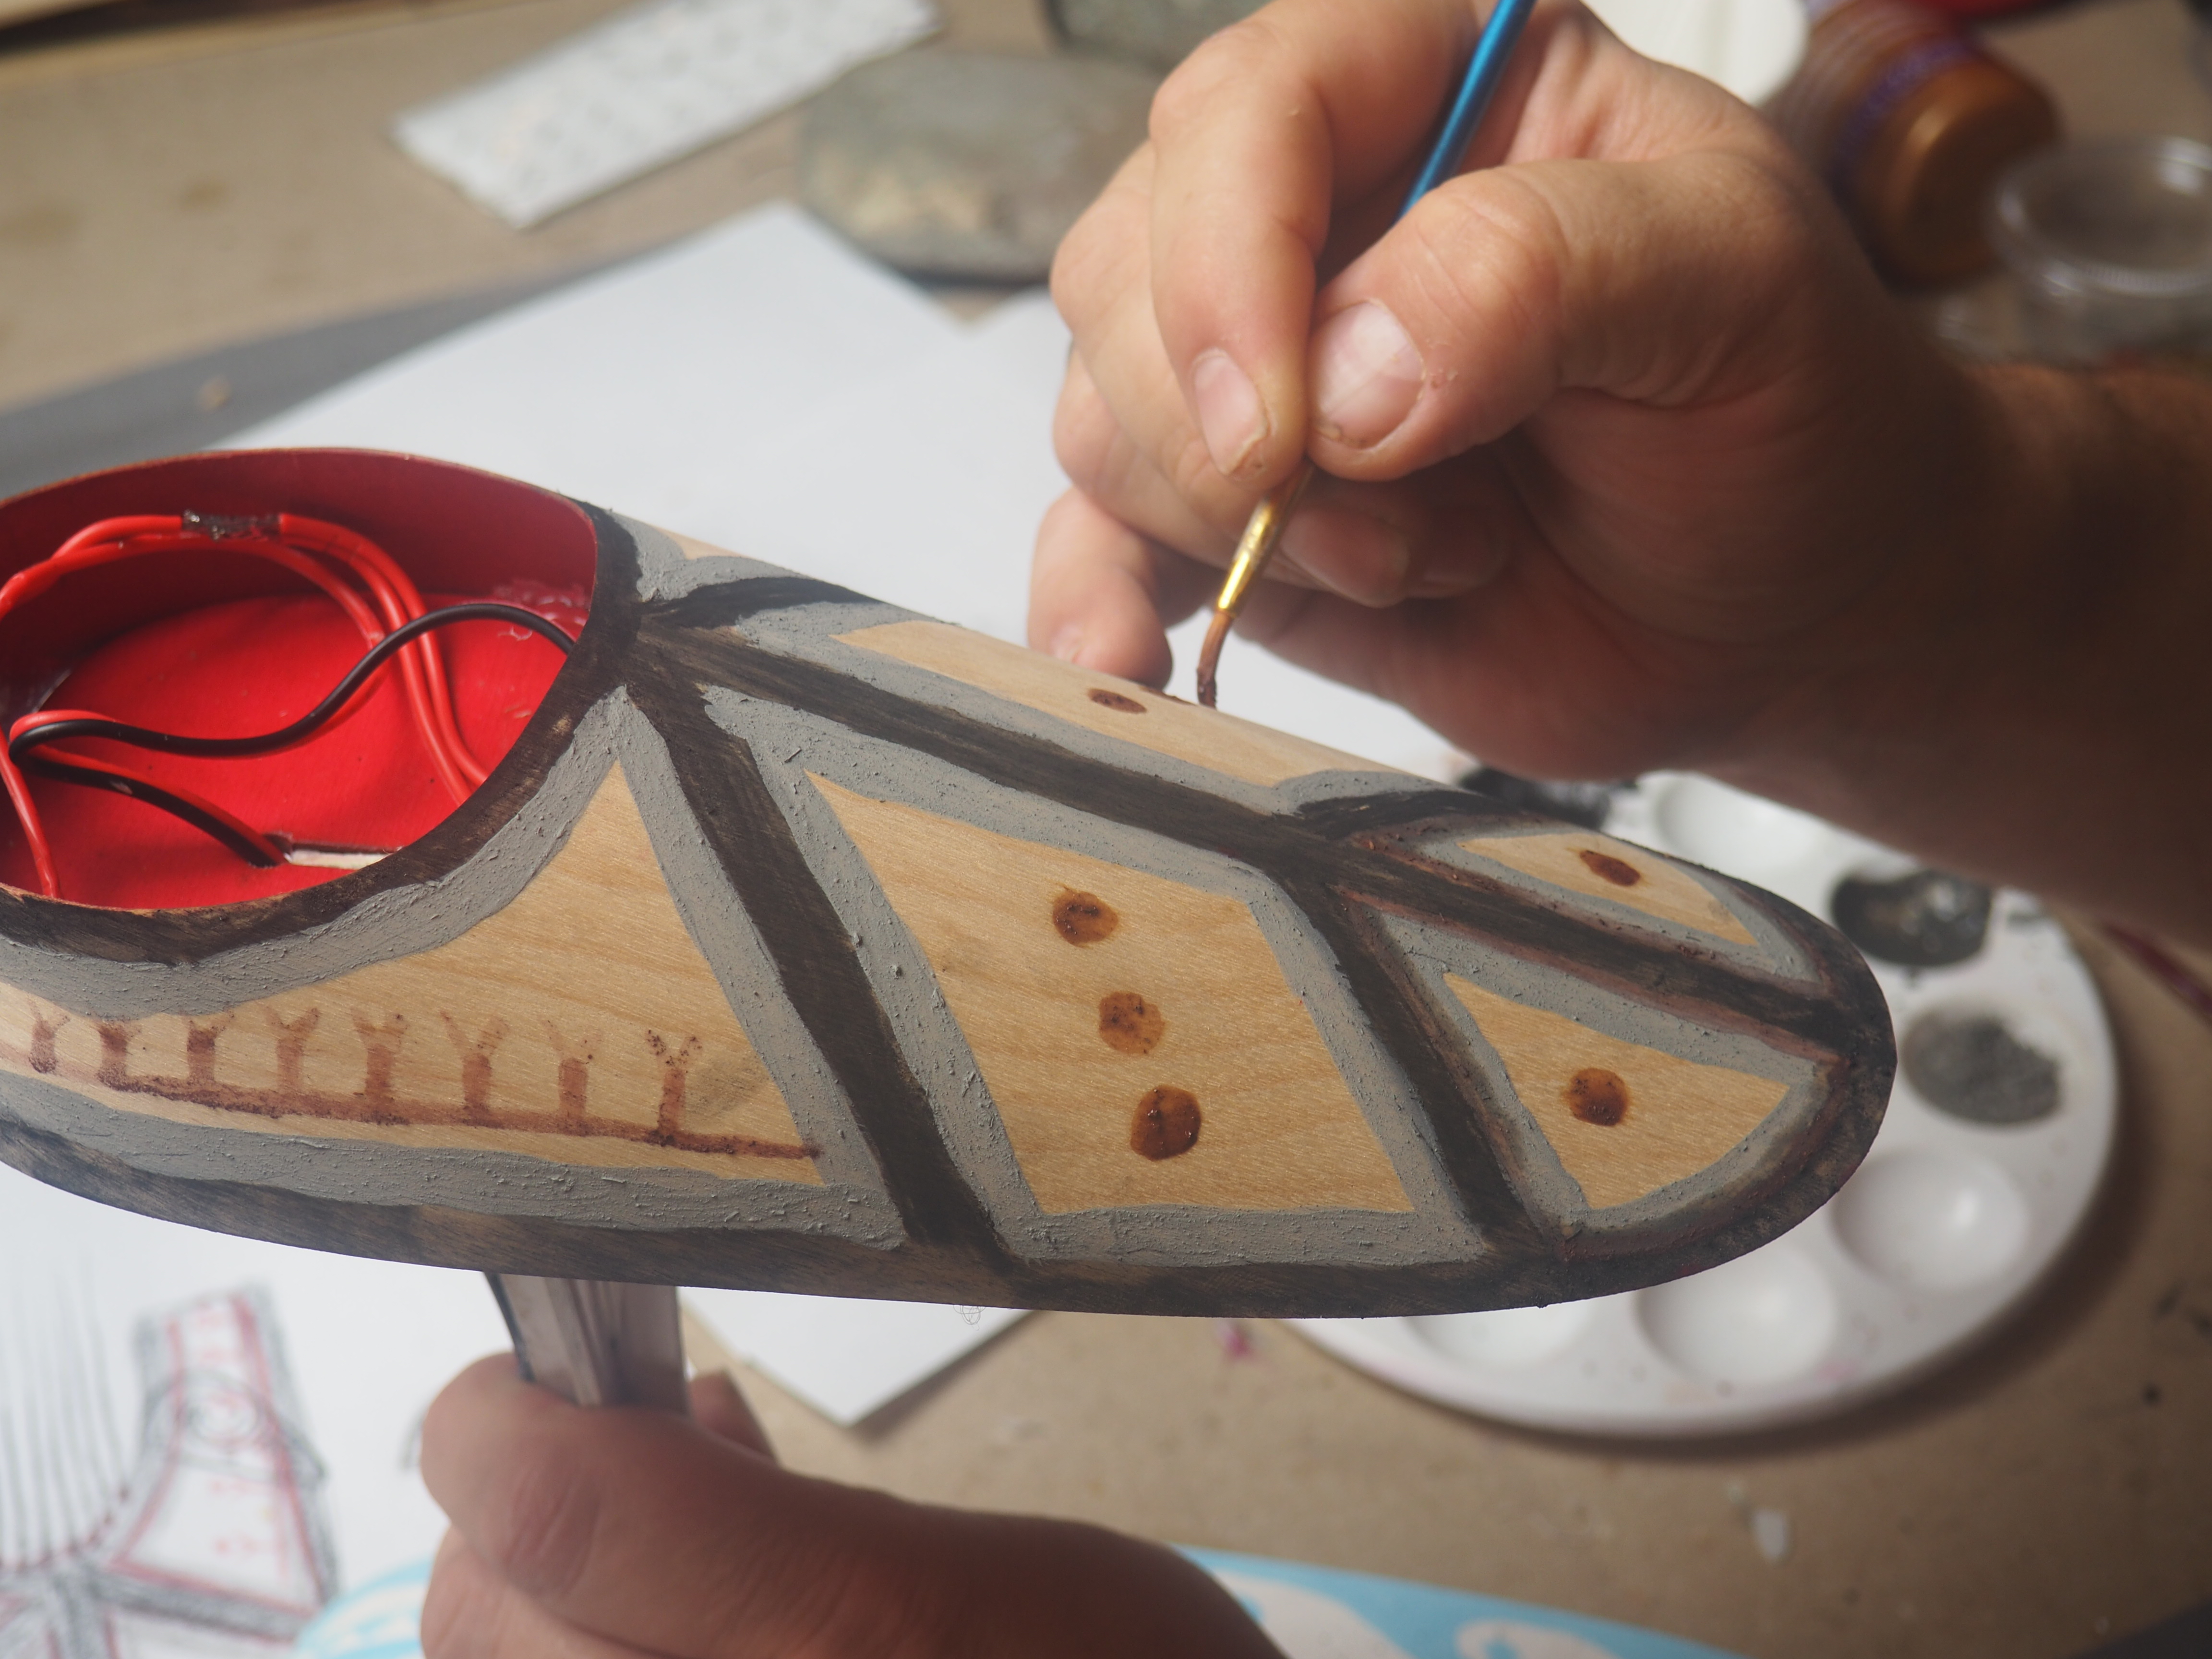
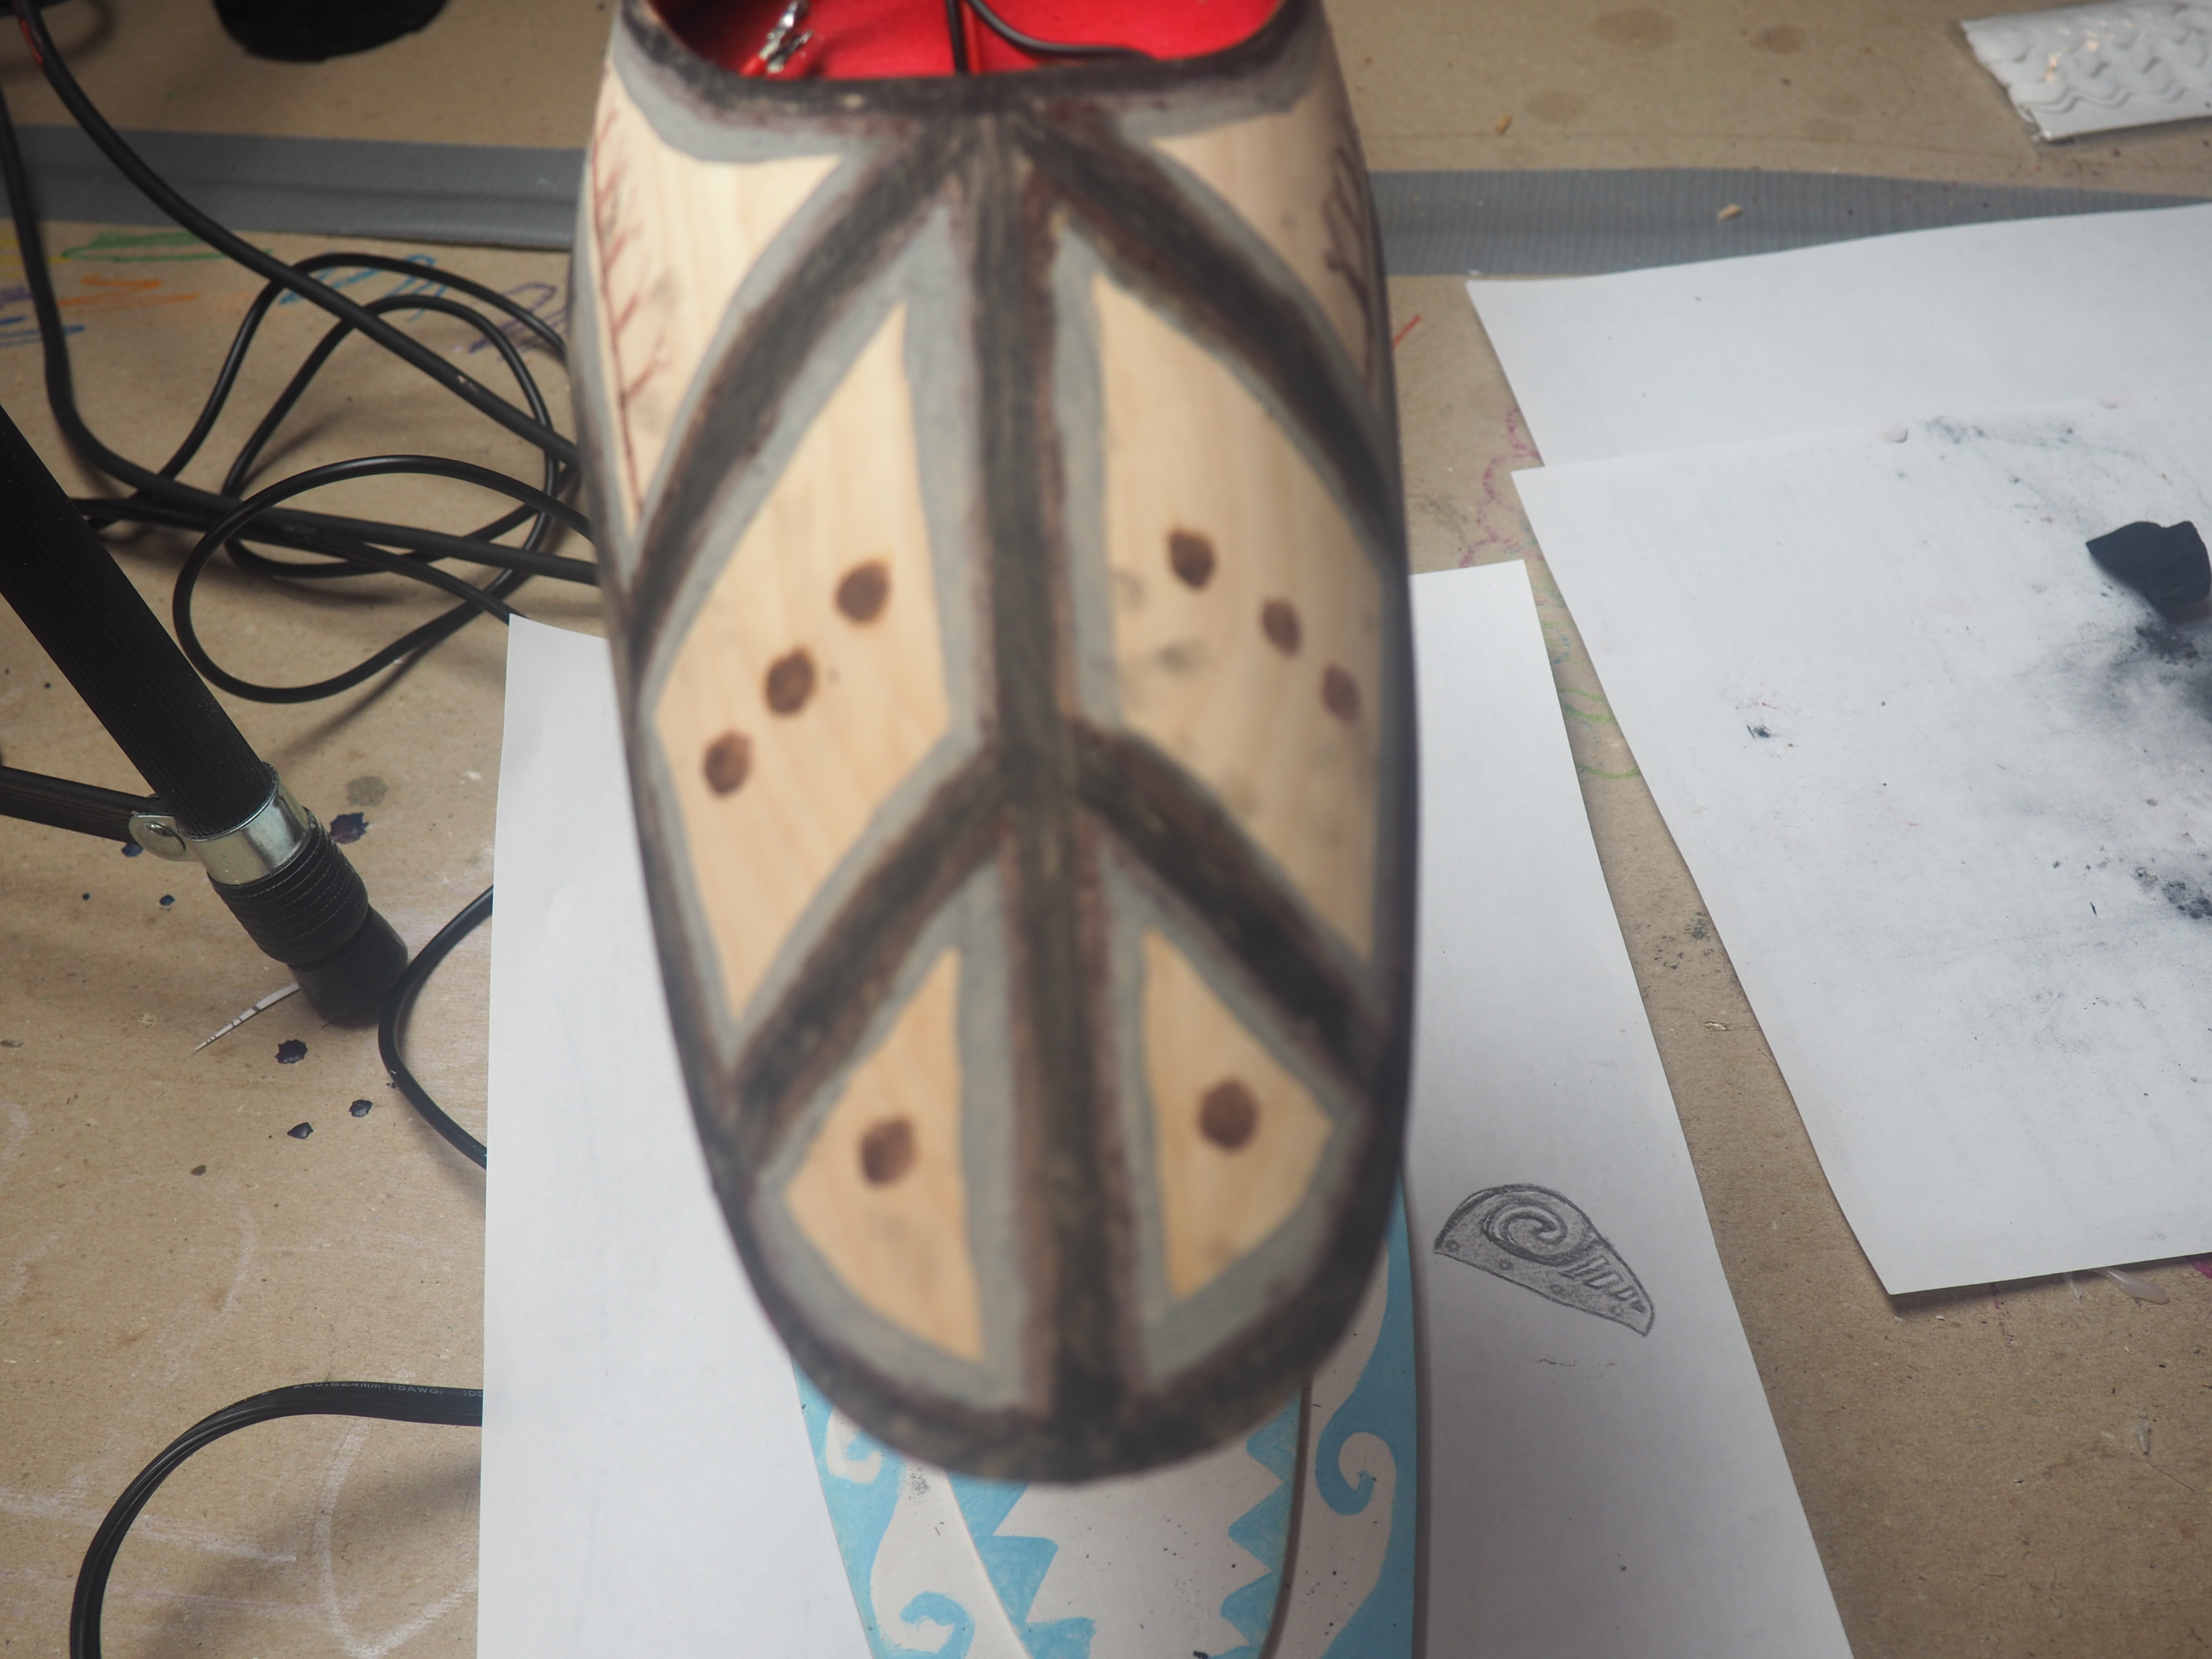
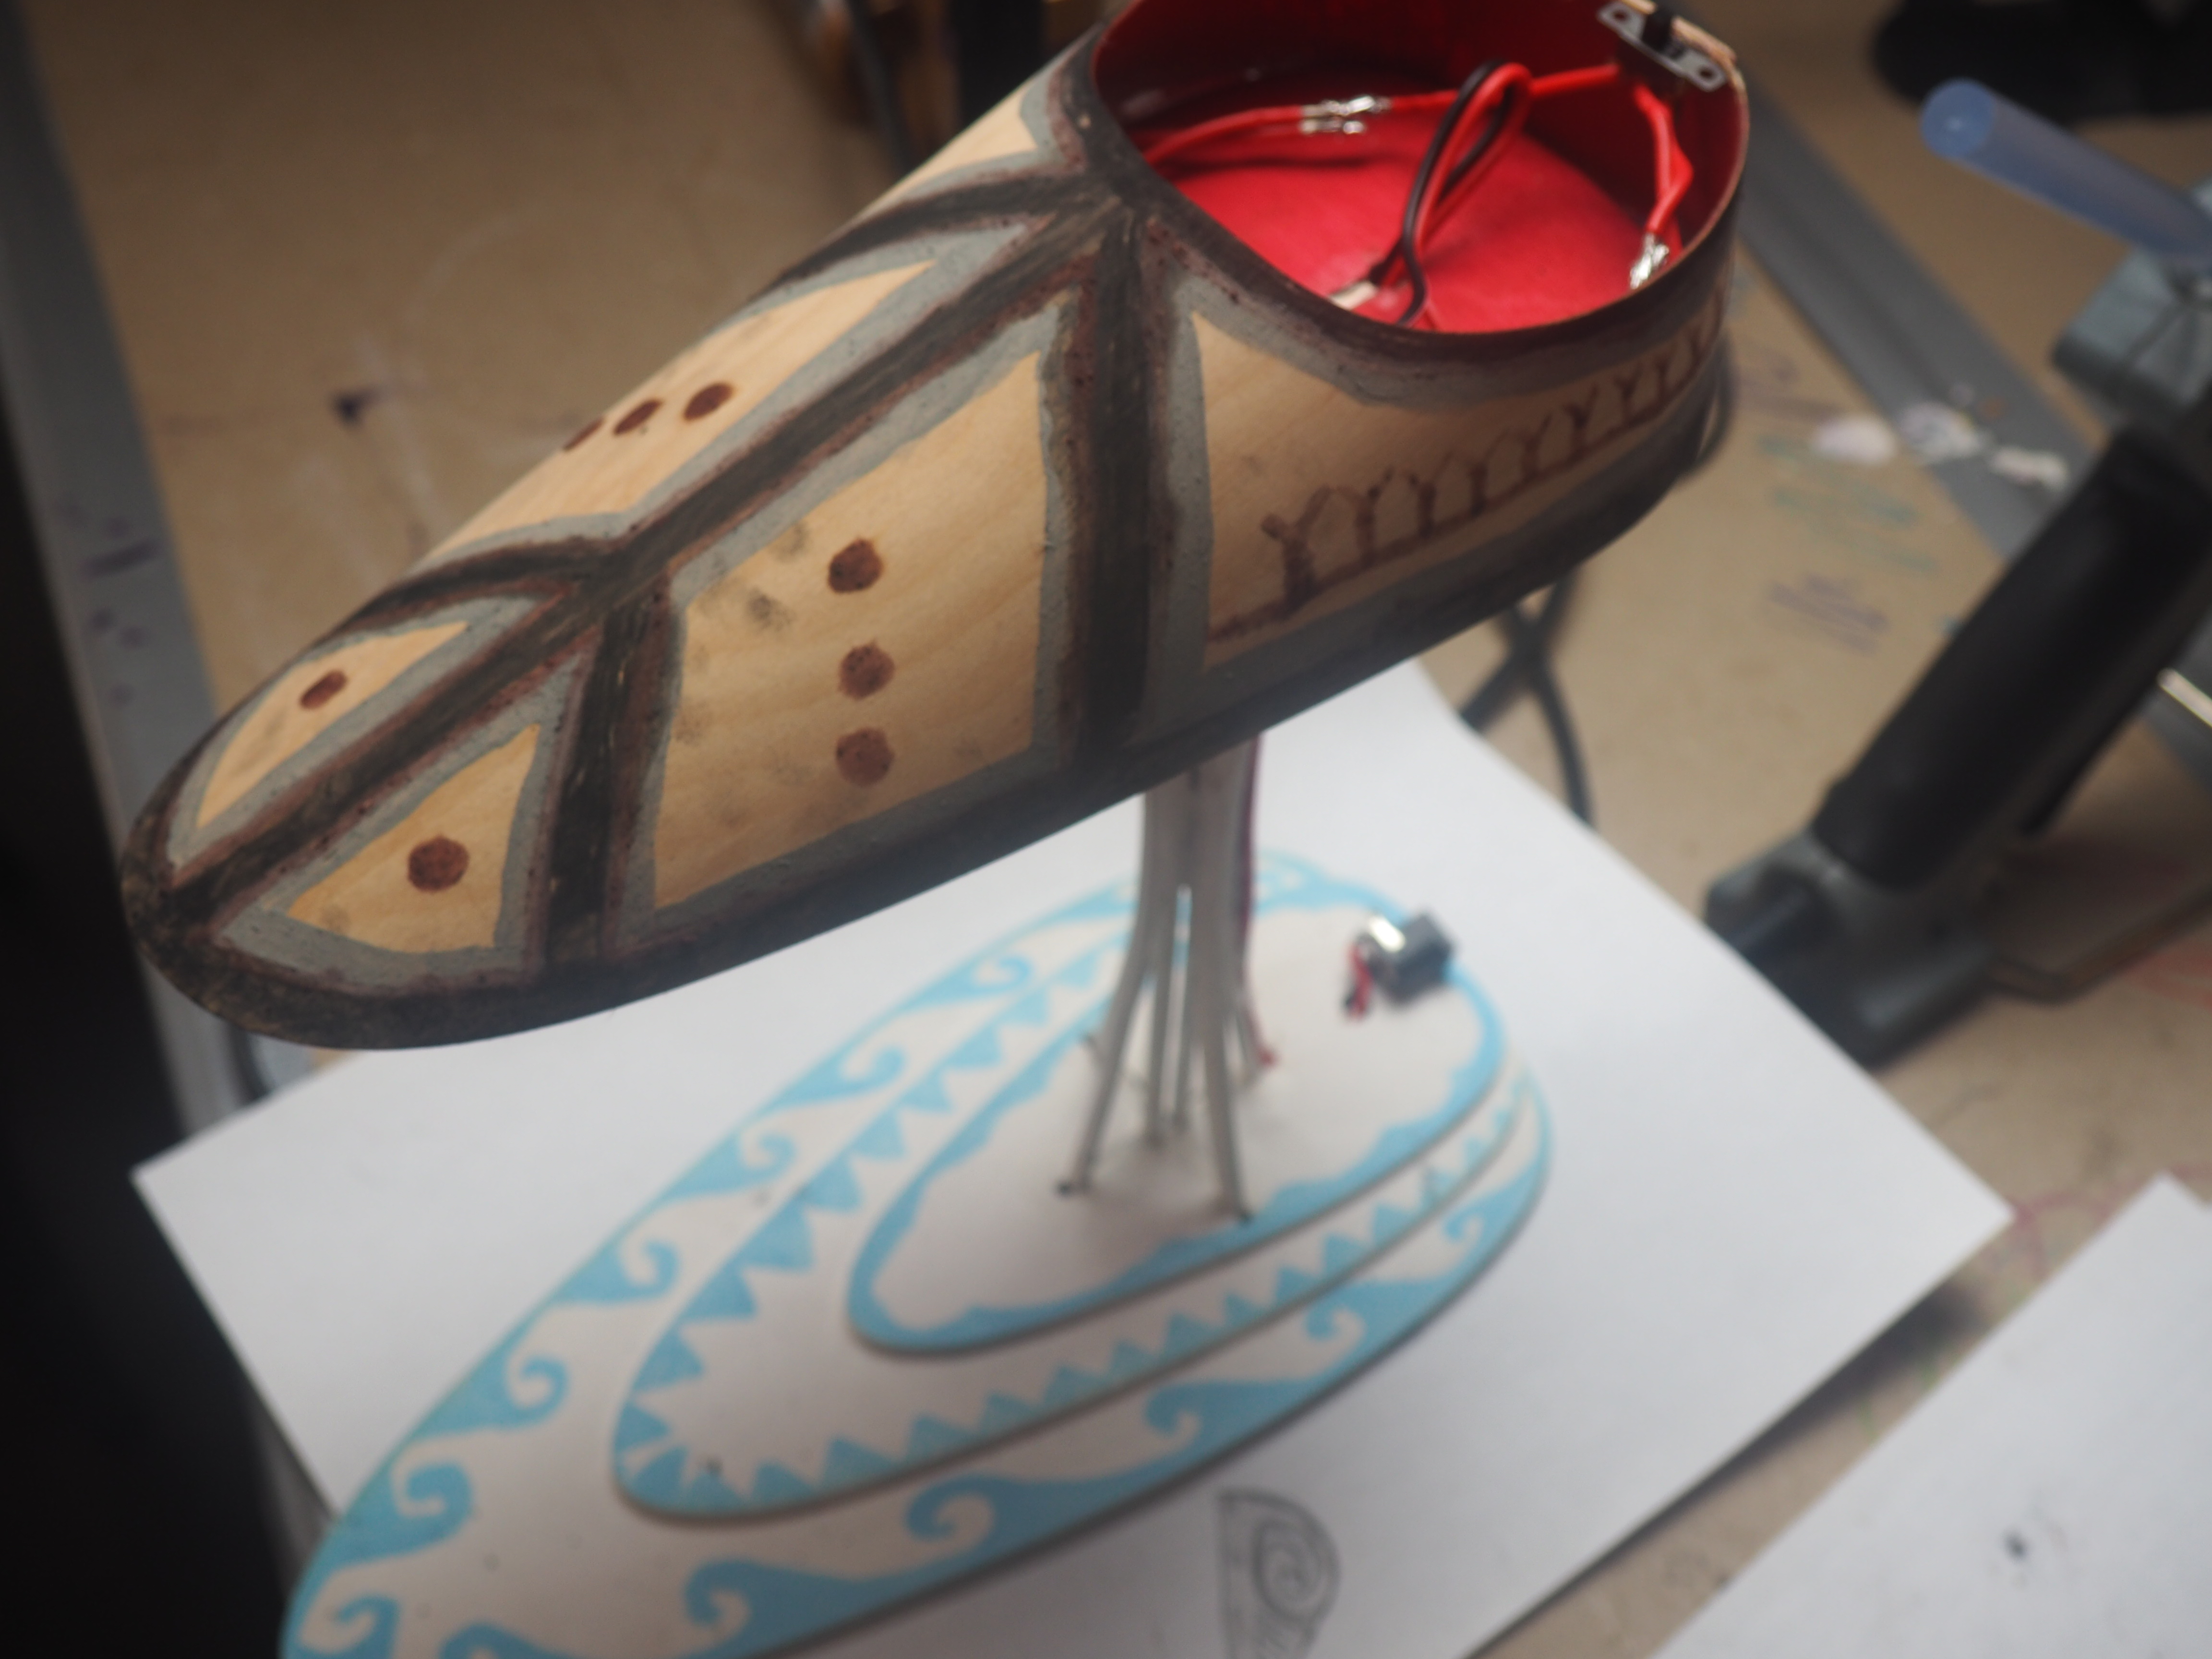
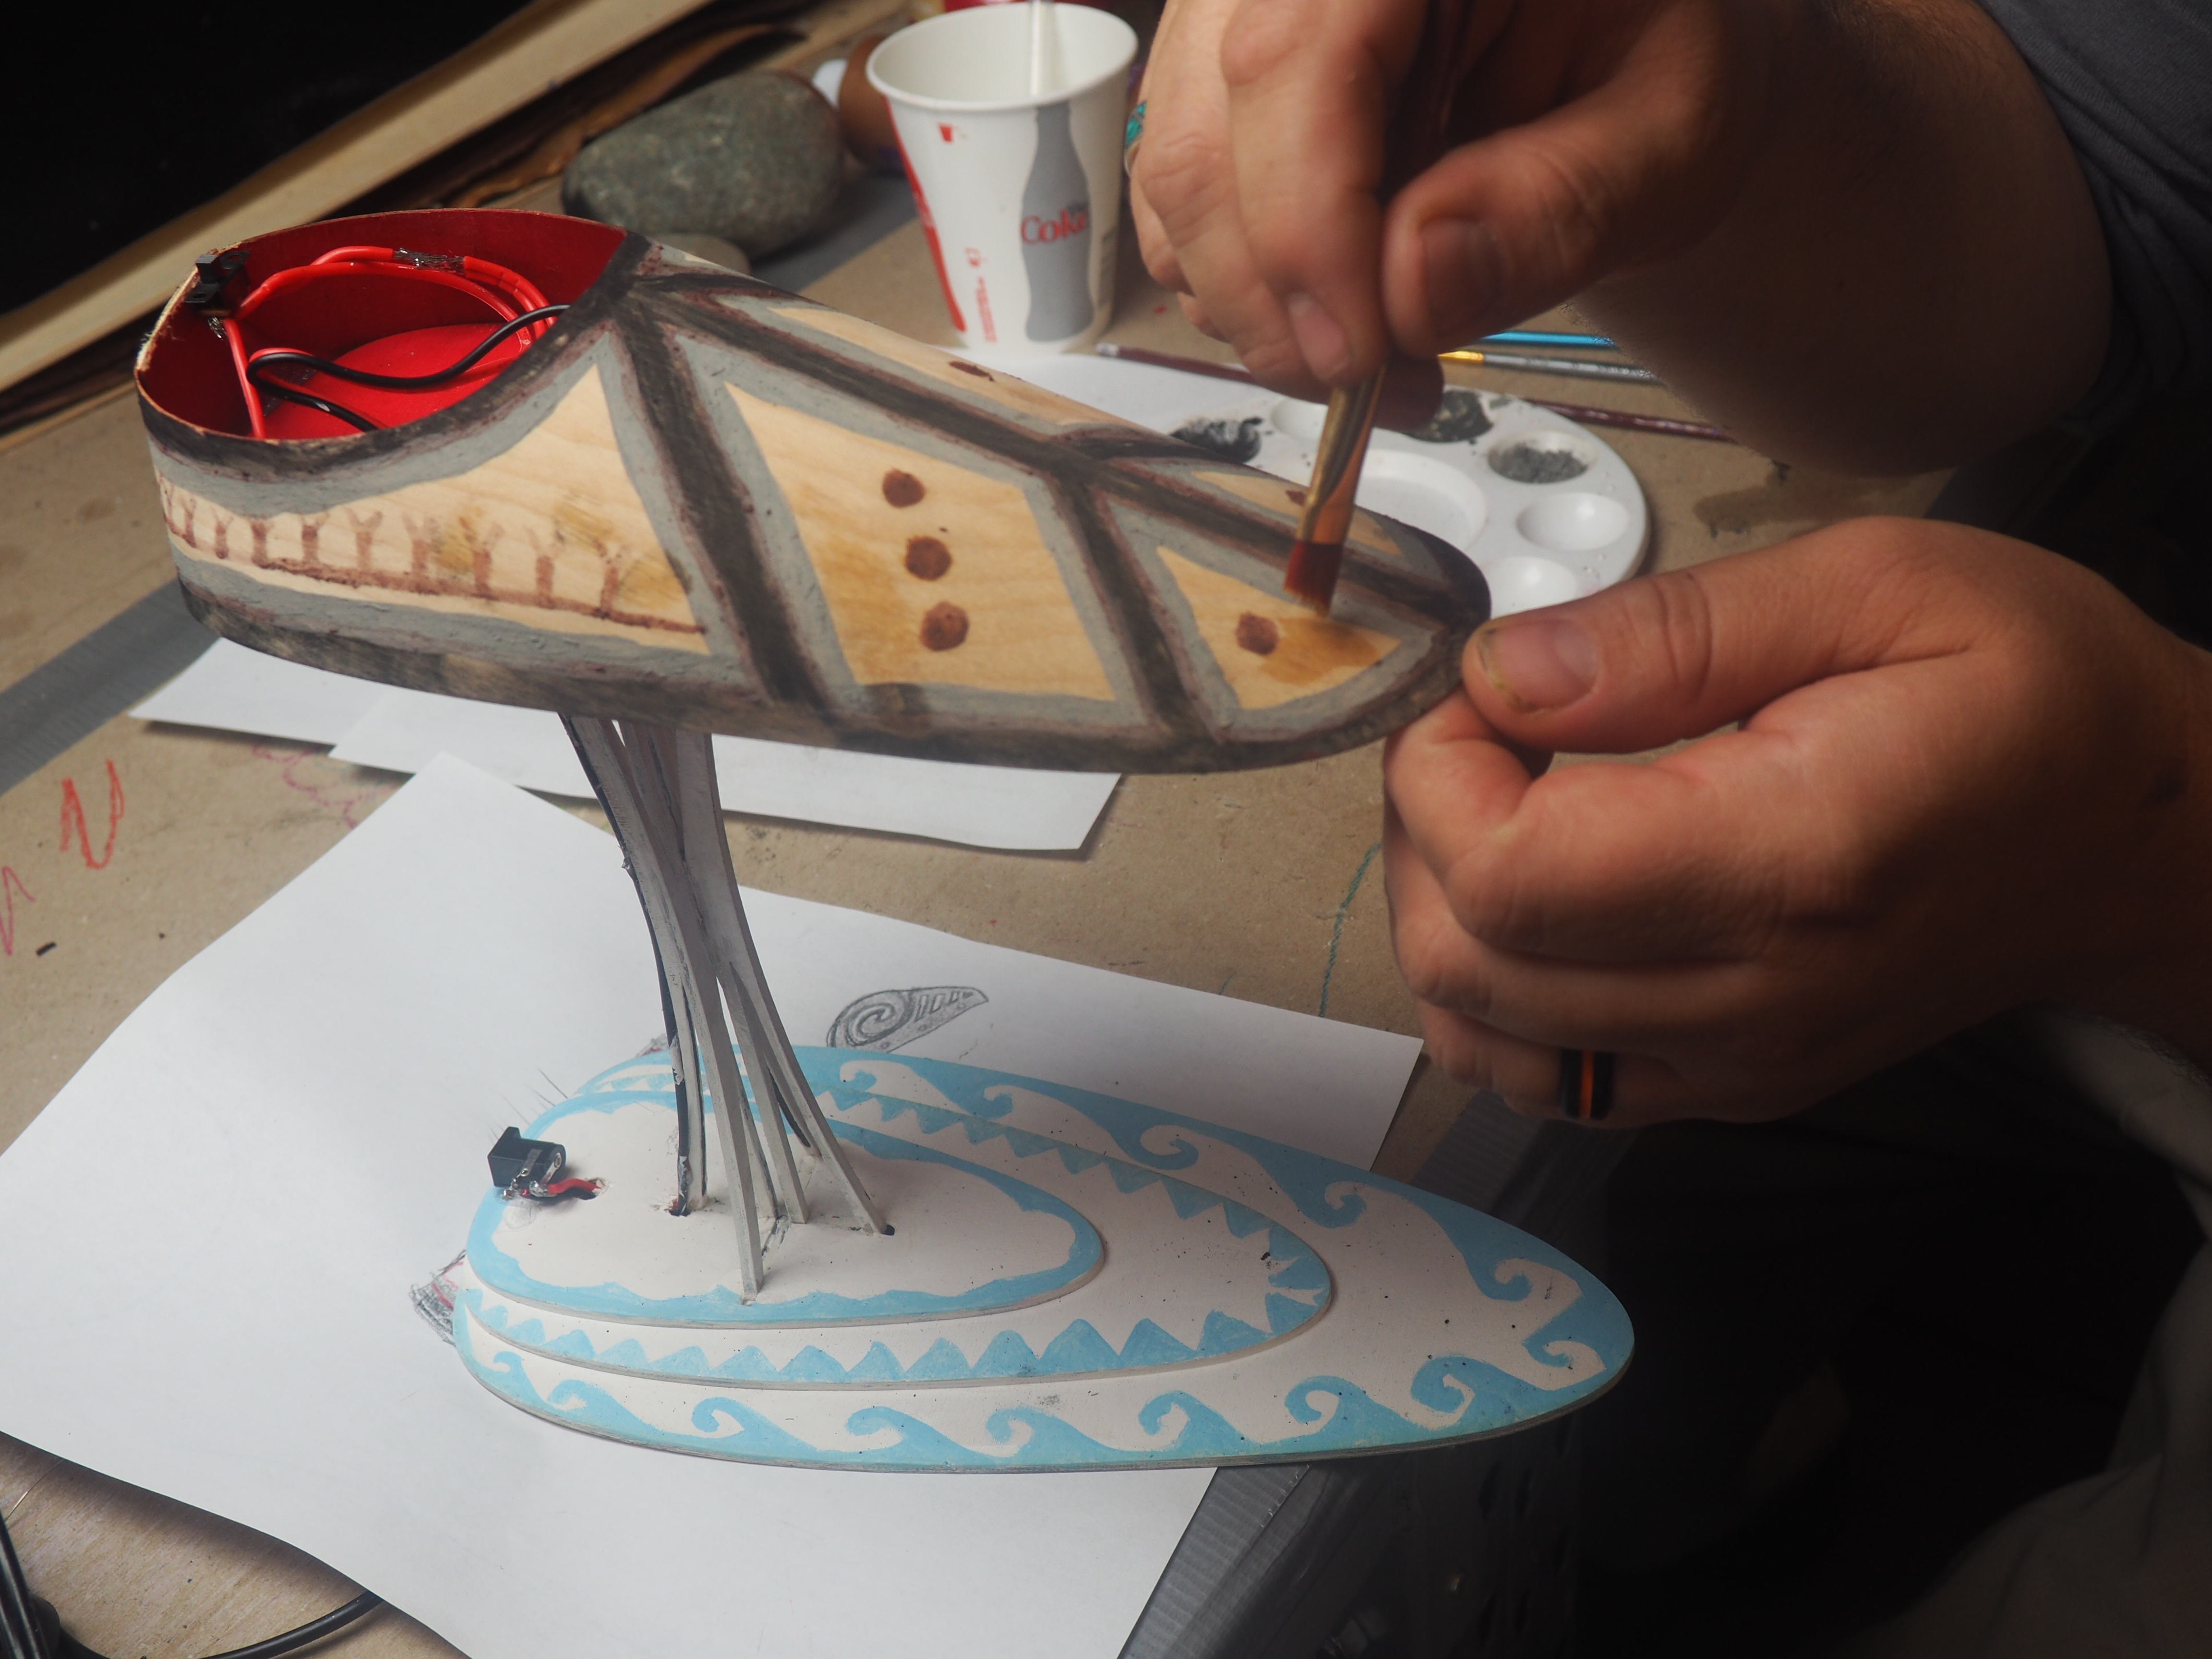
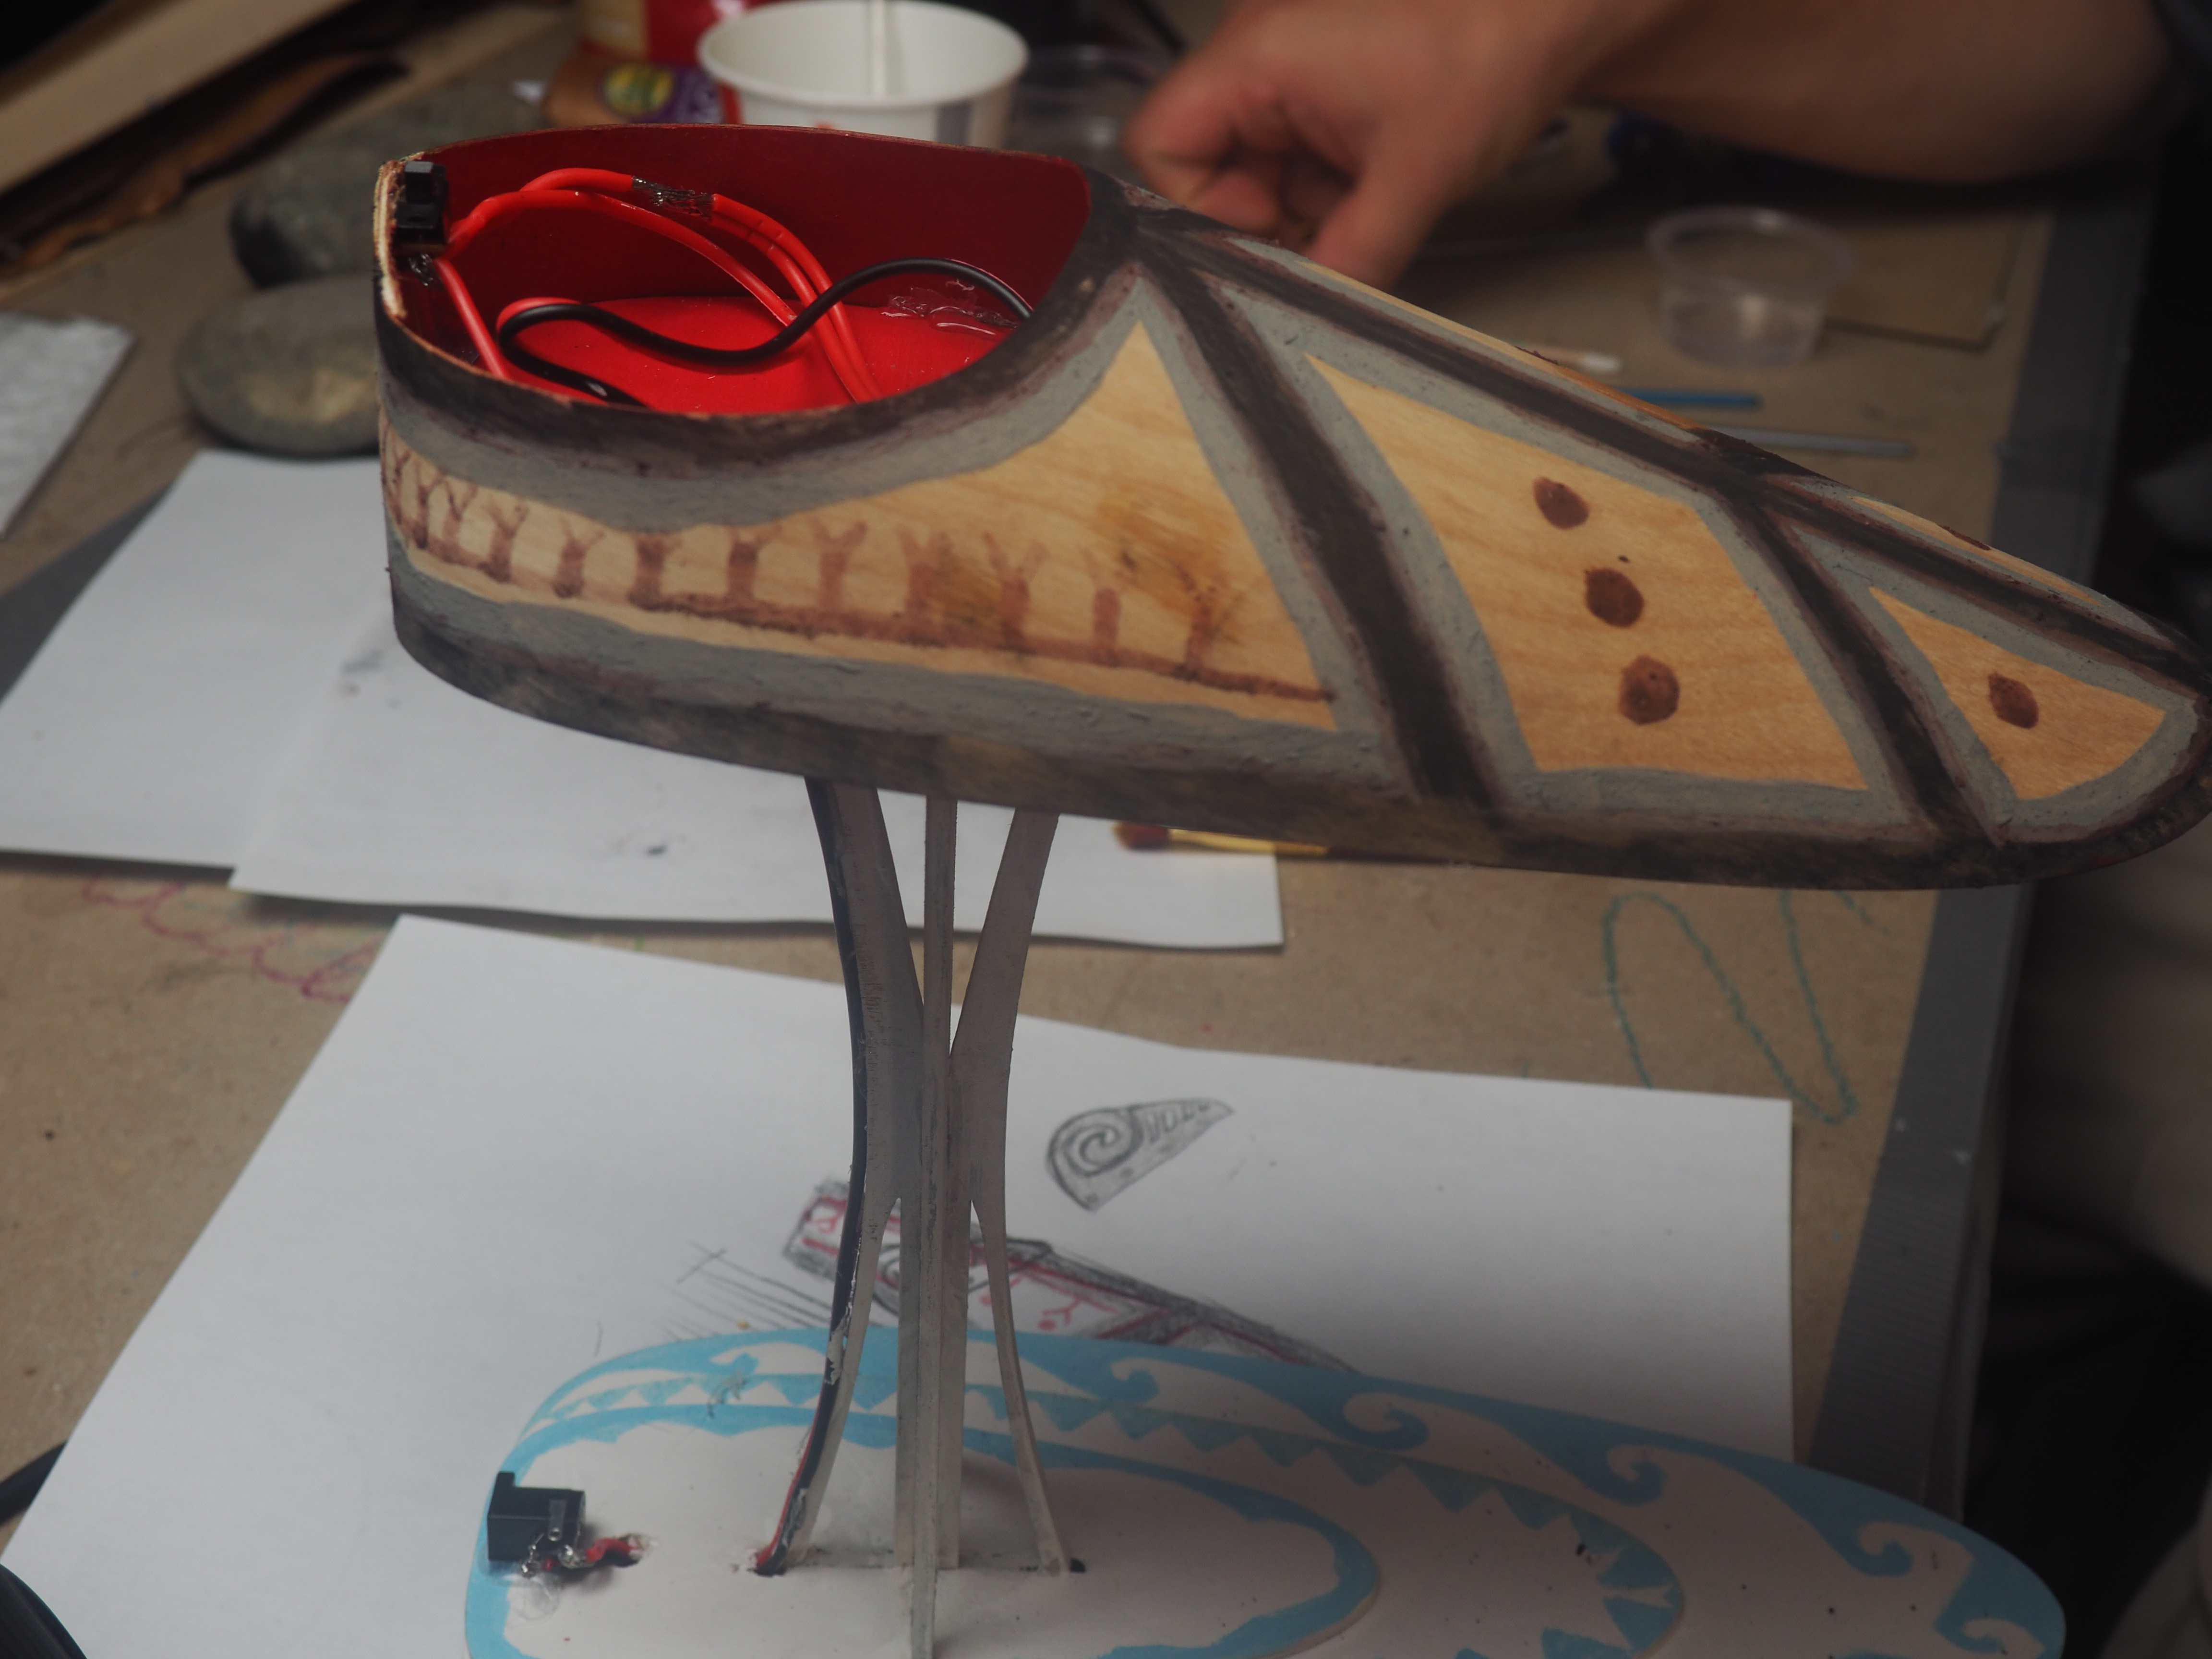
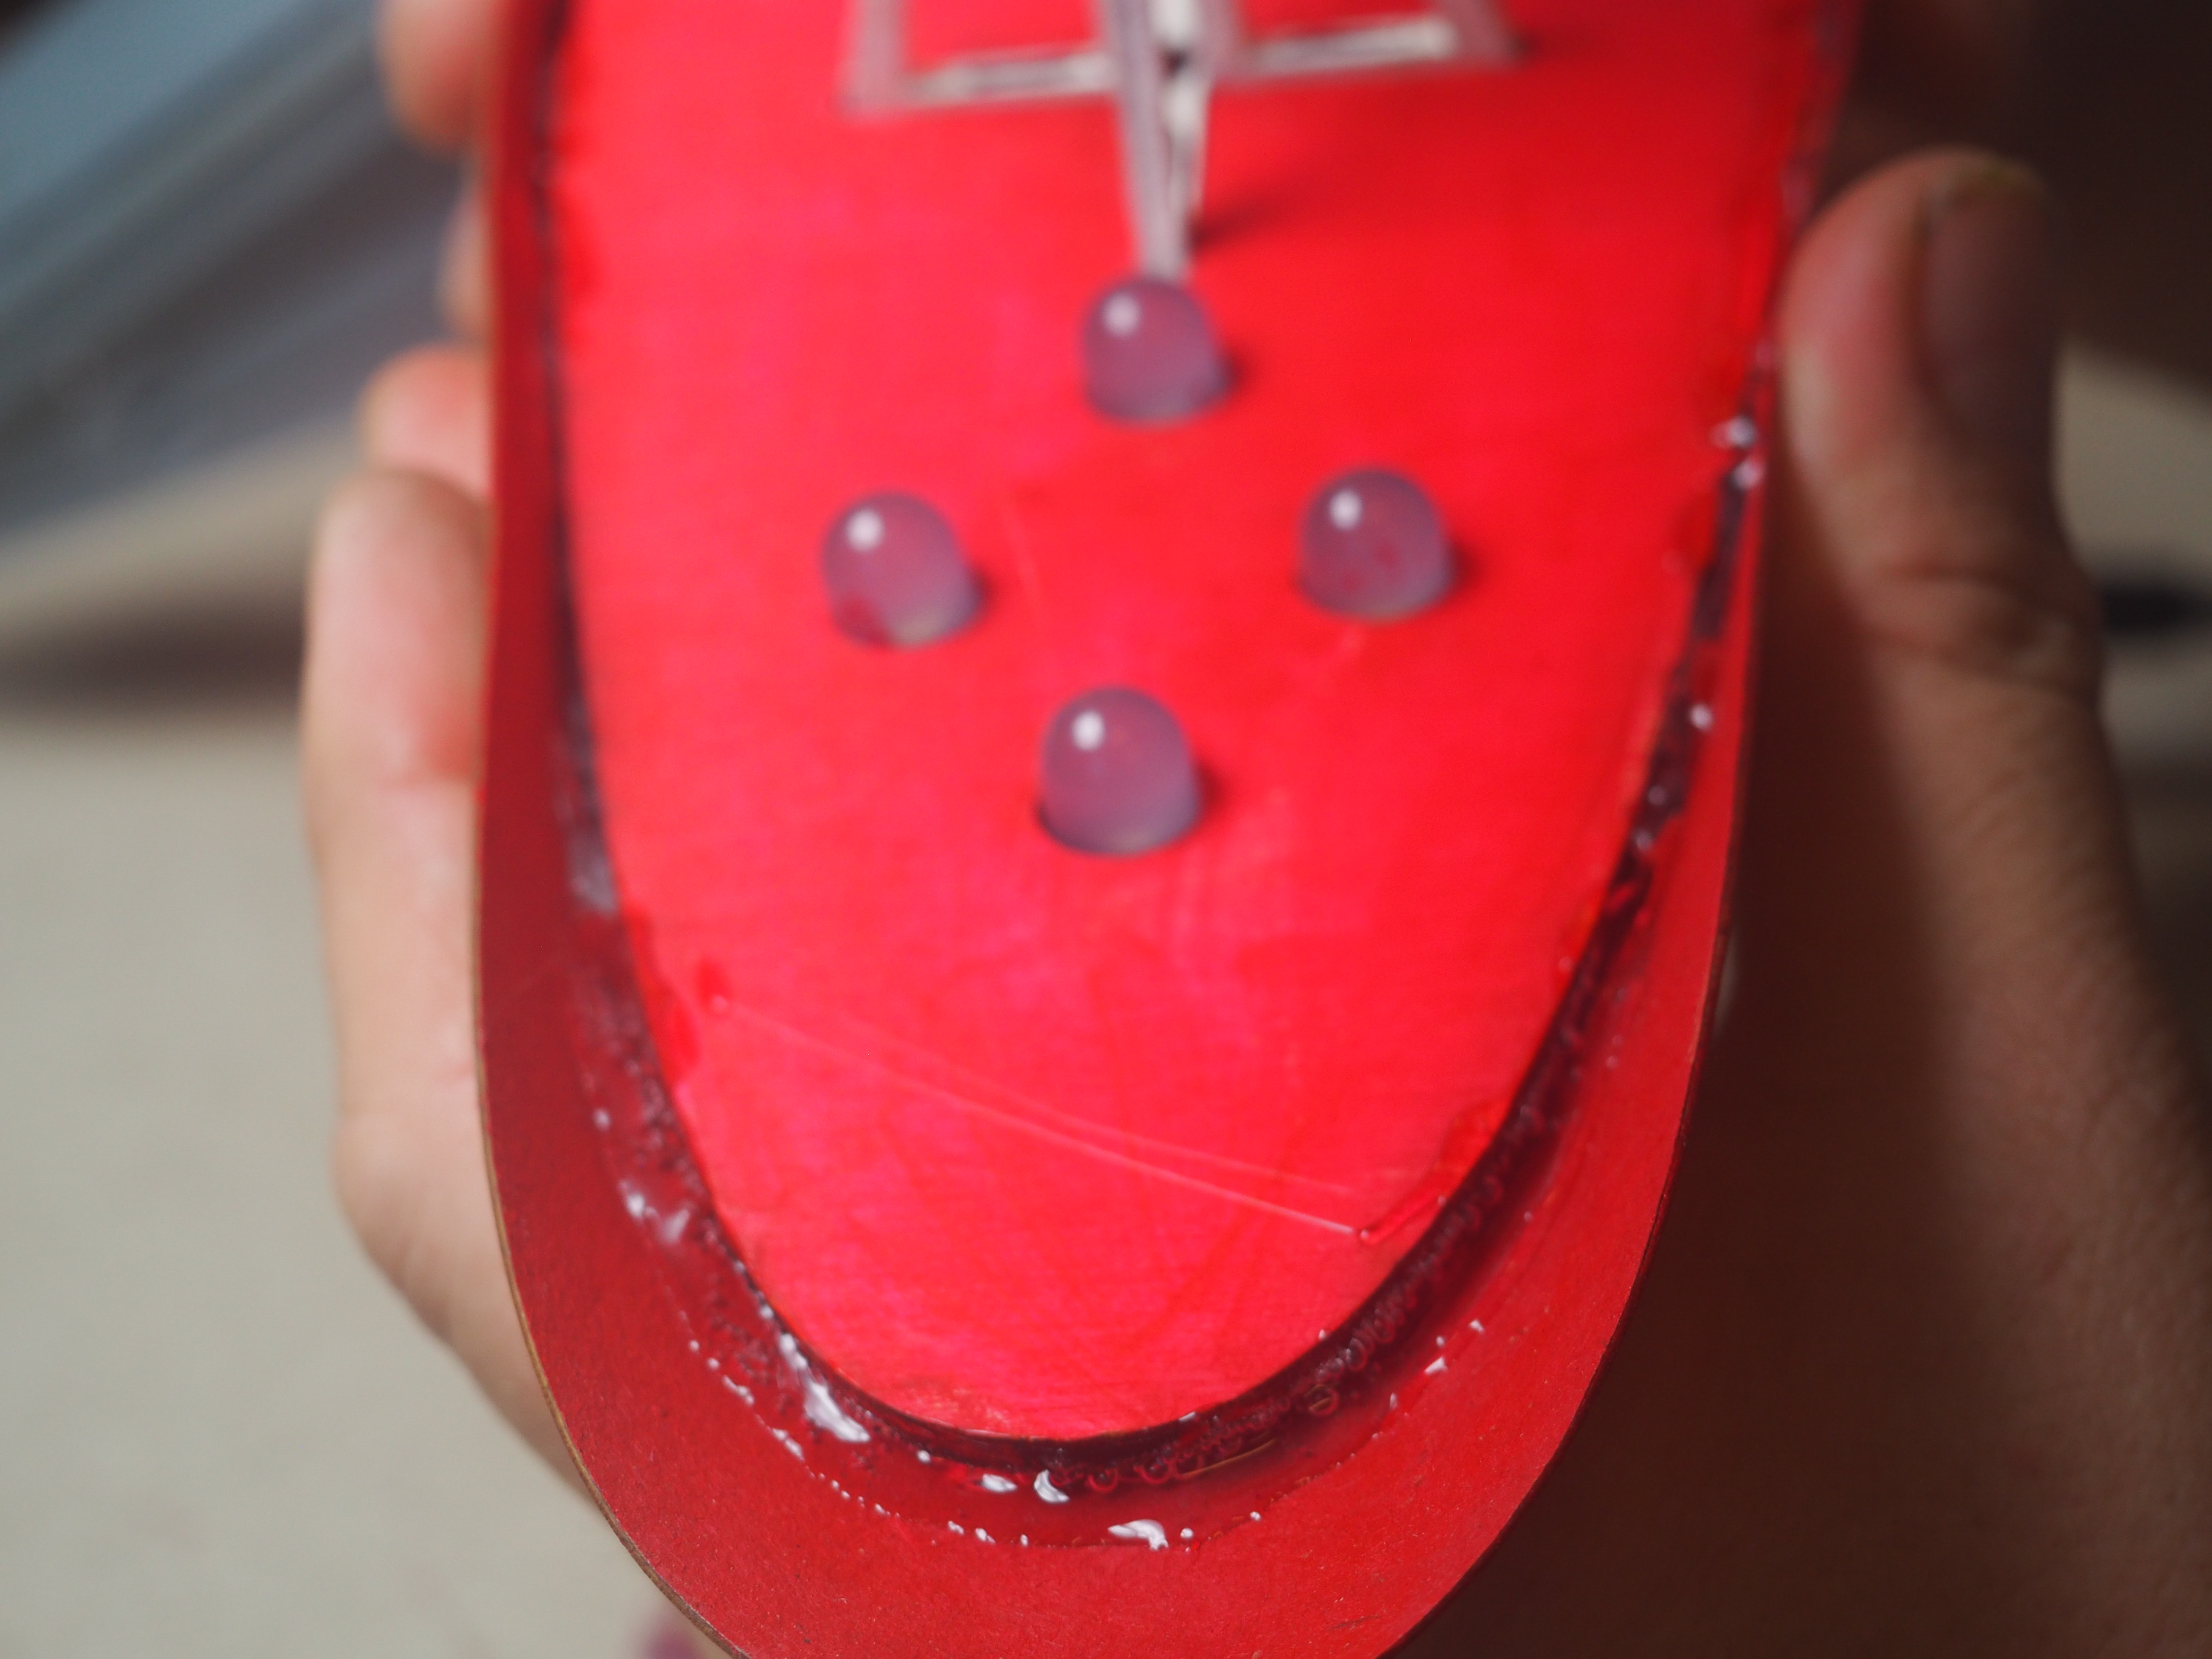
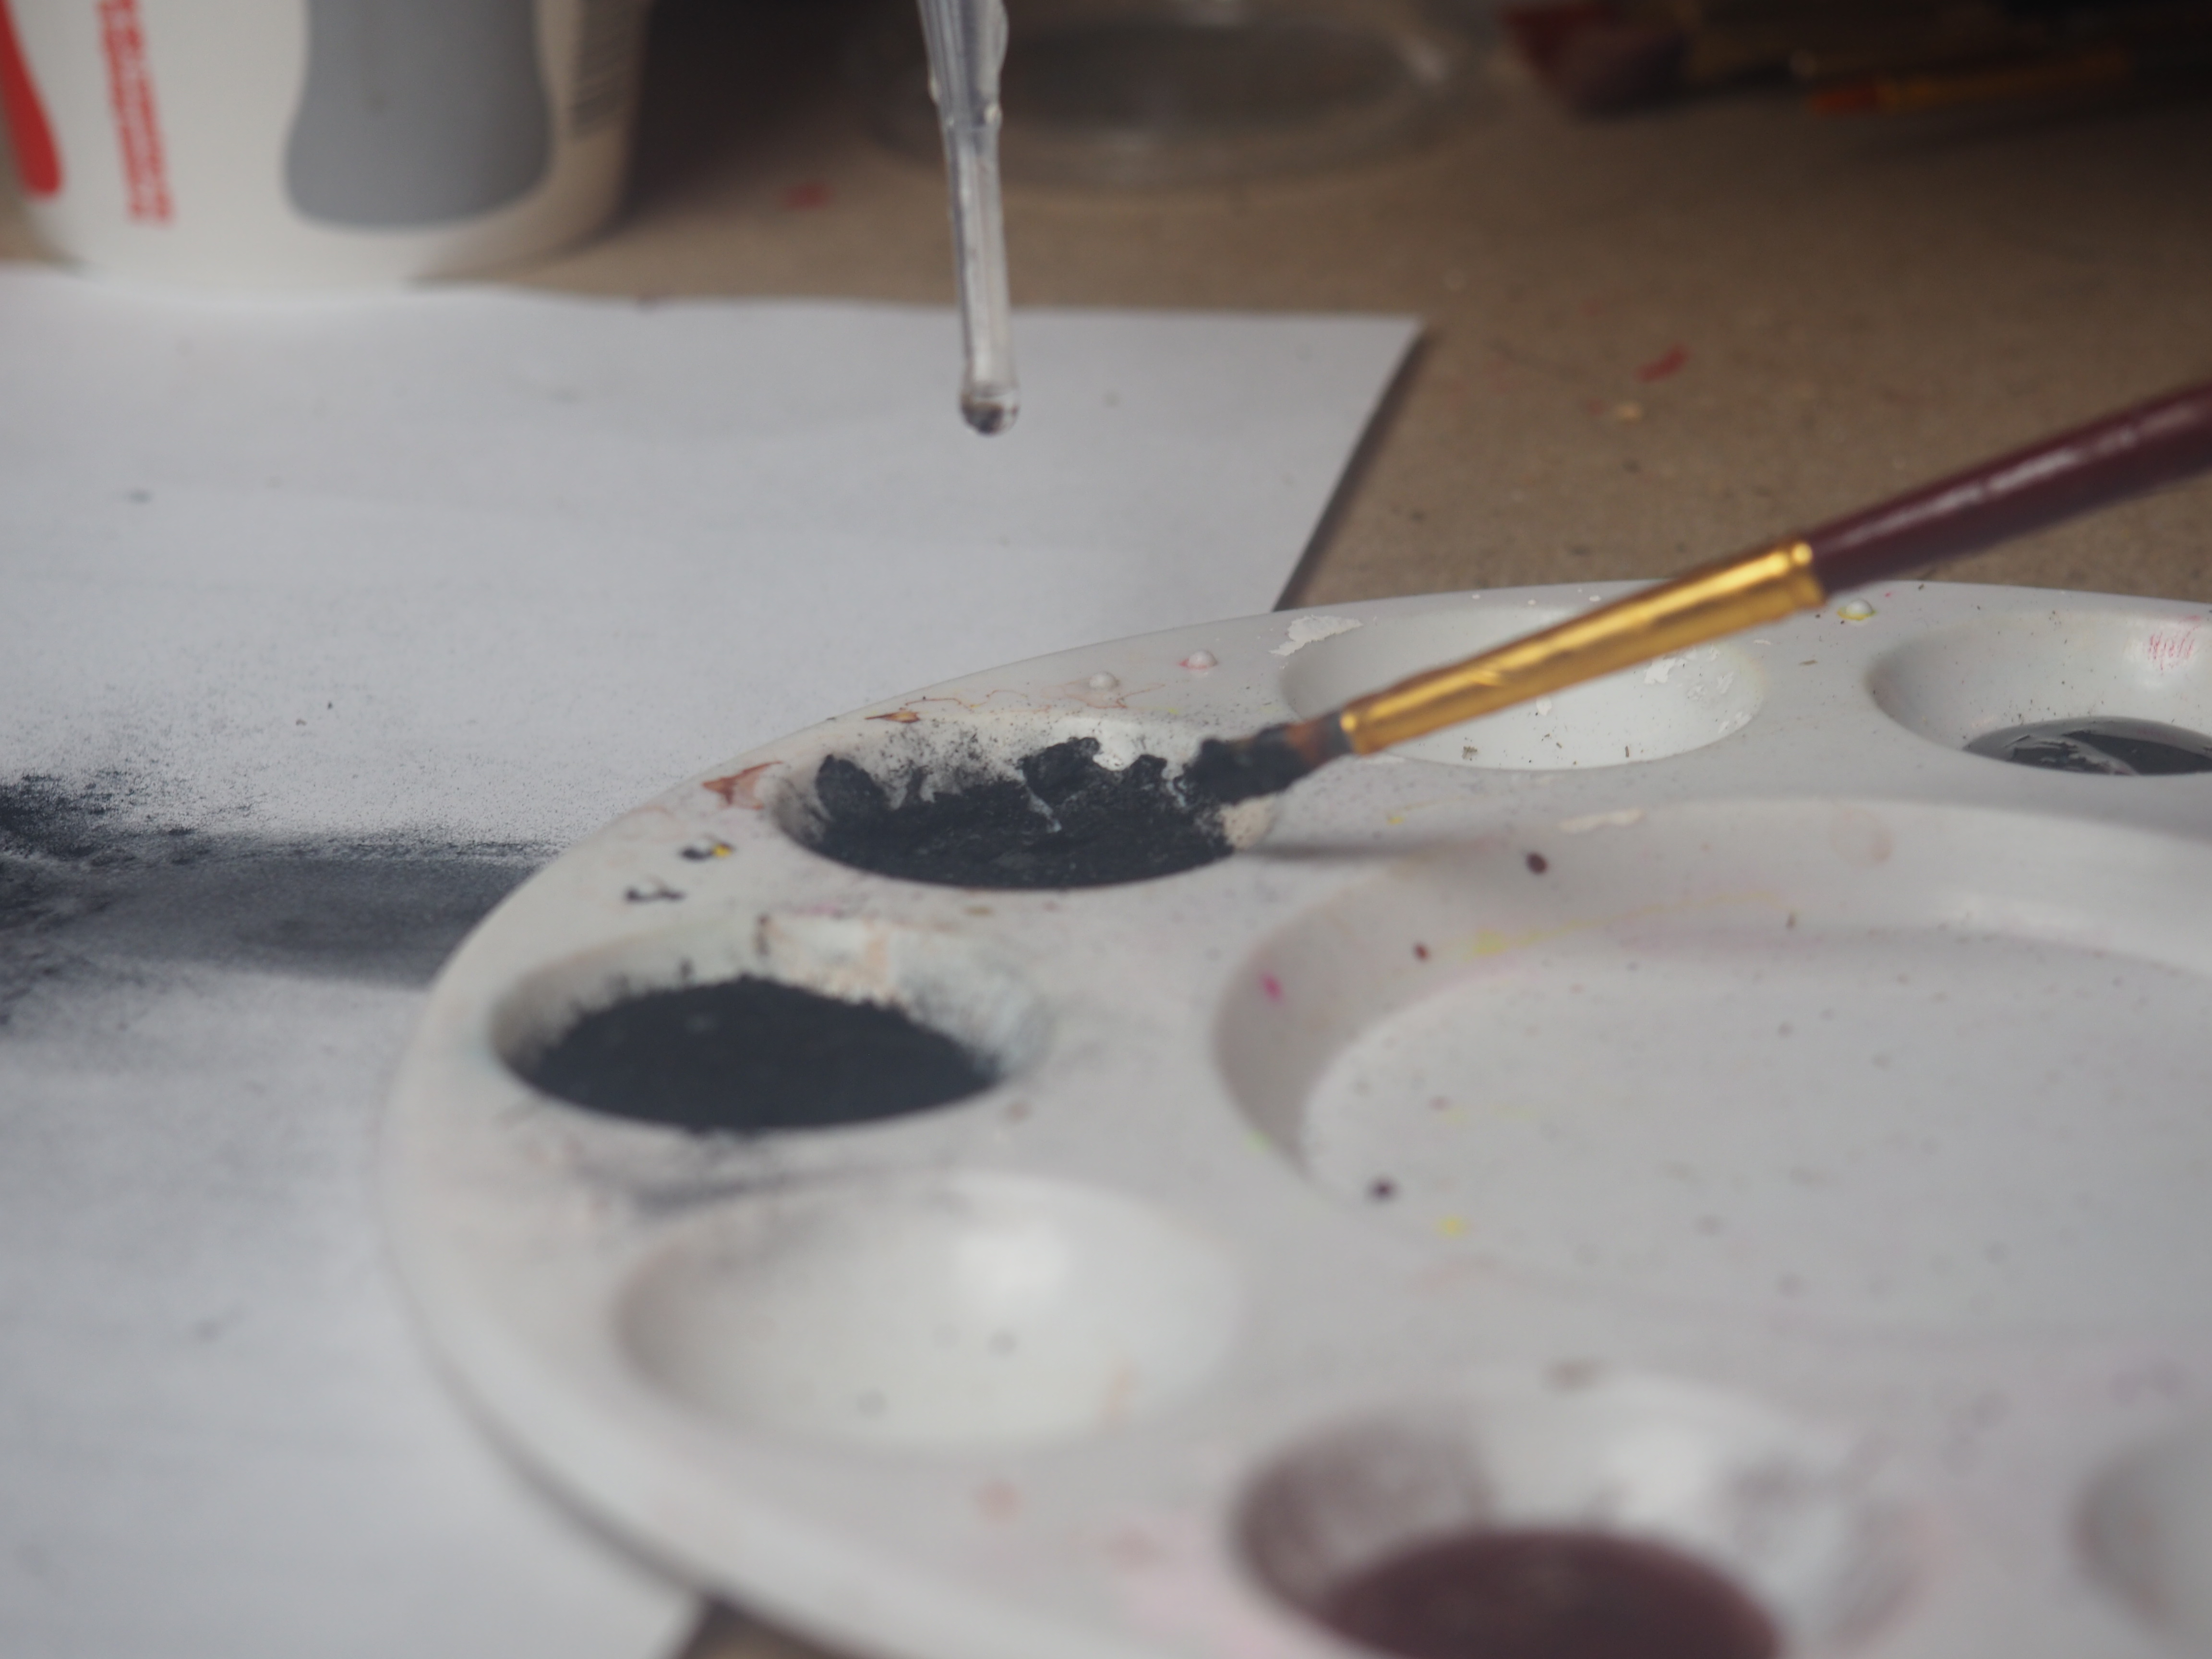
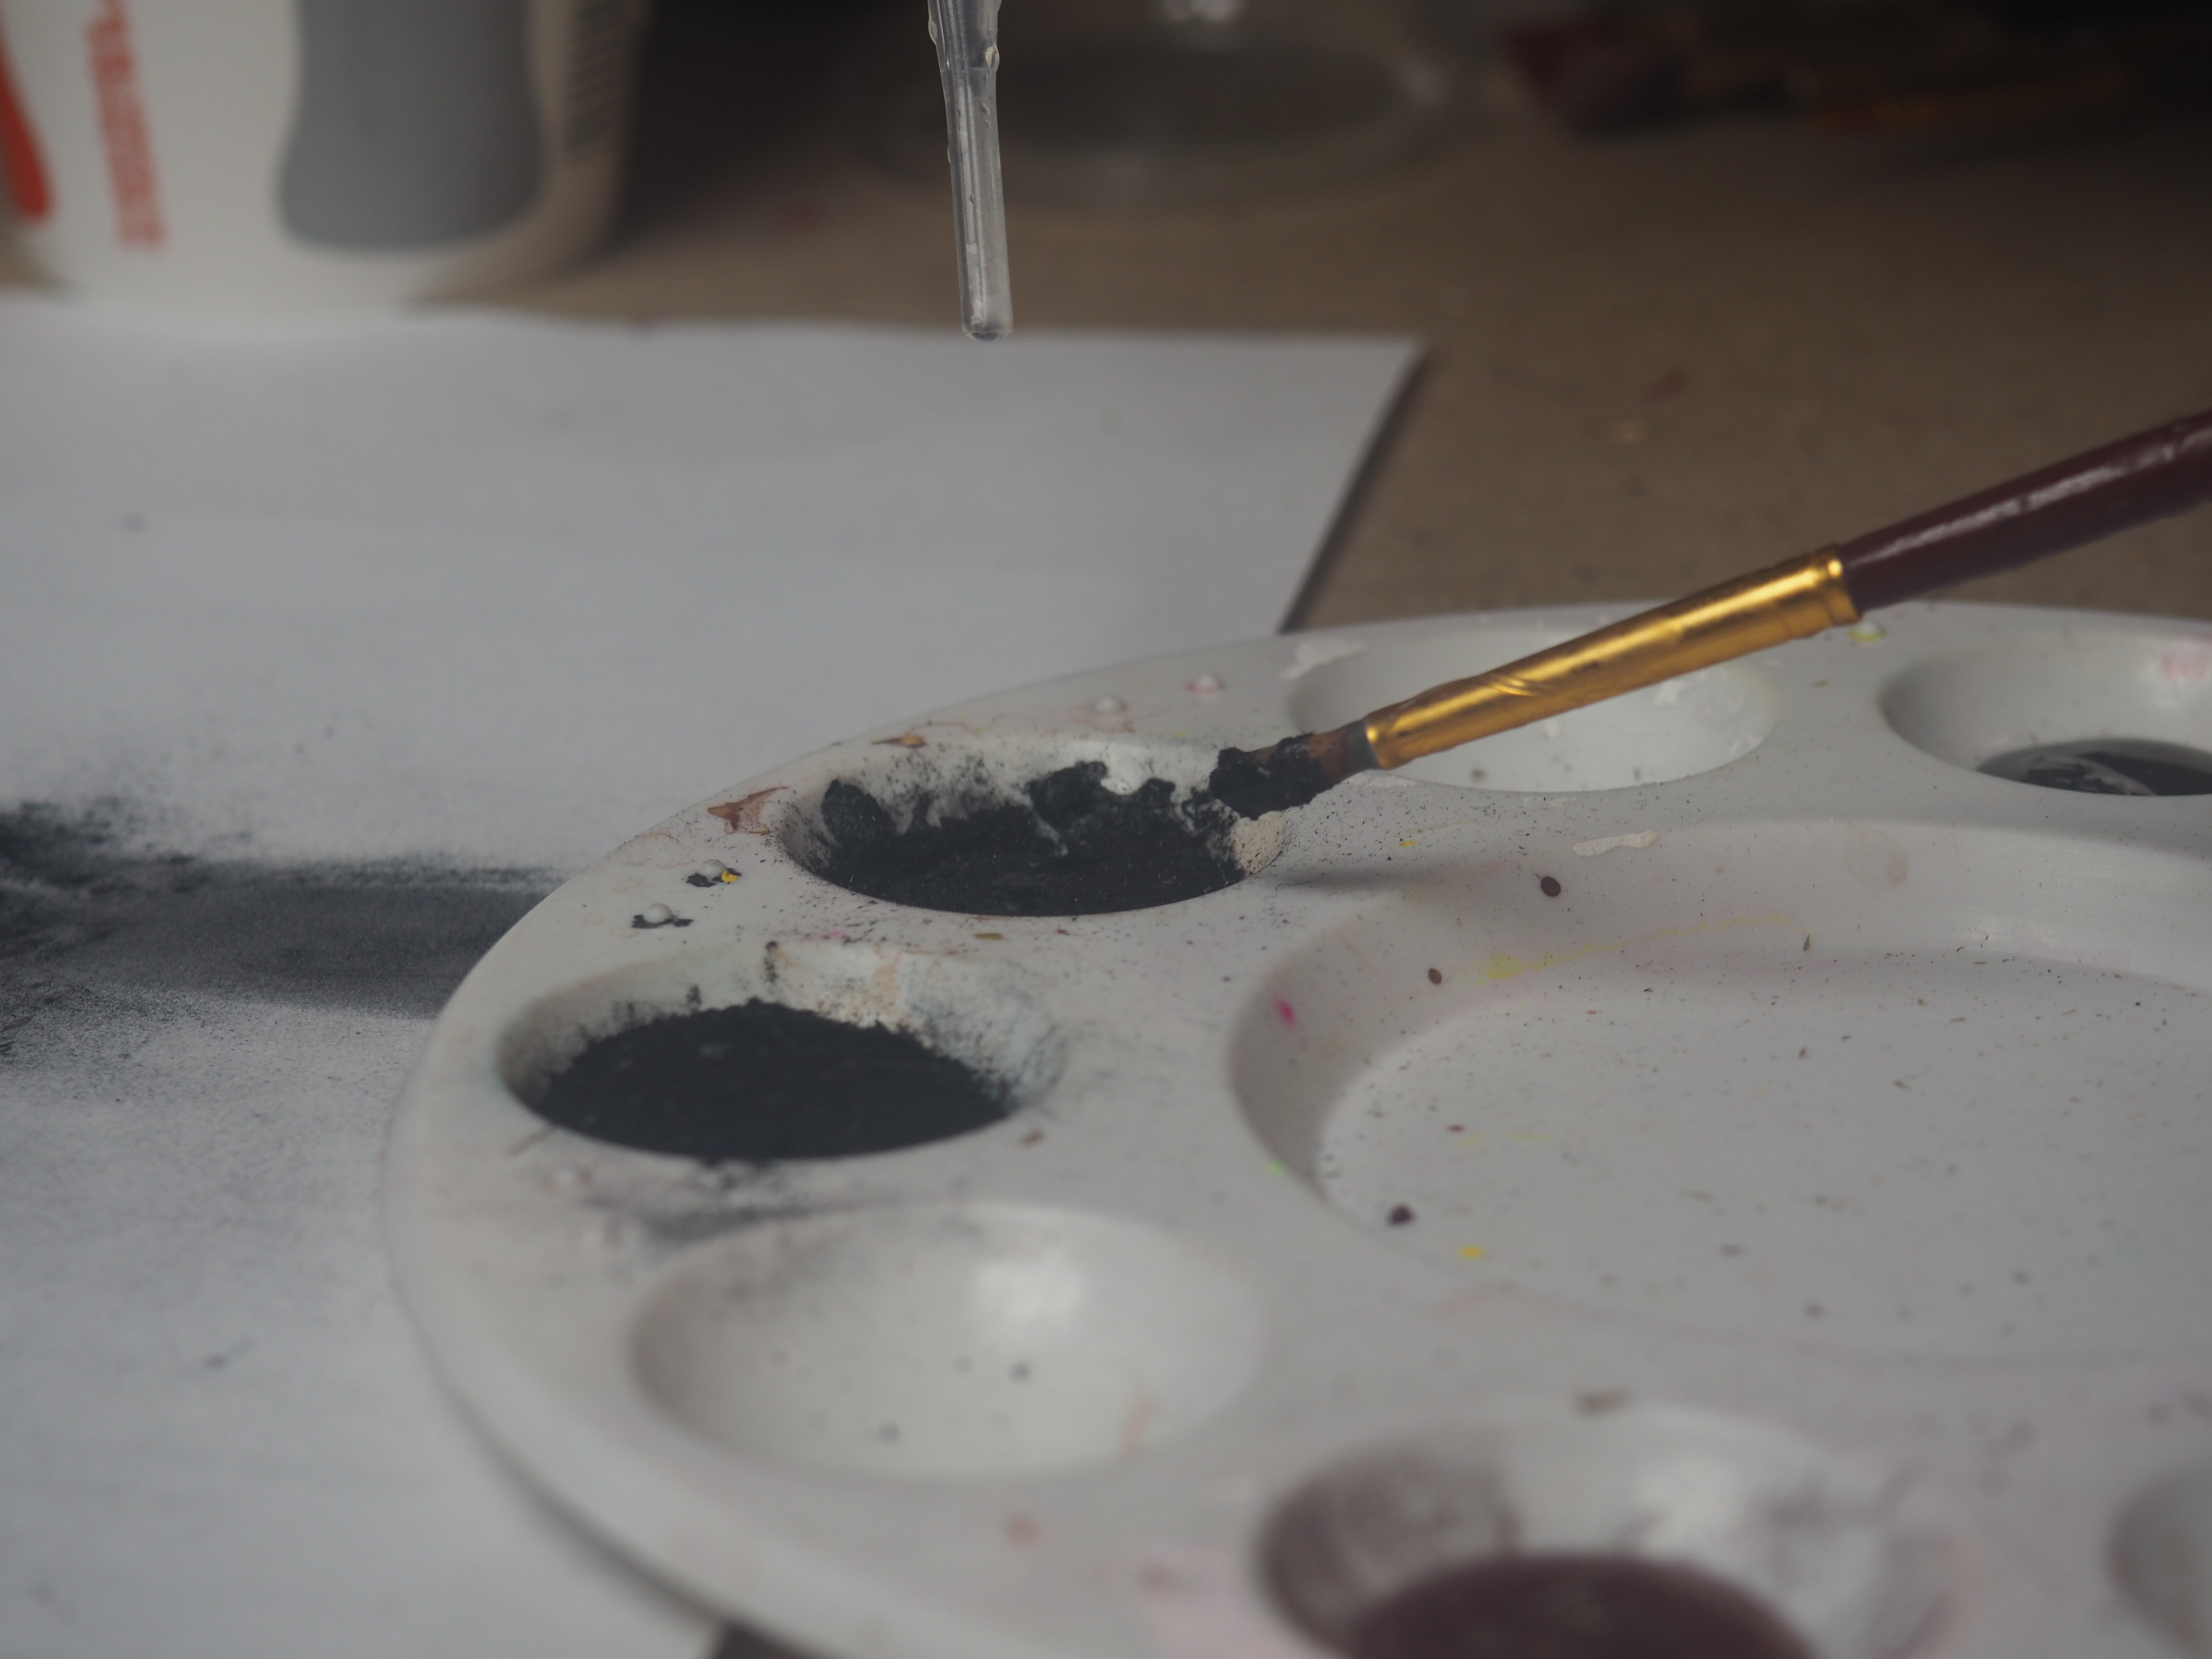
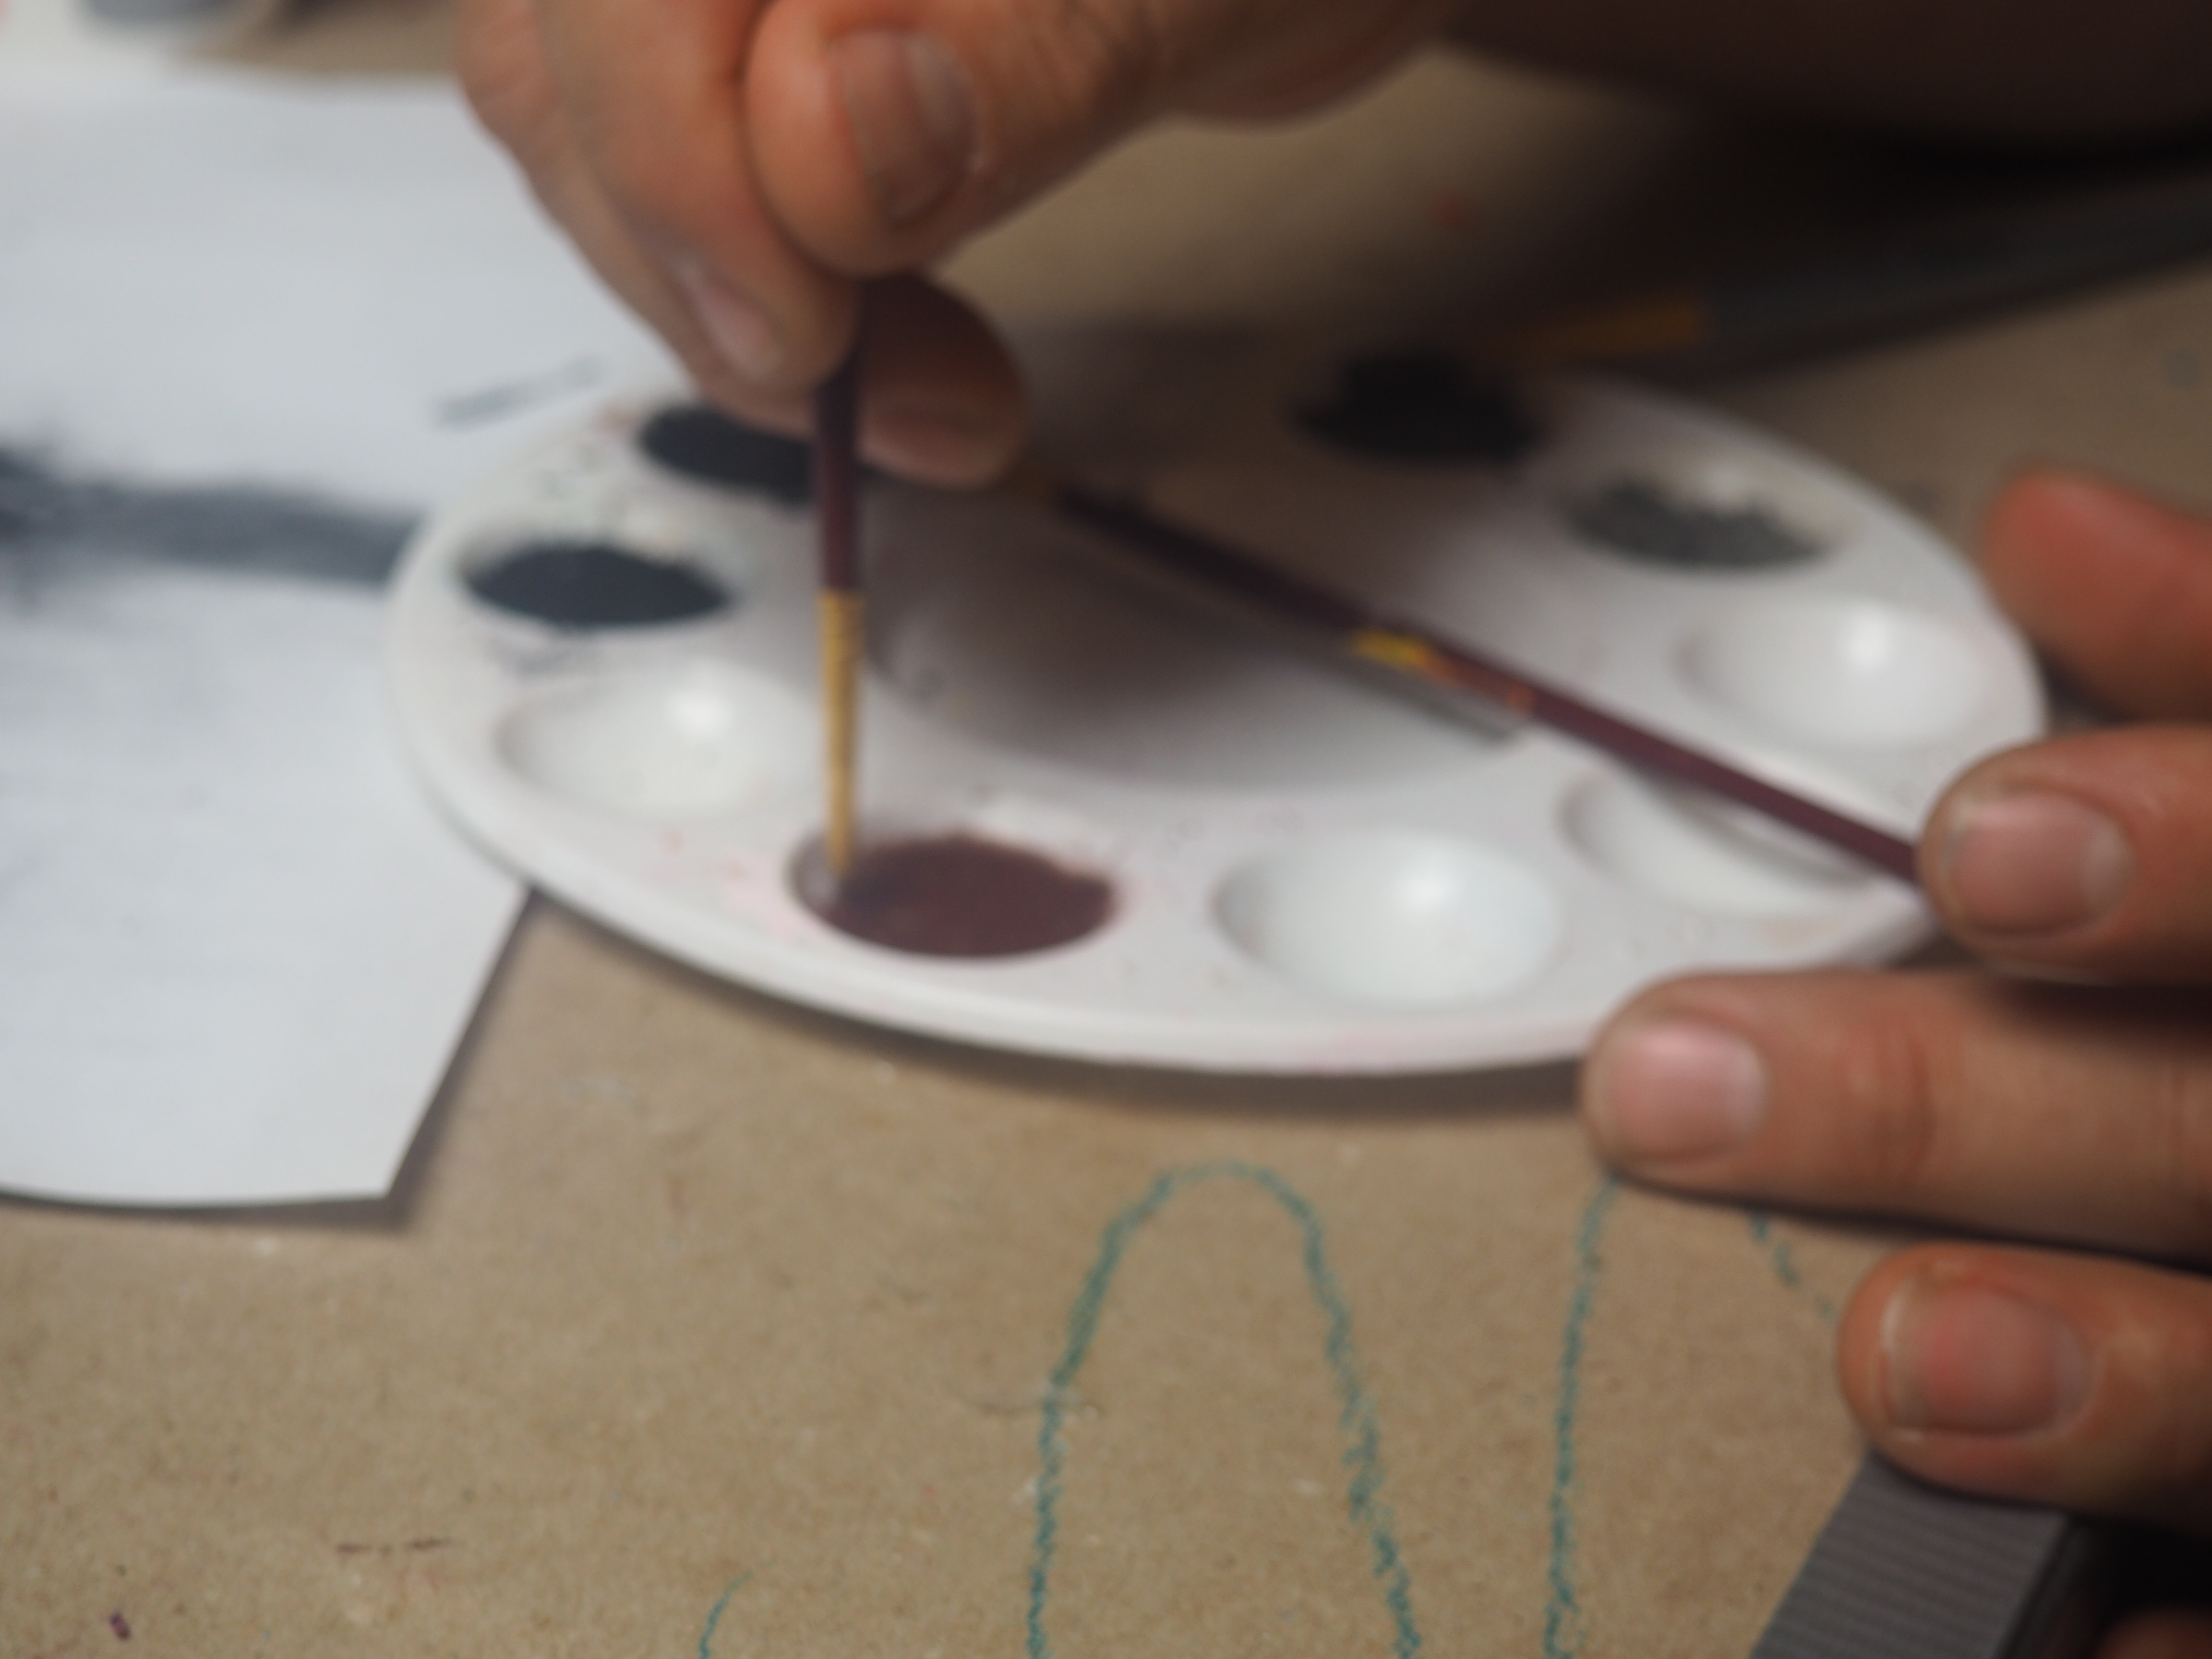
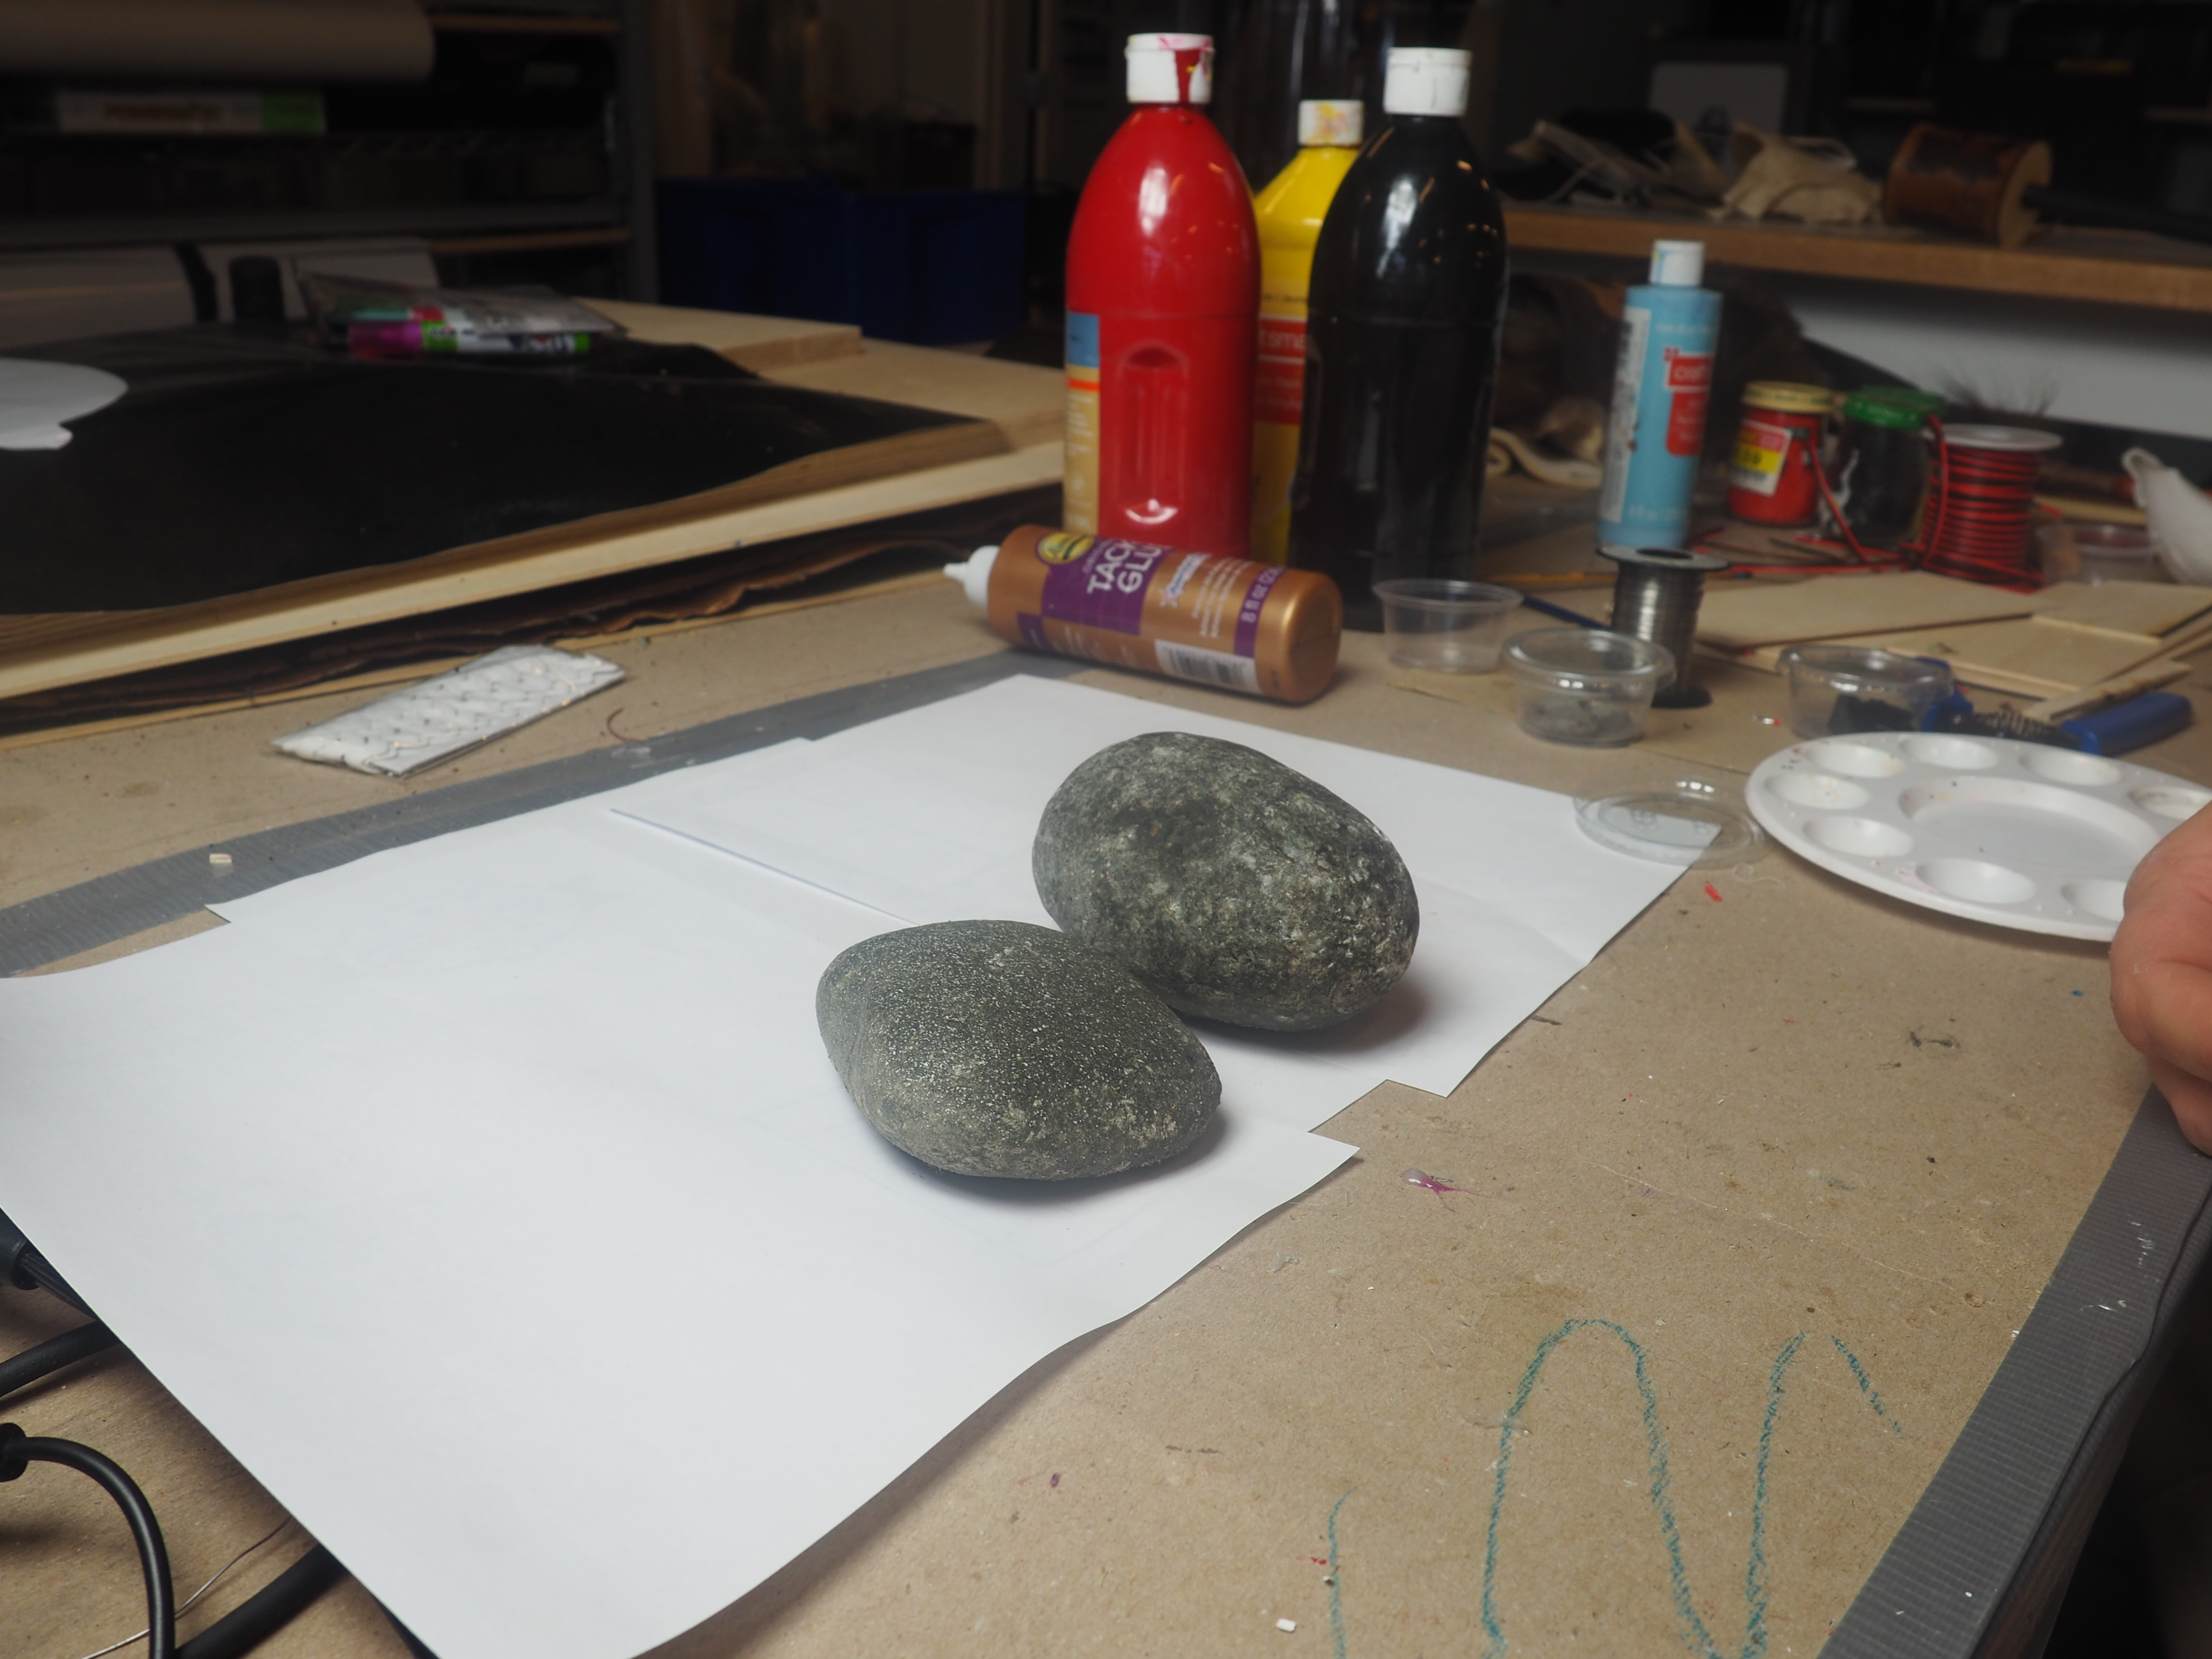
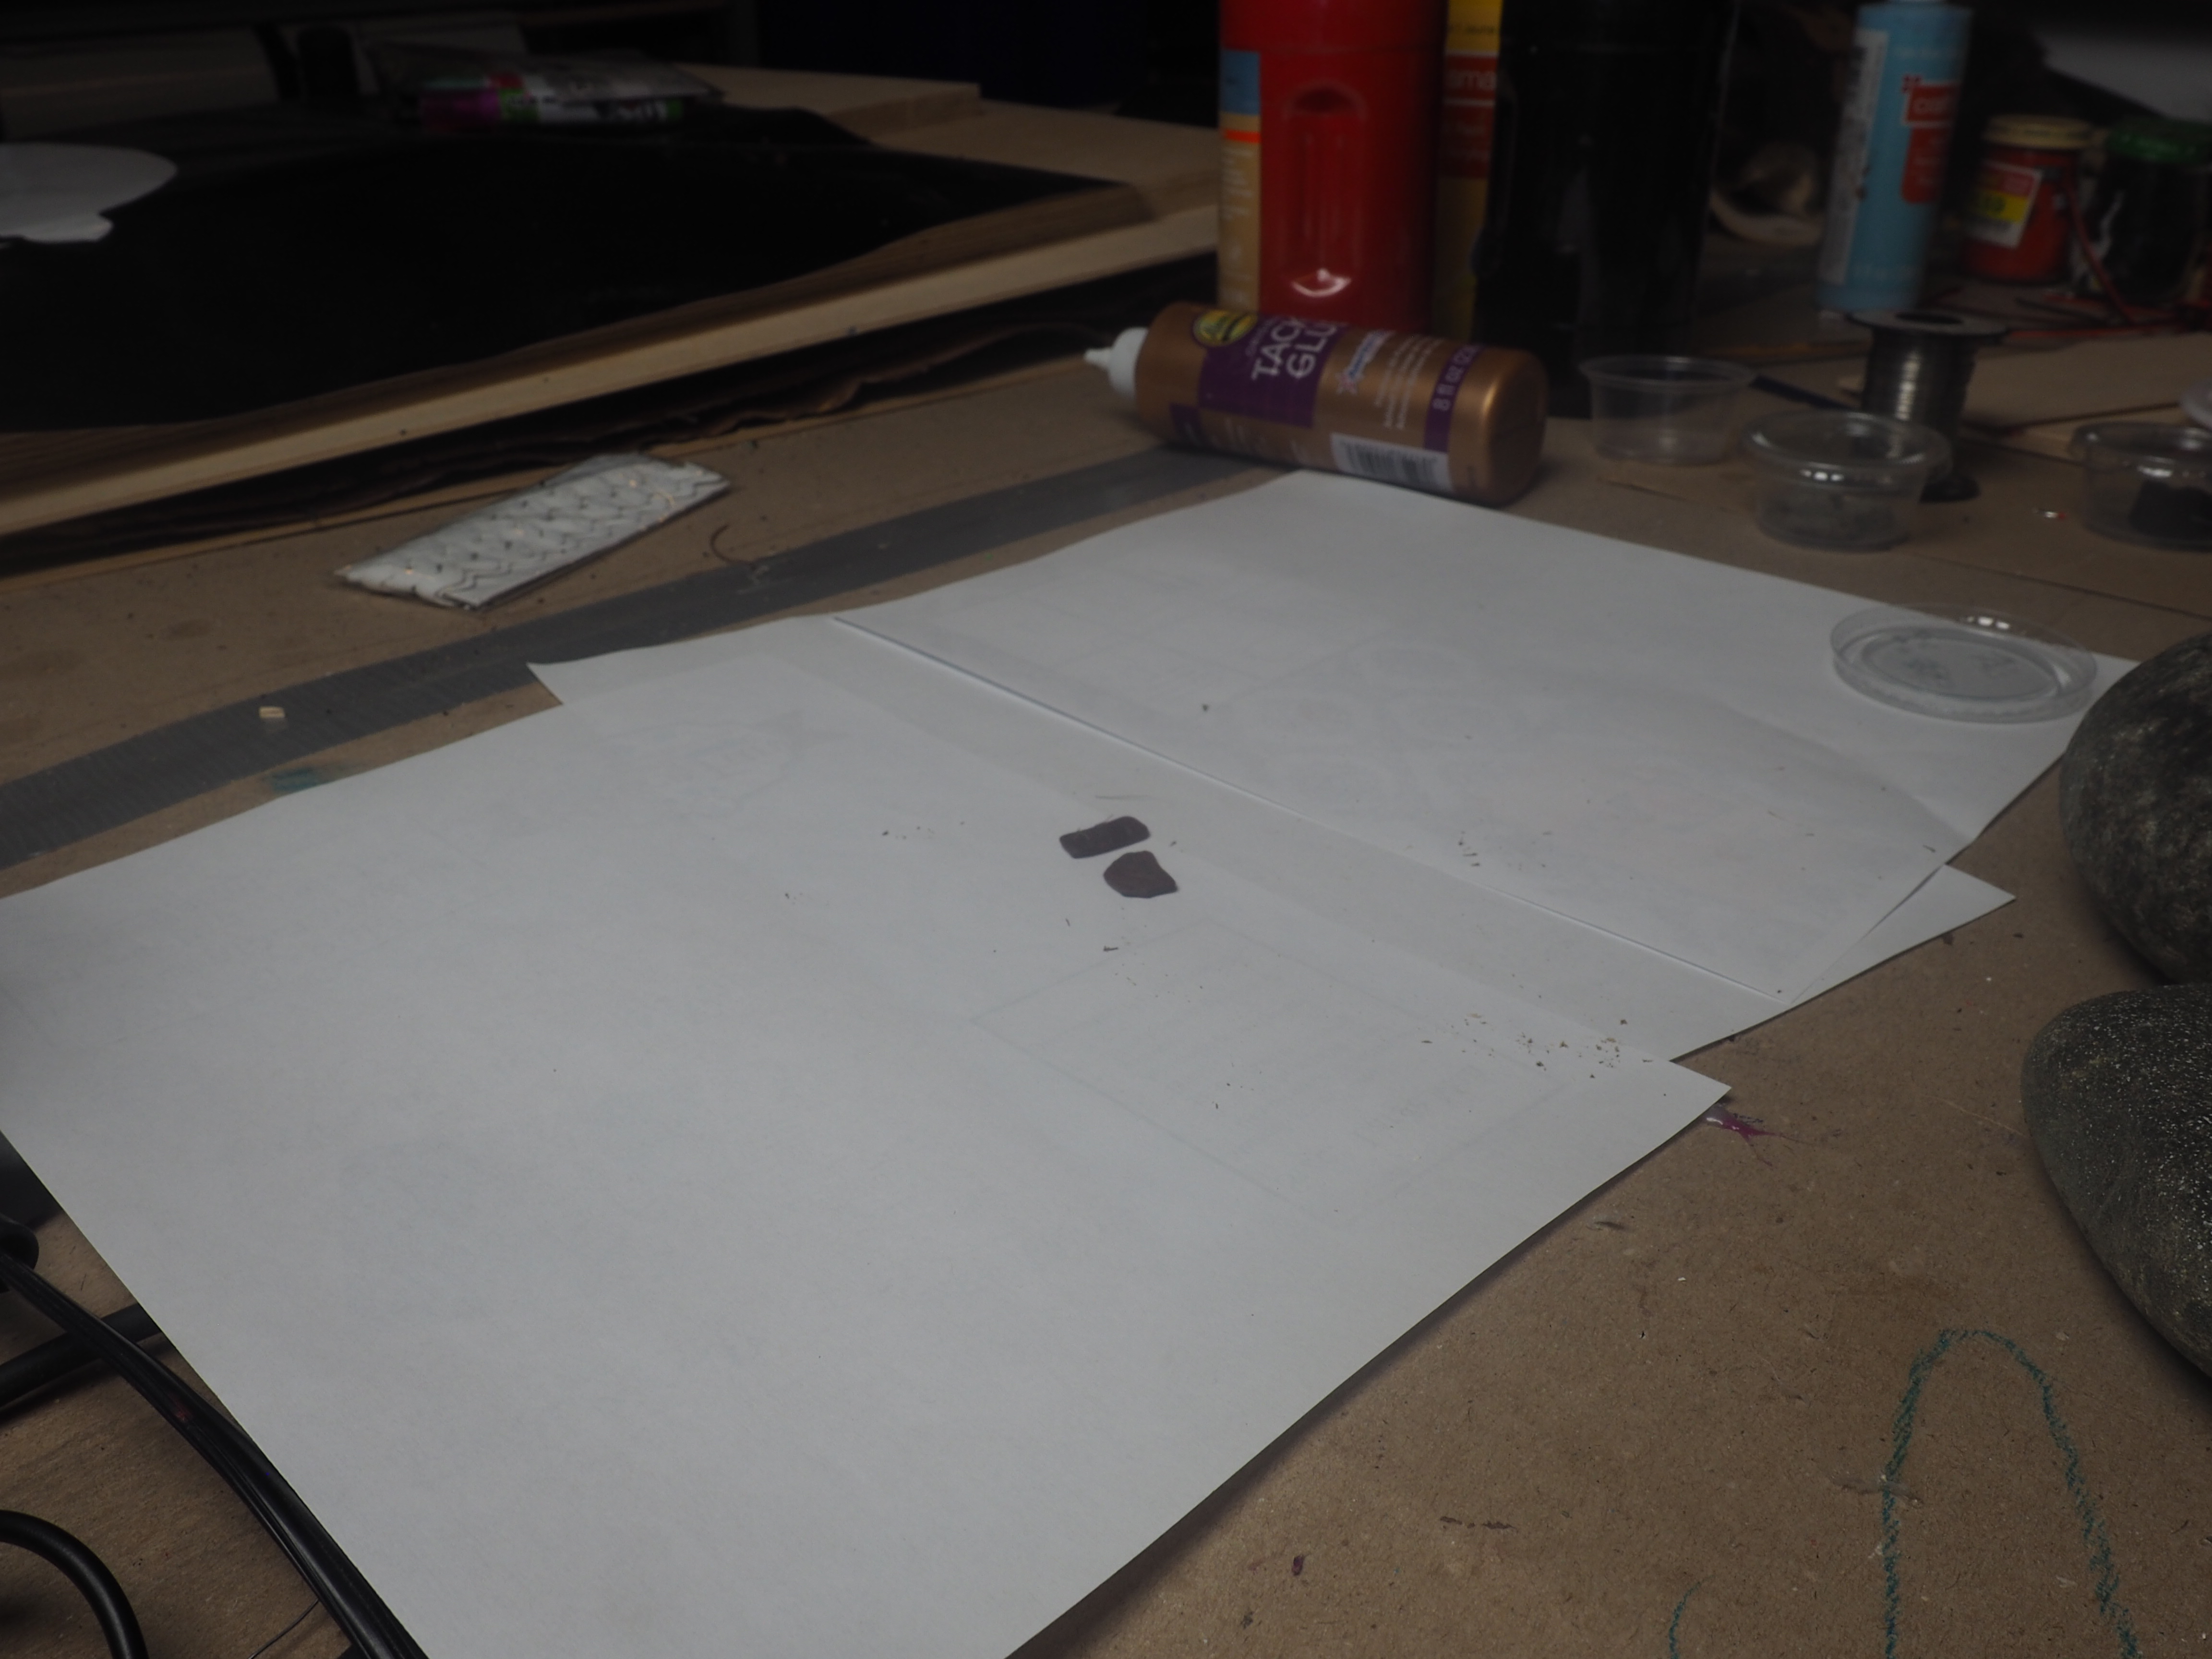
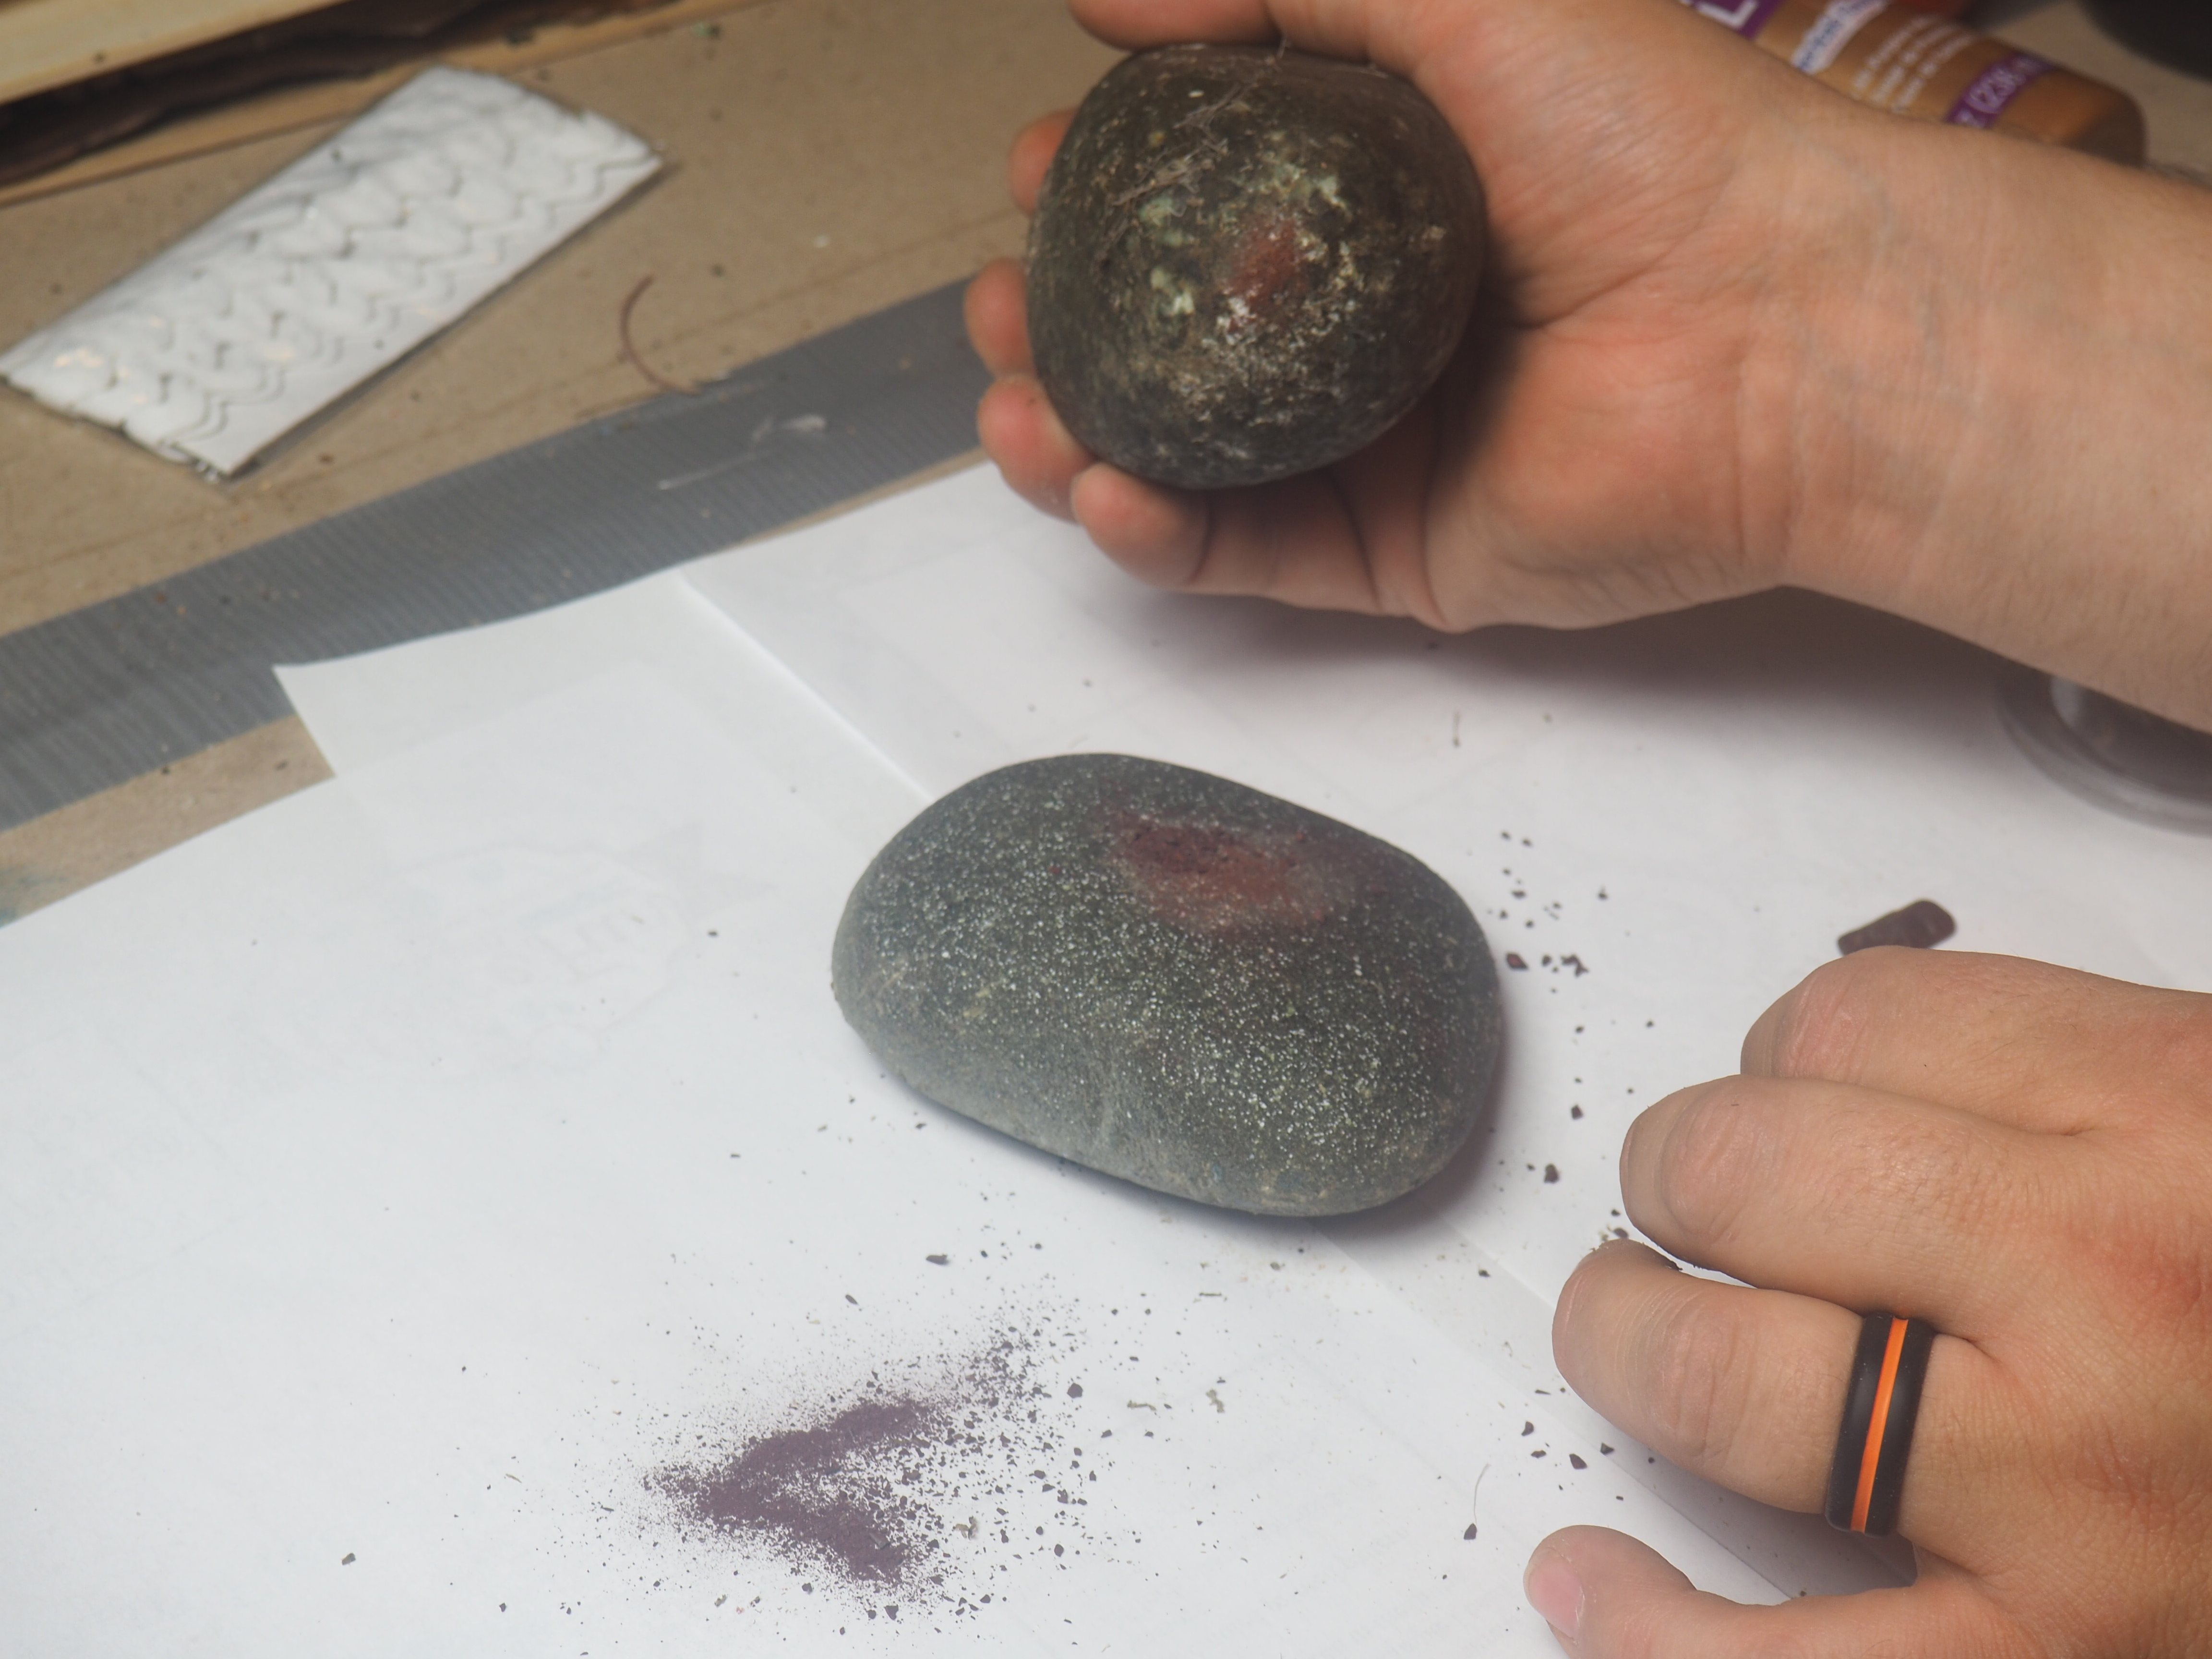
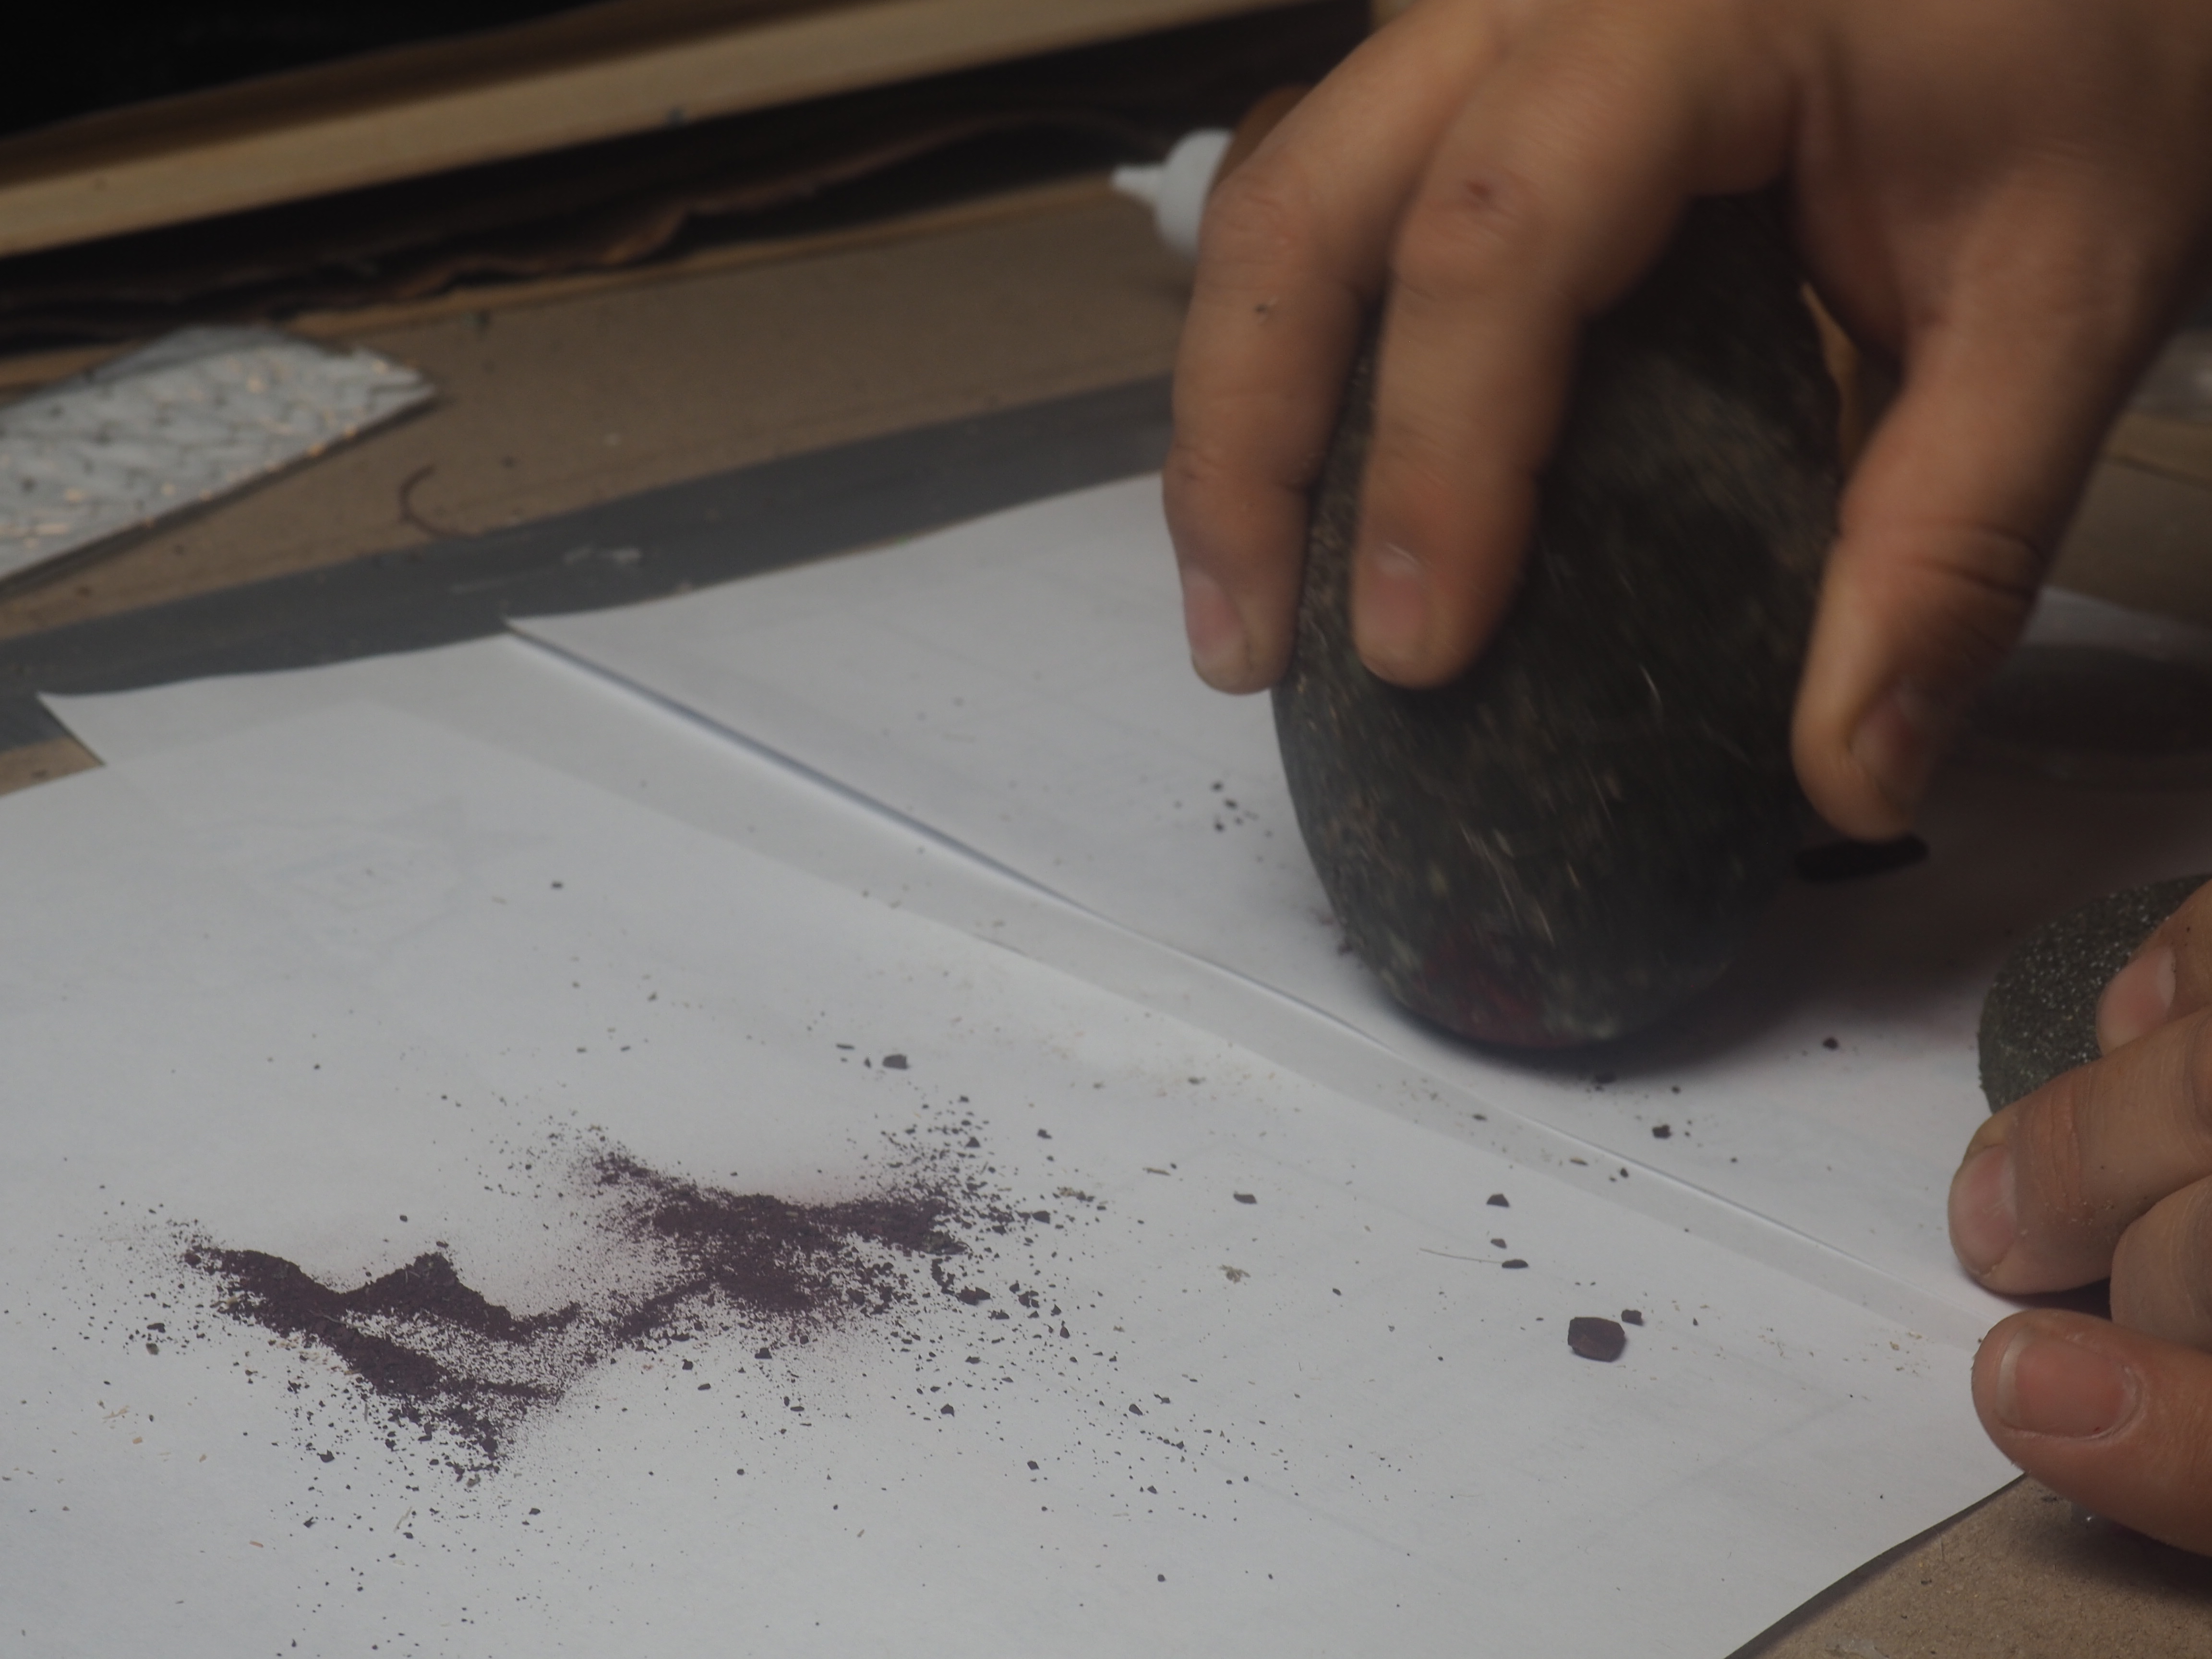
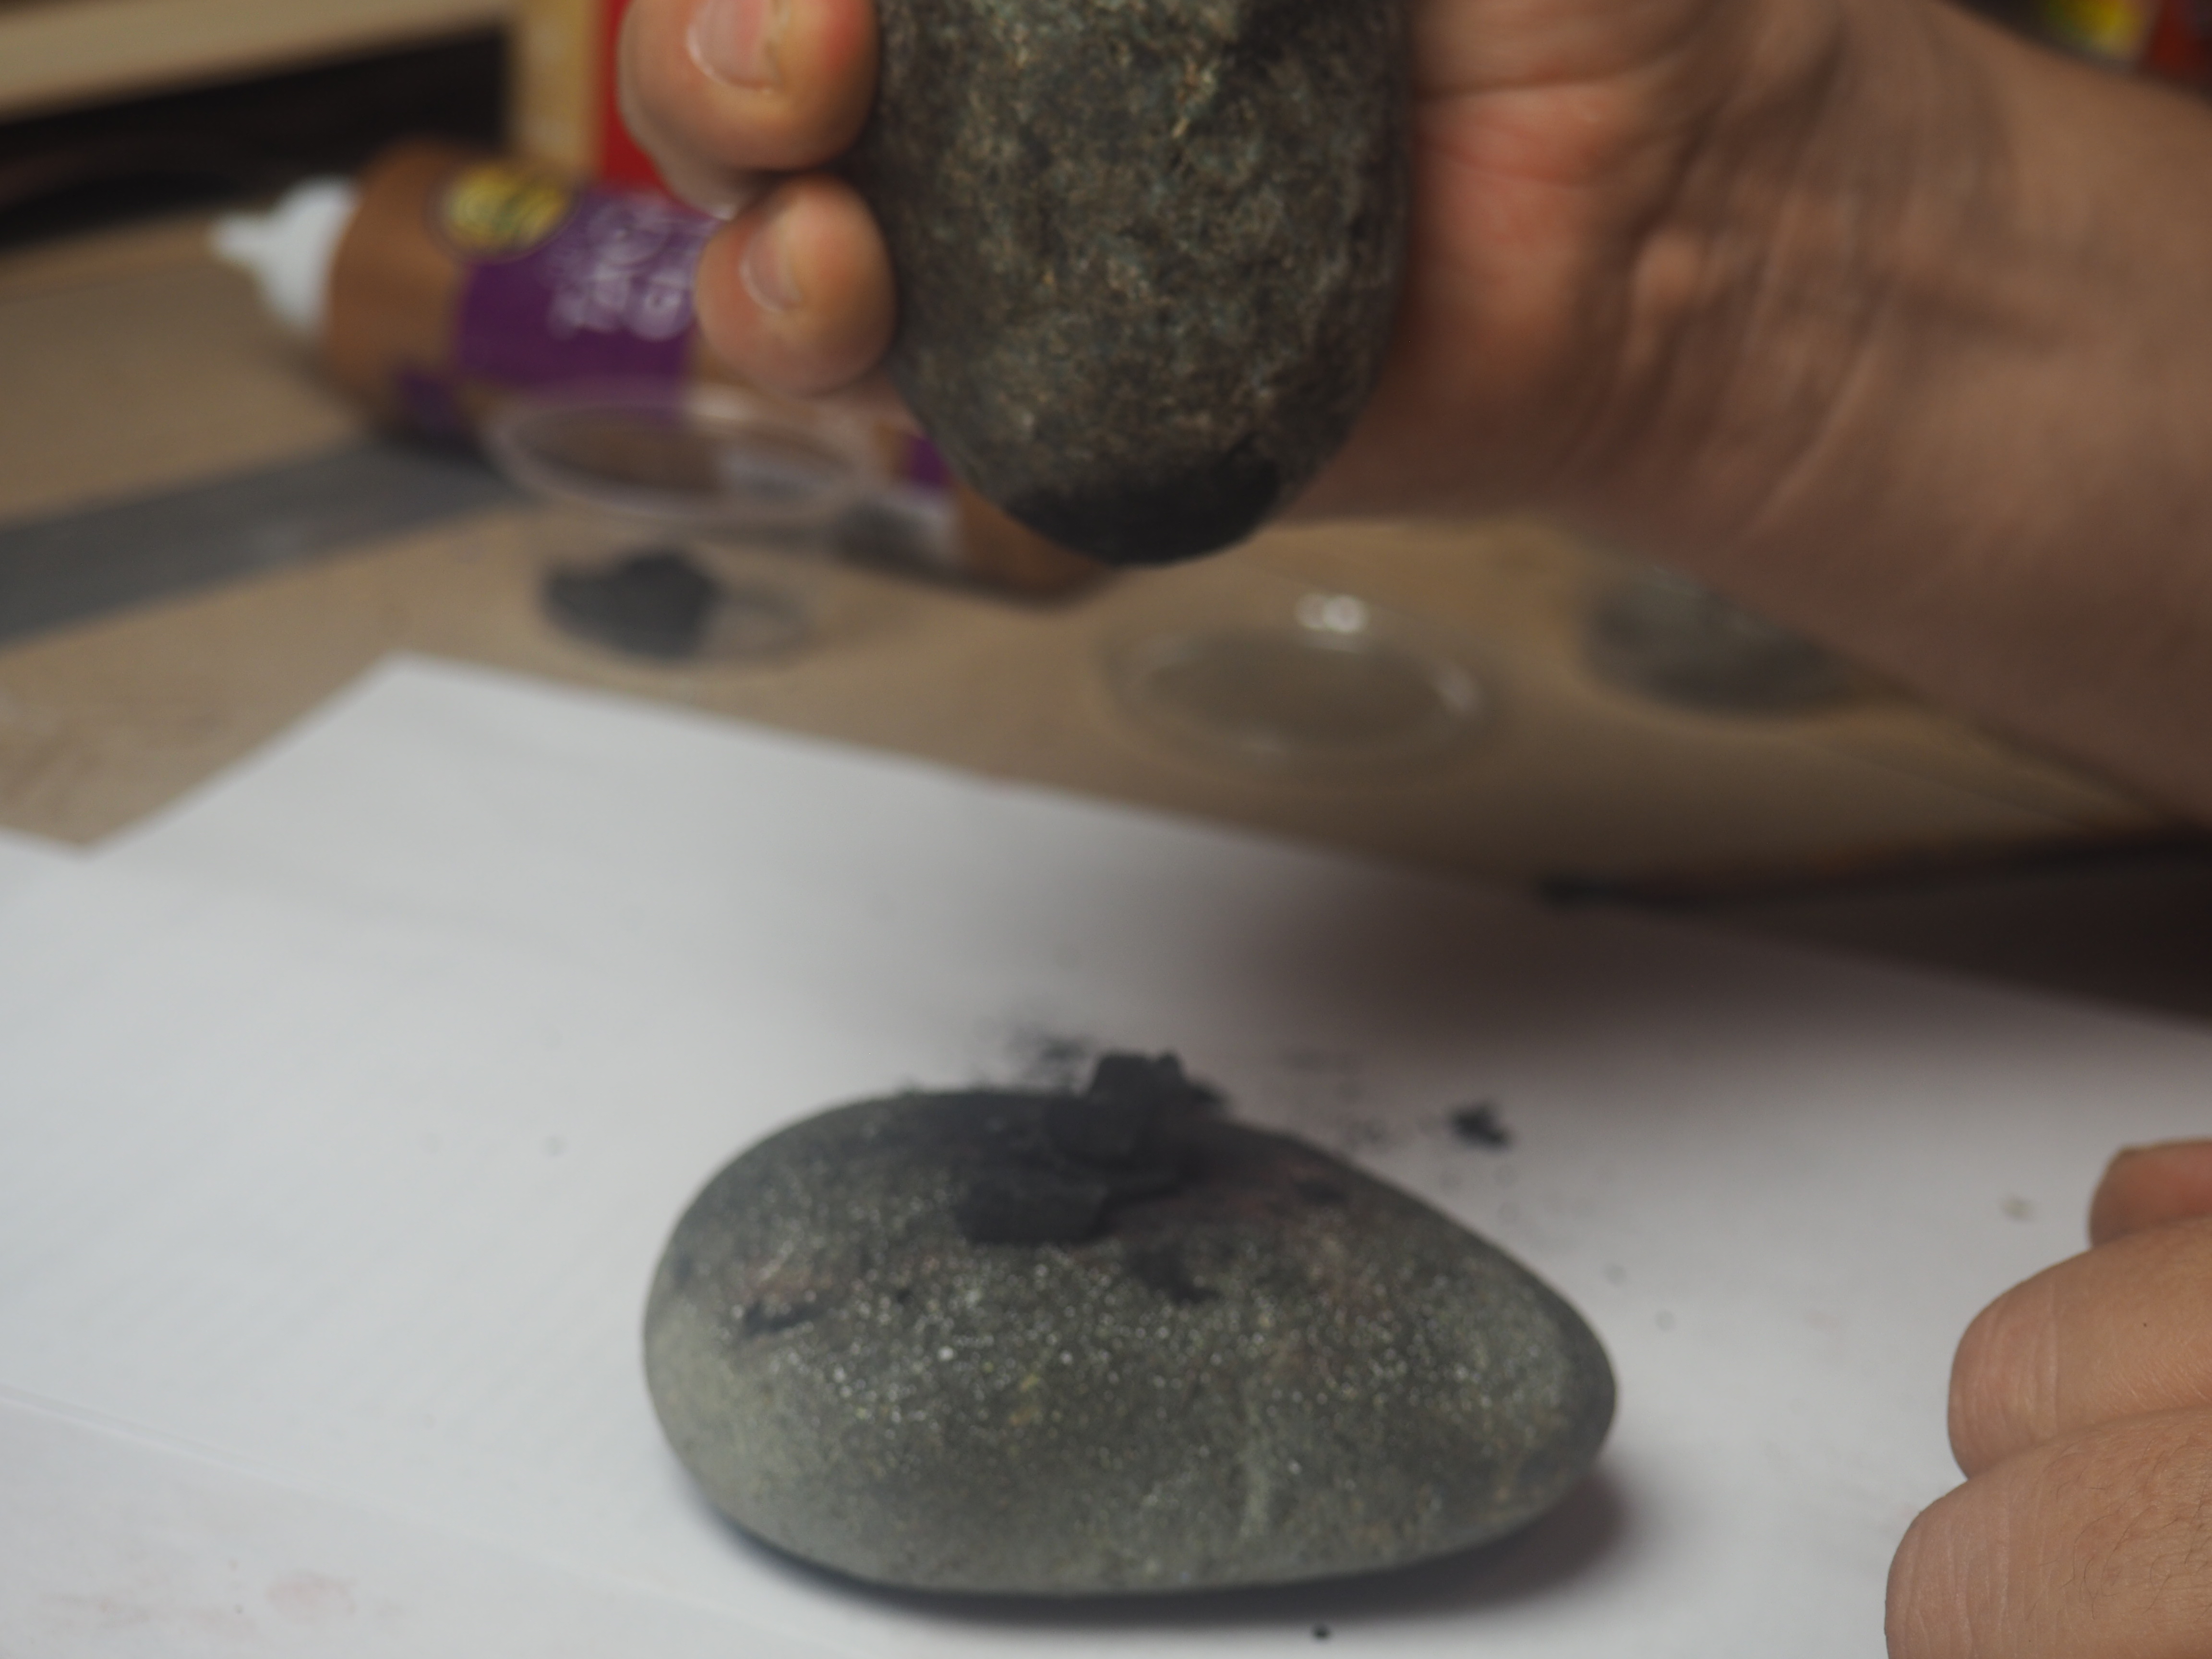
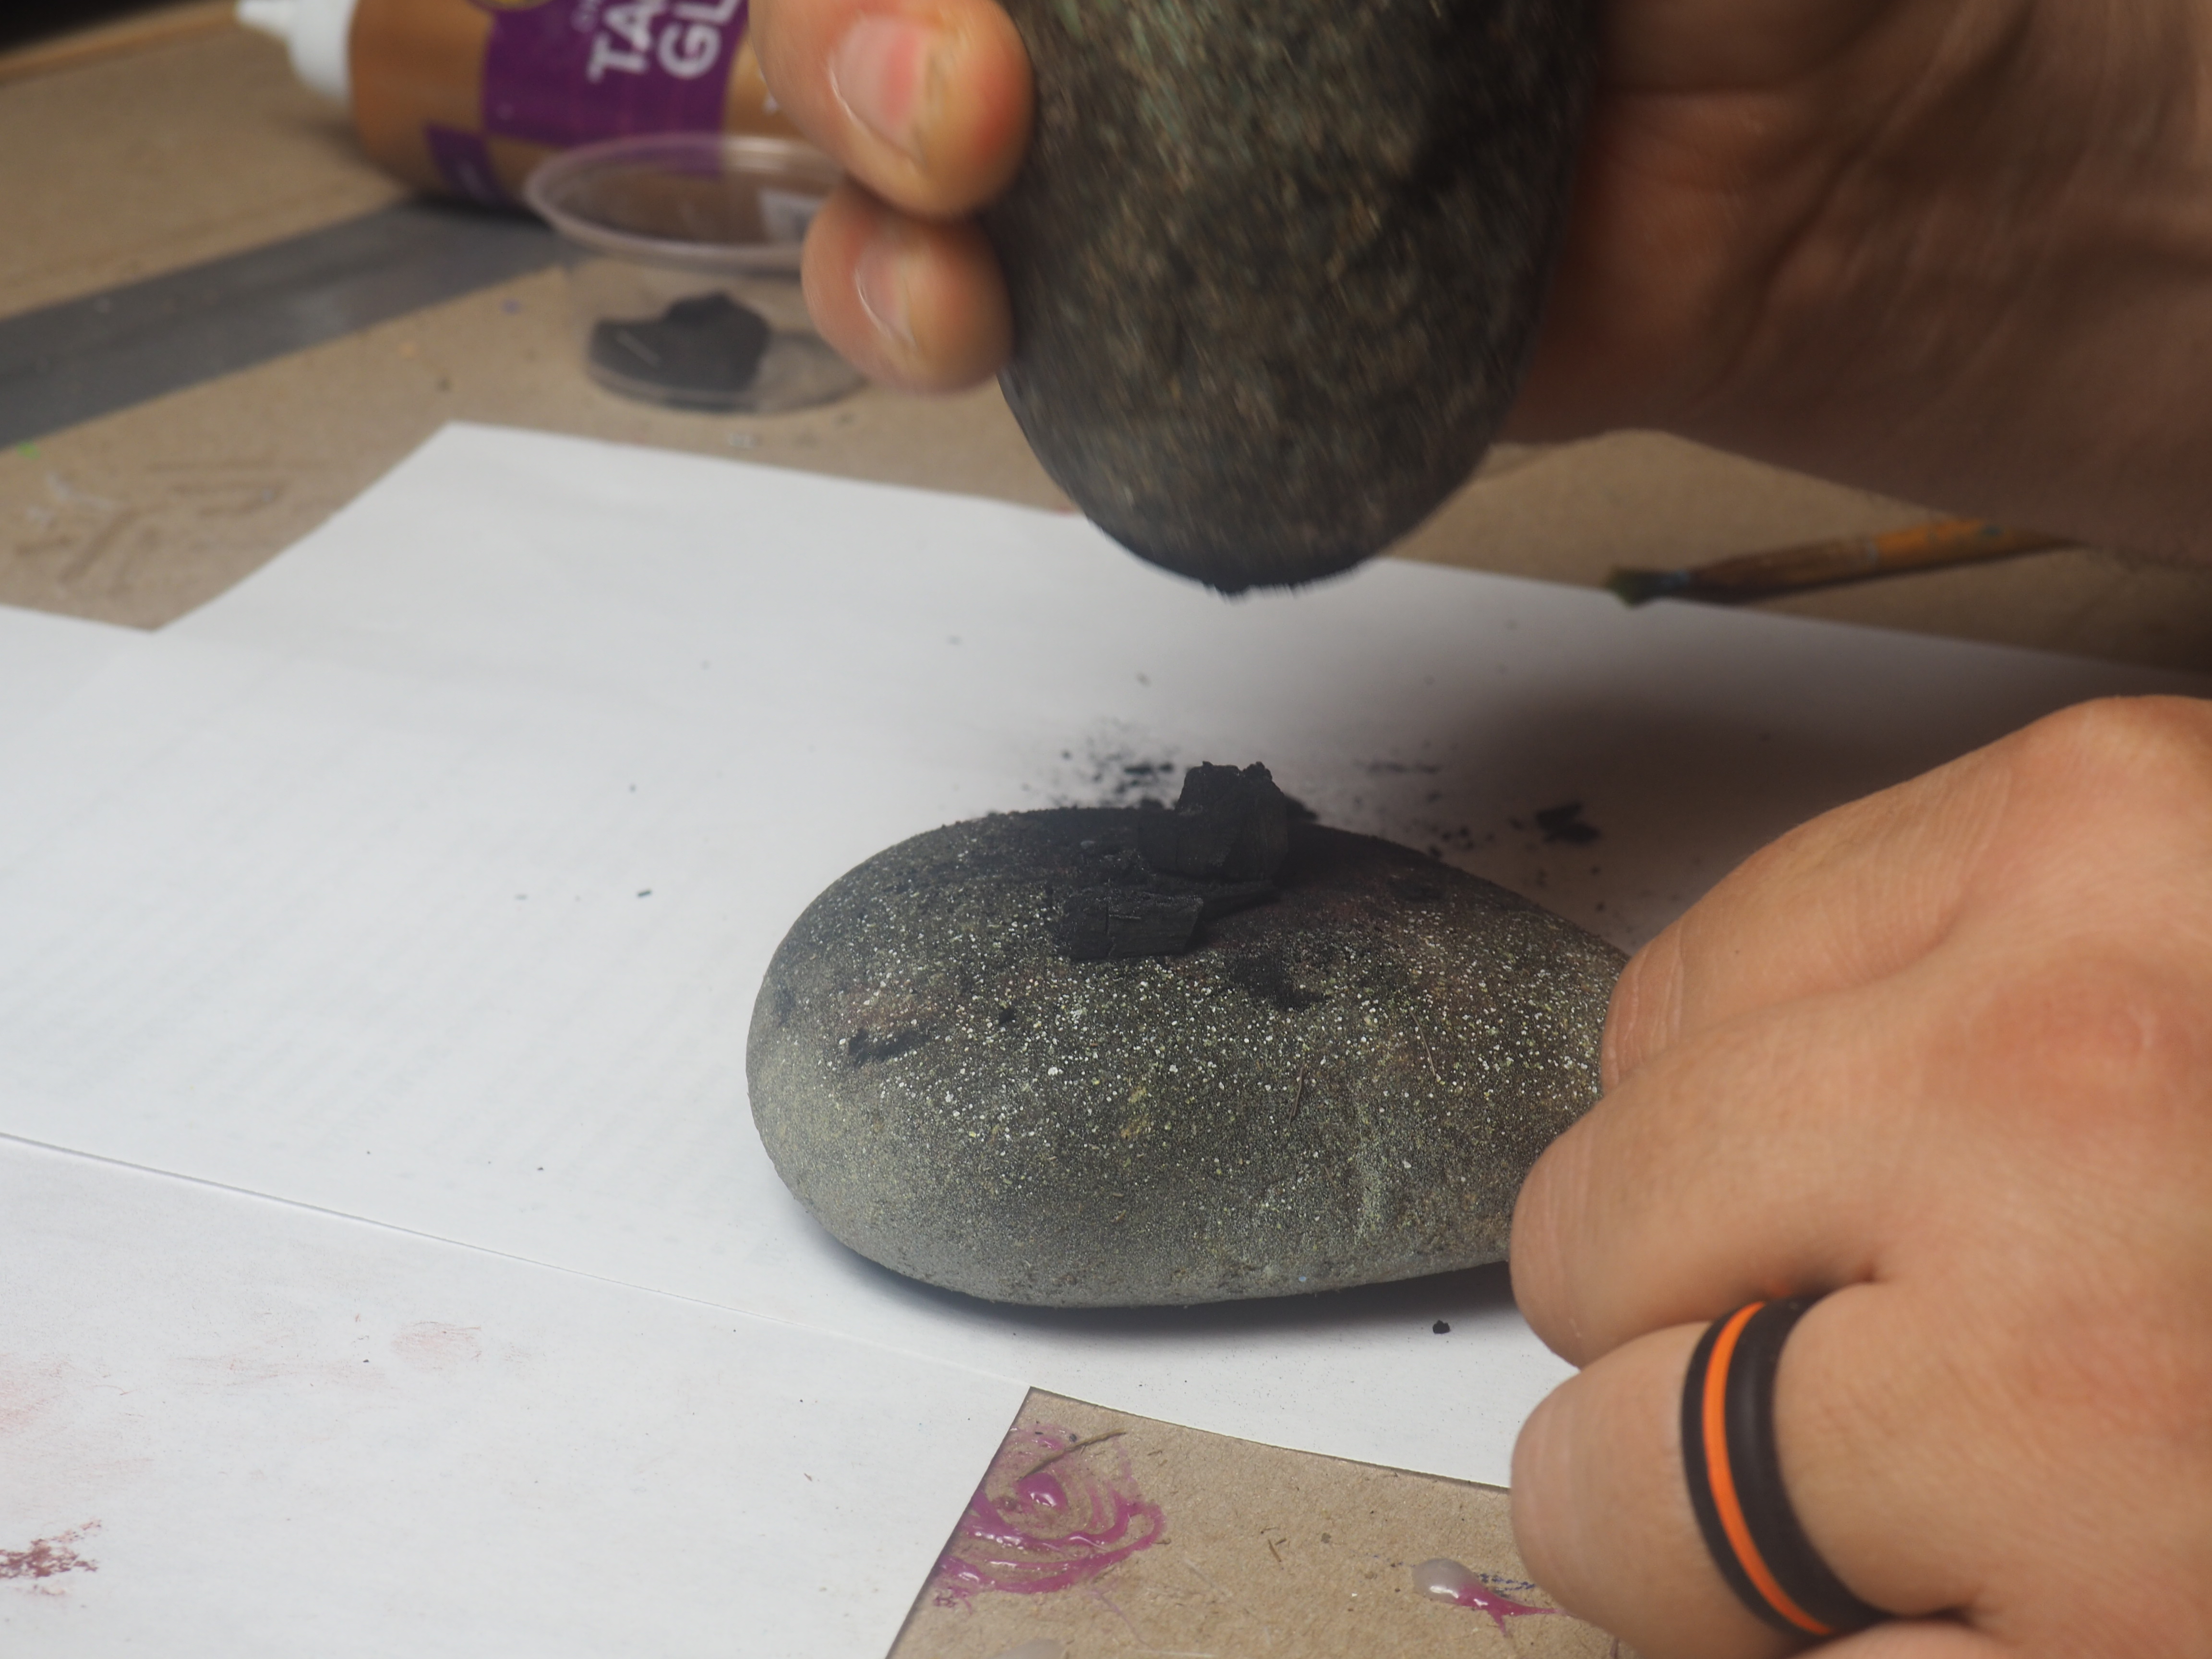
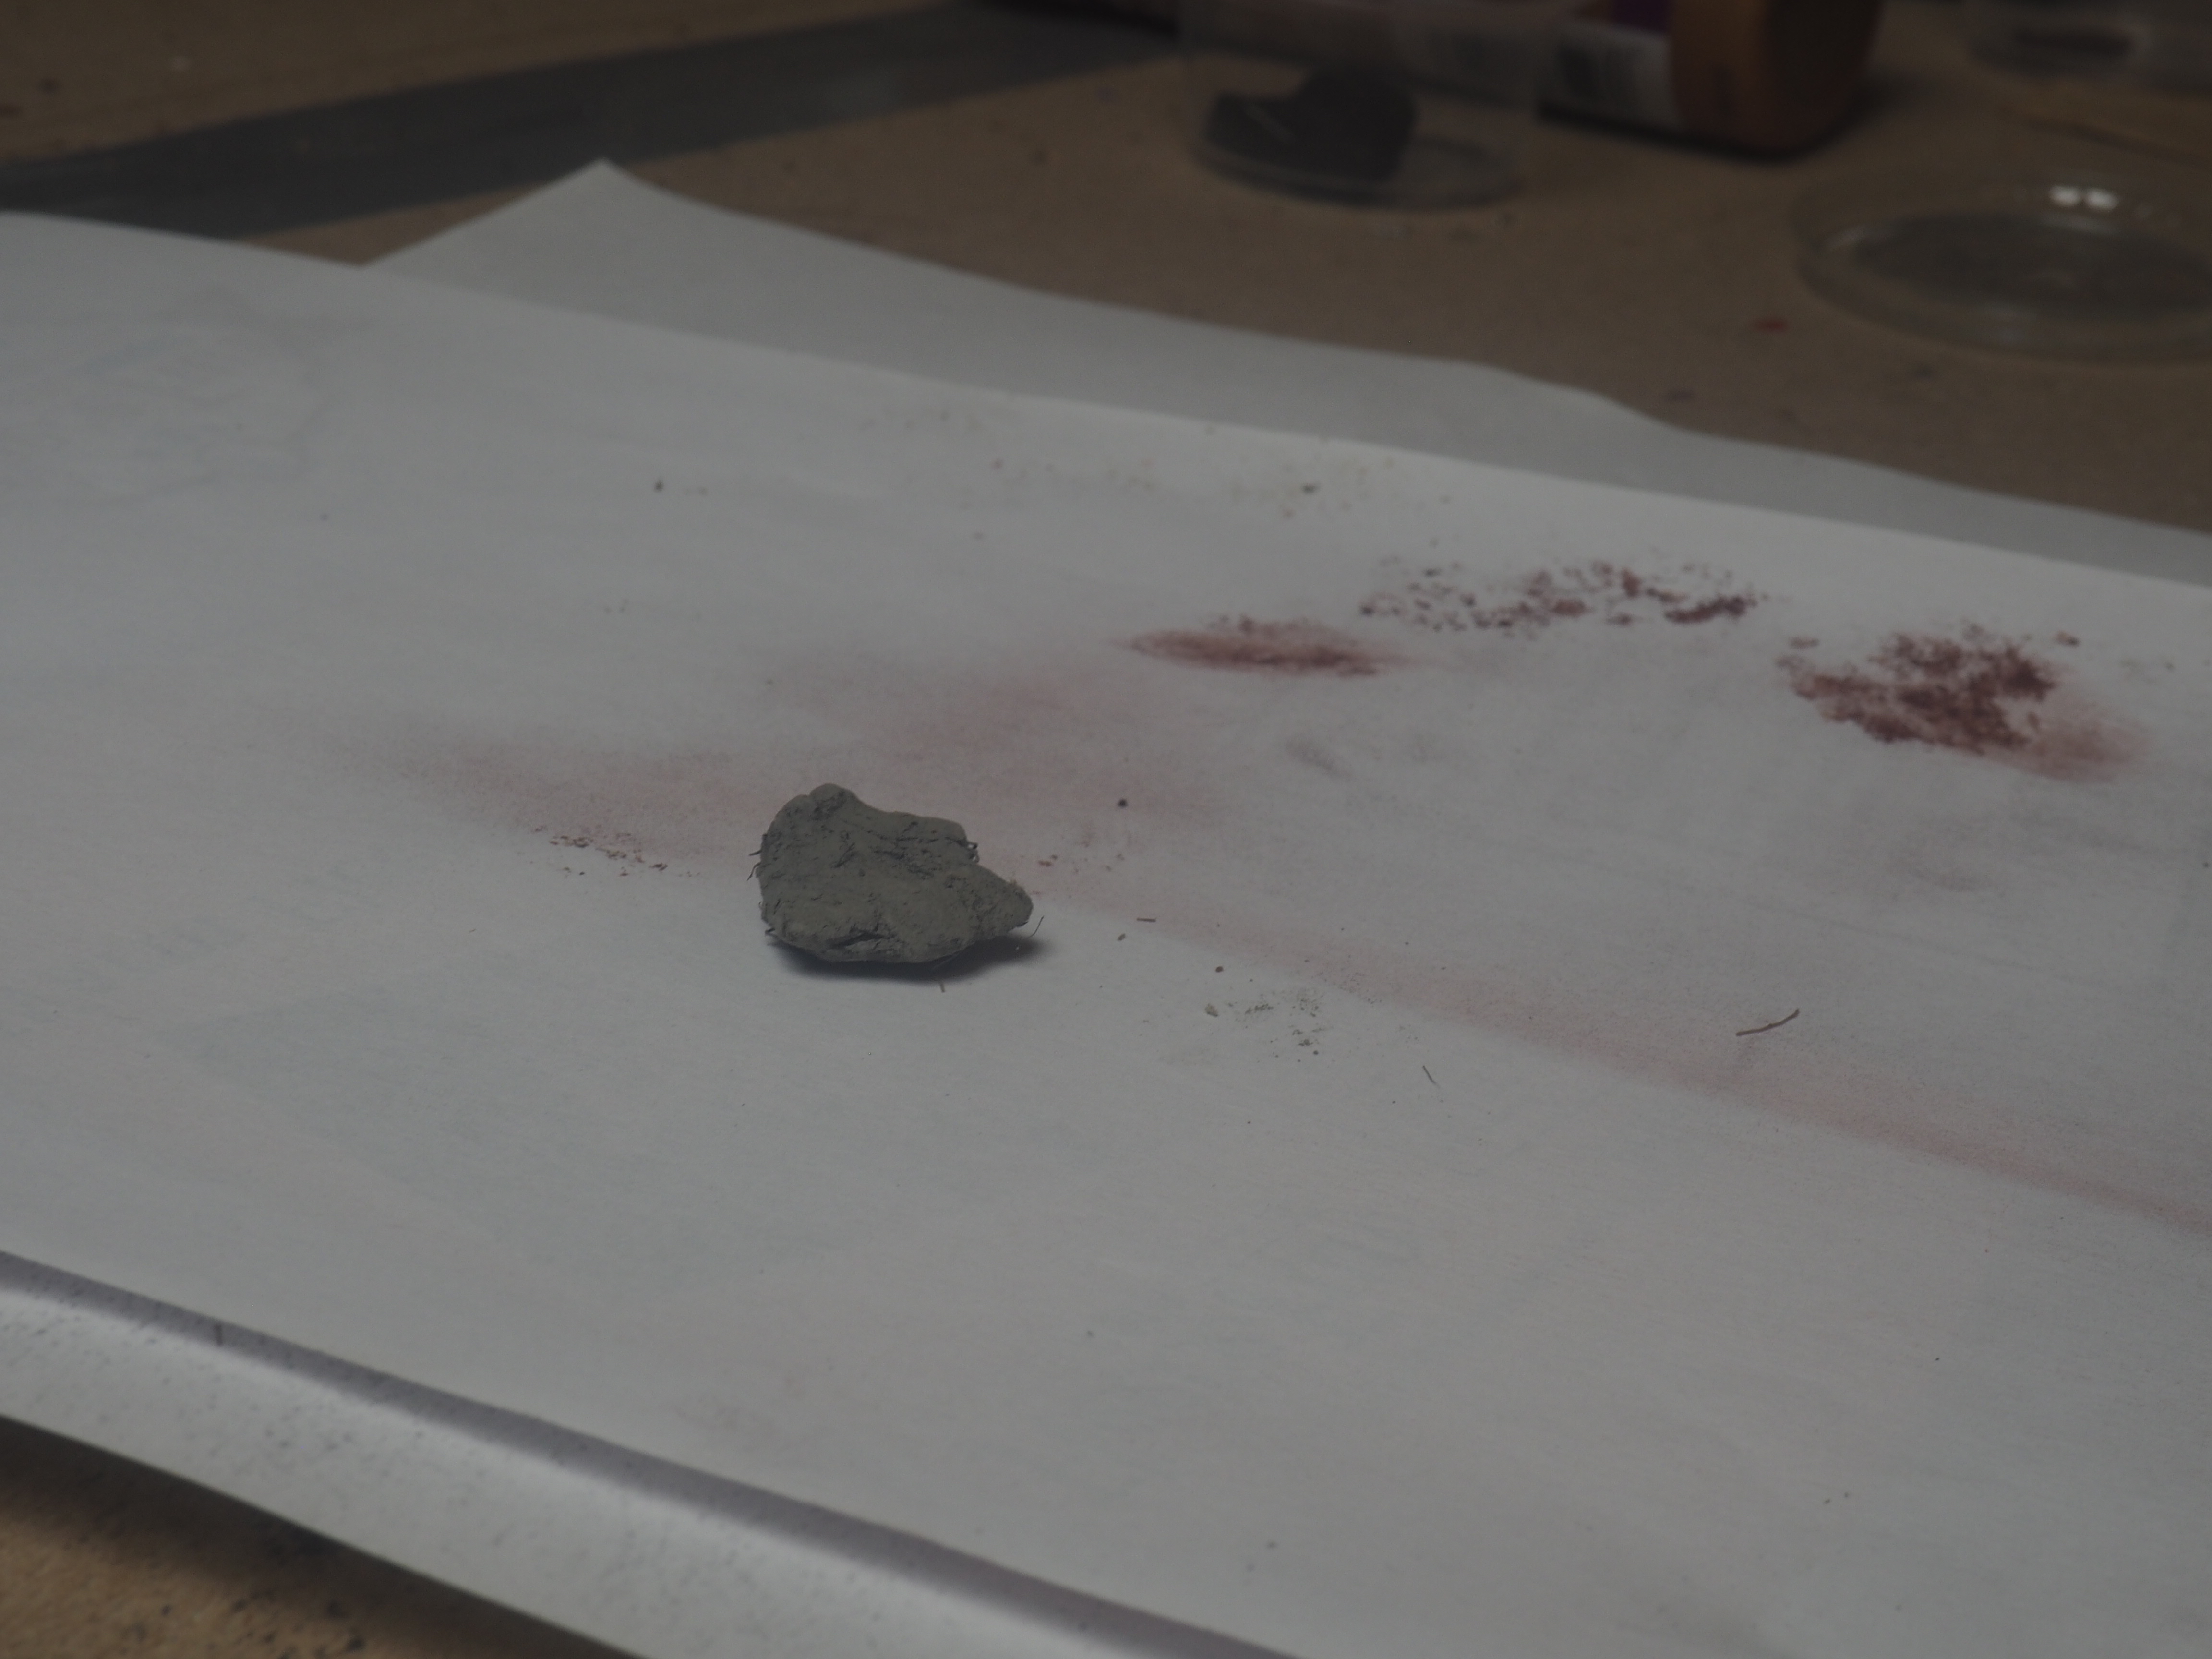
This step is attaching, painting and decorating the bentwood hat. This section will also go over making traditional paints to paint with, this is optional and you can use acrylic or whatever paints you have on hand. You will need: Hot glue gun Paint brushes Cup of water Pipet Anvil Rock Hammer Rock Paper Fishing line - 10 to 20 lb test Beads Feathers Super glue Drill 1/16th inch drill bit Sand paper

  • Unclamp your bentwood hat.


  • Use your hot glue gun to glue the edges of the LED base. Quickly and carefully so you don’t burn your fingers place your hat around the base and hold it in place till the glue dries. Make sure the wires are all inside the top of the hat.


  • Hot glue the Switch to the inside edge of the hat where you would like it.


  • Begin painting your hat. Sometimes it helps to draw out what you want to paint on a piece of paper first. If you are using traditional paints then follow the next set of instructions.


  • Spray your hat with Polyurethane or a sealant to protect your paint job


  • Add Sea Lion Whiskers ( fishing line) Cut the fishing line to about four inches. use the sand paper to roughen the fishing line so it goes from clear to white. Try to taper one end of the line so it looks like a whisker. Drill two holes using a 1/16th inch drill bit at the top of the visor .25 inches apart. You can add as many whiskers as you like. Traditionally the more whiskers the better the hunter you are.string the whisker through the bottom hole and back out the top hole. Add a bead or however many you want and use a drop of super glue to secure the line and beads. Once the glue is dry trim the excess end flush with the beads leaving the long whisker over the hat.


  • You can attach feathers at different parts of the whiskers using a bead as decoration put the bead on the whisker put the feather through the bead then add a drop of superglue to connect it.


  • add any other finishing touches you would like. There are other adornments that you can research and build to add onto your hat.


Traditional Paints!

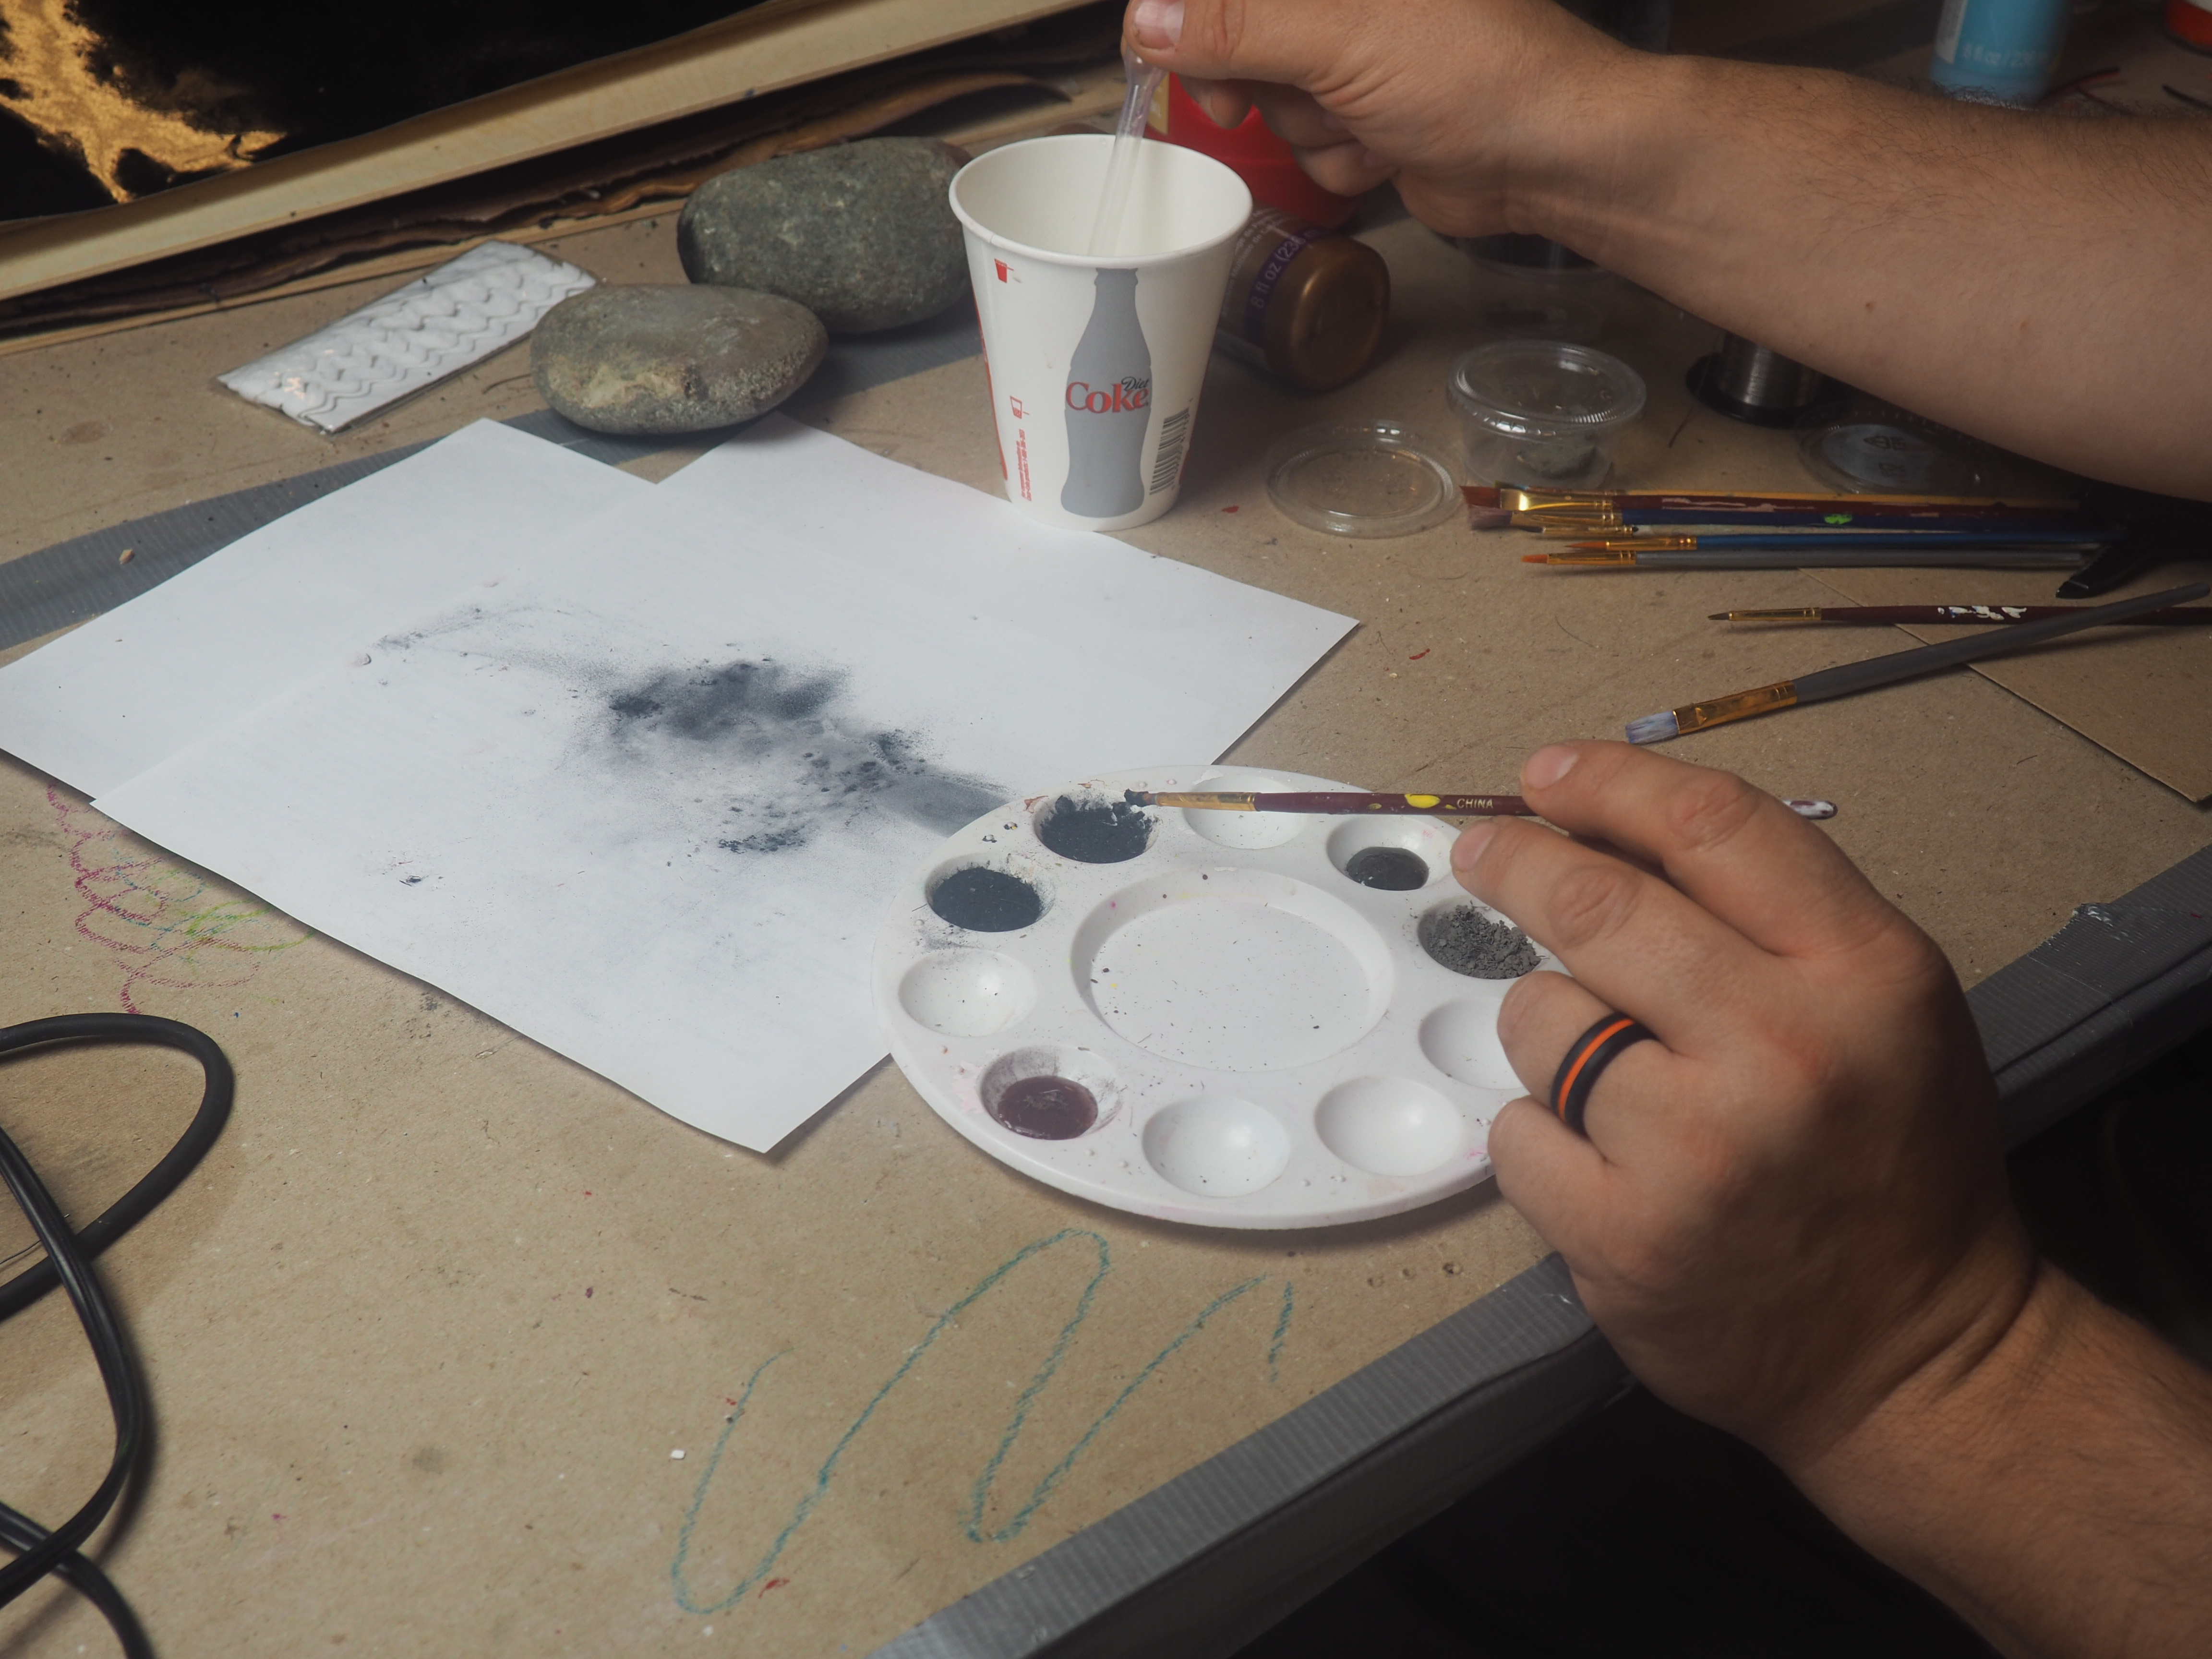
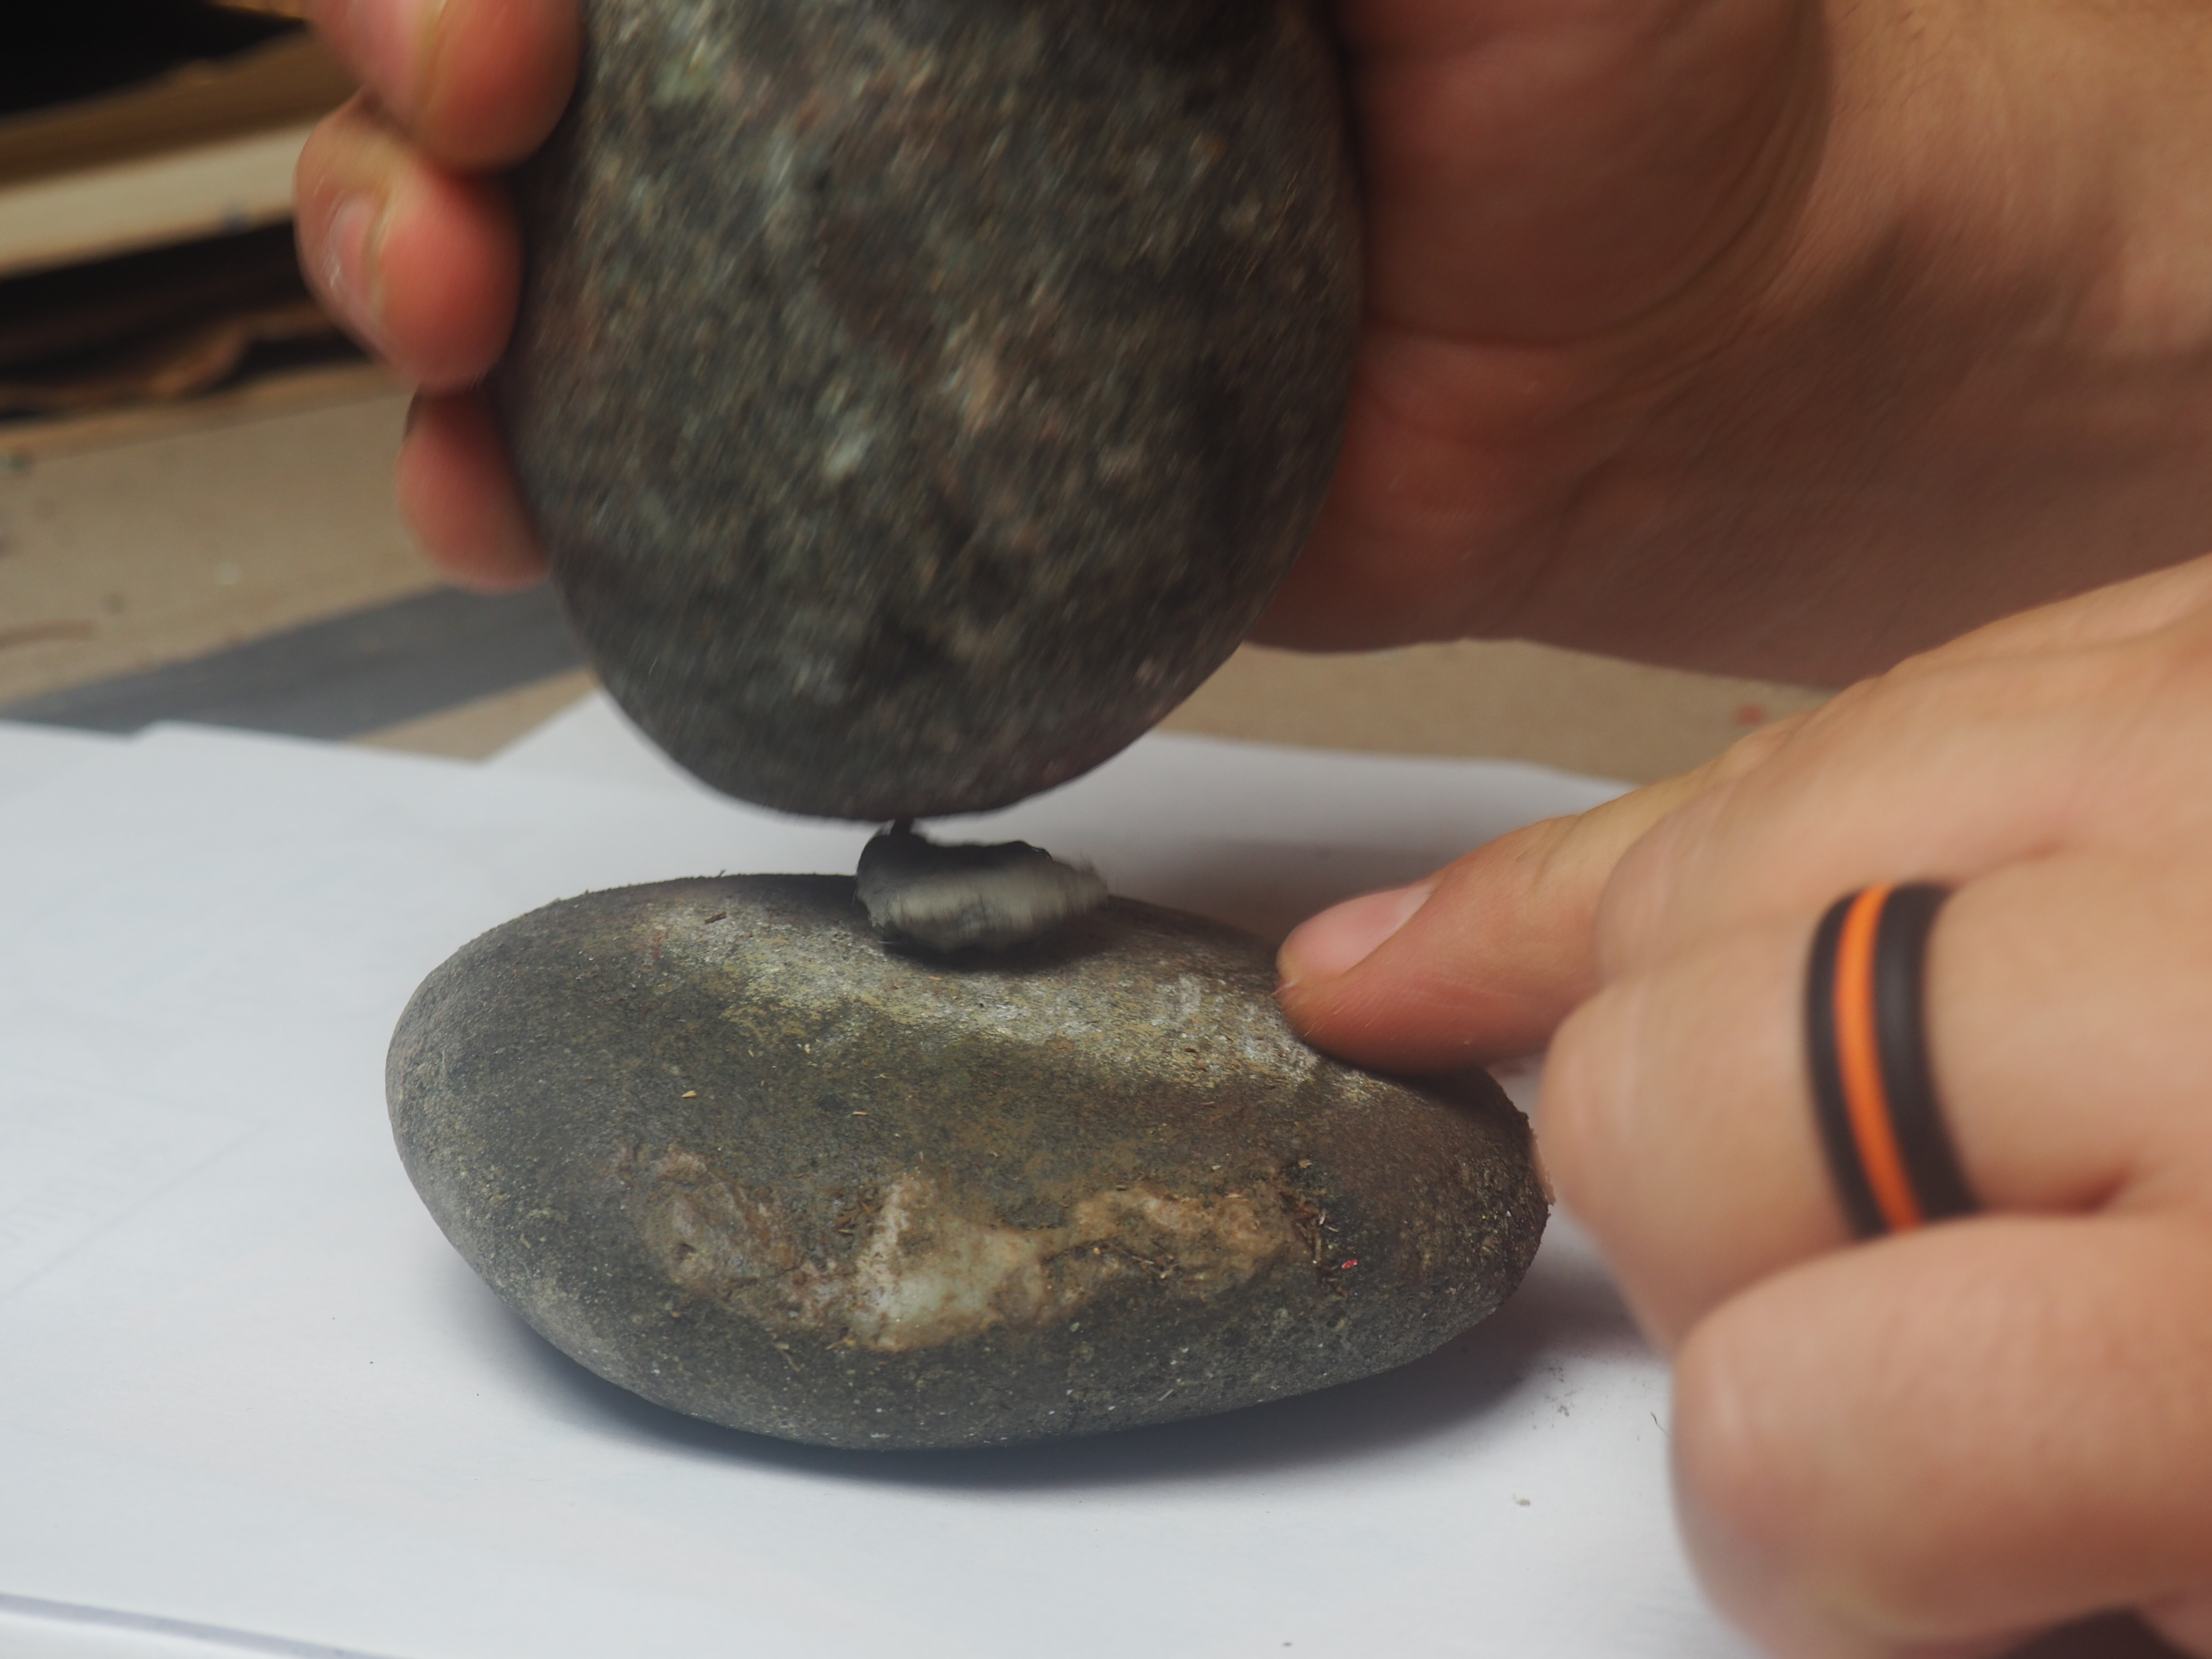
Making and using traditional paints. You will need: Hammer Rock or a hammer Anvil Rock or a hard surface Mortar and pestle (optional) Paper Water or oil Charcoal Clay Ocher

  • Traditional Paints are not as easy to use as modern paints, It takes more coats to get a good coverage. The paint also flakes off easier. However it is a very good way to get a traditional look and it gives an appreciation for modern paints.
  • To make Black: You will need charcoal. You can use charcoal as is as a pencil or marker. You can also crush the charcoal into a powder using your hammer and anvil. The finer the powder is the better the paint. You do not need to hit the charcoal very hard, smaller taps are better. Do this over a piece of paper so you can collect all the dust. Mix the dust in a container with water or oil, mix in a little bit at a time to get the desired shade and consistency. Begin to paint.


  • To make Gray or white: You will need gray or white clay. The clay we used is Eklutna Lake clay from Eklutna Alaska. This clay powders very easily and crumbles into a powder with barely any pressure from the hammer and anvil. Mix the dust in a container with water or oil, mix in a little bit at a time to get the desired shade and consistency. Begin to paint.


  • To make Red: You will need a stone called Ocher, ocher also comes in yellow orange and sometimes blue. Use your hammer and anvil to crush the ocher stone into a very fine powder by using light taps and also grinding, a mortar and pestle will come in handy to make a very fine powder. Mix the dust in a container with water or oil, mix in a little bit at a time to get the desired shade and consistency. Begin to paint.


  • Clean Up: You can store this paint and use it for later, to reuse the paint just rehydrate the material with water, or put in a bit more oil if you used oil.


Standards

  • (3.MD.B4): Generate measurement data by measuring lengths using rulers marked with halves and fourths of an inch. Show the data by making a line plot, where the horizontal scale is marked off in appropriate units-- whole numbers, halves, or quarters.
  • (Fab-Safety.1): I can safely conduct myself in a Fab Lab and observe operations under instructor guidance.
  • (Fab-Electronics.1): I can follow instructions to build a simple electrical circuit using conductive material, basic components, and power.
  • (Fab-Modeling.1): I can arrange and manipulate simple geometric elements, 2D shapes, and 3D solids using a variety of technologies.
  • (Fab-Fabrication.1): I can follow instructor guided steps that link a software to a machine to produce a simple physical artifact.
  • (Fab-Design.1): I can be responsible for various activities throughout a design process within a group under instructor guidance.
  • (Fab-Safety.2): I can operate equipment in a Fab Lab following safety protocols.
  • (Fab-Modeling.2): I can construct compound shapes and multi-part components ready for physical production using multiple representations.
  • (Fab-Fabrication.2): I can develop workflows across four or more of the following: modeling softwares, programming environments, fabrication machines, electronic components, material choices, or assembly operations.

Lesson Feedback