- Loading…
This lesson will take body systems interactions to the next level! To start students create a model of their skeletal, muscular and skin systems working together using common craft supplies and then they design and create customized fingertips for different uses using the 3D printer.
Materials needed (per student)
For the Hand Model ( to illustrate skin, muscular and skeletal systems interacting)
1 piece of printer paper
5 plastic straws
5 pony beads
5 pieces of yarn, string or fishing line
A ruler to measure length of fingers and apply to paper model
Transparent tape to attach straws to paper
Scissors to cut joints in straws
Color pencils or markers to customize their hand (optional)
Computer access with internet
3D printer access
Engage students using video of current technology and uses by students their age and teacher led discussion and time provide time for brainstorming.
1) Students watch a 3 minute video from National Geographic about kids their age already using 3D printing technology for prosthetic hands.
Video link: https://www.youtube.com/watch?v=Cl8ijPGEKO8
2) Teacher leads whole group discussion on pro’s or positive aspects they saw in the video for 3D hand design and how it benefits the student using it and con’s of the current 3D design and brainstorm ideas on how they could improve it or what they would want ease use limitations.
Individually students measure and create a working model of their hand. Students create connections between their knowledge of parts and functions of body systems required to move and control a human hand a the precision required do design prosthetics that can mimic fine motor functions,
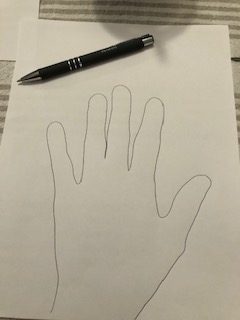
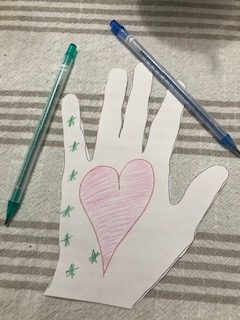
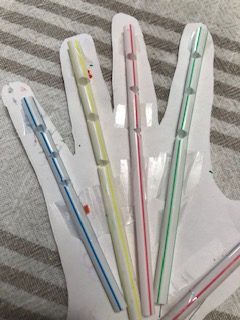
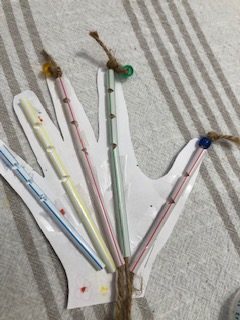
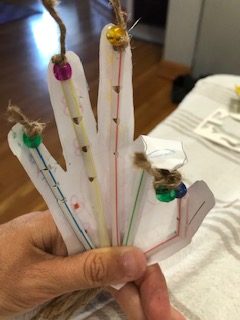
1) Students trace their non- dominant hand on paper and customize it with color pencils or markers.
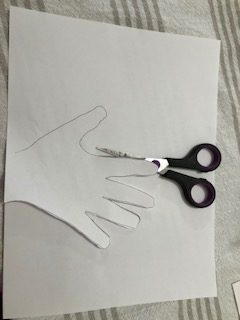
2) Cut out the outline of the hand.
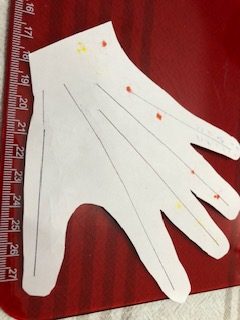
3) Measure the length of each finger from the base of the palm to the finger tip and record on paper model.
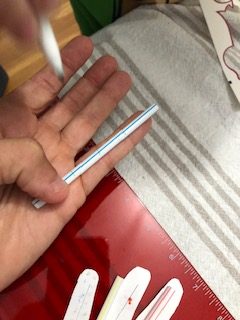
4) Cut the straws to match the length of the measured fingers.
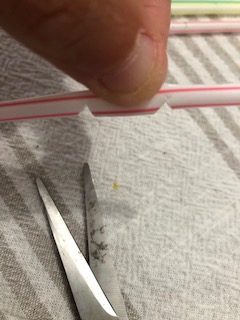
5) Hold the straw to the matching finger and mark where the fingers bend at joints on the straw with marker or pen.
6) Cut “v’s” in the straw at marked places for joints.
7) Tape the straws to the paper hand model (being careful not to tape over the joints)
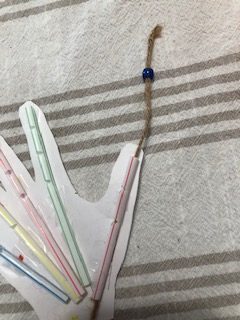
8) Thread the yarn or sting through the straw
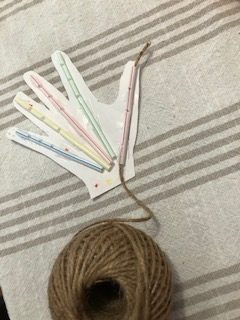
9) Tie a bead at the top of the string to prevent it from being pulled through the straw.
10) Gather and trim any excess string at the base of the palm/wrist of the hand model – leave enough to pull to operate fingers.
Students work in pairs or small groups with a 3 circle Venn diagram to organize and explain thoughts on strengths and weaknesses of 3 different " kinds" of hands.

1) Students work in pairs or small groups to fill in a 3 circle Venn diagram (pictured above) on the similarities and differences between their actual hand, paper hand model and 3D Printed Models they saw in the video on Step 1
2) Teacher compiles information from pairs or small groups and leads discussion on strengths and explanations of weaknesses of 3 “kinds” of hands.
After exploring weaknesses of the 3 kinds of hand models students work individually or in pairs to design solutions for 3D hand model weaknesses and to improve on or customize the tips of 3D printed prosthetic hands to better fit middle school age students needs.
1) Students brainstorm solutions for types of finger tips middle school students would use and functions
2) Measure and sketch finger tip customizations for function and use.
3) Explore options on Thingiverse (examples below) for designs that have been created to print


3) Students transfer sketch to scale to Tinkercad using (https://www.tinkercad.com) to digitize
4) Send file to 3D print
5) Students test their 3D printed designs according to functions
Given time to test functionality and durability of their designs students list ways to improve their design.
1) Give students time to share their designs with others and explore functionality of their own
2) Teacher leads discussion on which finger tip design created seems most useful for middle school age students.
3) Create an evaluative tool to rate and organize their thinking on how they think they could add or subtract materials or improve on design to meet the needs of students in the future.
Having trouble? Let us know by completing the form below. We'll do our best to get your issues resolved quickly.
"*" indicates required fields