- Loading…

Online session to celebrate the National day in the State of Qatar, the session directed to kids in order to share Joy, happiness, and Knowledge. In this session we will briefly explain the history behind the national day, in addition we will introduce the participant to Micro_controllers in a brief in order to make a flag out of LED’s and animate these LED’s.

This is an Unplugged session which doesn’t require any physical material rather than a login computer.
All the required files will be linked below:
We will start by ice breaking questions to grab the participant attention
1–We will ask the kids about the national day of Qatar:


In this section we will go through the history behind this date.
1–We will discuss with the kids what happened in (December \ 18 \ 1878).
2- So in this day “Sheikh Jassem bin Mohammed bin Thani” took the role in the state of Qatar.
3- As he succeeded to apply his vision of unity, grow rapidly, and to reach the highest of heights.

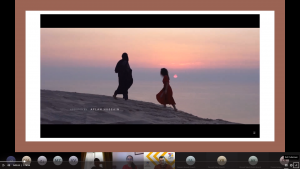
4- Then we will present a video talks about Qatar “Pearl Of Arabia”

5- Then we will ask the participant about “Why it’s called Pearl Of Arabia”
** Video Link
In this section we will be asking the participant about the previous celebrations and the future one.
1–We will ask the participant about their previous experience celebrating the national day and the event they went to.

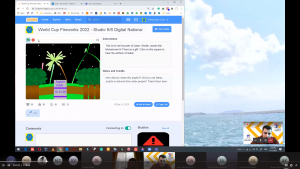
2–We will then show them an event have been staged in Katara as a celebration.

3- This Show held in Katara in 2019 it’s a “Drone Show”.
4- As Qatar Always seeks for the latest Technology to deliver the love and affection to citizens.
** Video Link
In this section we will be asking the participant about future celebrations of the national day.
1–We will ask about “How they wish to celebrate the National Day in the future?”

Note : in this section I’ve received a lot of imaginary ideas like “Driving a Helicopter to watch the pride form above”, “Flying Cars to reach the firework’s area to watch it” and many more.
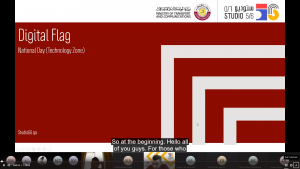
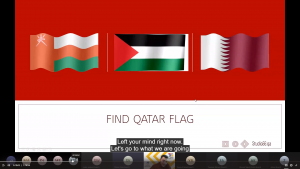
2- Then we will smoothly jump to our topic Digital flag by asking about the Qatar Flag Design.


3- After showing them the flag we will introduce what we will be doing Today.
In this section we will introduce what we will do in this day and we will introduce the knowledge in this small project we will stage.
1–We will make a digital Qatari flag using the Arduino Micro_controller.

2- Then we will discuss what is meant by Micro_Controllers.

3- Micro_controllers are integrated computers on chip that are capable to do heavy tasks but with very restricted ability.
4–We Call them Micro because they are Small.
In this section we will discuss the hardware we will use to build the circuit.
1- To build the Circuit we need the following Parts:

2- LED’s : stands for Light Emitting Diode, Which a circuit part that consume power to emit light.
3- In our circuit we about to build we are going to use 300 LED’s and we will connect them on Breadboard.

4- Then we will talk about coding.

5- For this circuit we will use block coding.
6–We will code the LED’s to blink and also we can add other mode like waving flag.
In this section we will connect the circuit and code it to do the specific task. We will do this circuit on TinkerCAD Platform.
1- Firstly: we need to go to TinkerCAD and give the participant a quick tour how to navigate in the platform and where to find the circuit section, In order to make a new workspace to start making their circuit.

2- Then we will stage the process of how to make the connection “the wiring” and also where to find the component to be added to the workspace.
3- Then we will show them where to find the coding section and what instructions type we have in order to understand the mechanism of block coding in TinkerCAD platform.

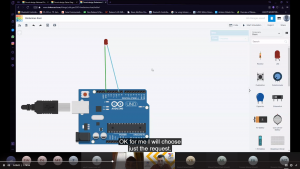
4- Now we will show participant how to code blink LED step by step.

5- This block is a special instruction for pin 13 on Arduino which has an internal LED connected for testing purpose.

6- This Instruction block will make the pin output and change its state whether HIGH or LOW.

7- This is the delay instruction block which will let the Micro_controller to wait.
 8- This is the final looking for the code.
**Note: the above points is just to show the participant how to make connection and how to code using TinkeCAD.
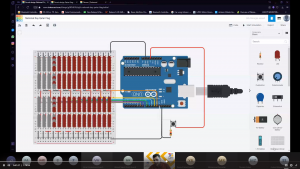
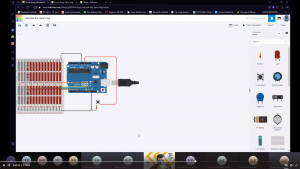
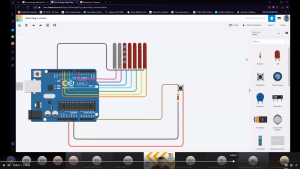
In this section we will show the participant how we built our circuit as this circuit is some how difficult on them to build.
1–We will start by showing the participant the circuit we have built then we will discuss how we built it in order to understand how it works so when we pass the connection for them, they know how to handle it.

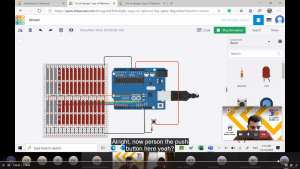
2–We are using a push button here in order to start the circuit when we press it.
3- This circuit will look like a blinking flag.

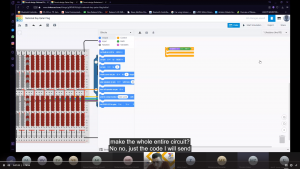
4- Then we will show the participant how we coded the circuit.
5- The code is pretty simple, it looks like blinking one LED as we are connecting each 2 constitutive rows together in order to control them using one command.
6–We will start our code by having an “IF Statement” in order to check whether the push button is pressed or not.

7- Then we will add a repeat function in order to repeat the blinking as much as we want when we press the push button.
8- Then we will start coding the LED’s.

9- As what we have done to a single LED we will do the same for these several ones, we will enable all the rows together to switch the LED’s ON.

10- Then we will Switch the LED’s OFF after a 1-Sec delay by sending a LOW instruction to the Micro-Controller, At the end we will add a delay for 1-Sec to make the blinking LED’s obvious.
11- At the end we will send the Connected circuit to the participant and ask them to code it without the need to build the circuit.
** Note: You may feel its so slow while TinkerCAD simulating the circuit, this is normal as it overloads the restricted flow.
Having trouble? Let us know by completing the form below. We'll do our best to get your issues resolved quickly.
"*" indicates required fields