Digital Textile - SCOPES Digital Fabrication

Lesson Details

Subjects
Age Ranges
Standards
Fab-Programming.1, Fab-Electronics.1, Fab-Design.1
Author
Additional Contributors

You need to login or register to bookmark/favorite this content.

Author

Studio 5
Studio 5
K-12 teacher
In line with the Ministry of Communications and Information Technology’s Digital Youth Strategy, STUDIO 5 is mainly aimed at nurturing youth as digital learners by sharpening their 21st century learning skills, as they develop in an all-pervasive digital environment. In… Read More

Summary

This Is a 5 days Track where we are going to introduce the participant to wearable technology and the advantages provided from wearable to fashion. They will also be introduced to the basics of microcontrollers and how to code it to perform the right task.


Days :

1- Day 1 : Wearable Technology.

2- Day 2 : Circuit and MCU.

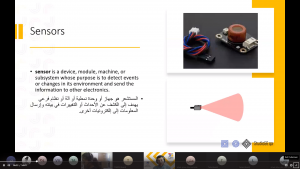
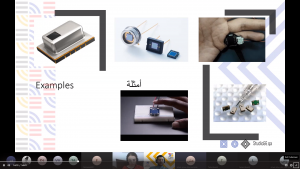
3- Day 3 : L & T Sensors.

4- Day 4 : Input & Output.

5- Day 5 : Project.

What You'll Need

This lesson is unplugged, All of content is online and free.


Presentation Files

Micro-Bit Platform

The Instructions

Day 1 (Introduction)

In this day we will briefly introduce Wearable technology to participant in order to understand the way this technology works. They will also understand the fields this technology involved in, in order to understand the variety of applications of this technology Able to change and affect. Also participant will be introduced to Micro-Bit Platform in order to deliver the knowledge of what is MCU and how it works so they will be able to code the board to create different application.

1-As usual we will start by an Ice braking question to drive their attention to what we are going to deliver.

“Have you heard about Wearable before?”

Most of the participant hears this term for the first time, and they are not aware of this technology.

So we will briefly describe the term for them in the next section.


Wearable Technology

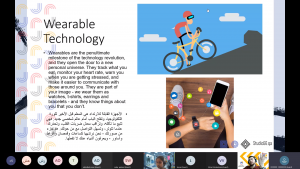
In this section we will introduce the definition of the wearable technology and for what this technology is used.

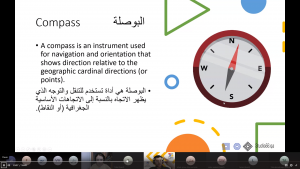
1- Firstly: We will mention what is wearable. “Devices that are comfortably worn and they are mainly used to track and monitor the user health and life style and they look nice when they are worn”

2- Then we will introduce to the participant the term “IOT” which refer to (Internet Of Things).

“This technology is known for connecting all of the available devices to the wide network in order to access them from any point on the globe in any time, mainly we are referring to sensors as they are the main data provider to any network or any device.”

3- Then we will mention the places we can find a Wearable attached to.

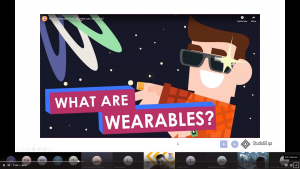
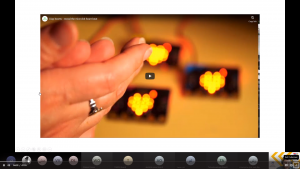
4- Then we will present a video to them explaining what is meant by Wearable technology.

Video Link

Fashion and Wearable

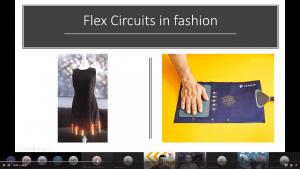
In this section we will introduce the way wearable is used with technology and the how its being integrated in the clothes without reducing the comfort of wearing the clothes. In addition we will go through some of the technology used to let this be real.

1- We will introduce the participant to the flexible fabric and how they are creating it by integrating steel flexible threads in the making process of this fabric and it will remain the elasticity of the fabric.

Video Link

2- Then we will introduce the participant to the flex circuit, where solid integrated chips are being built over flexible boards that can fit within clothes, without bothering the user wearing the clothes.


Micro-Bit

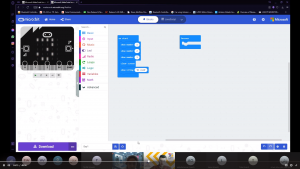
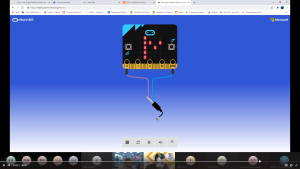
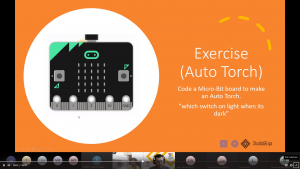
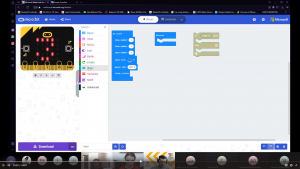
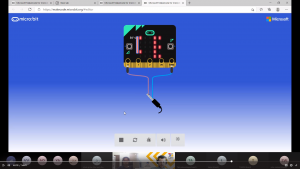
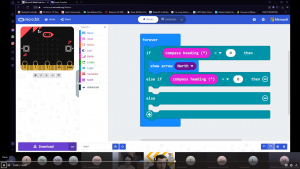
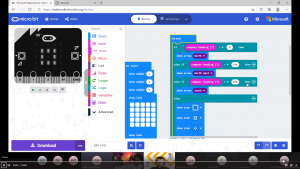
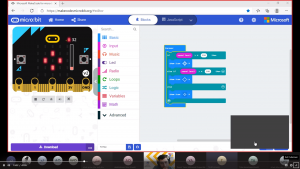
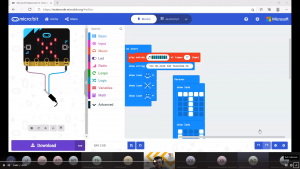
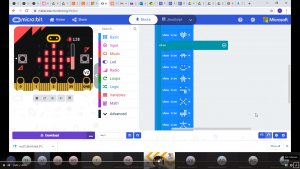
In this section we will introduce the participant to the Micro-Bit board and how it looks in order to understand how to code it on the Micro-Bit platform.

1- We will generally tell the participant what is meant by Micro-Bit board and show them a video that explain the component of the Micro-Bit board,

Video Link

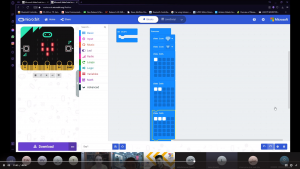
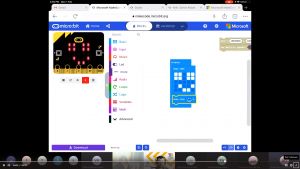
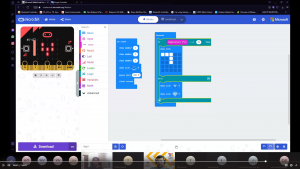
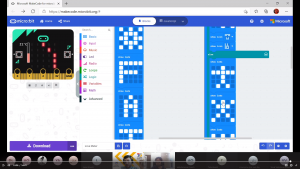
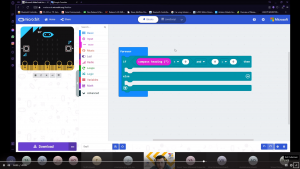
2- Then after theoretically explain what is Micro-Bit we will move to the platform in order to understand how to code the board and also to know the available instructions we can use.

3- Then we will give a quick tour in the platform to the participant in order to understand how it works to start building the codes.

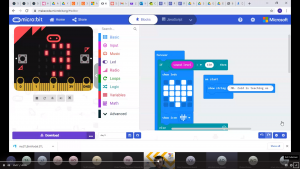
4- We will start guiding the participant to create project by pressing on New Project.

5- Then we will go through the operation of adding the codes and the meaning of the instructions.

6- Then we will go through the Instructions we can build in the platform.

7- Then we will make a little coding application to train the participant on how to use the platform.

Day 2

In this day we will recap the previous day information and we will briefly explain Circuits and microcontroller to participant.

1- As Usual we will start by recap last day knowledge and try to involve the participant in making the summery.

2- Then we will direct an ice breaking question to introduce the day topic.

QA :How is your life is going to look without electricity.

“Most of them will keep saying that electricity comes with life”


Electricity & Circuits

In this section we will briefly describe what is meant by electricity and circuits and introduce the participant to some application in fashion made using circuits.

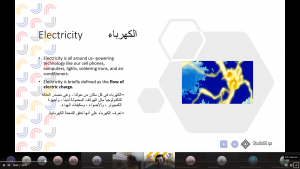
1- Electricity is briefly the flow of charges from point to another.

2- Then we will mention what is circuit and how circuits are the basic of any device to ensure the power is being delivered to the loads (Bulbs, LED’s, Motors, and speakers).

3- Then we will explain the basic switching technique which is the mechanical cutting of the circuit.

4- Then we will go through some examples in fashion that are using some parts of circuits.


Micro-Controllers

In this section we will introduce the micro-controllers to participant by explaining the computer and reflect on MCU.

1- We will ask the participant about what they know about the computer.

“Most of them will say that computers are for fun and gaming, small percent will go for education and how its can replace school”

2- We need here to explain that computers are devices used to process data and make actions upon what the user want.

3-Then we will reflect all computers abilities on MCU’s but however it will remain with restricted abilities but with very small size. briefly “Miniature computers “

4- Then we will stage a video for them showing what is meant by MCU’s and how it works.

Video Link

5- Then we will list some examples for MCU’s that can be used for wearable.


Software

In this section we will introduce the software and how codes are the base for any application.

1- We will introduce the software for the participant as instructions written by user to tell the computers what to do.

2- Then we will list for the participant the difference between the two coding types.

  • Text Coding : Professional way of coding that used to code any application.
  • Block coding : Is a picture coding where each block contain an instruction and its the first step to be pro. in coding.

3- Then we will introduce the participant to the IF statement, Which i can confirm no program devoid it.

Practice

In this section we will introduce the participant to what they are going to do in this day.

1- We will start by showing the participant the application we will do to day, as we are going to make an Auto torch.

2- We will start by coding the on start loop as and initialize illuminating process.

3- For the On start loop.

4- Then we will code the forever and add the if statement.

Day 3 ( L & T Sensors )

In this day we will start recapping last day information and we will go through today topic about Sensors and example about some of the sensors and their functions.

1- We will ask the participant about the human senses?

“Which is 5 senses :

  • hear
  • sight
  • taste
  • smell
  • touch

These are the senses do interact with the surrounding of the human.”

2- Then we will reflect the idea of collecting the data and send it to the brain; to the sensors of the MCU’s where it reacts with the surrounding and send the data to the MCU Core to be processed.

3- Then we will stage a video for the participant about Sensors.

Video Link

4- Then we will list some sensors used in wearable technology.

  • Temperature sensor
  • Light sensor
  • Heart rate sensor
  • Touch sensor
  • Microphone

5- Then we will introduce the push button as the basic switching mechanism.

6- Then We will explain the light sensor for the participant as a sensor to sense the existence of the light and tells the MCU the intensity of that light coming up to the surface of the sensor.

7- After the light sensor we will explain the thermal sensor (Temperature sensor) which is a sensor to measure the surrounding temperature.

Conductive Ink

In this section we will ensure that the participant do understand the variety of the material used in building circuits, especially customized circuits for fashion which requires to be light and flexible to move.

1- We will introduce them to the conductive Ink material, which is a conductive material that allow the current to flow from point to another, and it also enhances the circuit that is being connected using this ink by being so light and flexible to move.

2- Then we will stage some example on the conductive ink and show the participant the way this ink is being used.

3- Then we will introduce some example in using this ink in fashion especially in making shiny looking circuits.

Practice

In this section we will inform the participant what we are going to do in this day and how we are going to code this circuit step by step.

1- We will start by recapping the instructions we delivered in the previous day and ask the participant about it.

2- Then we will inform them about the circuit we are going to build and the sensors we are going to use in order to code the Board.

3- We will start delivering the code Step-By-Step and also insure the participant understand the way of how to build conditions.

4- Then we will show them the On-Start loop to make an initializing animation for the board.

5- Then we will code the Forever Loop to build the If Statement and the conditions.

6- Then we will give the participant the needed time to build the code and insure they are understanding the way of building codes.

Day 4 (Introduction)

In this day we will introduce the participant to the input and output devices and how distinguish between both. We will also introduce them to the compass in order to understand how it works and to code one.

1- We will start by summarizing what we had done in the previous day in order to refresh them and make sure that they still able to code using the if and building conditions.

2- Then we will reflect input and output from the human body on the computers, by refreshing them with the senses we took previously and let them guess whether its an Input or Output.

3- Then we will stage a video for the participant to explain more about the input and the output.

Video Link

Output devices and fashion

In this section we will discuss some Output devices and its uses in fashion.

1- We will start discussing the LED as the basic output device that is being used with any wearable in fashion.

2- LED is a device do emit light “changing the electricity energy into Light”.

3- Then we will try giving some examples about LED’s with fashion.

4- Then we will discuss the loud speaker for them in order they can understand that any application can be integrated in fashion.

5- Also the participant will understand that the speaker is an output device convert electricity into vibration.

6- Then we will show the participant some examples for speakers integrated in clothes.

7- Then we will explain the compass for the participant and deliver the way the compass works and how to make one also.

8- Then we will show them a video that summarize all what we said.

Video Link


Practice

In this section we will introduce the participant to the code of the compass and how to build it using very simple code.

1- We will start recapping the instruction of the previous day to refresh their mind.

2- Then we will introduce them to the circuit we will code today and the final result look.

3- Then we will start the Step-By-Step coding of the compass.

4- We will ask the participant to build their own On-Start loop and we will then go for the forever loop to be built, during building the code we will introduce the “AND”, “OR” conditions which their result is boolean (True Or False).

5- “AND” function is like :

Image result for and table logic


Briefly “If Me and you are in the class so both of us must be in the class it won’t take a second choice”

6- Then we will let them understand the meanings of the angles where 0 direct on the North, 90 on East, 180 on South, 270 on West, and 360 is equivalent to 0 degree.

7- Then leave a good space of time for them to build the code.

Day 5

In this day we will show the participant some reference projects in order to understand that we can direct the knowledge towards doing something useful.

1- We will recap what we learnt in the previous days and refreshing them with the instructions about how to use the loops and the if statement with conditions.

2- Then we will show them what we have made during the previous days.

3- Then we will stage some real applications has been made using Micro-Bit Board.

Video Link

Video Link

4- Then we will encourage the participant to make one of these applications or they can make one on their own.


Standards

  • (Fab-Programming.1): I understand the basic structure of a simple program and can modify values, variables, or other parameters to alter its output, function, or behavior.
  • (Fab-Electronics.1): I can follow instructions to build a simple electrical circuit using conductive material, basic components, and power.
  • (Fab-Design.1): I can be responsible for various activities throughout a design process within a group under instructor guidance.

Lesson Feedback