Drawing techniques: Orthographic projection – SCOPES-DF

Lesson Details

Subjects *
Age Ranges *

Author

David Fernandez Menendez

Summary

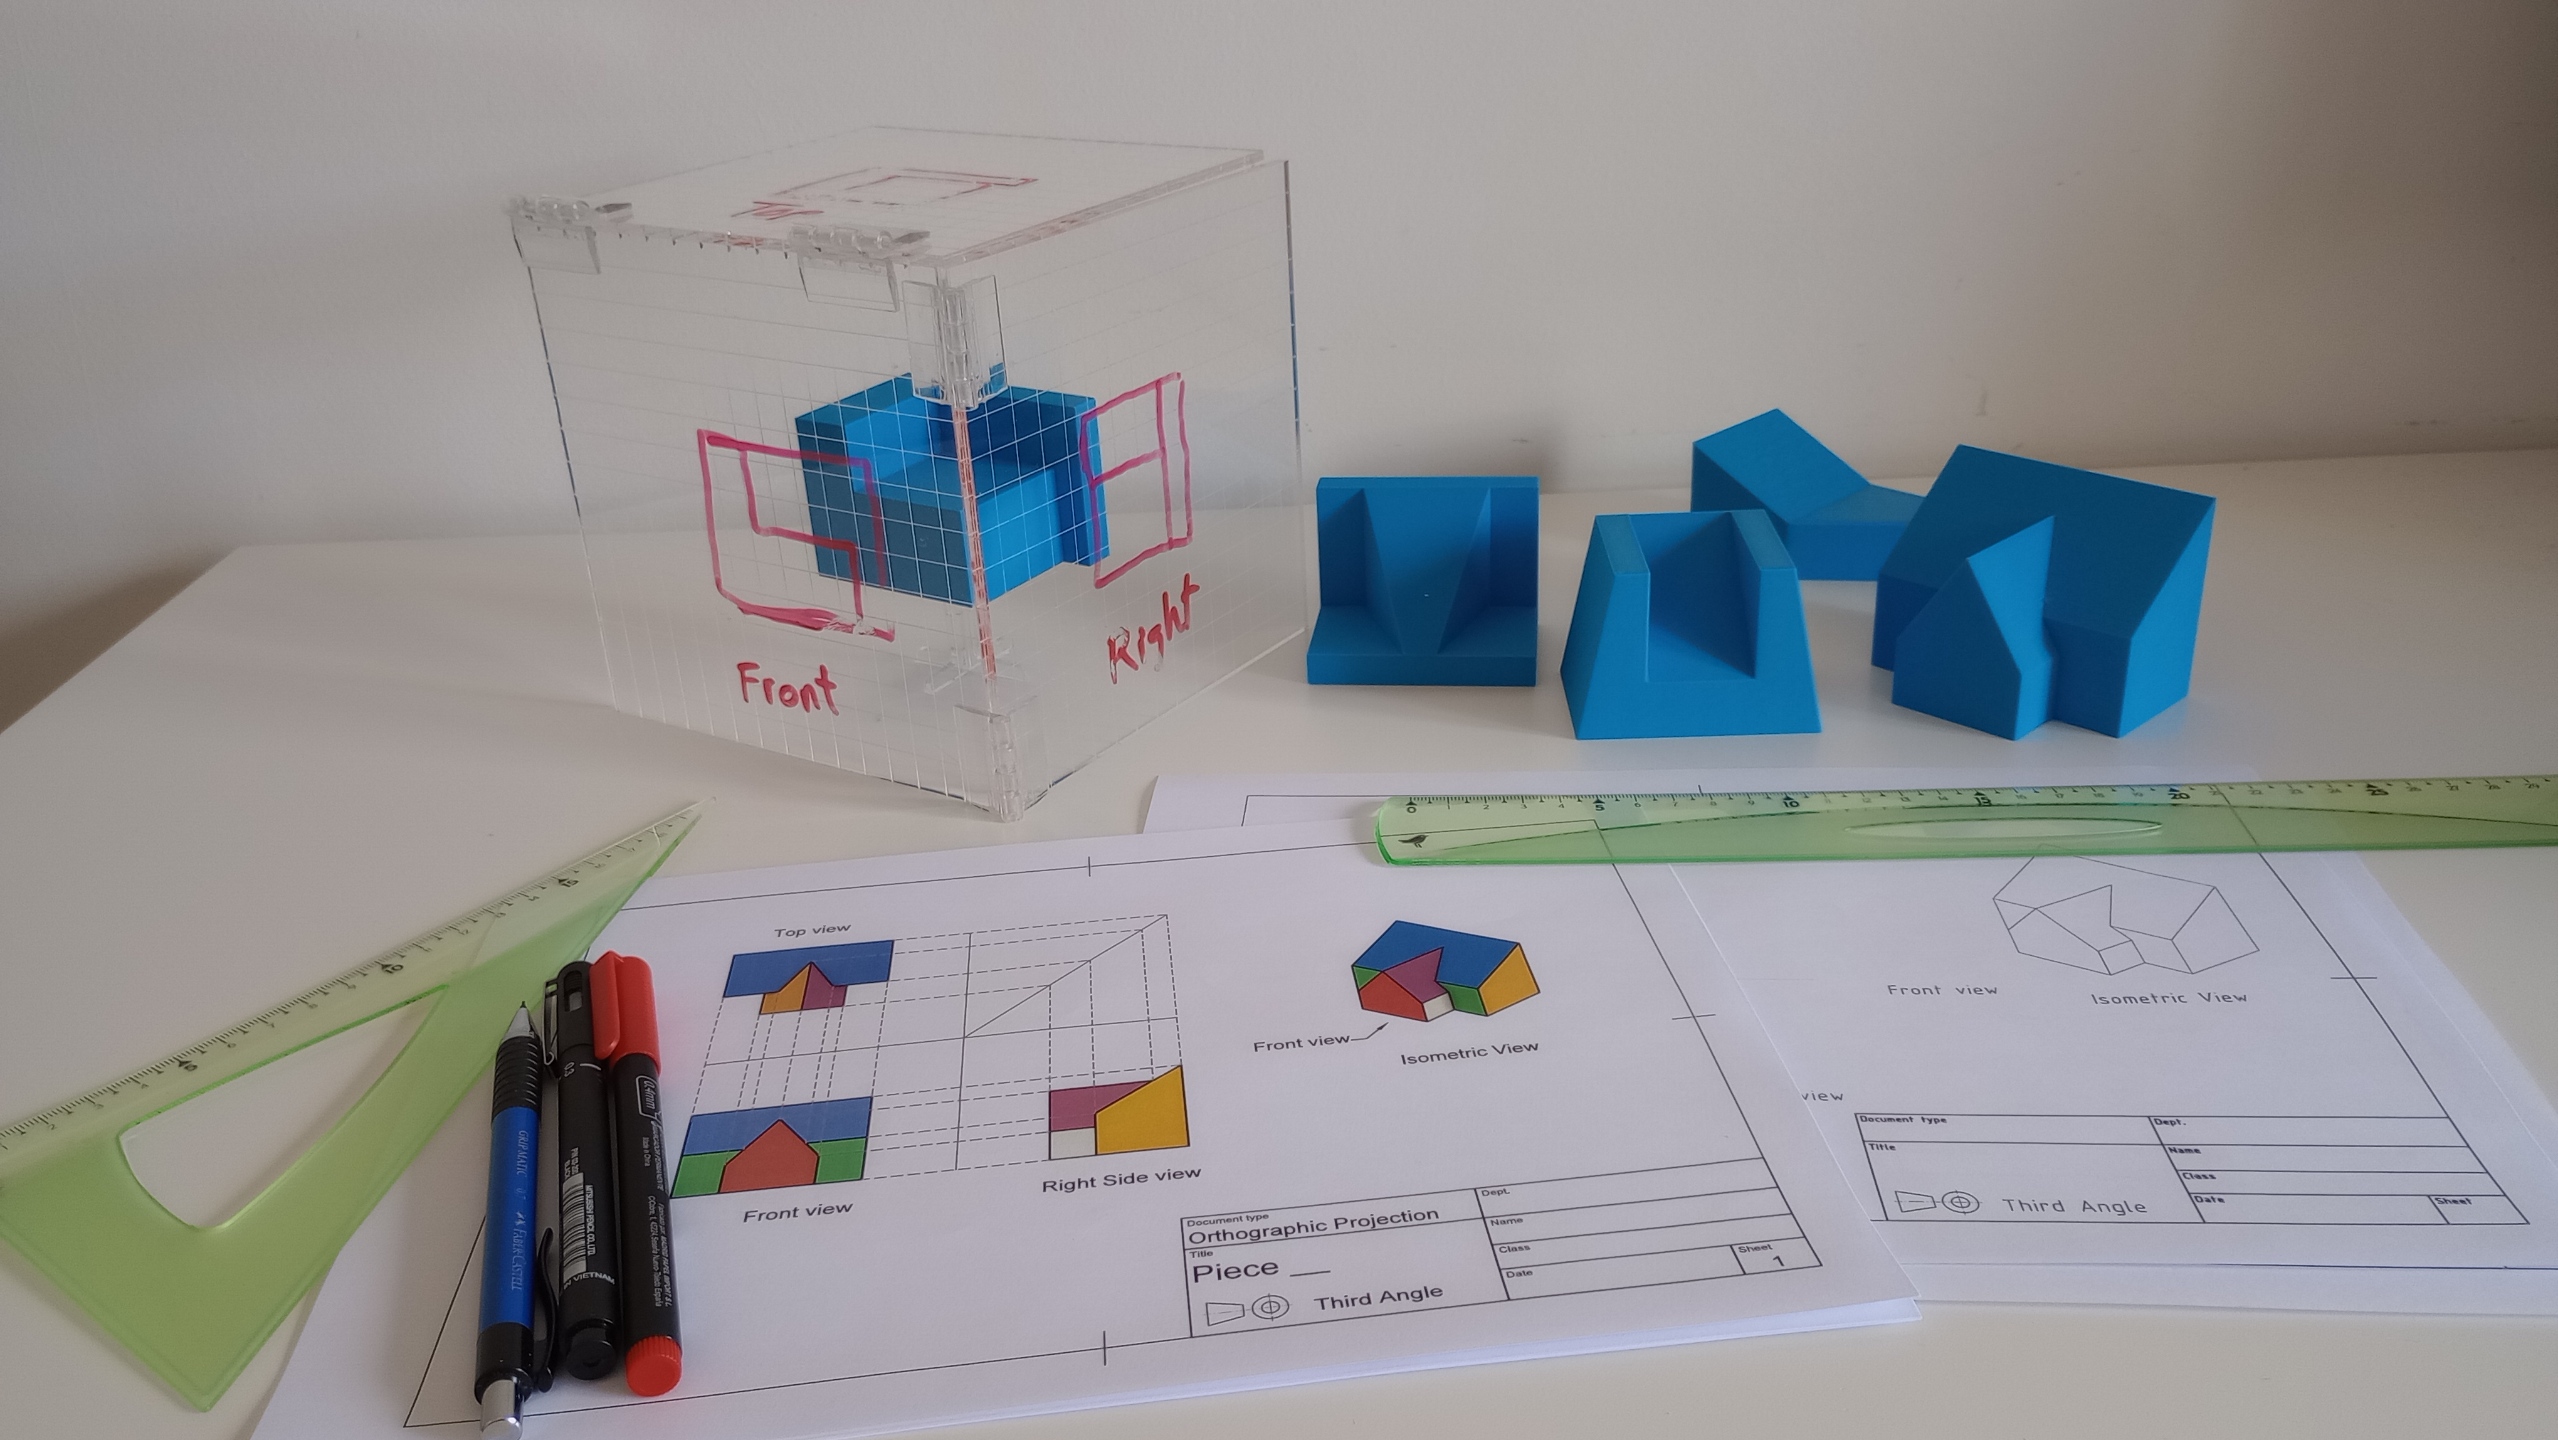
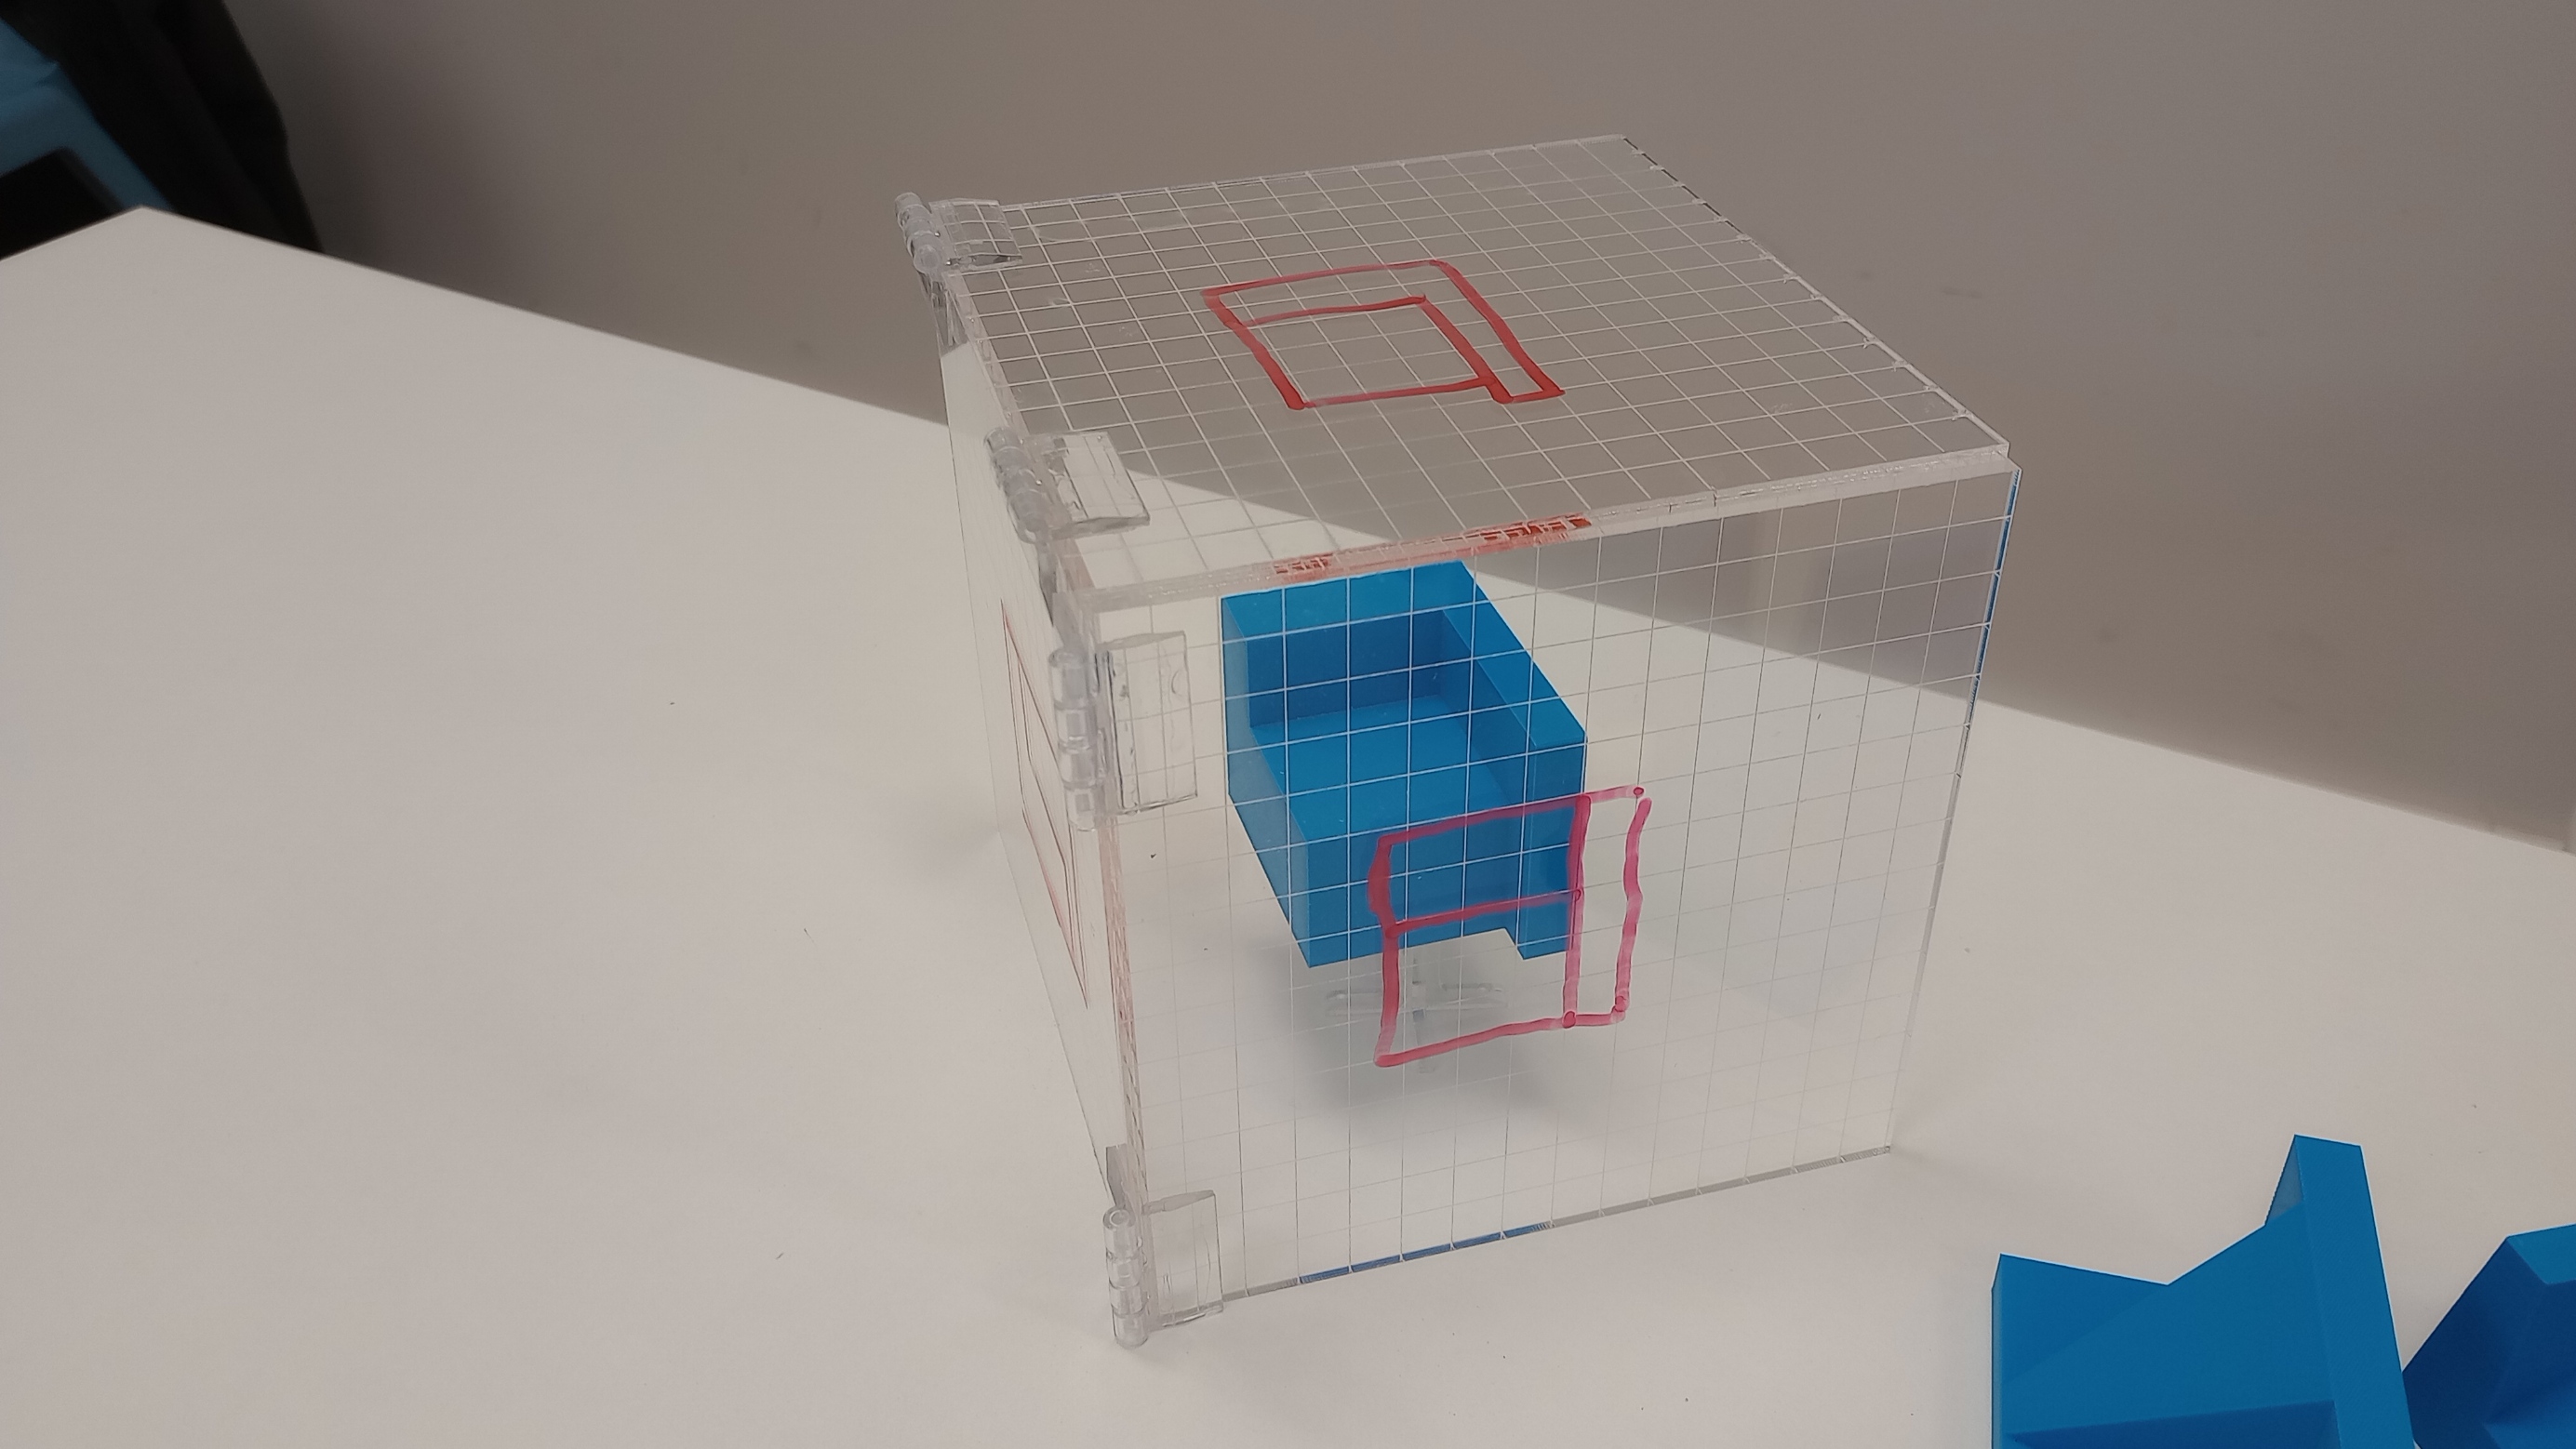
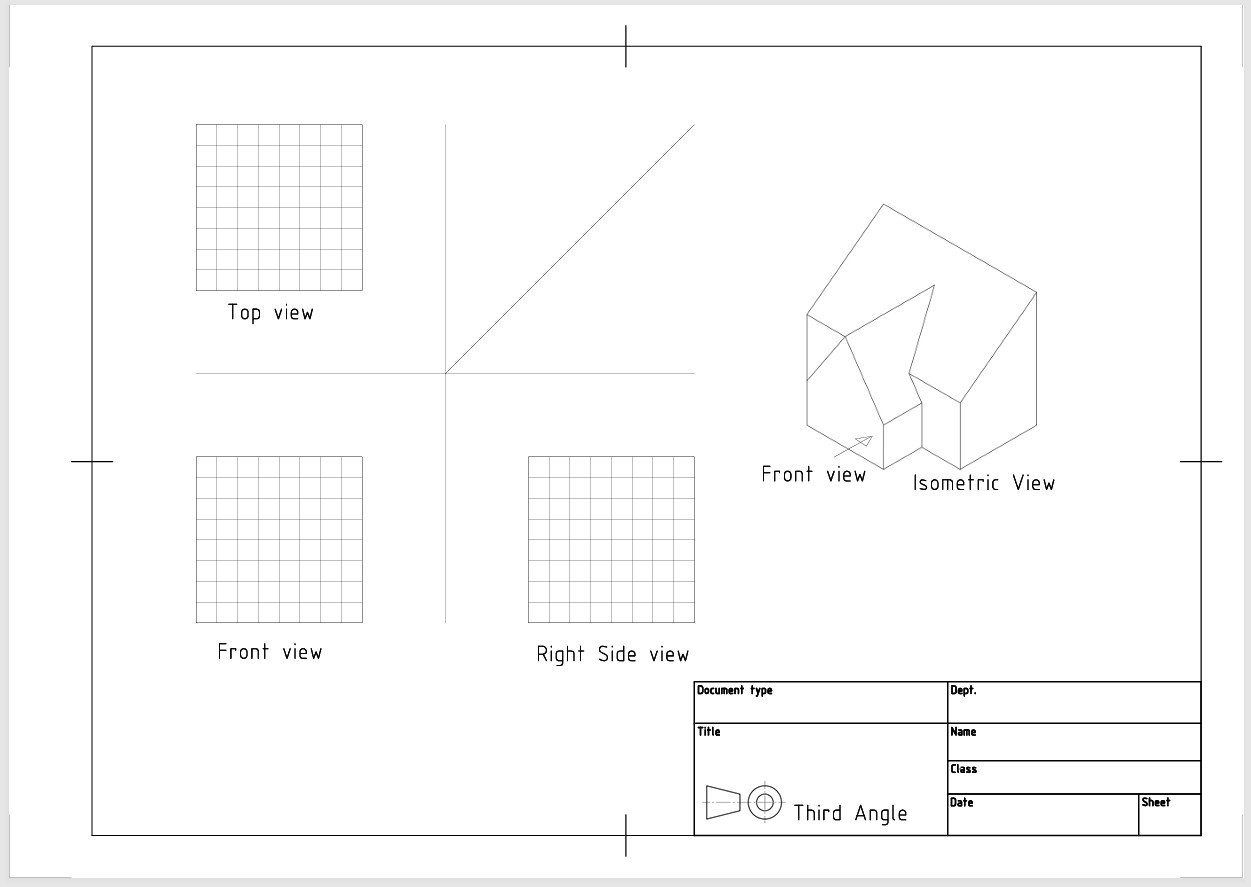
Students learn to draw orthographic projections using the three principal views of an object (front, top and right side view). We use the glass-box concept to show how views are projected onto the planes and then unfolded to present them on a 2D sheet. Working in groups, students receive a set of 3D-printed parts and worksheets to practice third-angle projections and isometric views

What You'll Need

  • Worksheets to draw orthographic projections
  • A set of 3d printed pieces per group (files included)
  • A glass box (files included) made of clear acrylic and laser cut
  • Markers, pencils, fineliners
  • Ruler and set squares


Learning Objectives

By the end of the lesson students will:

  1. Understand the use of multiple views (front, top, side) to represent a 3D object on a 2D plane
  2. Be able to draw an isometric view of a piece.
  3. Taking accurate measurements and using scales.


Reflection

  1. This topic is usually taught using direct instruction supported with some demonstrations, presentations, and worksheets. I’ve found that many students struggle to grasp how an object can be defined by its orthographic projections. Interacting with tangible pieces and the “glass box” in the early stages helps students develop their spatial perception, find the faces and edges, and visualize how to project onto the planes of the box and unfold it. Additionally, they are actually measuring the pieces and drawing them, which helps with concepts such as scale and proportion. I feel that making the lesson a more interactive, hands-on experience helps engage students and makes it less abstract.
  2. It requires initial time to fabricate enough pieces and planes for each group, but on the positive side, they can be used many times. It may also require simpler pieces and more complex ones to build differentiation into the lesson.
  3. Access to digital fabrication tools is a great opportunity to make your own tailored teaching resources, make lessons more engaging, making you reflect the way learners interact with tools. I think it can even have the potential to change the way you plan and deliver your lessons.


The Instructions

Demonstration of Orthographic projections using a glass box

Students in groups will use a physical “glass box”, to understand how to project views of an object (using 3rd angle projection) and represent them on a 2D plane.

  • Teacher demonstrates how to use the glass box to project the 3 main views (front, top and right side views) and turn them into a 2D plane.
  • One of the pieces is placed with the support so the front view of the piece is on the front view plane.
  • Using a marker draw the projections of the piece onto the planes.
  • Open the glas box to demonstrate how the projections are placed on a 2D plane.
  • Students work in groups
  • Each group gets a glass box and 5 pieces.Have students to repeat the process with one of the pieces.
  • After using the glass box students draw the orthographic projections on a worksheet. They need to take measurements and draw them to scale 2:1 on the worksheet.


Creating Orthographic projections using real pieces

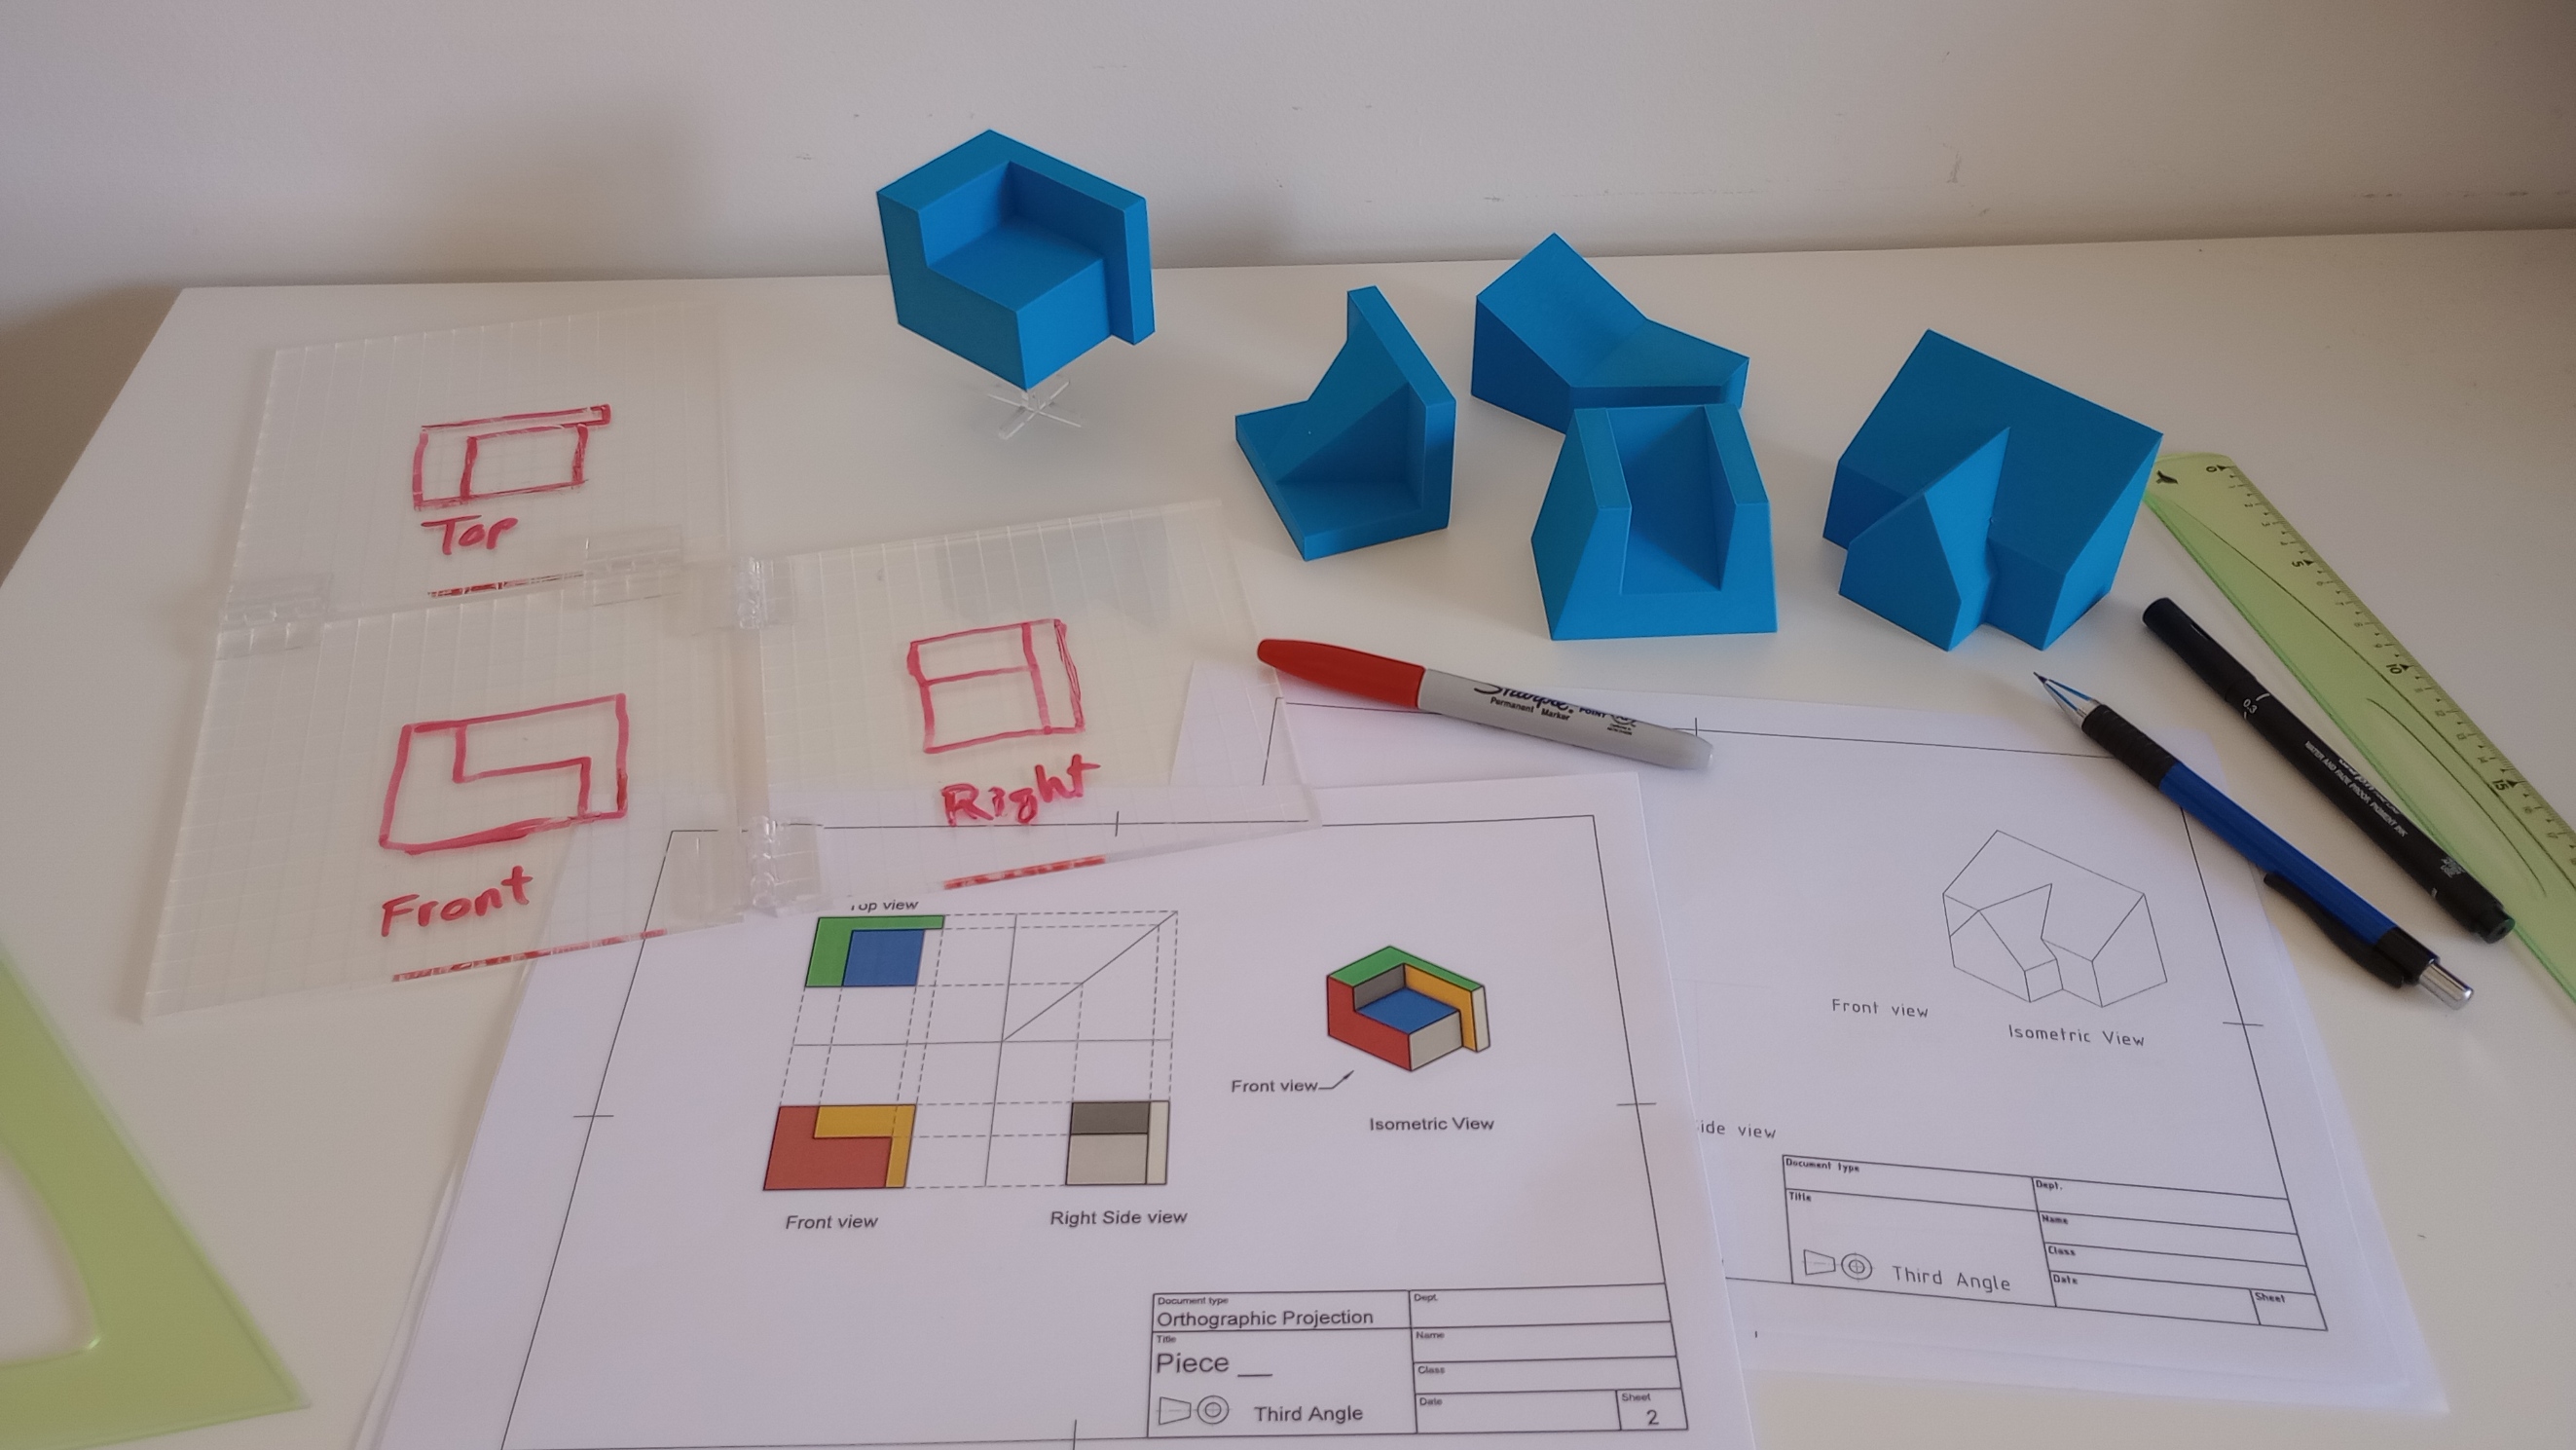
Students use actual pieces and worksheets to draw their main orthographic projections

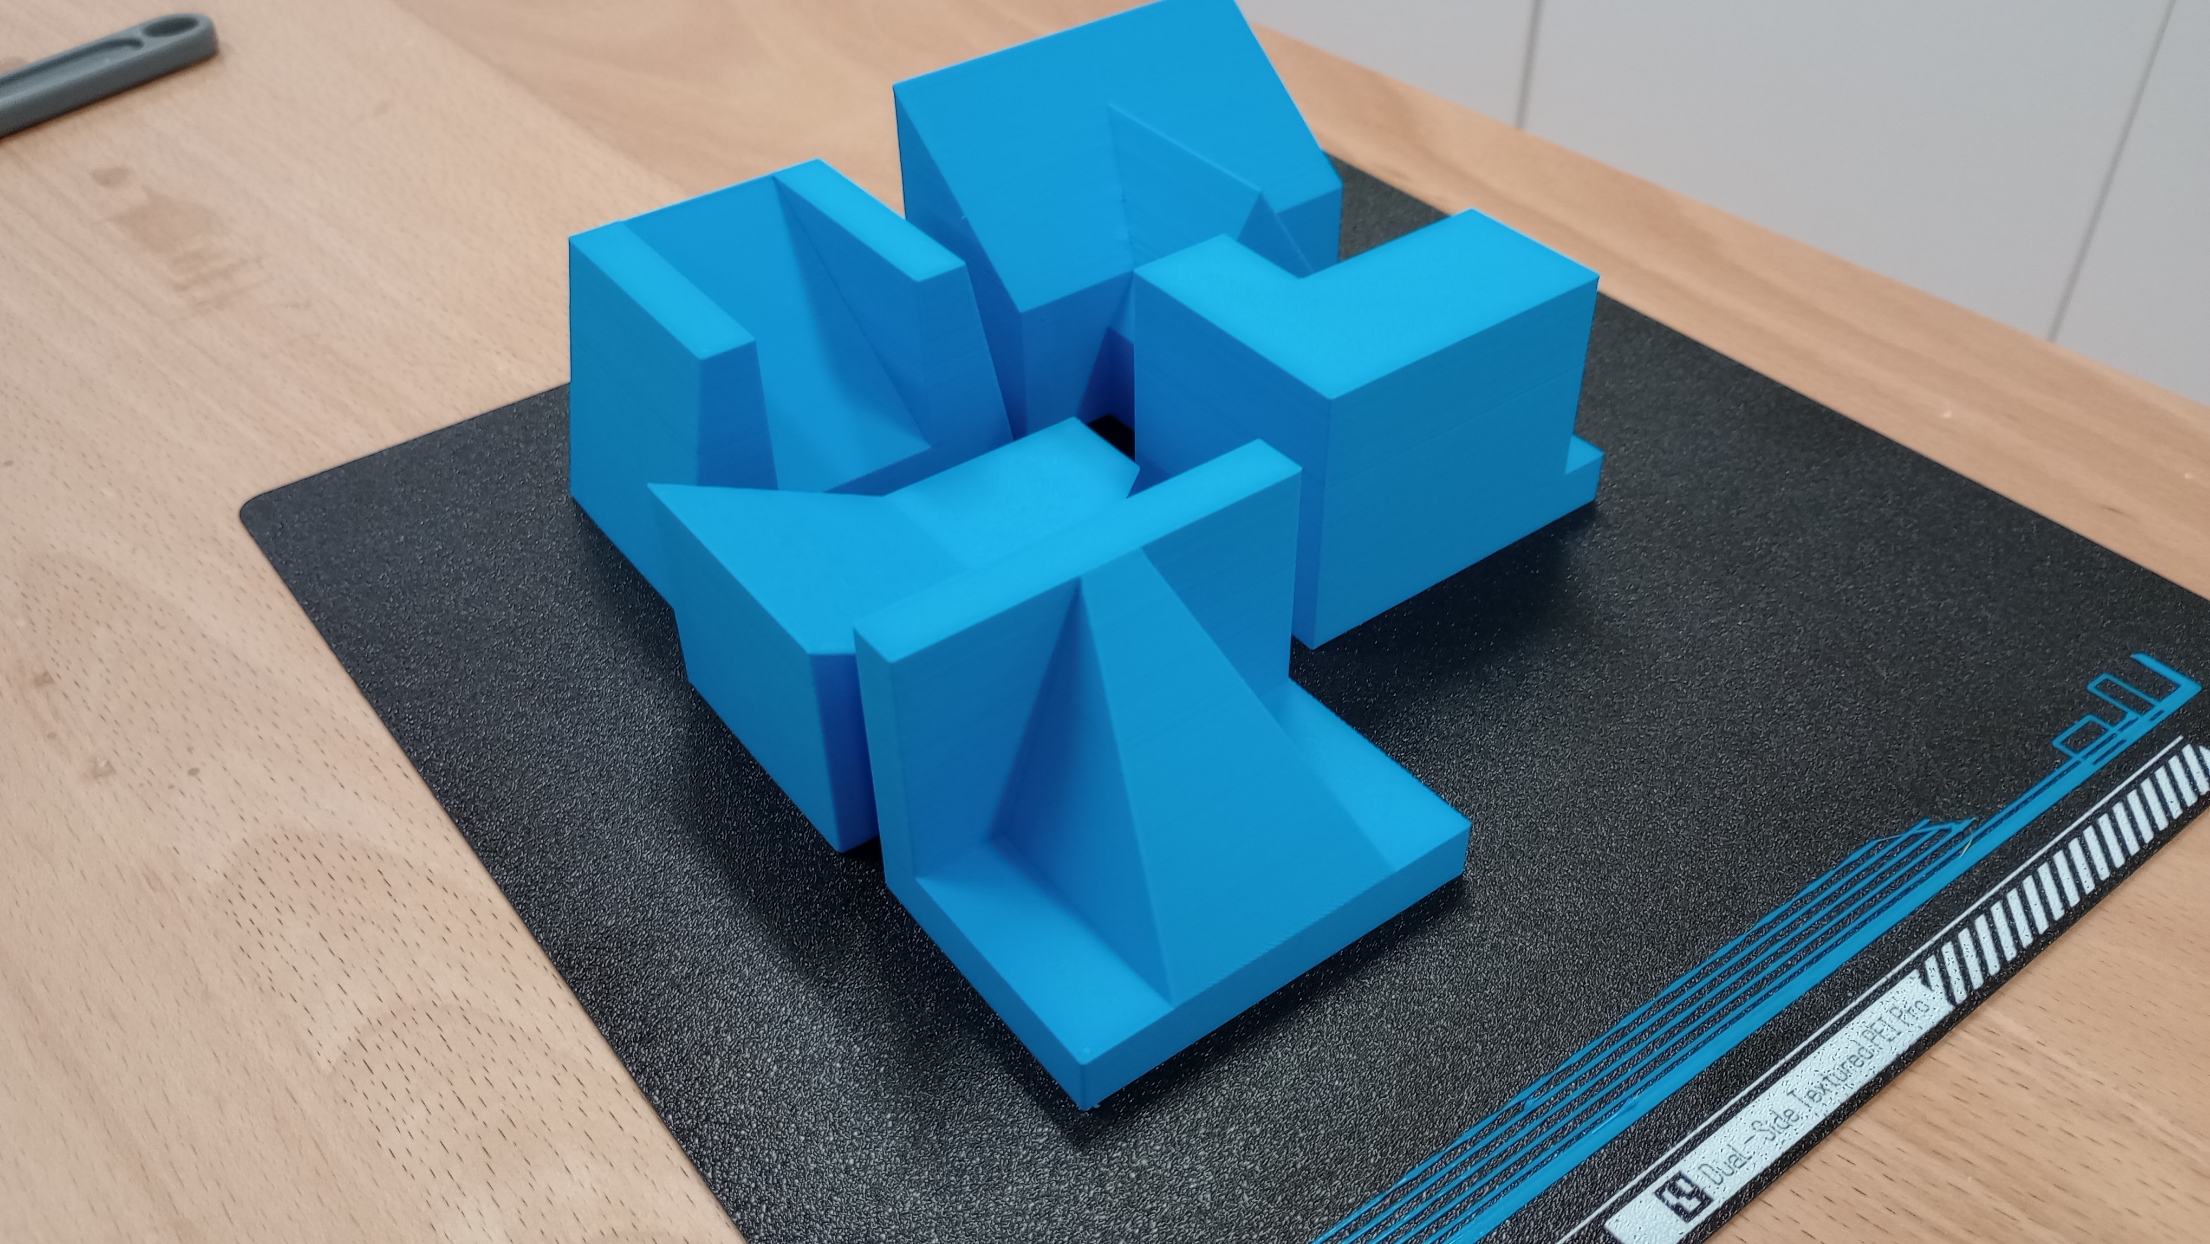
  • Students use the remaining 3D printed pieces to draw their orthographic projections (3rd angle projections) on the worksheets

  • They start by drawing the visible features of the front view.

  • Use constructions lines to project features to the top and side views. 

  • Use the 45 degree line to project geometry from the top and side views.


Lesson Feedback

Contact us

Having trouble? Let us know by completing the form below. We'll do our best to get your issues resolved quickly.

"*" indicates required fields

This field is for validation purposes and should be left unchanged.
Name*
Email*
?