- Loading…

Fabricating shoes presents fun opportunities for student to learn principles from design and mathematics while they explore digital fabrication process such as 3D modeling for 3D printing, laser cutting for mold making and casting, along with sewing, sketching, and making assemblies.
In this one-week intensive project the students are challenged with a variety of design and production tasks that can be linked with simple yet foundational mathematics. From their rubber outsoles to their foam insoles to their fabric uppers shoes embody complex geometric forms and assemblies that necessitate challenging degrees of volumetric and material-based thinking. Digital fabrication methods empower students to iteratively work between digital and analog representations.
As presented here this workshop focused on learning techniques for linking different types of software with various fabrication machines for working through a multi-stage design process. Daily documentation practices should be established so that students can see and reflect upon their progress and iterate through ideas.


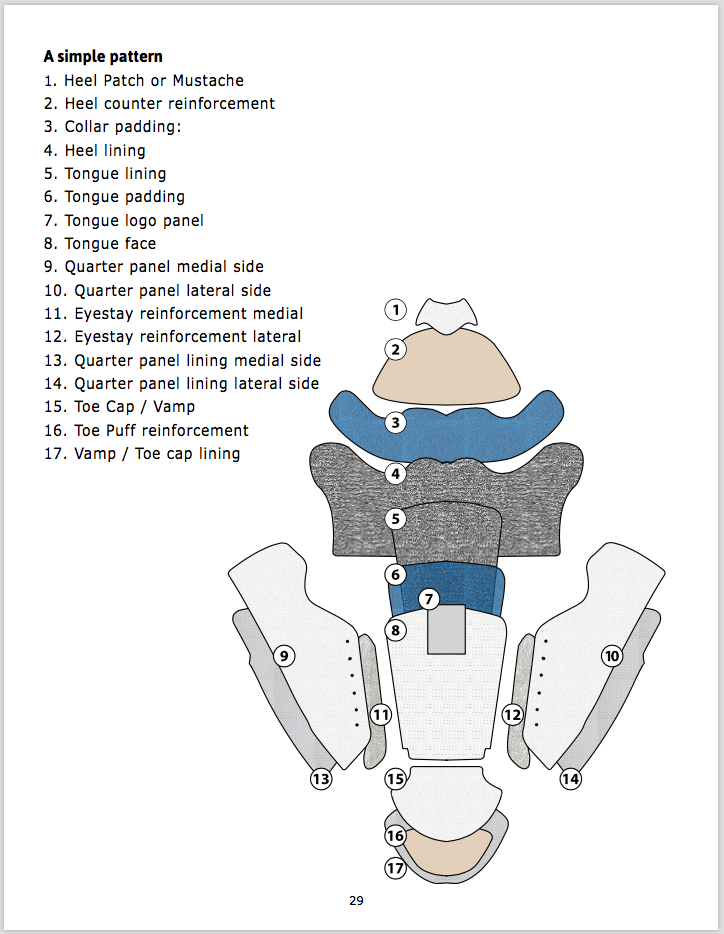
Start with broad research of shoe types, materials, and manufacturing methods. Encourage students to document their research through visual aids like sketches, pictures, and diagrams. The shoe uppers, typically made from numerous fabric panels, are often complex. Encourage students to keep things simple as they start off designing their own patterns.
Retreived from: https://sneakerfactory.net/sneakers/2018/03/what-is-a-shoe-pattern/
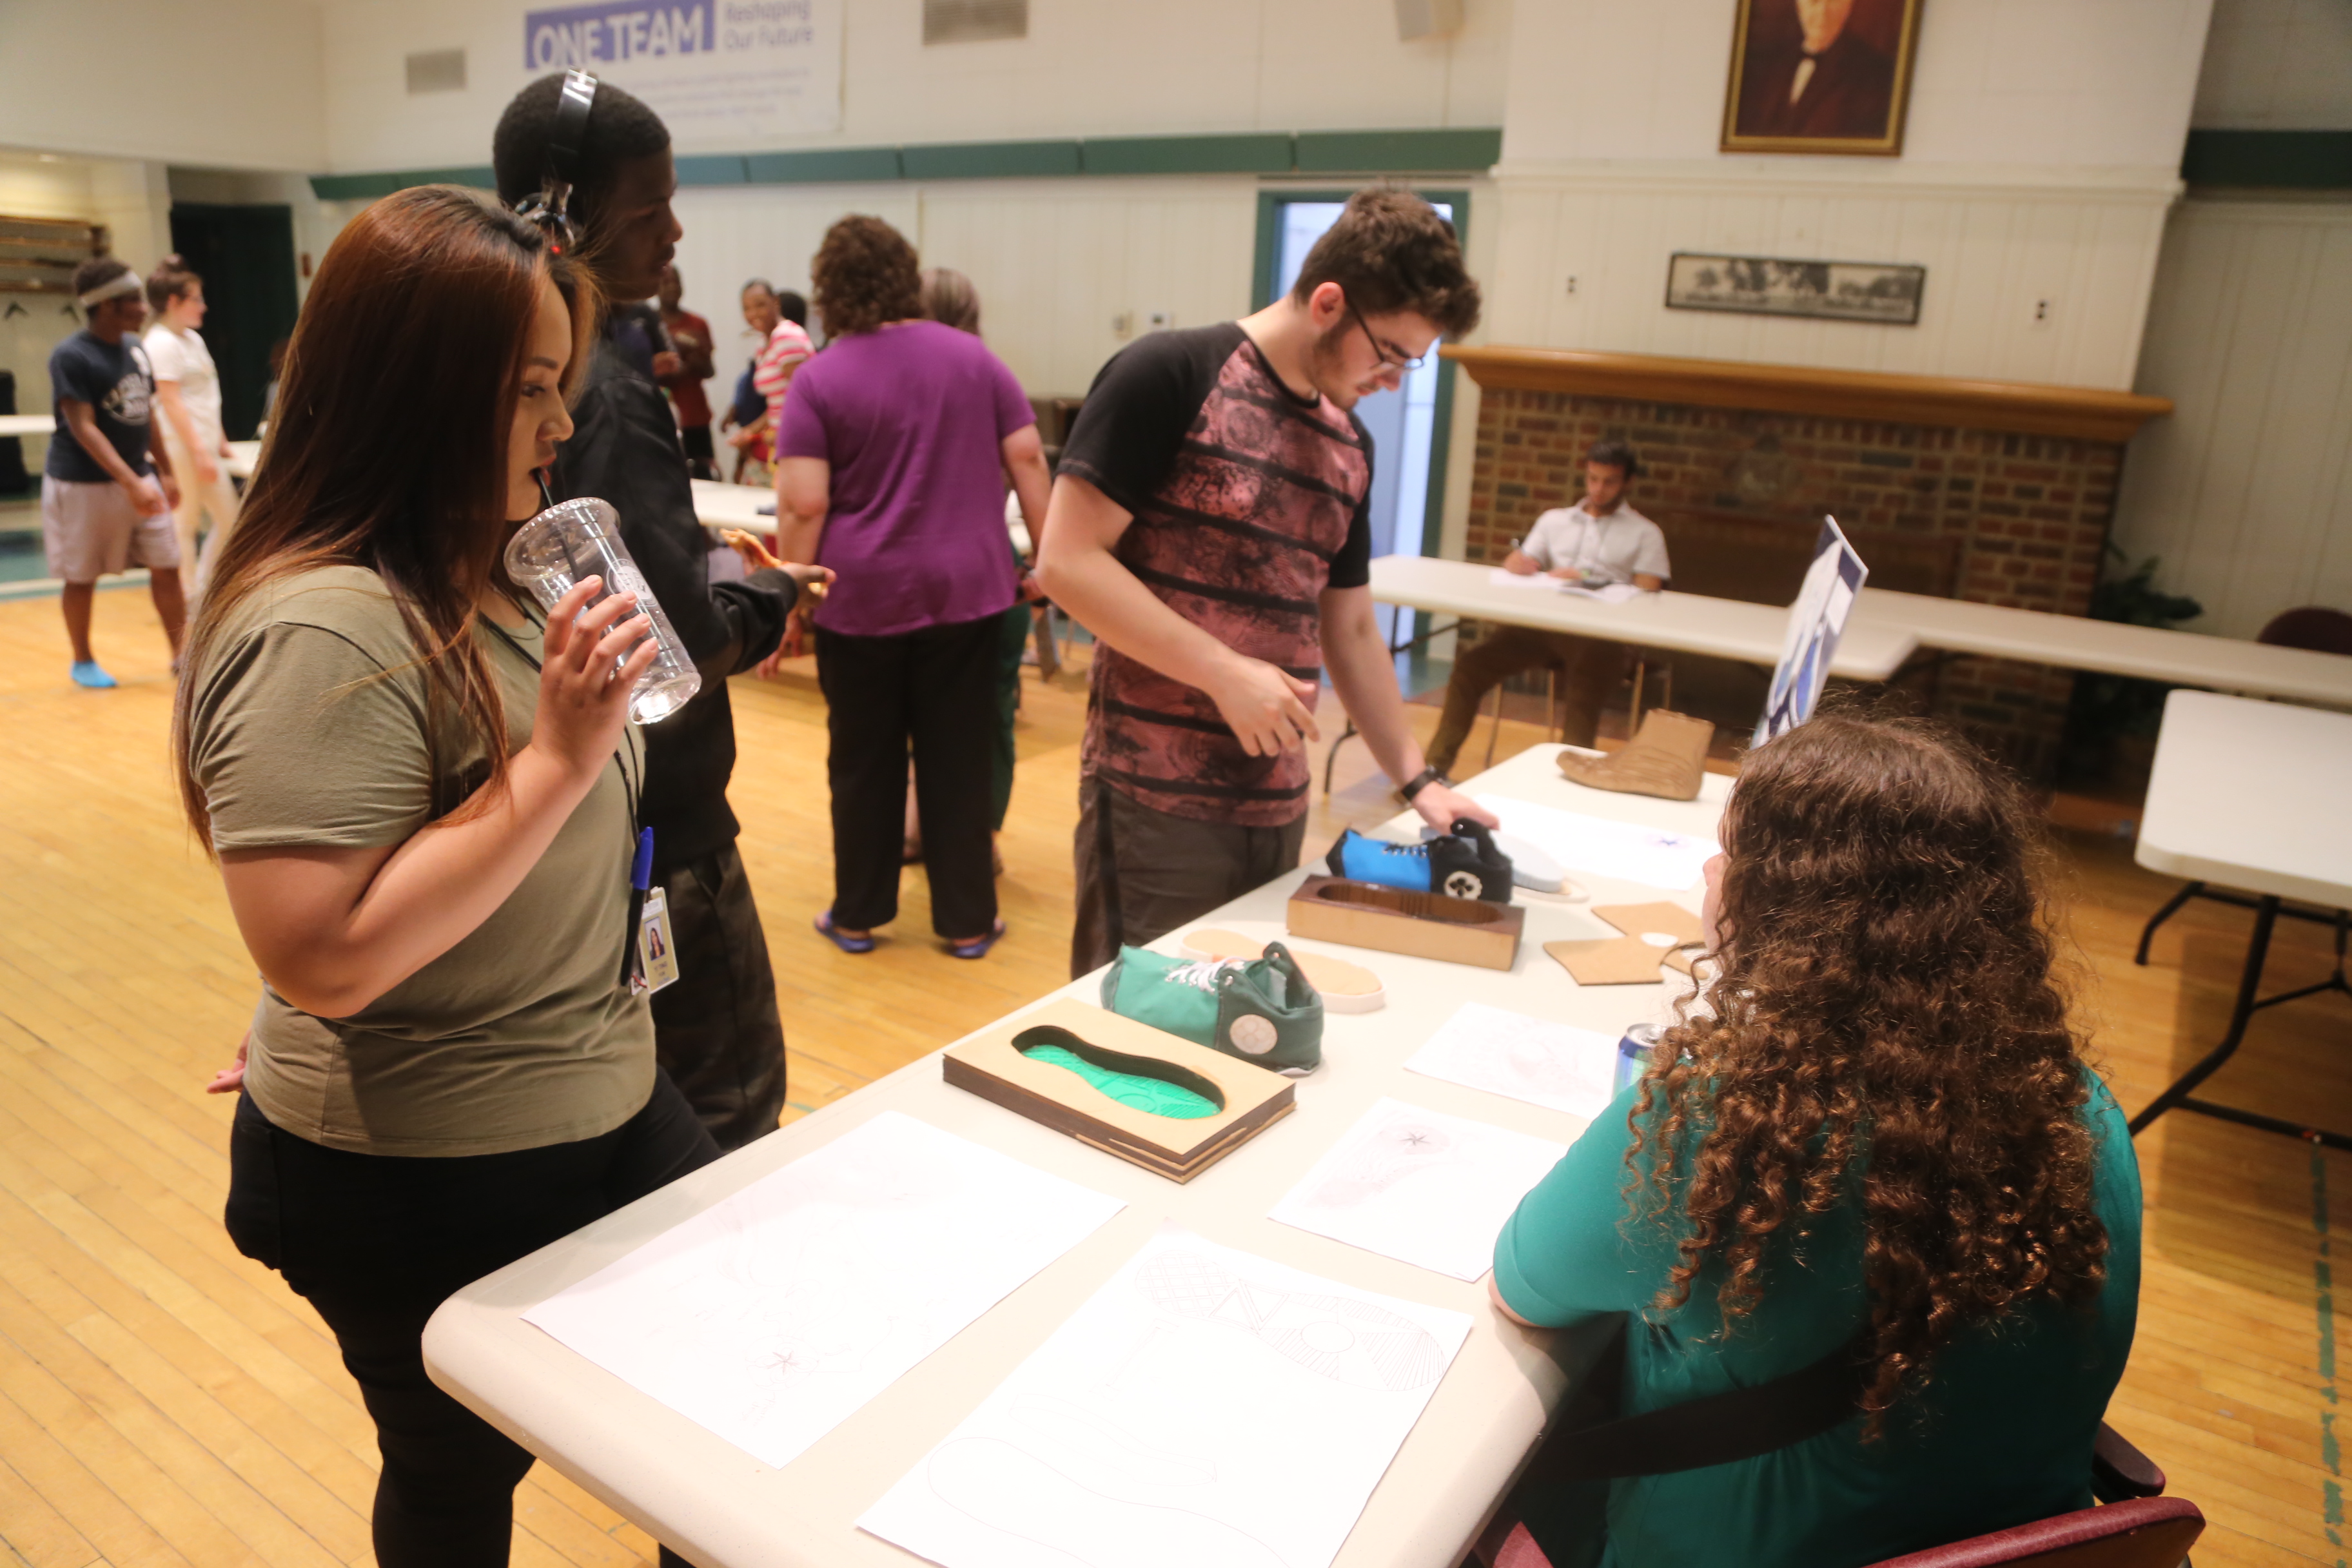
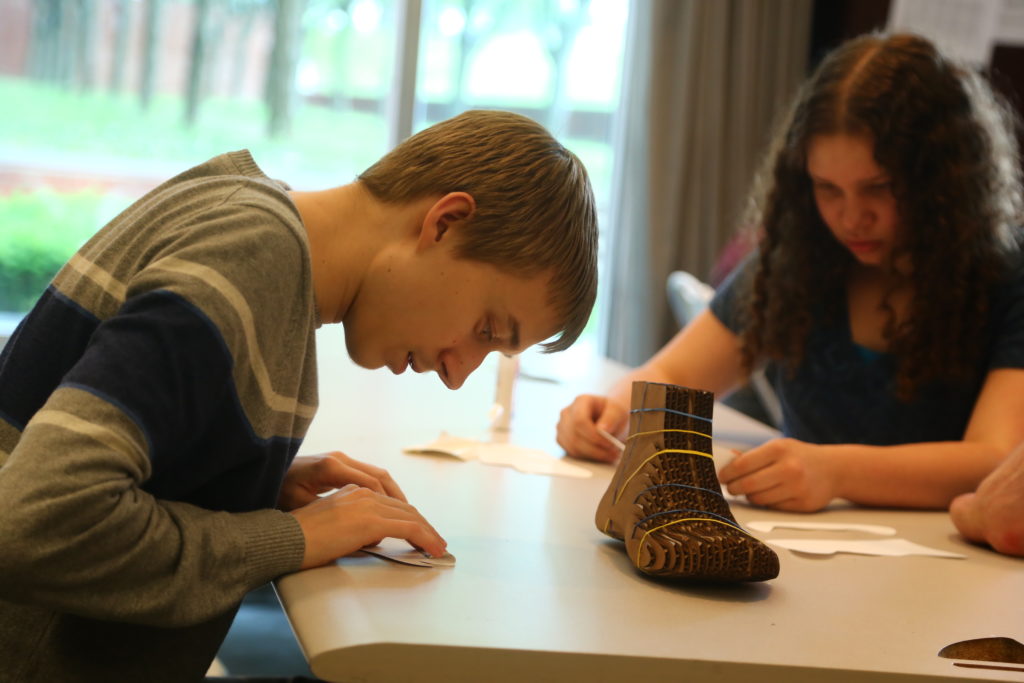
Students are challenged with making design choices from scratch so encourage them to find inspiration through their own personal styles and functionality requirements. Have students break down their shoes into their components such as the outsole, midsole, insole, uppers, etc. Tasks can be divided up amongst students.
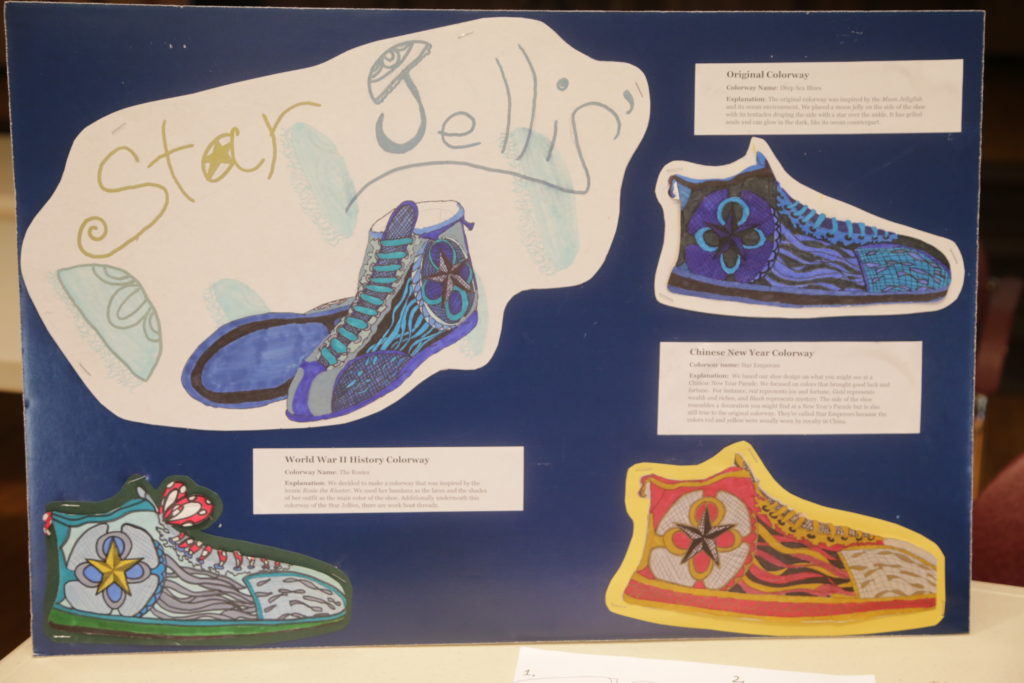
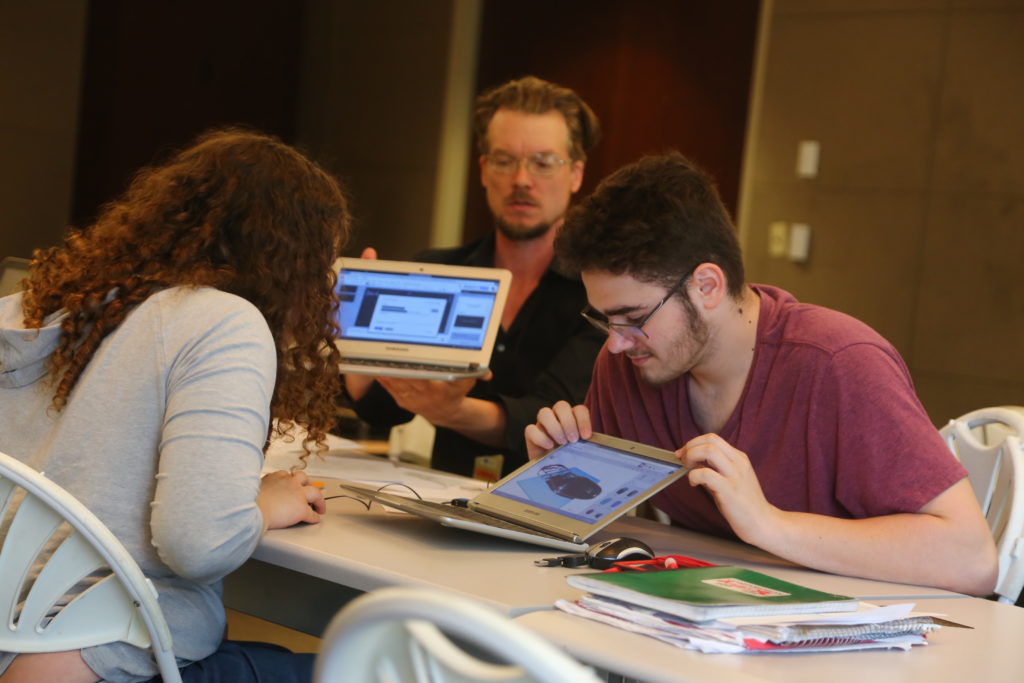

Students can sketch a tread pattern that can be digitally photographed and imported into 3D modeling software such as AutoDesk TinkerCAD. In TinkerCAD students can extrude 2D vector drawings into 3D forms.
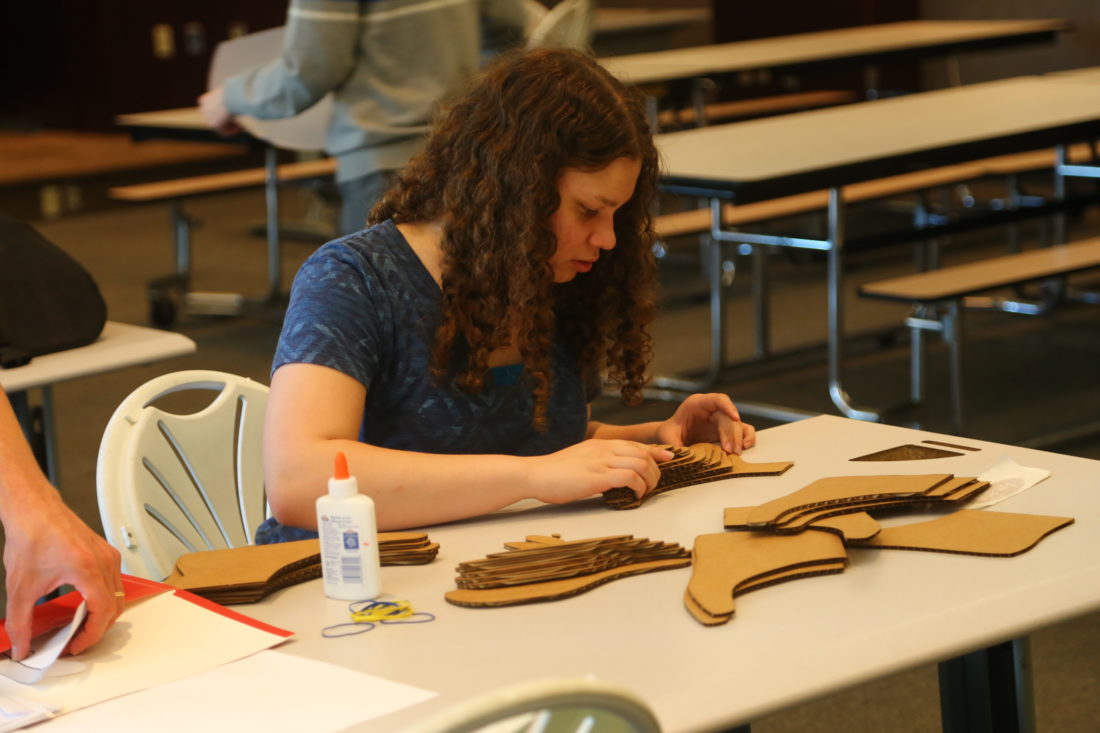
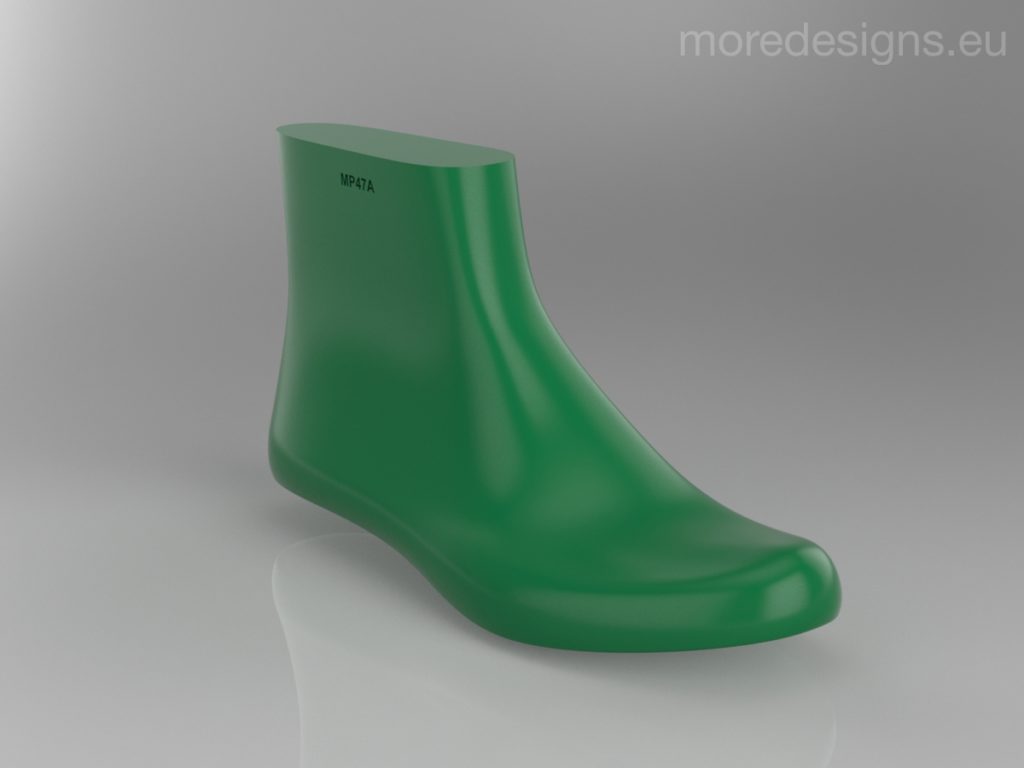
Construct a shoe last (a generic foot form) which will help in the assembly of the upper fabric panels. Students can either scan their own feet to generate a unique 3D form or numerous 3D models can be found online.
The shoe last can be sliced into thin layers in various software such as AutoDesk Fusion 360 or Rhino 3D. These slices can be laser cut in cardboard and assembled through layered manufacturing techniques.

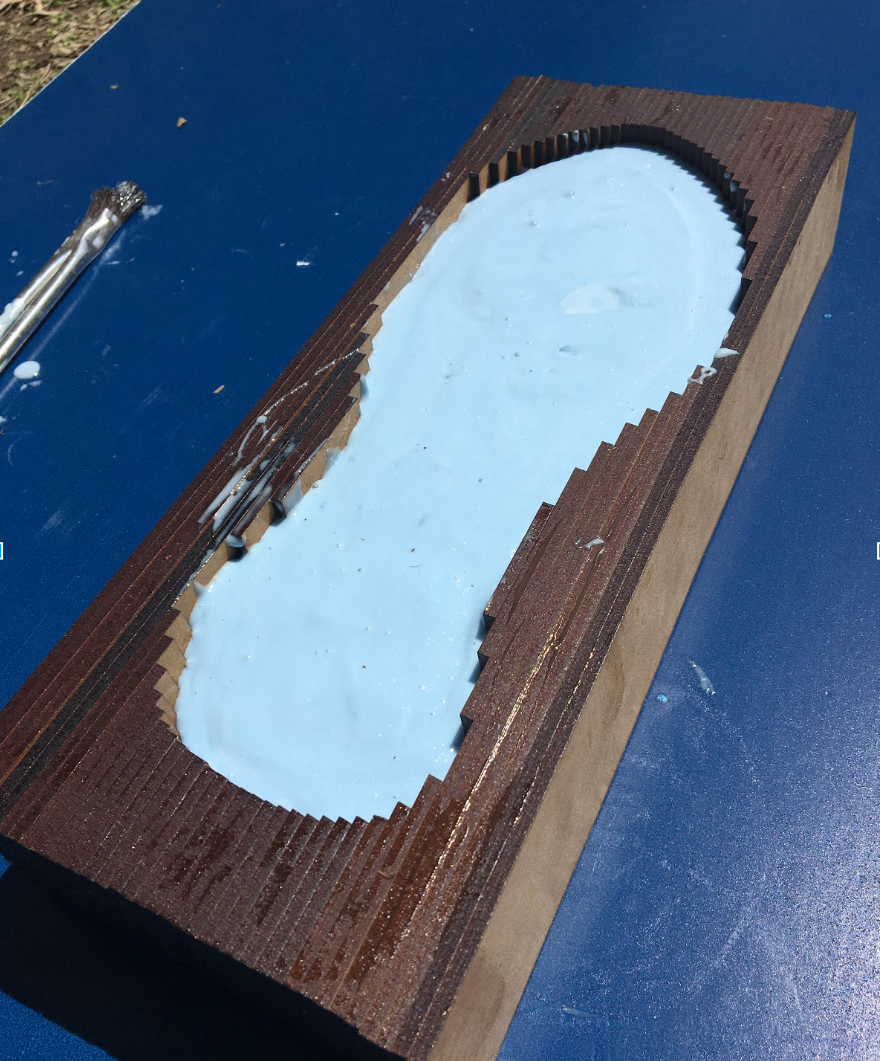
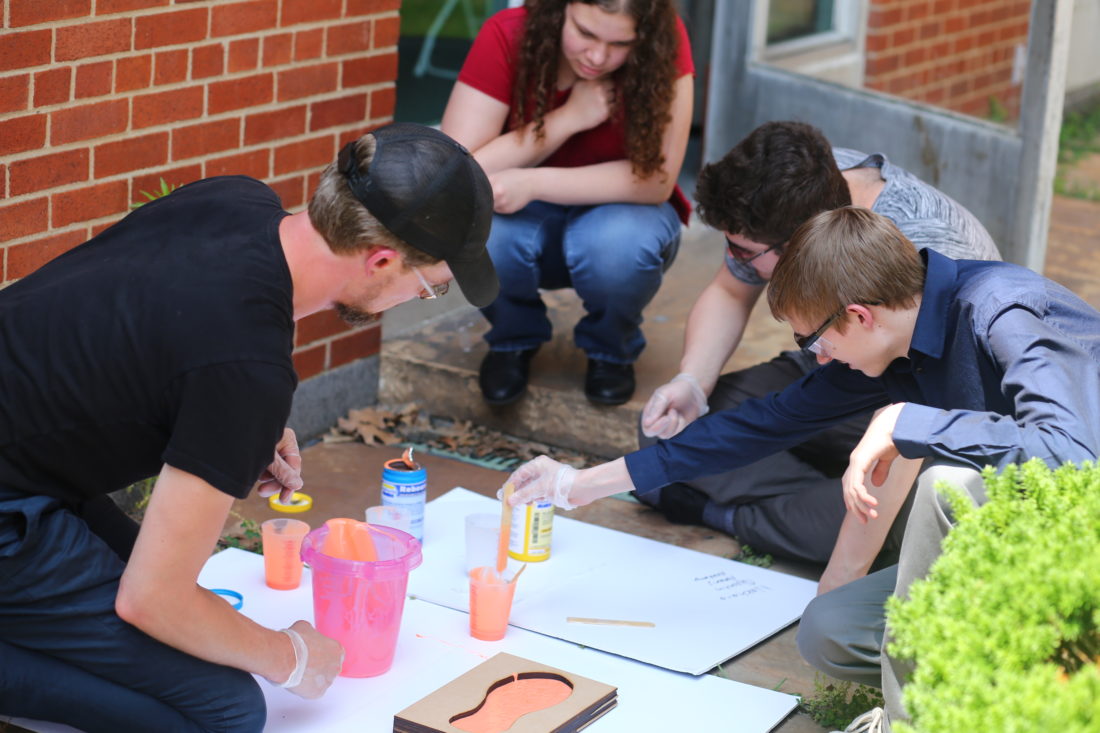
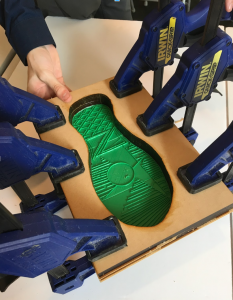
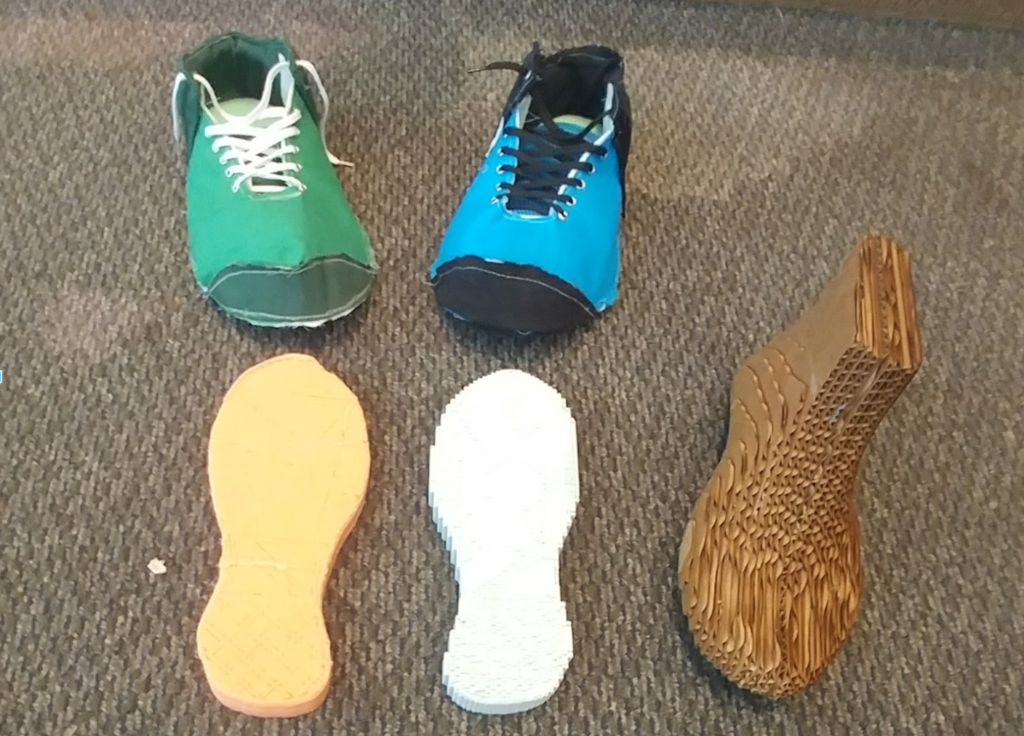
From the 3D model of the shoe outsole a negative form, a mold, can be fabricated to allow for casting liquid rubber. This process is messy and involves mixing chemicals, so beware of safety concerns and also time management for curing. We tested 2 different brands of rubber – each took 10+ hours for full curing.
Our form works were fabricated from similar slicing methods for laser cut layers. Make sure the thoroughly glue and clamp the formwork together. We used the students original tread sketch to 3D print the negative shape which would translate into the cured rubber.

A vertical slicing method resulted in a fun and unexpected ‘pixelated’ sole.

Allow ample time for students to iterate and improve upon their shoes. Final production time is needed to pull everything together.
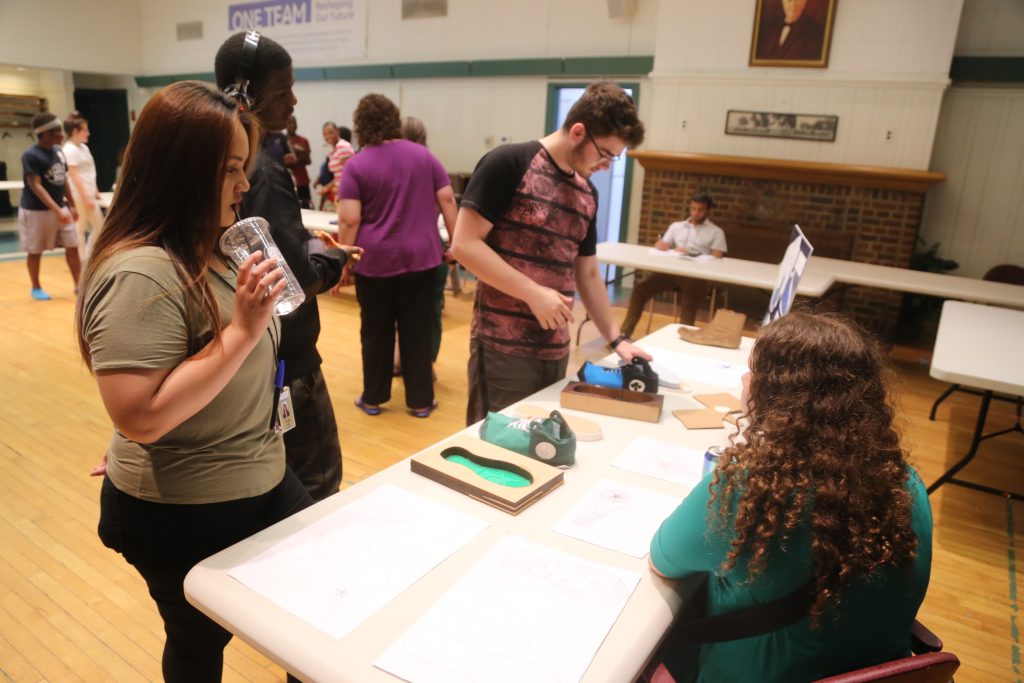
Encourage students to present their work and their processes to their peers.
Final thoughts and Recommendations
This one week intensive workshop requires ample time to allow students to explore new technologies, production methods, and self-motivation.
Having trouble? Let us know by completing the form below. We'll do our best to get your issues resolved quickly.
"*" indicates required fields
Thank you for your fab contribution!