- Loading…

WHAT IS A BEND SENSOR
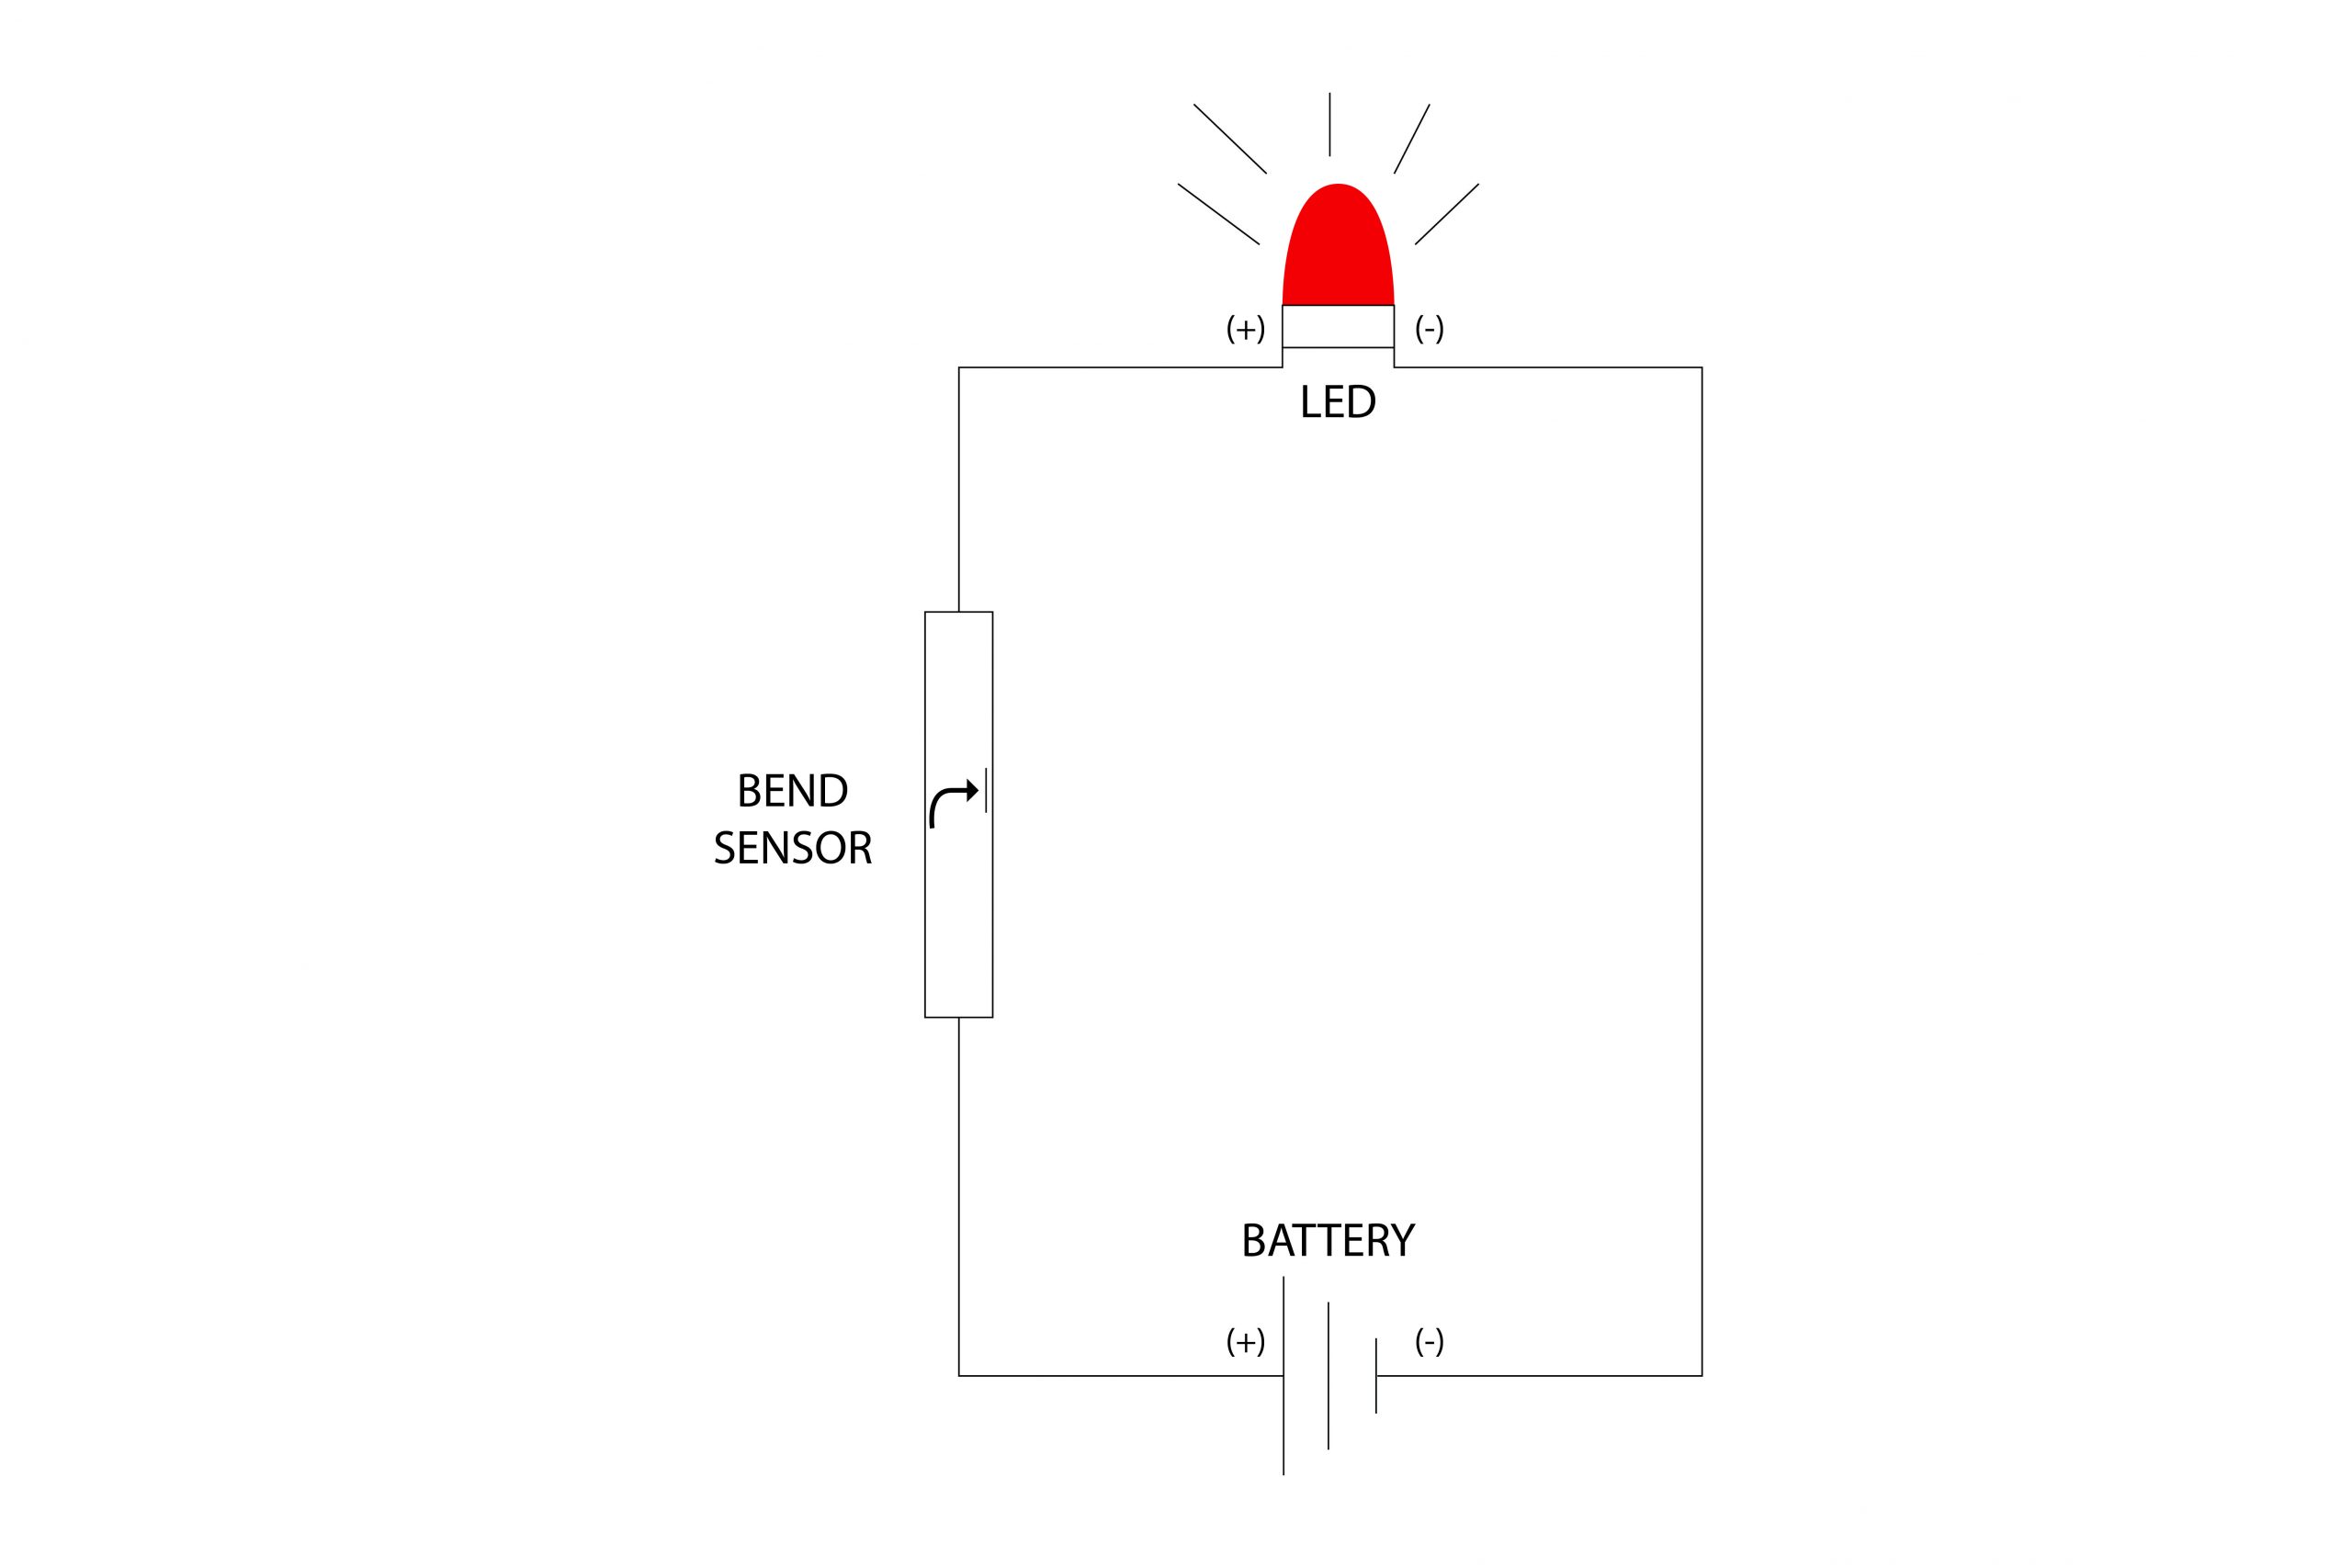
In this lesson we will create a fabric bend sensor. A bend sensor is a circuit created when a piece of resistive fabric is sandwiched between two pieces of conductive fabric. When relaxed (laying flat) the resistance between the conductive pieces is at its highest, then when the sensor is bent the resistance decreases and allows current to flow. The LED turns on as a result of the resistance decrease.
EXAMPLE IN REAL LIFE

KEY TERMS
LED: LED stands for light-emitting diode. It is a special type of diode that lights up when electricity passes through it. LEDs are unique because they only work when electricity passes through them in the right way, positive to negative.
Conductive Fabric: Conductive fabric is a fabric that can carry an electrical current. The fabric can be woven or knit and vary in structure from very fine, see-through mesh to densely woven fabrics.
Resistive Fabric: Resistive fabrics is a fabric that tends to have a high level of resistance across a distance. Resistive fabrics are great for making fabric sensors.
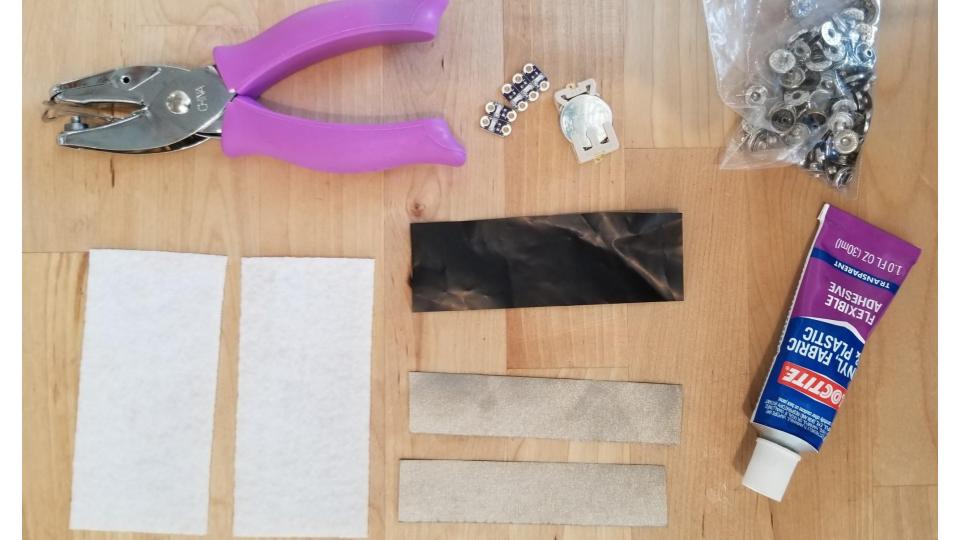
Before we begin gather the necessary material. Your material may vary, depending on your choice and size of fabric, as well as drawing tools.

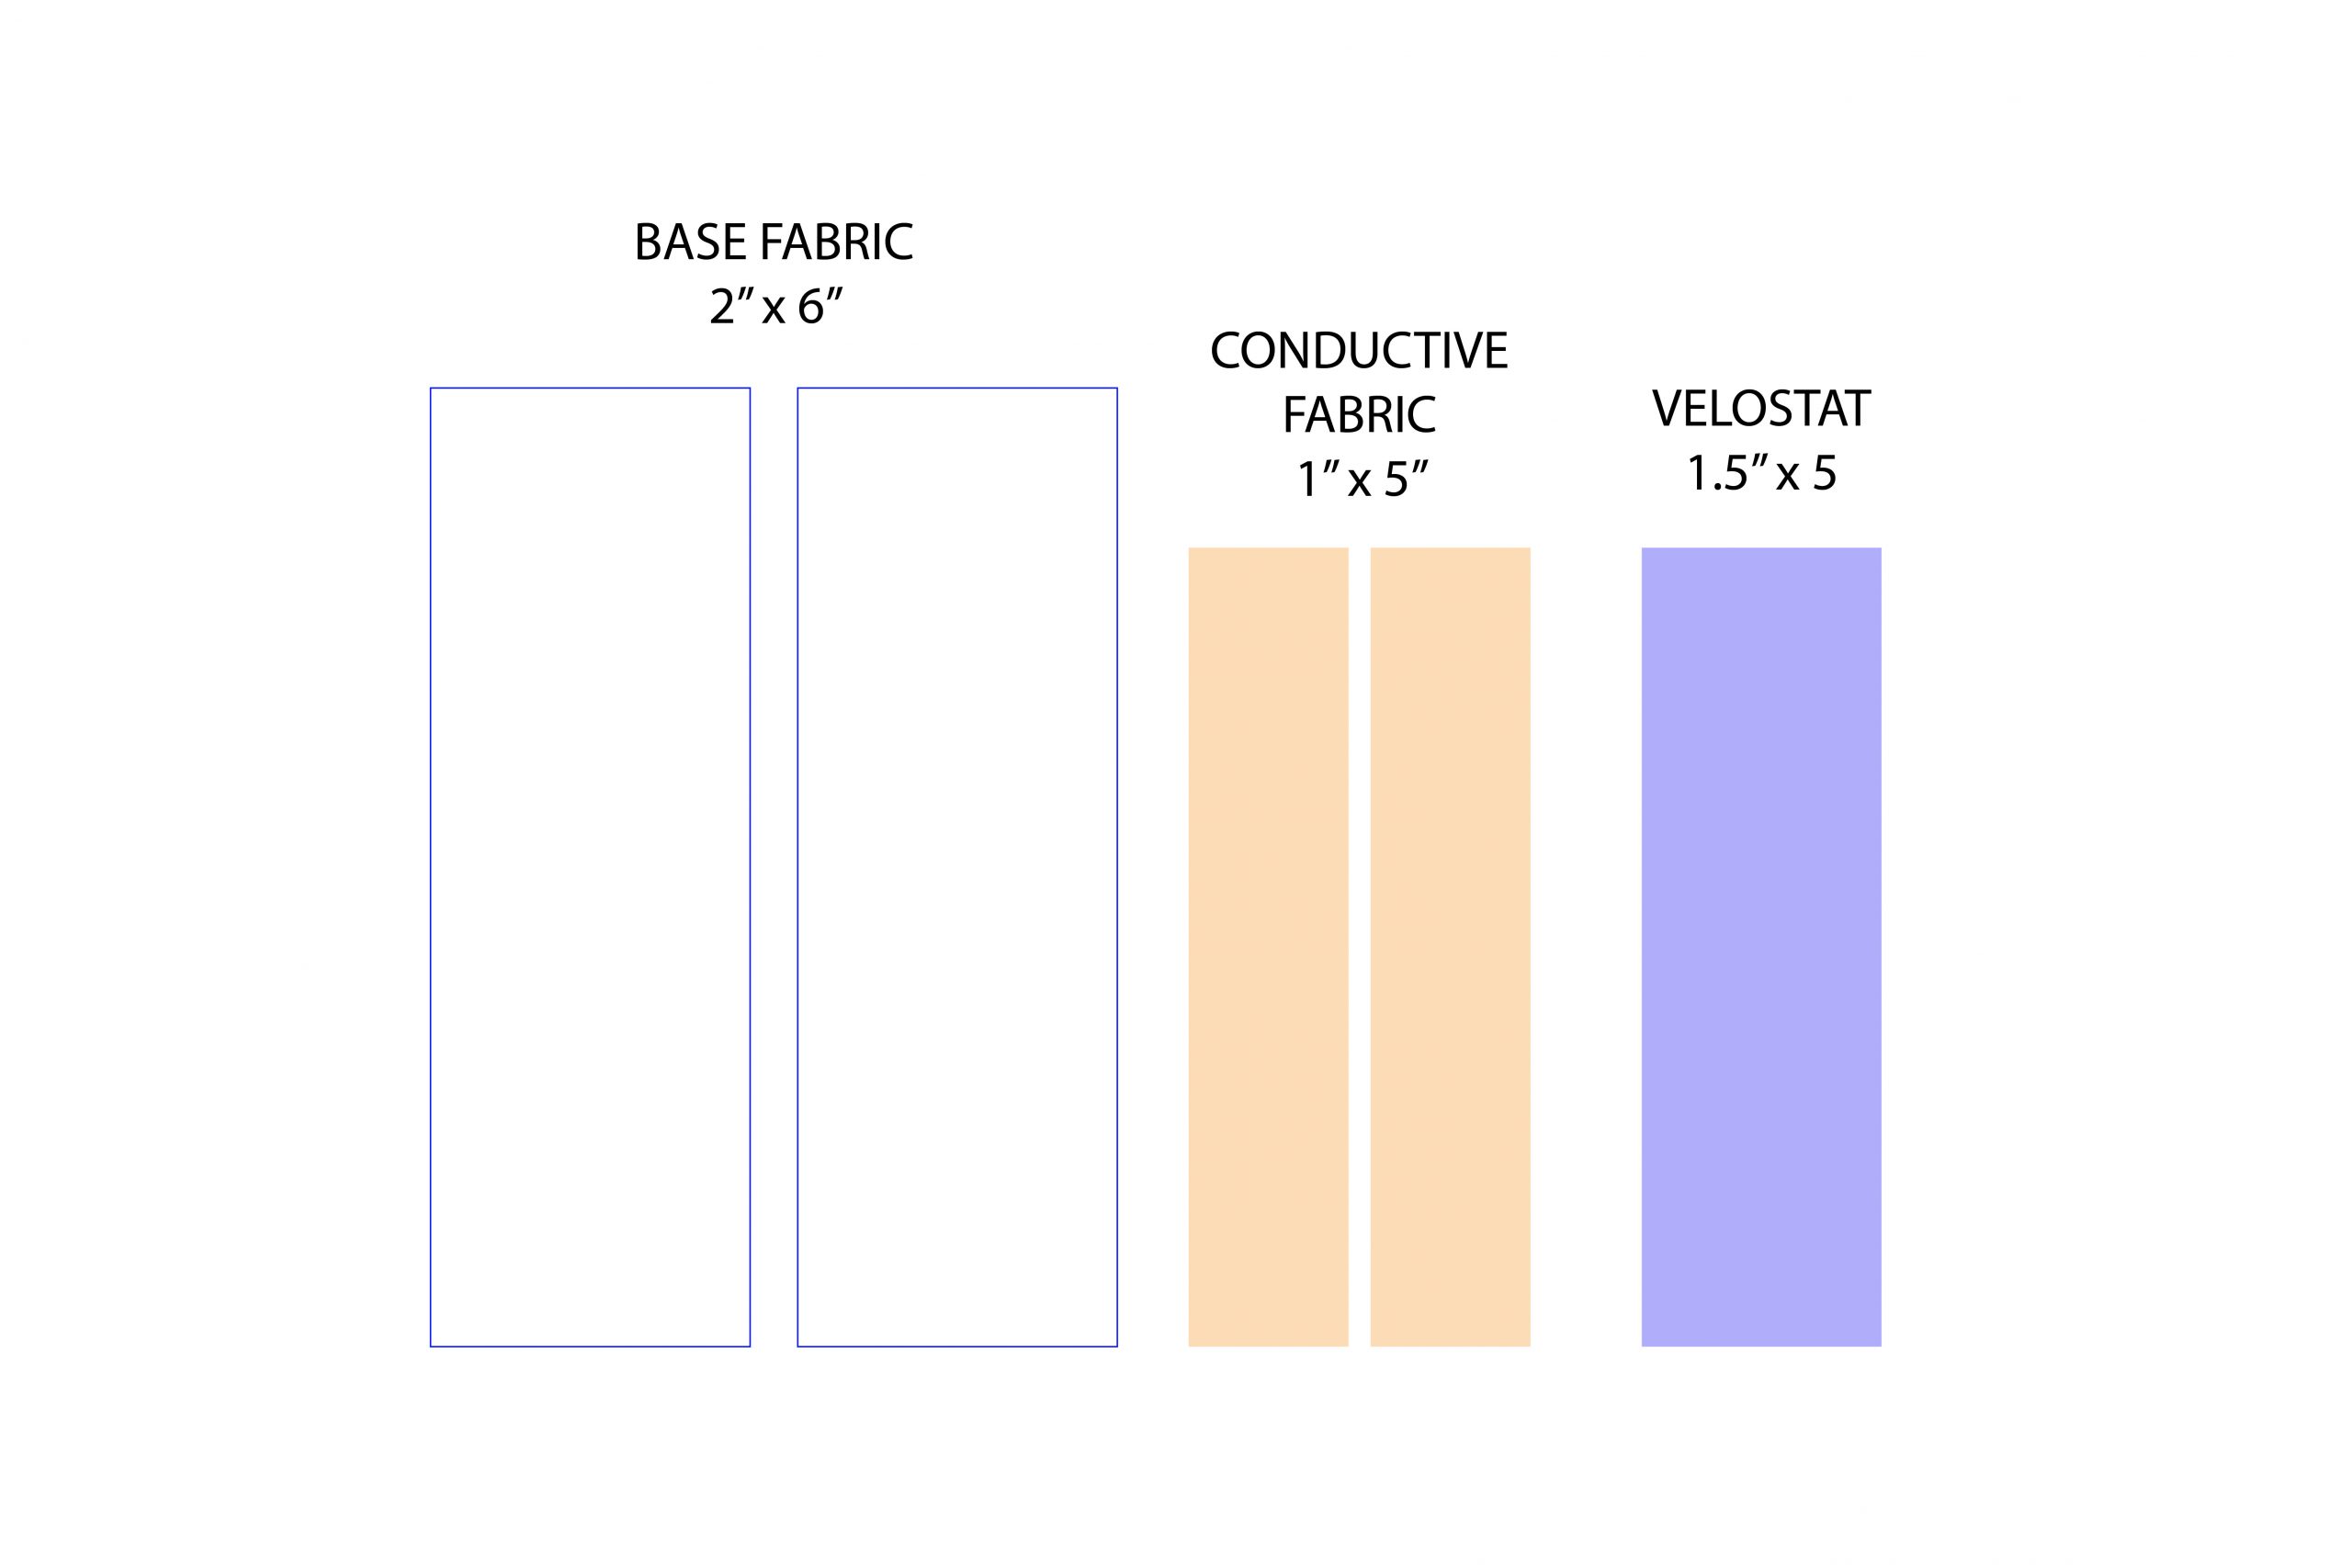
The next step is cutting out the desired shapes from your fabrics. Before you cut, sketch and stencil the shape you prefer, this will allow easier cutting. We will be cutting rectangles out of each fabric. Cut out two 2" x 6" rectangles from the felt, two 1" x 5" rectangles from the conductive fabric and 1.5" x 5" rectangle from the Velostat.

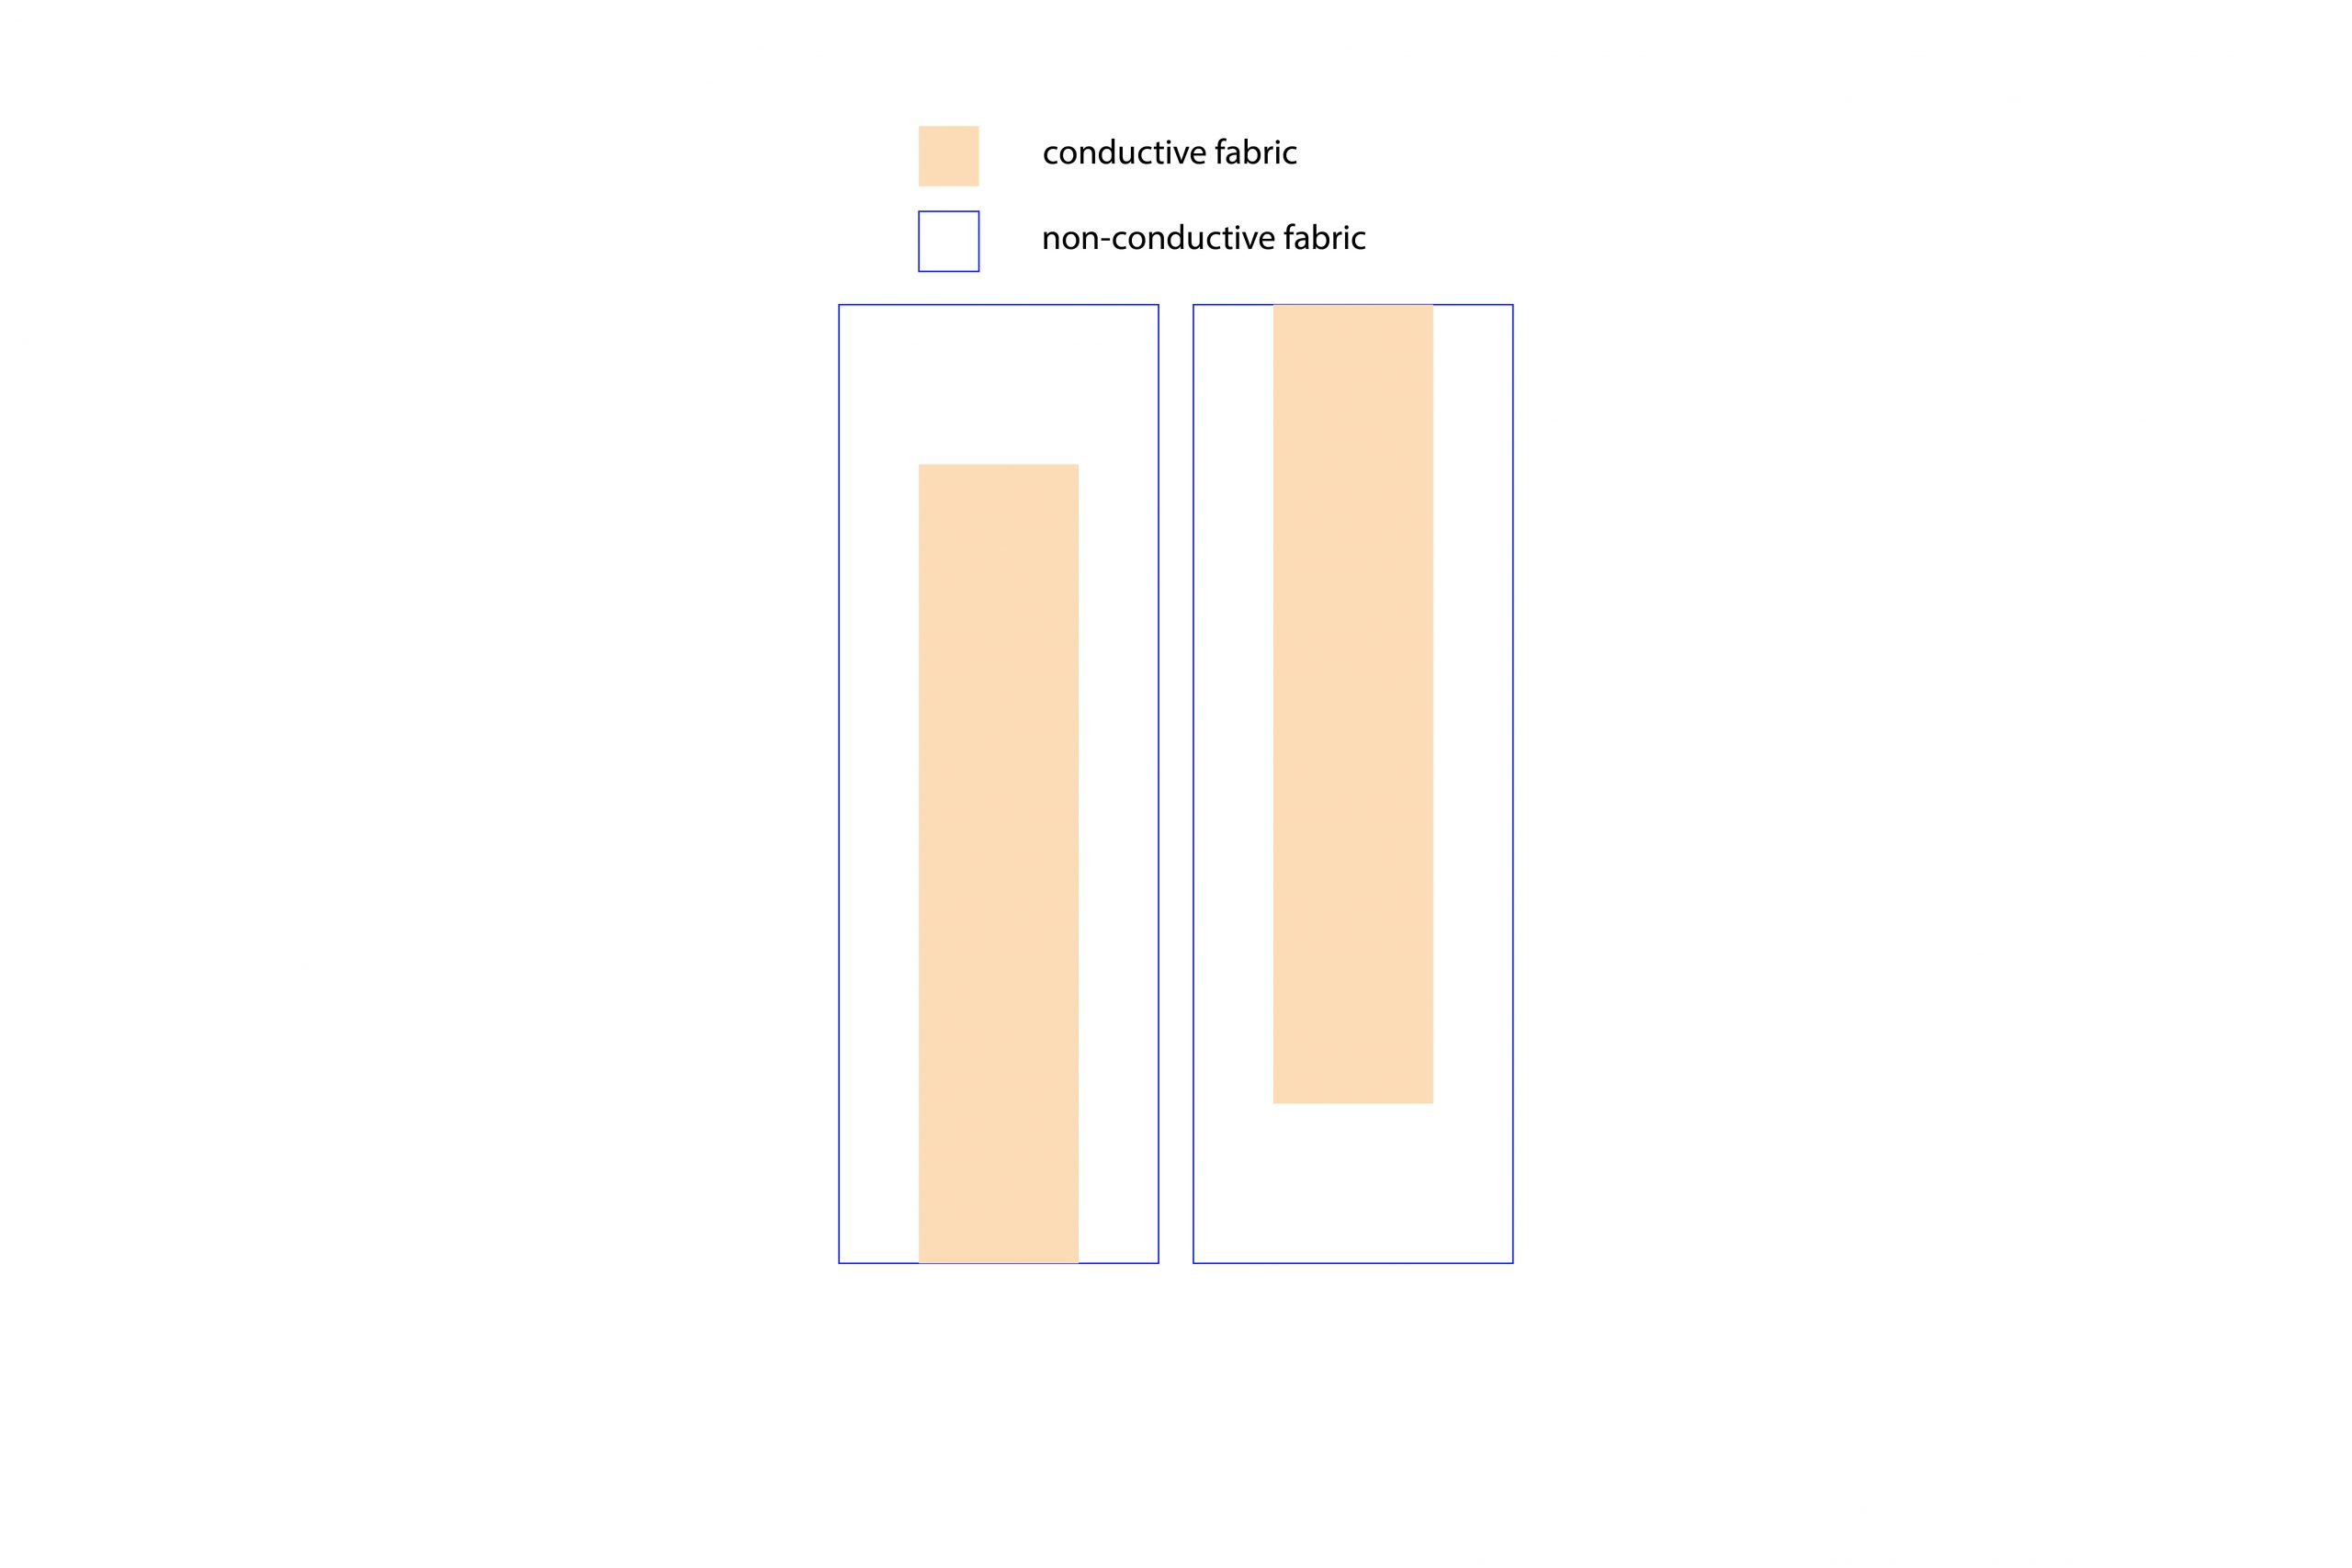
Lay flat the felt and place one of the conductive fabrics on top. Make sure to center and align the bottom edge of both the felt and conductive fabric. When happy with the position glue the conductive fabric to the felt. Repeat for step for the other set of non conductive and conductive fabric. (Optional: Instead of using glue, you can use double sided fusible to fasten the conductive fabric on to the non conductive fabric.)

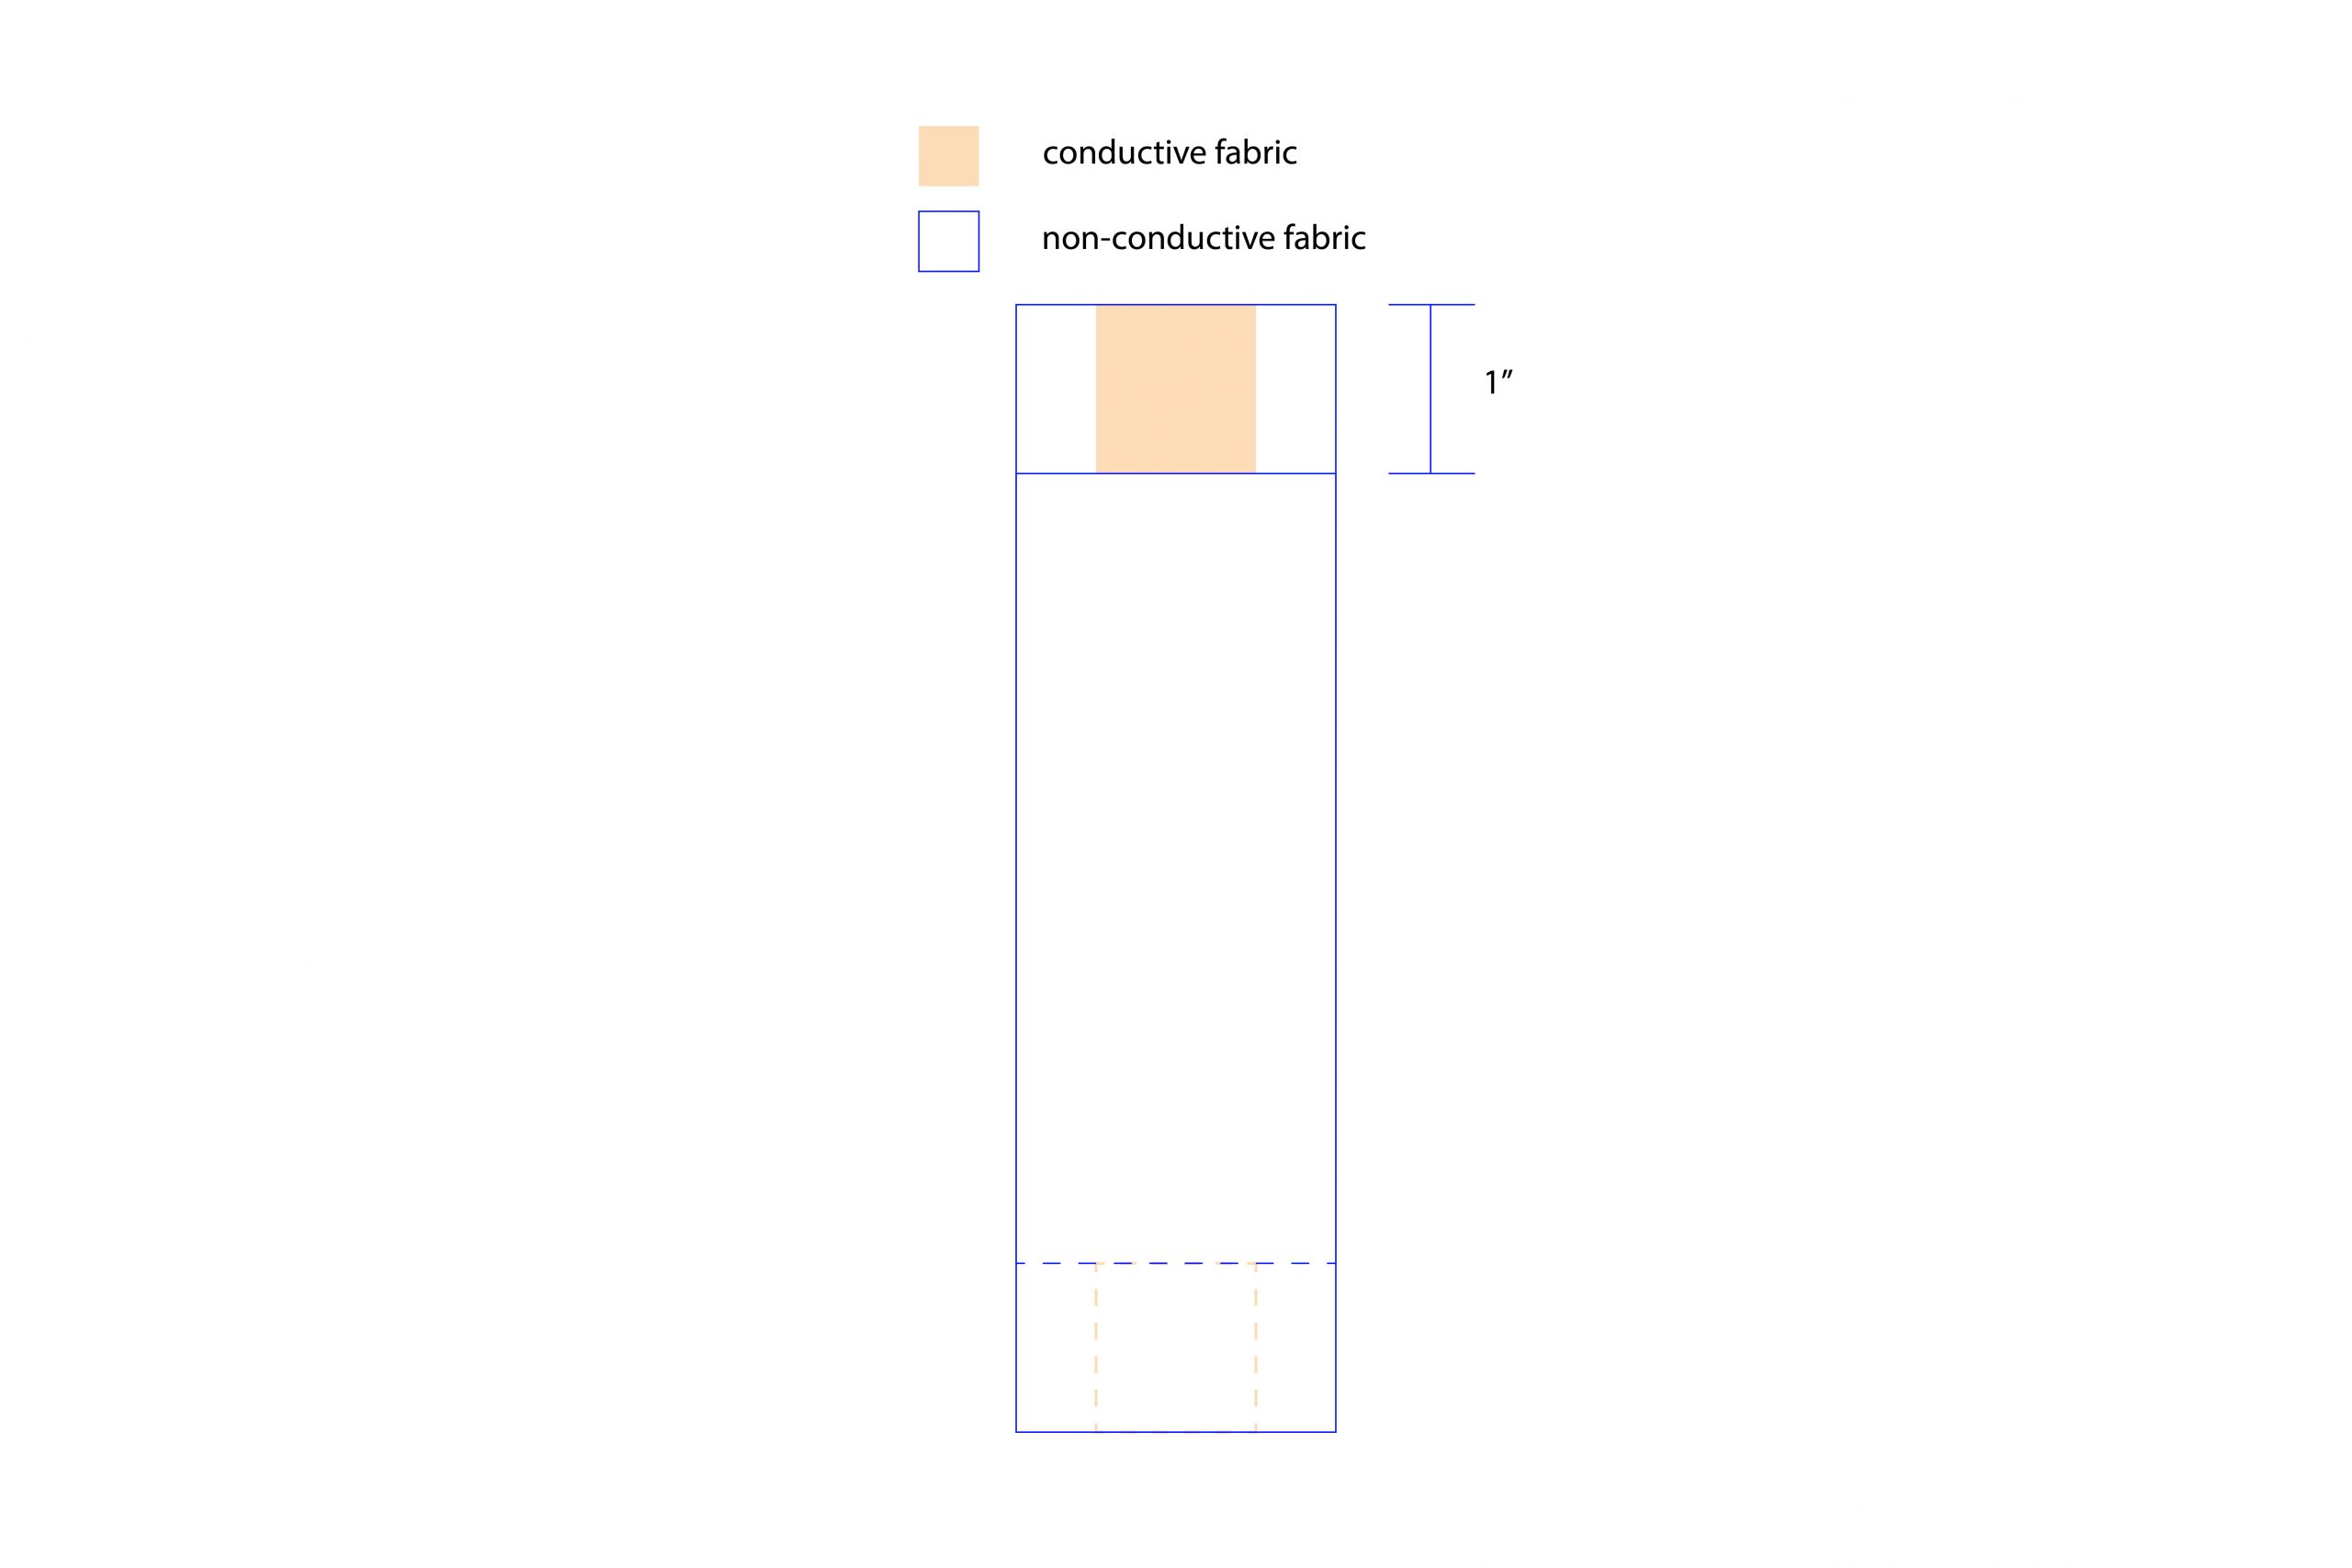
Sandwich your the Velostat between the the two pieces from the previous step, so that the conductive fabric faces inwards towards each other, separated only by the Velostat. Make sure that at least 1" of the conductive fabric is exposed before gluing together. Once things are in position glue the edges of the non conductive fabric together to secure everything in place. (Optional: Feel free to sew the edges of the sandwich together. Sewing can add an extra aesthetic element to your pressure sensor)


Installing popper/saps will create easier connection points for our bend sensor. Read the instructions that came with your popper machine.


We are now ready to create our circuit. The circuit is a simple one, there are only three components, the battery, bend sensor and LED. Using alligator clips connect the positive lead of the battery to one side of the pressure sensor. Then connect the other side of the bend sensor to the positive lead of the LED and then connect the negative lead of the LED to the negative lead of the battery to finish the circuit. (Optional: This connect can be made free form but you can also use a breadboard to make things simple.)

Your bend sensor is complete. Bend and enjoy!

Having trouble? Let us know by completing the form below. We'll do our best to get your issues resolved quickly.
"*" indicates required fields