- Loading…

WHAT IS A PRESSURE SENSOR
In this lesson we will create a fabric pressure sensor. A pressure sensor is a circuit created when a piece of resistive fabric is sandwiched between two pieces of conductive fabric. When relaxed (untouched) the resistance between the conductive pieces is at its highest, then when pressure is added the resistance between the conductive pieces decreases. The LED turns on as a result of the resistance decrease
EXAMPLES IN REAL LIFE

Light up your stride! Mod a pair of high-tops with NeoPixel strip and FLORA, Adafruit’s wearable electronics platform. These sneakers use a pressure sensor in the heel to trigger firey animations as you walk!
KEY TERMS
LED: LED stands for light-emitting diode. It is a special type of diode that lights up when electricity passes through it. LEDs are unique because they only work when electricity passes through them in the right way, positive to negative.
Conductive Fabric: Conductive fabric is a fabric that can carry an electrical current. The fabric can be woven or knit and vary in structure from very fine, see-through mesh to densely woven fabrics.
Resistive Fabric: Resistive fabrics is a fabric that tends to have a high level of resistance across a distance. Resistive fabrics are great for making fabric sensors.
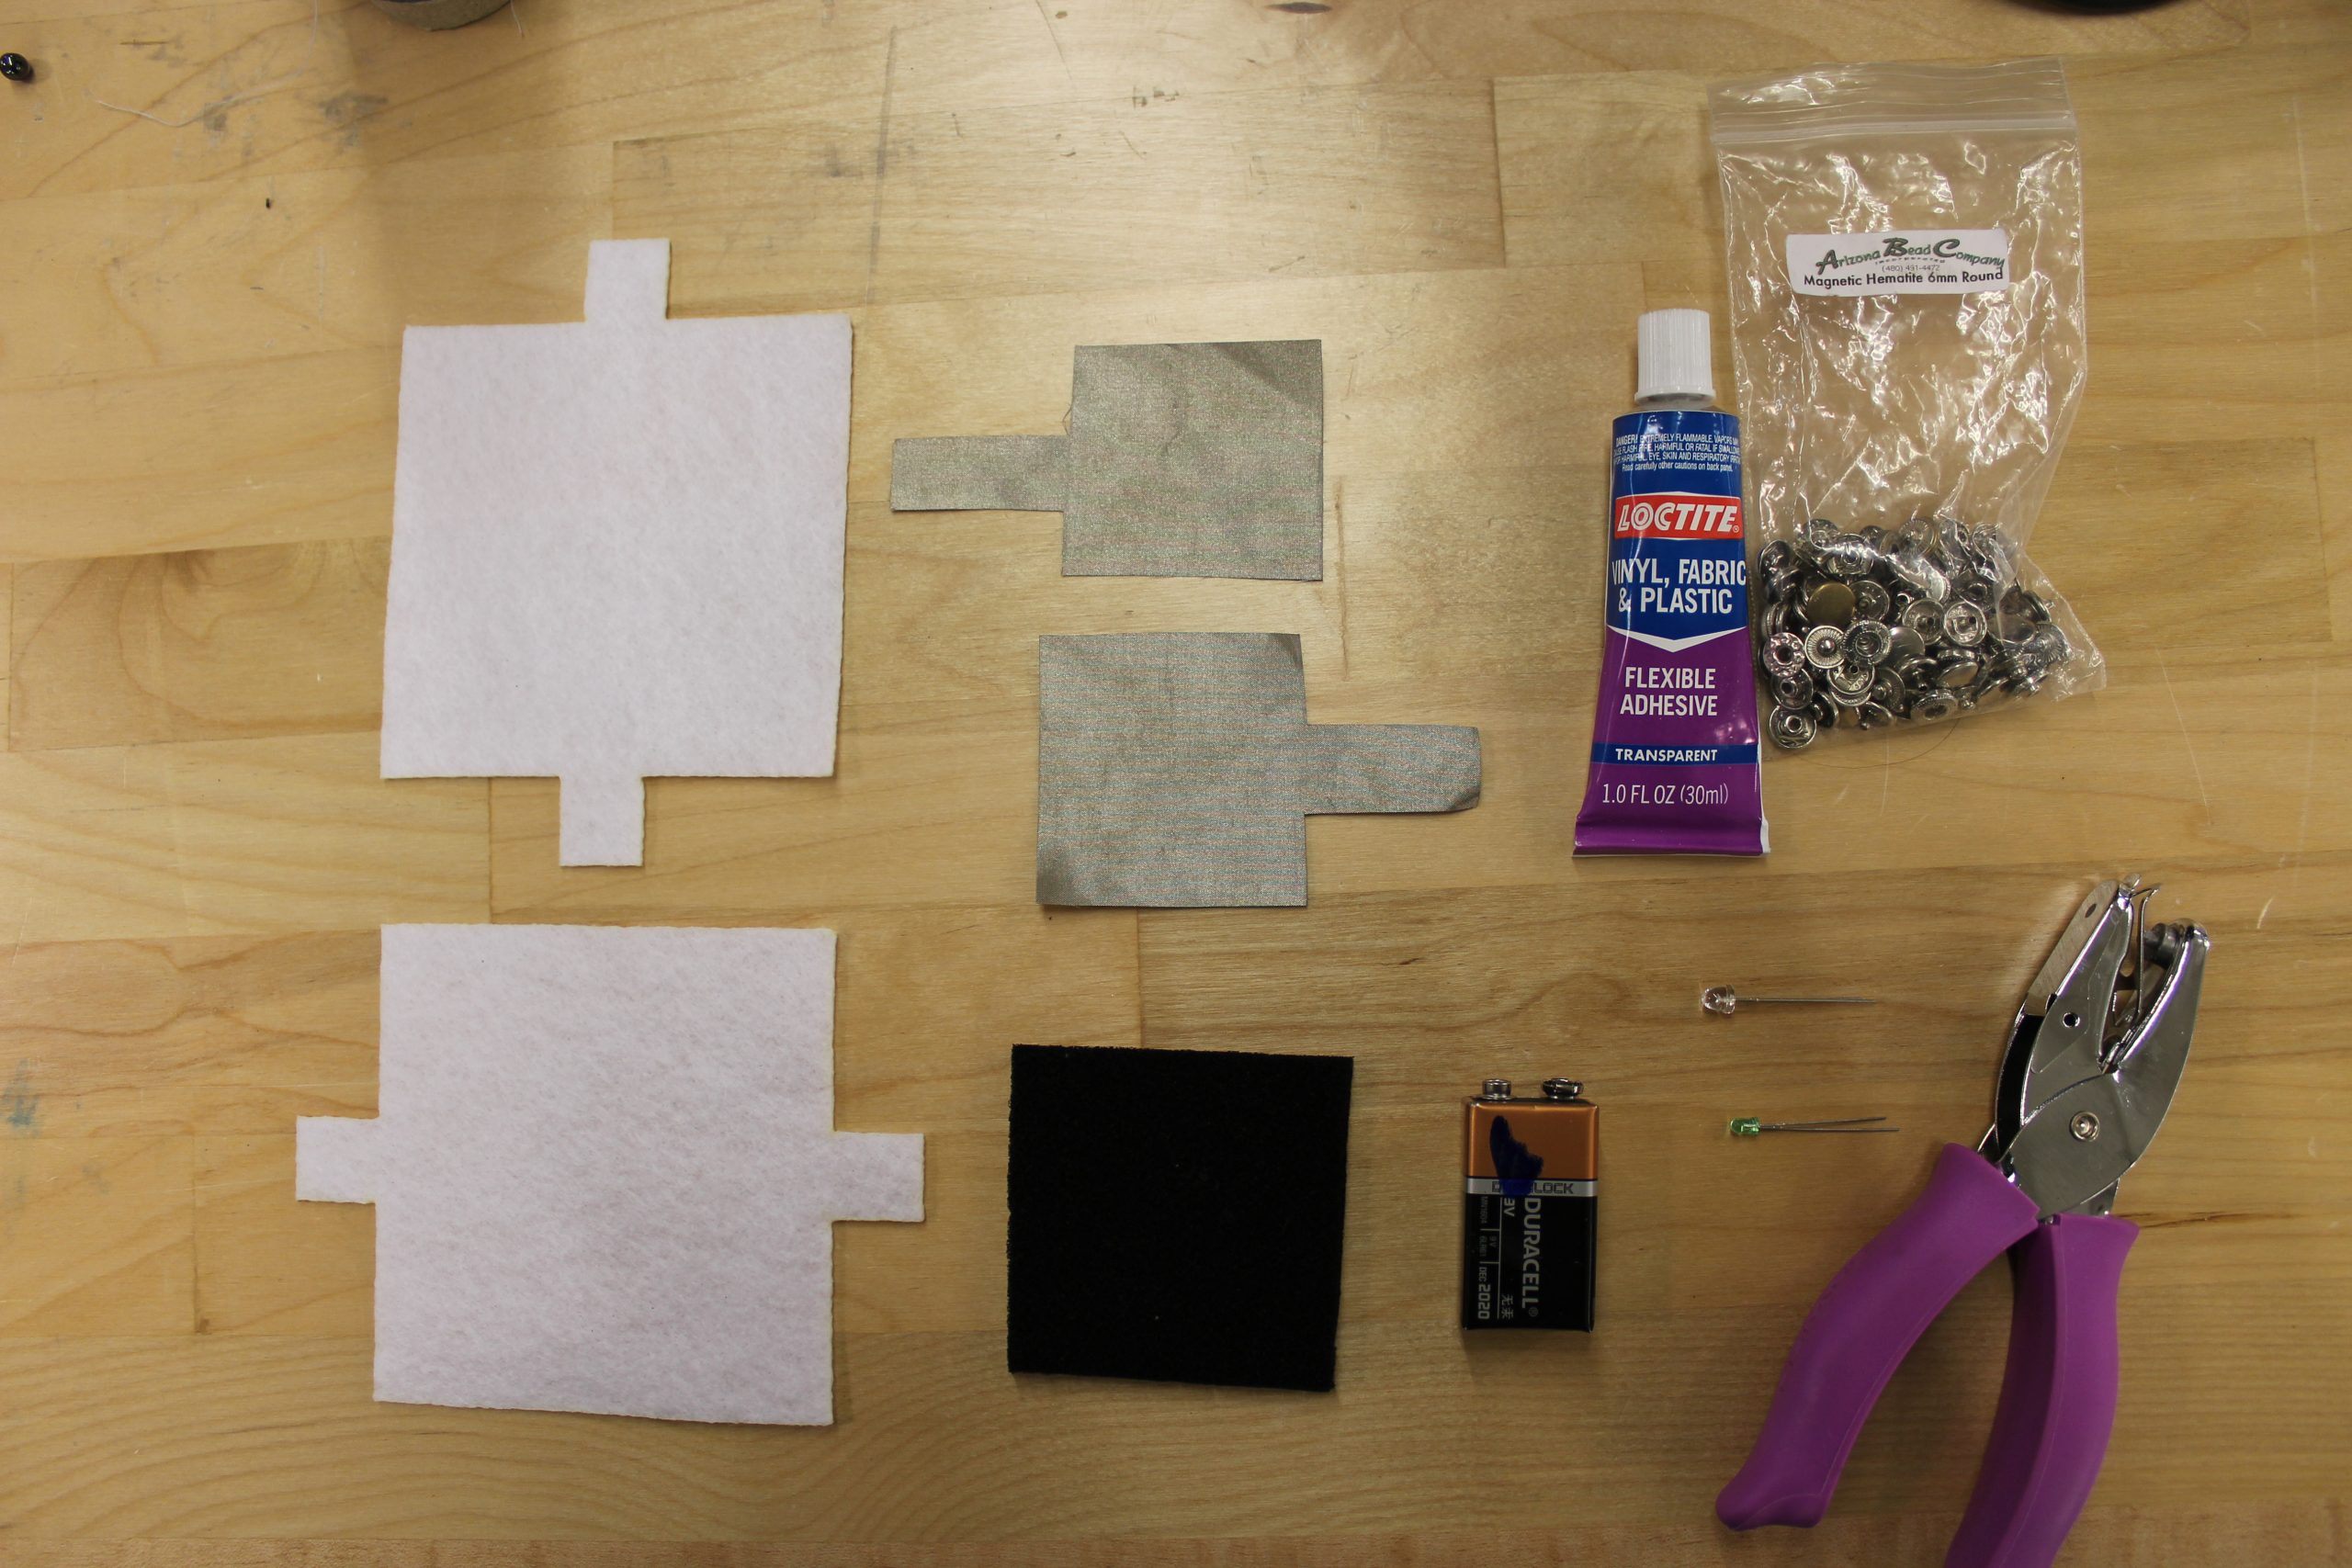

Materials + Tools:
Felt
Conductive Fabric ( Adafruit) | FIND HERE
Resistive Fabric (Anti-Static Foam / Velostat )
LED
Battery
Pen
Ruler
Fabric Scissors
Fabric Glue
Machine Popper/snaps (hand held)
Alligator clips
Optional:
Double Sided Fusible interface
Thread
Sewing Needle
Breadboard
Before we begin gather the necessary material. Your material may vary, depending on your choice and size of fabric, as well as drawing tools. A quick note about the resistive fabric. If you want to make a fully fabric pressure sensor Velostat is the way to go. The down side of Velostat is that it can be difficult to acquire depending on your location in the world. A good alternative is Anti-Static foam that can be easily found on Amazon. One of the plus sides of using the foam is that there is physical feedback when applying pressure to the foam. Which can be great when it comes to understanding the concept of a pressure sensor.

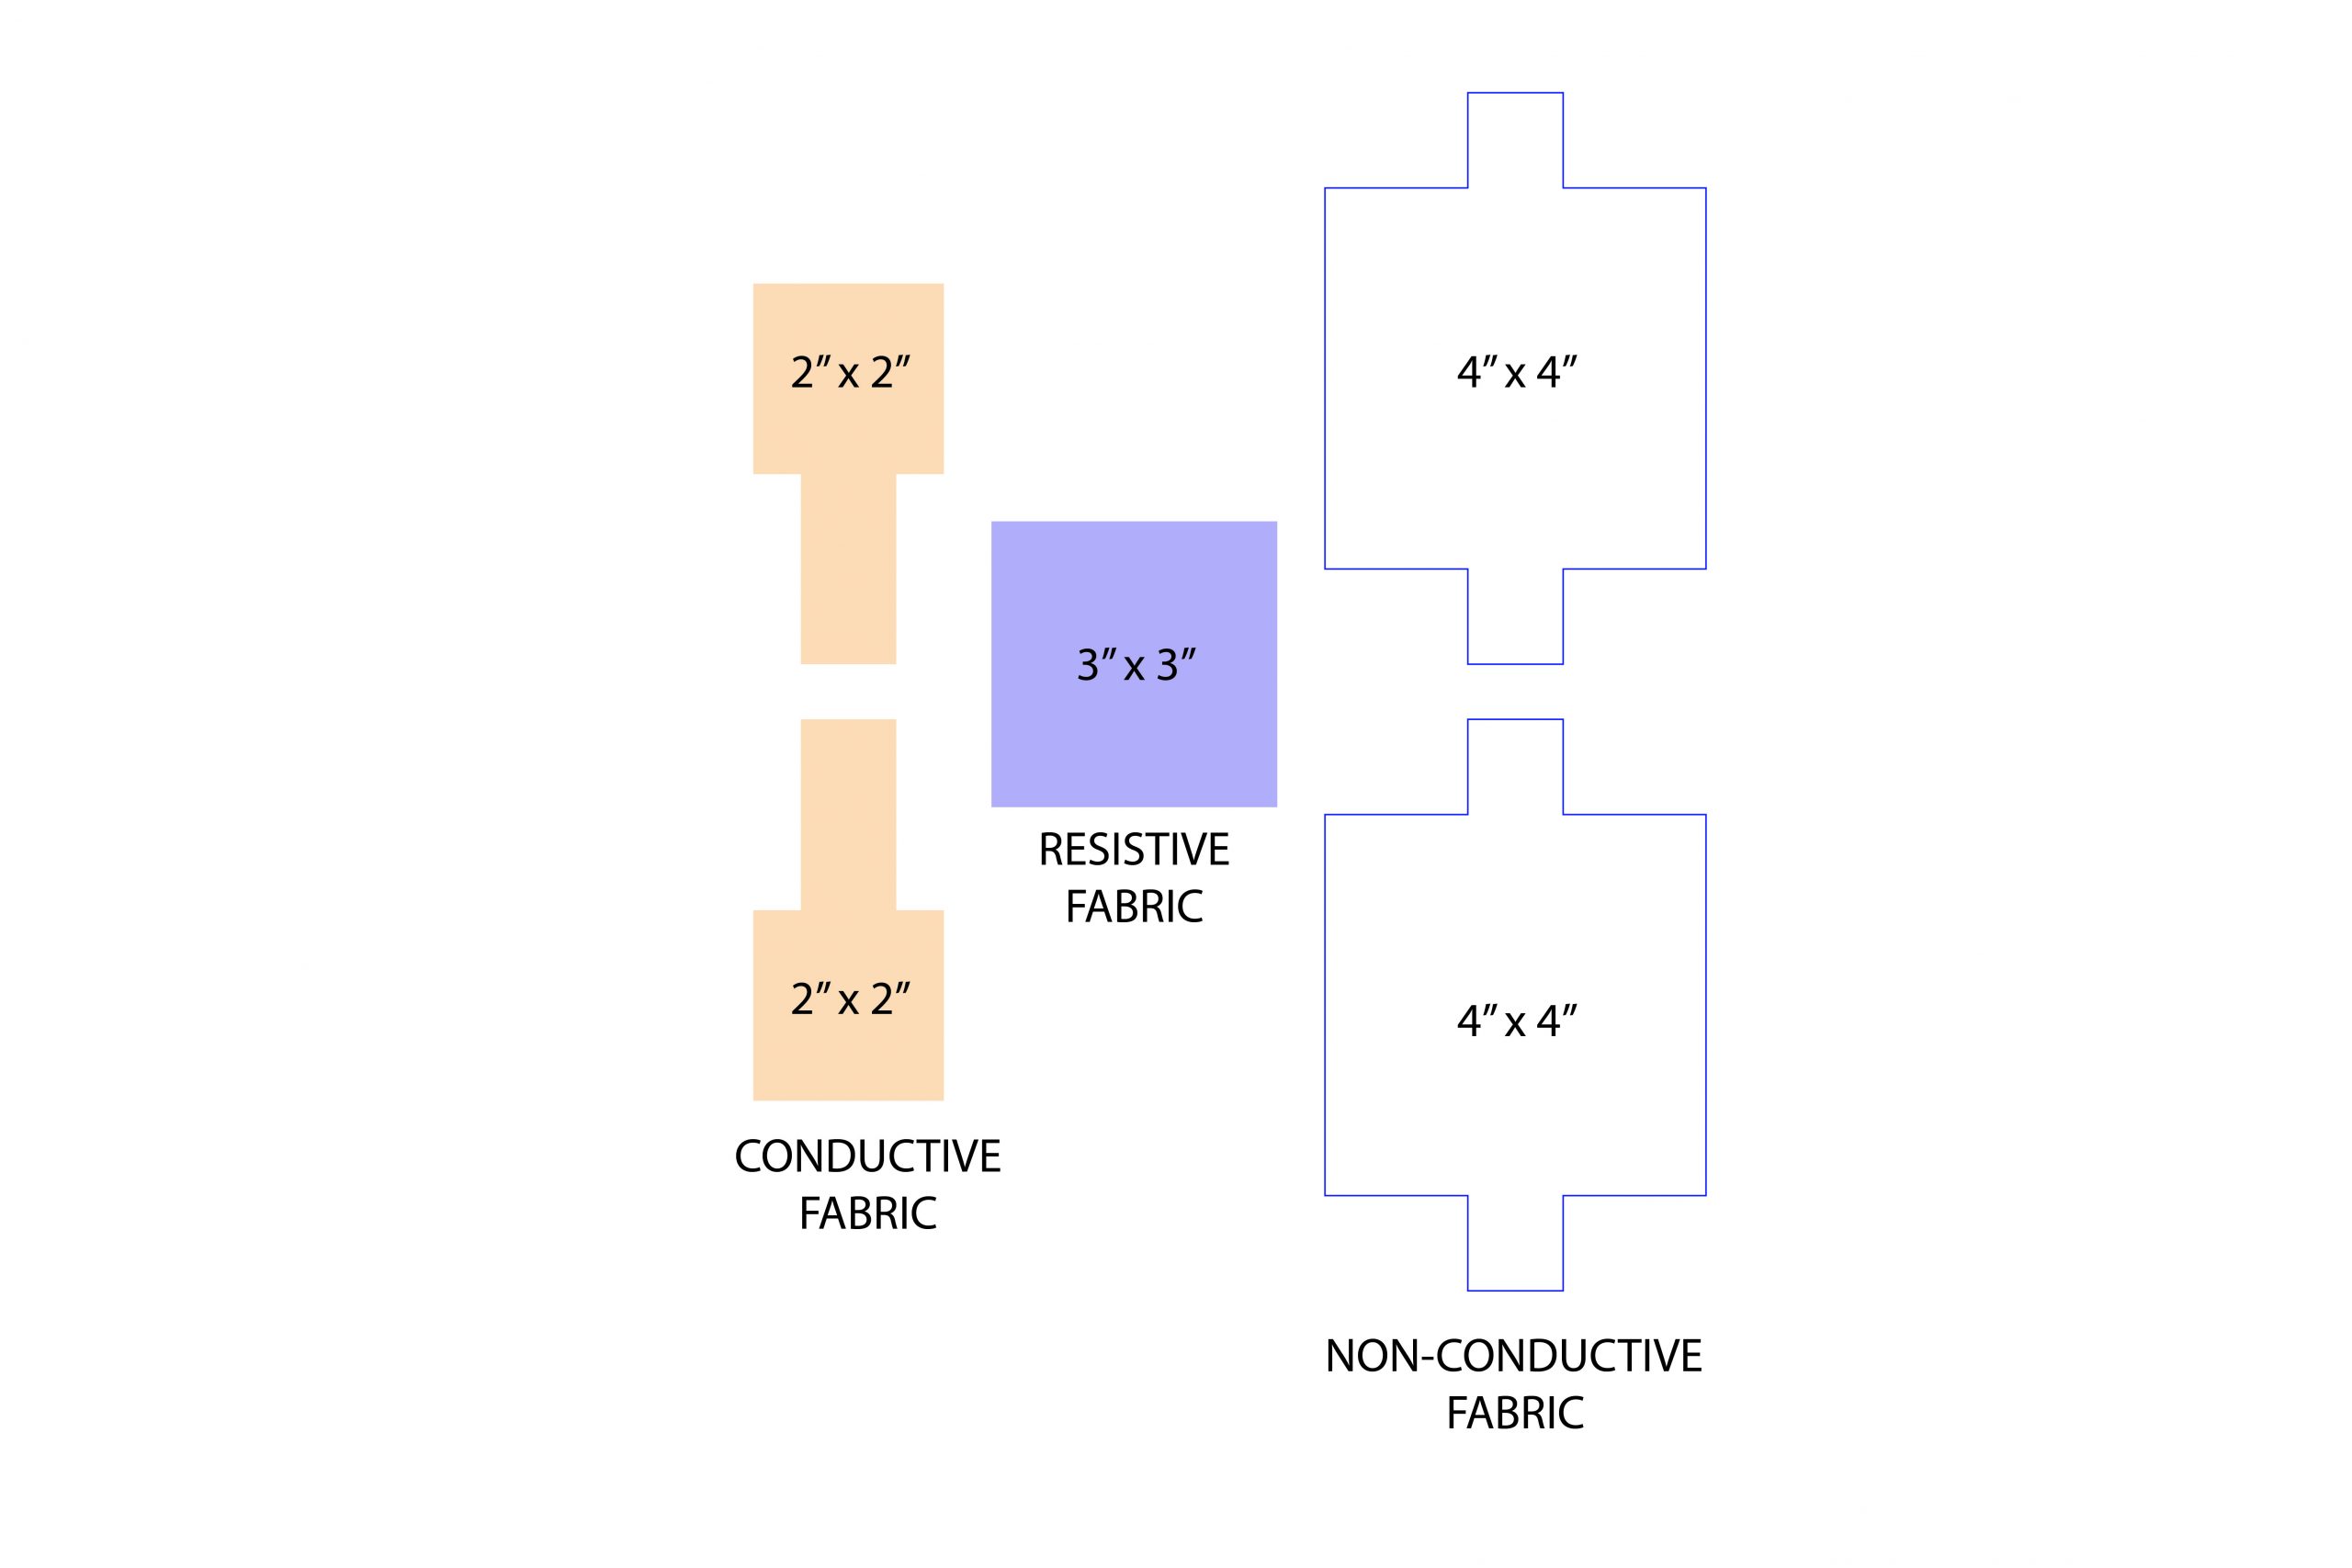
The next step is cutting out the desired shapes from your fabrics. Before you cut it may be easier to sketch out the shapes on paper and create stencils for you to reference when cutting. For this lesson we will be cutting out square shapes. (Dont let this limit you, you can make the pressure sensor to any shape you desire). We will start with the felt. We will cut out a 4" x 4" box with 1" long (at least) tabs on both sides. The tabs are essential for the shape because they will act as the connection locations when the pressure sensor is complete. Next we will cut shapes out of the conductive fabric. This time we will cut out 2" x 2" squares with 3" long tabs only on side. Next we will cut a 3" x 3" square with no tabs from the resistive fabric.

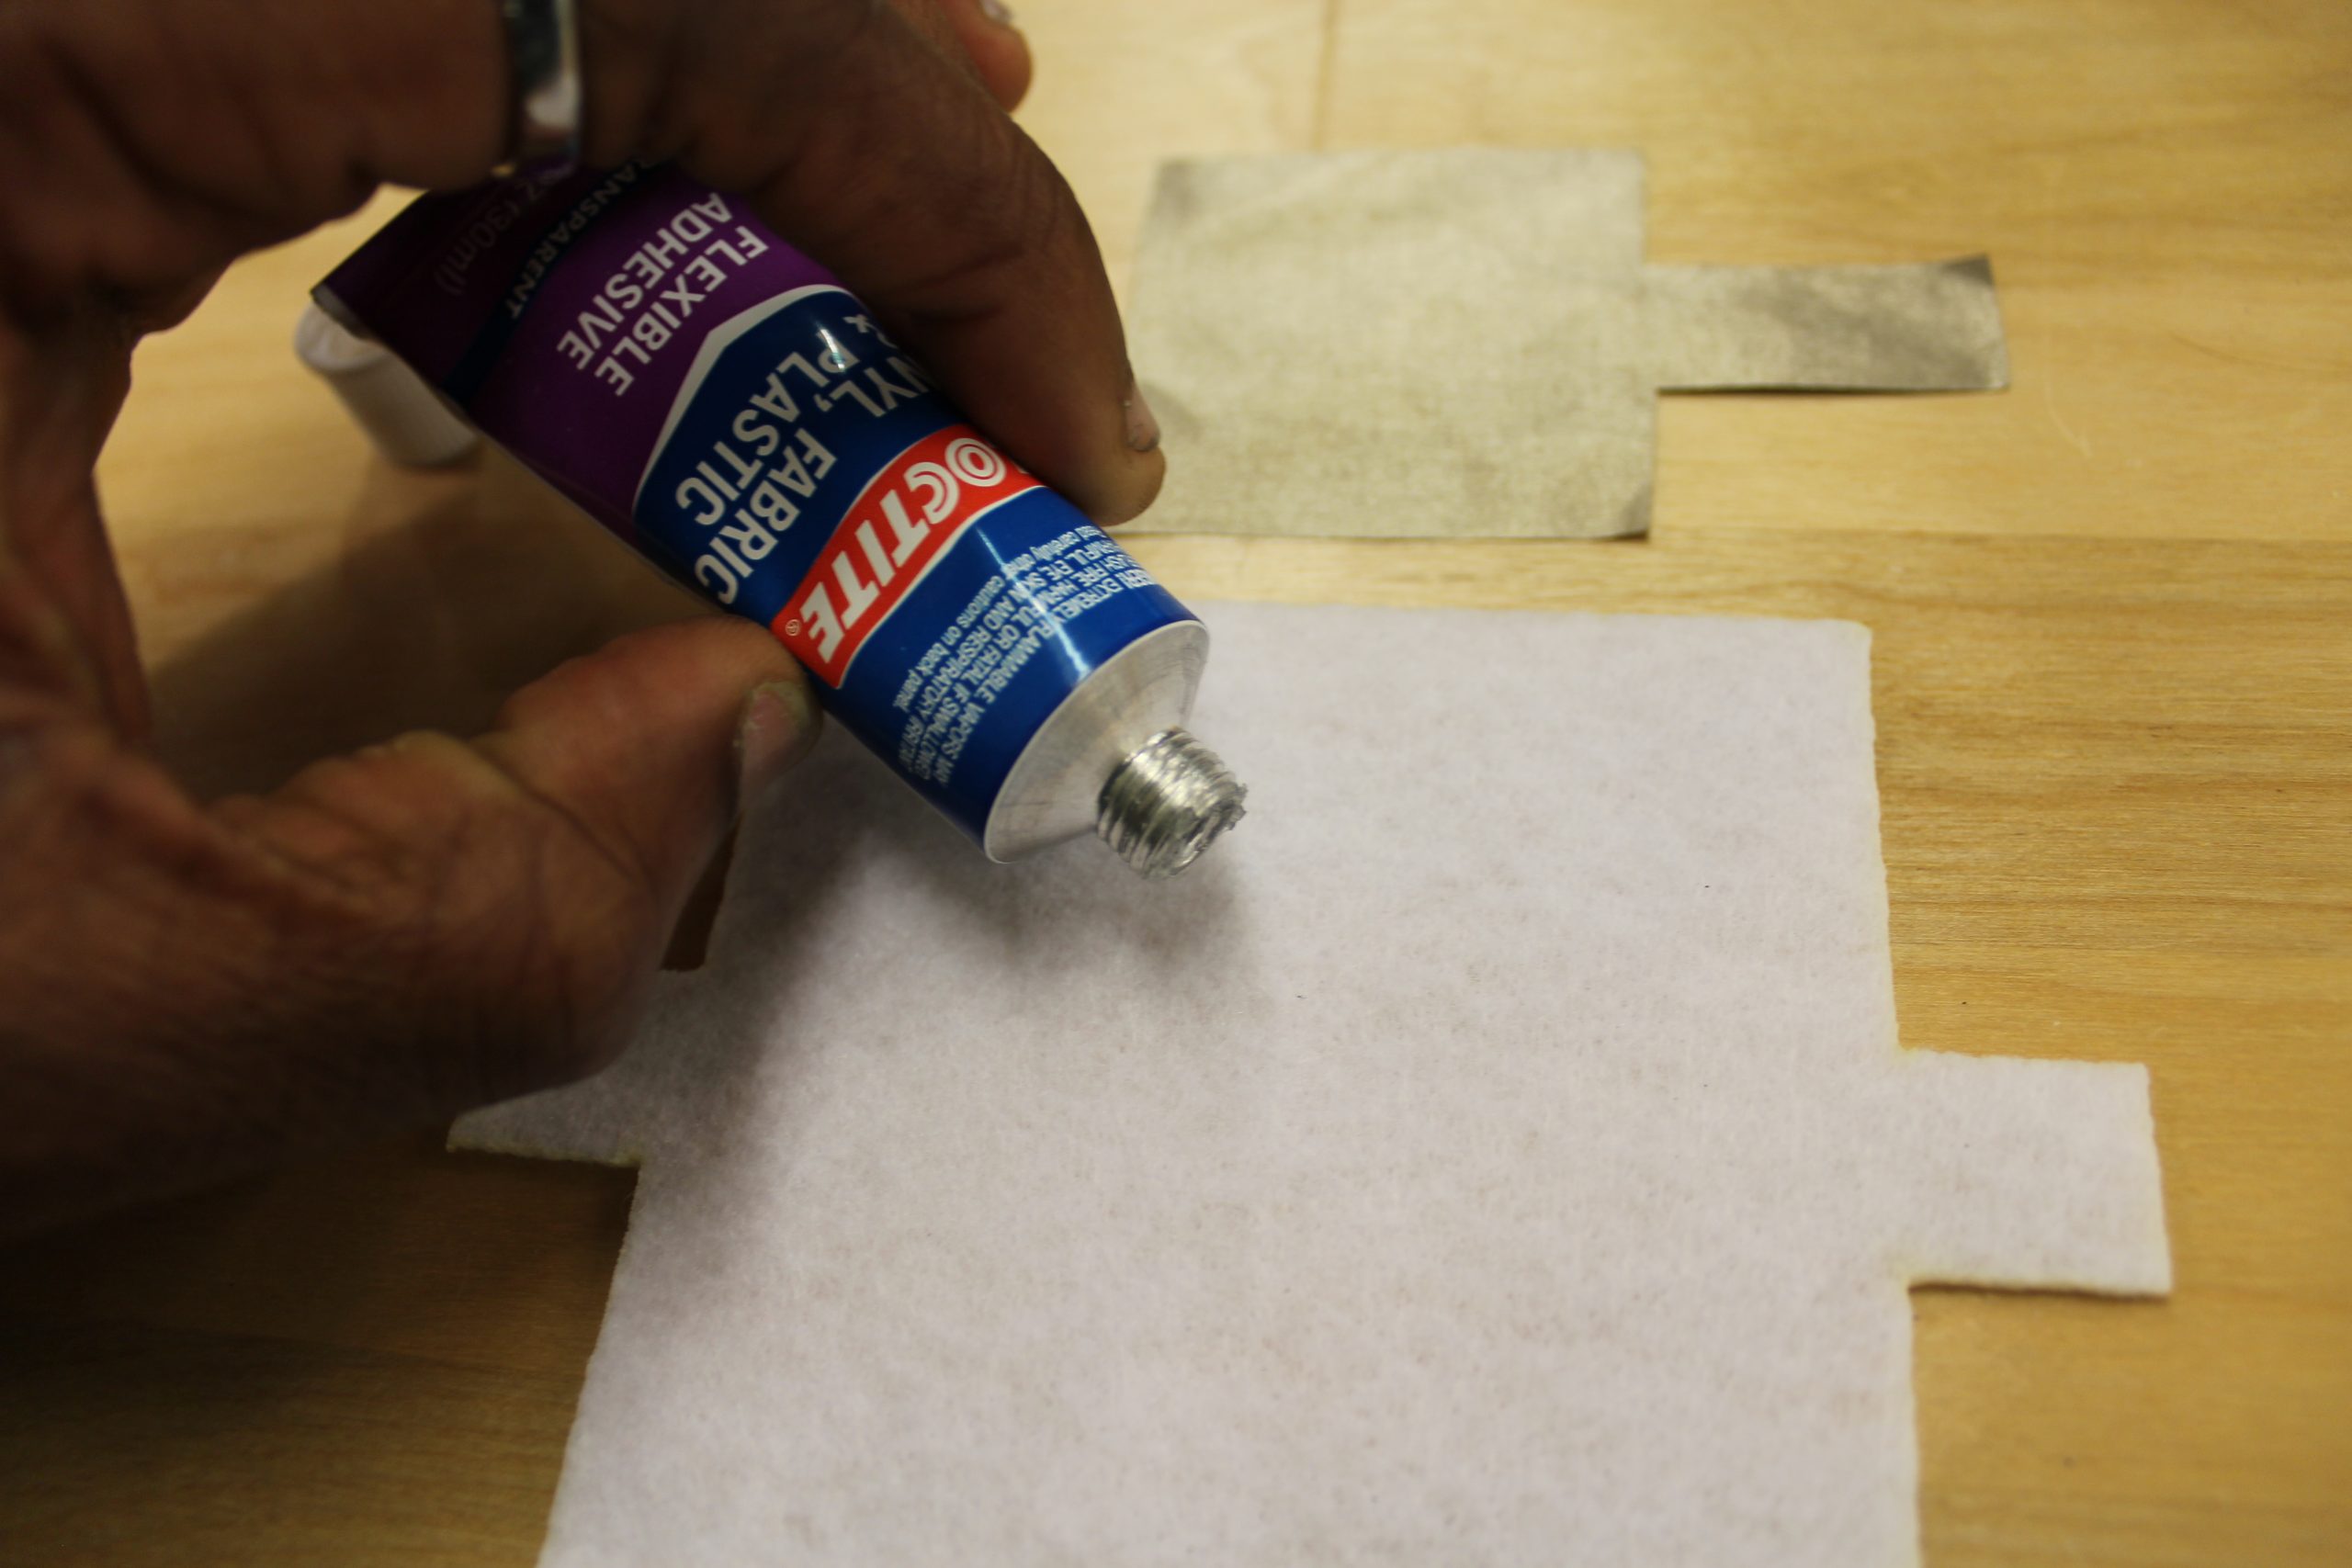
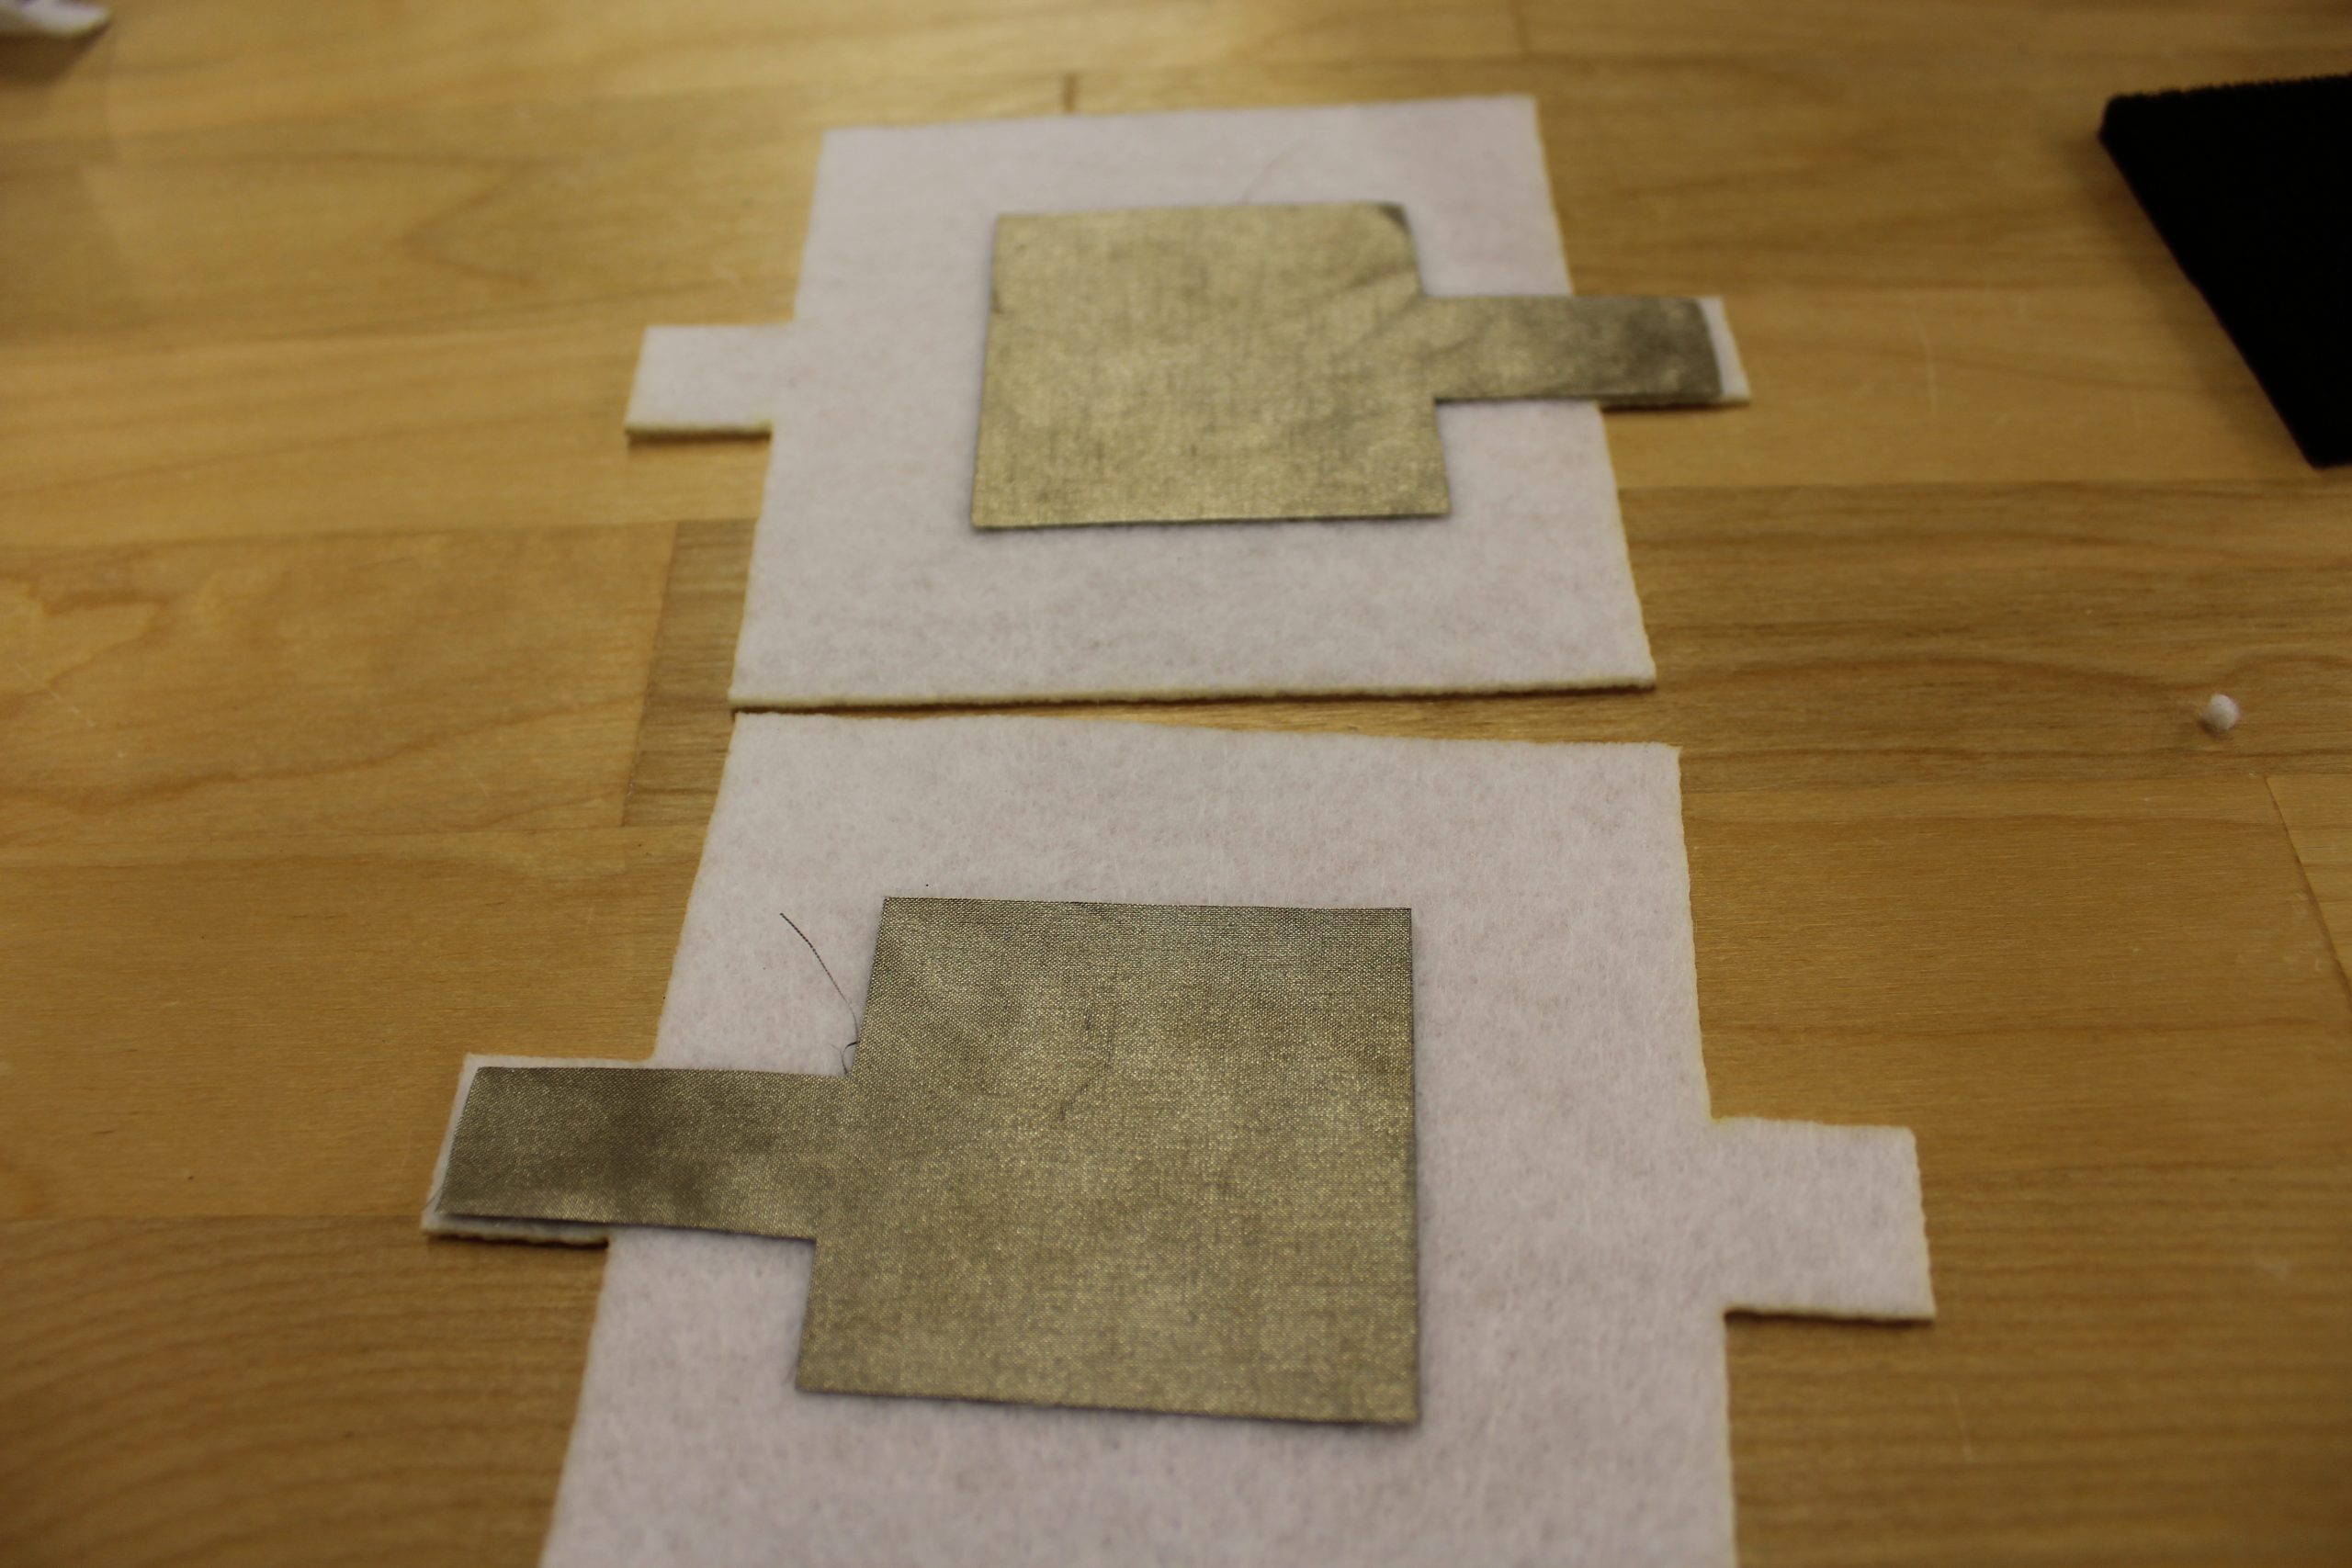
Start by laying down the felt and placing one of the conductive fabrics on top. Keep the conductive fabric centered and make sure that the tabs of the conductive and felt are aligned. When happy with the position glue the conductive fabric to the felt. Repeat for step for the other set of felt and conductive fabric. (Optional: Instead of using glue, you can use double sided fusible to fasten the conductive fabric on to the felt.)


Sandwich your resistive fabric between the the two pieces from the previous step, so that the conductive fabric faces inwards towards each other, separated only by the resistive fabric. Check the image for the placement. Glue the edges of the felt together to secure everything in place. (Optional: Feel free to sew the edges of the sandwich together. Sewing can add an extra aesthetic element to your pressure sensor)


Using snappers will create easier connection points for our pressure sensor. Attach a female popper to one side and a male popper to the other, preferable facing the same side.

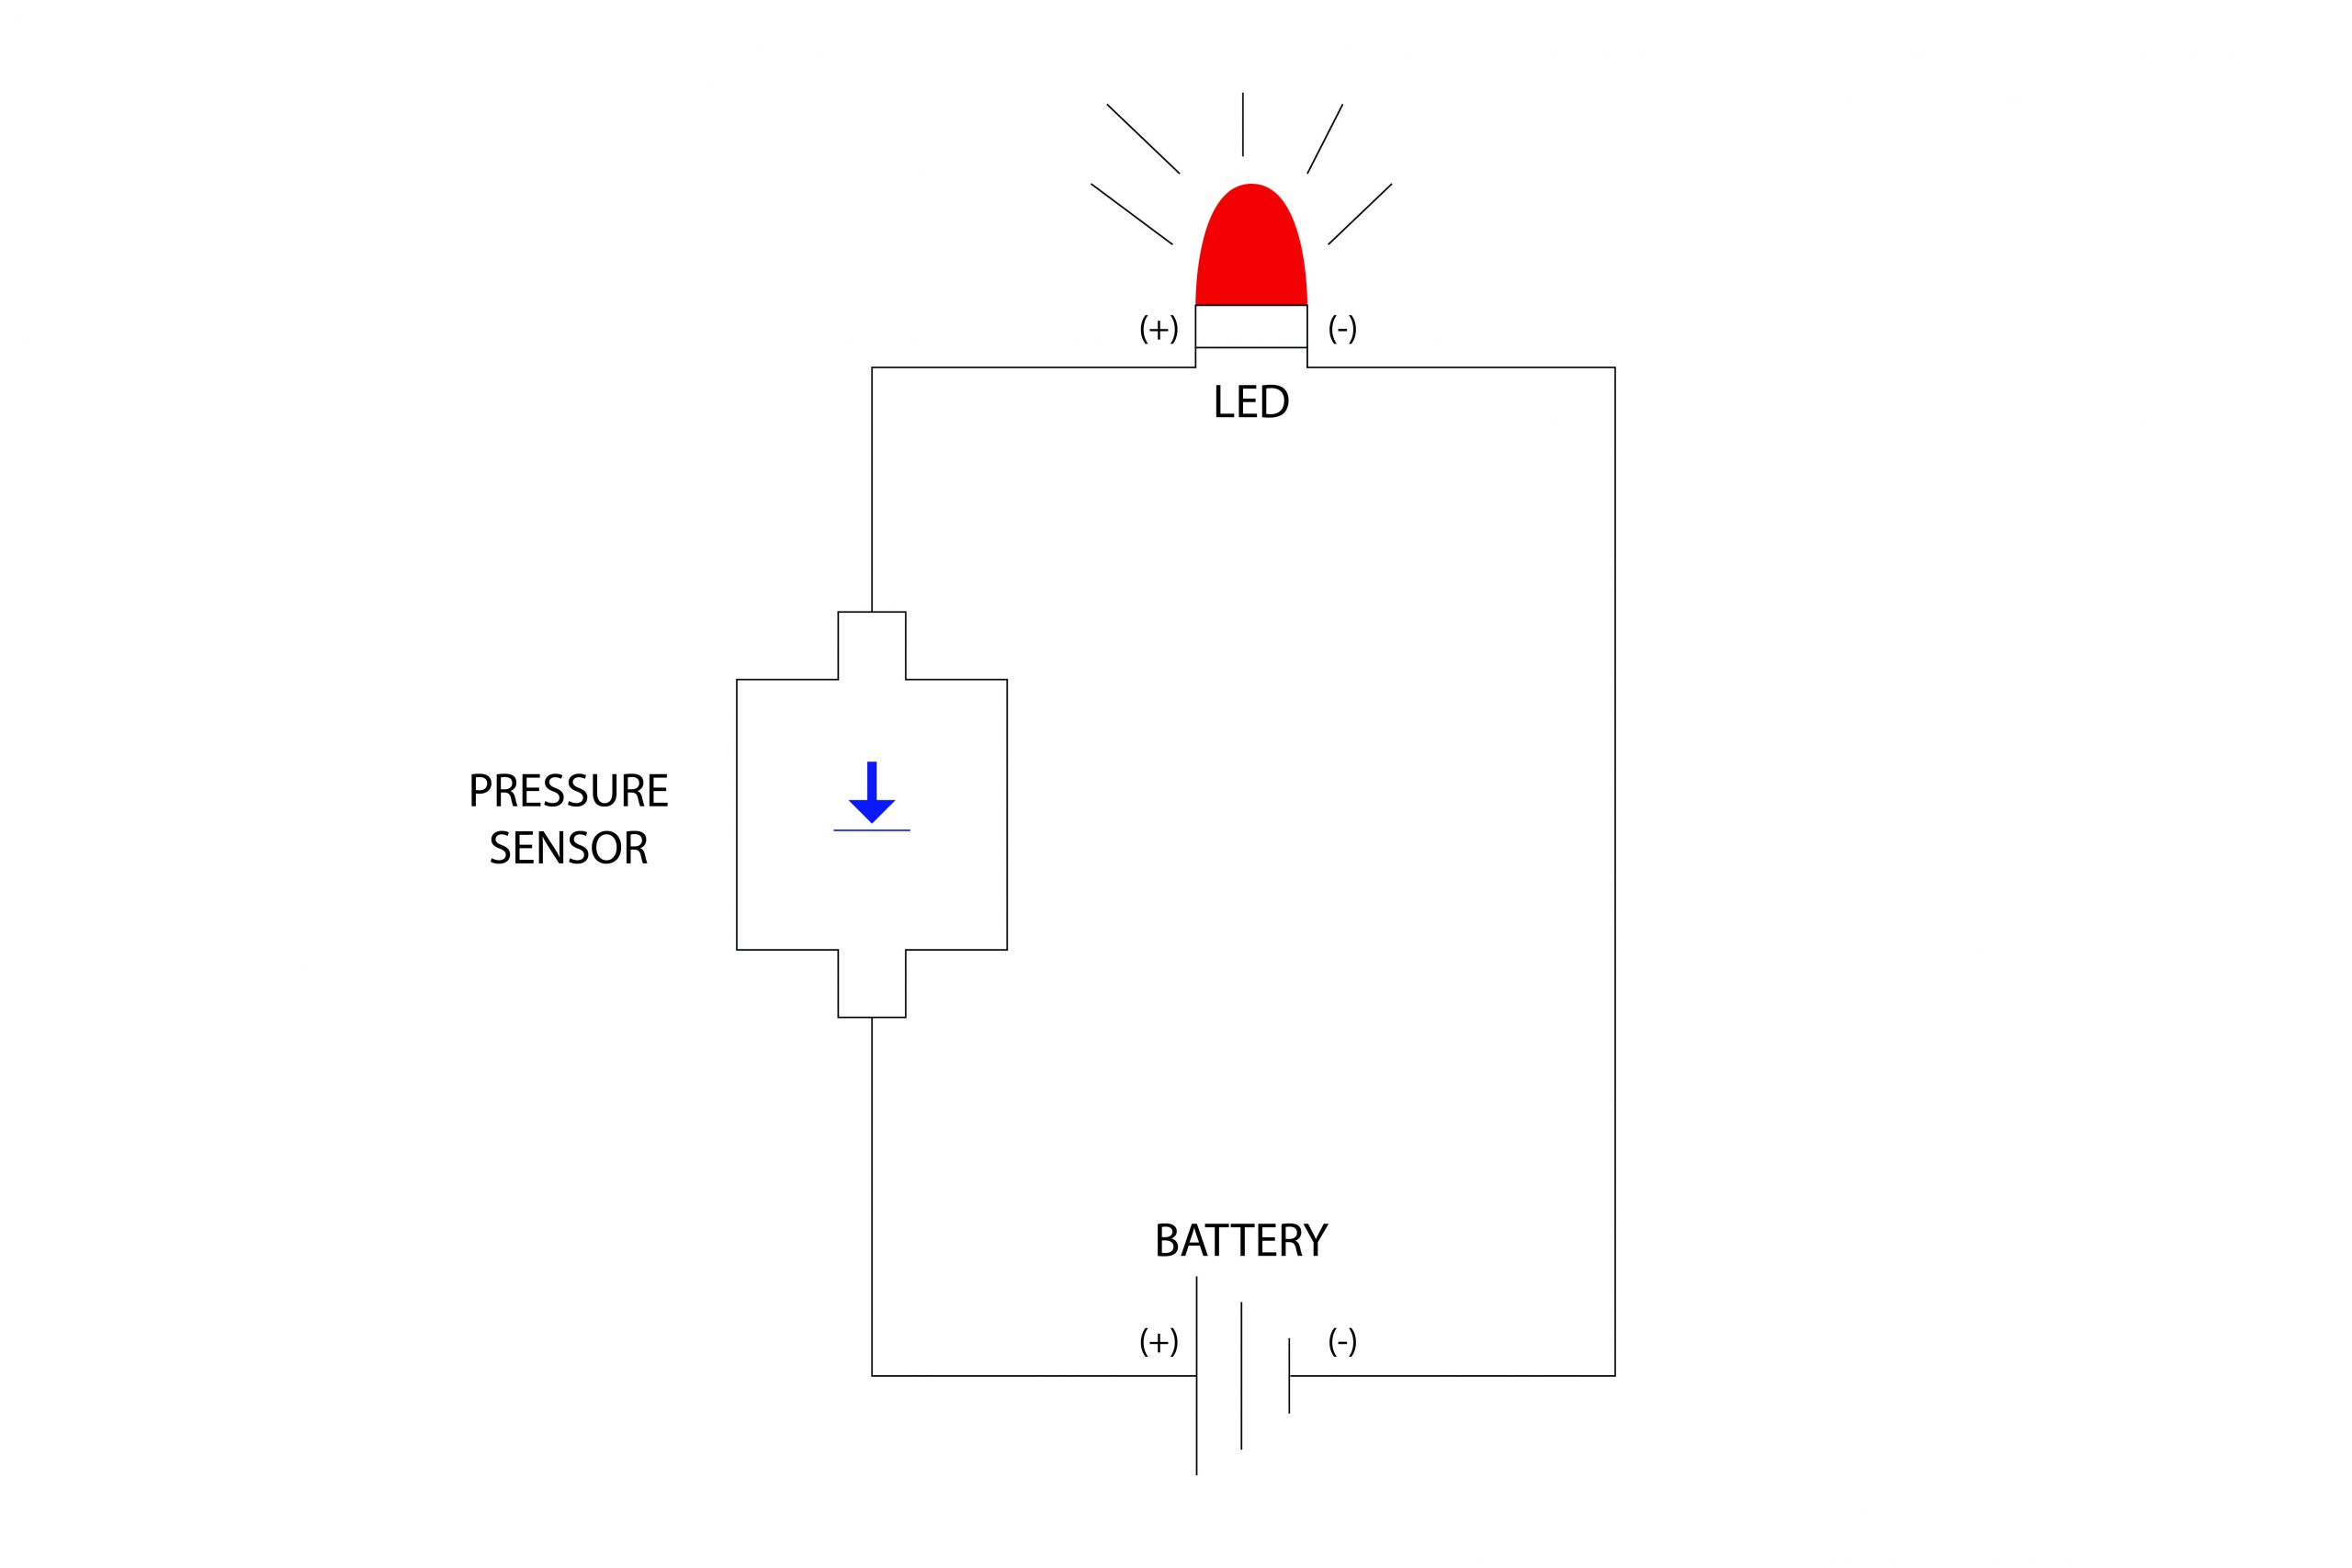
We are now ready to create our circuit. The circuit for this lesson is a simple one, there are only three components, the batter, pressure sensor and LED. Using alligator clips we will connect the positive lead of the battery to one side of the pressure sensor. Then we will connect the other side of the pressure sensor to the positive lead of the LED and then connect the negative lead of the LED to the negative lead of the battery to finish the circuit. Simple right. (Optional: This connect can be made free form but you can also use a breadboard to make things simple.)

Your pressure sensor is complete. Press and enjoy!

Having trouble? Let us know by completing the form below. We'll do our best to get your issues resolved quickly.
"*" indicates required fields