- Loading…

In this lesson we will create a fabric pressure sensor. A pressure sensor is a circuit that can display our orientation by visual representation. Using a metal bead and “hot spots” created by conductive fabric, when the metal bead makes contact with one of the petals the circuit is completed and the LED in that position will turn on. This very simple technique for detecting direction of tilt can be used in many different ways and variations, and this lesson aims to illustrate the basic functionality of the design.
EXAMPLES IN REAL LIFE
Wearable Tech Device E-Trace Draws Ballet Dancers’ Movements

KEY TERMS
LED: LED stands for light-emitting diode. It is a special type of diode that lights up when electricity passes through it. LEDs are unique because they only work when electricity passes through them in the right way, positive to negative.
Conductive Thread: Conductive thread is a thread that can carry electrical current. Generally there are two types of threads available. One type is coated conductive thread, which is regular thread is that is covered with silver. The second type is plied conductive thread, which is thread made out of silver fibers.
Conductive Fabric: Conductive fabric is a fabric that can carry an electrical current. The fabric can be woven or knit and vary in structure from very fine, see-through mesh to densely woven fabrics.
Resistive Fabric: Resistive fabrics is a fabric that tends to have a high level of resistance across a distance. Resistive fabrics are great for making fabric sensors.
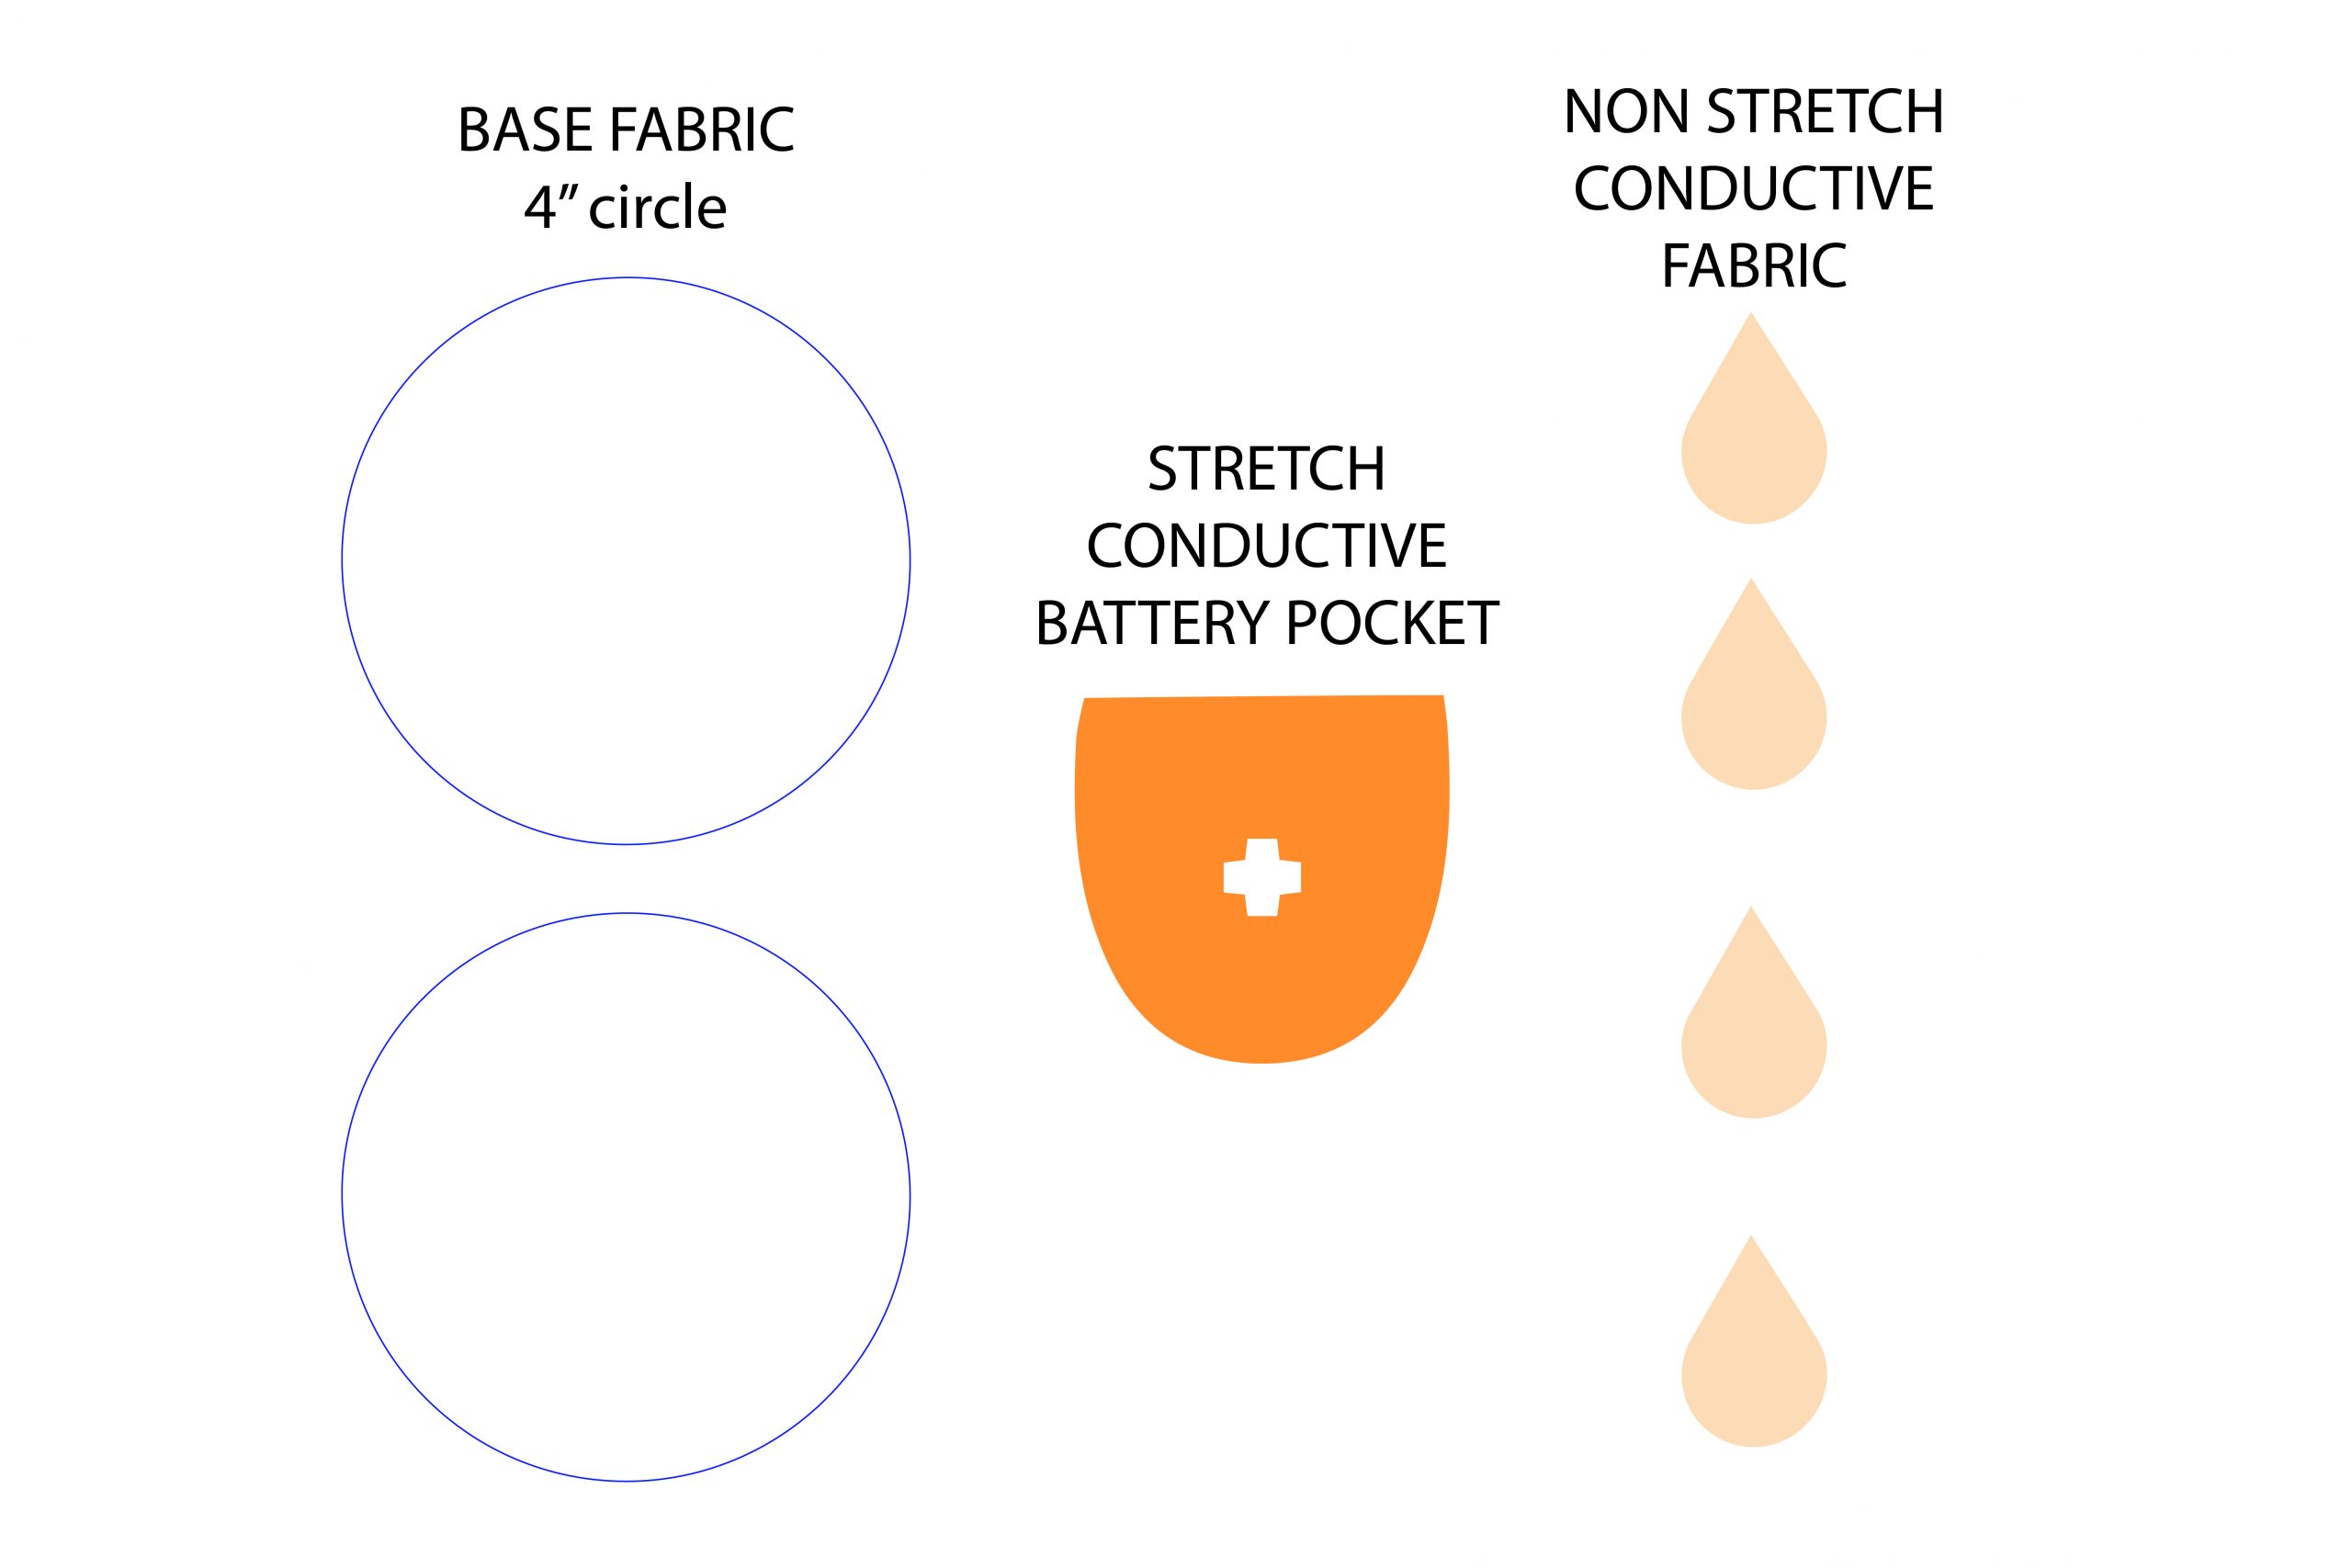
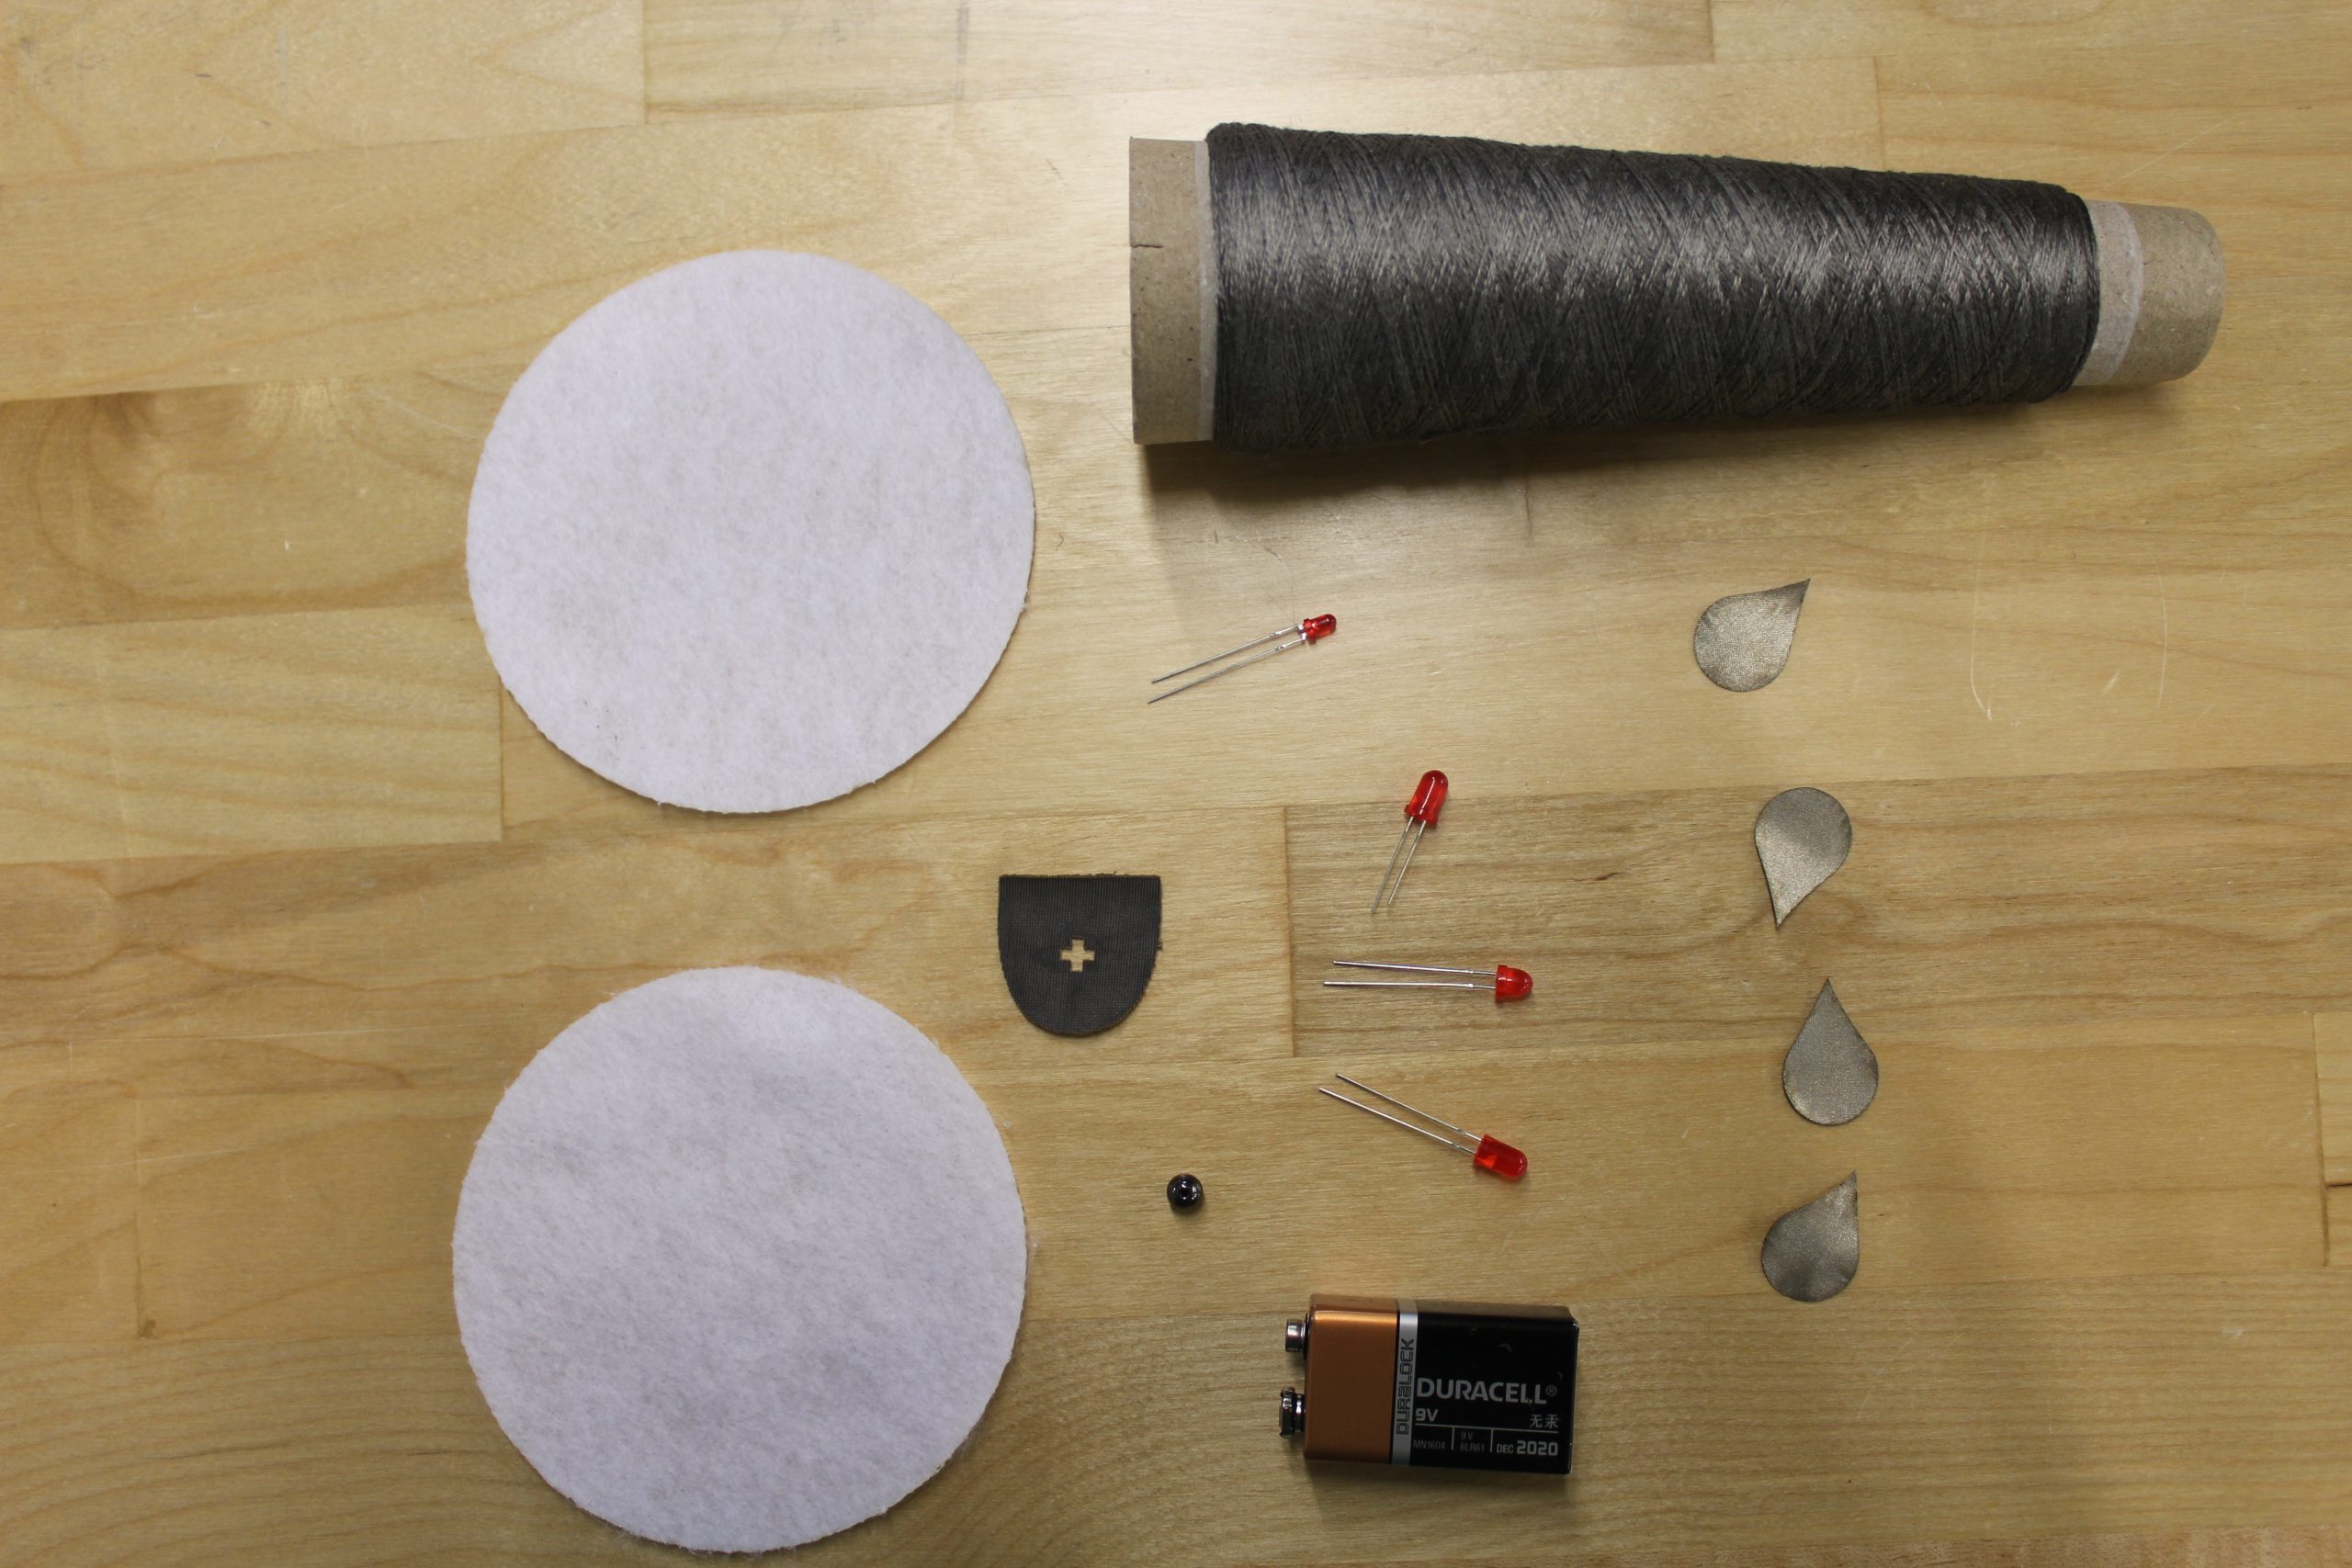
Begin by gathering the necessary material and tools for the lesson. We are going to use two types of conductive fabric, stretchy and non stretch. The non stretch conductive fabric will be used to create the conductive "hot spots" on the front of our tilt sensor. The stretch conductive fabric will be used to create the battery pocket on the back of our sensor.

Cut the desired shapes out of each fabric. Before cutting creating stencils can help with this process. For shapes we have three different types. The first shape is two 4" diameter circles cut out of the base fabric. The next shape is 4 rain drops cut out of the non stretch conductive fabric and the last shape is the batter pocket out of the stretch conductive fabric. The battery pocket resembles a shape of shield. ( Keep in mind you are not limited to the sizes or shapes mentioned above. You can do what you prefer)

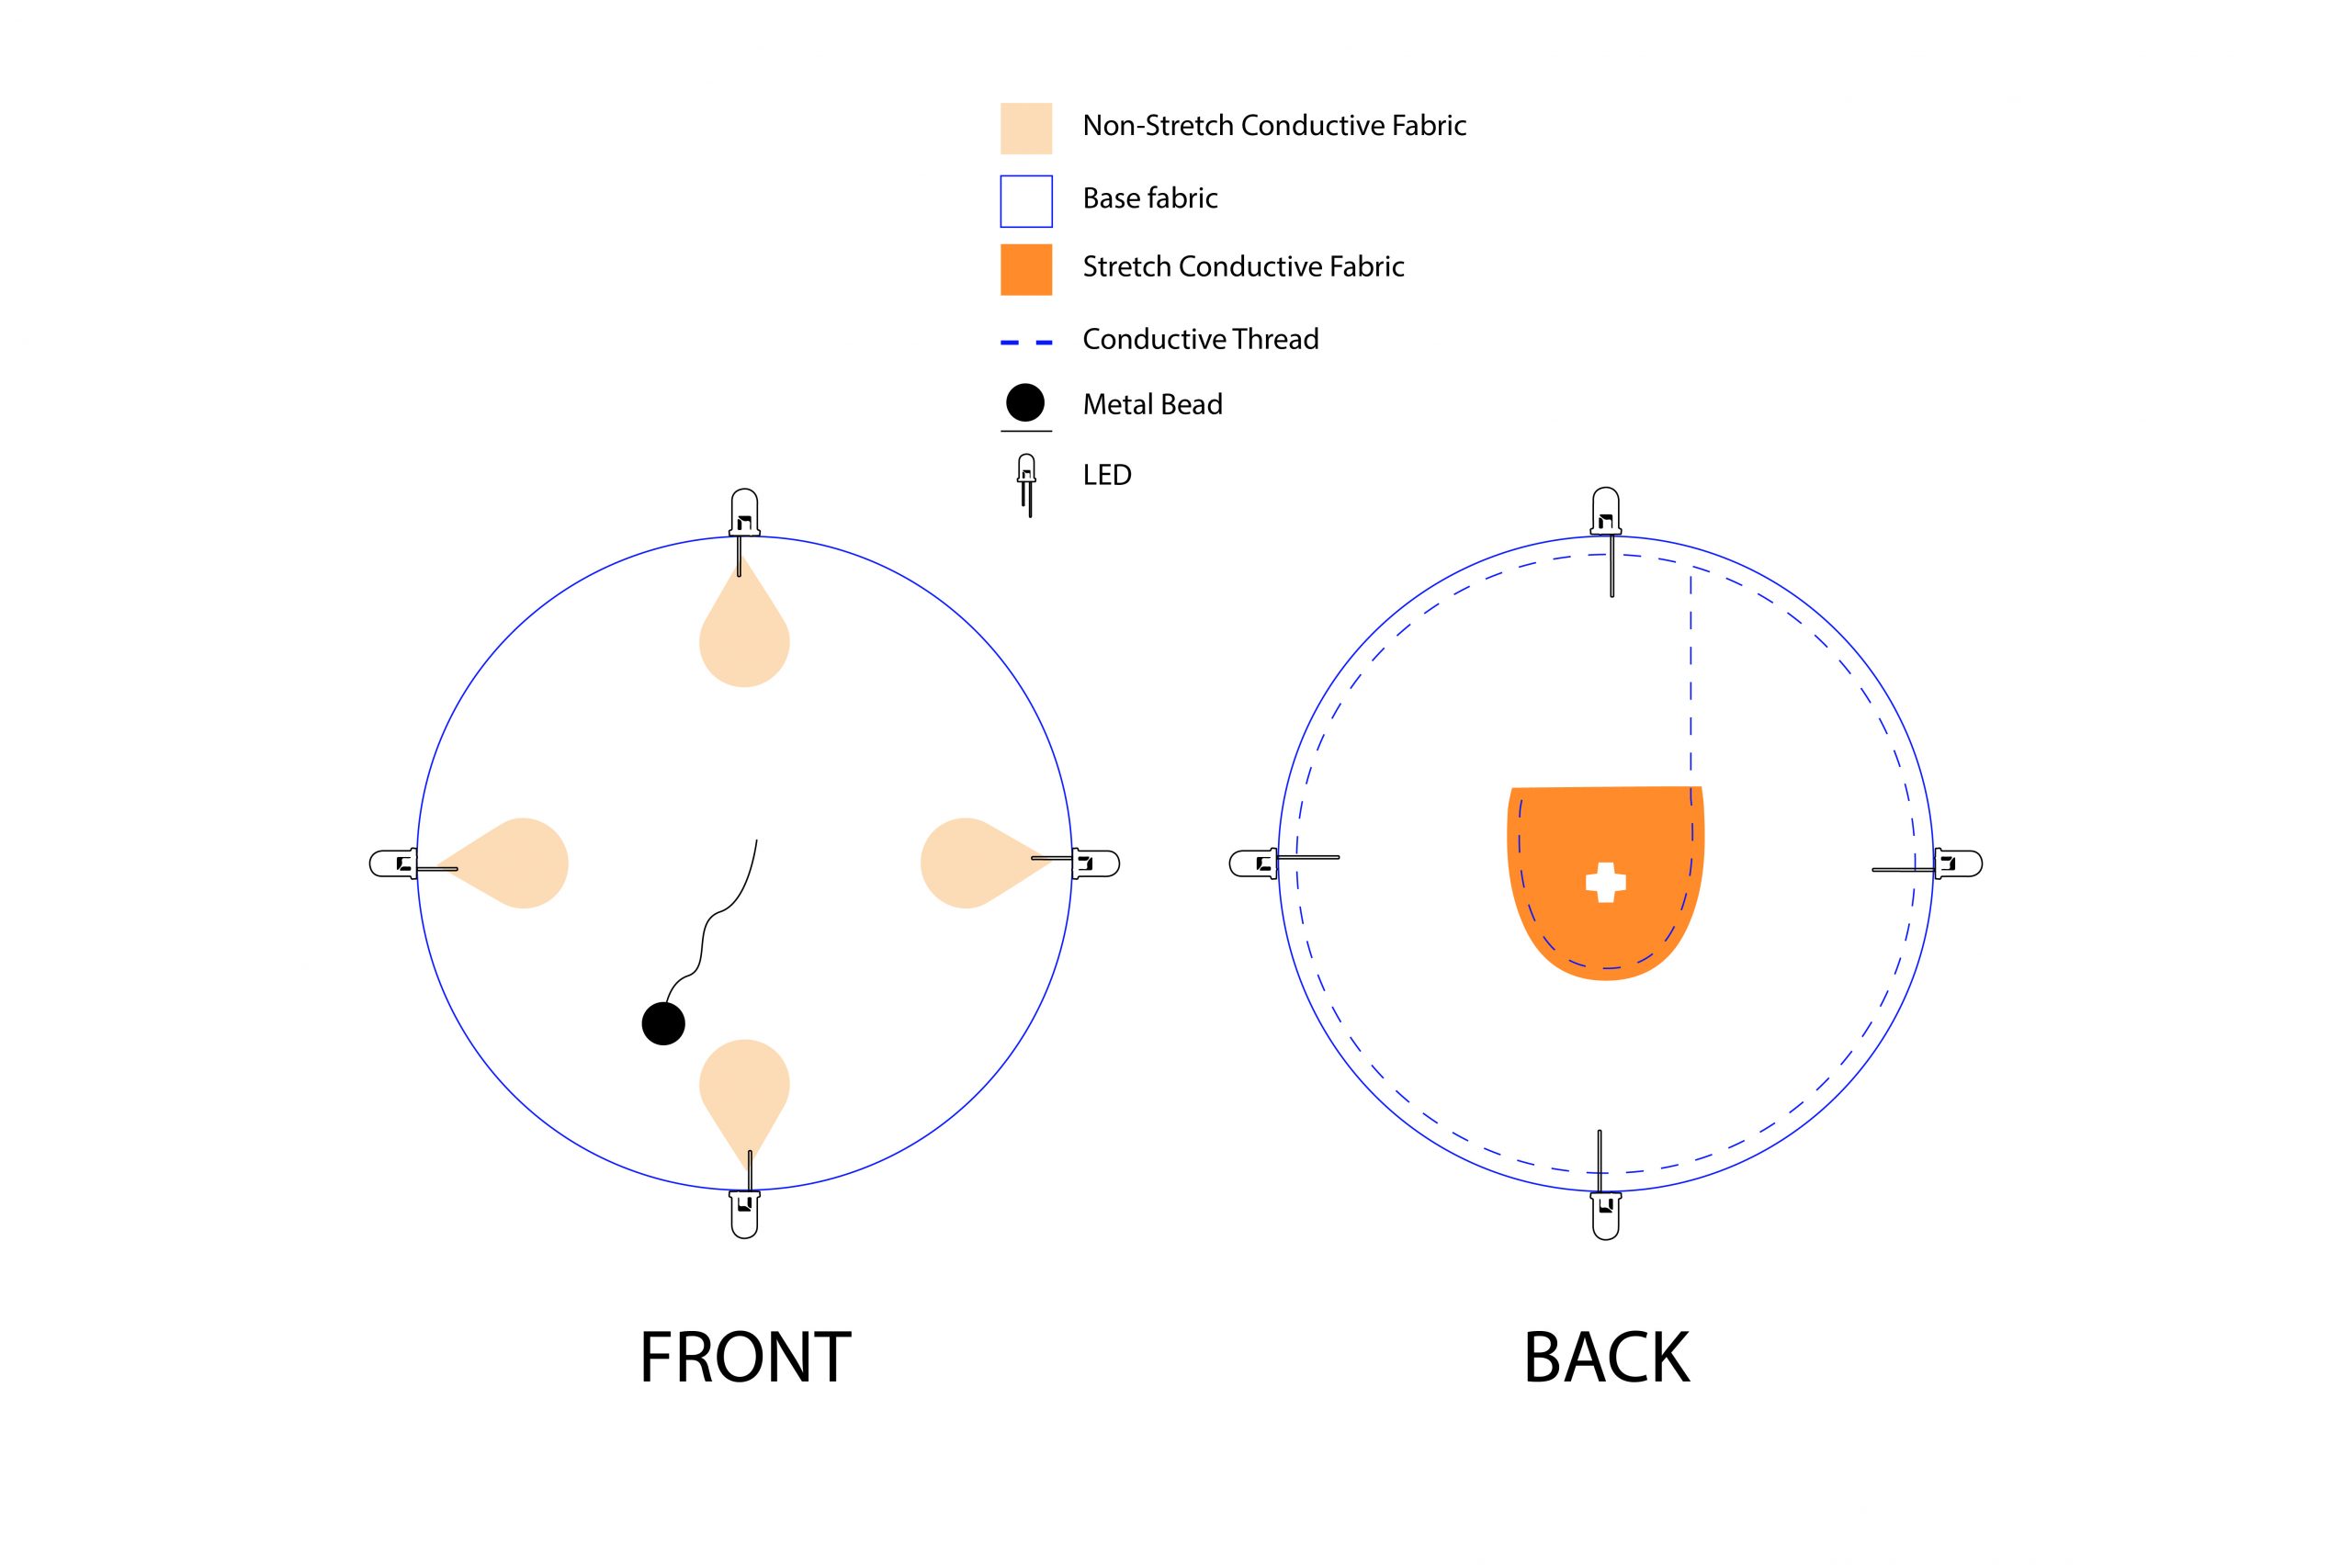
The circuit for the tilt sensor is fairly simple but can easily get confusing. There are two parts, the front and the back. The front of the circuit consist of of the metal bead and conductive hot spots and the back is where battery pocket and majority of the conductive thread are. In case you every get lost refer to this diagram for help.

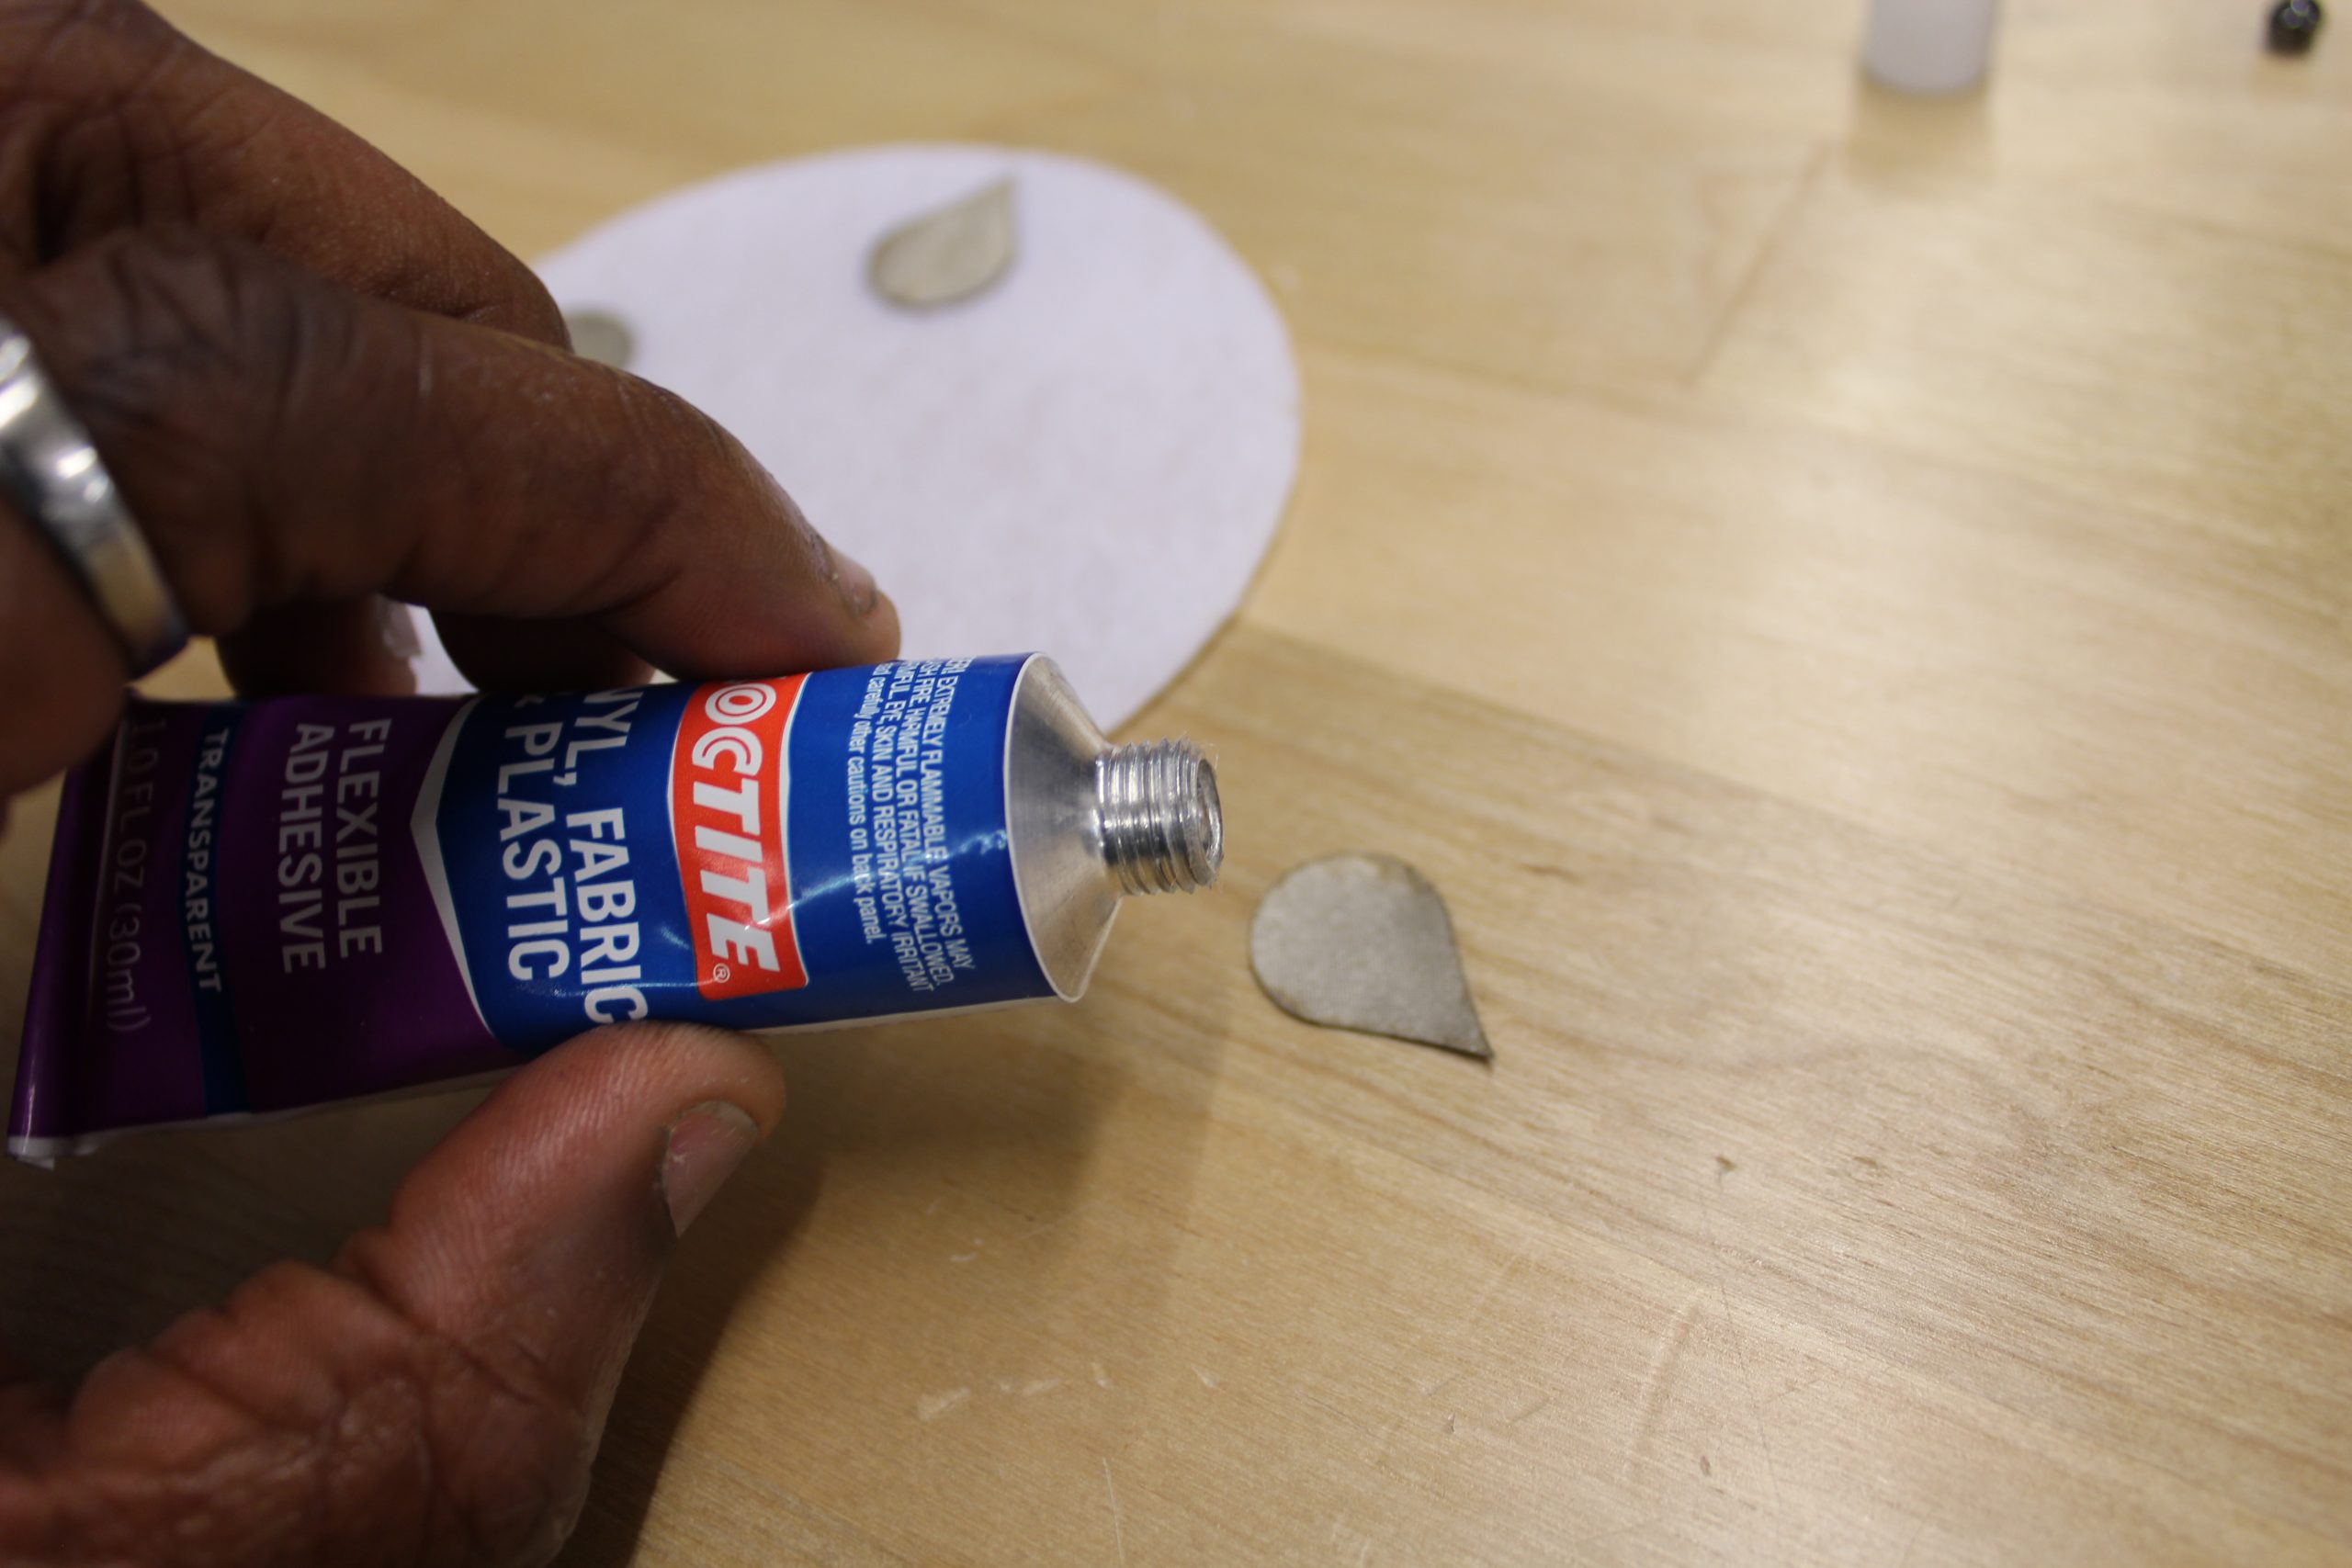
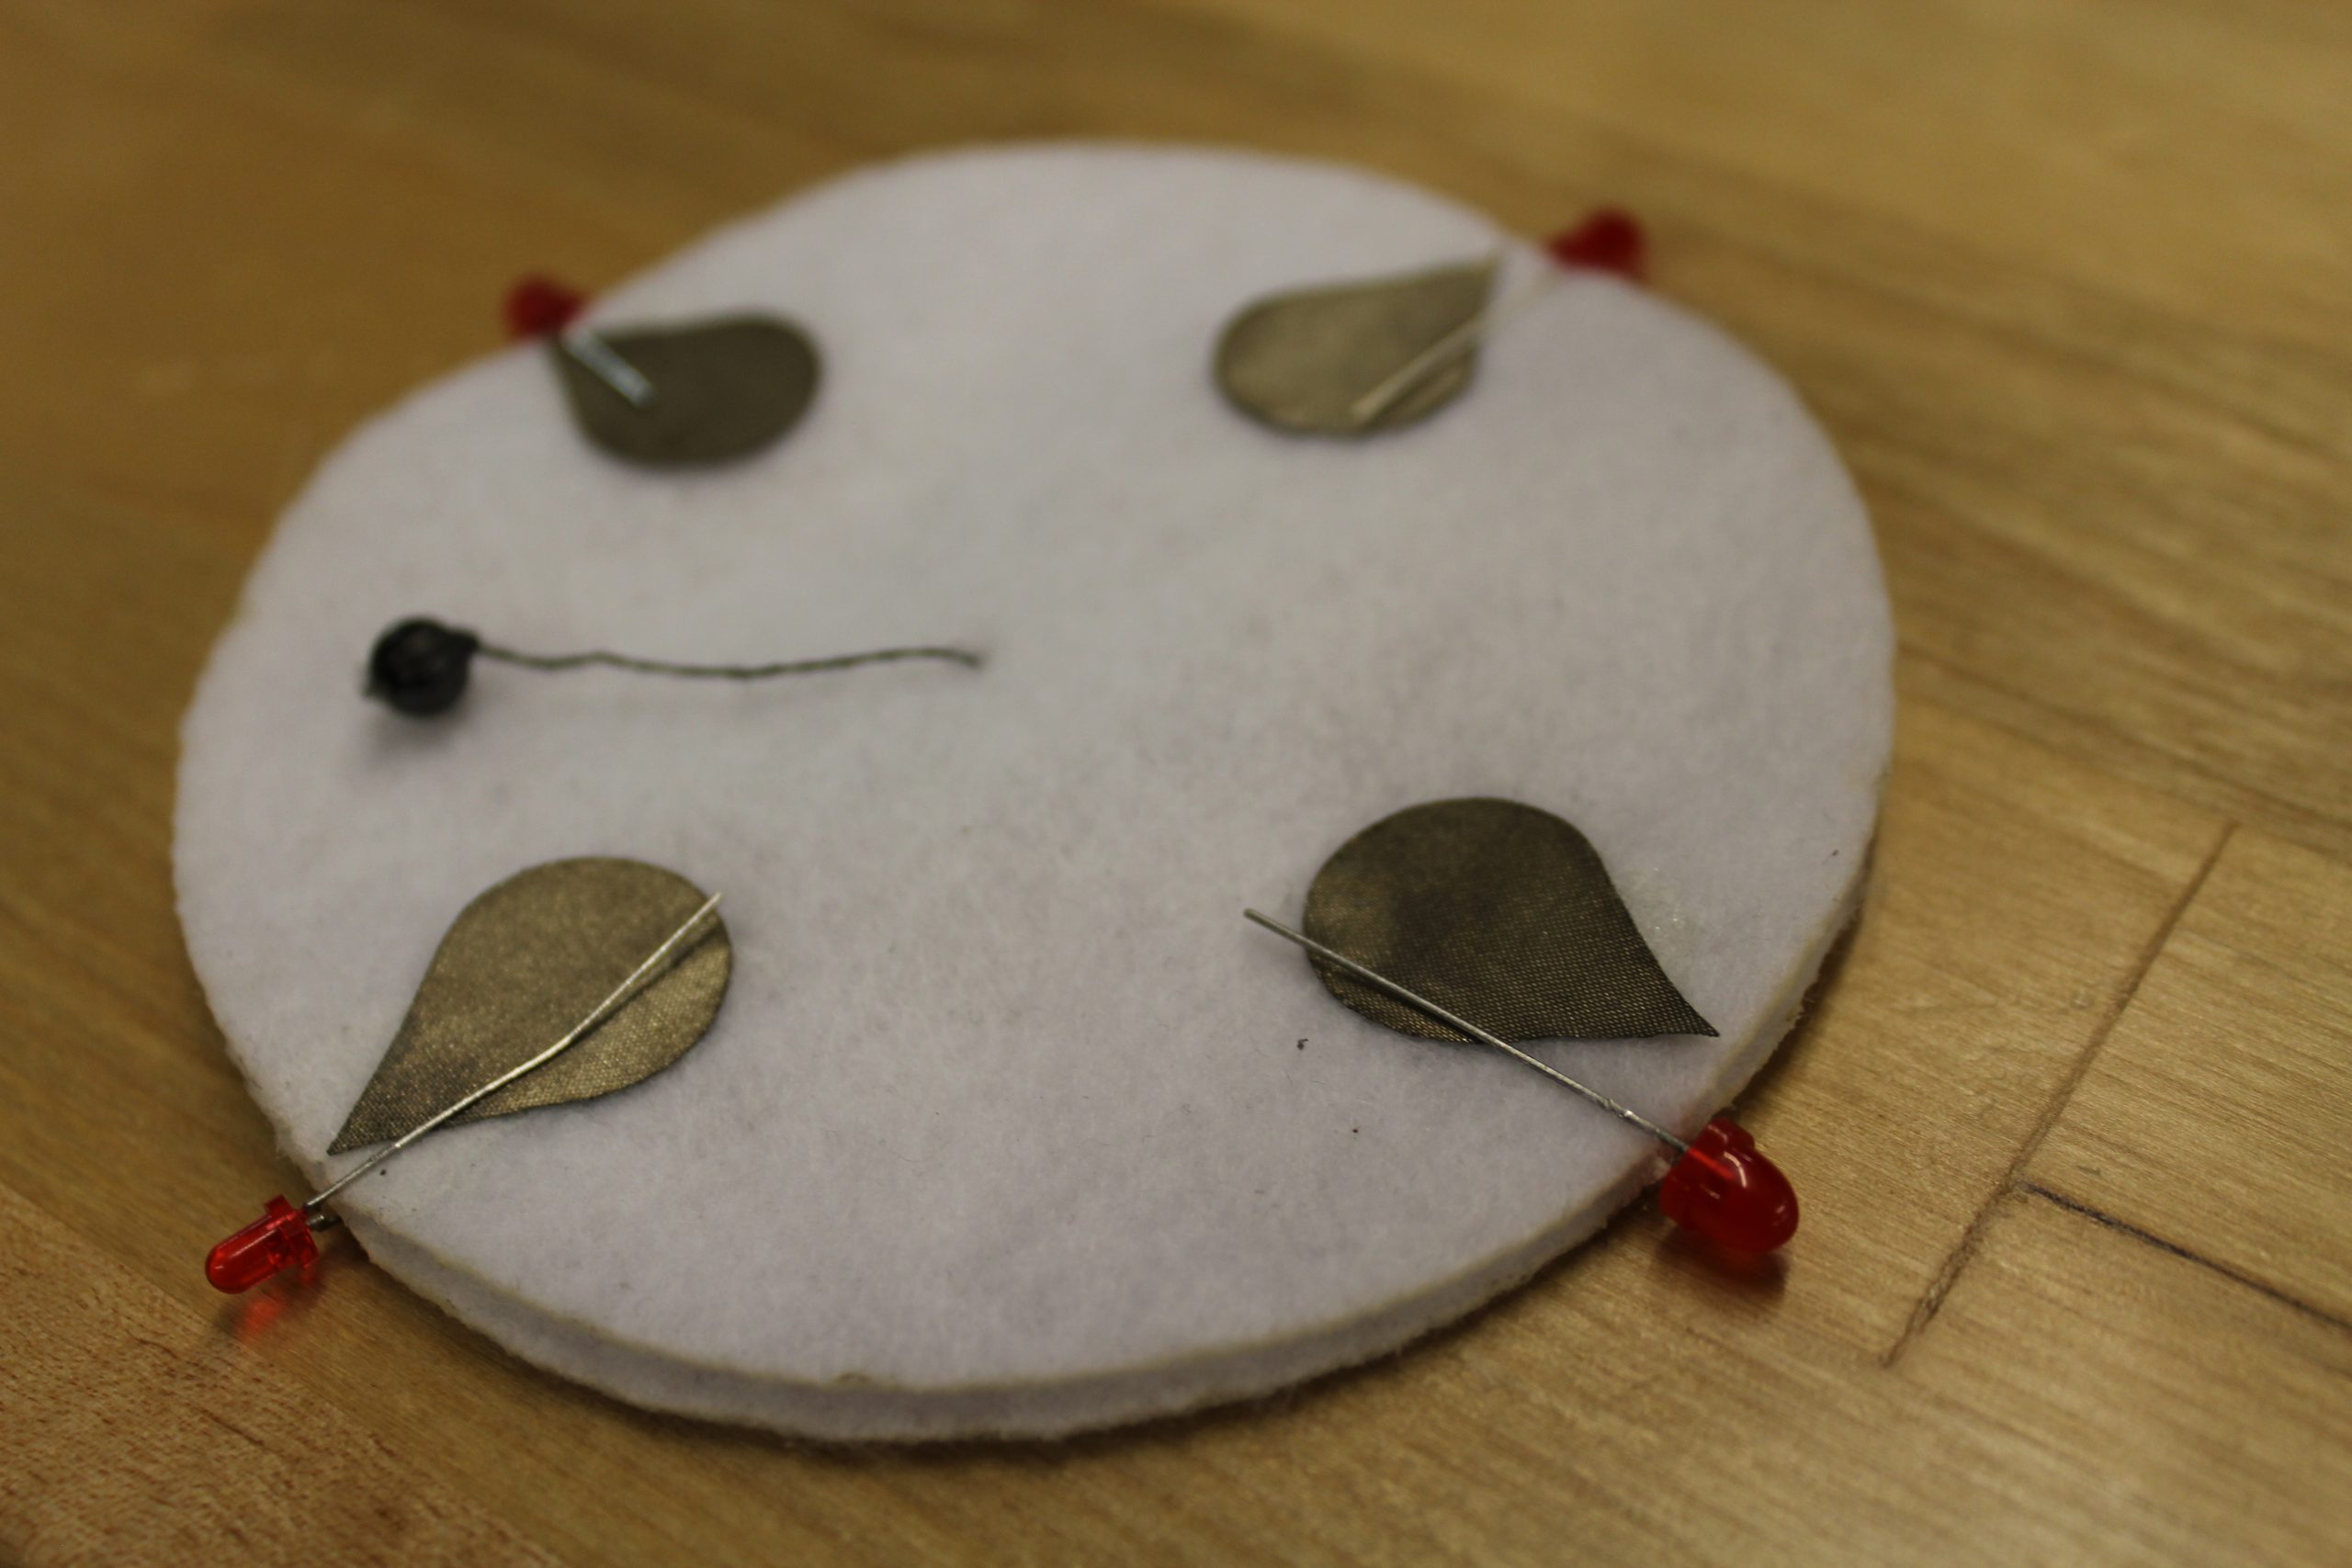
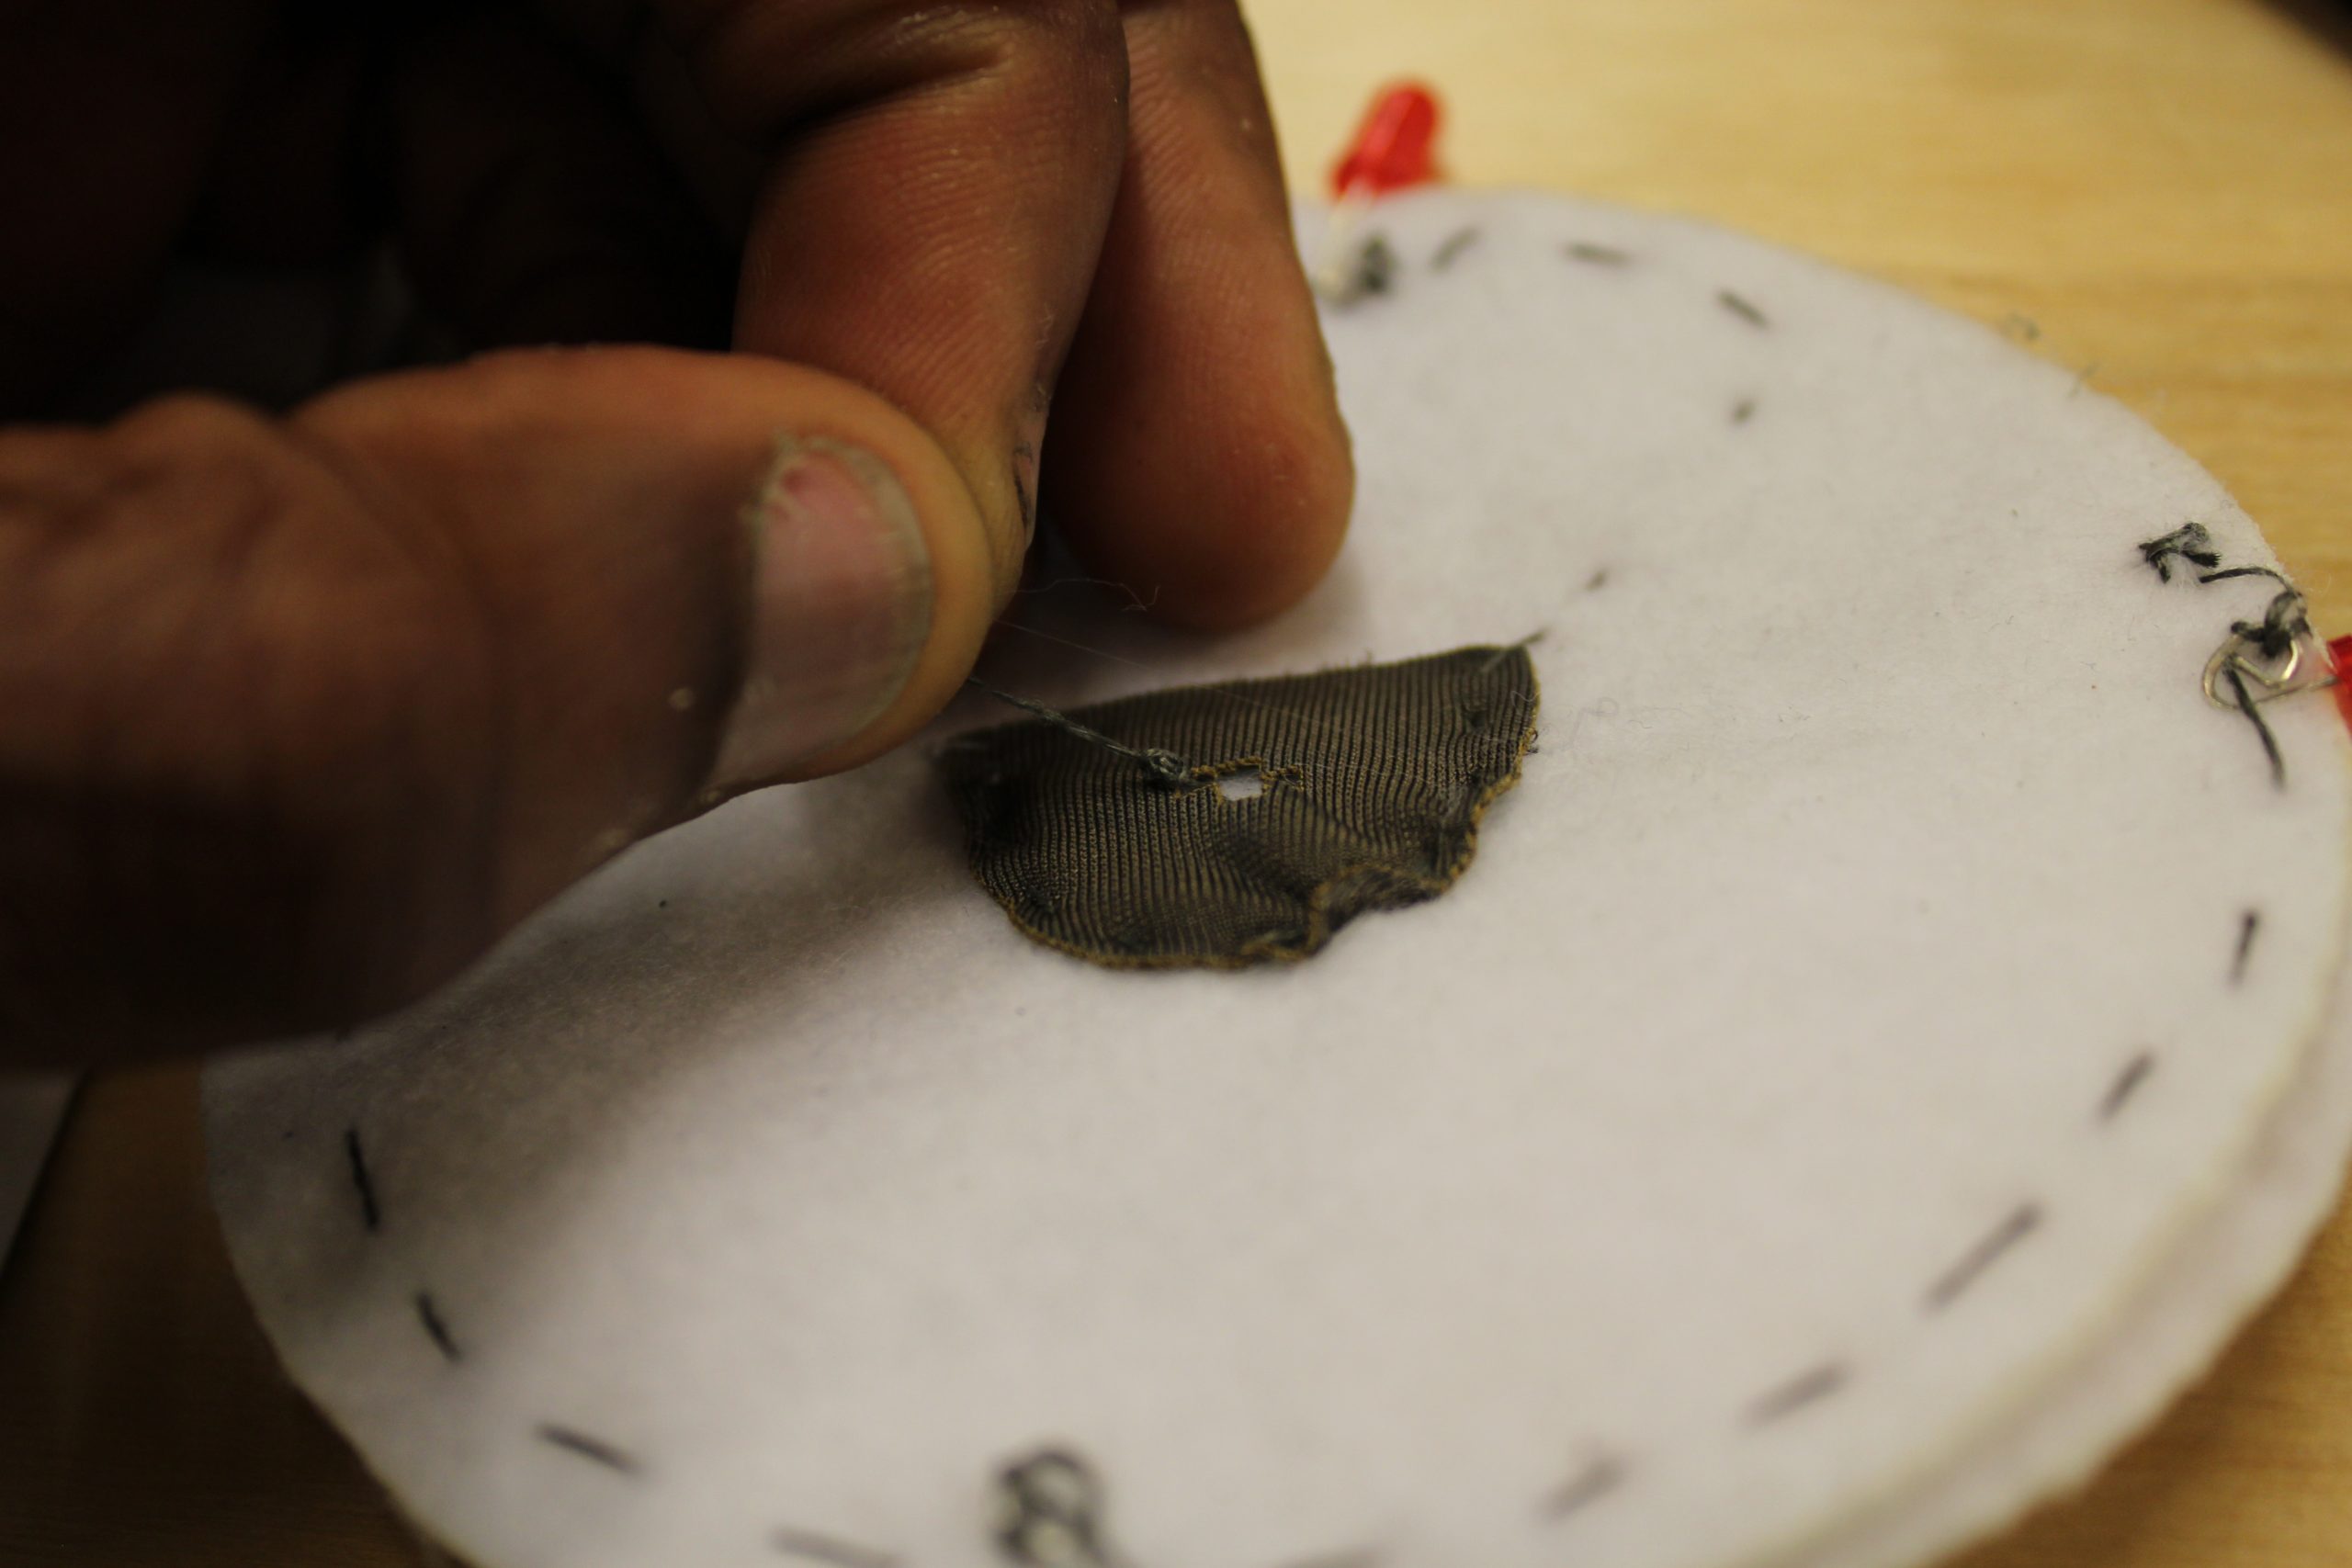
Glue on the four pieces of non stretch conductive fabric on to one of the circles of base fabric. For positioning we place the conductive fabric north, south, east and west.

Take the LEDs and attach sew them to the each hotspot. It will be one LED per hotspot. Before sewing make sure that you are sewing the negative lead (shorter leg) to the conductive fabric. (If using light bulb LEDs, it is not necessary to sew their legs to create contact. Simply placing the legs on top of the hotspots and making sure the leg and hot spot are touching is enough to complete the circuit. Be aware this is a less secure approach)

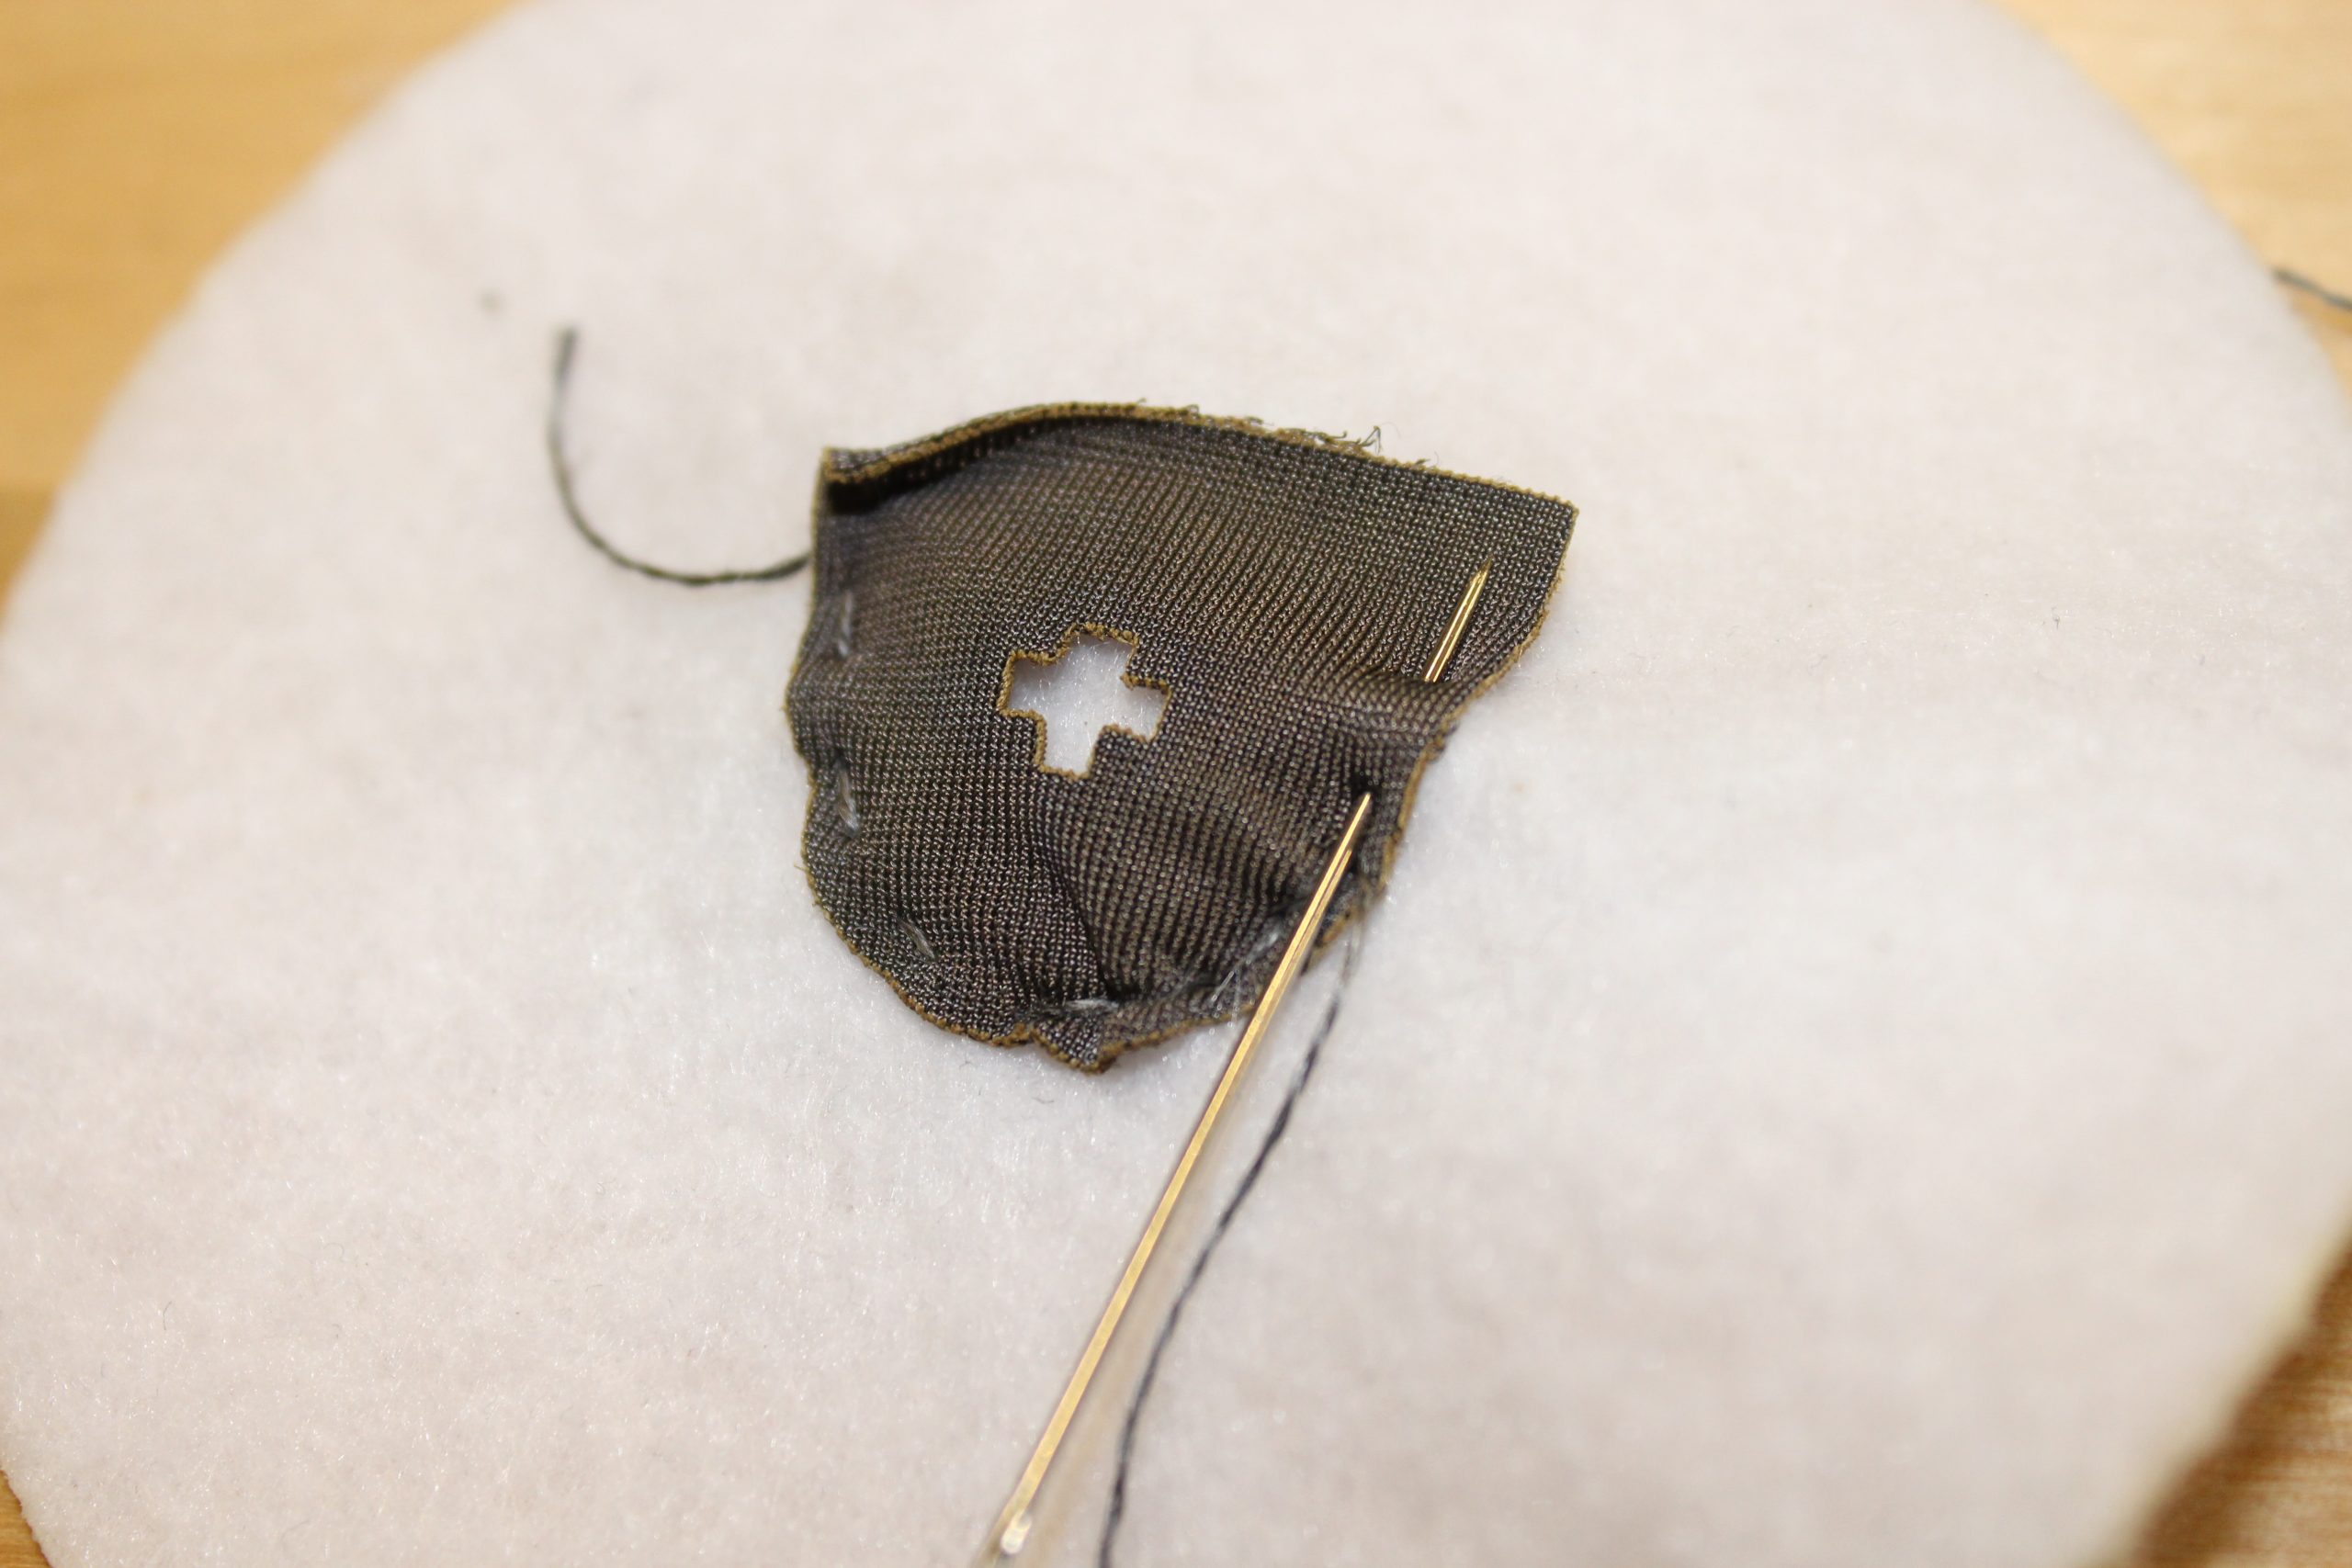
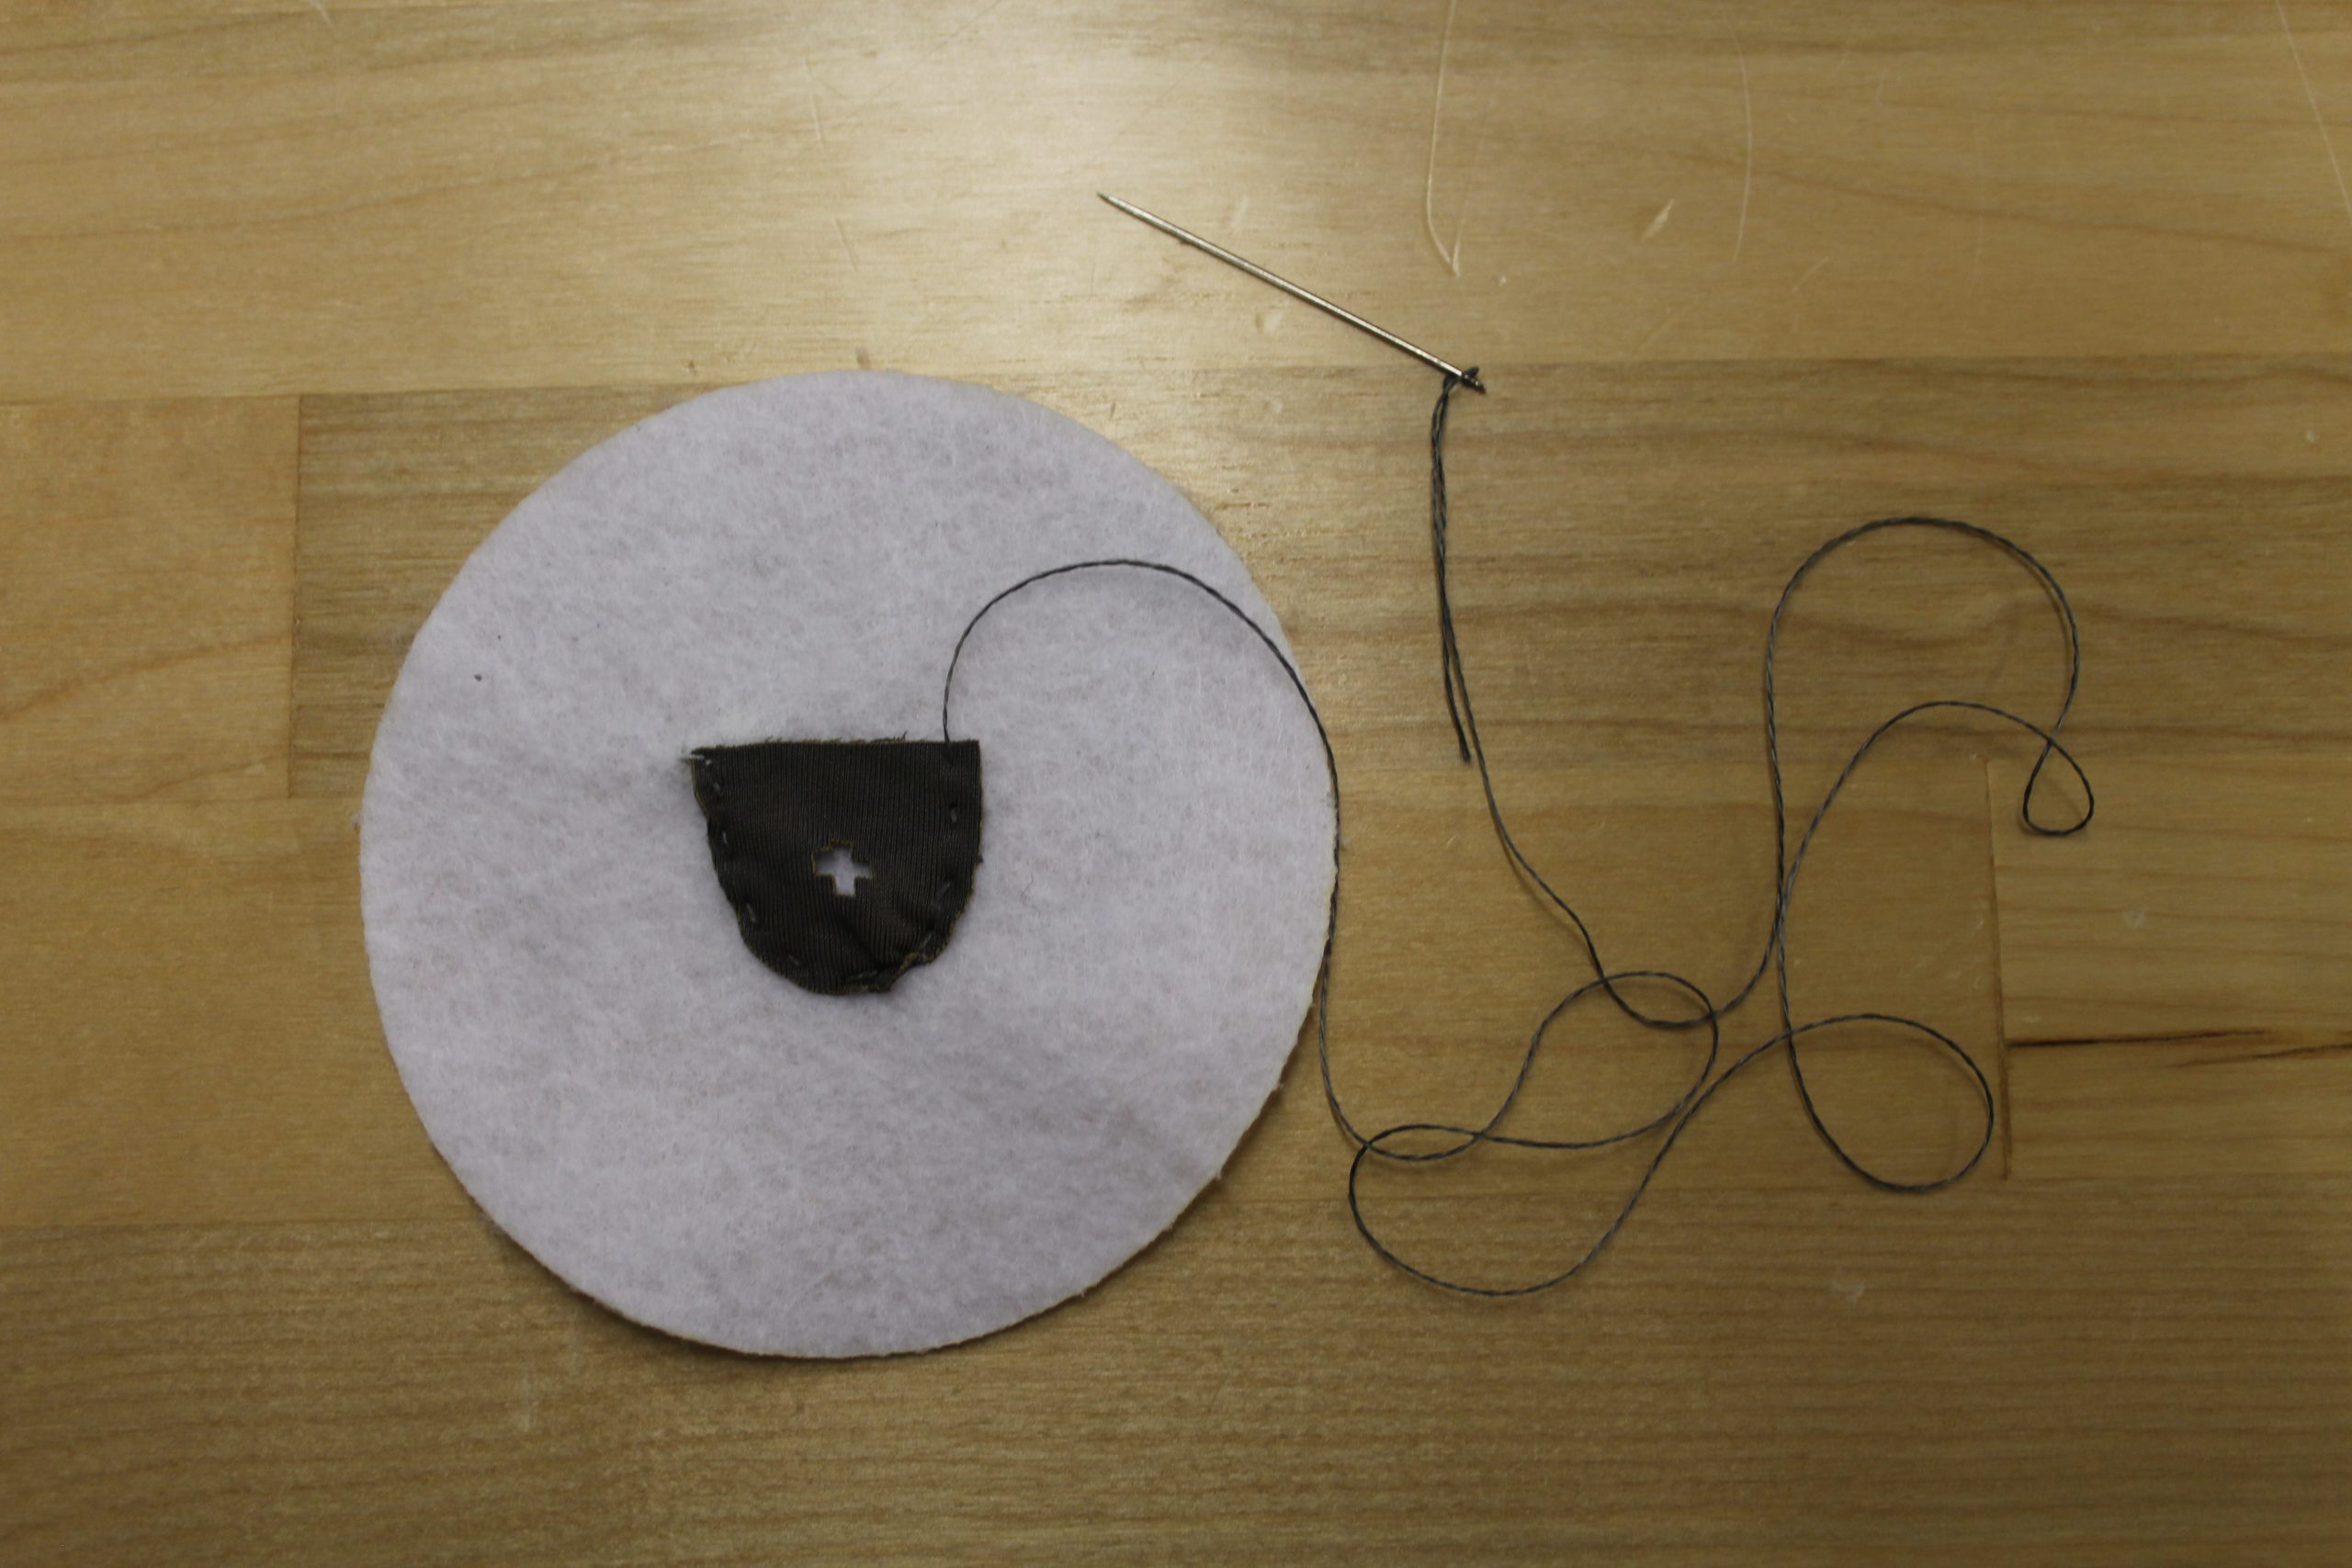
Position the battery pocket in the center of the second circle of base fabric. With conductive thread stitch around the edge of the pouch to connect it to the base fabric. When you are done DO NOT CUT THE THREAD. The extra thread will be used in the next step.


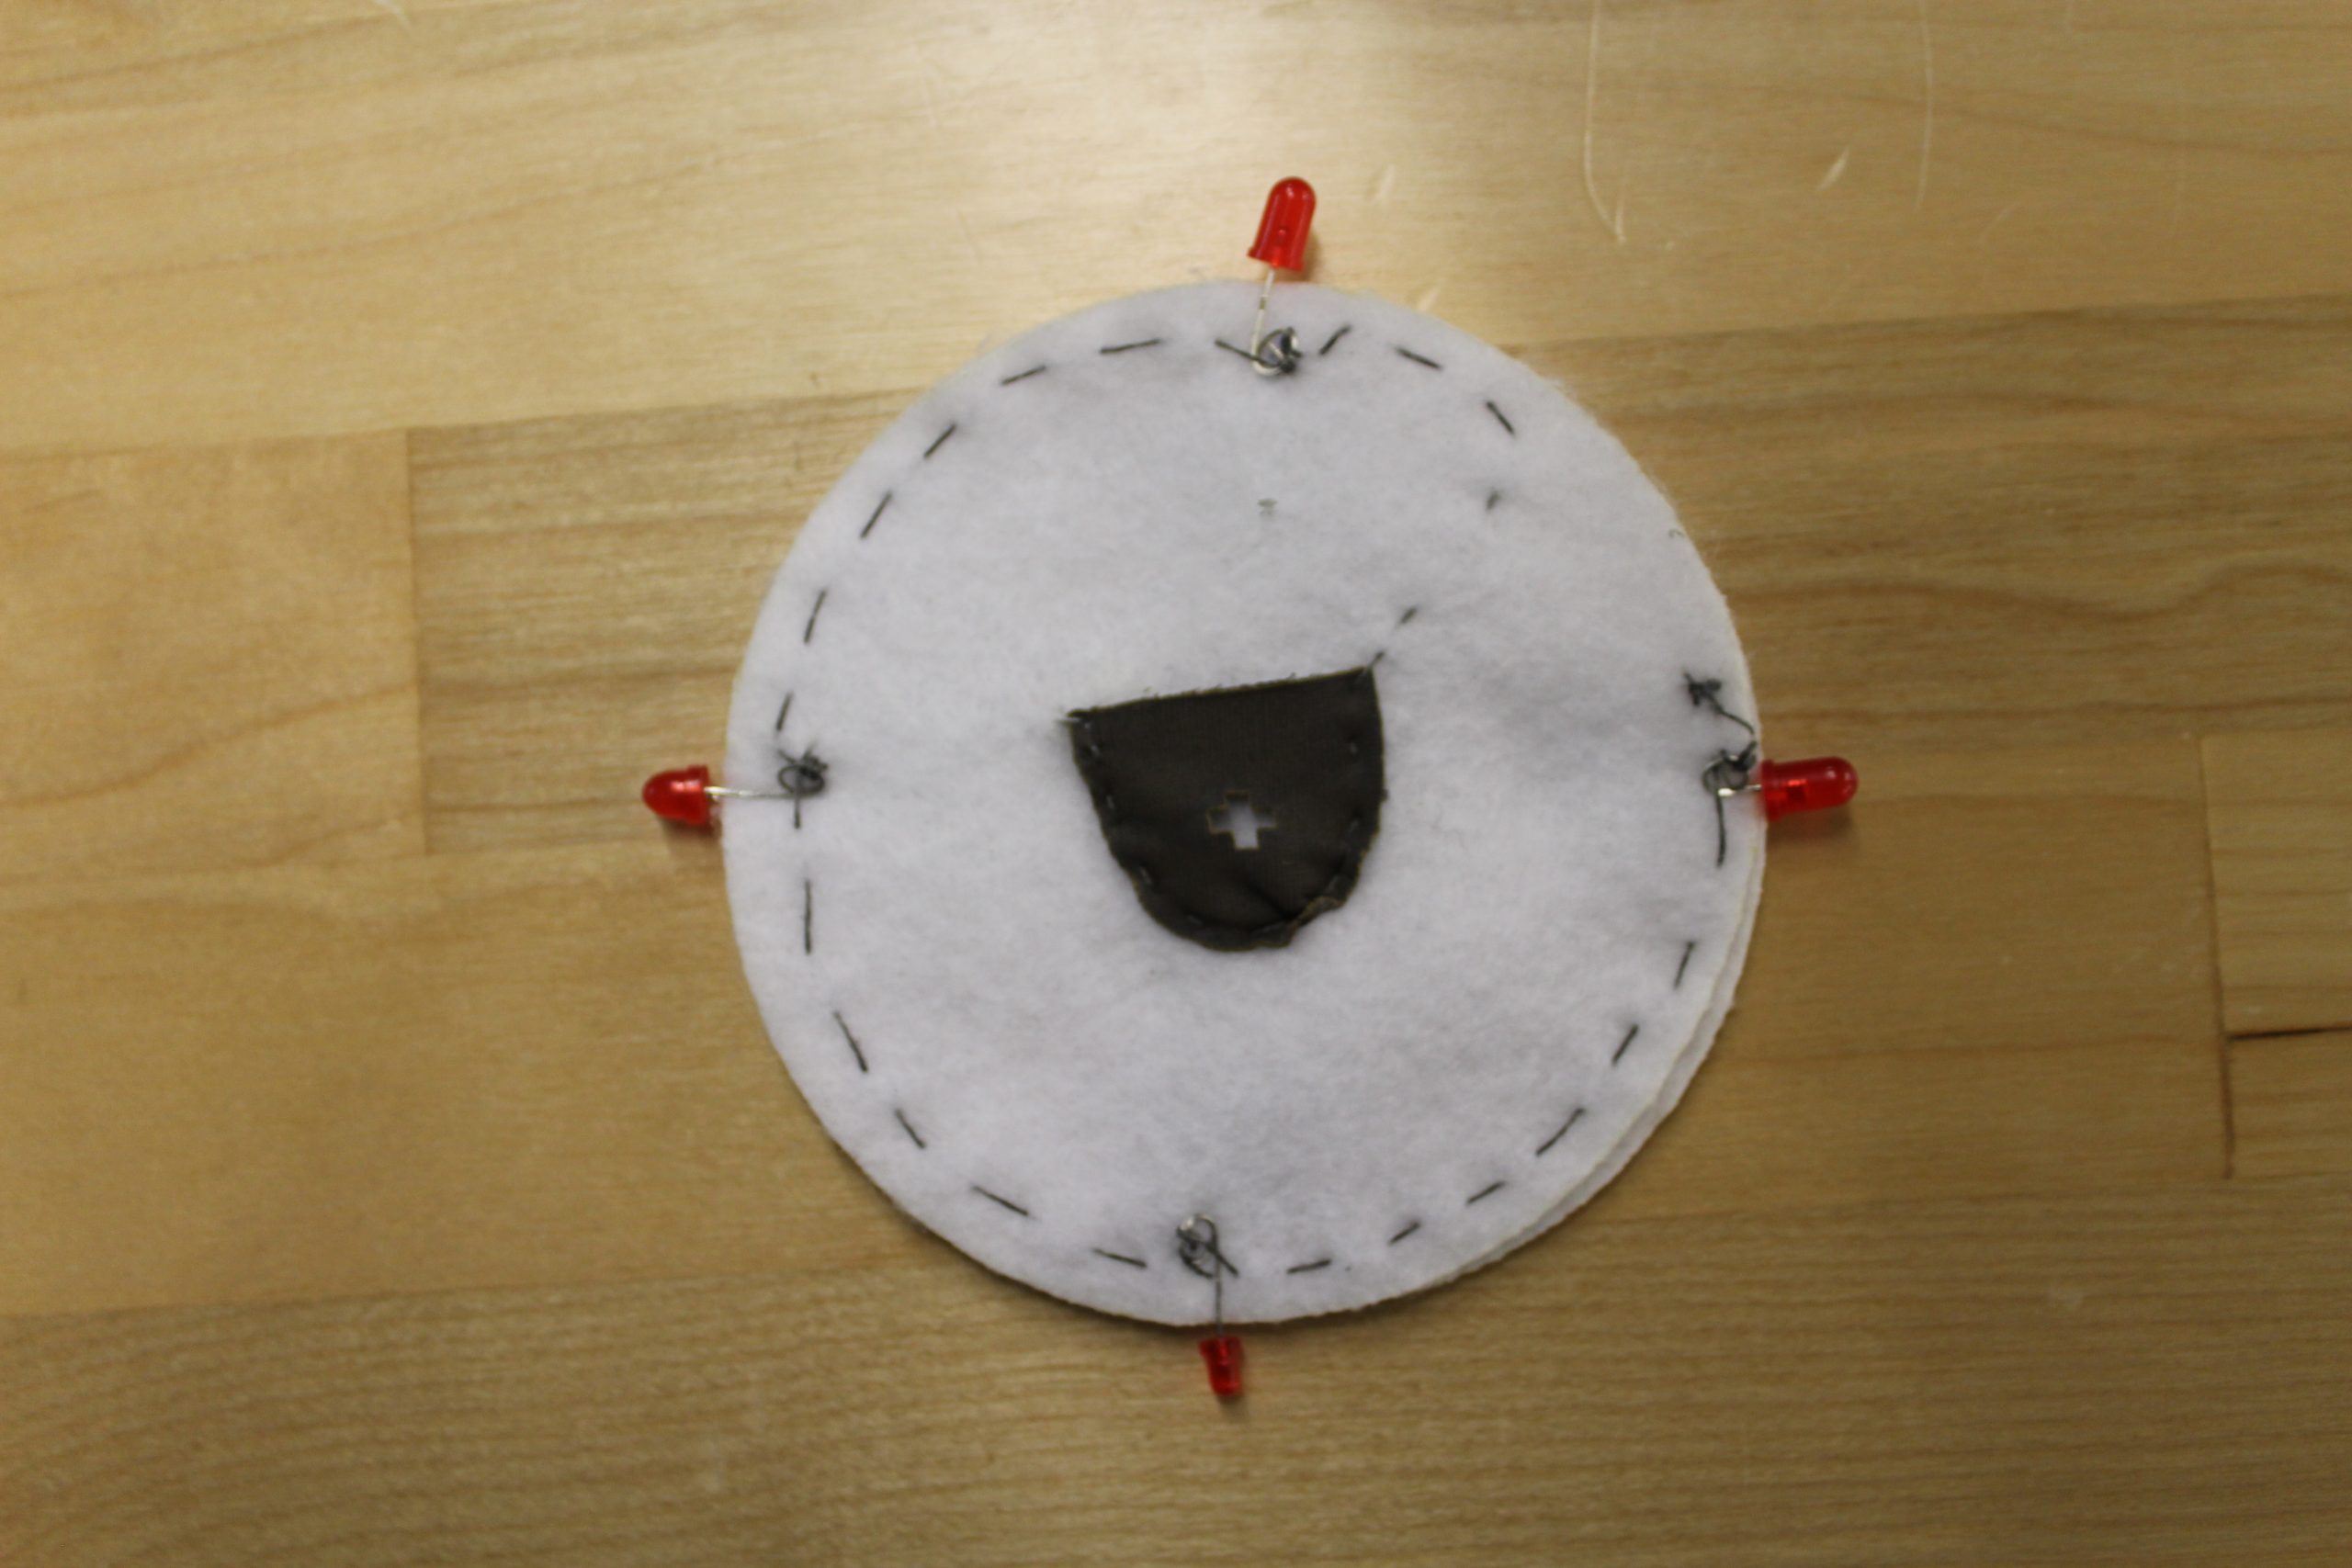
Using the same thread from the previous step sew the positive leads of the LEDs to the back piece of base fabric. Before sewing sure to squeeze the back piece between the front and the positive leg of the LEDs. When sewing the LEDs make sure that you only sew through the back fabric and not the front. This will prevent the chances of short circuits and keep the front clean.

Cut a small piece of conductive thread, some where around 5"-6". Tie three knots at the end of the conductive thread. Thread the thread through the “+” of the battery pocket with the knot as the tail end. Take the metal bead and thread the conductive thread through it at least twice then back through the back side of the sensor. Create a knot and cut thread. What we did in this step was create a connecting point for the metal bead. The knots created, when the battery is placed in the pocket will touch the negative side of the battery and complete the circuit.

The last step is placing the battery into the pocket. Orientation of the battery is important. Coin cell batteries have engravings on them to let you know what side of the battery is which. We want to have the positive side facing up and the negative side facing down. A quick way to remember is the negative touches the knot and the positive faces the positive symbol on the batter pocket. Once the battery is in your sensor is complete. Tilt and enjoy!

Having trouble? Let us know by completing the form below. We'll do our best to get your issues resolved quickly.
"*" indicates required fields