- Loading…

In this workshop the children design the creatures of their fantasies through a digital plasticine and then be fabricated with the help of machines to make toys: 3D printers.

Materials List
Technological tools
Digital Fabrication Tools
Hardware: 3D Printer
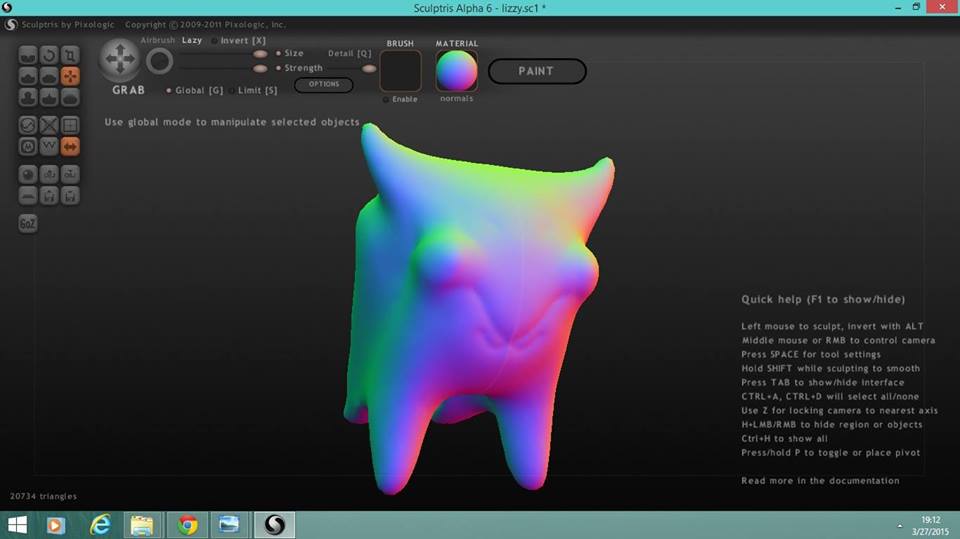
Software: Sculptris
It's time to meet us and present the workshop
TEACHER NOTE: Use this guide – which will serve as support throughout the sessions – and tell the children that sessions will be like a game in which they must overcome different levels to learn how to design and make their own toys.
It is time to meet us, introduce yourself by indicating your name or nickname, how old you are and what you like to do, then invite them to voluntarily introduce themselves.
PD. This workshop consists of 2 sessions.
It's time to create our first characters in the real world using colored plasticine

Tell the children that their first mission is to create the fantastic creature of their fantasies. For this, give them plasticine (neon colors) and plastic or wooden punches.
Now let's name each manual process that we do

With the characters that the children are creating, together with them, explore the images of level 2 to associate each manual process with a new name and a button. In that way they will review how the buttons work: Create, Draw, Inflate, Smooth and Grab, buttons that coincidentally will be seen in level 4 when they have to digitally design their characters,
From the real world to digital and from the world 2d to 3d

Show the participants the first pair of images of level 3 and ask them what are the differences between both images. Invite everyone to participate in an orderly manner. Make a rescue of their comments and close saying that effectively one image is real world and the other digital world.
Next, show the second pair of images and do the same dynamic asking the difference between both images. This time you close commenting that although both images are from the digital world one is from the world 2d and the other from the 3d world.
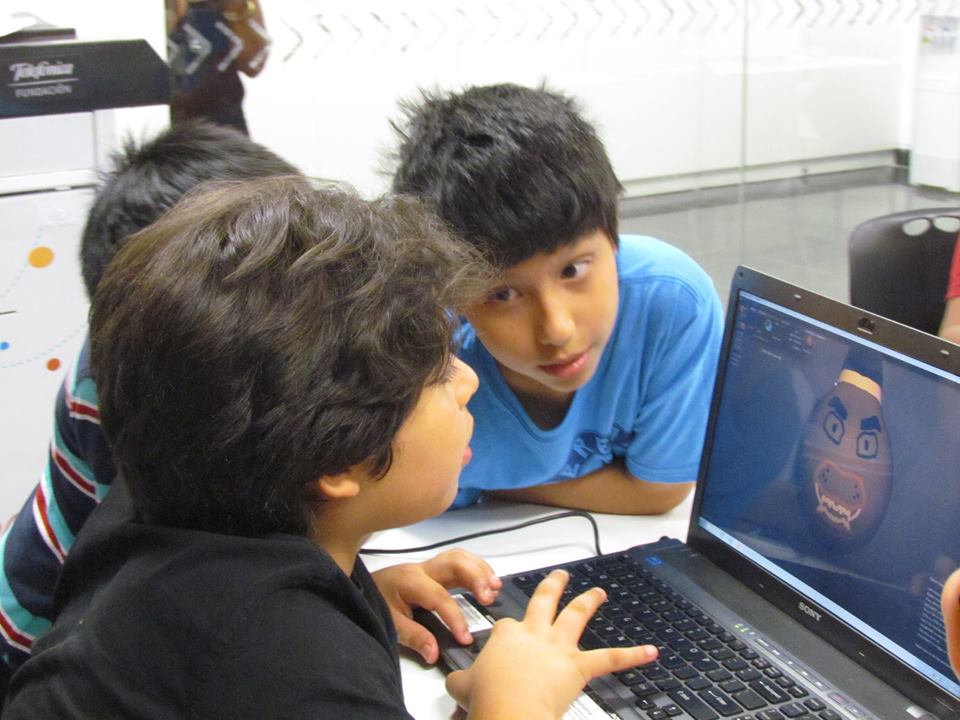
It's time to digitally design your first fantastic creature

Open the digital design program. Sculptris and ask the participants what familiar things they can see . Once they got to identify the buttons explored in level 2, you make a review of all of them designing a basic 3d character.
Now tell the participants that their new mission is to create a fantastic digital creature that looks like it was made with plasticine in level 1 or a completely new one. On the way you invite them to create a name and a story to that character.
Let's use the machines to make toys: 3D printers

Make a review of the session rescuing how they went from the real world to the digital world and ask them if they have any idea how to take their digital characters to the real world. After they give you their answers, including the one you expected in this workshop, show the video of level 5 or project it directly from youtube. At the end of the video – if you want to play it again – comment that as the main character “Hiro” they will have the possibility of making their fantastic creatures with the machines to make toys: 3D Printers.
Finally, print a sample character and while this is happening, explain how the 3D printer works just like a silicone gun but in an automated way.
Teacher Note: indicate that they have to save their creations on the computer, export those as obj file and send to you via usb or email.
Print their creations in the following hours until the next session.
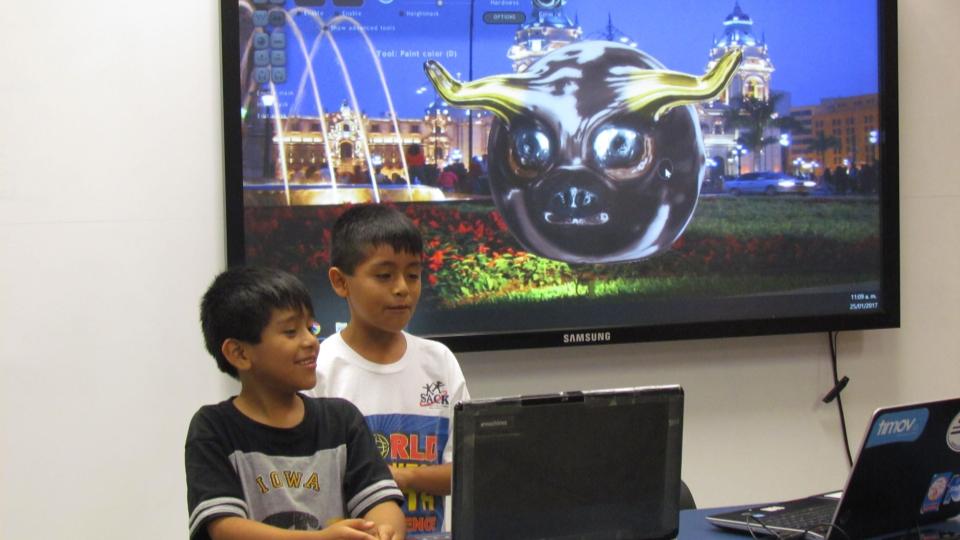
What about if we color our creations?
 In this second session, make a review with the children of everything explored and learned previously and proceed to deliver their fantastic creatures printed in 3d.
Tell them that the new mission is to color their creations with the help of brushes and acrylic paints.
Finally, invite them to exhibit about their Fantastic Creatures of DIGITOYS, including their names and created stories.
Having trouble? Let us know by completing the form below. We'll do our best to get your issues resolved quickly.
"*" indicates required fields

|Superb article, we will do this on our very own blog site. I appreciate you sharing.
Hi everyone :) I’m relatively new to 3d printing and I have a lot of questions on the topic, so I hope you will not get mad at me for asking here at least couple of them. I think before I’ll get seriously into designing I should focus on the software itself, and that’s what I would like to ask you about. Mainly, should I start with the most crudest CAD I can find or would it be better to start on something more complex? I’m worried that I’ll get some undesirable quirks while working on simpler software. Second question is about the software as well: should I search for software that would allow me design and slice it in it, or should I use a separate program for each? Does it even make a difference? Weirdly, I couldn’t find the answer to that, as it seems like most articles want to focus on the very basics (like what is 3d printing and so on), and while the answers to those questions are fine, it seems like no one wants to go into the details (it looks like some of them even plagiarise each other! I swear I’ve found the same answers to the same questions on at least 3 different articles) but I’m getting off-topic… The last question is about 3d pens. Would it be possible to somehow convert whatever I draw with a 3d pen to a 3d model in a software? For example, if I’ll draw a cat with 3d pen, would it be possible to get its outline in a program? I’m not sure how that would even work, but the very idea sounds interesting to me. Anyway, I think I’ll stop here just in case no one will ever answer me and all of this writing will go to waste. I’m sorry that I’m using your content to ask questions, but I hope you’ll understand and assist a newbie like me. Anyway, thank you for posting. I did learn something from this and that’s always appreciated. Thank you, and I hope to hear back from you very soon :)