FCH - Earring bottle caps – SCOPES-DF

Lesson Details

Subjects *
Age Ranges *
Additional Contributors

Author

Julia Teeninga

Summary

The “Earring bottle caps” activity is part of the FabConnectHer project, which helps young women get inspired, learn new skills, and find opportunities in STEAM (science, technology, engineering, art, and maths).


In this lesson, students learn how to turn used plastic bottle caps into colourful earrings. They melt the plastic into flat sheets, design shapes, and then cut them out using a laser cutter. At the end, they attach clips to make their earrings ready to wear.


The activity mixes creativity with technology and shows how waste can be given a new life. Students learn about recycling and upcycling while also practising safe use of tools like an oven, heat press, and laser cutter. They build confidence by designing their own ideas and making something unique step by step.


The lesson is made for small groups of students from middle school to college, especially girls and young women aged 11–30 who are interested in art, design, and technology. By the end, each student has their own eco-friendly earrings and a first experience with design and digital making. It is a fun way to see how creativity and sustainability can go together.

What You'll Need

Materials Needed:

  • Plastic bottle caps (variety of colours)
  • Small oven
  • Metal press, heat press or other device to melt the caps and form
  • Laser cutting machine
  • Clips for earrings
  • Protective gloves
  • Safety goggles
  • Heat-resistant mats
  • Baking sheets
  • Parchment paper
  • Sandpaper
  • Design templates (for laser cutting)
  • Rulers and markers
  • Tweezers


Safety Precautions & tips:

  • Always wear protective gloves and safety goggles when handling hot materials and equipment.
  • Ensure proper ventilation in the workspace.
  • Supervise the use of the oven and laser cutter at all times.
  • The plastic heats up when being laser cut, it is hot and must be taken from the laser cutting area directly after laser cutting, otherwise it might melt back together.


Preparation

  • Collect plastic caps, preheat them in oven or press, laser cutting machine.


Learning Objectives

  • Understand how recycling and upcycling can be used to create new products from waste materials.
  • Learn how to safely melt and press plastic bottle caps into flat sheets.
  • Gain basic skills in designing small objects and preparing a vector file for laser cutting.
  • Use a laser cutter to cut out earring shapes from recycled plastic.
  • Attach clips to create a finished, wearable pair of earrings.
  • Build confidence by designing and making a unique product from start to finish.
  • Explore how creativity and technology can work together to make eco-friendly designs.


Reflection

This activity gives students a first experience with turning waste into something new and valuable. By recycling plastic bottle caps into earrings, they see how simple everyday materials can be transformed into creative products. The process combines design, technology, and sustainability, helping students understand both the importance of recycling and the fun of making their own jewellery.


Students practise problem-solving when working with the oven, heat press, and laser cutter, and they learn to handle materials and tools safely. They also gain confidence by seeing their ideas become real, wearable objects. Working in small groups allows them to share ideas, help each other, and celebrate their results together.


In the end, students not only take home a pair of unique, eco-friendly earrings but also leave with new skills and a better understanding of how creativity and technology can work together to protect the environment.

The Instructions

Introduction

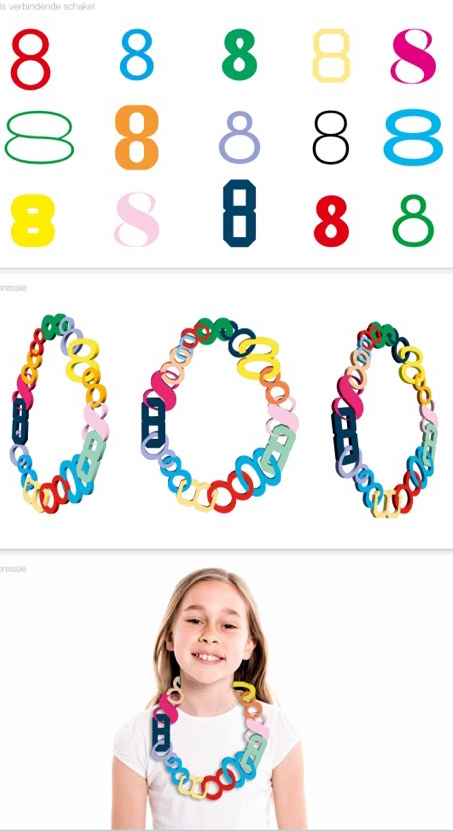
In the introduction, students are welcomed to the lesson and learn what they will be doing: making earrings from recycled plastic. The teacher explains the goal of the activity and why recycling is important. Students see how waste materials, like plastic bottle caps, can be given a second life in creative ways. To inspire them, examples of earrings made from recycled plastic are shown.

  • Welcome students and explain the objective of the lesson.
  • Discuss the importance of recycling and how it can be applied in creating jewellery.
  • Show examples of earrings made from recycled plastic.


Preparing the Plastic (30 minutes)

Students collect and sort bottle caps, then melt them in the oven to prepare the plastic for shaping.

  • Have students collect plastic bottle caps and sort them by colour.
  • Preheat the oven to 175°C (350°F ).
  • Place the bottle caps on a baking sheet lined with parchment paper.
  • Put the baking sheet in the oven and bake until the plastic is melted (approximately 5-10 minutes).
  • Carefully remove the baking sheet from the oven and let the melted plastic cool slightly.


Pressing into Sheets (20 minutes)

Students flatten the melted plastic into thin, even sheets using a press or heat tools and let it cool completely.

  • Once the melted plastic is cool enough to handle but still pliable, place it between two sheets of parchment paper.
  • Use the metal press or heat press to flatten the plastic into a thin sheet. Ensure even pressure for a uniform thickness.
  •  Allow the plastic sheet to cool completely.


Alternative using heat press or heat gun to heat up the plastic and press.

  • Option 1: Heat a cap with a heat gun and then press with steel spatula other firm objects between baking paper.
  • Option 2: use baking paper place it in a heat press and place a plastic cap on the press. Press together open and press with spatula or another firm object. 


Designing and Cutting (40 minutes)

Students create or choose designs, transfer them onto the plastic sheets, and cut them out safely using a laser cutter.

  • Provide students with design templates for their earrings or allow them to create their own designs.
  • Transfer the designs onto the cooled plastic sheets using a marker.
  • Use the laser cutting machine to cut out the designs from the plastic sheet.
  • Demonstrate the proper and safe use of the laser cutting machine.


Finishing Touches (30 minutes)

Students smooth the edges of their designs and attach clips to finish making wearable earrings.

  • Smooth the edges of the cut-out designs with sandpaper to avoid sharp edges.
  • Attach clips to the plastic models using tweezers.
  • Ensure the clips are securely attached and the earrings are ready to wear.


Review and Showcase (15 minutes)

Students share their finished earrings, reflect on the process, and discuss other creative recycling ideas.

  • Have students share their finished earrings with the group.
  • Discuss the process and any challenges faced.
  • Encourage students to think of other ways to recycle materials creatively.


Wrap- up & reflection

Students clean up their workspace, review what they learned, and reflect on the value of recycling and creative making.

Cleanup (10 minutes)

  • Ensure all materials and tools are properly cleaned and stored.
  • Make sure the workspace is tidy.


Conclusion (10 minutes)

  • Recap the lesson and highlight the importance of recycling and creativity.
  • Encourage students to continue exploring eco-friendly crafts.


Additional Notes and extension activities

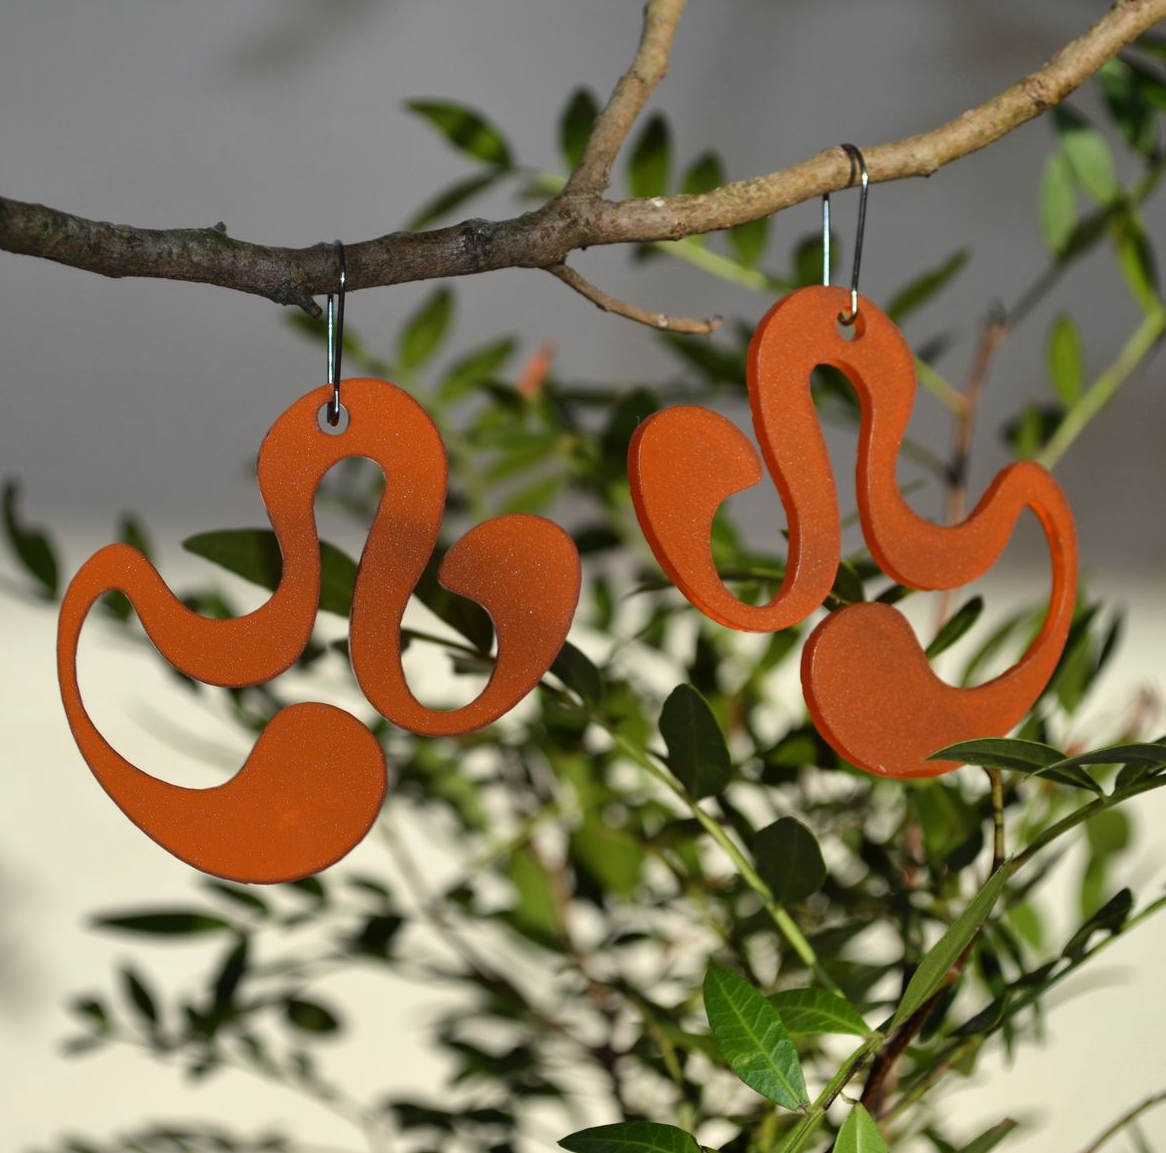
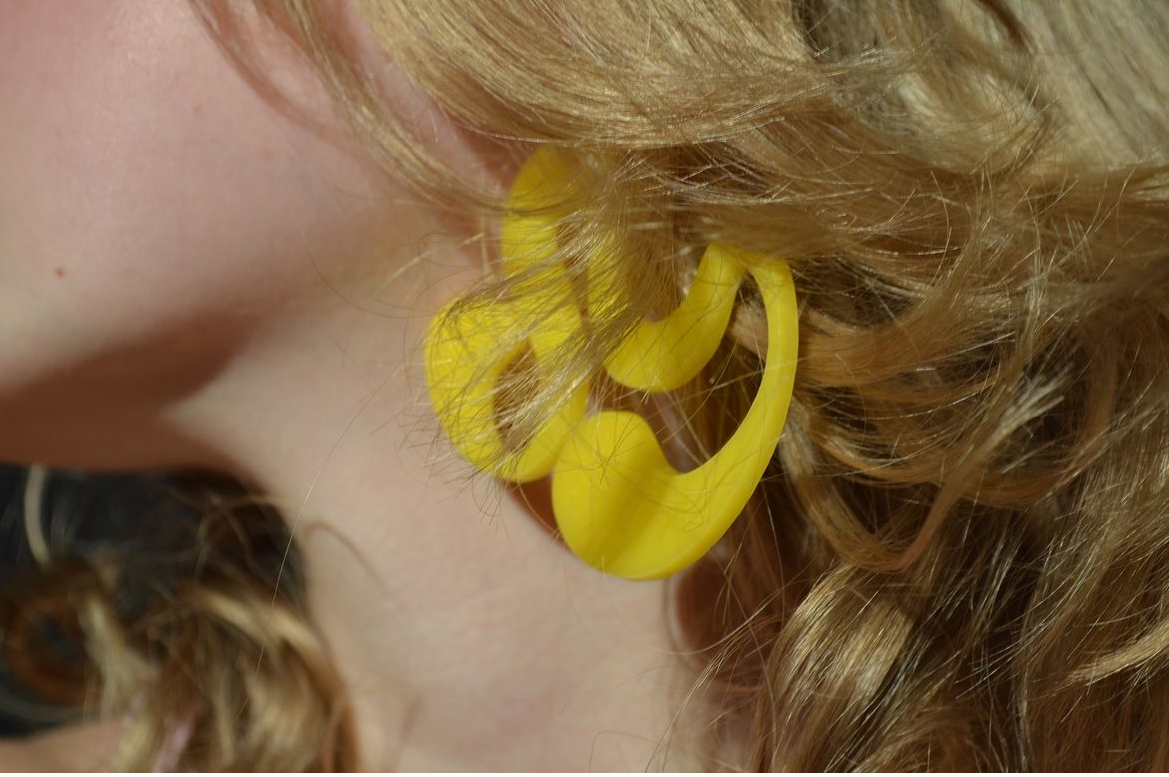
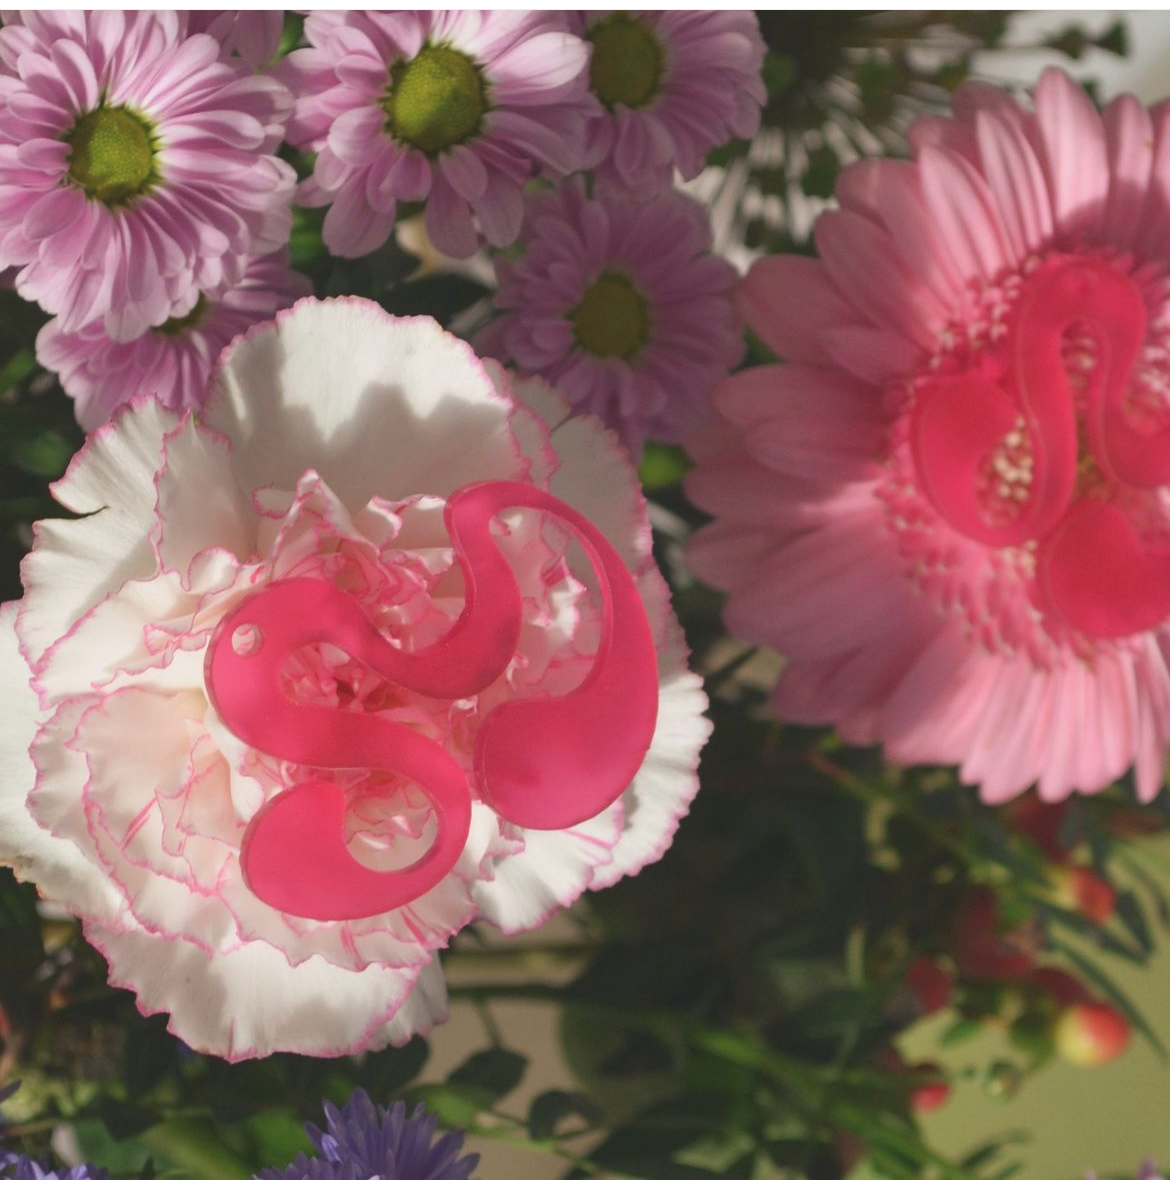
Students can extend the activity by exploring new design inspirations, such as nature, and by experimenting with other materials like plexiglass or wood.

Extension activities

The exercise can be repeated with a greater emphasise on design elements. Using nature for example as an inspiration of form and cutting out in plexi or wood, see additional resources for inspiration. 


Additional Notes:

  • Adjust the duration of each segment based on the class’s pace and engagement.
  • Consider having additional helpers or instructors to assist with the use of the oven and laser cutter for safety.


Lesson Feedback

Contact us

Having trouble? Let us know by completing the form below. We'll do our best to get your issues resolved quickly.

"*" indicates required fields

Name*
Email*
This field is for validation purposes and should be left unchanged.
?