Imaginary Village – SCOPES Digital Fabrication

You need to login or register to bookmark/favorite this content.

Author

Fab Foundation
Fab Foundation
Maker
Our mission is to provide access to the tools, the knowledge and the financial means to educate, innovate and invent using technology and digital fabrication to allow anyone to make (almost) anything, and thereby creating opportunities to improve lives and… Read More

Summary

Students will use TinkerCAD to create imaginary houses or buildings using basic geometric shapes. At the end of the lesson, each student will have their 3D printed building. Together, students will create each of the buildings making up the imaginary village.

What You'll Need

Materials:​ ​3D Printing Filament
Hardware:​ ​3D Printer
Software​: TinkerCAD

The Instructions

Step One: Introduction and presentation of 3D printing – 15 mins

In whole class, Introduce 3D printing with a video and presentation of your local equipment.

Recommended by Techno Culture Club: http://abc3d.technoculture.club/en/resources/presentation PBS Off the Book:

http://www.pbs.org/video/-book-will-3d-printing-change-world/

Future Engineers: https://www.youtube.com/watch?v=XTP-WBrAnPY Coursera – 3D printing at Fab Lab Champaign Urbana IL (start at 4:22):

https://www.coursera.org/learn/3d-printing-applications/lecture/PuC0A/learning-by-making-and-making-for-f un-at-the-fab-lab

Step Two: Overview of the activity – 5 mins

  1. Briefly explain the flow of steps for the day’s activities
  2. What will the participants do? : Create an imaginary home or building.
  3. Which software will be used? : TinkerCAD

Step Three: Log in each participant to the software TinkerCAD – 5 min

Log in each participant to the software TinkerCAD. Use a single account per class or teacher or school.

Ask each participant to log into the software TinkerCAD. Provide the username and password.

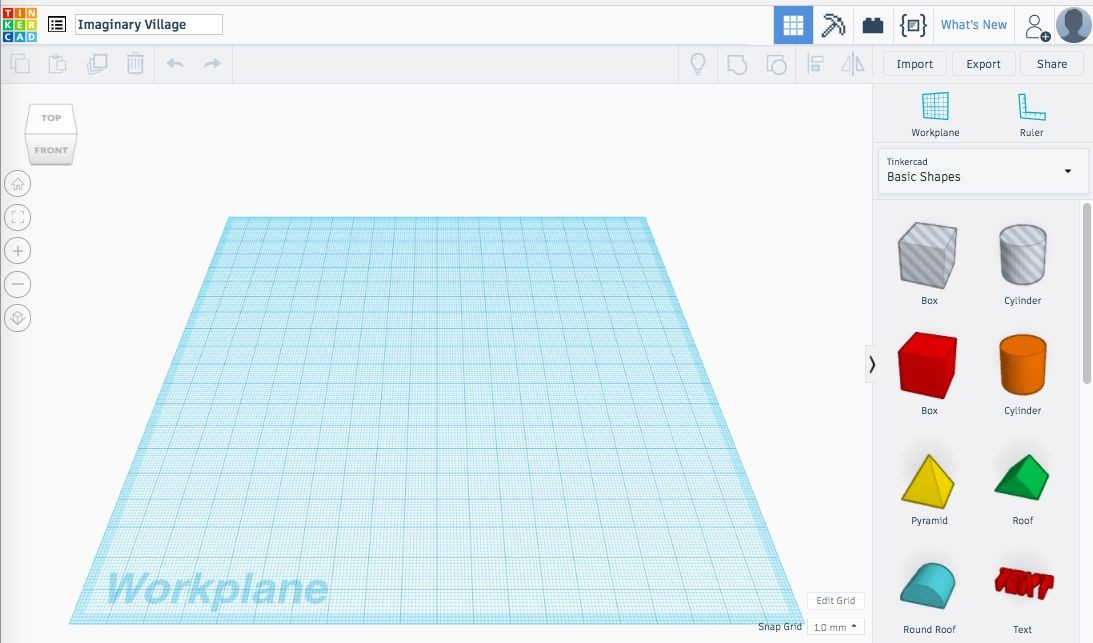
Step Four: Introduction to TinkerCAD – 15 min

TEACHER NOTE: Key concepts in TinkerCAD to show participants:

  • The workplane
  • Zoom in/out (scroll)
  • Rotation of the viewpoint (right-click and move mouse)
  • Reset the viewpoint (“Home view” button)
  • Pan view (hold shift + right-click, and move mouse)
  • Sidebar with various parts and how to place them on the workplane
  • The geometric primitives (“Basic Shapes” tab) available in the sidebar
  • The solid vs hole state of a shape
  • Selecting an object (left-click)
  • Selecting multiple objects (hold shift + left-click)
  • Using a selection box (hold left-click and move mouse, release left-click)
  • Group / ungroup multiple objects (adding / subtracting)
  • Handles for scaling and translating objects
  1. In whole class, run through the entire 3D modeling process to demonstrate the software TinkerCAD.
  2. Students observe while the teacher describes what they are doing.
  3. Ask students to follow along, up until the 3D printing step.
  4. After launching the 3D print of the demo model, students will prepare to create models.
  5. Students create their own 3D model.


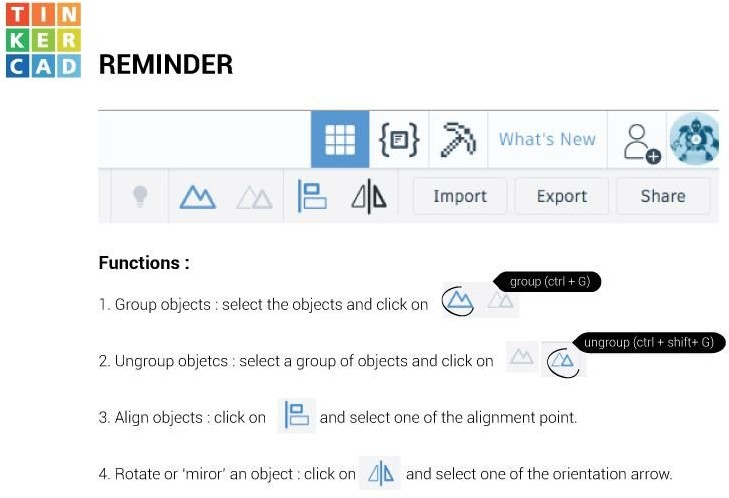
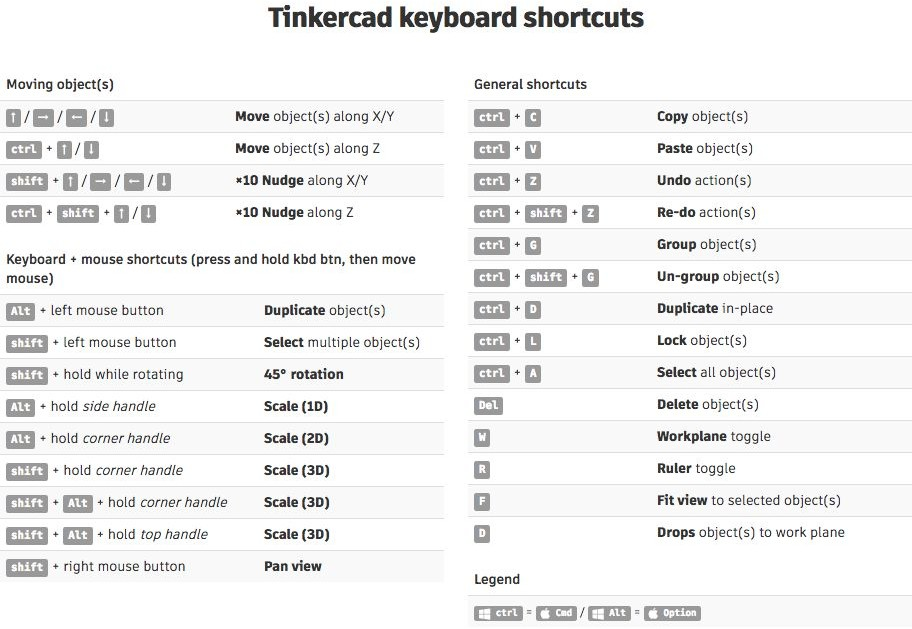
TEACHER NOTE: Teacher moves around the room to assist and re-explain concepts as necessary. Demonstrate common questions or repeat challenging concepts to all participants. Often participants want reminders for how to select, group, and subtract objects.

More Resources: https://www.tinkercad.com/learn/

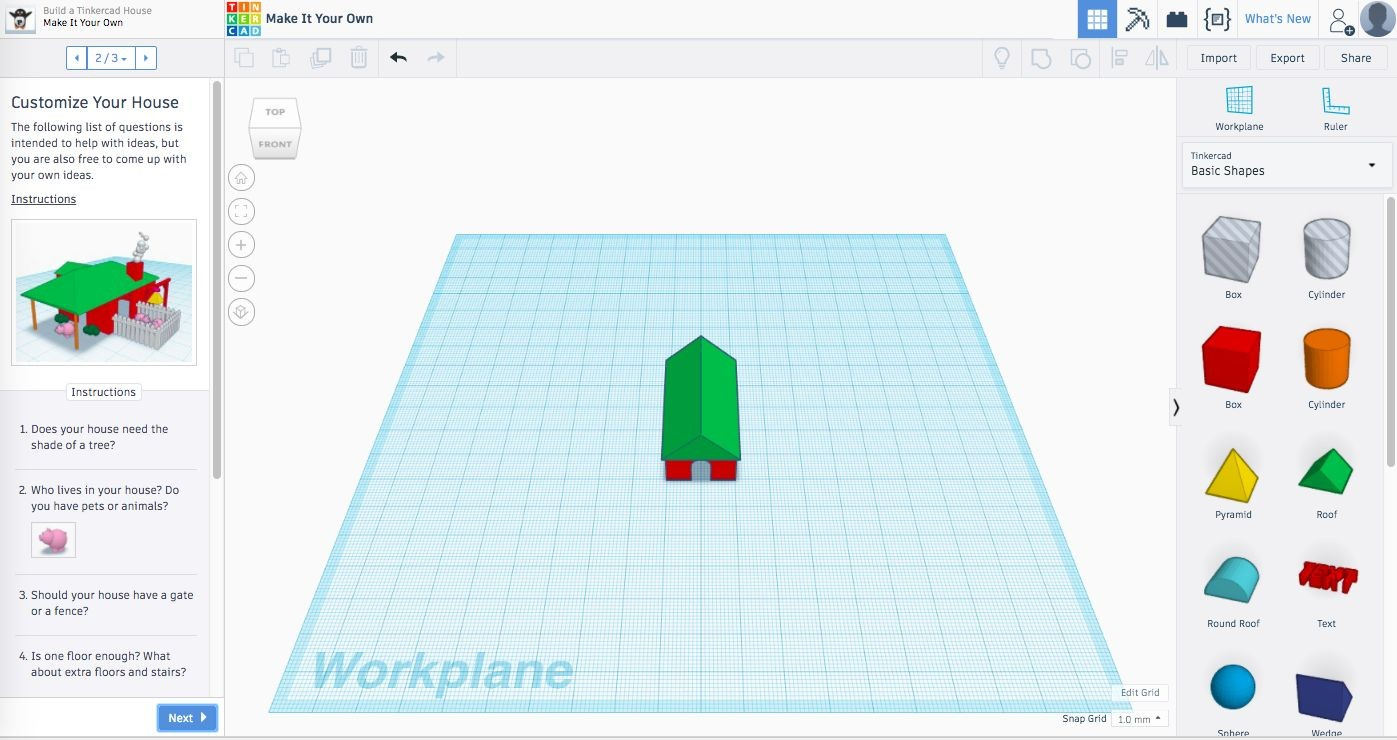
Step Five: Demo creating a model of imaginary building in TinkerCAD – 15 min

(If students need additional instruction, guide them through this process, otherwise allow them to explore on their own)

  1. Place a box on the workplace and make it taller (tower)
  2. Place a cone on top of the box, and align the shapes (roof)
  3. Group the objects. Important! The objects must be grouped to print properly
  4. Add a box, scale it down to a window, place it so it intersects the tower (window)
  5. Add a dome, scale it down to a doorway, place it at the base of the tower (door)
  6. Make sure the window and door are intersecting the tower. Select the window and door, set them to the “hole” state.
  7. Select all the objects (tower + roof + window + door) and group them together.
  8. Rename the file with your name
  9. Export the STL file
  10. Import the STL file in Tinkerine ou Cura
  11. Set the printing parameters and start the 3D print!

Extension: If your students are very new to TinkerCAD, try more lessons from AutoDesk Education on building a house.

Step Six: Student create their own model of imaginary building in TinkerCAD – 45 min

TEACHER NOTE: After having demonstrated the process, ask each participant to create their imaginary home or building. Once they start playing with TinkerCAD, move around the room to assist and answer questions. Demonstrate common questions or repeat challenging concepts to all participants (selecting, grouping, and subtracting objects). After 45 minutes, ask participants to export their files.

Step Seven: Saving the STL file

Ask participants to rename their files

  • Click on the nonsense name in the top menu bar, type in a name, and press “enter”

Log-in to the common user account and download the STL files

  • Export : Everything in Model, STL

Step Eight: Import the files into Slicer software
– 5 min

  1. Open the preferred slicer software, such as Tinkerine or Cura.
  2. Import the STL file
  3. Adjust the print settings (fill, wall thickness, speed, height, …)\
  4. Save the file (.Gcode) to the SD card

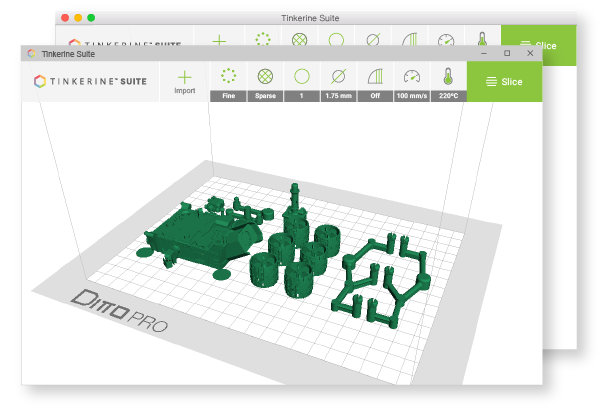
More resources: EduTech Wiki, Tinkerine U or Ultimaker Cura Help.

Step Nine: 3D Printing – 30–45 m

  1. Insert the SD card in the 3D printer
  2. Select the previously saved file (.Gcode)
  3. Start the print!

Step Ten: Feedback – 5 min

Ask the participants to provide feedback on the workshop while the models are being printed.

Extension: Try remixing designs to create models using other digital fabrication tools, such as a laser cutter.

Standards

NGSS Science and Engineering Standards:

Students who demonstrate understanding can:

Grade Band K-2:

  • K–2-ETS1-1. Ask questions, make observations, and gather information about a situation people want to change to define a simple problem that can be solved through the development of a new or improved object or tool.
  • K–2-ETS1-2. Develop a simple sketch, drawing, or physical model to illustrate how the shape of an object helps it function as needed to solve a given problem.
  • K-ESS3-1. Use a model to represent the relationship between the needs of different plants or animals (including humans) and the places they live

Grade Band 3-5

  • 3–5-ETS1-1. Define a simple design problem reflecting a need or a want that includes specified criteria for success and constraints on materials, time, or cost.
  • 3–5-ETS1-2. Generate and compare multiple possible solutions to a problem based on how well each is likely to meet the criteria and constraints of the problem
  • 3–5-ETS1-3. Plan and carry out fair tests in which variables are controlled and failure points are considered to identify aspects of a model or prototype that can be improved.

Common Core English Language Arts:

Grade Band K-2 (Reading Informational Text Standards )

  • RI.K.1 With prompting and support, ask and answer questions about key details in a text.
  • RI.K.1 With prompting and support, ask and answer questions about key details in a text.

Common Core Mathematical Practices

  • K.MD.2 Directly compare two objects with a measurable attribute in common, to see which object has “more of”/”less of” the attribute, and describe the difference.
  • MP.2 Reason abstractly and quantitatively.
  • MP.4 Model with mathematics.
  • MP.5 Use appropriate tools strategically.

Common Core Mathematical Standards

  • 3.MD.3 Draw a scaled picture graph and a scaled bar graph to represent a data set with several categories. Solve one- and two-step “how many more” and “how many less” problems using information presented in scaled bar graphs.
  • 3.MD.4 Generate measurement data by measuring lengths using rulers marked with halves and fourths of an inch. Show the data by making a line plot, where the horizontal scale is marked off in appropriate units—whole numbers, halves, or quarters.
  • 3.NBT.1-3 Use place value understanding and properties of operations to perform multi-digit arithmetic.
  • 3.NBT.1-3 Use place value understanding and properties of operations to perform multi-digit arithmetic.

Digital Fabrication Competencies: I Can Statements

  • (S.2) Safety: I can operate equipment in a Fab Lab following safety protocols.
  • (DP.2) Design Process: I can design something in a Fab Lab using a specific process under close instructor guidance.
  • (CAD.3) Computer Aided Design: I can draw a basic design using any 3D CAD software.
  • (MO.2) Machine Operation: I can safely operate a digital fabrication machine under close observation of an instructor.

(MC2 STEM High School, Cleveland OH version, using a laser cutter)

Lesson Feedback