- Loading…

This lesson was inspired by the musical fantasy film Jingle Jangle: A Christmas Journey, specifically the main character Jeronicus Jangle who is an inventor, toymaker, and owner of Jangles and Things. Among the toys seen in the film are mechanical devices or automata, which are designed to automatically do something such as fly. Students will create a flying machine or ornithopter, a rubber band powered device that flies by flapping its wings.
Teacher Notes: This project can be created at home using found and low-cost materials. You will see some materials listed with lower cost alternatives.
Key Vocabulary
automaton/automata
ornithopter
wing spar
wing (membrane)
Materials List
Balsa wood or wooden coffee stirrers
Metal (music) wire or paper clips
Ruler
Pencil, pen or thin marker
Craft glue
Long rubber bands (ex. used for model airplanes)
Tissue paper
Scissors and/or craft cutting tool
Thin drinking straw or bead
Plastic earring backs
Thin plywood (optional)
Wire cutter (optional)
Needle nosed pliers (optional)
Glue gun/glue sticks (optional)
Super glue (optional)
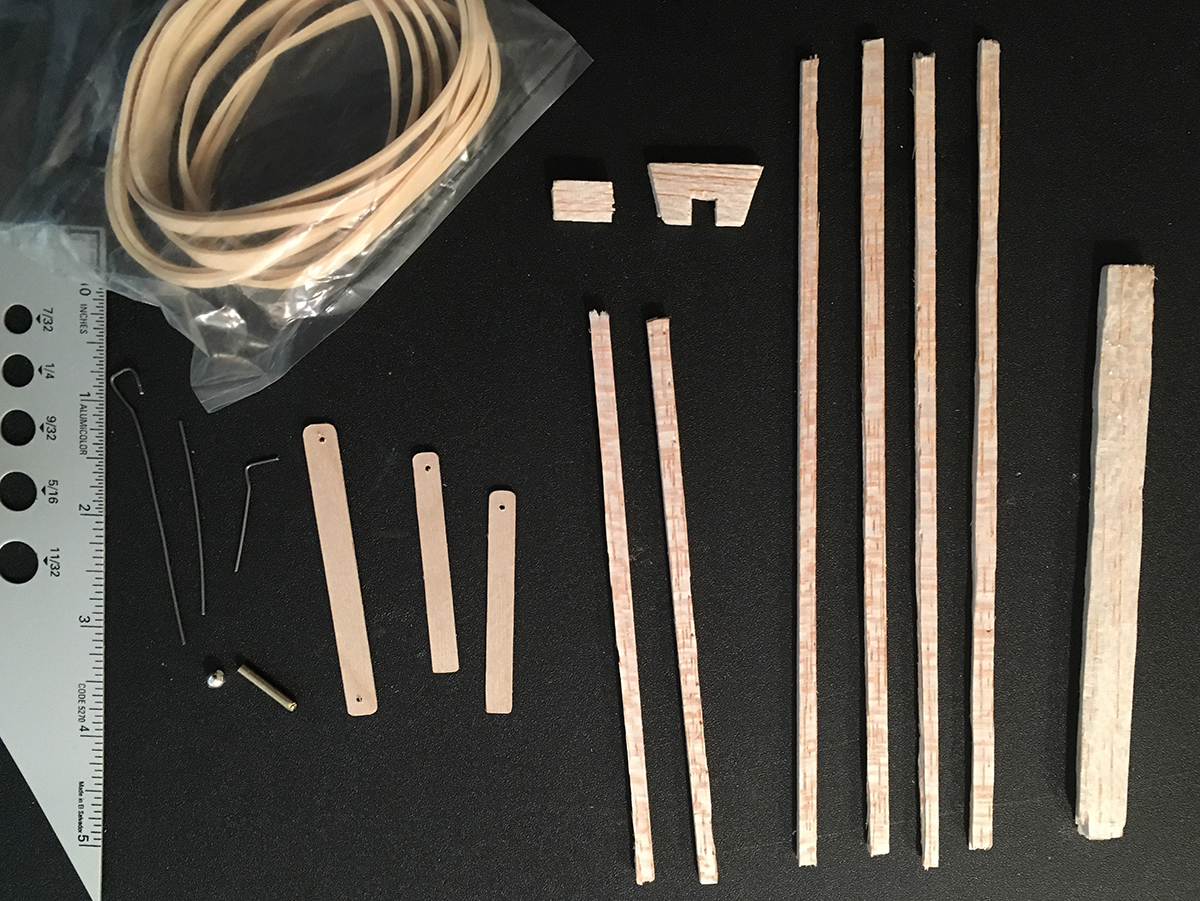
Gather all of your materials and prepare to build the machine.
Collect all of your materials. Then cut out all of your wood pieces in the following quantities and lengths*
For the Machine Body
one 5 in. x 3/4 in. x ¼ in.
one ½ in. x ¼ in. x ¼ in.
For the Machine Tail
two 5 in. x ¼ in. x ¼ in. stick
one 1 in. wide (¾ in. opposite side) x ¼ in. thickness
For the Machine Wings
two 8 in. x x ¼ in. x ¼ in.
two 7 in. x ¼ in. x ¼ in.
two 2 in. x ¼ in. (thin balsa or plywood)
one 2¾ in. x ¼ in. (thin balsa or plywood)
*The width for each stick is around ¼ inches.
Straighten and cut metal wire into the following quantities and lengths:
one 2 1/4 in. wire
two 2 in. wire
one 1 1/4 in. wire
Cut 1 5/4 in. thin tubing or a thin drinking straw
Print out paper supports PDF handout (you can also re-draw it using a ruler).
Learn about automaton/automata as toys and the ornithopter or flying machine.
Watch Jingle Jangle and/or read about Leonardo da Vinci’s ornithopter design: https://www.leonardo-da-vinci.net/ornithopter
Use metal wire to make hooks that hold and wind up a rubber band to power your machine.
Bend your wires as shown in the picture (step 4) and PDF. Use pliers or another tool to bend the wire. Only bend the curved sides of the tail hook and crank wires. You will need to insert them to finish bending the other wire ends.
You need to make the body of the machine and add the tail hook.
Make a tiny hole in one end of your 5 in. x 3/4 in. stick and push wire tail hook through. Bend the wire and glue into place (see photo). Glue the 1 in. piece of wood to the other end to support the wire crank.

The tail stabilizes the machine.
Cut a section from the center of the shorter side to fit the body of the machine (see photo). Glue the two 5 in. x ¼ in. sticks to the side of the 1 in. wood piece. Once dry attach and glue the tail structure to the machine body.

The tube/bead holds the crank wire.
Insert the wire crank/hook into the tube or bead; then glue the tube or bead on to the smaller piece of wood on the body of the machine. Note: Make sure the wire crank can turn freely (360 degrees).

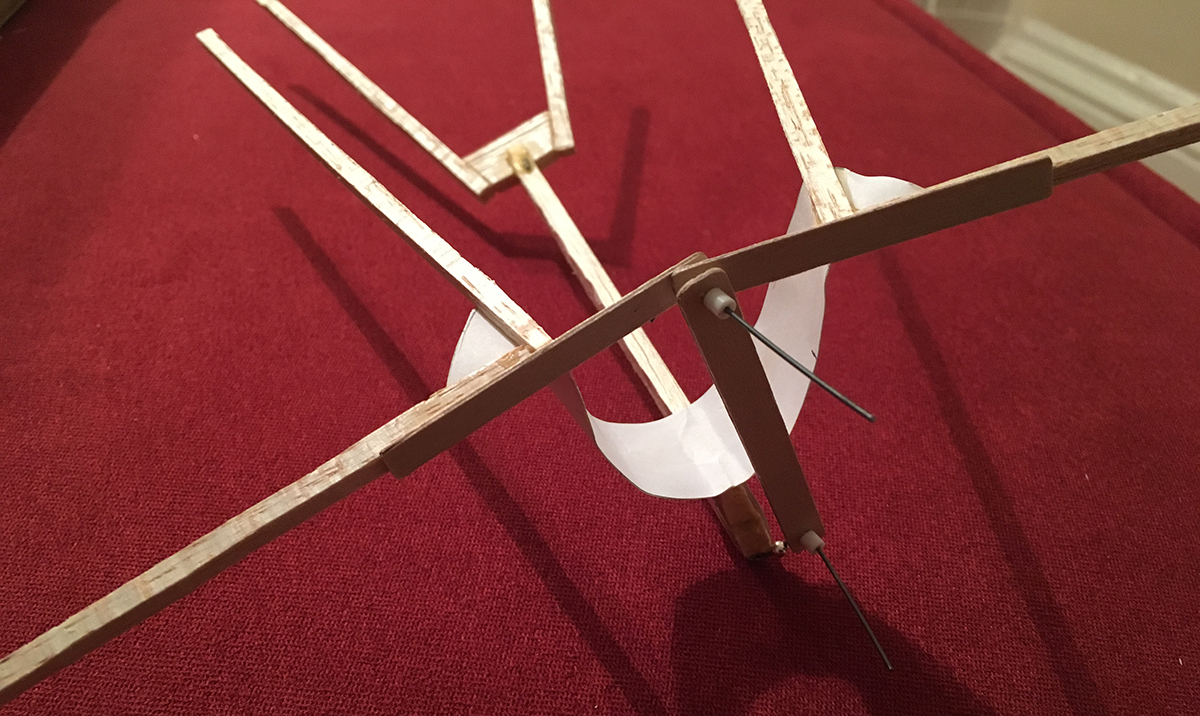
The paper supports hold the rigid wing structure in place.
Print out or draw and cut out the paper wing supports (see PDF). Glue the two curved pieces together, making sure to line up the edges of the short and longer pieces.
The membrane wing consists of a spar, at the leading edge of the wing and down the center.
Glue the 8 in. and 7 in. pieces of wood to the paper support, using the guides (see PDF).
Drill holes at one end of each 2 in. plywood stick, making sure to match the holes with the arrows on the paper support (see PDF).

The wing membrane extends backward from the spar and attaches to the body of the ornithopter.
Carefully curve the paper support to form the wings; bring each side upwards and connect the two 2 in. plywood levers by inserting the wire (one side is bent) through the holes. Drill holes at both ends of the 2¾ in. plywood connector and attach using the crank wire (on one end) and the levers at the top. Use the earring back to secure the levels and wire.

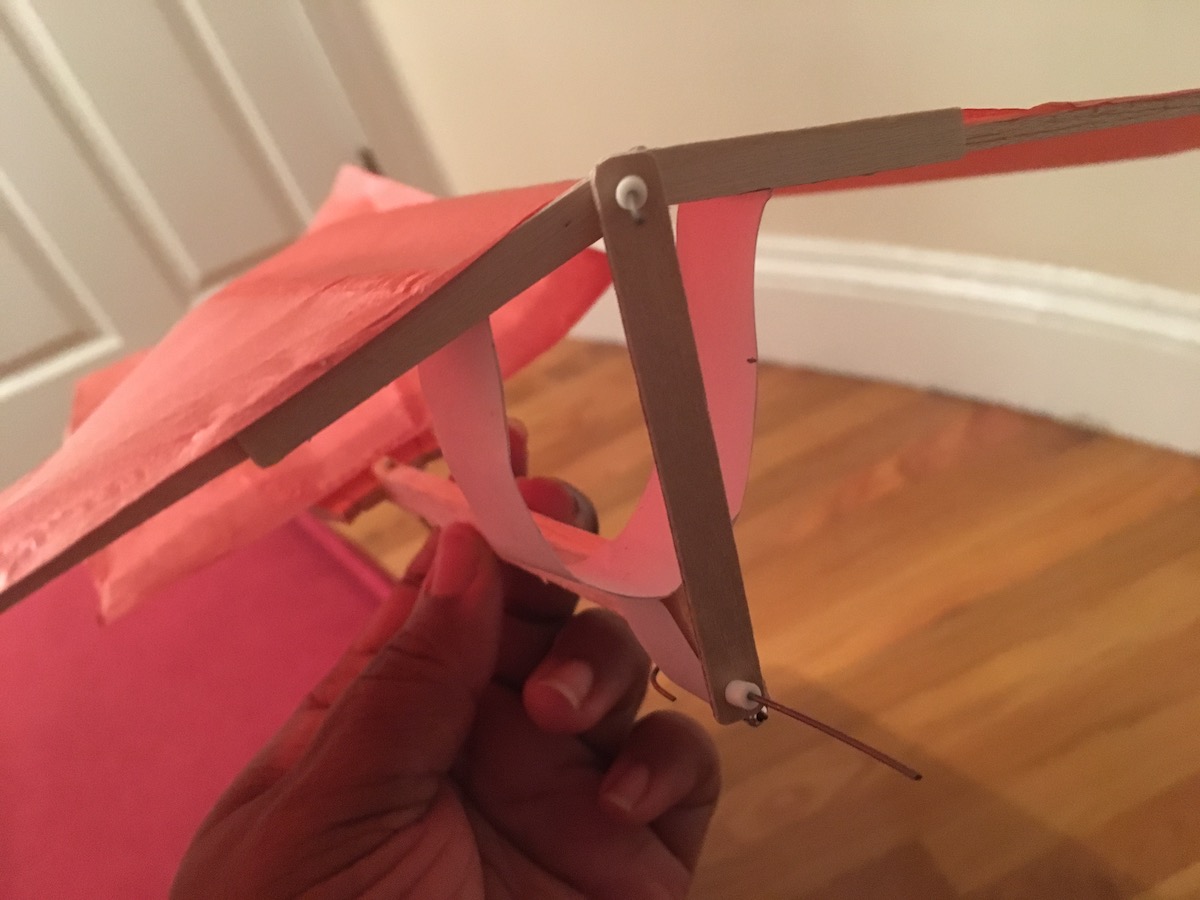
The tissue paper "membrane" is an important element of the ornithopter wing design. Use tissue paper to make these parts.
Cut a piece of tissue paper that is 16 in. in width and 7 in. in height. Apply glue to the top of the wing structure (do one stick or part at a time – glue dries quickly) and carefully attach the tissue paper as shown.
Cut another piece of tissue paper, cover and glue the tail end. Once dry, cut away the excess paper using scissors.
Rotate the crank wire, driven by a rubber band. As the crank goes around, the connecting rods push the wings up and down.
Just attach a rubber band, wind it up using the wire crank and let it fly!
Here’s what happened when I tested my machine: https://www.youtube.com/watch?v=O5QMm2nriyk

Having trouble? Let us know by completing the form below. We'll do our best to get your issues resolved quickly.
"*" indicates required fields