Laser Cut Mobiles: Exploring Balanced Foodwebs – SCOPES-DF

Lesson Details

Subjects *
Age Ranges *
5-8, 8-11,

Author

Lauren Kartzman

Summary

This third-grade science lesson on food webs incorporates a digital fabrication component using a laser cutter. The lesson is adaptable and can be modified to incorporate other forms of digital fabrication, such as 3D printing or vinyl cutting, depending on available resources and instructional goals.

Students engage in research on producers and consumers within various habitats, categorizing flora and fauna according to their roles in the ecosystem. They identify and communicate key physical and behavioral traits of different species, translate their scientific illustrations into digital files for laser cutting, and construct hanging mobiles that visually represent balanced food webs.


The lesson is organized into two sub-lessons, which can be facilitated by a single instructor or collaboratively taught by science and technology teachers. It is recommended that this project be preceded by foundational lessons on food webs and habitats to ensure student readiness and contextual understanding.


What You'll Need

Technology: 

  • Computers
  • Canva Educator Account
  • Laser Cutter
  • Software for creating Laser Cutter files


Science Materials: 

  • Pencils 
  • Black sharpies (a combination of thin and thick tipped)
  • Drawing paper
  • 1 Research Organizer Printout per group
  • 1 Traits Worksheet per student
  • Foodwebs Research Materials 
  • Bookmarked Websites 
  • Books 
  • Printouts


Mobile Materials: 

  • 1 Mobile Organizer Printout per student
  • 1 piece of 12 inch x 12 inch 3mm plywood or cardboard per student 
  • 12 gauge (2mm) craft wire (at least 5 feet per mobile)
  • Wire cutters / pliers
  • String to hang mobile 


Learning Objectives

Students will be able to:


Science & Engineering

  • Use online sources to conduct research  
  • Categorize flora and fauna into consumer and producer tiers
  • Identify and communicate species’ traits through observational drawing
  • Make connections between shared traits of species and the conditions of their habitat
  • Make observations and/or measurements of an object’s motion to provide evidence that a pattern can be used to predict future motion.


Technology

  • Digitize illustrations and prepare files to be laser cut
  • Build a balanced, hanging mobile 


SEL

  • Compromise in group settings
  • Build efficient systems with peers through communication and division of tasks.


Next Generation Science Standards:


3-LS3-1: Analyze and interpret data to provide evidence that plants and animals have traits inherited from parents and that variation of these traits exists in a group of similar organisms.


3-LS3-2: Use evidence to support the explanation that traits can be influenced by the environment.


3-PS2-1: Plan and conduct an investigation to provide evidence of the effects of balanced and unbalanced forces on the motion of an object.


Learning Goals that can be achieved during future lessons using the models and research from this lesson: 


  • 3-PS2-2: Make observations and/or measurements of an object’s motion to provide evidence that a pattern can be used to predict future motion.


Reflection

This project provided an engaging and effective way to teach students how to use web-based sources for science research while fostering collaboration in small groups. Students responded positively to having agency in selecting the habitat their group would investigate. Introducing the concept of labor division proved valuable, as it encouraged students to recognize their individual strengths and interests while contributing to a shared team effort.


I allowed pairs to split up and work independently to draw and build their mobiles after the research portion was complete. In future years, I would not offer this to the groups due to time constraints. Still, it was a good soft assessment to note which students continued to divide labor and which were ready to work independently.


The project took longer than I had planned. I had each student edit an entire mobile’s illustrations in Canva and allowed them to choose the shapes for each food web level. In the future, I would require students to work in groups of 4, only edit the illustrations they drew, and then combine a group’s illustrations into one mobile document to give them more time to build and experiment with the models after building them.

The Instructions

Part 1: Research Using Online Sources

Students use online resources to research the consumers and producers found in a specific type of habitat. Notes should be recorded in a journal or folder that can be easily referenced.

  1. Review the parts of a food web: Producers, Primary Consumers, Secondary Consumers, and Tertiary Consumers.
  2. Guide students in efficient web search methods
  3. An option is to give a web search sentence starter: “habitat type habitat food web diagram”
  4. example: “forest habitat food web diagram” or “forest habitat producers”
  5. You may also choose to have a document available for each group with a list of linked sources
  6. Assign or allow students to choose a habitat to research for this project.
  7. Assignment Instructions:
  8. Create the following four lists of the different producers and consumers that live in your habitat.
  9. 20 producers
  10. 15 primary consumers
  11. 10 secondary consumers
  12. 5 tertiary consumers
  13. TEACHER NOTES:
  14. These lists can be divided between group members or worked on collaboratively.
  15. They should be recorded somewhere students can reference for their mobile work, like a science journal.
  16. It’s optional to add more parameters to the research, like specifying types of animals (mammals, reptiles, invertebrates)


Part 1: Balanced Food Webs Whole-Body Activity

Students will be introduced to balance through a quick, whole-body activity. They will apply their understanding of structural balance to the concept of a balanced food web.

  1. Draw a diagram, project an image, or use a model of how the final mobile will look.
  2. Identify the different levels of the food web and how many species are represented per level. 
  3. Activity: Have students stand up.
  4. Question: Look at the mobile. Why is it important to have equal numbers of producers and consumers on each side of the tertiary consumer? 
  5. Take one or two answers.
  6. Instruct students to make a tent shape with their fingertips touching and their elbows angled down.
  7. Question: Pretend your arms are the mobile. A tertiary consumer is at the top, where my fingertips meet, and the producers are all the way down at the level of my elbows. Right now, I have an equal number of consumers and producers on both sides – my food web is balanced. What would my mobile look like if I had a different number of producers on each side?
  8. Student Response: Students can show unbalanced or lopsided mobiles with their arms and bodies.
  9. Question: Exactly! If we have different quantities of producers and consumers on either side of the food web model, the structure will be Imbalanced. This mobile represents a balanced food web, meaning that the number of consumers and producers is just right, helping to maintain a healthy system. In real life, what is something that could happen to a food web to cause it to become imbalanced?
  10. Student response: allow students to share what they think could cause an imbalance in an ecosystem first in pairs and then to the group.
  11. potential topic introductions: scarcity of a producer or consumer, or the introduction of invasive species
  12. TEACHER NOTES:
  13. If you have a model of the food web to use, this is a good point to go over the same questions and take away or introduce weight to the mobile to simulate imbalance.


Part 1: Food Web Organizer + Illustrations

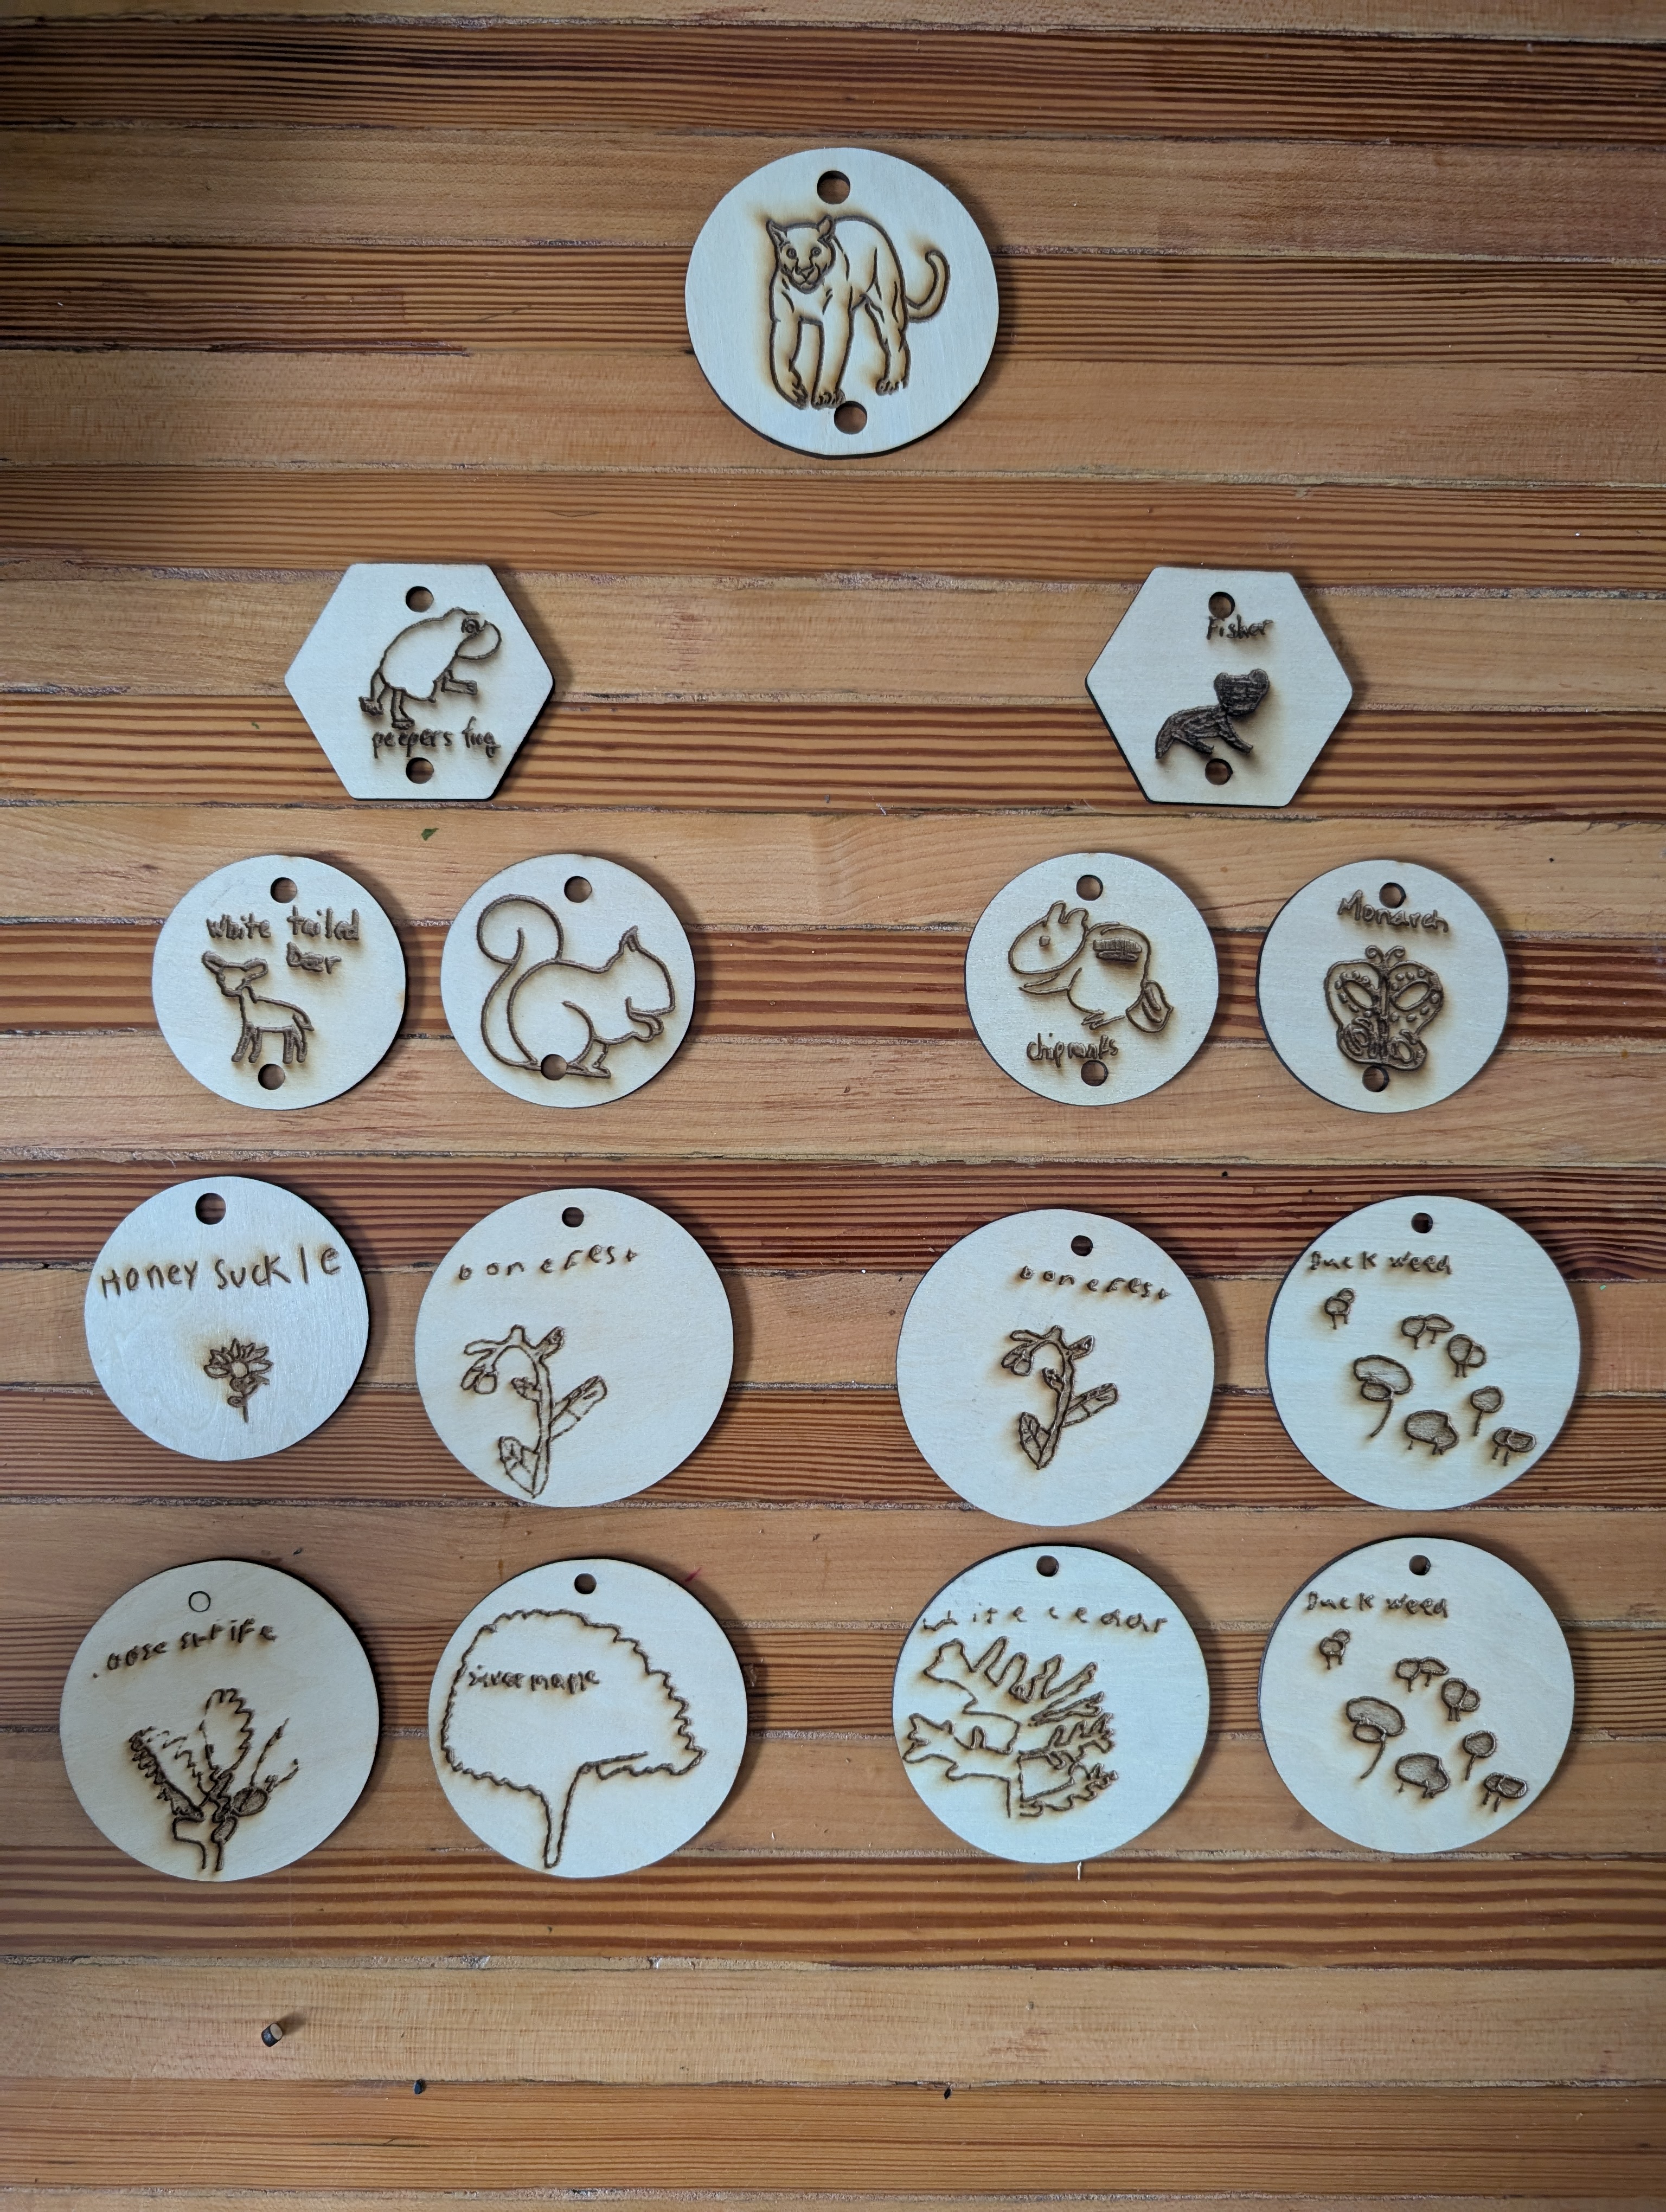
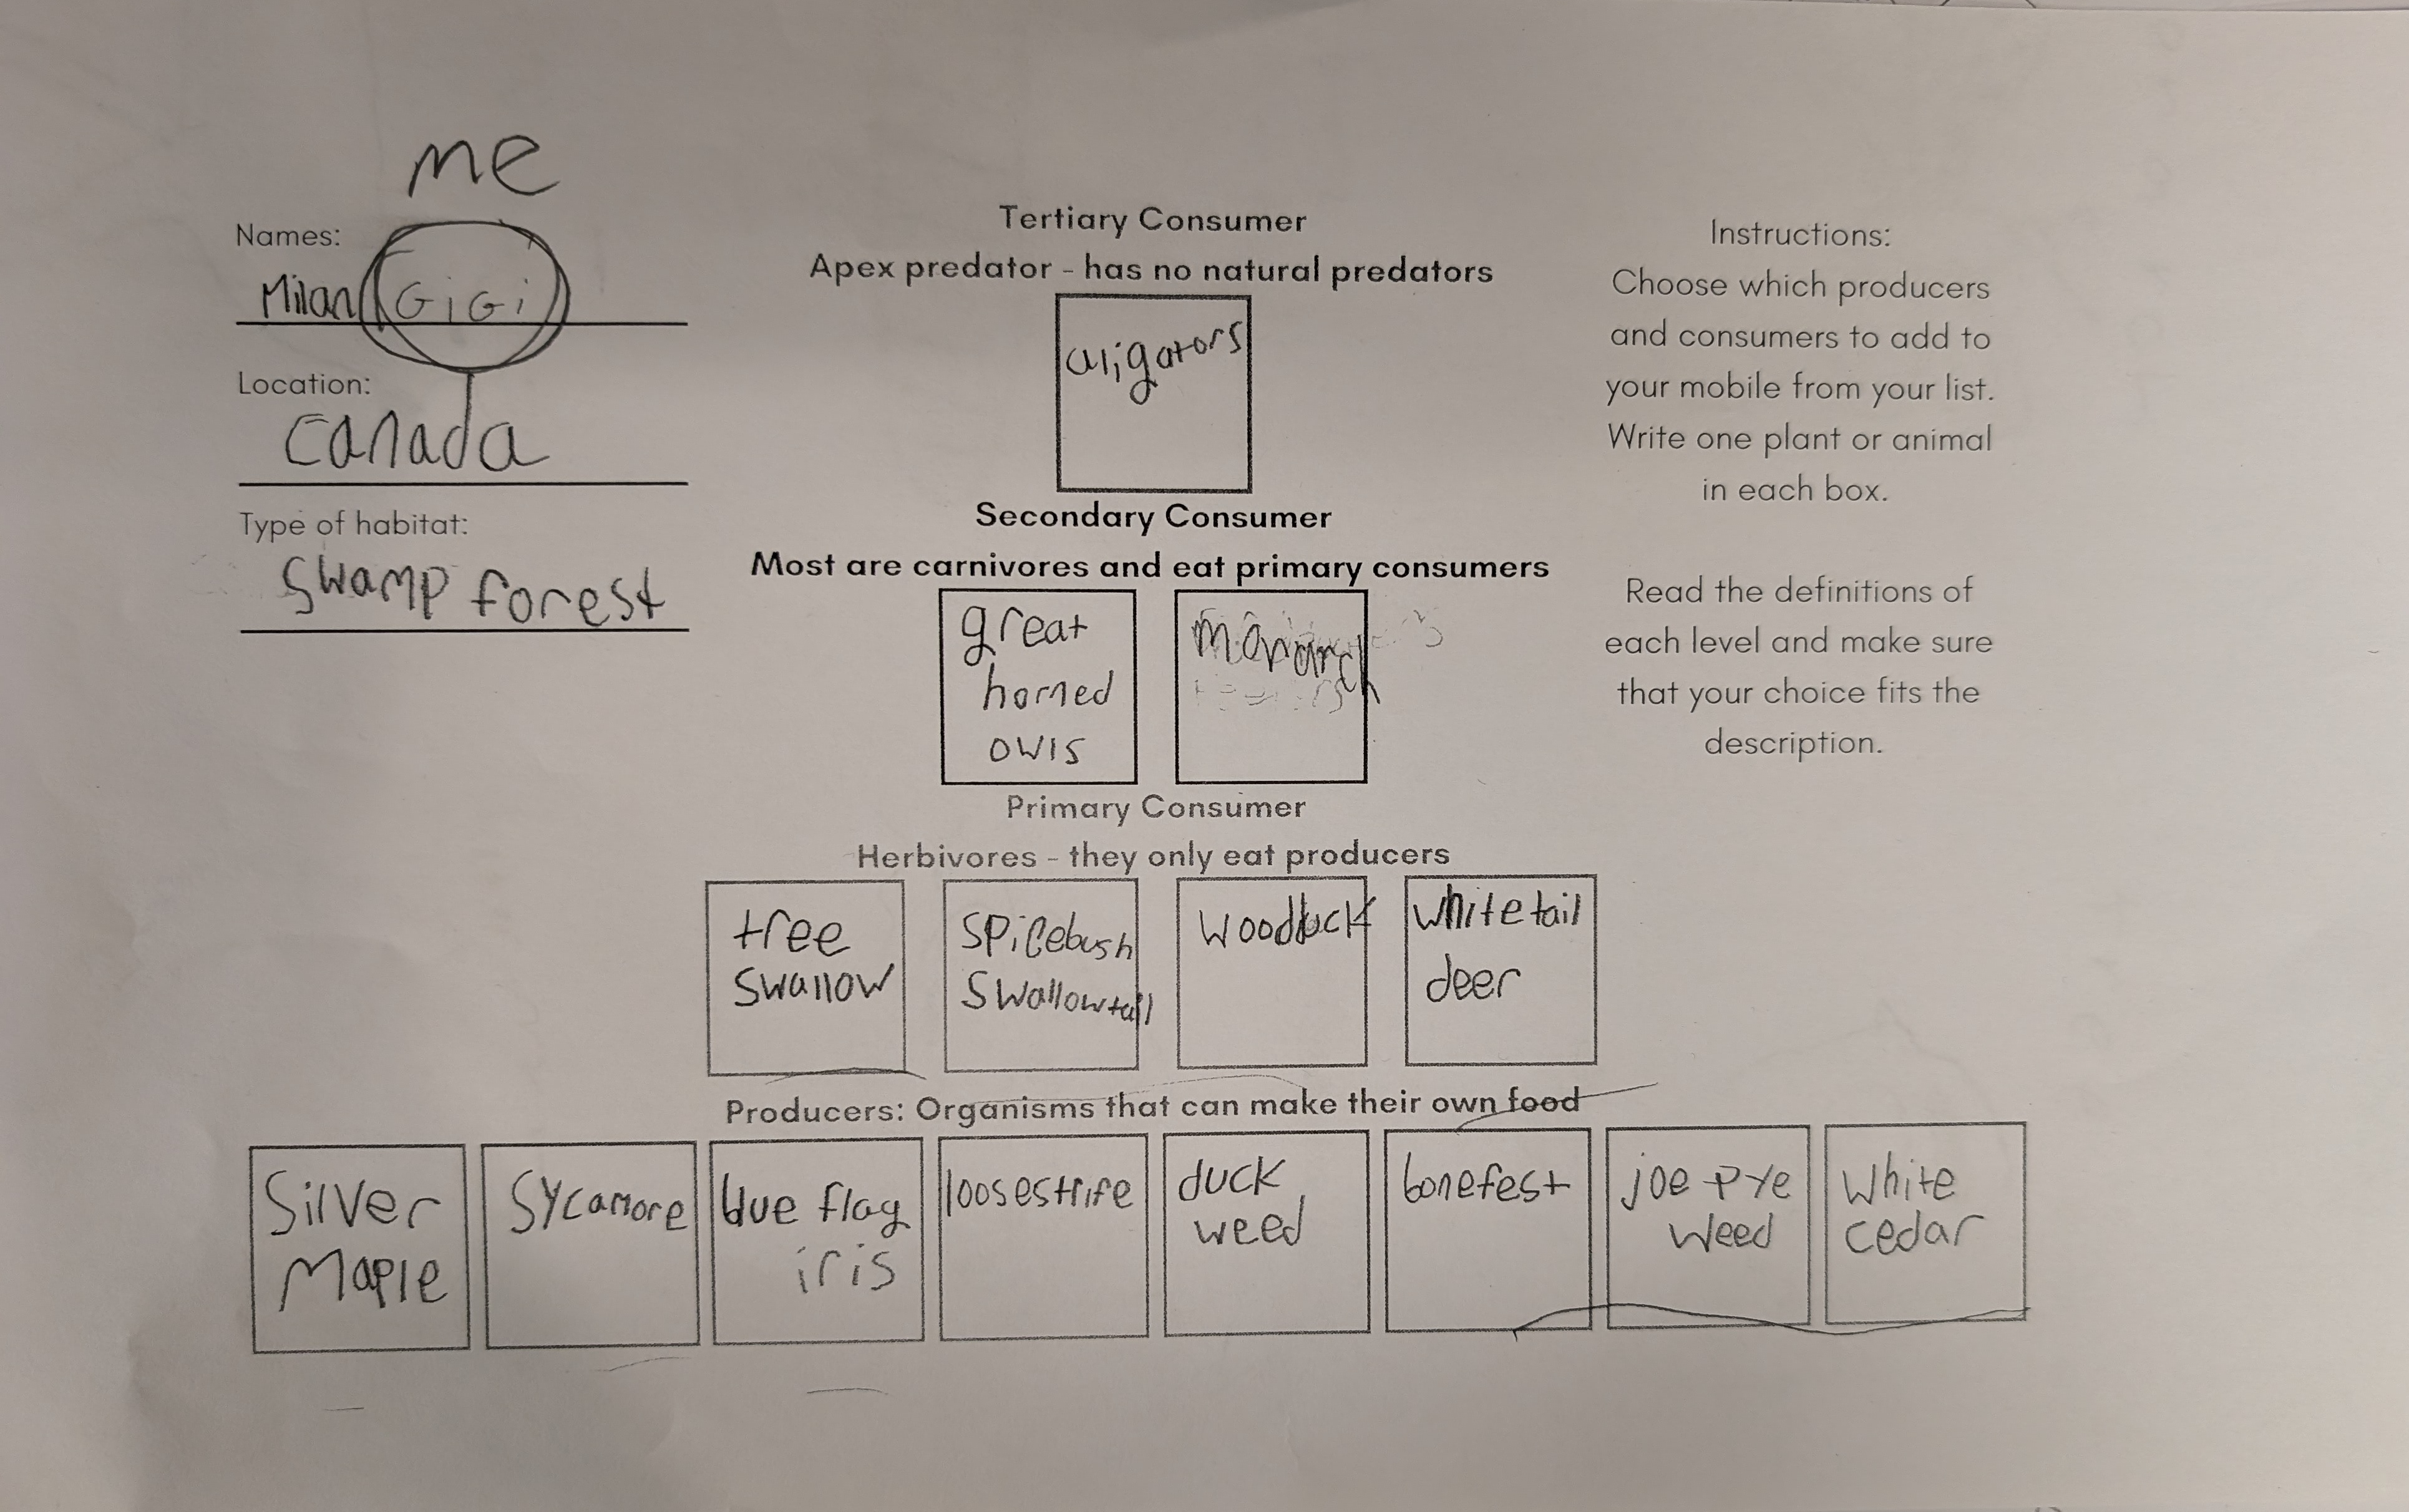
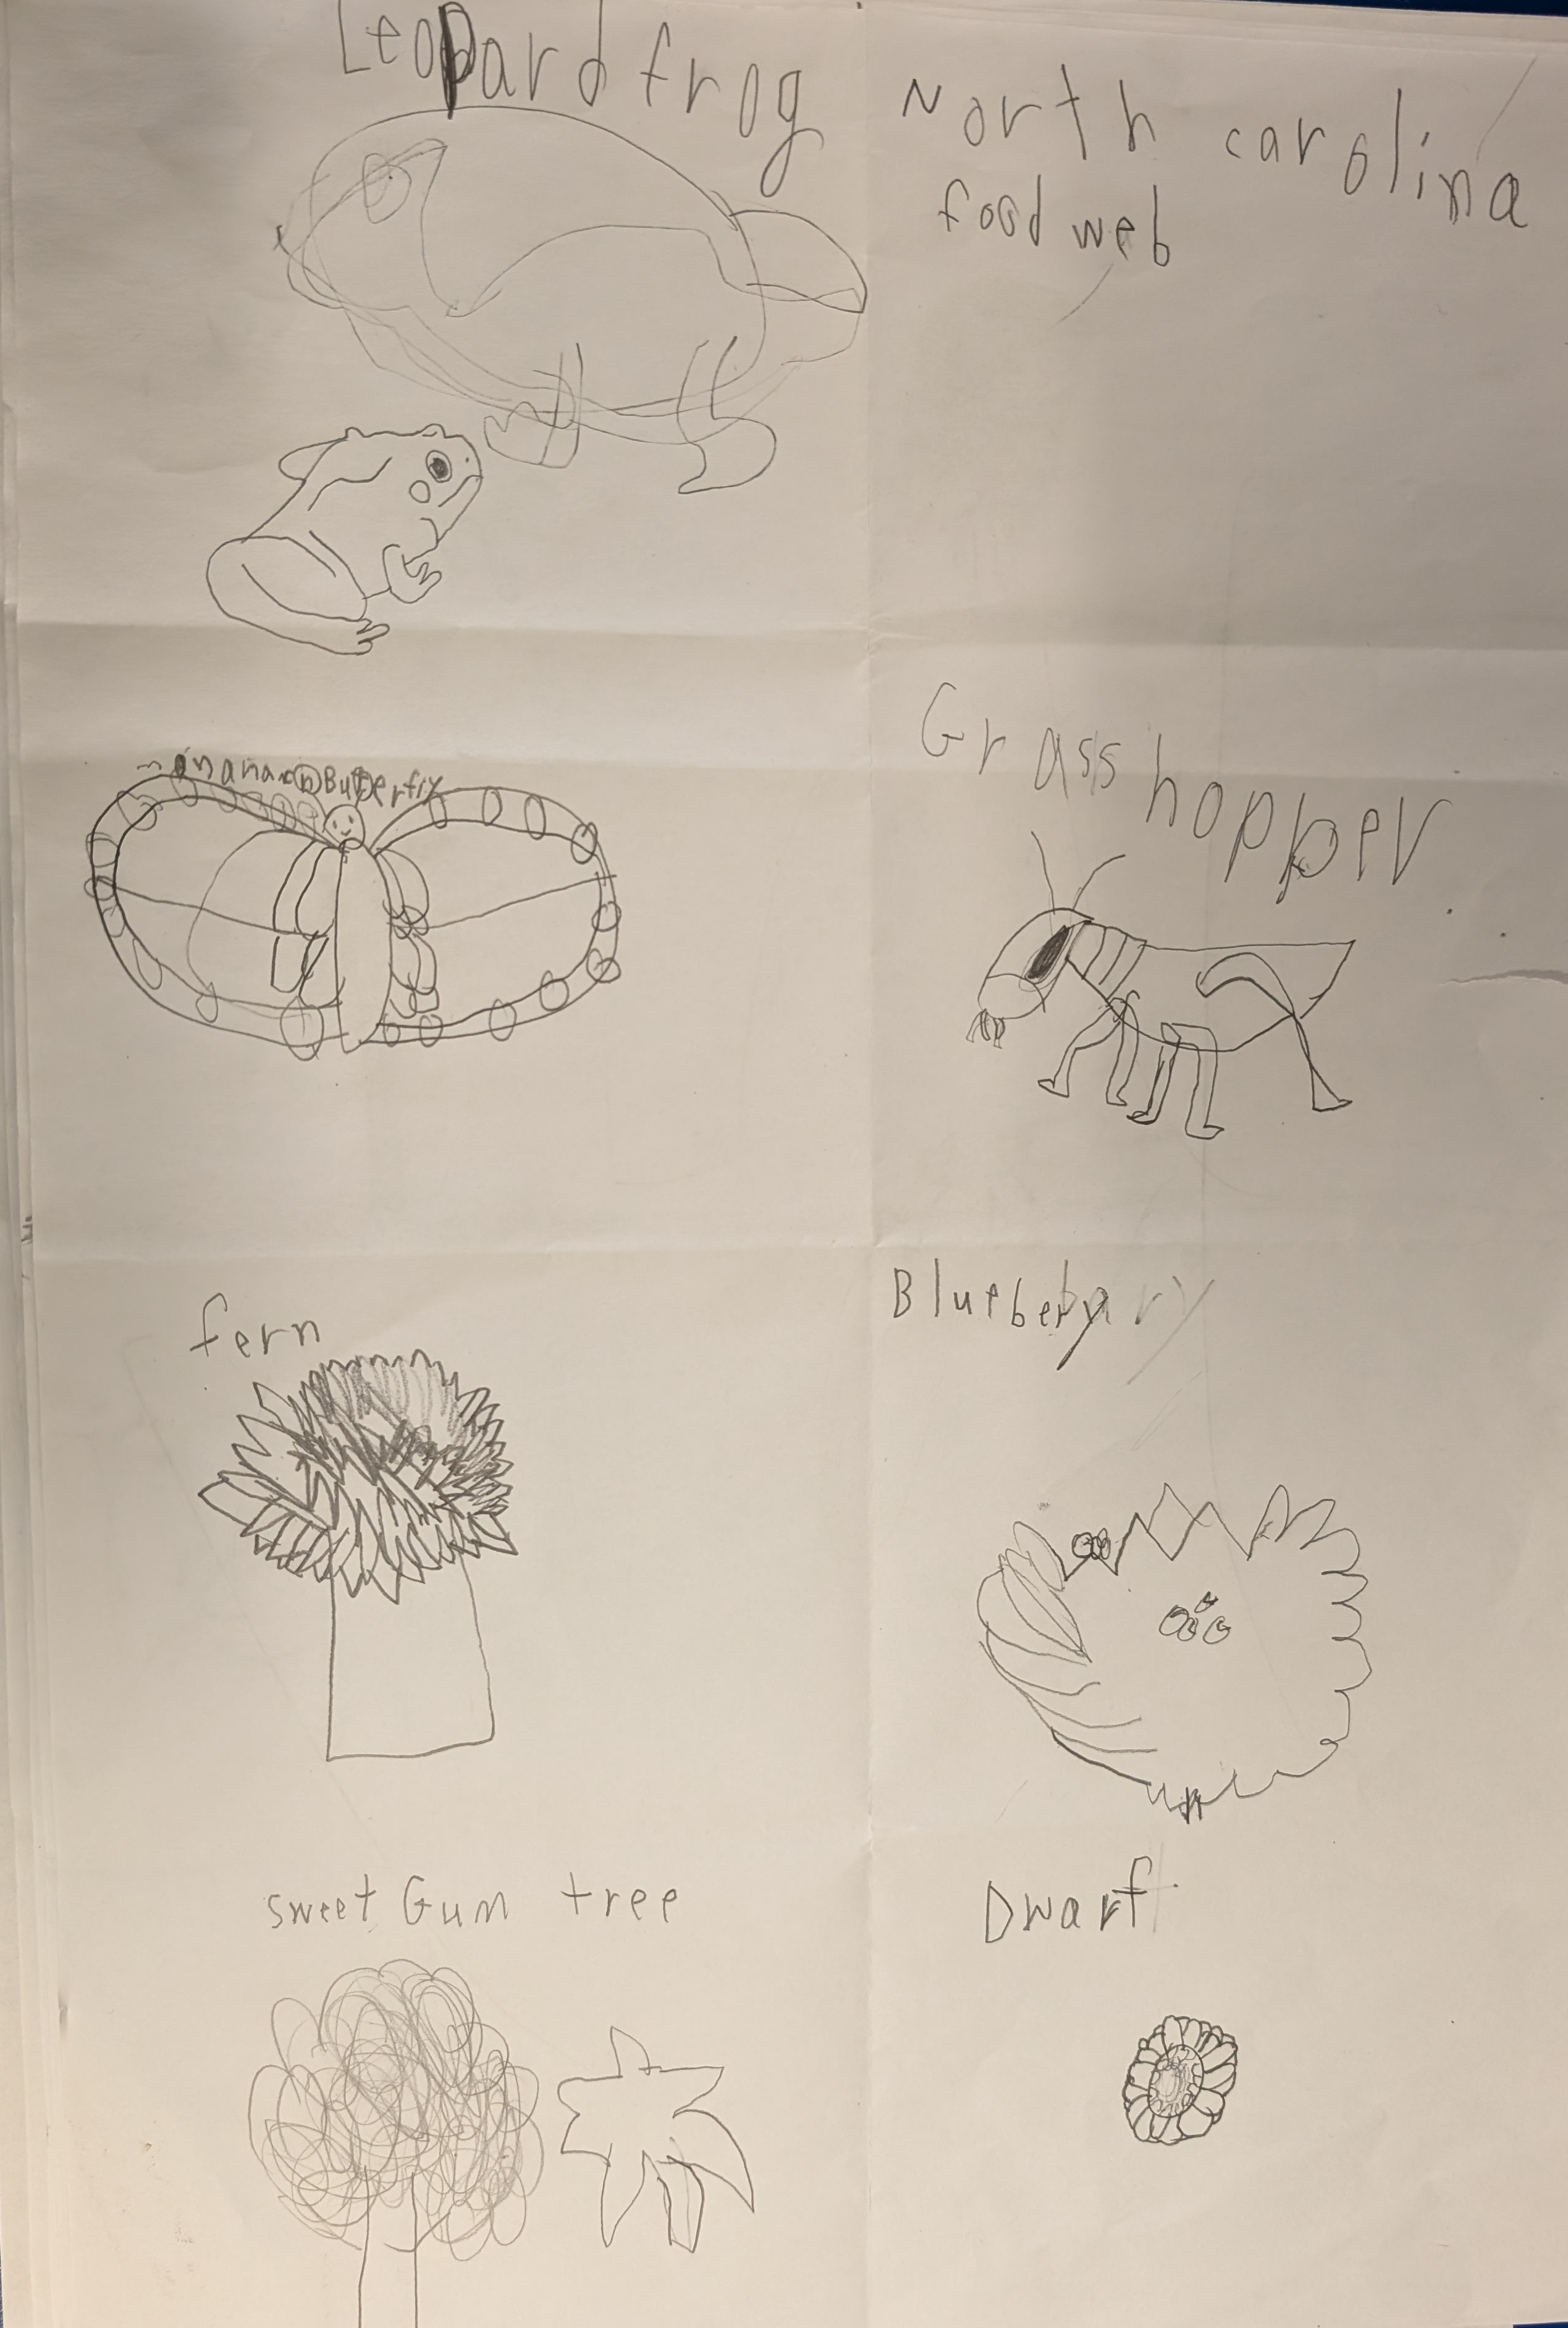
Groups will fill out food web organizers from the lists of producers and consumers created during research. They will illustrate each of the species to be laser-engraved.

  1. Pass out one Food Web Organizer and eight sheets of blank paper to each group.
  2. The organizer is attached at the end of this lesson.
  3. Instructions: Add the name of one producer or consumer species to each box. Be sure to add them to the correctly labeled food web level. If you are unsure where a species belongs, research its diet and use the dietary descriptions on the sheet to help you categorize it.
  4. TEACHER NOTES:
  5. This is another good place to add any parameters around species diversity you want represented by the food webs.

Example Organizer:


  1. Instructions: (The instruction sheet is linked in the attachments section.) Draw an illustration of the consumers and producers on the blank sheets of paper. Add one drawing per sheet of paper. Use the entire sheet for your illustration and include three important physical traits for the consumers.
  2. TEACHER NOTES:
  3. I chose to pause the project here and led an entire lesson on traits and adaptations because the activity was taking longer than expected. You could do the same or simply use the Food Web Mobiles Illustration sheet to introduce the term and have students identify them as they draw their illustrations.
  4. *Important* Drawings should be in pencil and then outlined in a thin, black marker.


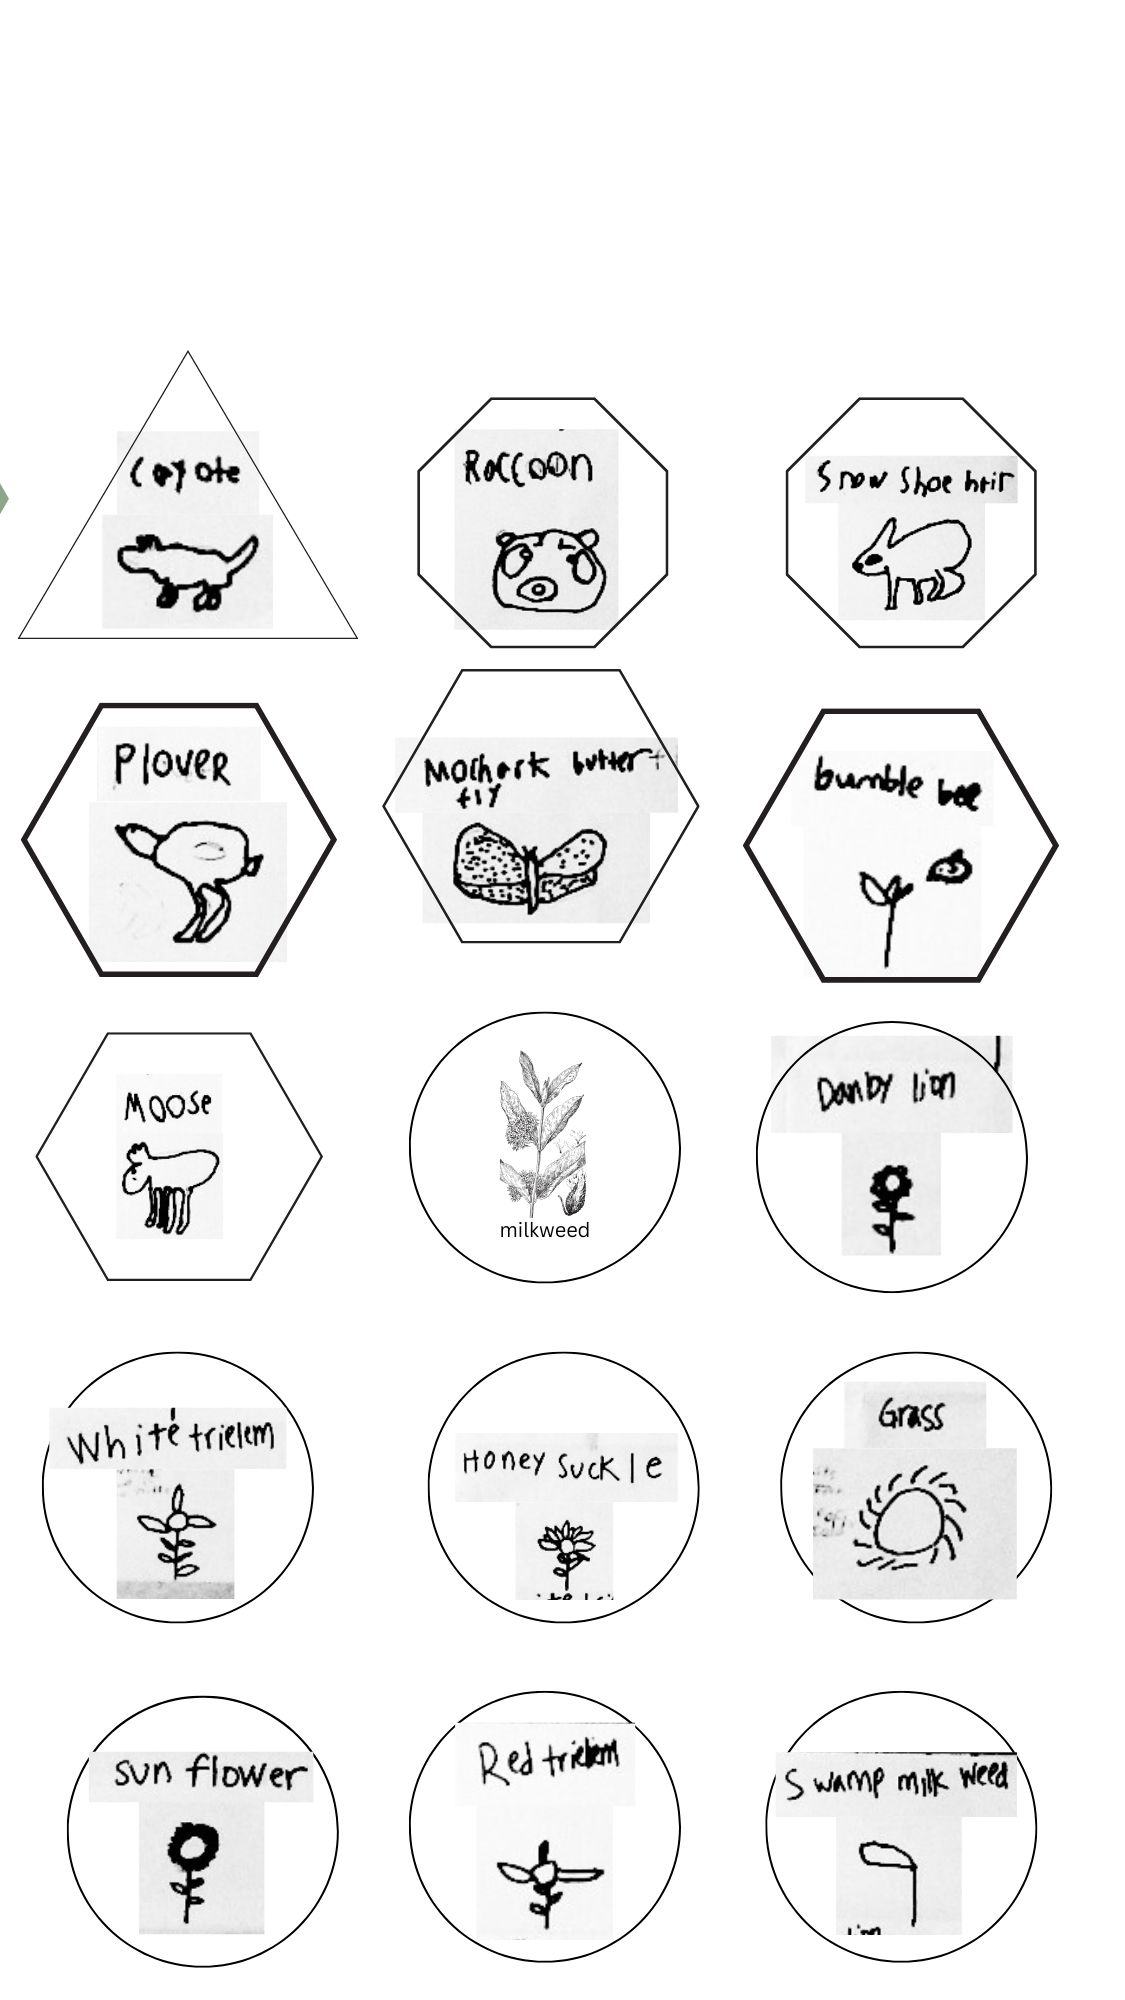
Example Illustrations: *Note students used one large sheet folded into eighths for drawings, which made scanning more difficult.


Part 2: Digitize Illustrations and add to Mobile Tile Template

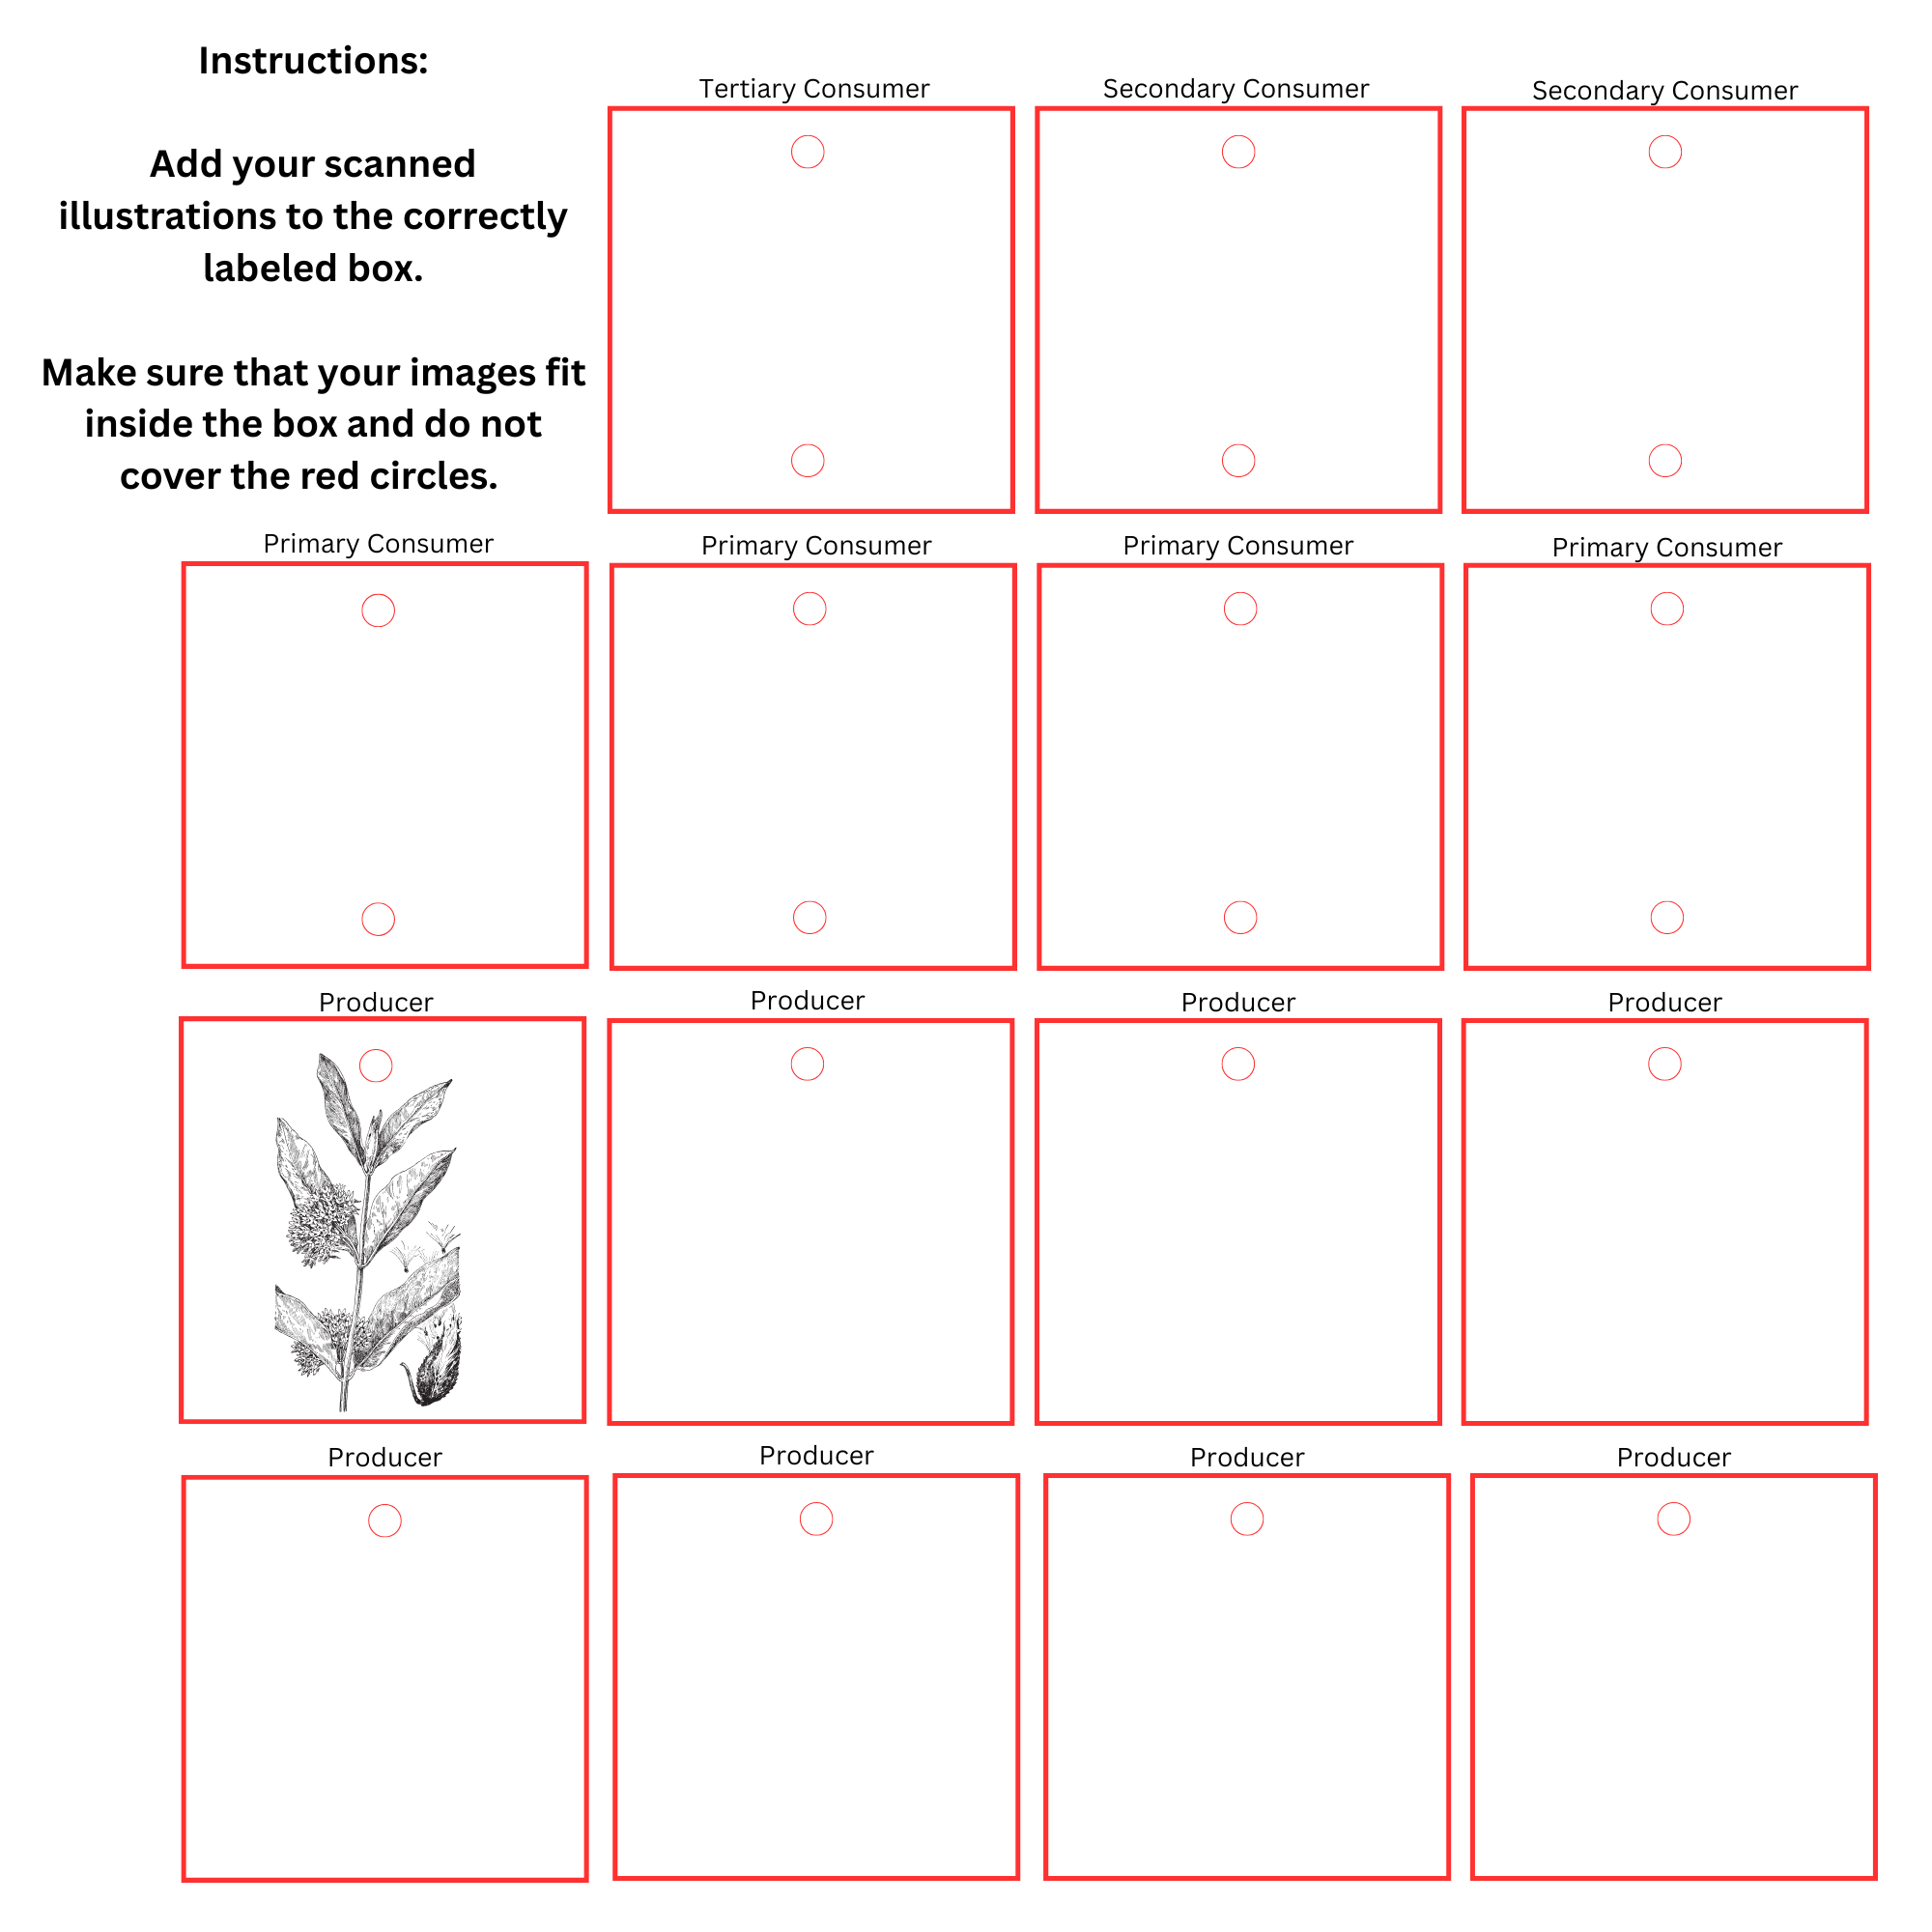
Students will scan and edit their illustrations using Canva. A Canva template is available in the attachments section.

PREP: Upload the Canva template to Canva Classroom and share it with the class. Students can each work from an individual template, and images can be combined into one group template at the end.


  1. Students scan their illustrations and upload them to their Canva template
  2. My students used their Chromebooks to complete this task by taking a photo with the front camera and then uploading the images to Canva. The images weren’t perfect, but this gave students full control of the process.
  3. Alternate options:
  4. Scan using a mobile scanning app on a tablet or iPad and upload to Canva
  5. Scan and send illustrations using the buik scan and send option available on copy machines.
  6. Make sure to scan in batches per student to make it easier to upload to individual templates efficiently.
  7. Scan & Resize Instructions:
  8. Scan your illustrations and upload them into the Mobile Tile Template in Canva.
  9. Resize your images to fit inside the boxes.
  10. Add your image to the correctly labeled box (reference your organizer if you have forgotten)
  11. Make sure each image is within the lines of the box and does not cover the red circle.
  12. Color Adjustments Instructions:
  13. Use the background eraser tool to get rid of any white areas.
  14. Click on the image
  15. Then click on edit
  16. Then click on adjust and follow the next steps:
  17. Increase contrast to 100
  18. Increase Black to 100
  19. Adjust brightness as needed.


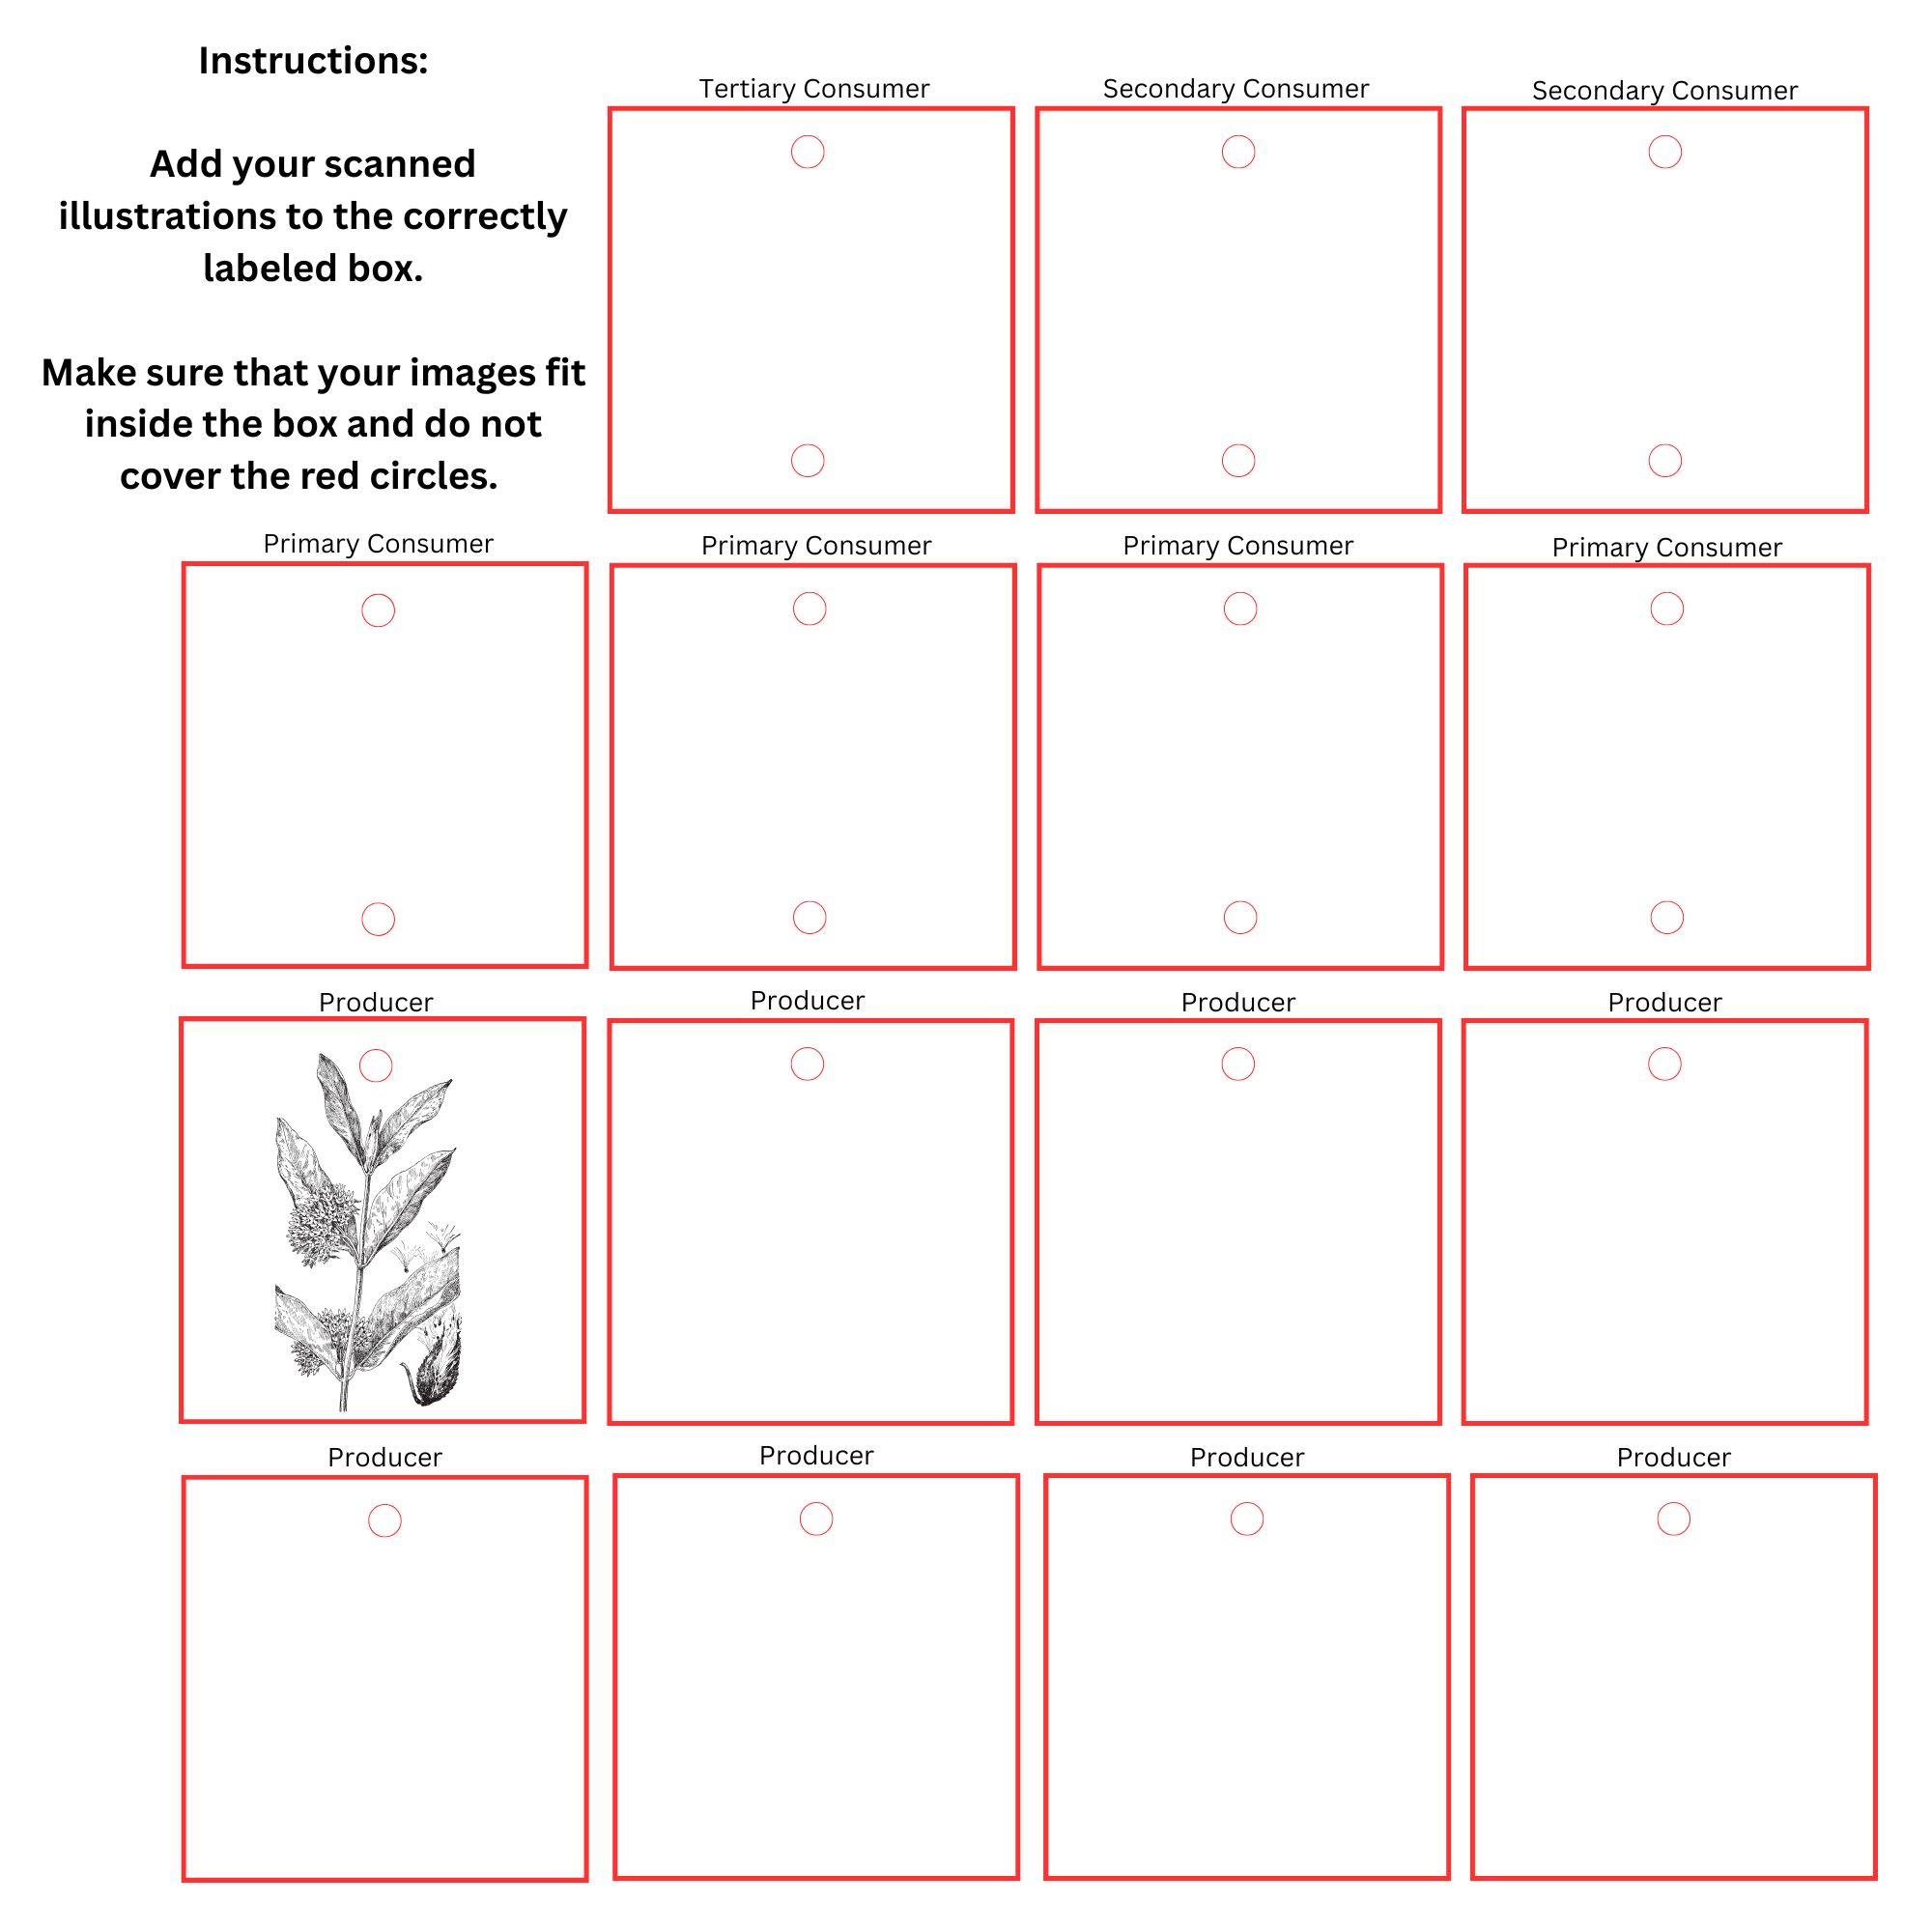
Example of Student Work: *Note, I allowed students to choose their shapes. They used my original template as a guide for shape placement.


Part 2: Laser-Cutting Mobile Tiles

Import the Canva files into the laser cutter software. We use a WeCreat machine in our school, and the instructions follow the steps we used. The steps should be altered as needed for your specific machine.

These next steps can be done by students or teachers, depending on the students’ ability.


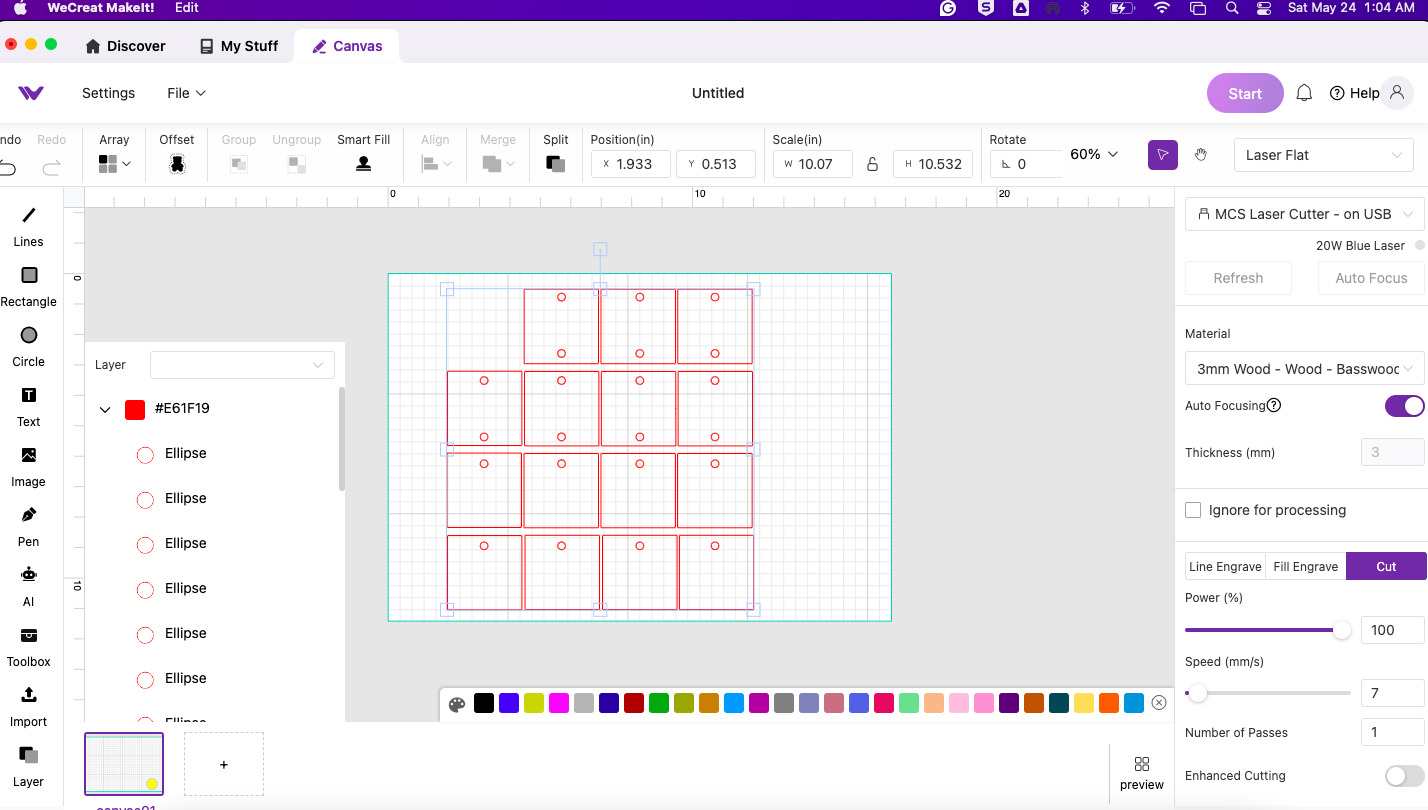
PREP: Create a template for the cut lines.

  1. Import the Canva template into your laser cutter software (we use WeCreat) or Adobe Illustrator software.
  2. Importing it as an SVG from Canva may work, but if not, import it as a JPEG and use the trace tool to outline the shapes.
  3. Erase the original image.
  4. Set the traced shapes to .001 width and make red. Make sure that a .25 inch diameter cut hole is included at the top and bottom (centered) of the consumer tiles and at the top only of the producer tiles.
  5. Import your illustration files into a doc that already contains this cut template.


Instructions for downloading the Canva files:

  1. Delete the shape outlines and any text so only the illustrations are left.
  2. Download the Canva files as JPEGs.
  3. Import into the file that contains a copy of the cut lines template.
  4. Line up the illustrations with the cut lines.
  5. We use the WeCreat software, which does not require that illustrations be changed to vector images. If you run into an issue with Illustrator that requires you to trace the illustrations before laser cutting, use ChatGTP to help you identify the steps needed to do so using the trace tool.
  6. Adjust engraving settings within the software or export to Adobe Illustrator file to the laser cutter software and adjust settings there.
  7. Send the file to the laser cutter!


Build Mobiles

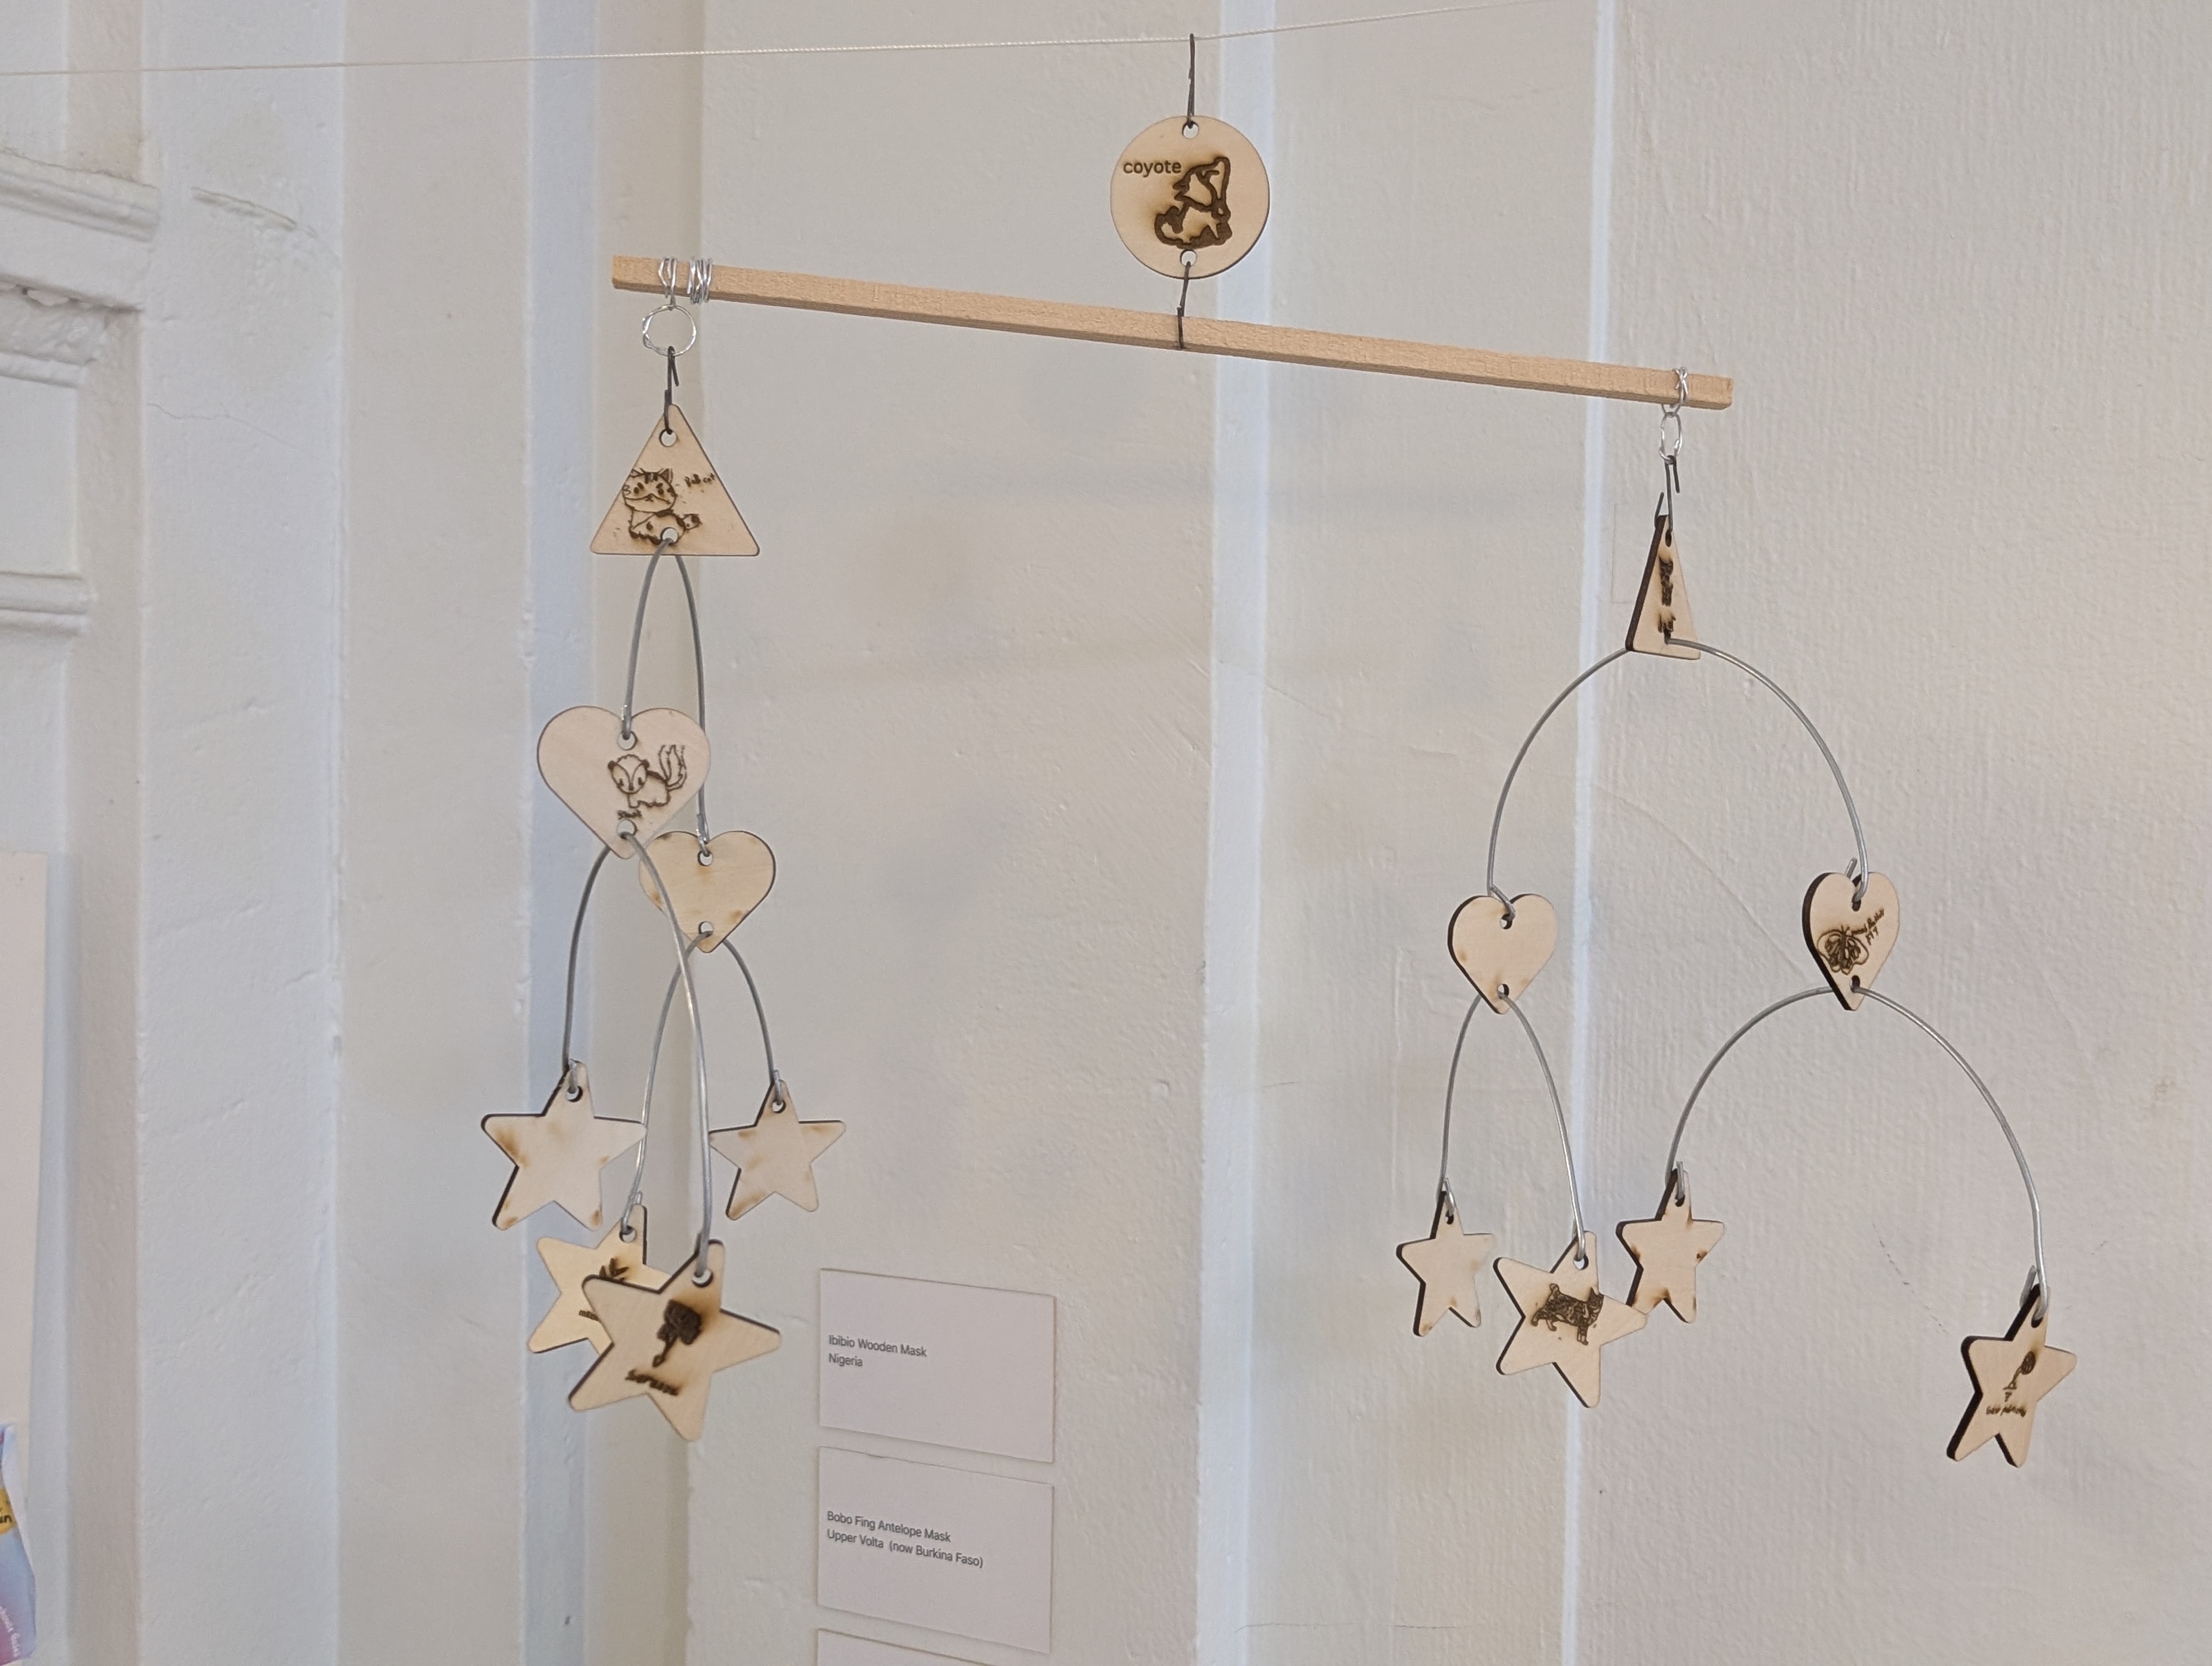
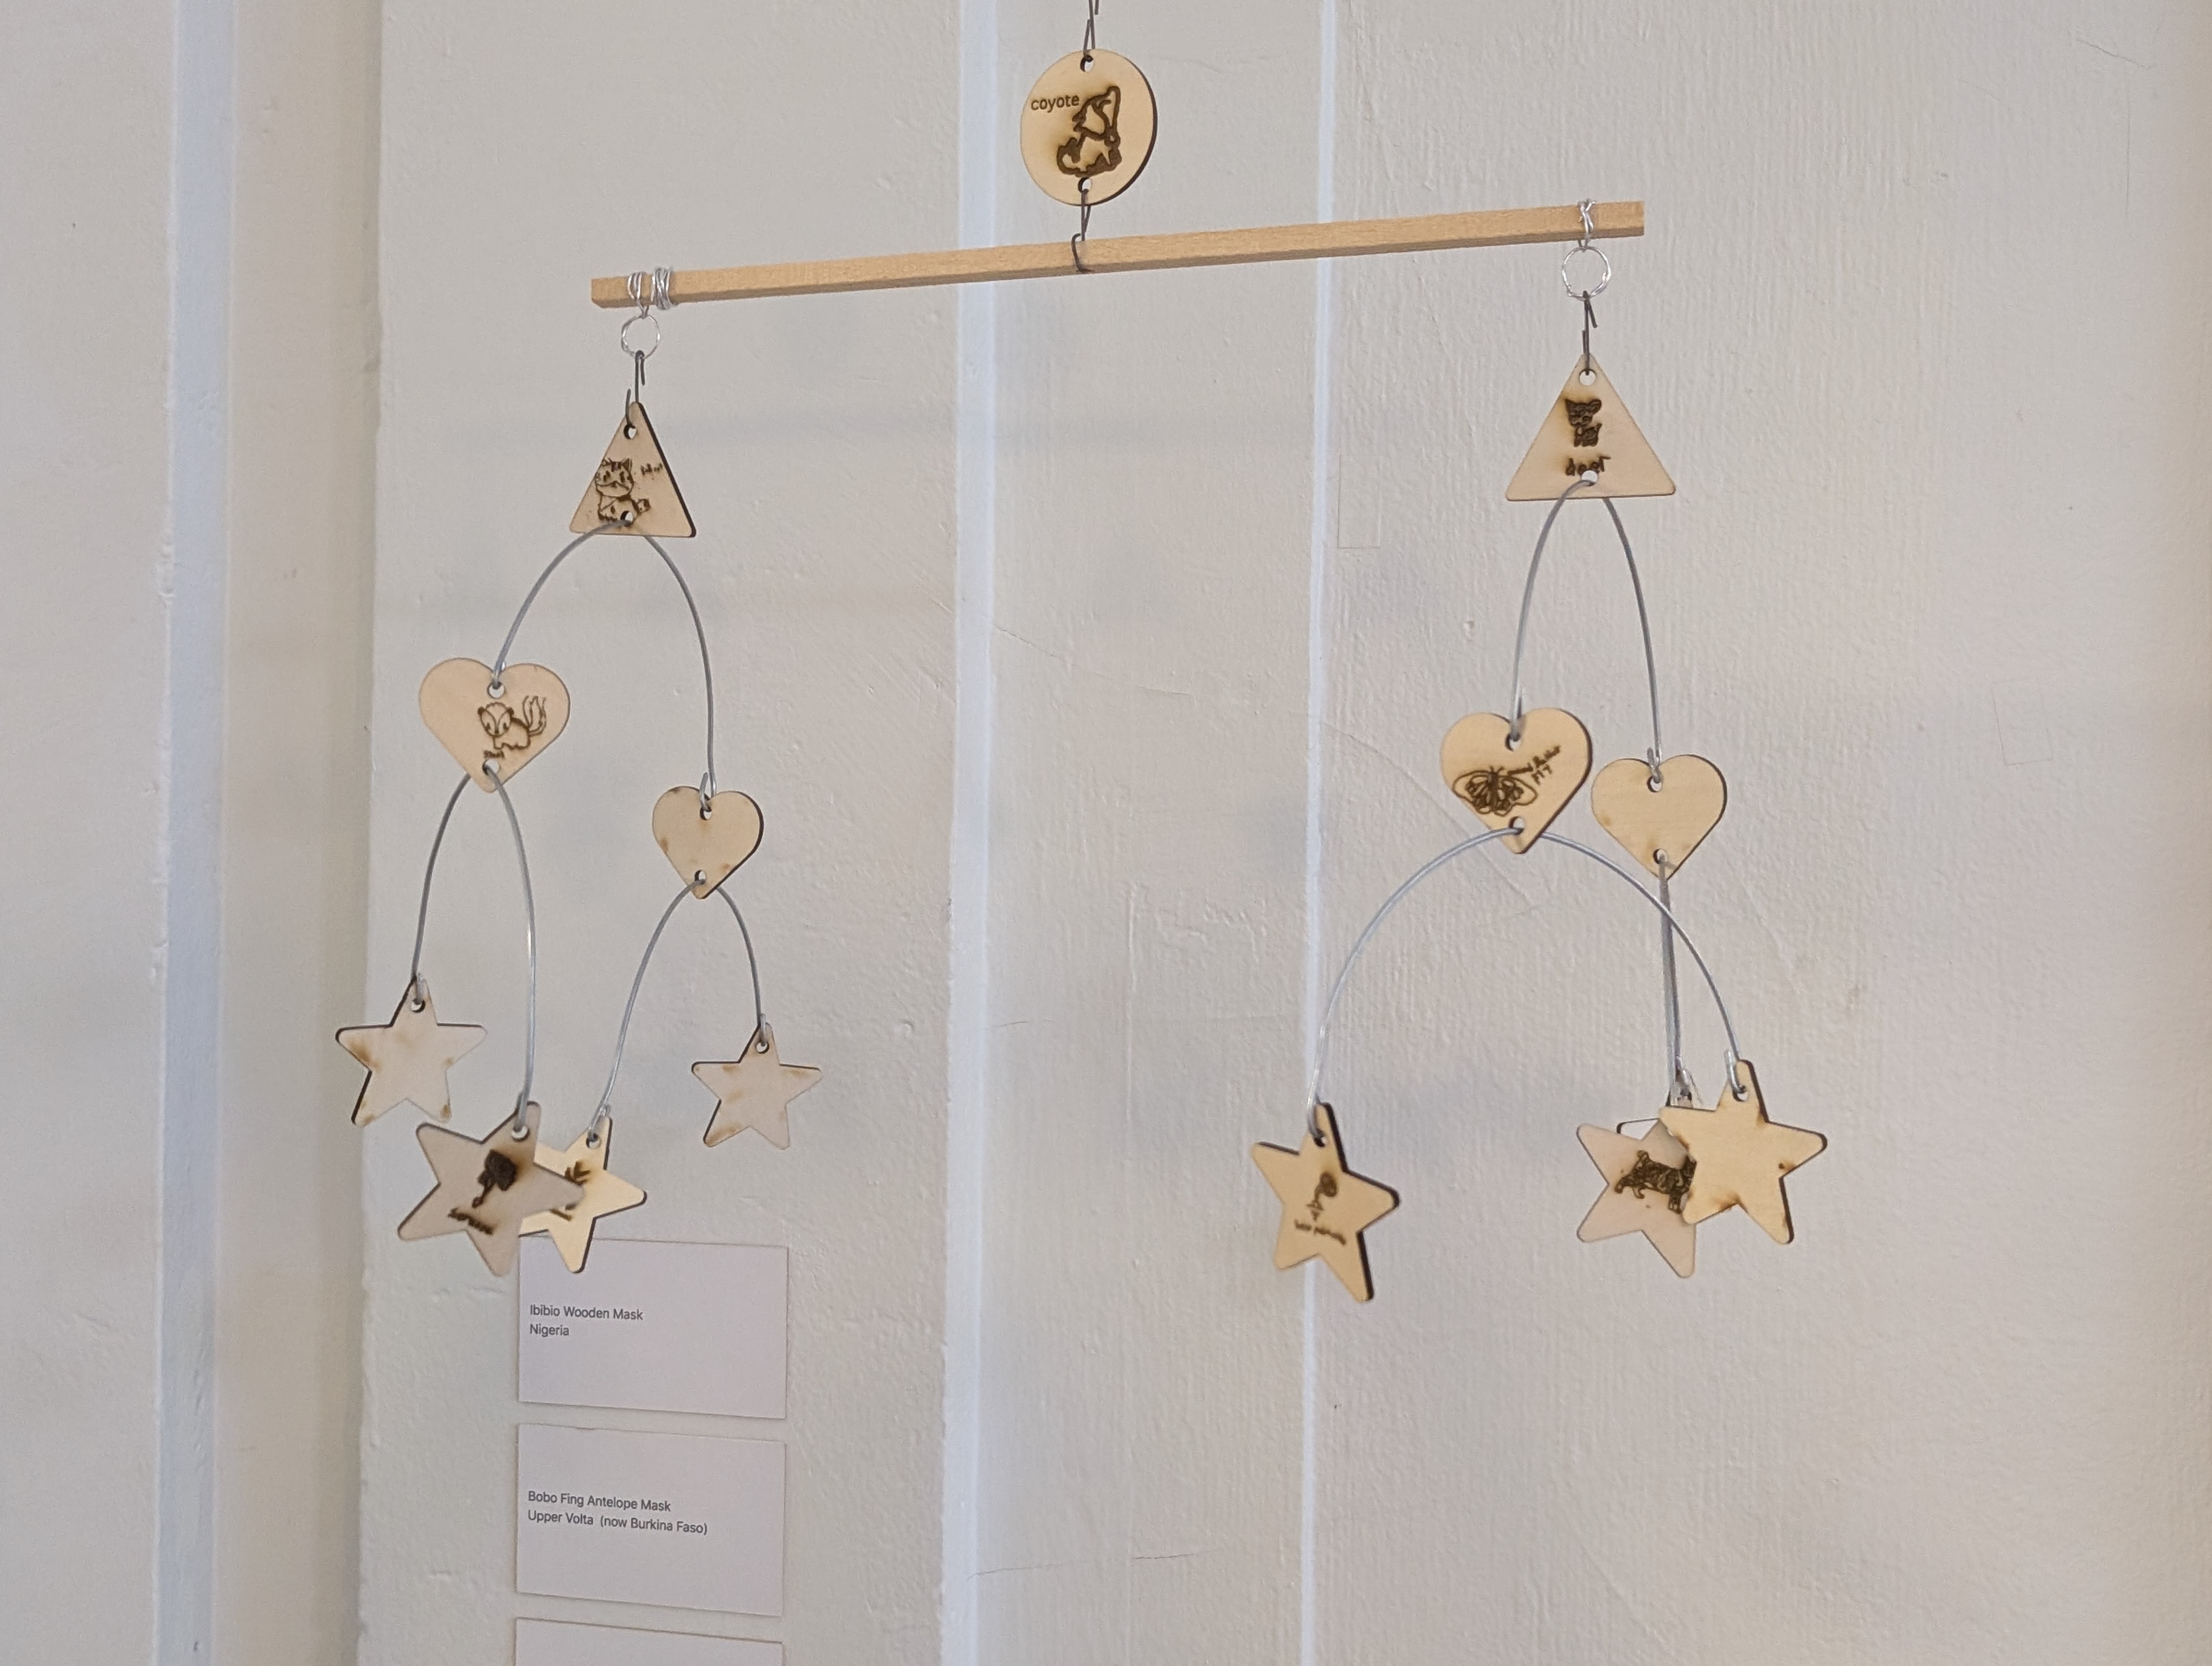
Students will assemble their mobiles using the laser-cut tiles and wire, focusing on creating hanging sculptures that are balanced on center.

PREP: Choose whether to pre-cut the wire or allow students to cut it themselves. Set out wire cutters, wire, and tiles organized by group or student. I chose to cut a mobile for each student to make. If you have other materials, like dowels, those can be added too.


INSTRUCTIONS:

  1. Lay out your tiles by food web level.
  2. Cut out the following lengths of wire and bend into slight arches.
  3. 1 x 12 inches
  4. 2 x 8 inches
  5. 4 x 6 inches
  6. You can have students add a small, U-shaped notch at the center of each arch for added stability when hung.
  7. Cut a 3-inch piece of wire and thread it through the top hole of the tertiary consumer. Secure the end around the tile and bend the top section into a hook.
  8. Thread the 12-inch wire through the bottom hole of the tertiary consumer tile and hook the secondary consumers to either end using the top holes. Secure the wire so that the tiles cannot fall off, but leave enough room to move freely.
  9. For best results, make sure that tiles are hung facing outwards.
  10. Thread the 8-inch wires through the bottom of secondary consumer tiles. One piece of wire per tile.
  11. Attach the primary consumers to the ends of each wire.
  12. Thread the 6-inch wires through the bottom holes of the primary consumers.
  13. Attach producers at the ends.


Lesson Feedback

Contact us

Having trouble? Let us know by completing the form below. We'll do our best to get your issues resolved quickly.

"*" indicates required fields

Name*
Email*
This field is for validation purposes and should be left unchanged.
?