Mp3 Speakers - SCOPES Digital Fabrication

Lesson Details

Age Ranges
Standards
Fab-Safety.1, Fab-Electronics.1, Fab-Modeling.1, Fab-Fabrication.1, Fab-Design.1, Fab-Safety.2, Fab-Electronics.2, Fab-Modeling.2, Fab-Fabrication.2, Fab-Design.2, Fab-Safety.3, Fab-Modeling.3, Fab-Fabrication.3, Fab-Design.3

You need to login or register to bookmark/favorite this content.

Author

Brandon Prentice
Brandon Prentice
K-12 teacher
Brandon Prentice is a fabrication teacher and instructional coach for the Trinity-Area School District, located in southwestern Pennsylvania.  He is a graduate of California University of Pennsylvania, earning his BS and MEd in Technology Education. A major part of his… Read More

Summary

Students will be given an amplifier/speaker kit to assemble and solder. Students will also create a casing for this circuit system. This can be achieved by using the step-by-step tutorial design provided, or by creating their unique and original design.

What You'll Need

Materials List

Hardware:

  • Laser Cutter/Engraver: students will use this equipment to vector cut the needed pieces to create the speaker box. Students will also raster their designs into their selected material
  • Speaker Kit: students will use this kit to solder and connect all required components to make the speaker.
  • 2x5Watt 6-14DCV/1A Amplifier Kit: http://www.jameco.com/webapp/wcs/stores/servlet/Product_10001_10001_2196588_-1
  • 3”, 8 ohm, 5 Watt Speakers: http://www.jameco.com/webapp/wcs/stores/servlet/Product_10001_10001_2167285_-1
  • Cable: the cable is needed to connect the board to a wall jack to provide power when in use. Students will have to strip and locate appropriate wires to correctly assemble the connector cable.
  • Soldering Equipment: students will use this equipment to complete the speaker circuit board.
  • Consumable Materials: acrylic, plywood, cardboard, solder wire, cable, acrylic cement, or wood glue.

Software:

  • Vector graphics software (e.g. CorelDraw, Inkscape or similar)
  • Optional – laser cut box maker (e.g.makercase.com)
  • Optional – Sketchup


The Instructions

t

t

Step One: Define Sound

TEACHER NOTE: Review and print Discovery Education lesson on sound waves: http://www.discoveryeducation.com/teachers/free-lesson-plans/the-phenomenon-of-sound-waves.cfm

TEACHER NOTE: Play music at beginning of class using CD player. Emphasize sound differences. Review how sound waves travel by asking students to explain how sound energy travels. Review https://www.youtube.com/watch?v=GkNJvZINSEY

Essential Question: How does sound energy travel?

  1. In whole class session, students will learn how speakers work by building their own and examining features needed to improve sound quality.
  2. Define the following key concepts:
  • Acoustic Definition: The total effect of sound and the ability of an enclosed space, such as an auditorium, to reflect sound waves to produce distinct hearing. Context: The acoustics in the building were superb, making it an ideal place for a concert.
  • Compressional Wave: A wave that carries sound energy. Context: Compressional waves need a medium to travel.
  • Echo: The repeating of a sound caused by reflection of sound waves off a surface. Context: When they shouted into the canyon, their voices echoed back up to them from the rocks.
  • Vibrate: To move rapidly back and forth. Context: The string vibrated after being plucked.
  • Wave: A transfer of energy as it travels away from the energy source. Context: She threw a rock into the water, causing a ripple of waves to spread outward in all directions.

Formative Assessment: Students should understand that vibrations (e.g., sounds) move at different speeds in different materials and have different wavelengths.

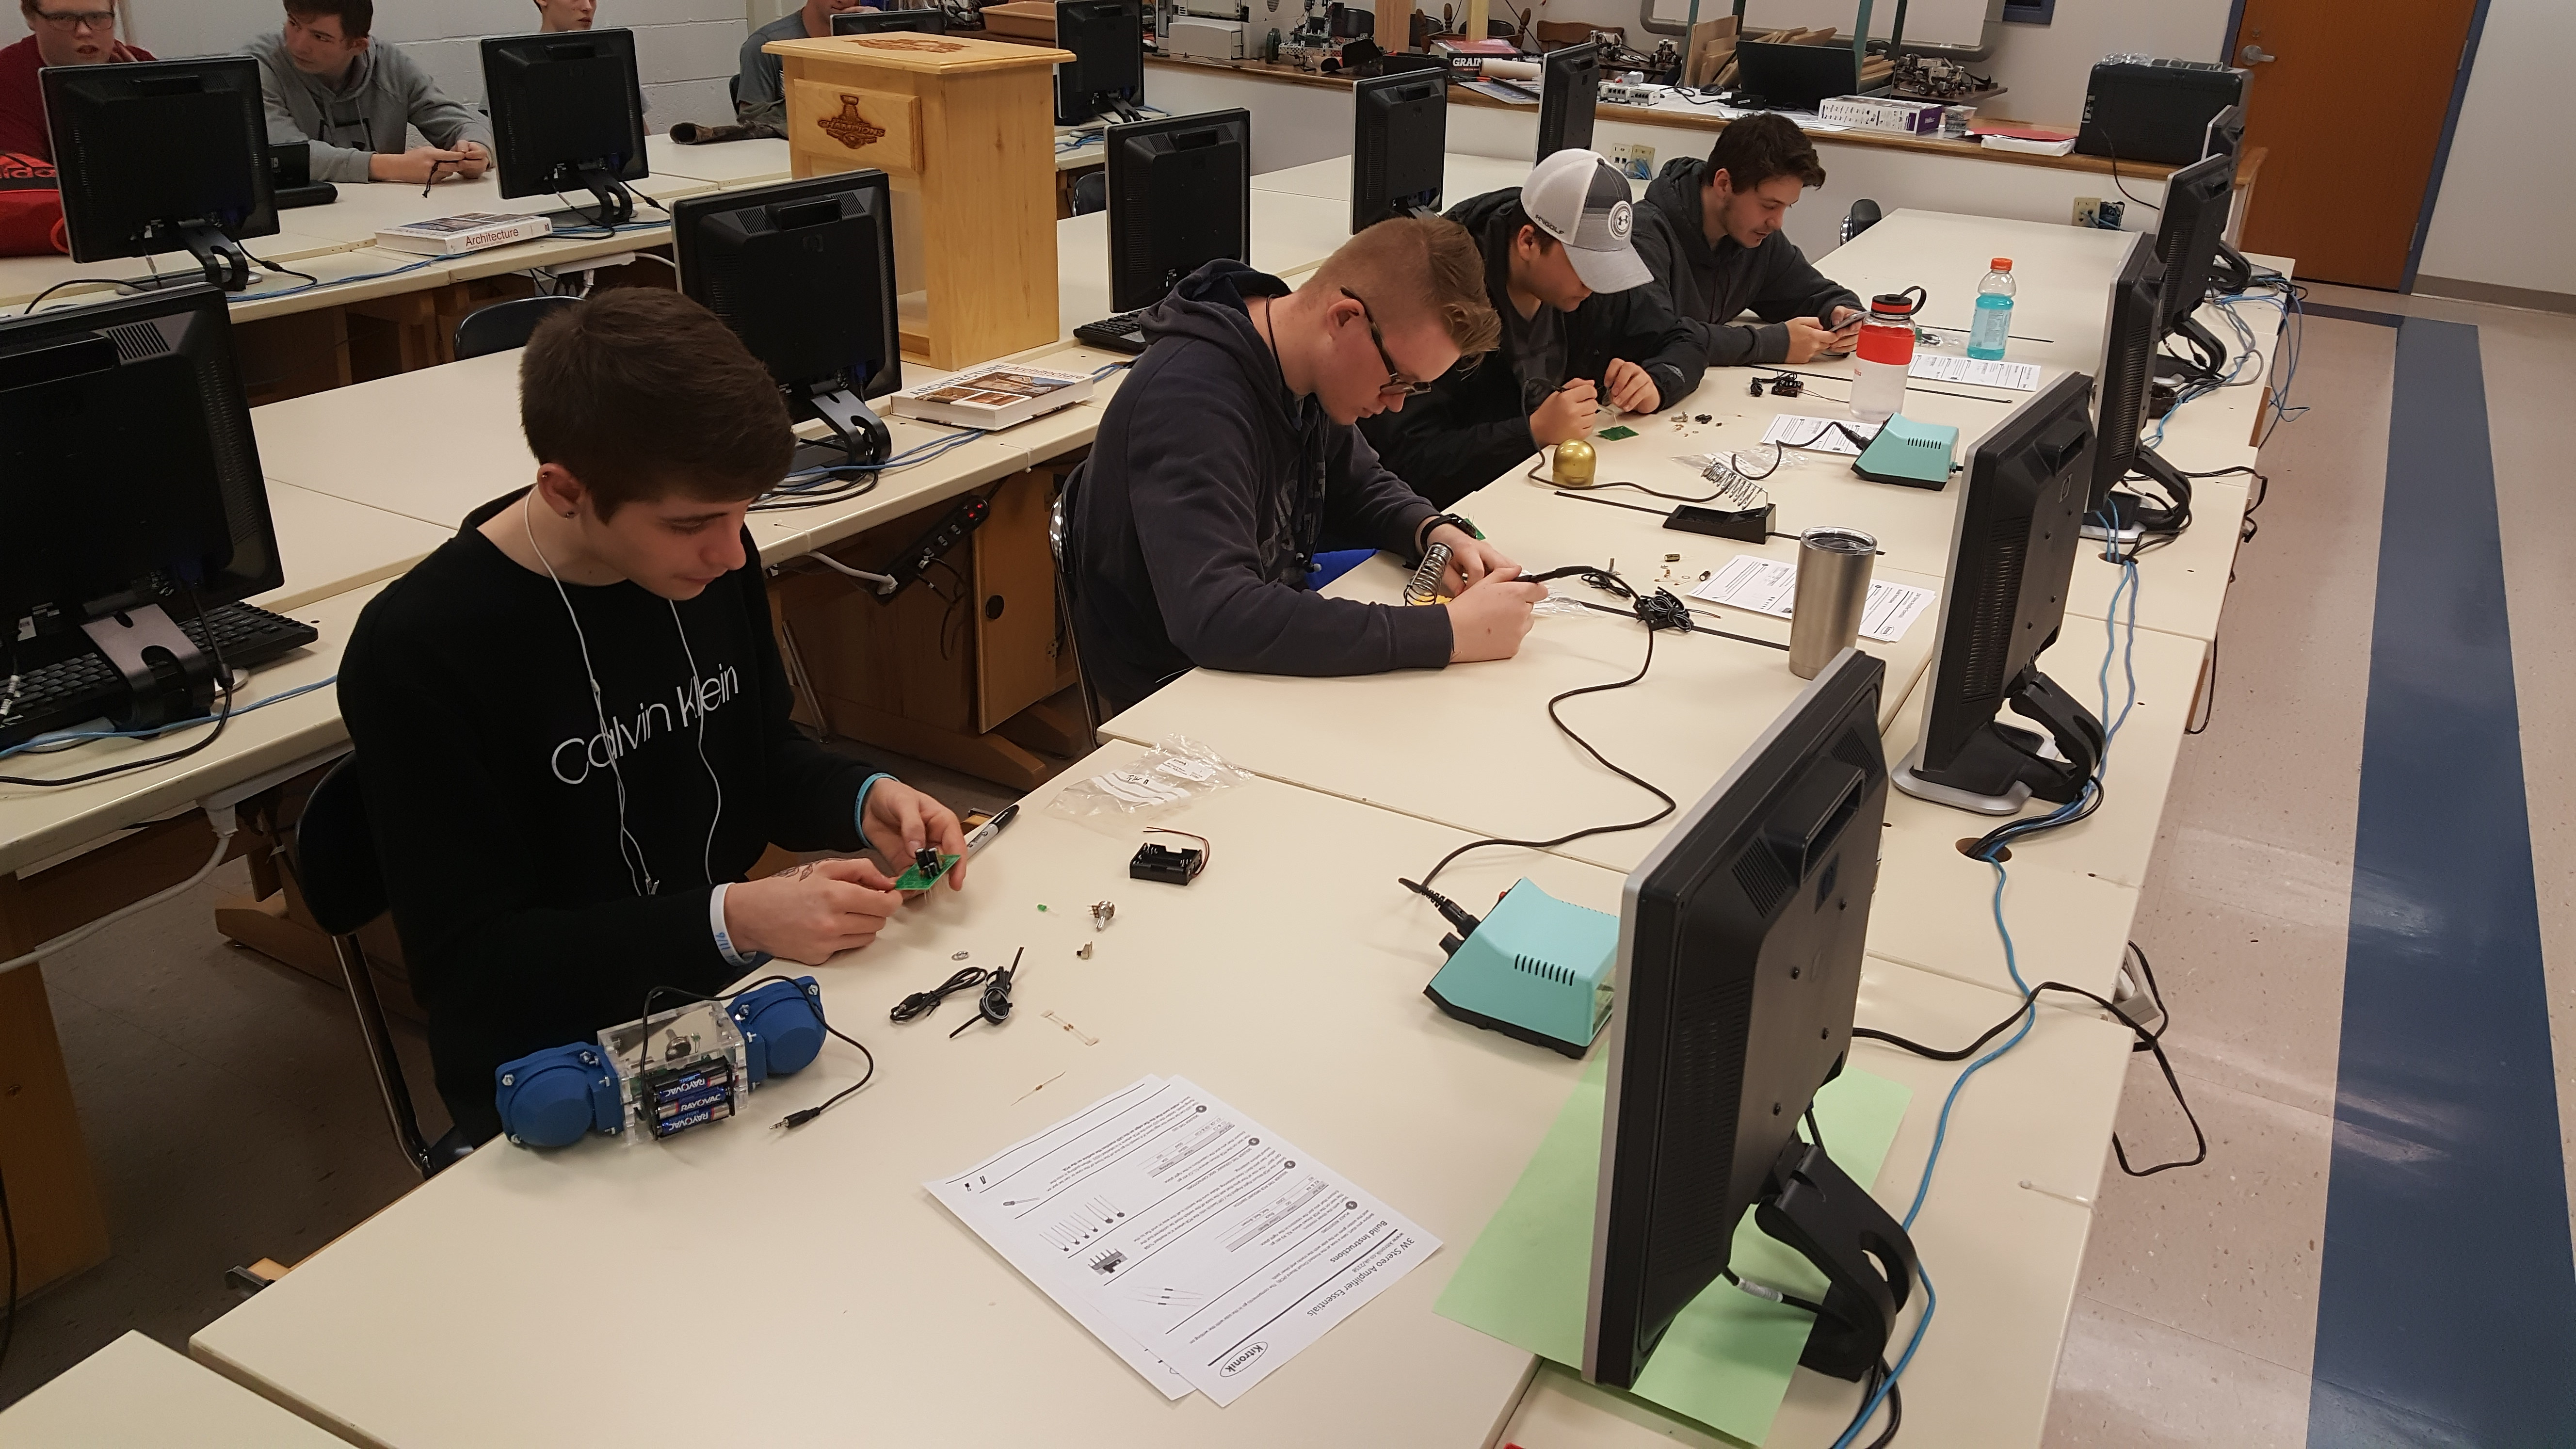
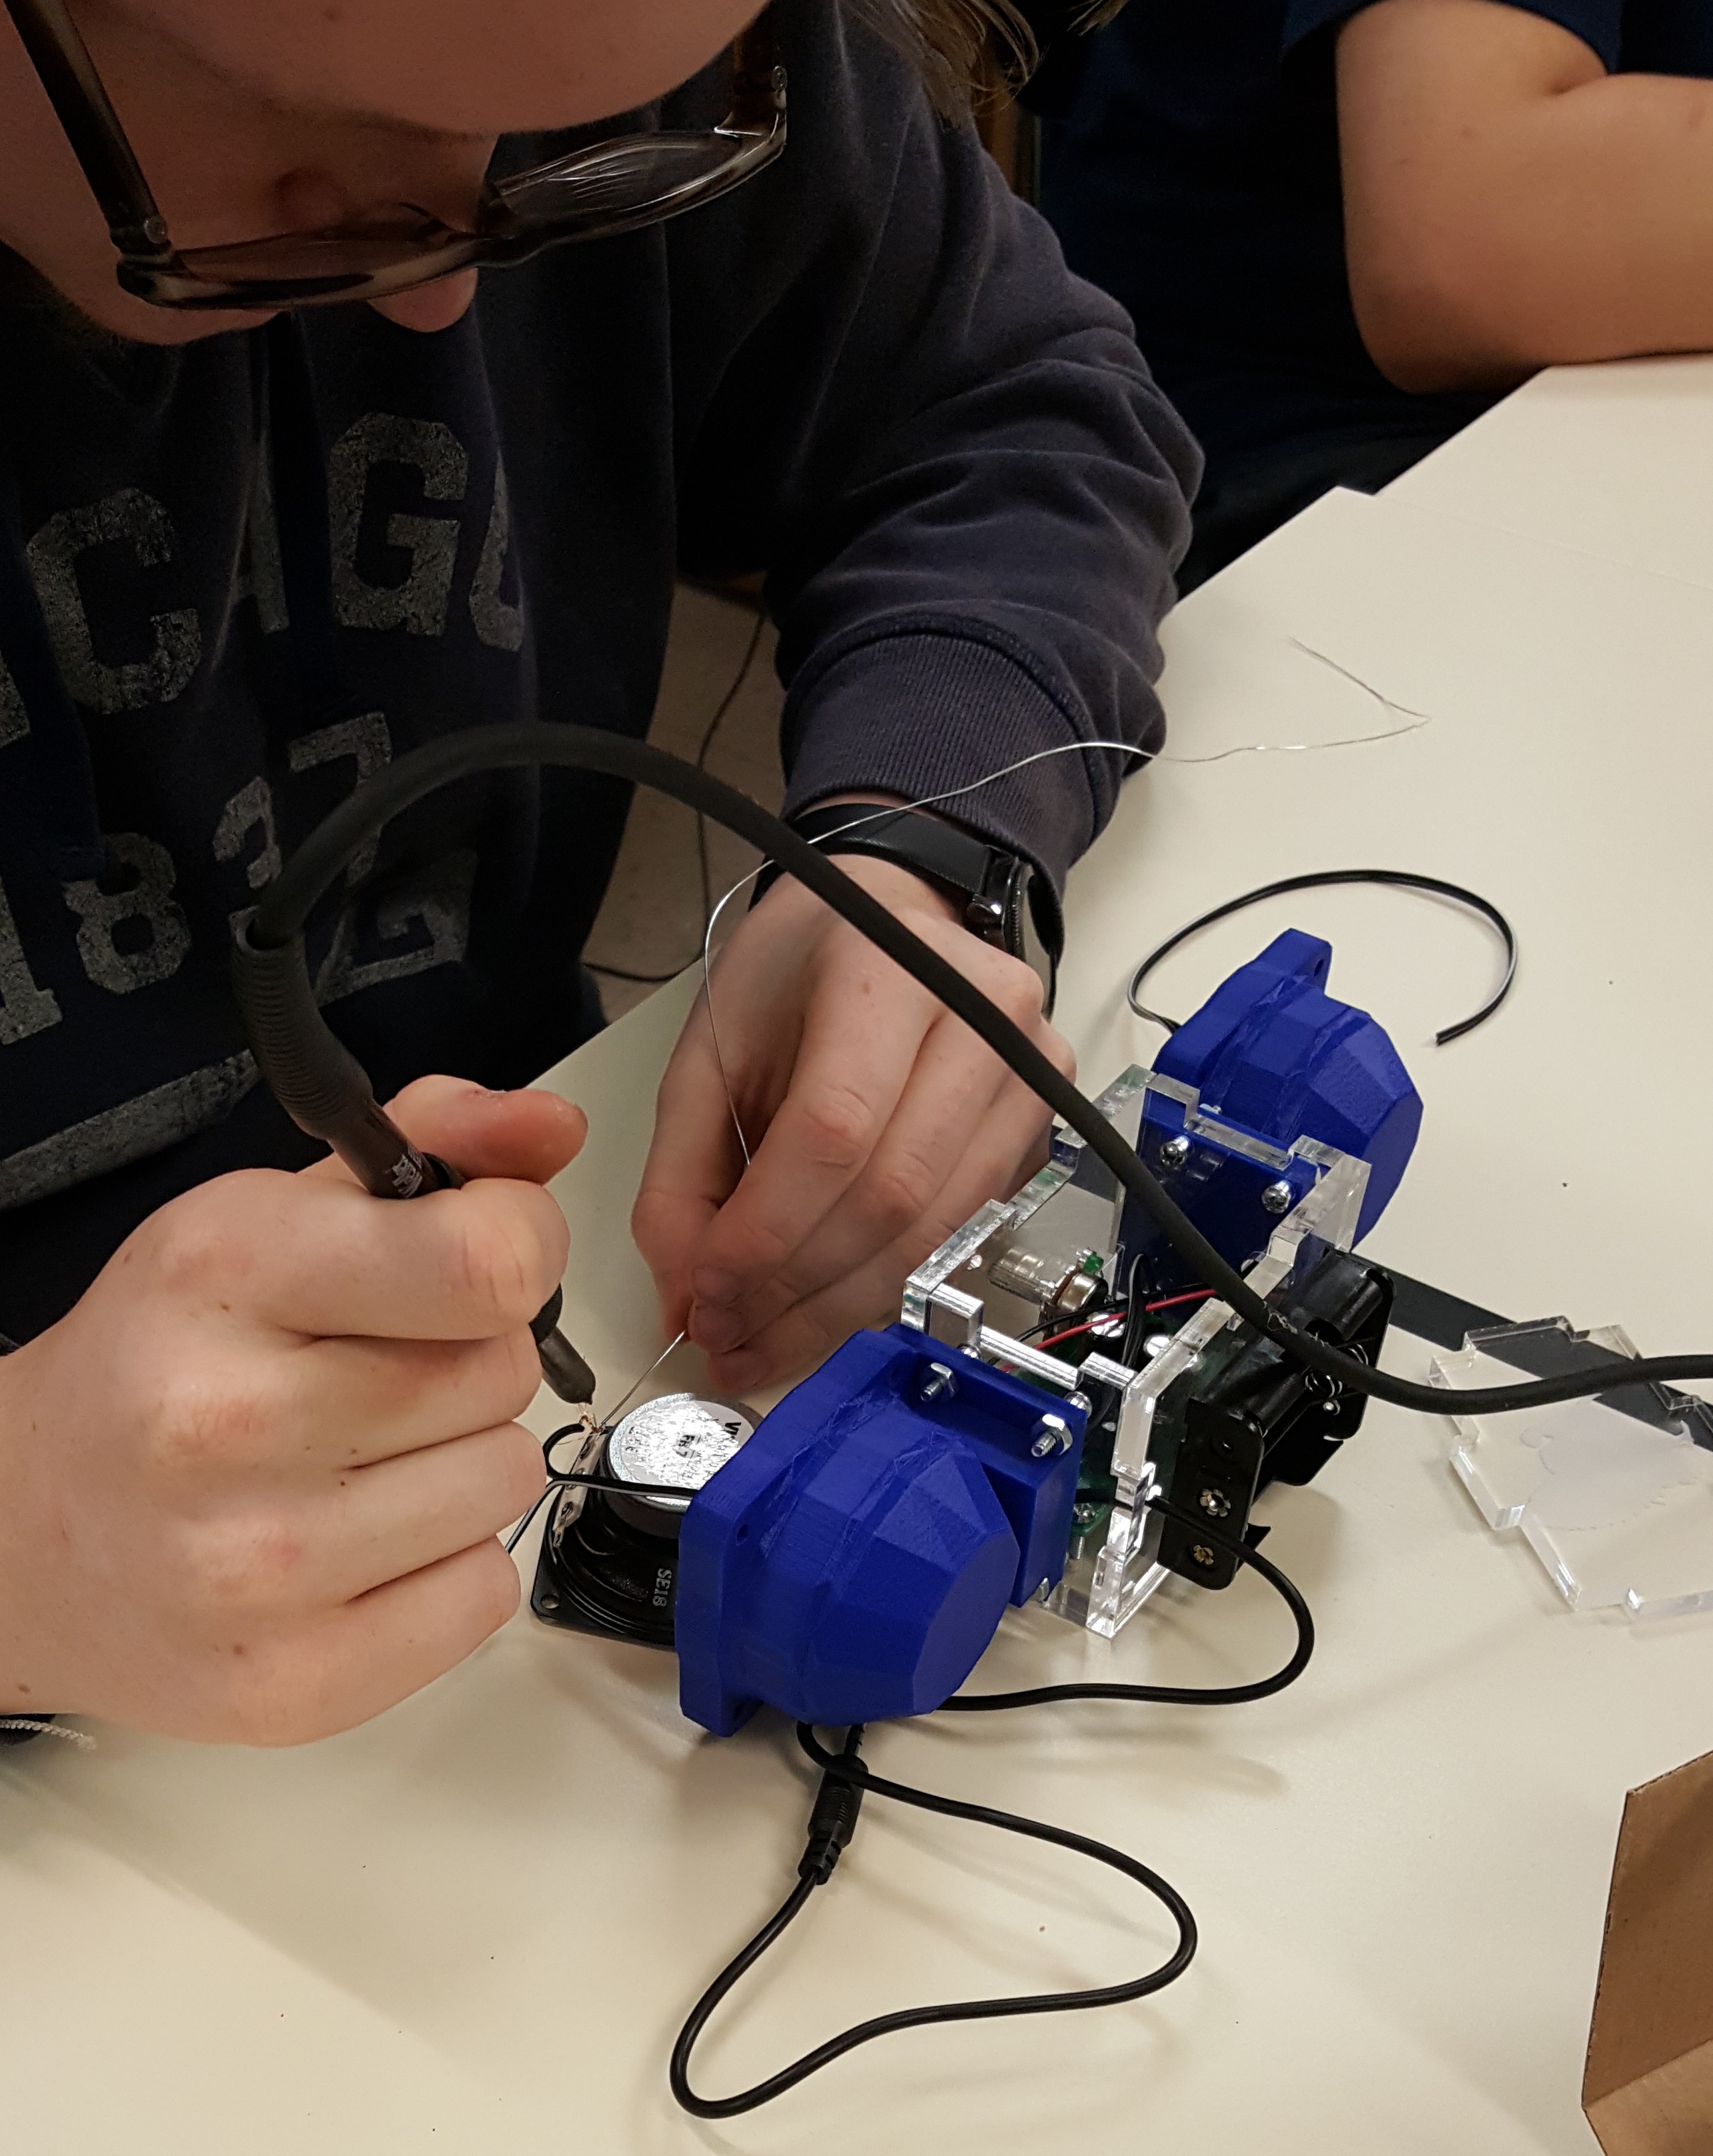
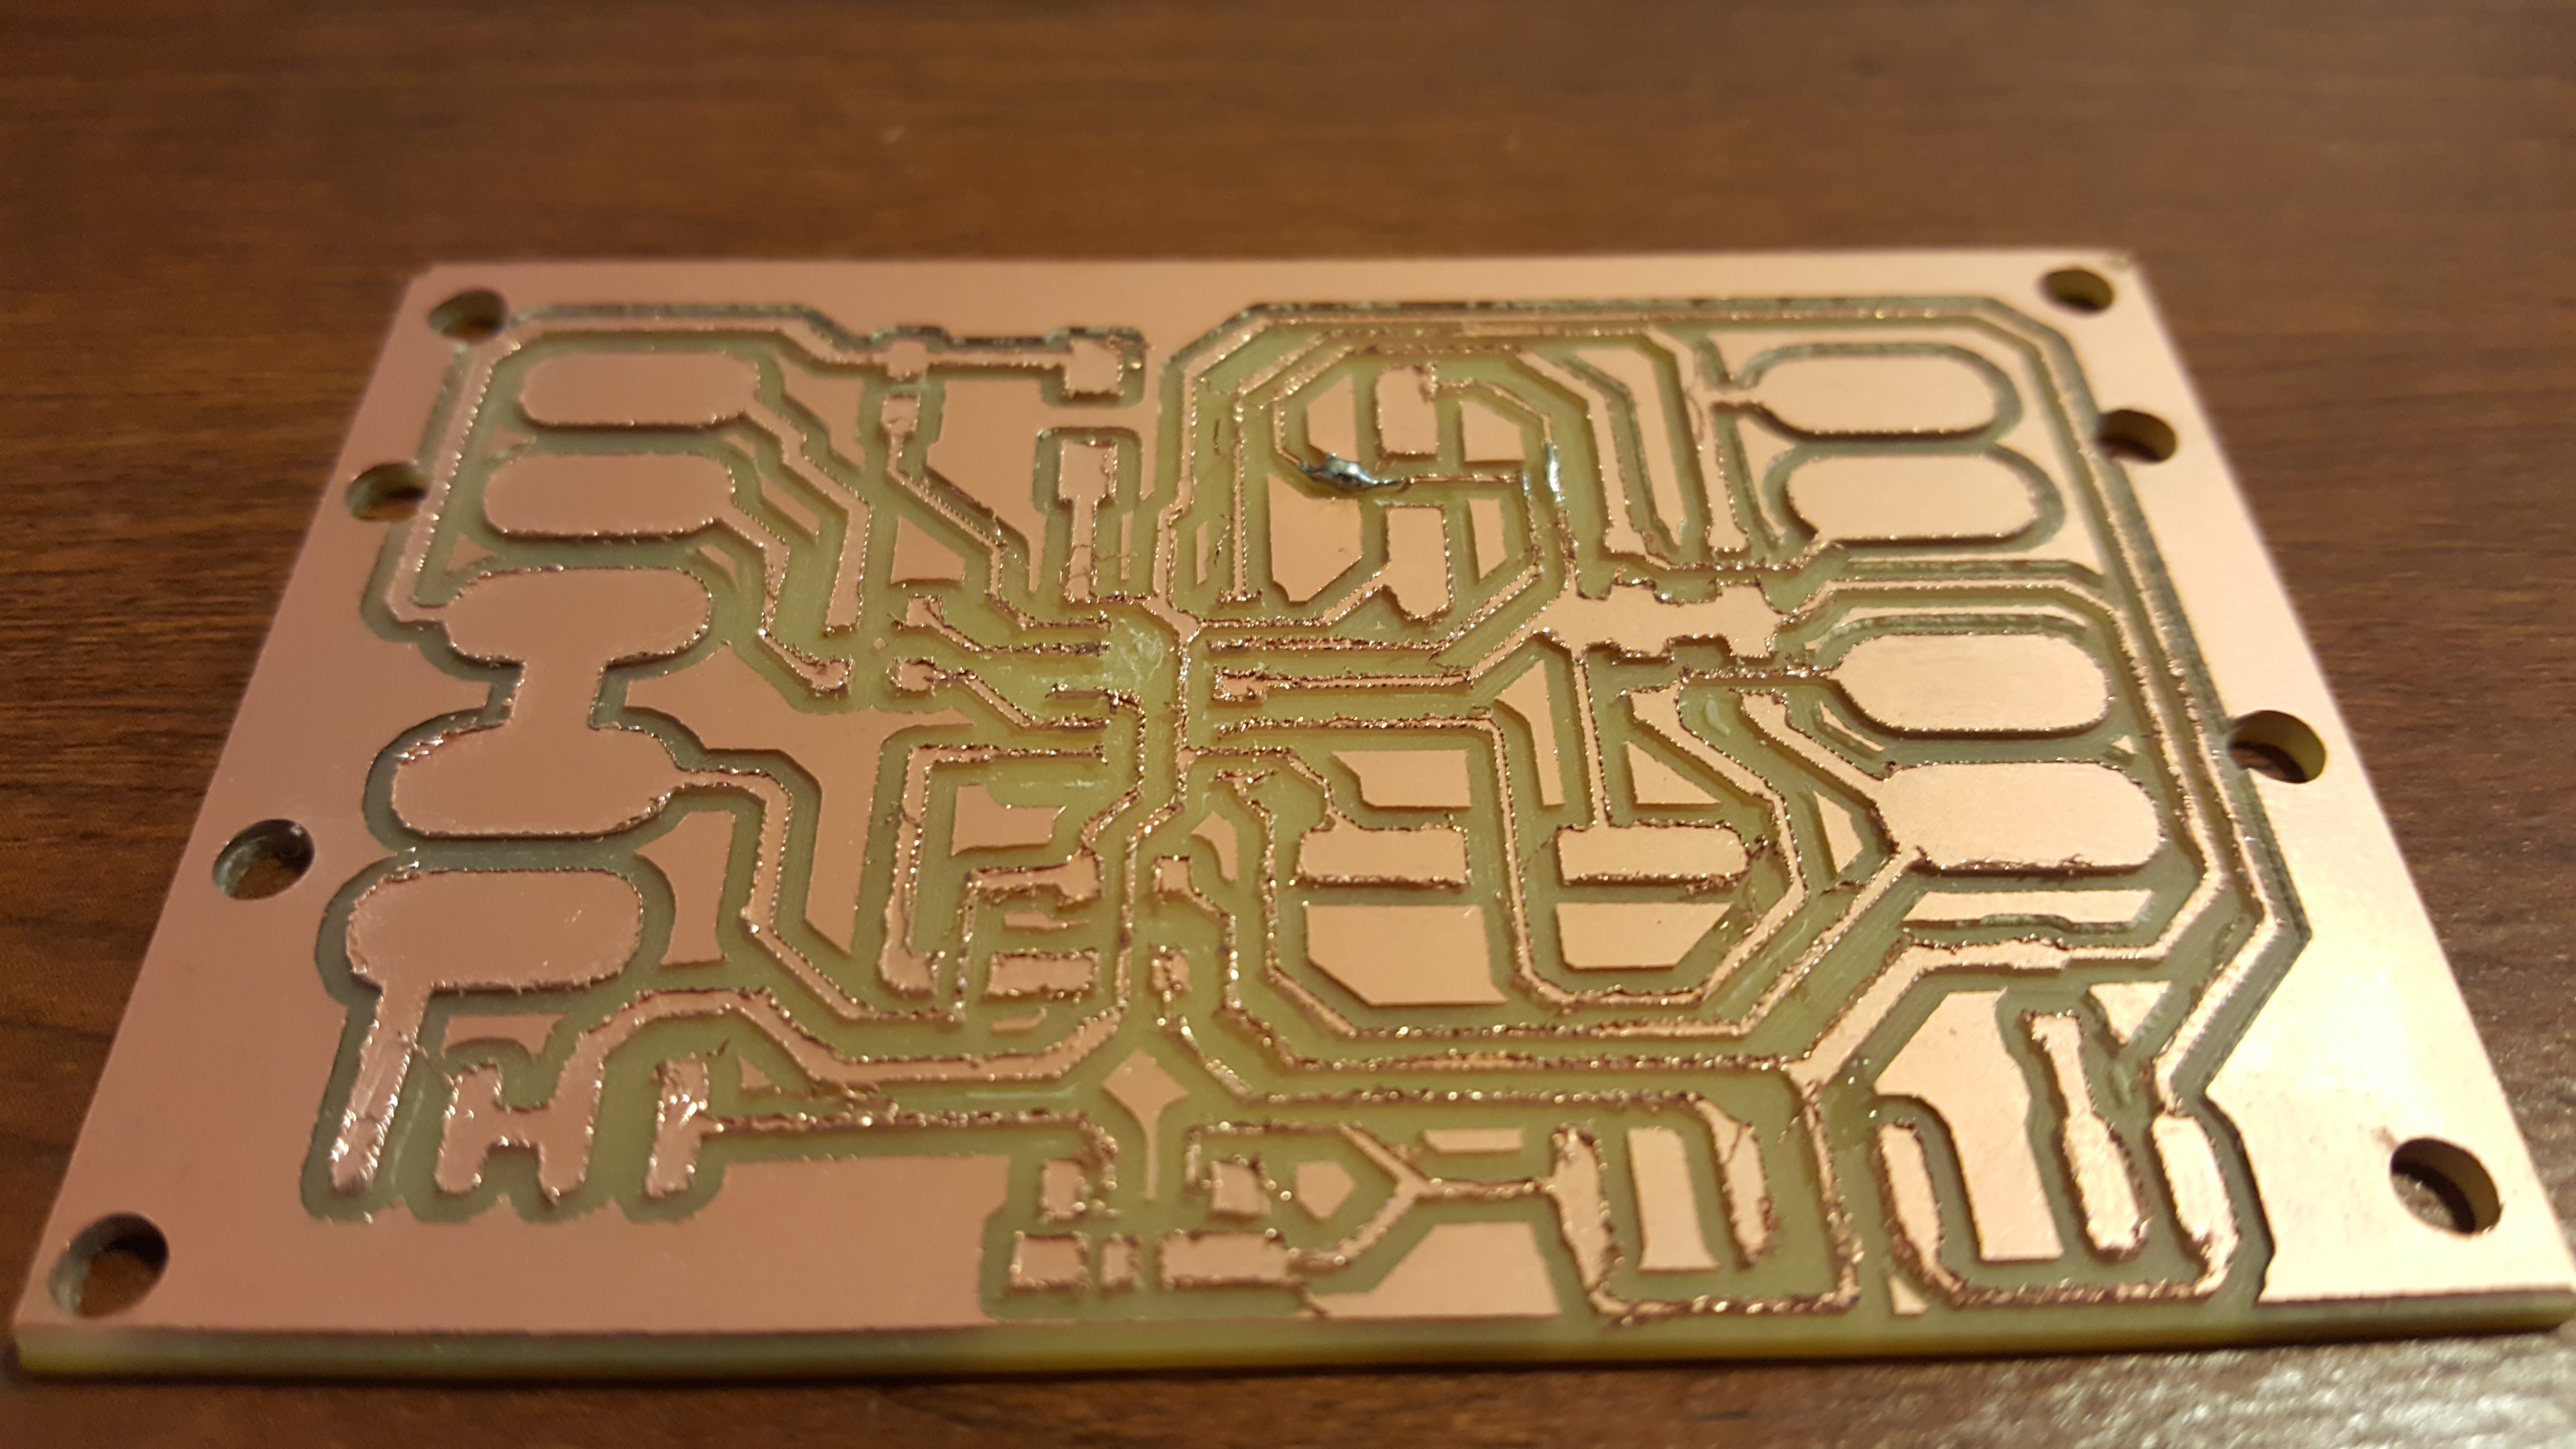
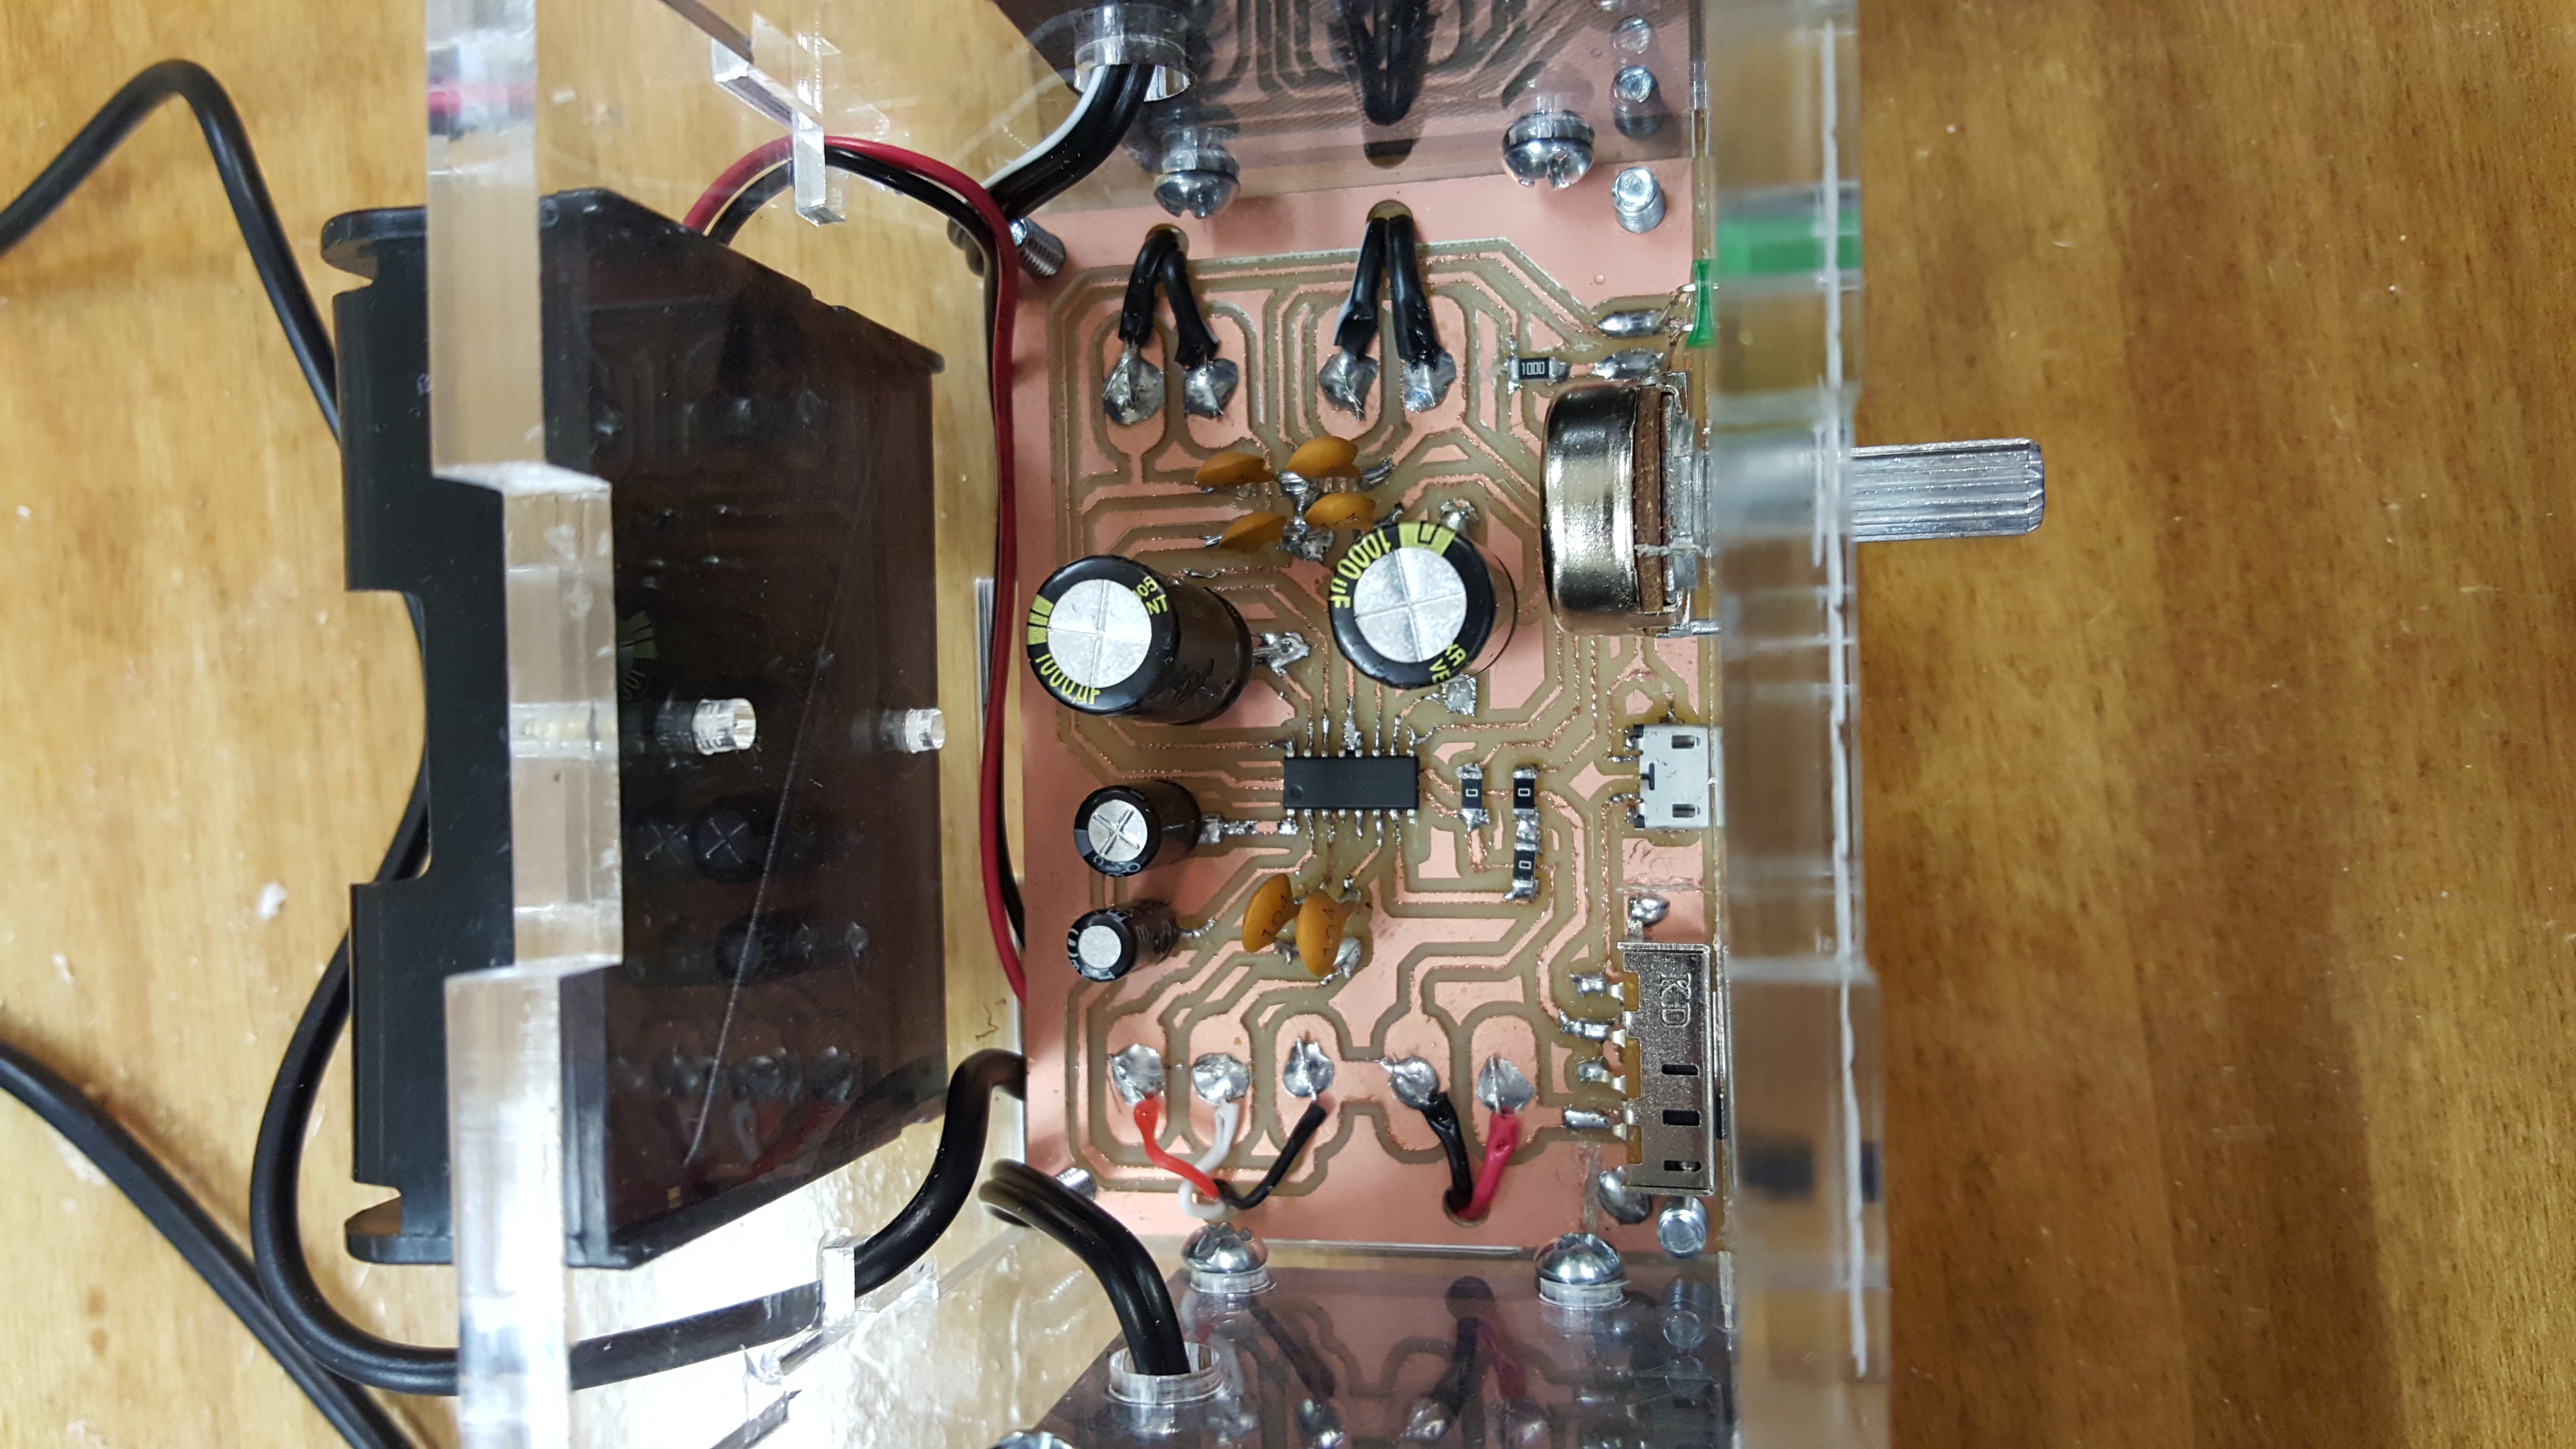
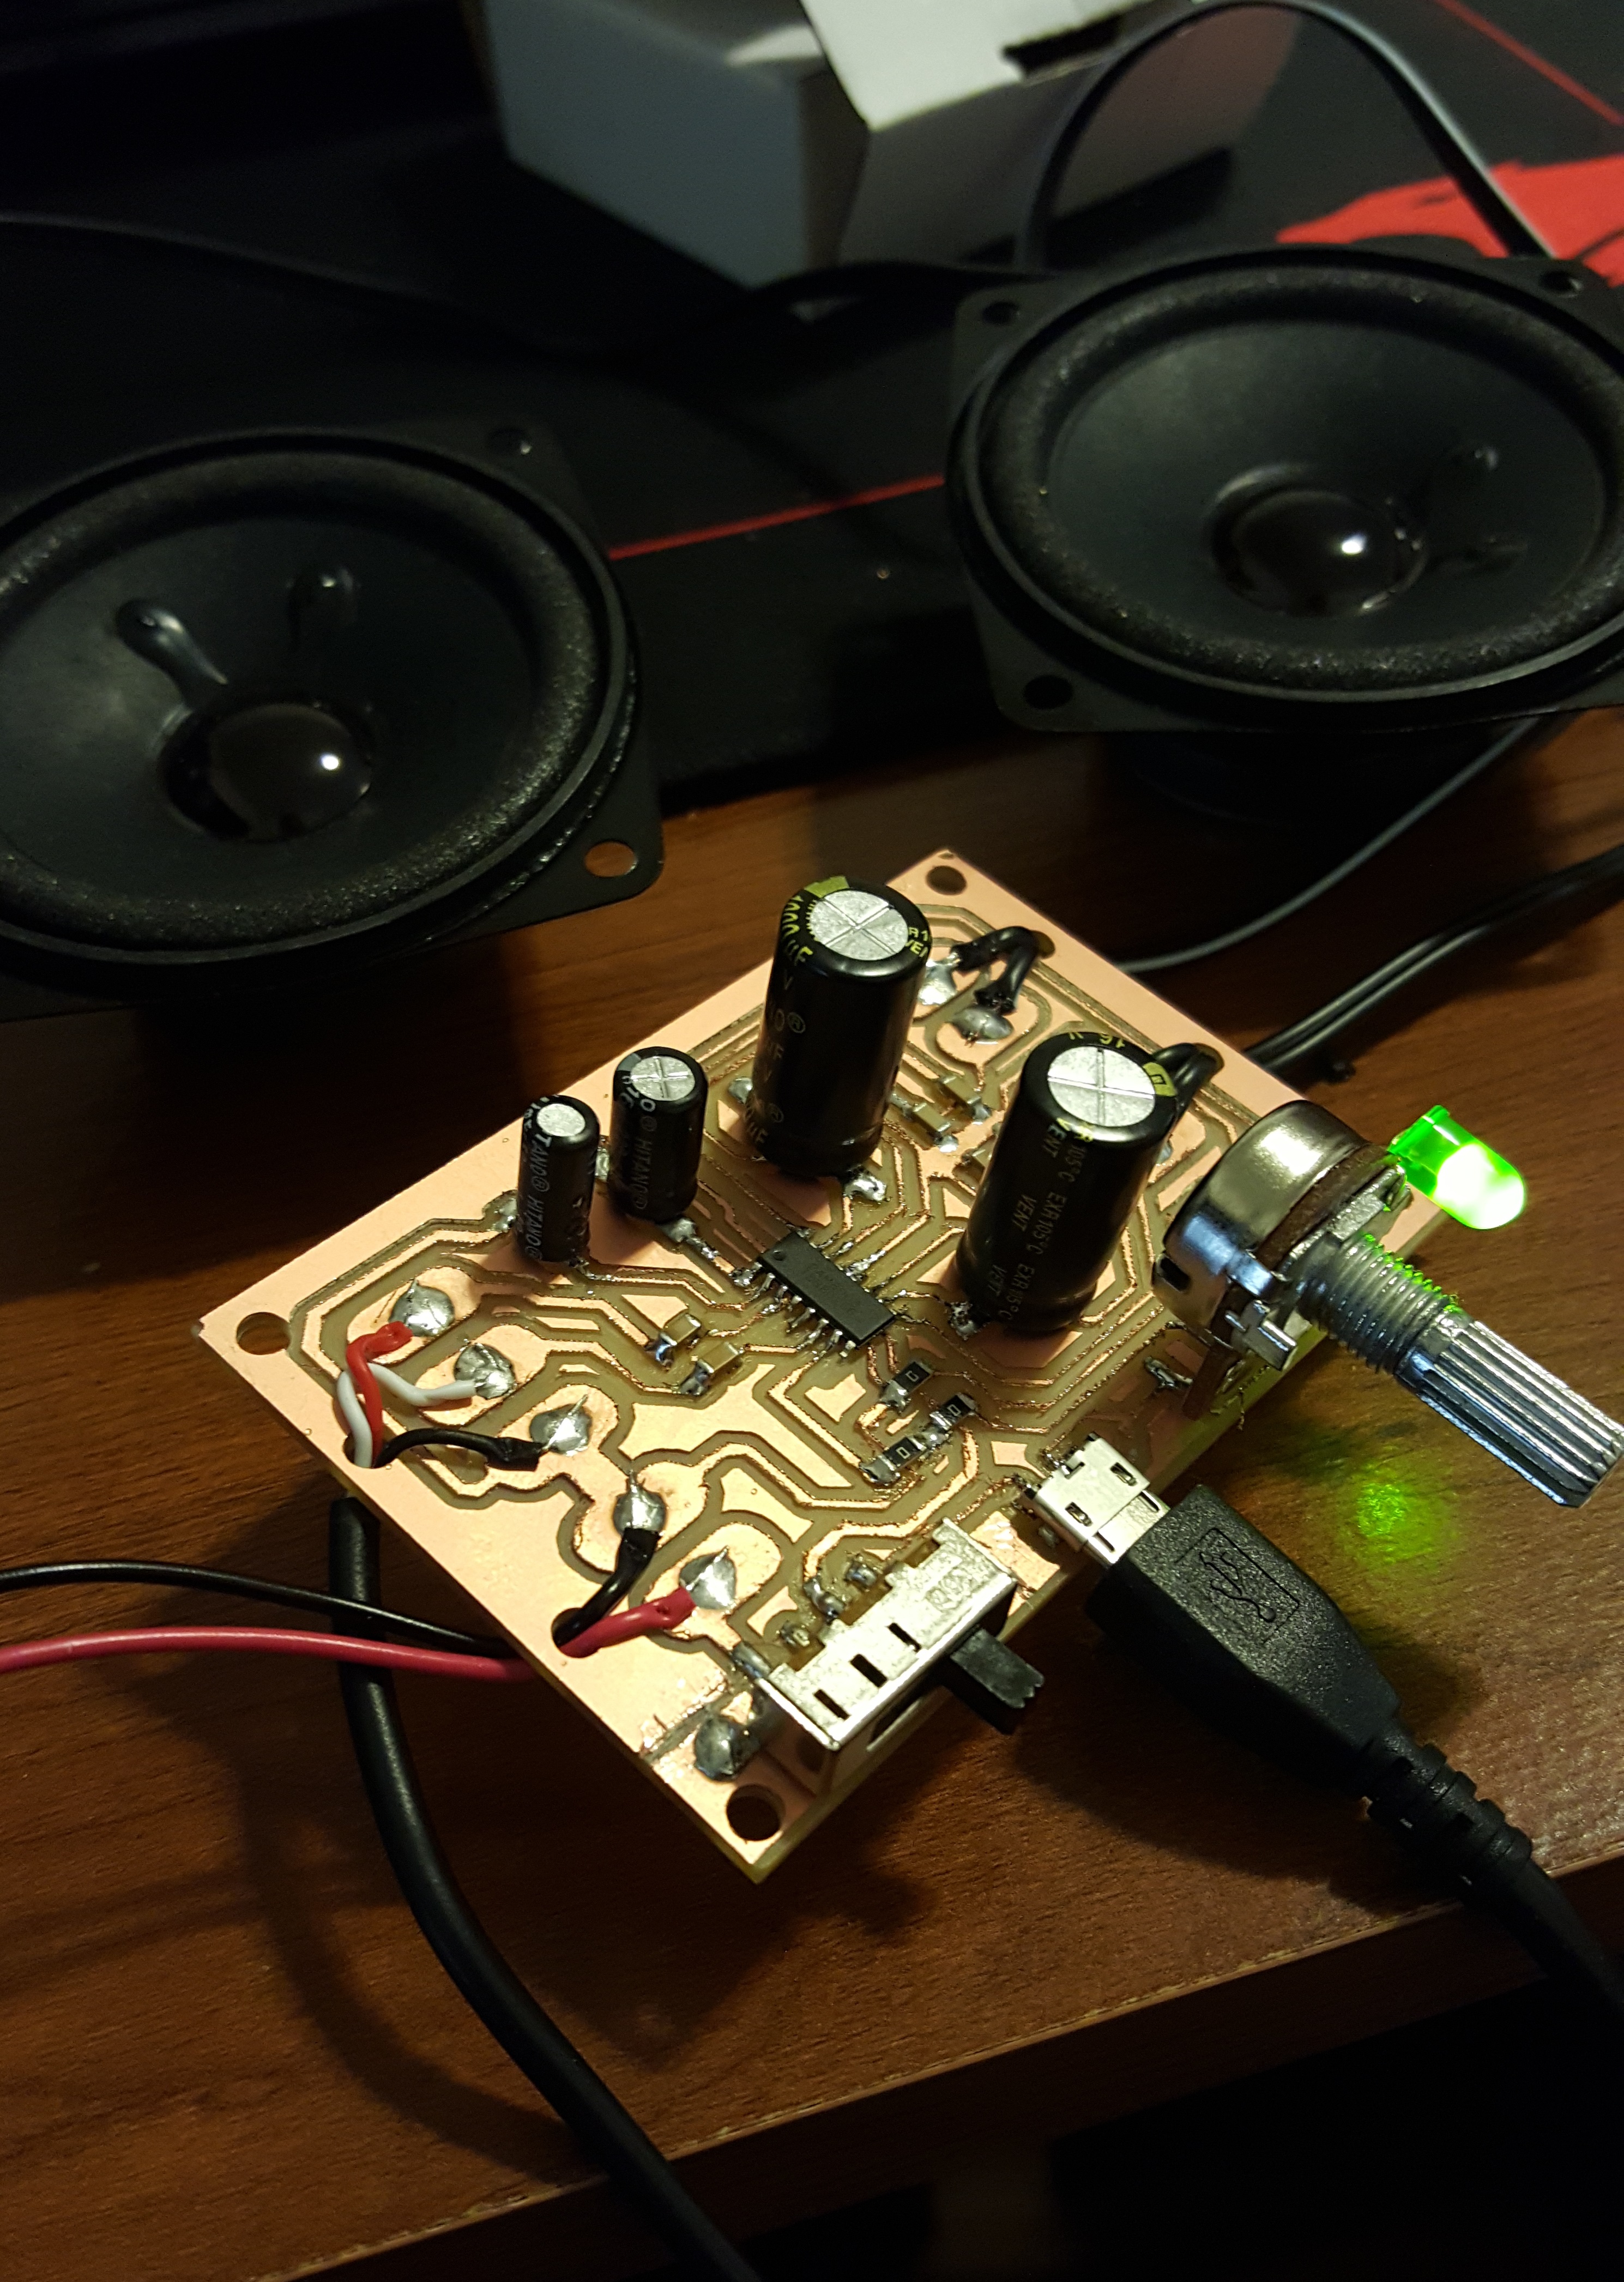
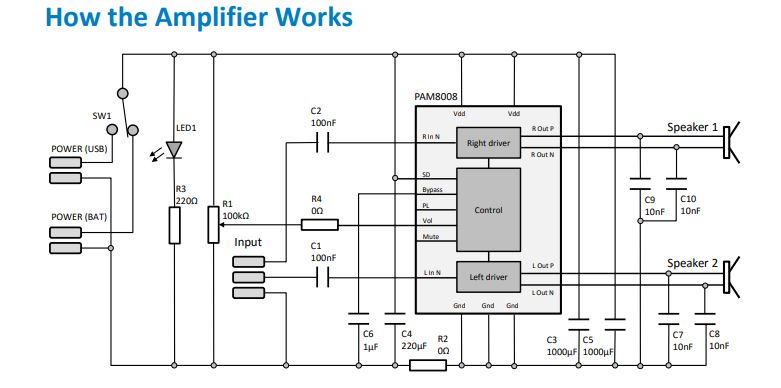
Step Two: Solder the Amplifier Circuit Board

Essential Question: How can you apply your knowledge of auditory processing to make your speaker?

  1. In whole class, show Khan Academy auditory system https://www.youtube.com/watch?v=peSLM4XObBEFormative Assessment: To show that students are ready to build their speakers, provide opportunities in a “call and response” for students to demonstrate their understanding of sound waves and auditory system.
  2. Time to Build: 60 minutes – Solder the Amplifier Circuit Board

Using the step-by-step instructions provided in the kit, build/solder your circuit board and then connect the two speakers.

Resources:

  • 2×5 Watt Amplifier for Portable Audio Player – Kit 6-14VDC/1A
  • Square Ferrite Speaker 3″ 8 Ohm 5 Watt
  • Power Supply Wall Adapter


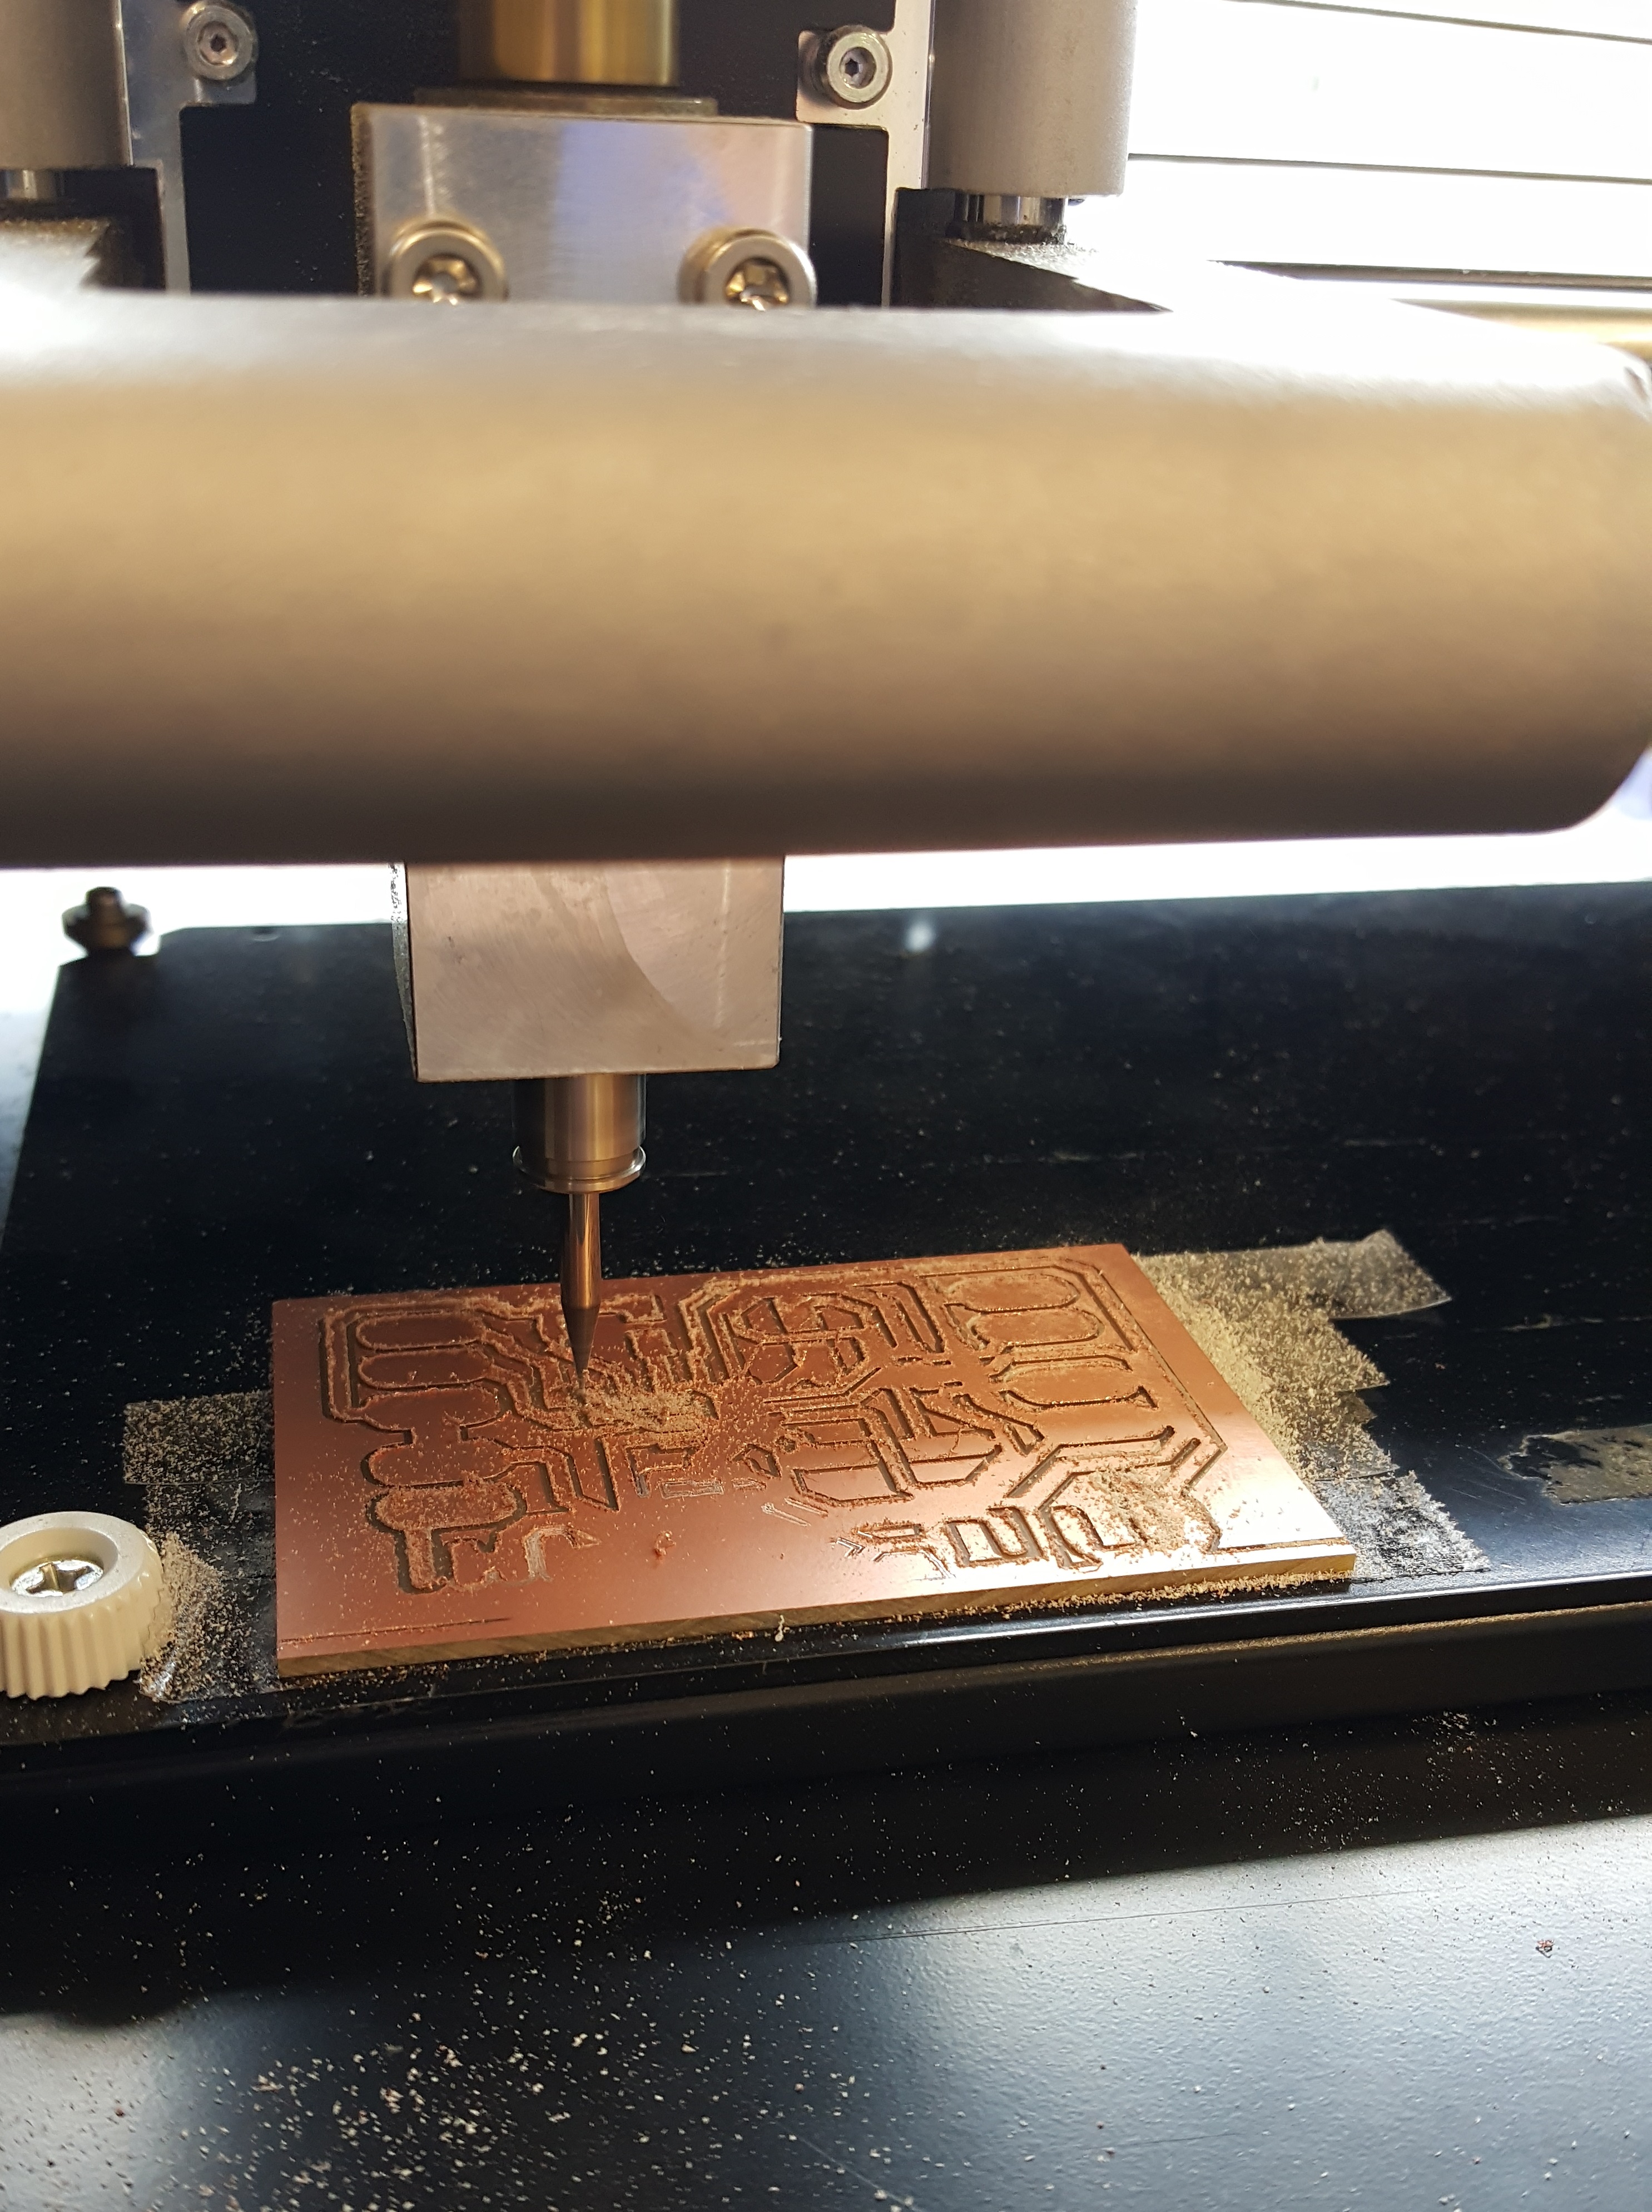
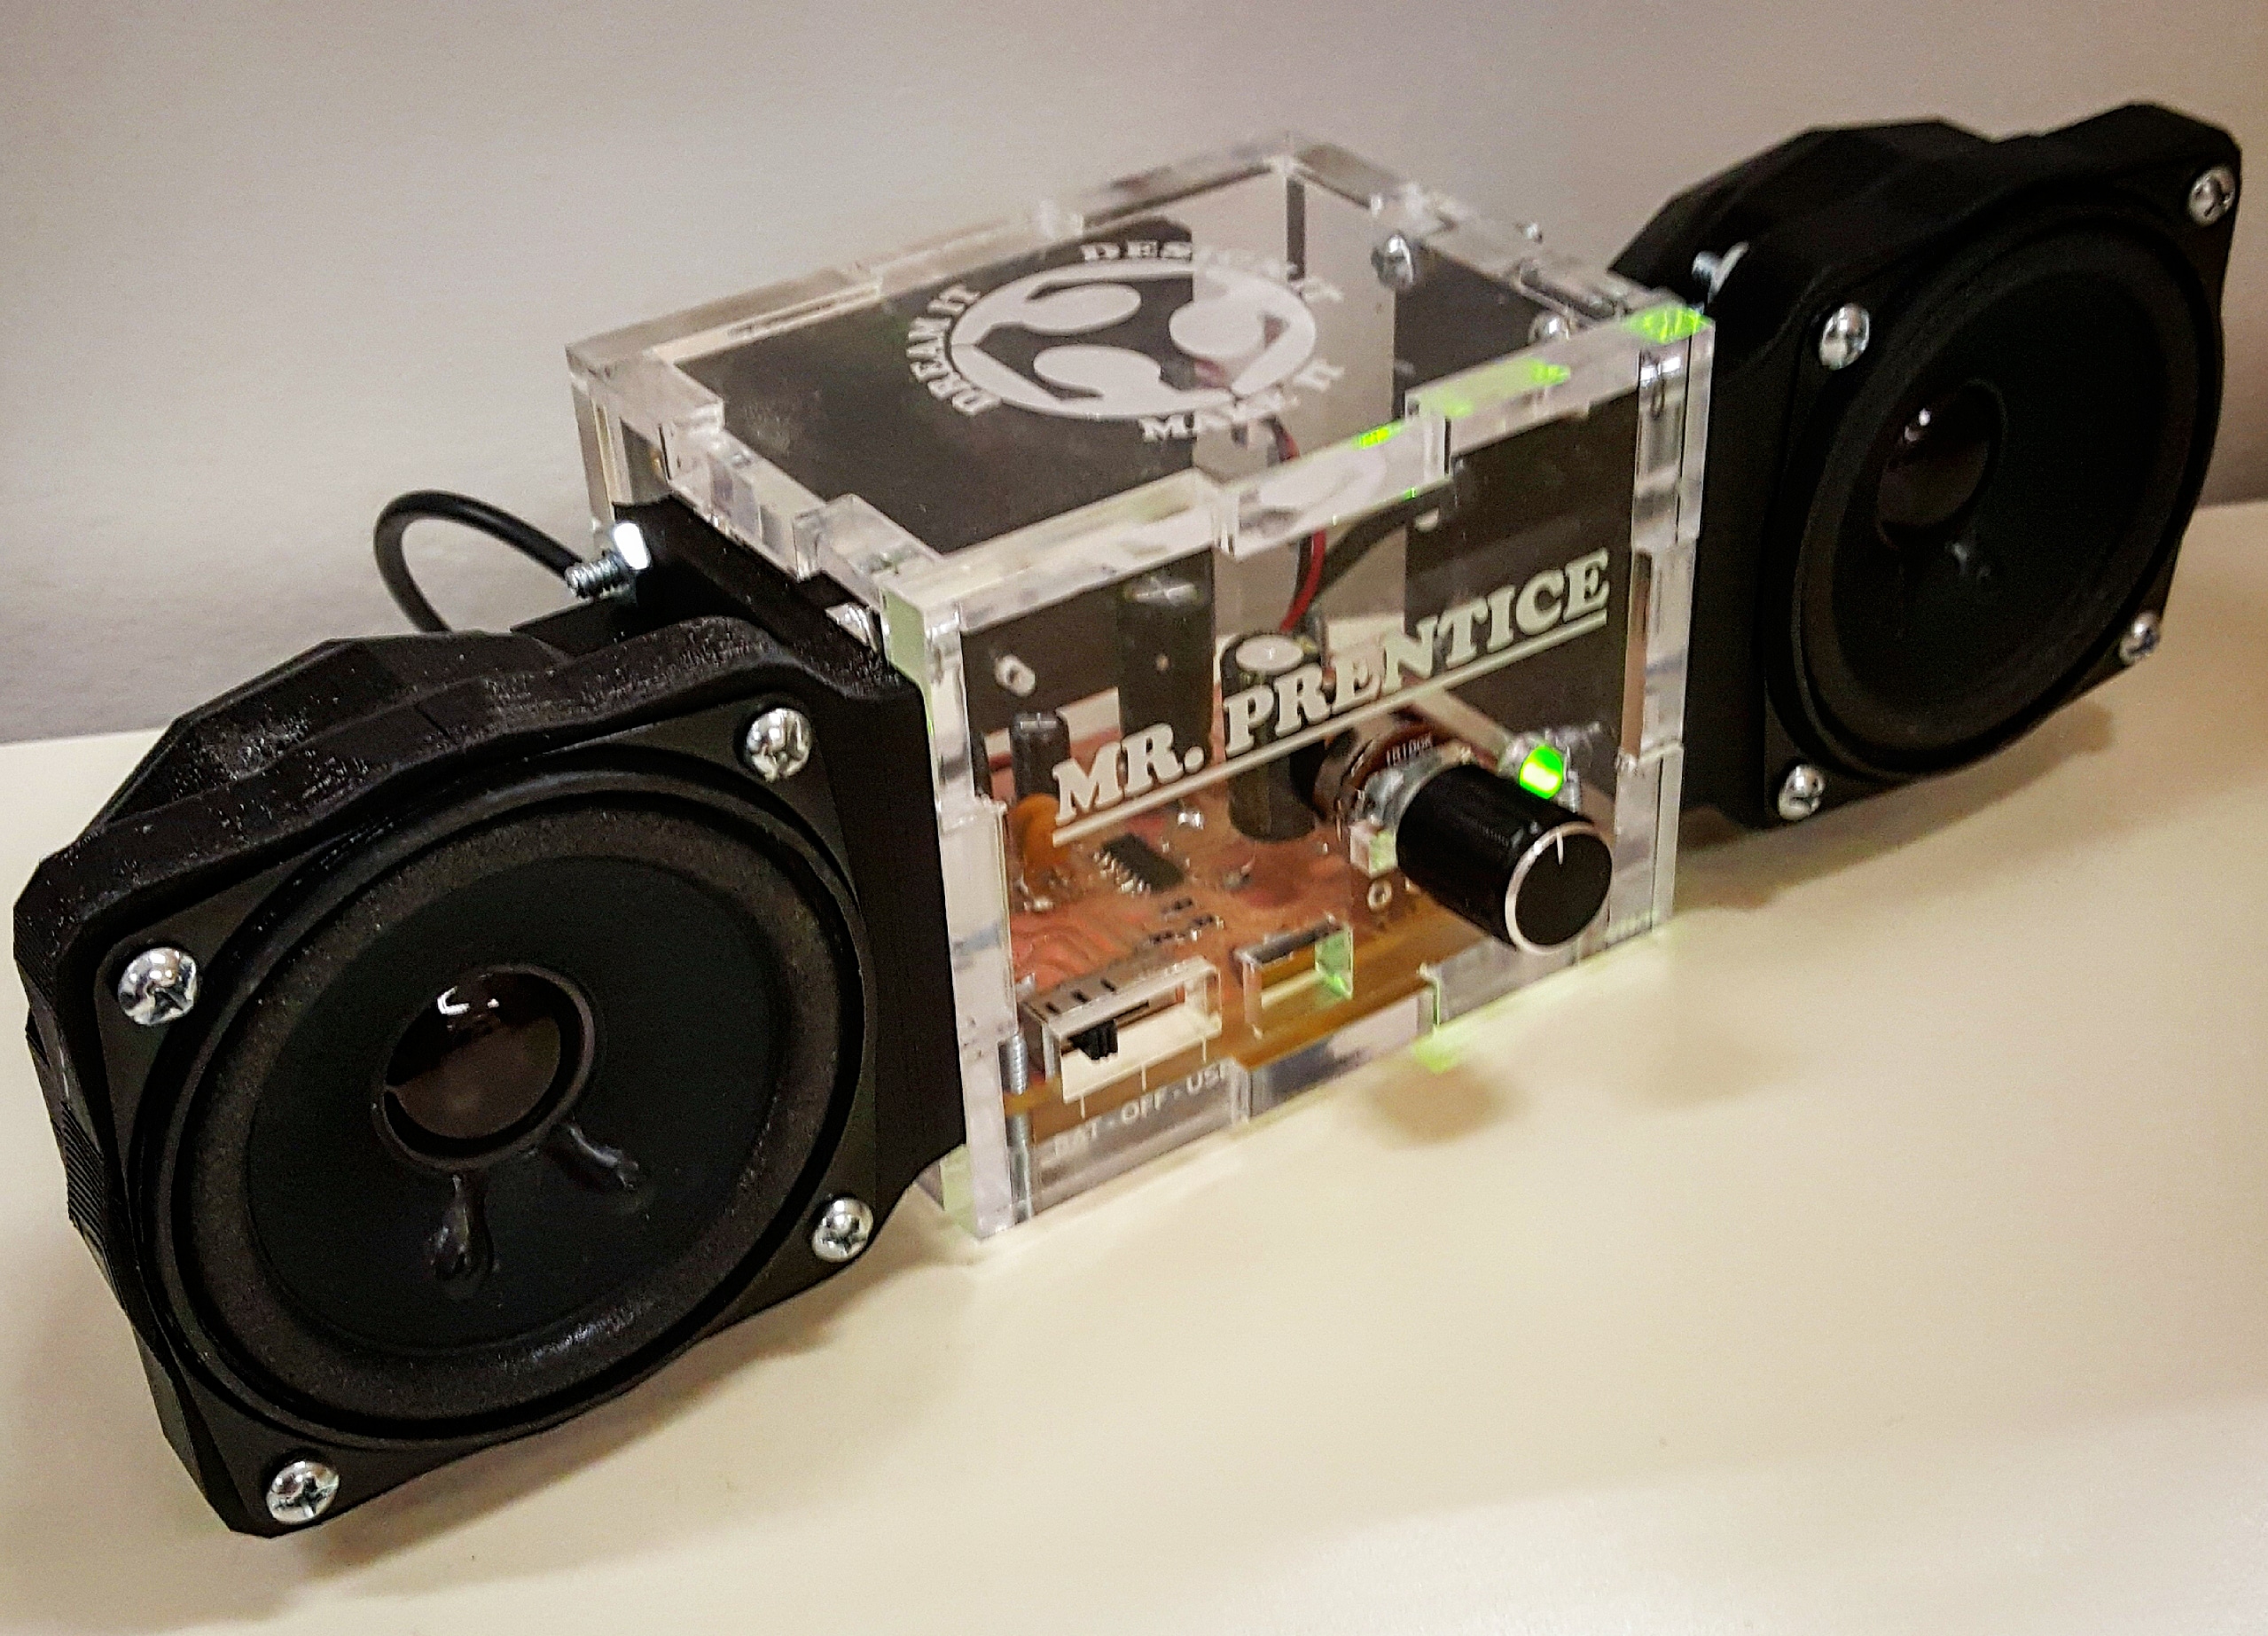
Step Three: Create a Vector for a Casing Design

 Students will create a simple box vector to house each speaker and kit separately by downloading instructions from www.makercase.com. Download the .SVG file that is specific for design. Students will then import this file into whatever vectoring software is provided (Adobe Illustrator, CorelDraw, Inkscape, etc).

Whether students create a unique casing of their own, or vector a box design as instructed above, it is important afterwards to draw out the specific cutouts for every part that needs to be exposed from the casing (3” speaker fronts, volume control knob, LED switch light, power/auxiliary port).

TEACHER NOTE: Use this step to apply any graphics via laser engraver to make your casing stand out!

Step Four: Putting It All Together

Students will use adhesives and/or screws depending on the project size/materials to assemble casing. This also includes how to attach circuit board inside the casing, based on project design.

See more build steps in Design Brief attachment

Formative Assessment: Have students review Mp3 Speaking Rubric and discuss what changes might improve their speakers performance.

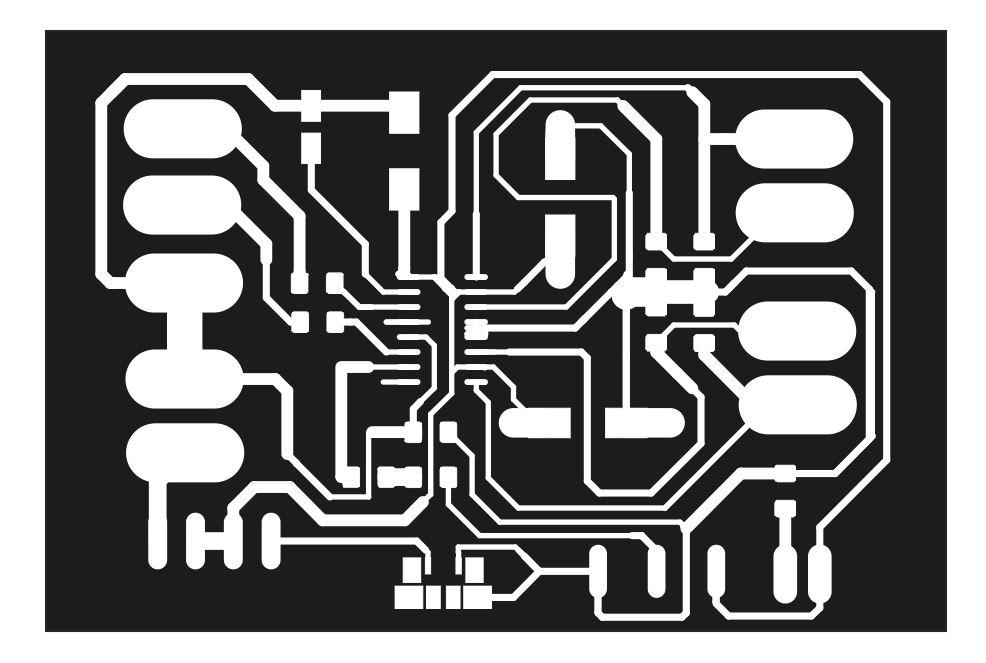
Design Files Developed: Downloaded from MakeCase.com

2x5Watt 6-14DCV/1A Amplifier Kit: http://www.jameco.com/webapp/wcs/stores/servlet/Product_10001_10001_2196588_-1

3”, 8 ohm, 5 Watt Speakers: http://www.jameco.com/webapp/wcs/stores/servlet/Product_10001_10001_2167285_-1

Power Adapter: The amplifier kit can handle power between 6-14V, so any AC-DC power supply in your lab would work well. If you need to order one, an example that would work well is http://www.jameco.com/z/AD-1280G-Arndt-9-6-Watt-12Volt-800mA-AC-DC-Unregulated-Linear-Wall-A dapter_2217799.html

I also attached the .CDR template I made for my 1st working prototype. This file has been adapted to an svg available here for non-coreldraw applications.

Standards

  • (Fab-Safety.1): I can safely conduct myself in a Fab Lab and observe operations under instructor guidance.
  • (Fab-Electronics.1): I can follow instructions to build a simple electrical circuit using conductive material, basic components, and power.
  • (Fab-Modeling.1): I can arrange and manipulate simple geometric elements, 2D shapes, and 3D solids using a variety of technologies.
  • (Fab-Fabrication.1): I can follow instructor guided steps that link a software to a machine to produce a simple physical artifact.
  • (Fab-Design.1): I can be responsible for various activities throughout a design process within a group under instructor guidance.
  • (Fab-Safety.2): I can operate equipment in a Fab Lab following safety protocols.
  • (Fab-Electronics.2): I can follow a schematic diagram and create a circuit including a microcontroller with electronic components.
  • (Fab-Modeling.2): I can construct compound shapes and multi-part components ready for physical production using multiple representations.
  • (Fab-Fabrication.2): I can develop workflows across four or more of the following: modeling softwares, programming environments, fabrication machines, electronic components, material choices, or assembly operations.
  • (Fab-Design.2): I can participate in design reviews with prepared presentation materials as well as give and receive feedback from peers.
  • (Fab-Safety.3): I can supervise others in a Fab Lab and ensure safety protocols are being followed.
  • (Fab-Modeling.3): I can define complex systems with parametric modeling using generative, algorithmic, or function representation.
  • (Fab-Fabrication.3): I can make my own applications, electronic components, or machines to solve new problems and to grow my Fab Lab's capacity.
  • (Fab-Design.3): I can initiate design processes to generate multiple solutions to problems I have framed for multiple stakeholders.

Lesson Feedback

One Response

  1. SCOPES-DF March 8, 2019
Load More