- Loading…

Building Piccolo Holder


CorelDraw (Software)
Acrylic
Molding wax
Glue
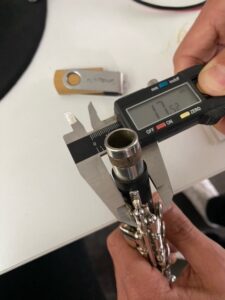
Vernier caliper
Measuring Piccolo Diameter by Vernier caliper.
First wee need to zero Vernier caliper at closed position. Then open in size of piccolo and measure.
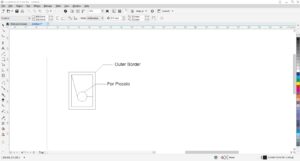
We used CorelDraw for designing Piccolo Holder.
First, we draw a circle with Piccolo’s diameter. The we draw as outer border using rectangles and lines.
We delete all unwanted lines for laser cut.
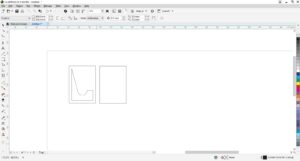
Use virtual segment knife for deleting all unwanted lines for laser cut.
Cut acrylic with laser.
Set laser preferences for the material and cut.
Gluing inner and outer parts, that were cut in the previous step.
Take the inner and outer parts and glue them each other using a specific glue for the material. The material I used was acrylic.
This is the final process.
Warm up the mold and fill the case we have made in the previous step.
Having trouble? Let us know by completing the form below. We'll do our best to get your issues resolved quickly.
"*" indicates required fields