- Loading…

In the Smart Factory and Industry 4.0 lesson, students gain an understanding of the working principles of hydraulics and the electromechanical robot arm, their benefits in factories and how robot arms work in sync in a smart factory. Technology trends in the world and the jobs of the future inspired us to create the Smart Factory and Industry 4.0 workshop. Open source designs such as robot arm with syringes was the starting point. We used it to explain hydraulics to students, then developed it to show a electromechanical robot arm and how a piece of code is debugged.

Per 2 children
6 x 5 ML syringe
1 x iv kit
2 x jumper cables
3 x food color – blue, red, black
5 x 4×18 mm screw and nyloc nut
2 x 4×48 mm screw and nyloc nut
2 x 33 mm screw and nyloc nut
10 x 1,5×2 mm screw (pointed)
4 x M4 nut
1 x 2,5×18 screw and nut
1 x Screw driver
For Electromechanical Robotic Arm
3 x SG90 RC mini 9gr servo motor
1 x Arduino Nano
3 x 10K Potentiometer
2 x 1,5V 2AA Battery
20 x Female-Male jumper cable
20 x male male jumper cable
Per group:
50×70 cm Factory Layout
50×70 cm Jumper Game Layout
Ice breaker game - questions and answers.
This lesson starts with a game. This game will serve as an ice-breaker and help students get introduced to the smart factory concept.
There are a few cables on a chart and students are asked to separate these cables in 5 minutes according to both size and type. Students work in groups of two where one separates the cables according to size and the other according to type. (There will be music in the background )
After this first game, the trainer asks some questions:
· What did you pay attention to while playing this game?
· What can you do to be able to do it in less time?
· Could you separate the cables in a different way?
· What would you do if there were something heavier or bigger instead of cables?
· Where is this kind of work done? Can you give an example?
· What can do this type of work instead of you?
watching video - discussion
At the and of these questions, students discuss about how a smart factory can work using robotic arms. The first video will give more details about factories. (You can see the video on the presentation)
Is there any relationship between the video and the game at the beginning?
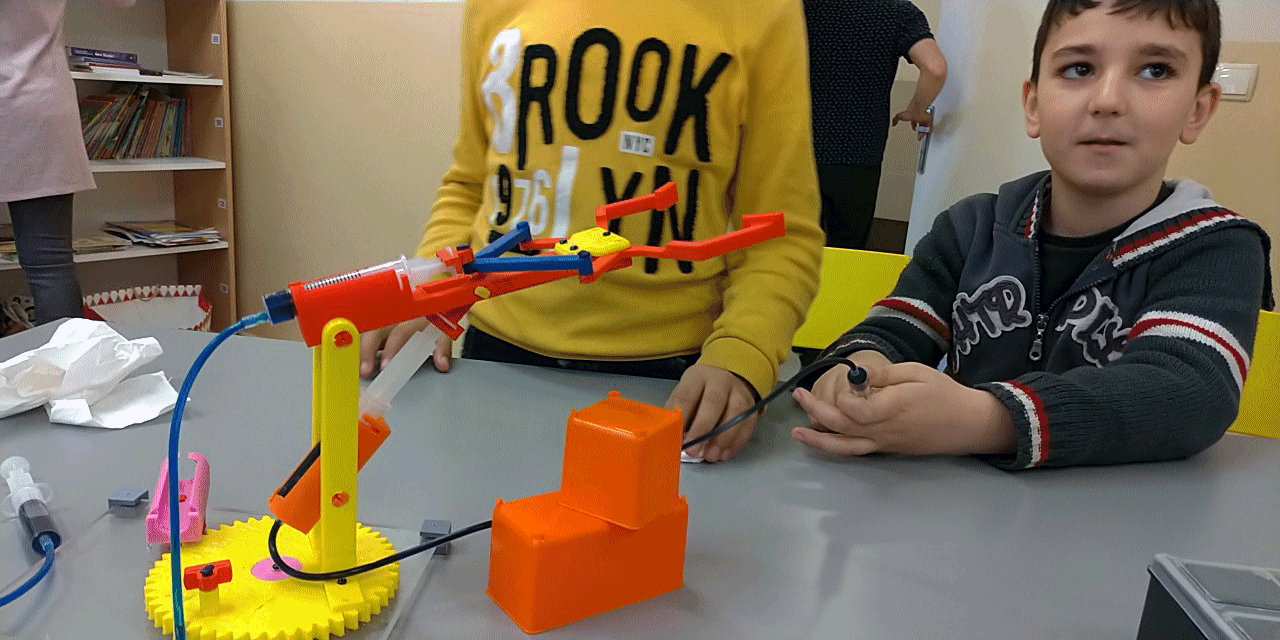
Using hydraulics - assembling a robot arm
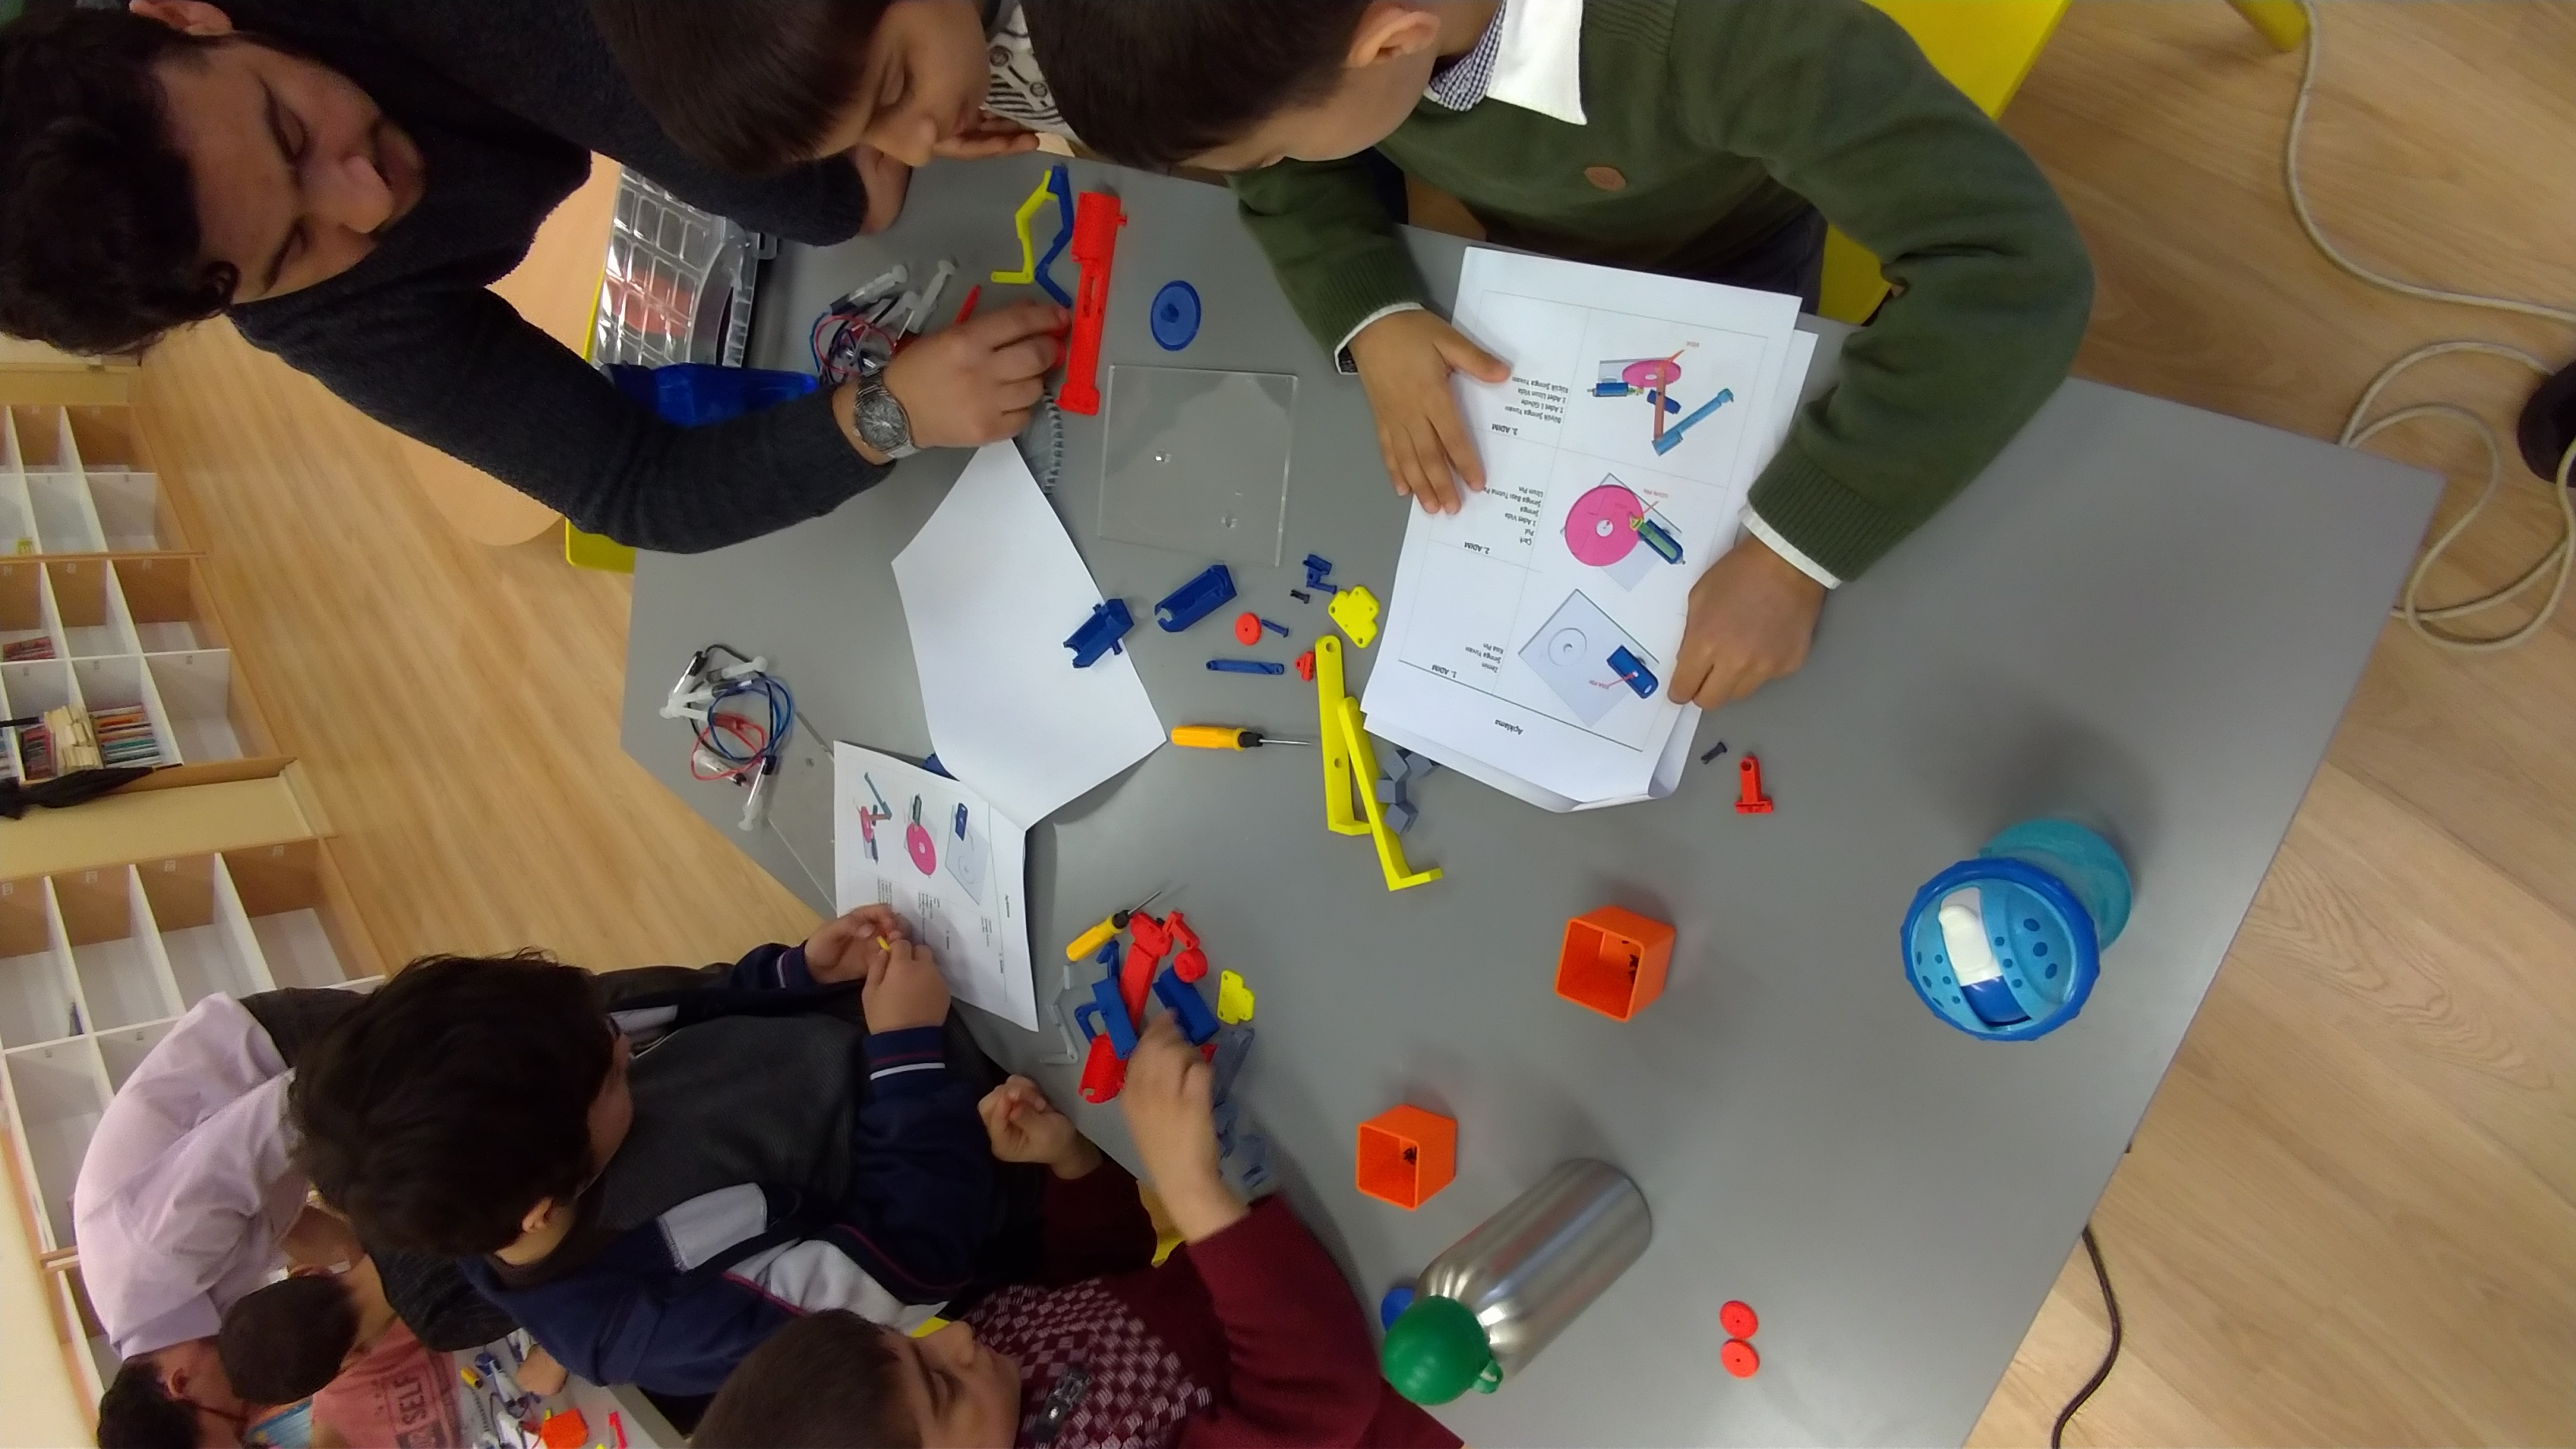
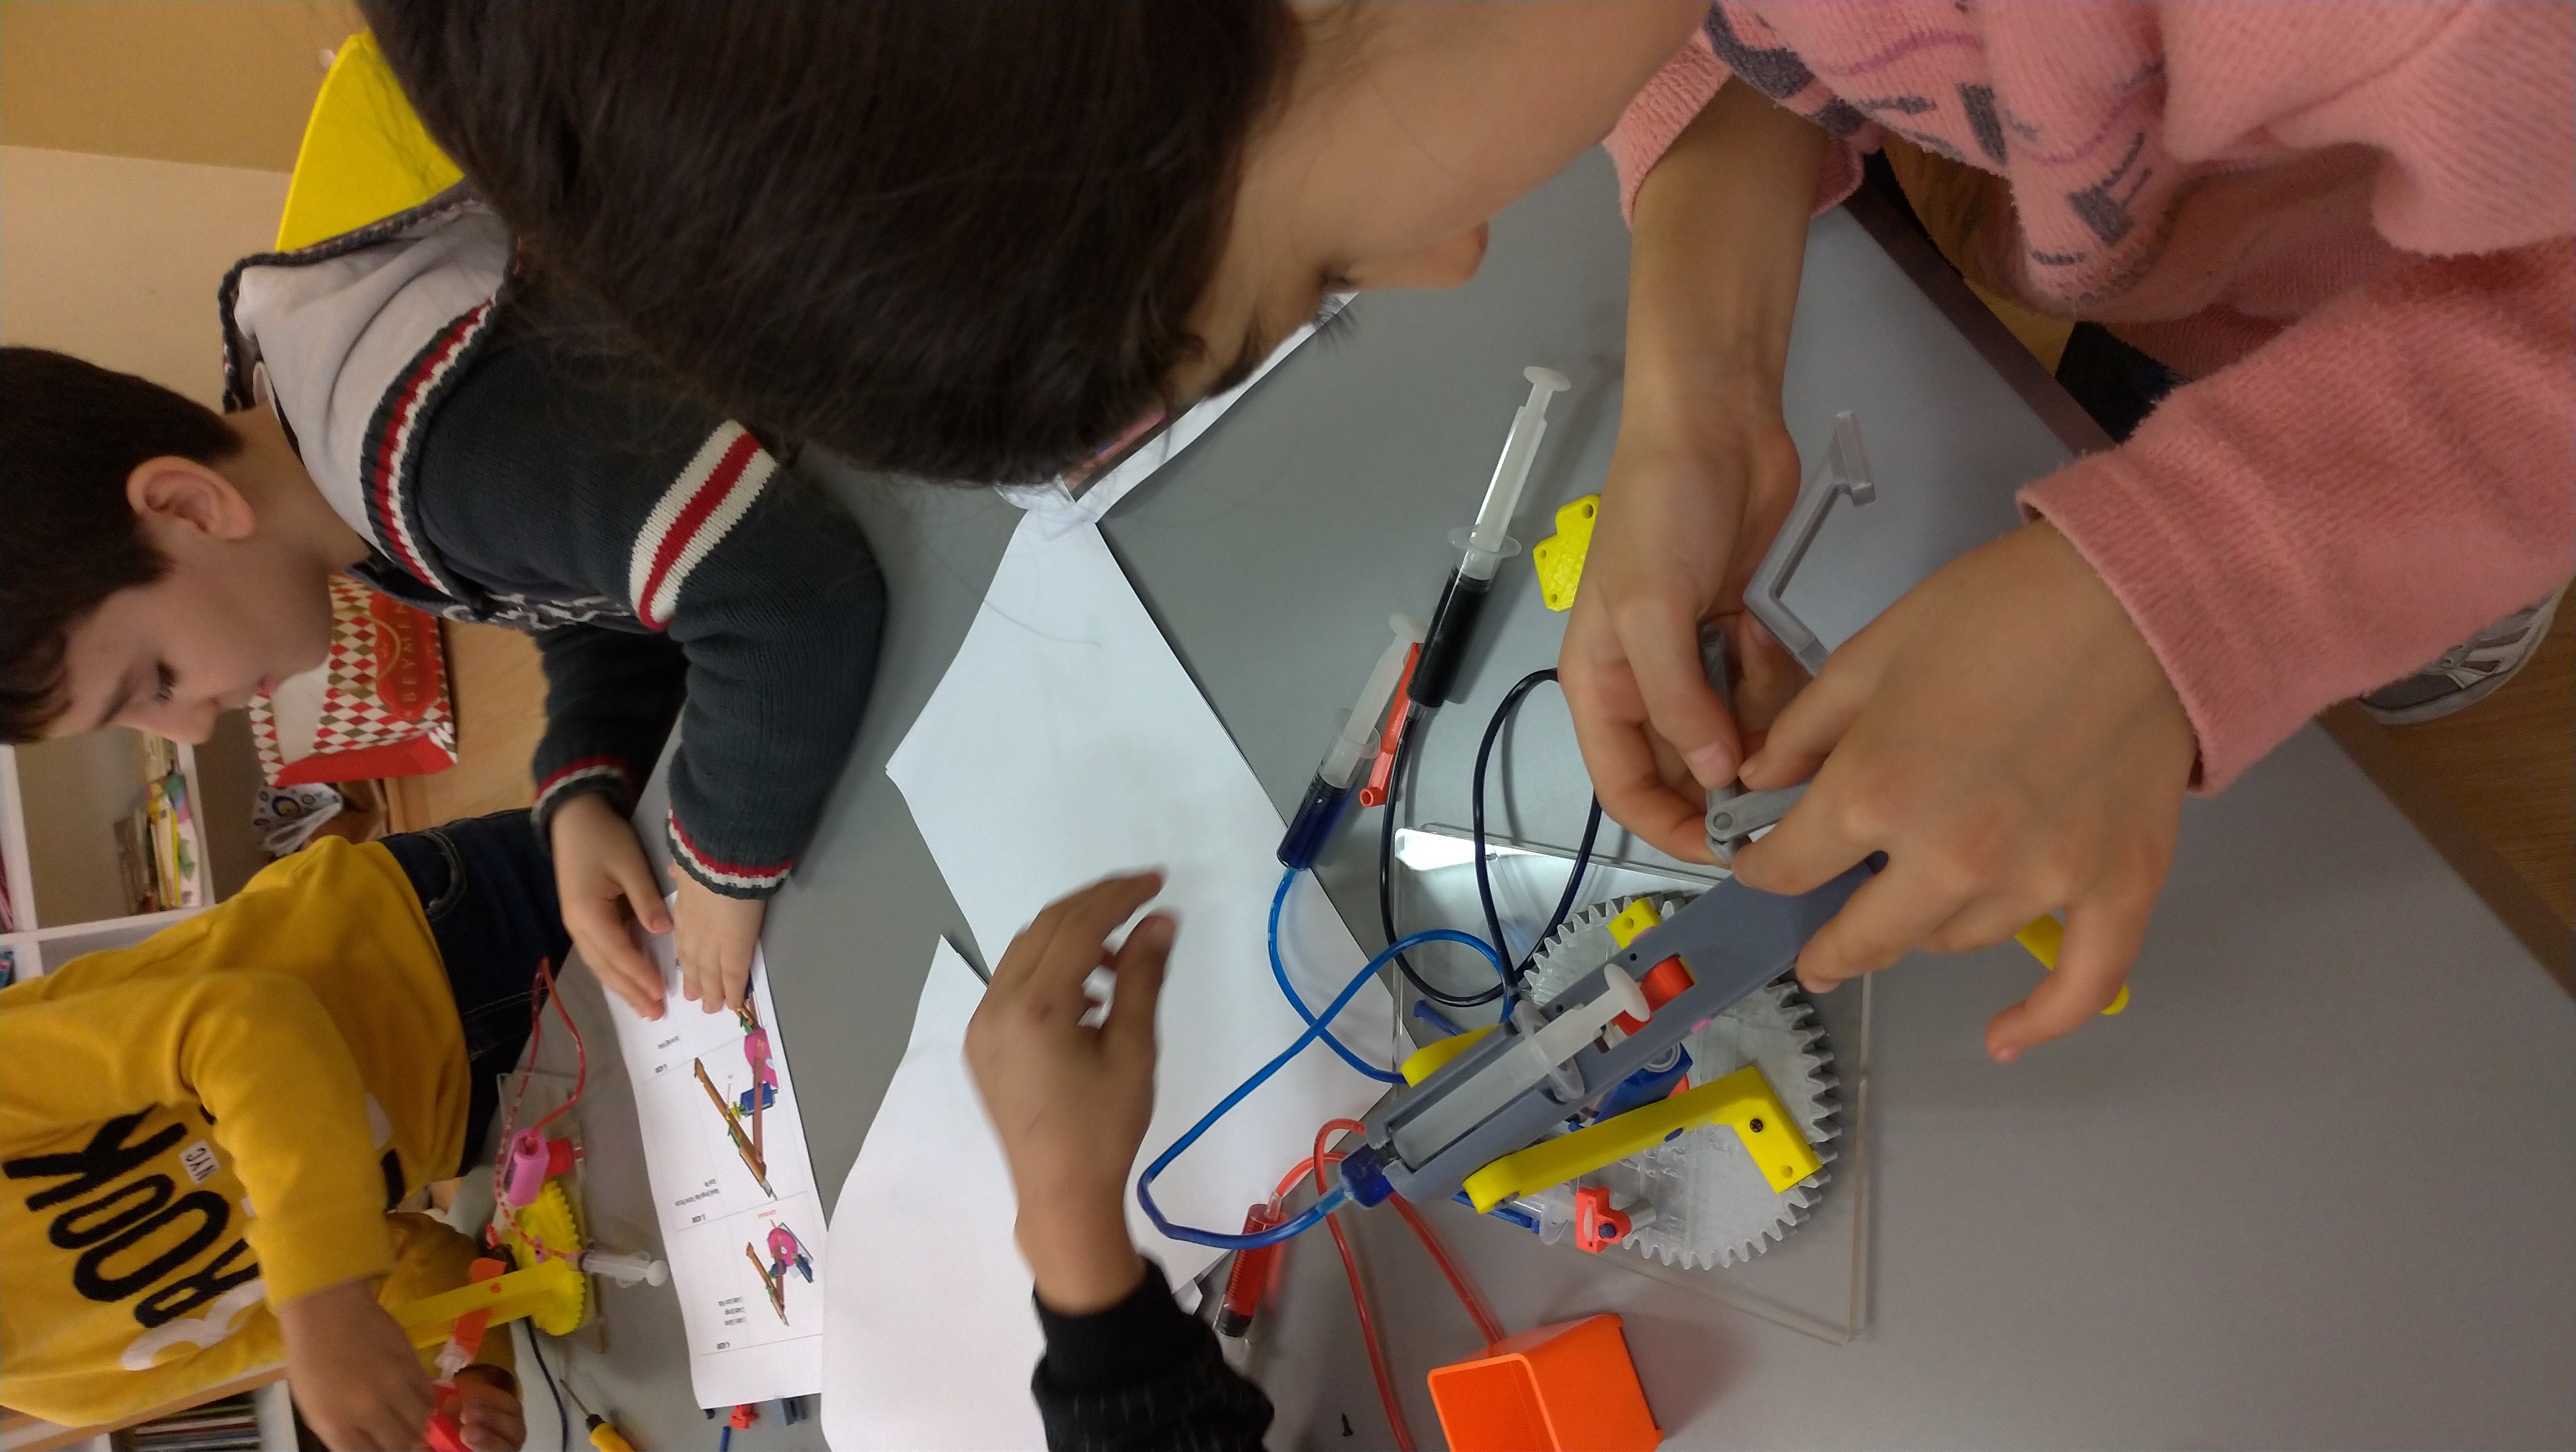
The robot arm that students make uses hydraulics to operate. Syringes are given to the students to help them discover how hydraulics work. Please see the second video for this section.
Why are hydraulic pistons needed?
What needs to be changed to lift heavier things?
What else can we use instead of water?
After the video, the trainer gives the students the parts of the robot arm and a student guide for the assembly process. The students try to assemble the robot arm by following the guide. (You can see the guide in the attachments.)
When the robot arms are assembled, the students start a new game to understand how we operate a robot arm in a factory and why we need them in a factory.
We have a factory layout. (You can print one out or draw it on a 50x70cm size paper) The trainer places two robot arms in the corners. There are some 3D printed objects on the layout to move with a robot arm in the factory area. You can use other random objects. Just make sure that the robot arm can hold and carry it around.
Have a break (10 min.)
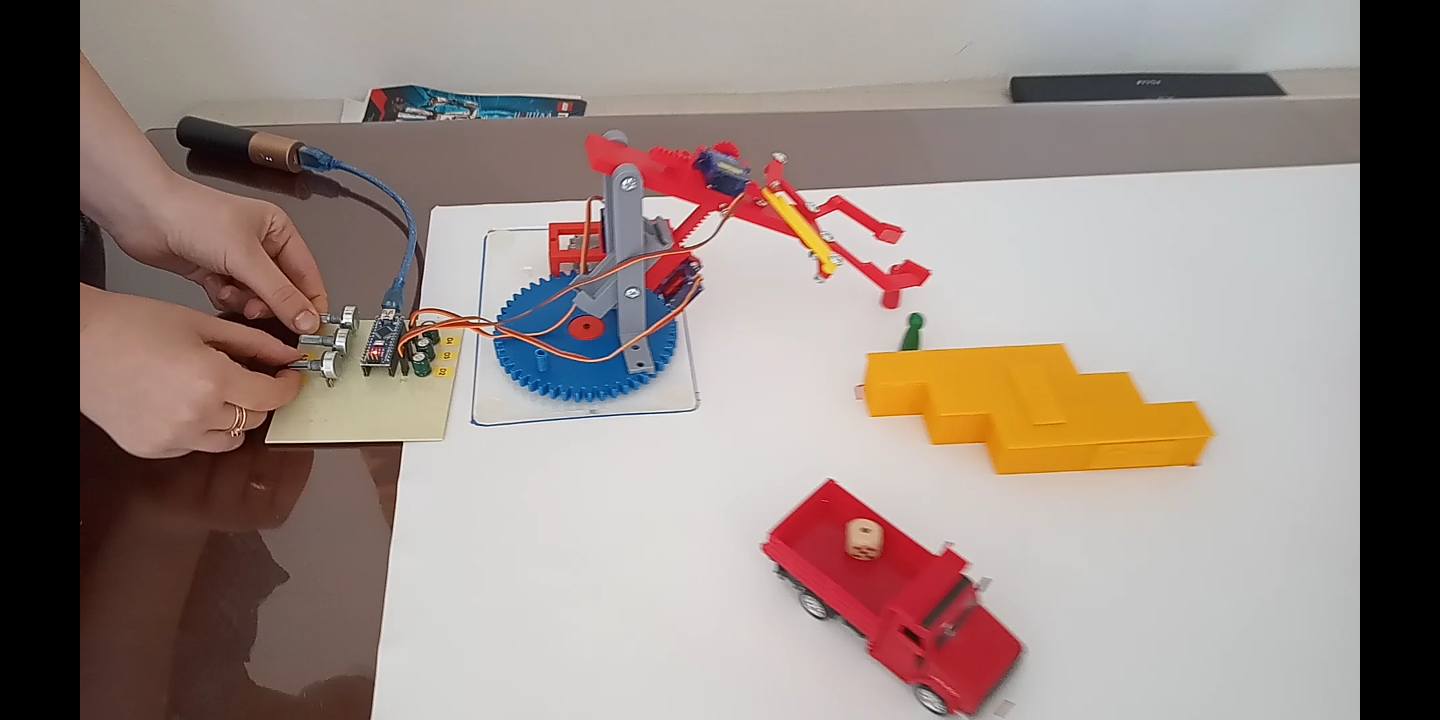
Transforming the robot arm - Programming Arduino
This part starts with the third video on the presentation. After the video, ask questions similar to the below.
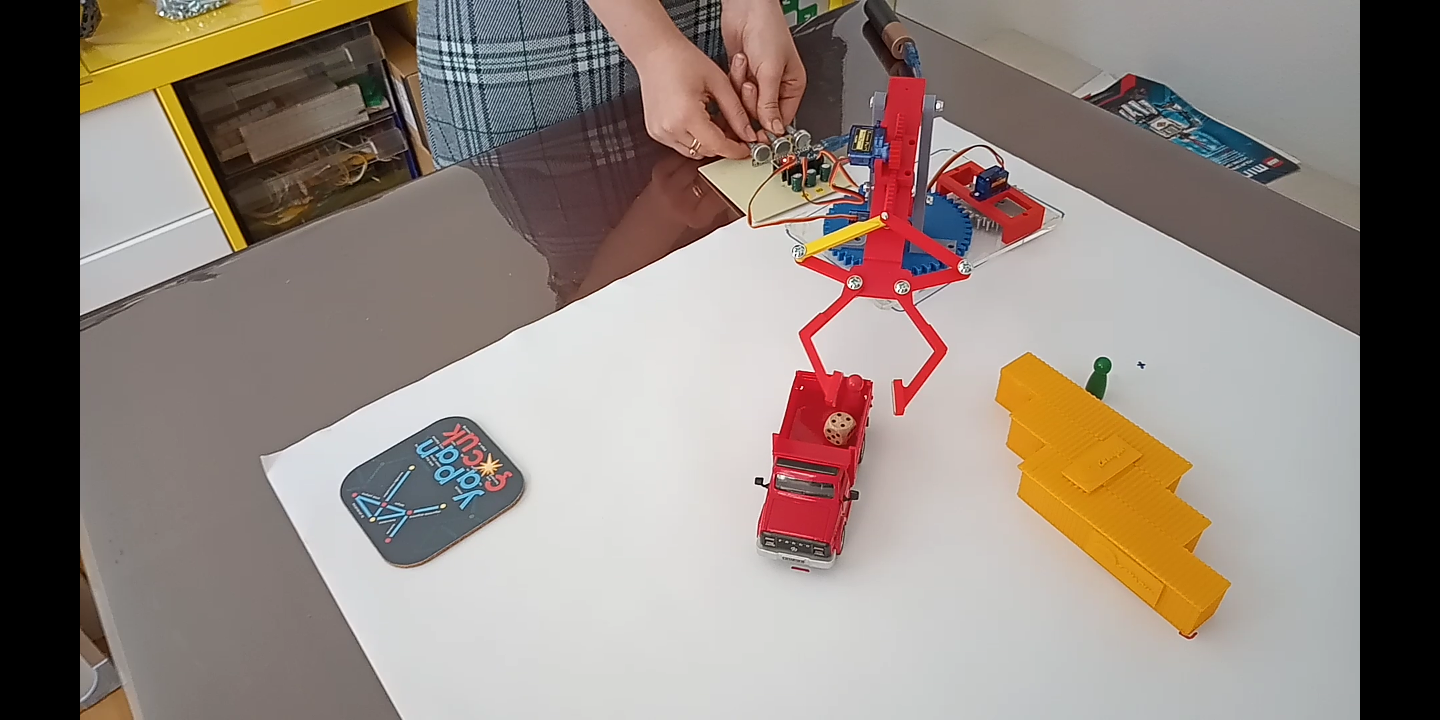
Now it is time to transform the hydraulic robot arm to an electromechanical robot arm. Before this step, the trainer gives gear wheels to the students to discover how it works. trainer explains how circular motion is transformed into linear motion.
Ask the students which parts of the robot will be replaced with the motors and wait for the answers. The students need to find a way to transform this robot arm with the parts given.
When all the transformation is done, the motors need to be activated using an Arduino board. After this, they will program the motors and potentiometers using the mBlock platform. mBlock is a simple platform for coding. You can use another platform which you prefer as well.
You can see the circuit design on the attachment. Students can make the circuit by following the picture.
The trainer has to upload the code below before the lesson.
If the students know to program well you can give them another challenge. You can teach them how to do debugging.
Finally, they will do a similar task with their electromechanical robot arm where they move around objects on the factory layout.
Having trouble? Let us know by completing the form below. We'll do our best to get your issues resolved quickly.
"*" indicates required fields


