- Loading…
What is Tshem-zo?
The art of tailoring in Bhutan is known as Tshem-zo.
This art can be classified into three parts:
1. Tshem drup the art of embroidery
2. Lhem drup the art of applique
3. Tsho lham the art of traditional Bhutanese boot making.
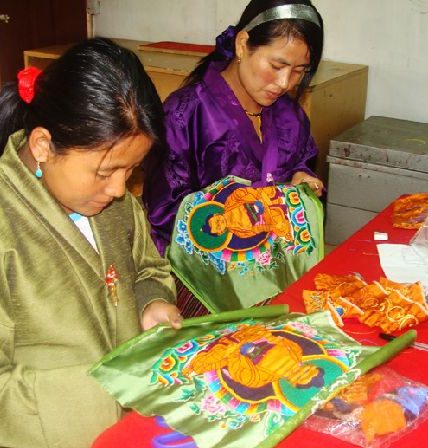
Tshem drup and Lhem drup is normally practiced by monks to produce large religious scrolls known as Thangkas that depicts Gods and Goddesses, deities and Saints. Tsho lham is practiced by Bhutanese layman, which is worn by officials during special functions and gatherings.
Use of Tshem-zo and Wearable technology:
As the art of traditional Tailoring is diminishing, this would be a great way of bringing it back by in cooperating Tshem-zo and wearable technology. By using Embroidery machine, students can put their desired pattern or image in any cloth materials and it makes it easier. With this Students can learn about their tradition and learn about circuits as well.

Tools
1. Computers or laptops
2. Embroidery machine (brother SE1800)
Materials
1. Polyester Embroidery Thread (Polystar)
Software
1. PE Design
First go to lesson material and click on the lick. This will download an image which you will use for this lesson.
First open the software (PE design).

Then click on Image tab and then select Open folder as shown on the right side.

Then select “From file”, in the drop down menu.

After selecting “From file” in the drop down menu, you will be presented with an option to choose what design you want. For this lesson, locate the Image you downloaded from the lesson material and click open.

The imported image should look like as shown on the right side.

After that click on the “Photo Stitch” button and choose “Color” from the drop down menu as shown on the right side.

You will be presented again with an option to further detail your image for the final work. Select the boundary that you desire, but for this lesson select the circle boundary.

Now click on the “Image Tune” button. Change the setting as same as in the image given on the right side and click “OK”.

Then click next.

Now click on the “Fit to page” button and then click next.

In this option we will be fine tuning the image for the Embroidery machine to trace. Change the setting as shown on the right side. This will give you a clearer image, which gives a better result while stitching it on cloths. Then click “Finish” button.

After clicking on “Finish” button you should have a similar result as shown on the right side.

Now for the final step just resize the Image as you desire.

Having trouble? Let us know by completing the form below. We'll do our best to get your issues resolved quickly.
"*" indicates required fields