Virtual Hispanic Art Gallery - SCOPES Digital Fabrication

Lesson Details

Subjects
Age Ranges
Fab Tools
Standards
6-8.RH.7, 6-8.RH.1, 6-8.RH.2
Additional Contributors

You need to login or register to bookmark/favorite this content.

Author

Theresa Montenarello
K-12 teacher
I began my journey as an international educator in Peace Corps Thailand, where my interest in cultivating world citizens peaked. I continued my teaching career at the International School of Aruba where I have taught both secondary mathematics and third… Read More

Summary

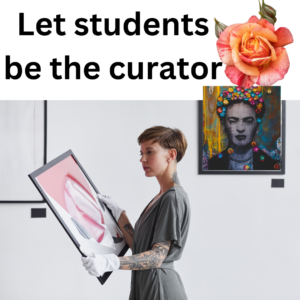
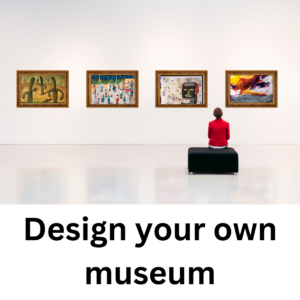
The “Exploring Hispanic Artists from the US” project is designed for middle school students to delve into the world of Hispanic art and culture by researching and creating virtual art galleries inspired by notable Hispanic artists. This project spans approximately one week and encourages independent learning, digital presentation design skills, and understanding of Hispanic artists and their contributions. Students will create and design a virtual museum in Google Slides/ Canva or Powerpoint.

What You'll Need

  • Computers with Internet access
  • Google Slides, Canva, or Microsoft PowerPoint
  • List of notable Hispanic artists from the US
  • Website links for artist exploration
  • Rubric for assessment
  • Resources for creating virtual art galleries (e.g., background images, furniture, frames, etc.)
  • Instructions for using Remove.bg


The Instructions

Introduction to Hispanic Art (1 hour)

This step provides students with an introduction to the Smithsonian Molina Family Gallery's online tour, a valuable resource for exploring Hispanic art. In this segment, students will learn the importance of visiting museums and galleries, even virtually, to gain exposure to art and culture. It sets the stage for students to embark on their journey of artist exploration within the virtual gallery.

Objective:

  • To introduce students to the project, its objectives, and the world of Hispanic art and culture.


Step 1: Introduction (15 minutes)

  • Start the lesson by introducing the project and its objectives. Mention that students will be exploring Hispanic artists from the US and creating virtual art galleries.
  • Emphasize the significance of art in conveying cultural identity and expression.
  • Explain that the Smithsonian Molina Family Gallery online tour will serve as a general introduction to Hispanic art.


Step 2: Discussion on Hispanic Art and Culture (20 minutes)

  • Engage students in a discussion about Hispanic art and culture. Discuss aspects like diversity, influences, and styles.
  • Encourage students to share any prior knowledge or experiences related to Hispanic art or culture.


Step 3: Overview of the Smithsonian Molina Family Gallery (15 minutes)

  • Provide an overview of the Smithsonian Molina Family Gallery’s online tour. Explain that it will serve as a starting point for their exploration.
  • Discuss the importance of visiting museums and galleries, even virtually, to gain exposure to art and culture.


Step 4: Assignment (10 minutes)

  • Assign students to explore the Smithsonian Molina Family Gallery online tour. Instruct them to select a Hispanic artist that interests them for their project.
  • Remind students to take notes and consider why they chose that particular artist.


Researching Hispanic Artists (1 hour)

During this step, students will independently explore provided website links and resources to conduct in-depth research about their chosen Hispanic artists. They'll focus on gathering information about the artist's background, influences, and notable works. This research will serve as the foundation for their virtual art gallery project, helping them gain a deeper understanding of their selected artist and their contributions to Hispanic art and culture.

Objective:

To guide students in conducting in-depth research about their chosen Hispanic artist, delving into their background, influences, and notable works.


Step 1: Artist Selection Review (10 minutes)

  • Begin the lesson by revisiting the artists selected by students in the previous class. Ask students to briefly share why they chose a specific artist.


Step 2: Website Links and Resources (15 minutes)

  • Provide students with website links and resources related to their chosen artists. These may include artist profiles, museum websites, and online galleries featuring the artist’s work. Such a list you can find in the attachment of this lesson.
  • Explain how to use these resources for gathering information.


Step 3: Independent Research (25 minutes)

  • Instruct students to conduct independent research on their chosen artist. They should explore the provided websites and seek information about the artists:
  • Background (birthplace, upbringing, cultural heritage).
  • Influences (artistic, cultural, historical).
  • Notable works and art style.
  • Encourage students to take notes and make connections between the artist’s life and their art.


Step 4: Sharing Insights (10 minutes)

  • Allow students to share interesting insights they’ve discovered about their chosen artists. This can foster curiosity and knowledge sharing among the class.


Homework:

  • Remind students to continue researching their artists as needed and to gather information for creating their virtual art gallery.


Creating Virtual Art Galleries

In this step, students begin the process of creating their virtual art galleries using digital tools. They learn how to select and apply background images and frames that align with their chosen artist's style. Assembling the gallery involves arranging and displaying their chosen artist's works, paying attention to layout and composition. This step serves as the foundational building block for the creative and personalized virtual art galleries students will develop throughout the project.

Note: In the attachment is a PDF, that has links to tutorials and how-to’s on YouTube. You can provide these to the students or show them in class.


Objective:

  • To guide students in the process of creating virtual art galleries using digital tools like Google Slides, Canva, or Microsoft PowerPoint, and incorporating essential design elements.


Step 1: Review and Introduction (5 minutes)

  • Begin the lesson by reviewing the progress made in the previous lessons, specifically the research students conducted on their chosen artists.
  • Introduce the main objective of the lesson: creating the foundation of their virtual art galleries.


Step 2: Selecting Backgrounds and Frames (10 minutes)

  • Discuss the importance of selecting suitable backgrounds for their galleries. These backgrounds can set the tone and atmosphere for the art display.
  • Provide students with resources for gallery backgrounds and frames. Encourage them to choose designs that align with their chosen artist’s style.


Step 3: Assembling the Gallery (35 minutes)

  • Demonstrate how to use Google Slides, Canva, or Microsoft PowerPoint to start assembling the virtual gallery. Guide students on adding background images and frames.
  • Encourage students to select and arrange their chosen artist’s work within the gallery, considering layout and composition.


Step 4: Furniture and Decoration (5 minutes)

  • Discuss the importance of adding furniture elements, like sofas or pedestals, to the virtual gallery to create a realistic environment.
  • Provide resources for furniture and decoration, and instruct students on how to incorporate these elements into their galleries.


Step 5: Transparent Images (5 minutes)

  • Revisit the use of Remove.bg to create transparent images. Explain how this tool can be used to add objects with transparent backgrounds, such as sculptures or other artwork.


Homework:

  • Assign students to continue building their virtual art galleries. They should aim to complete the gallery layout and begin personalizing it in the next lesson.


Personalizing the Art Galleries

In this step, students learn techniques for personalizing their virtual art galleries, making them visually engaging and reflective of their chosen artist's style. They explore the addition of personal details, decorations, and avatars while considering ways to create a unique and appealing gallery. This step empowers students to infuse creativity into their virtual galleries, enhancing the overall presentation.

Objective:

  • To guide students in personalizing their virtual art galleries by adding unique elements, decorations, and transparent images, enhancing the visual appeal of their creations.


Step 1: Recap and Introduction (10 minutes)

  • Begin the lesson by recapping the progress made in the previous lesson. Ask students to share their experiences in designing their virtual galleries so far.
  • Emphasize the importance of making the gallery visually appealing and reflective of their chosen artist’s style.


Step 2: Personalization Techniques (5 minutes)

  • Discuss various techniques for personalizing virtual galleries, such as:
  • Adding personal details like their name and year.
  • Incorporating decorative elements, such as borders, banners, or thematic images related to their chosen artist.
  • Using bitmojis or other avatars to represent themselves within the virtual gallery.
  • Show examples or provide templates for inspiration.


Step 3: Transparent Images (5 minutes)

  • Revisit the use of transparent images using Remove.bg.
  • Instruct students to identify any elements in their gallery that could benefit from transparent backgrounds. This might include additional artwork, decorations, or personal avatars.
  • Demonstrate how to use Remove.bg for creating transparent images.


Step 4: Work Time (35 minutes)

  • Give students time to continue personalizing their galleries. Encourage them to apply the techniques discussed during the lesson.
  • Circulate through the classroom to provide guidance and answer questions as needed.


Step 5: Reflection (5 minutes)

  • Conclude the lesson by asking students to reflect on the progress they’ve made in personalizing their galleries.
  • Encourage them to consider how their gallery’s style and decorations align with the chosen artist’s work.


Homework:

  • Remind students to continue refining their virtual art galleries and be prepared for the upcoming lesson, which involves peer evaluation.


Peer Evaluation and Sharing

In this final step of the project, students engage in peer evaluation, providing constructive feedback on each other's virtual art galleries. They discuss the design, personalization, and alignment with their chosen artists' styles. The lesson also includes a special presentation for parents, where students showcase their galleries and interact with their families. Students plan for sharing their work with a broader online audience, emphasizing the project's culmination and the broader reach of their creative expression.

Objective:

  • To encourage students to evaluate each other’s virtual art galleries, provide constructive feedback, and showcase their galleries to parents and a broader online audience.


Step 1: Peer Evaluation Guidelines (10 minutes)

  • Begin the lesson by explaining the peer evaluation process. The Students are provided with a rubric to evaluate each other’s work.
  • Emphasize the importance of constructive feedback and fairness in the evaluation process.


Step 2: Peer Evaluation Session (20 minutes)

  • Organize students into pairs or small groups. Each group will evaluate and provide feedback on one another’s galleries.
  • Encourage students to assess aspects like gallery layout, design, inclusion of personalization elements, and alignment with the chosen artist’s style.


Step 3: Group Discussion (15 minutes)

  • After the evaluation session, gather the groups to discuss their findings. Ask each group to share the feedback they provided and discuss what they found particularly impressive or areas that could be improved.


Possible Step 4: Sharing with Parents (10 minutes)

  • Facilitate a virtual presentation for parents, where students showcase their virtual art galleries. Encourage students to provide insights about their chosen artist and the creative choices they made during the project.
  • Parents can ask questions or provide feedback, creating an engaging interaction.


Possible Step 5: Online Sharing Plan (5 minutes)

  • Discuss with students the plan for sharing their galleries online with a broader audience. Consider options such as school websites, social media platforms, or virtual exhibitions.


Standards

  • (6-8.RH.7): Integrate visual information (e.g., in charts, graphs, photographs, videos, or maps) with other information in print and digital texts.
  • (6-8.RH.1): Cite specific textual evidence to support analysis of primary and secondary sources.
  • (6-8.RH.2): Determine the central ideas or information of a primary or secondary source; provide an accurate summary of the source distinct from prior knowledge or opinions.

Lesson Feedback