- Loading…

In this lesson students are going to learn about basic electronics and basic programming and apply the received knowledge in making the waving droid project following the engineering design process and project paced learning techniques. Also, they will be introduced to the concept of
digital fabrication where they are going to experience Onshape as a CAD software and operate the laser cutter.
Material needed:
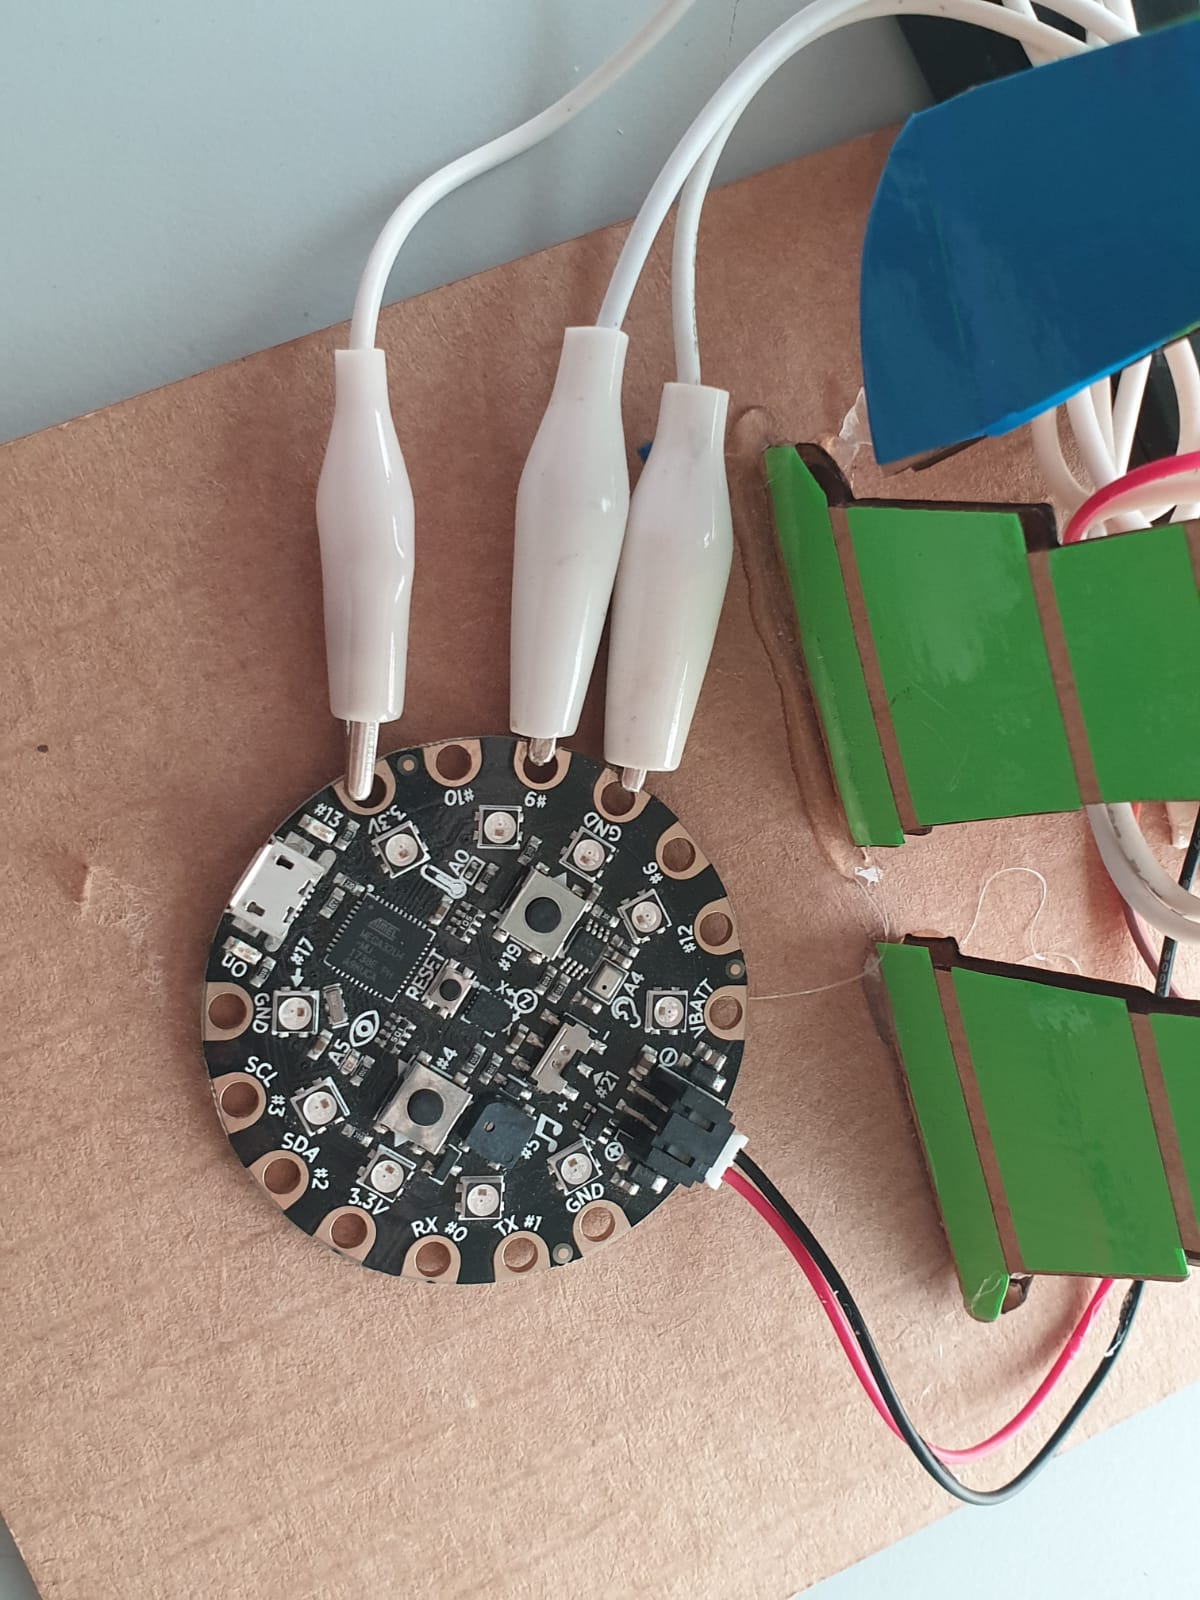
– Circuitplayground.
– Laptops
– Internet connection
– Access to OnShape website and MakeCode website
– 5 Wires
– 5 alligator wires
– Batteries
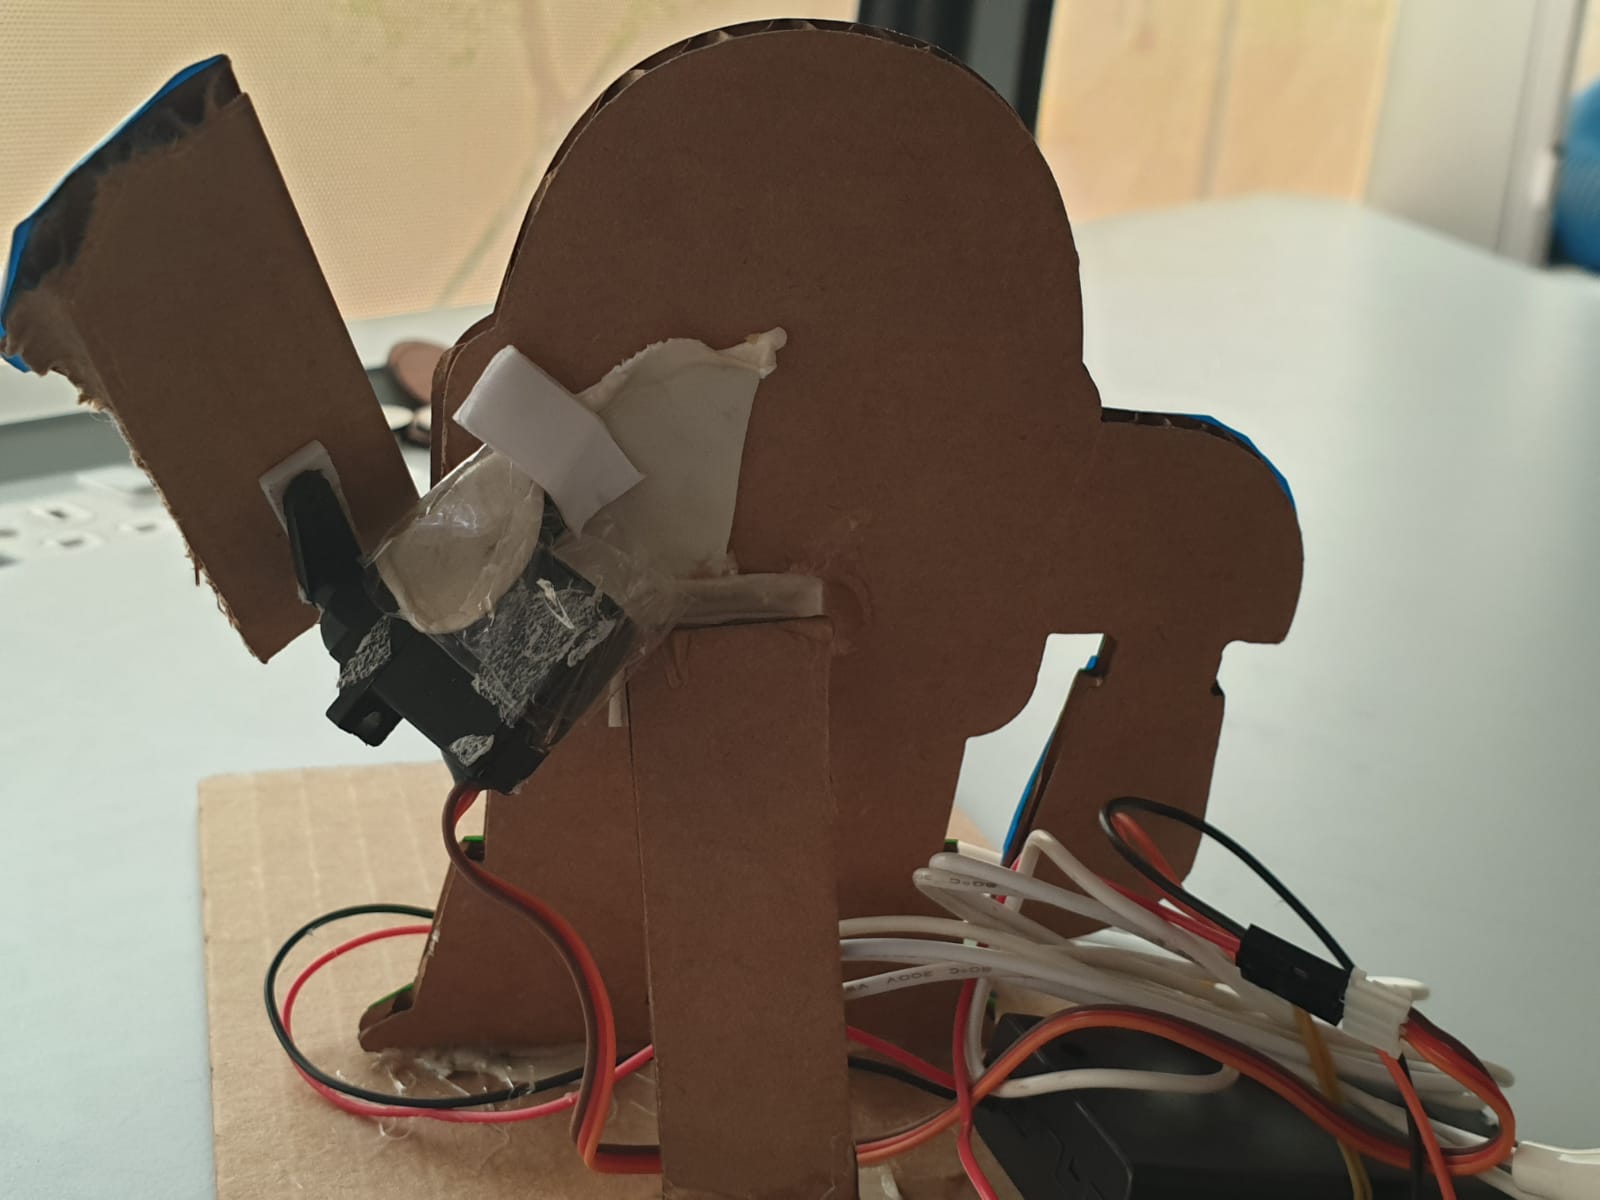
– 1 Servomotor
– Double sided tape
– scissor
– Cardboard
– Stickers (Optional)
Websites:
makecode.adafruit.com
Drive an open discussion to introduce the workshop challenge, by asking participants the following questions: (5 mins)
Q1: Have you ever built a robot?
Q2: What do we need to build a robot?
Q3: How can we move parts of a robot?
At this step, Introduce the Engineering challenge
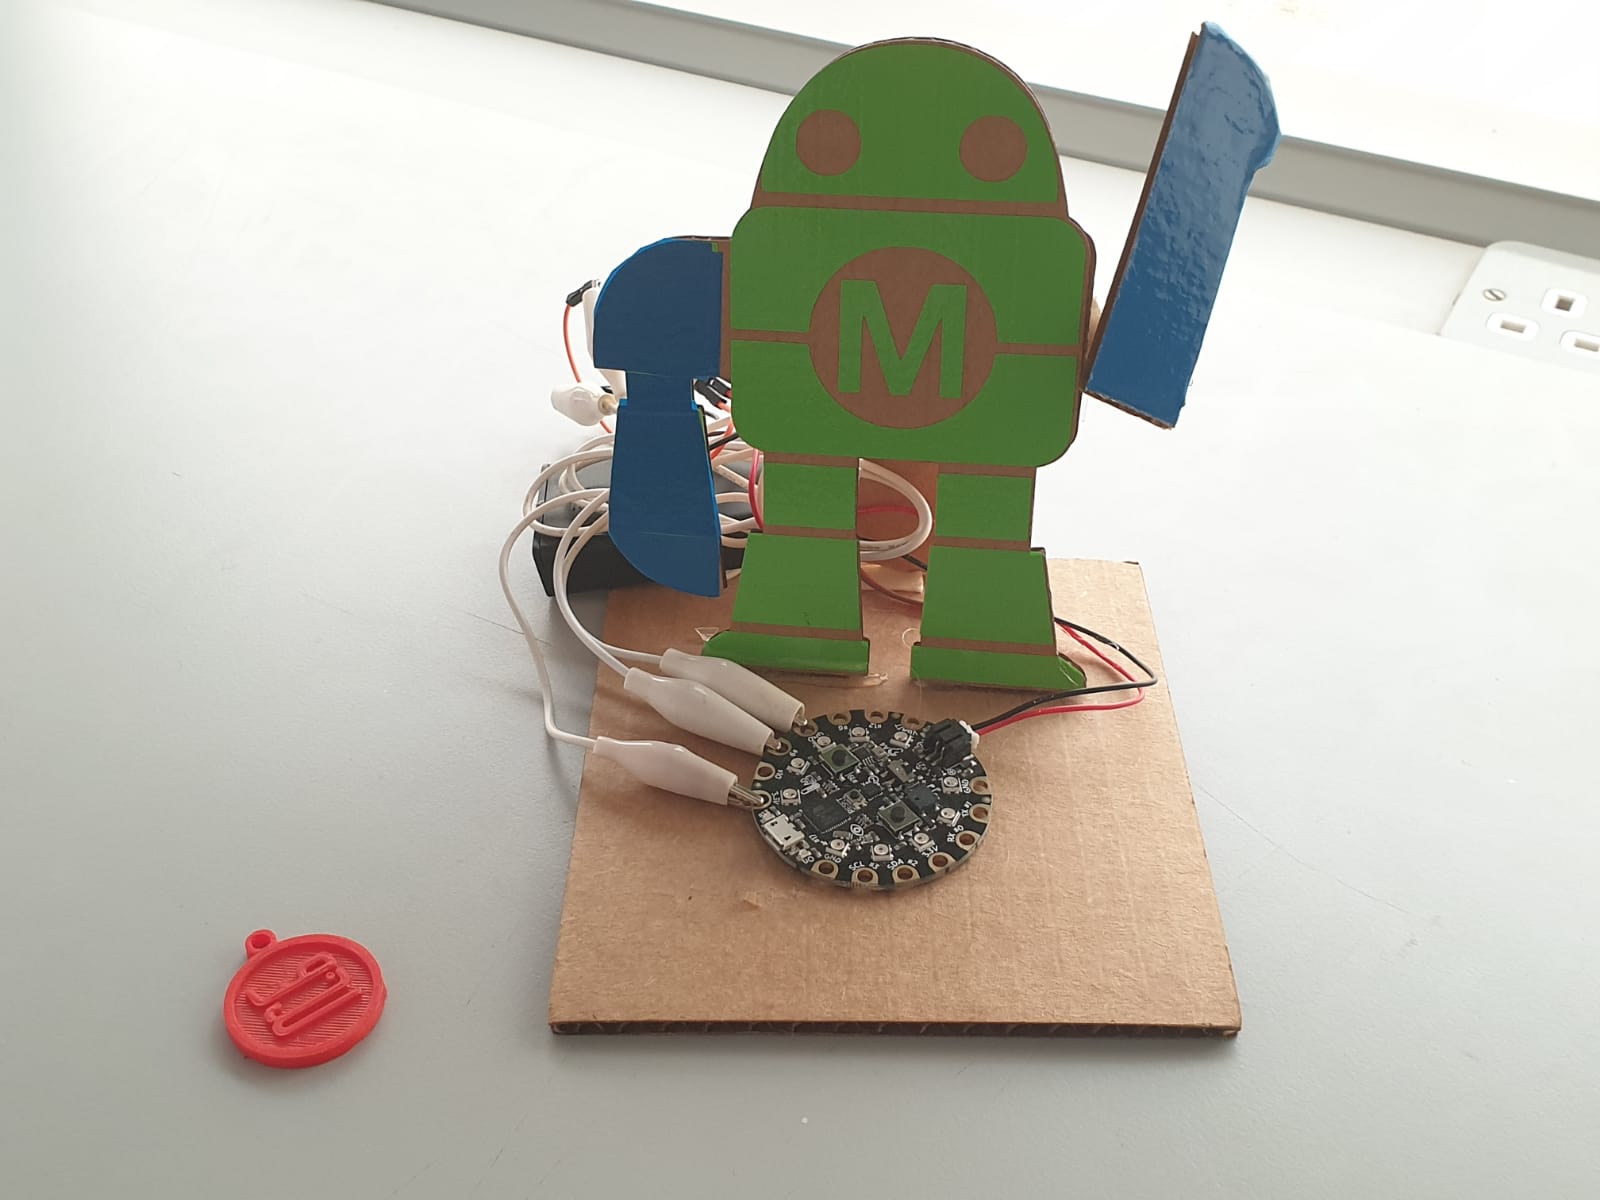
Introduce the challenge of needing to move a robot hand and the components that will be used. I,e: a robot to control, Servomotor to move the hand of the robot, and Circuit playground to control the hand movement direction.
circuit components and flow of the current
Introduce the basic components of electric circuits. Such as wires and power sources and explain how electrical current flow in a circuit
Introduce CircuitPlayground block coding, and how it can be used to control the different output options depending on the inputs chosen.
Give an example of a lighting LED when a button is pushed as students follow.
Guide participants to controlling the Servomotor block through two buttons A&B, and ask them to find the two angles in which the robot hand can wave.
Introduce the students to the concept of 2D designing and how it’s different between 2D and 3D
On Shape is an opensource CAD software for educators
As students follow, the instructor teaches the basics features of Onshape software.
Every student will sketch his own robot
Instruct the student on how to sketch a simple robot using basic tools such as lines, circles, and rectangles
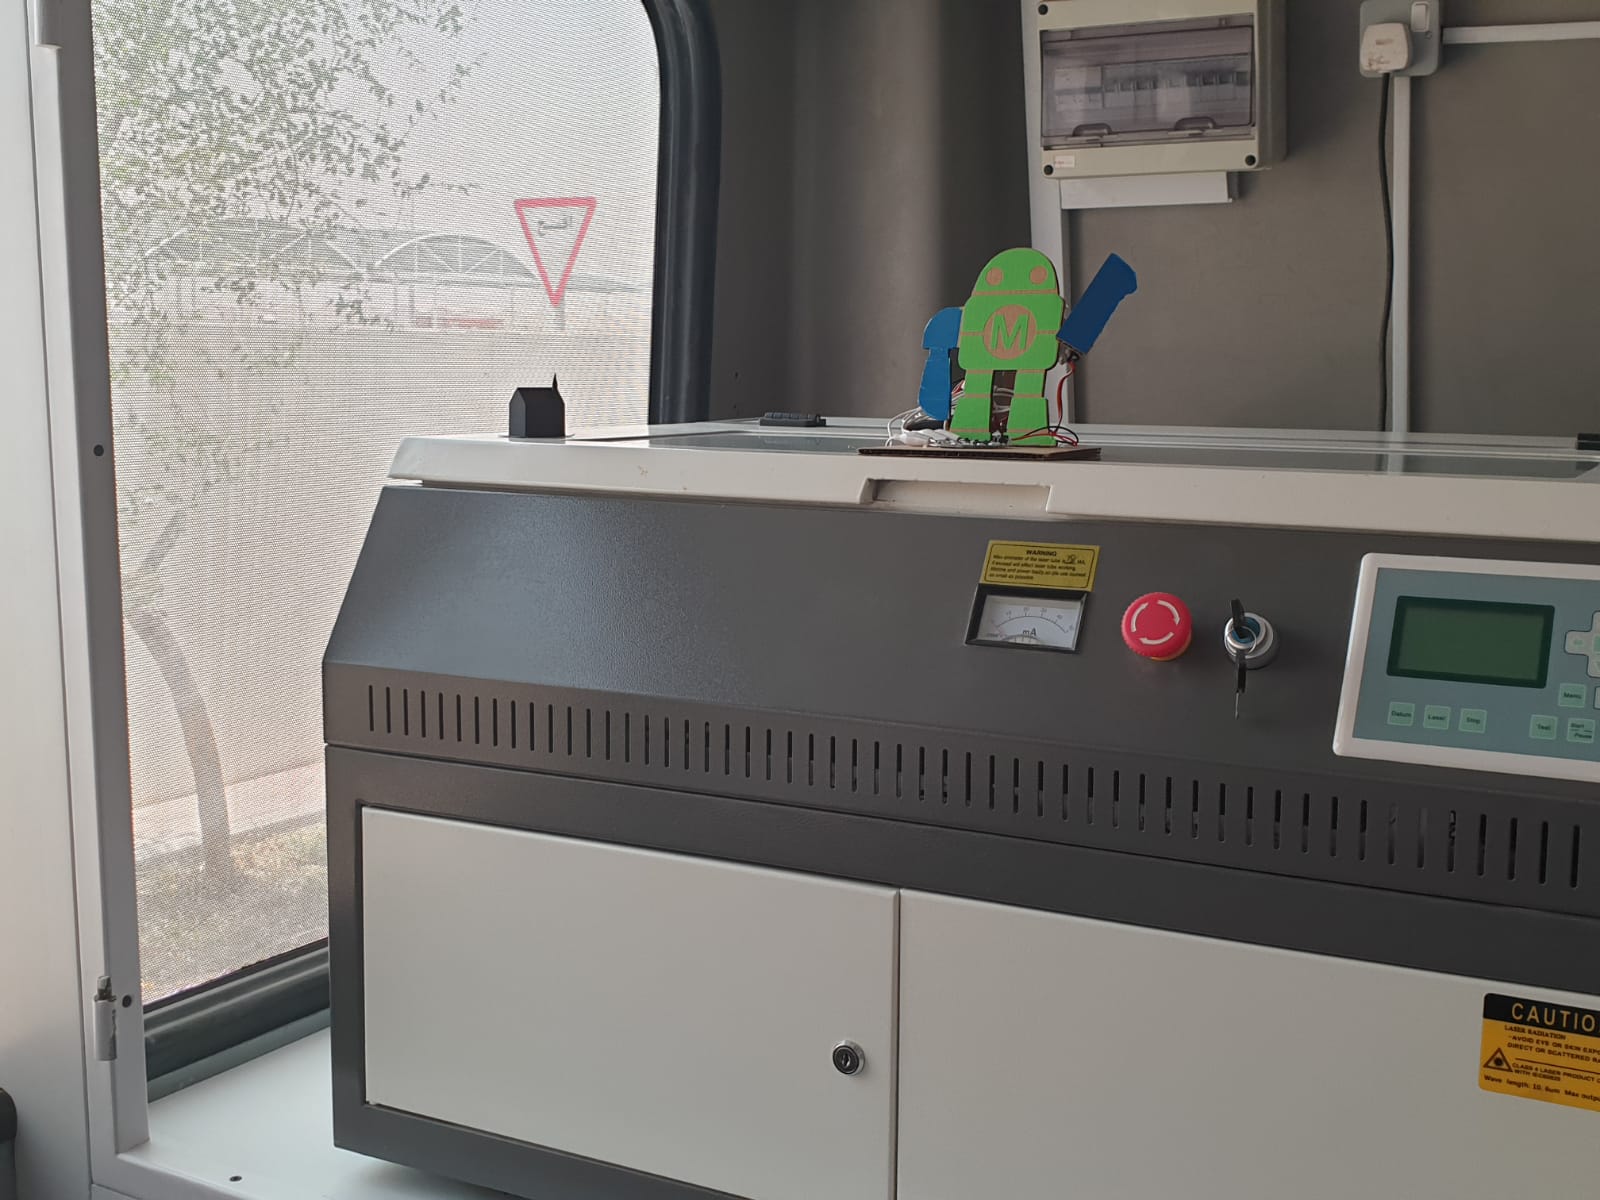
At this step, students are going to learn how to operate the laser cutter and how to transfer files from the computer to the machine
Gather all the designs done by the students to be cut using the laser cutter and explain how the laser cut works, safety instructions and how to operate it. Cut all the designs at once (Let one of the students operate the laser cutter)
let students start combining the electronic circuit they designed with the laser cut robot.
Provide the following items:
– Double sided tape
– scissor
– Stickers
The student is going to fix the Circuitplayground and the servo motor using double-sided tape.
review the session and ask students what have we learned today
Having trouble? Let us know by completing the form below. We'll do our best to get your issues resolved quickly.
"*" indicates required fields