- Loading…
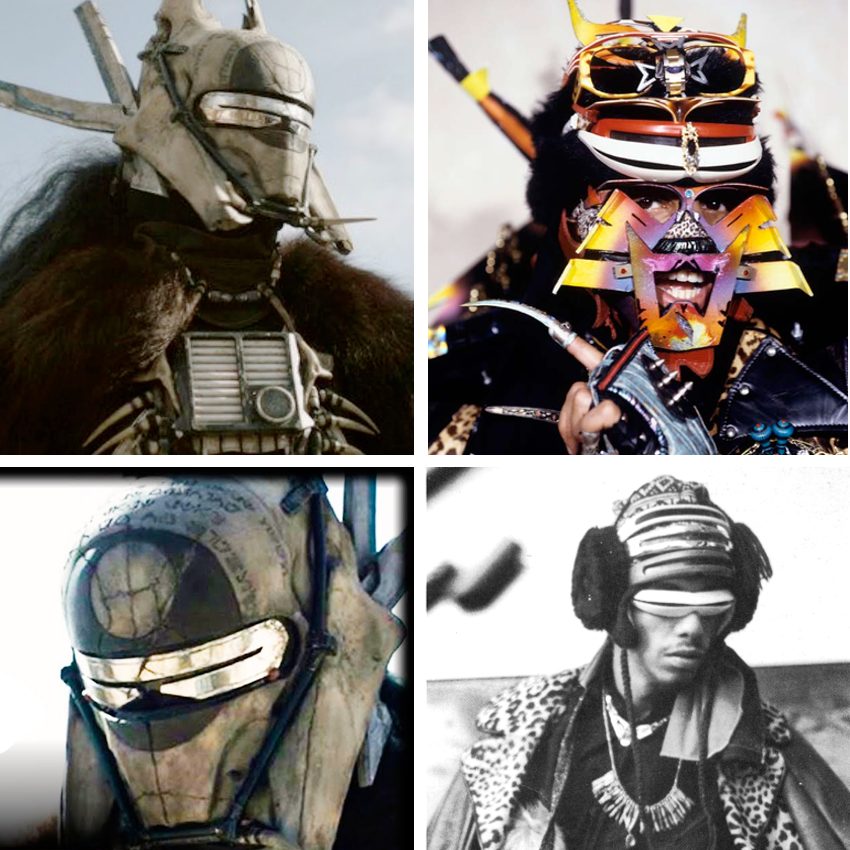
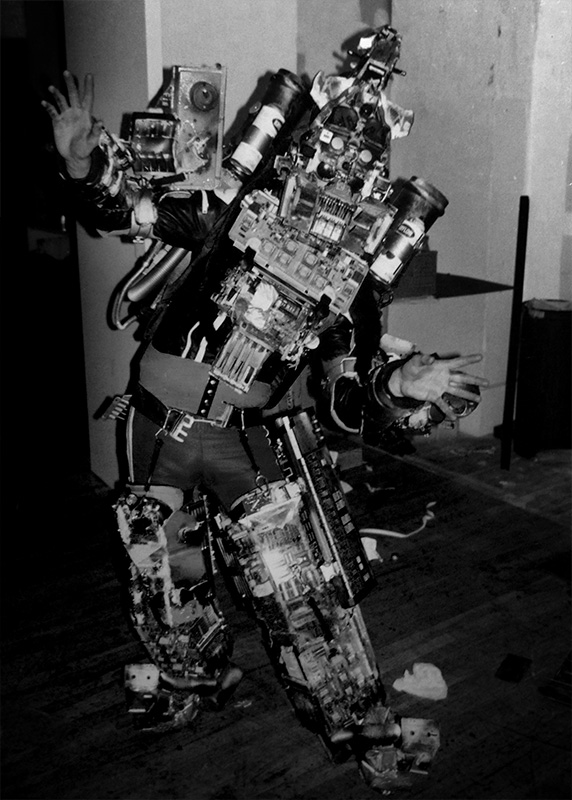
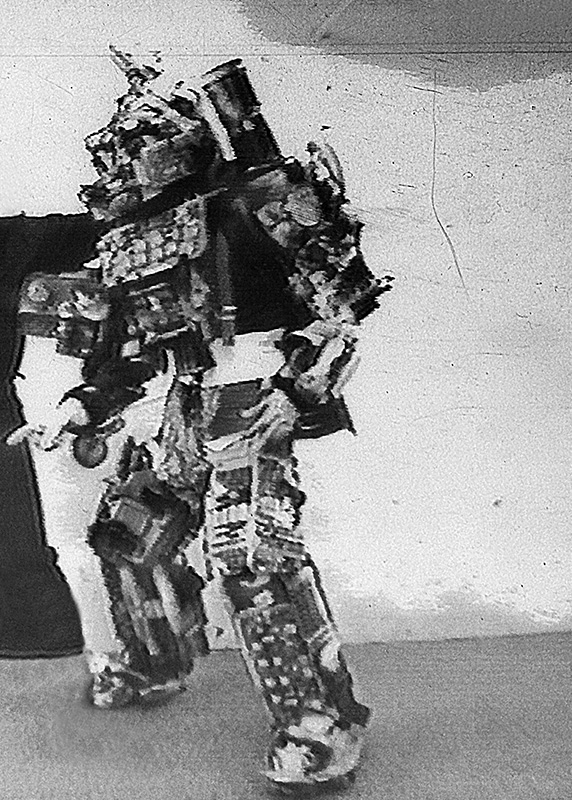
Afrofuturism encompasses a wide variety of creative explorations across numerous fields – music, art, film, and literature – over nearly a half-century in black culture. This lesson plan explores the emergence of the Afrofuturist as a maker. This includes looking at work by Rammellzee, a visual artist, musician, performer, and poet in full-body exoskeletons made entirely out of garbage, resembling futuristic samurai warriors, complete with flamethrowers and sound systems.
Students will be able to understand connections between culture, art and fabrication; learn basic upcycling techniques by creating wearable tech exoskeletons and; and enhance these wearables with electronics. They will learn about Afrofuturism, which offers a framing that allows designers to more fully explore both environment and context, thus imagining more empathic, inclusive, and impactful design solutions. Students will create designs for an exoskeleton prototype and build rapid prototypes for their designs.
Material List
Design Files attachment: Files to print
Step 1 (45 minutes)
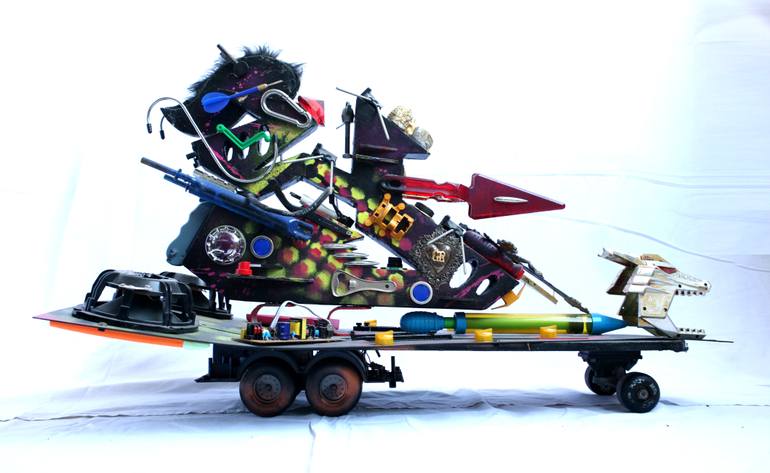
Introduction: Introduce students to upcycling as remixing in Afrofuturism and hip-hop: a remix is a piece of media, which has been altered from its original state by adding, removing, and/or changing pieces of the item. A song, piece of artwork, book, video, or photograph can be remixes. The only characteristic of a remix is that it appropriates and changes other materials to create something new. Students learn about the ways that some artists make use of upcycling — transforming discarded products into new products of value – in order to remix something.
Mini-Lesson – 10 minutes Students learn about how Rammellzee wore exoskeleton’s in his live performances. In groups of 2-3, students each discuss one of the artworks and how engineering or technology was used in the work. Guided Practice – 10 minutes Students think of new ideas to use exoskeletons in a sculpture or other artwork. Activity – 15 minutes Students sketch and work on possible solutions to their new idea(s). Performance/Exhibition (Share-Out) – 5 minutes In groups, students share or display their work.
Step 2 (45 minutes)
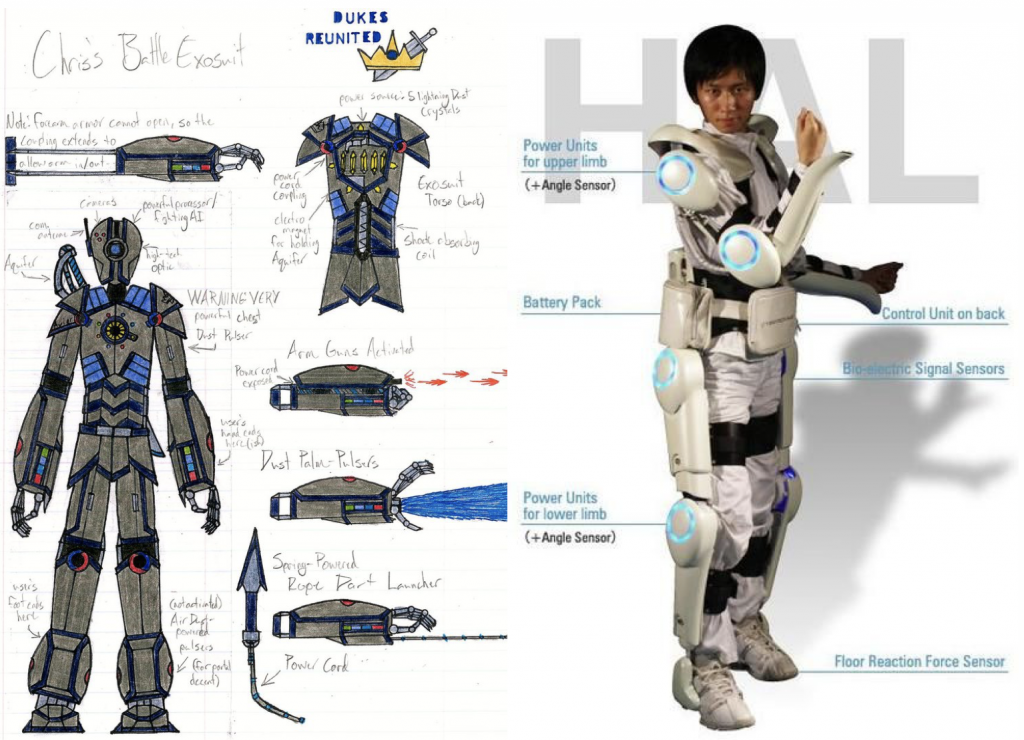
Introduction – 5 minutes Recap lesson 1 and learn how exoskeletons are used to help people; and learn how they can remix an exoskeleton (design) using found objects and other materials. Watching the Netflix Liquid Science episode on “Stronger, Faster” is a good motivational activity. Ideally, students would have a chance to have a Q&A with a professional artist, mechanic or engineer to discuss the application of exoskeletons in the world. Mini-Lesson – 10 minutes Students research prototypes for exoskeletons. Guided Practice – 10 minutes Students learn how to make exoskeletons using elastic, glue, cardboard and found objects. Activity – 15 minutes Students develop prototypes for their exoskeletons, documenting their outcomes through writing prompts, images and video. The full building instructions can be found here.
Performance/Exhibition (Share-Out) – 5 minutes In groups, students share or display their work.
Step 3 (45 minutes)
Introduction – 5 minutes Recap lesson 2 build and test their final exoskeletons, documenting their outcomes through writing prompts, images and video. Mini-Lesson – 10 minutes Learn how electronics are used to power exoskeletons. Activity – 25 minutes Students wire and mount electronics to their exoskeletons.
Performance/Exhibition (Share-Out) – 5 minutes In groups, students share or display their work. Once the exoskeletons are finished, the final step of the project is students collaborating to write storyboards and film videos, editing their videos, and presenting their work to their peers and teachers.
Having trouble? Let us know by completing the form below. We'll do our best to get your issues resolved quickly.
"*" indicates required fields
Thank you for your fab contribution!