- Loading…

Online unplugged session presenting the tradition wearing of the Qatari people, In order to present the wearable technology to relate it to the tradition wearing and how it could modify the dresses of people.
In this section we will introduce the participant to the session, and we will introduce them to the tradition wearing in Qatar State.
1- We will start by an Ice-Breaking Questions “What is meant by Tradition dress”, Most of the participant will keep saying that its what people wear, and it’s the way we recognize and identify a group of people.

2- Then we will define what is the tradition dress as an ensemble of garment and jewellery that is worn by an identifiable group of people.

3- Then we will go through the tradition of dress of men and then women in the State of Qatar.

4- Men In Qatar wear a Thebe which is a long white robe covers the whole body from the wrist to the ankles.

5- For women they wear Abaya which is a flowing robe that covers the whole body, and it always comes with long sleeves to cover the arms.
6- Then we will be asking the participant regarding their opinion about the dress if it’s really affected by the climate and the land forms

7- Most of the participant will agree with this.
8- Then we will present wearable to the participant as devices worn with comfort.

9- Then we will show a video shows what is wearable devices.

In this section we will introduce the participant to what we are going to do today, and we will introduce them to the component we will be using.
1- We will make a wearable circuit today using Tinker-CAD platform, and we will be using Micro-Bit board, and RGB LED’s.

2- We will introduce them to the component we will be using during the making process, and we will discuss each component individually.

3- Micro-Bit board is a small development board that contain input and output modules, it also contains 25 LED, speaker, MIC, Push buttons, Switches, Magneto Meter, and accelerometer.

4- Then we will discuss what is meant by the RGB LED which is a Pack contains 3 different colour LED (Red, Green, Blue), that combine the colours together to hue more than 16 million different colour.

5- Then we will start practising on Tinker-CAD.
In this section we will discuss the practice side we will do in this session.
1- We will send the participant the needed link to access Tinker-CAD we usually create a class for each session we deliver using Tinker-CAD.
2- Due to this we will ask the participant to join the class using the link we sent, and we have also to provide each participant with a Neck-Name to join the class.

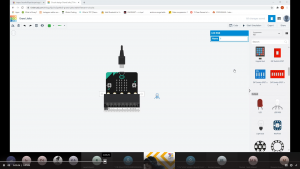
3- This is the first page they will see when they access tinker-cad after they enter their nick-name.
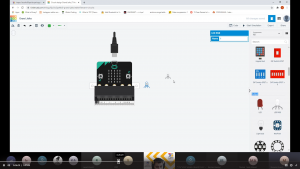
4- We will have to ask them to go to circuits and then press on to create a new circuit.

 5- Then we will give a brief instruction for the workspace and the component we will use.

6- Then we will choose the needed board which (Micro-Bit with breakout shield) we can find this from the list by choosing the all components.
7- The main difference between the normal micro-bit board and the one with the breakout shield is the number of available pins we can use to connect external modules.


8- In our case we will use the one with the breakout shield in order to use the RGB LED as we are going to use to RGB LED’s
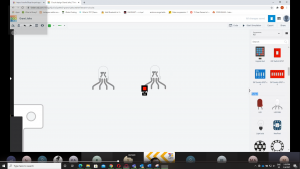
9- We will show the participant also how to connect the RGB and the pins each RGB pack has.

10- Each pin represent the Lead will control the colour and the black one is representing the ground for the RGB.
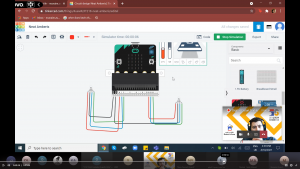
11- So we will connect the RGB to the Micro-Bit.

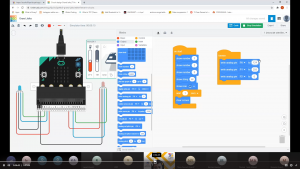
12- So here I already connected 2, and now we need to go to the coding part where we can control our RGB LED’s.
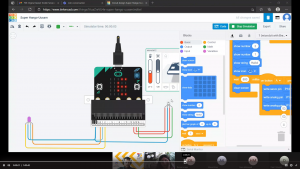
13- Before that we need to understand that this RGB is an output device, so we need to provide it with voltage, so the proper instruction for this is a (write analogue pin), by doing this we are controlling the intensity of light for each colour, so we need to have three instructions for each RGB LED connected to control it.

14- We can introduce the participant to the RGB calculator to understand how the colours are being combined.
Just write on Google (RGB calculator and choose the best one for you) for me:

15- It’s important to understand that the value is between 0 and 255; 0 means no emitted colour and 255 means full intensity for the specified colour.
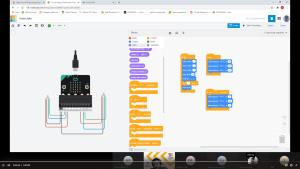
16- Then we will show them how to build simple RGB works when we press one of the push button on the Micro-Bit, So here they have to understand that we are building a condition so in case of micro-bit this condition is built by default which is (On button *** pressed).


17- This is what we will ask the participant to do, but it’s important to mention the difference between the “On start loop” and the “Forever loop” most of the participant have a clue regarding it.
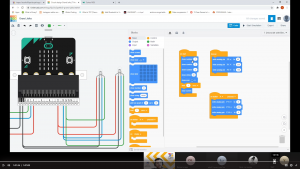
18- Then we will ask them to build a circuit contains more than 3 RGB LED’s and code it not forgetting to use the push button and for the one who finish fast that mean we should let them challenge their self by doing a bit harder exercise by asking them to use one of the internal built sensors and showing the action on one of the RGB LED’s connected.
Having trouble? Let us know by completing the form below. We'll do our best to get your issues resolved quickly.
"*" indicates required fields