- Loading…

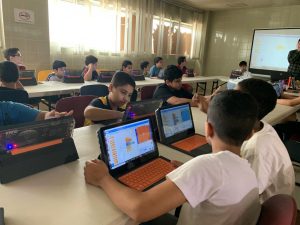
Onsite workshop aims to show the student the power of being creative and having a good coding skills.
The workshop will deliver knowledge of how to code and connect between different coding methods to develop a game from scratch,
The workshop will push the participant to demonstrate his creativity through designing.
This is a 4 days activity start in designing and ends playing.
Day 1 –> Draw the field and character
Day 2 –> Code the Game
Day 3 –> Use Makey Makey
Day 4 –> Competition
In this section we will go through the time line of the workshop.
1- We will go through the workshop objectives, and we will motivate the participant as we will have a competition in the 4th day.
2- We will explain the delivered content in the 3 days and what we will be doing.

The participants will be introduced to the Scratch platform UI and how it works. They will also design and customize the game background as the paddle field, the paddle and the paddle ball.

1- We will start with a question to grab the participant attention to the topic of the session.

2- Then we will explain the world cup tournament, going to happen in the late November in Qatar

3- Then we will ask the participant about what is sport in their opinion.

4- Sport is any form of physical activity that contribute to physical and mental well-being.

5- Then we will ask the participant about their favourite sport?

6- Then we will talk about the paddle tennis, as a game mixes between the tennis game and the squash game, but this game played only in doubles.

7- We will also describe the paddle tennis field to the participant.

8- Then we will explain what we will be doing today to the participant.

9- We will use scratch to build a paddle tennis game to have a tournament at the 4th day.
10- We will draw the fields and the paddles also the ball.

11- We will open Scratch and explain to the participant how to start creating.

12- We will ask participant to have an account to save their progress if they are using the online version of scratch.

13- We will start by deleting the cat.
14- Then we will start drawing the field on the stage section as a backdrop.


15- We will ask the participant to customize the field as they want, through changing the colour of the field also the line colours, they can also add their names.
16- Then we will ask the participant to draw a sprite at the sprite section.

17- the sprite is going to be the ball, they can customize it and also choose the best size for their ball.
18- Then we will ask the participant to draw the paddle under sprite section.

19- Then after they draw and customize their own paddle, we will ask them to duplicate the paddle for the second paddle.

20- Then we will ask the participant to show their result.

On the second day participants will program the paddle game using block coding, and they will add features of the game, as record their own voice, edit it, and import a sound file for the winner and the game over.

1- We will start with a recap for the previous day.
2- Then we will ask the participant an Ice breaking question.

3- Then we will ask the participant about what they know about coding.
4- Explain coding instructions.

5- Distinguish the difference between the types of coding.

6- Explain coding through a video.

7- Then we will start coding with the participant step-by-step.

8- The coding of the game will start from the ball code.

9- the coding process will start by creating the variables for “Player 1” & “Player 2”.

10- Then we will explain the need for event instructions and the use of each event.

11- Then we will discuss the way of calculating the position of the ball and how to turn the ball when it bounces.

12- Discuss loops and the need for it.

13- Then we will explain the need for If condition statement.

14- Then we will discuss the speed of the ball and how to make the ball movement.

15- Then we will discuss the event instruction and the need to reset the ball position when a certain key is pressed.

16- Then we will explain the scoring scenario and how the score are going to be counted.

17- The code must start when the game start, so both are connected with the same event.

18- Then we should decide when the score are counted this has to be decided from the design process as the ball when it touches a certain colour it should count a score.

19- Then we will decide the winning scenario through putting the final score to win.

20- This is the final part of the ball code.

21- Then we will start coding the paddle.

22- The code will start with an event order and an initialization position for the paddle.
23- Then we have to discuss the need for having variables to store the position of the paddle.
24- We will create two variables for each paddle.

25- Then we will add the loop function and add the way of moving the paddle in addition to add the bounce feature to the paddle when it touches the wall.

26- Then we will add the condition to move the paddle upward and downward.


27- The first paddle code.

28- Then we will code the second paddle.


29- This is the final result for the game.

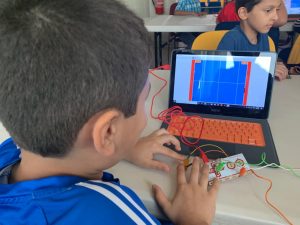
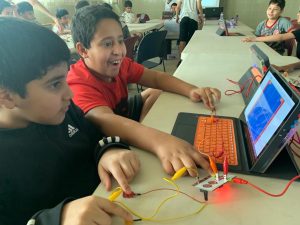
During the third day, participants will test the final game and fix any issues. They will be introduced to basic electronics and to Makey Makey kits, that can convert objects into keyboard, so they will control and play the game with it.

1- At the beginning we will recap the entire previous days from design to coding.
2- It’s normal to find some participant not having their game finalized.
3- We will ask the student then about the transmission of the electrical current.

4- Most of the participant will agree on “Wires”.
5- Explain the electricity in general to the participant and the formation of it.

6- Then show them a video that describe electricity.

7- Then we will ask the participant about the connectivity of the human body.

8- Then we will explain how every thing on earth can connect electricity, but there is material that resist very high the movement of the electricity, so it got burn other they don’t resist the electricity, so we call them good conductors.
9- Then we will show them the device that will help us in proving that our body can connect electricity using the makey board.

10- Then we will show a video to explain how Makey-Makey works.

11- Then we will show participant what are we going to do with the board.
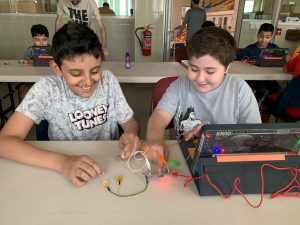
12- We will be connecting the board with the computer in order to control the game, As we are going to use the gummi bear candy as button.

13- Also, we will show the participant the needed material to connect our board and create our controller.

14- Then we will start the assembly process.

15- We will start with preparing the board.

16- Then we will connect the crocodile connectors to the board.

17- We will connect the other side of the crocodile with the gummi bear.


18- Then we will connect the board to the computer.

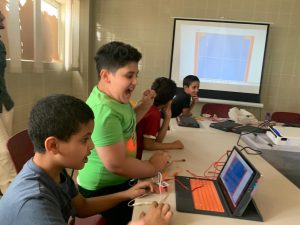
19- Then they have to play the game using the board.

In the last day, participant will be involved in a Digital Paddle Tournament. They will compete with the games created in the previous days, and they will play against each other to challenge the best one.

1- We will recap all of the previous days.
2- Then we will ask the participant to list their names.
3- Then we will use Tournament Bracket Generator to create a random matches.
“https://tournamentmgr.com/bracket-generator”

4- Then we will let the student go through the matches to find the only winner.

Having trouble? Let us know by completing the form below. We'll do our best to get your issues resolved quickly.
"*" indicates required fields