- Loading…
In this activity student will learn the fundamentals of mobile robot control by programming a line follower using the micro:bit microcontroller board and the Smart Cutebot base by Elecfreaks. They will use a block based programming language (MakeCode) and the extension needed to program the Smart Cutebot and access its onboard sensors, motors and other components. After programming the basic line following behaviour on the robot, students will test their programs on a modular track designed to challenge them with more complex tracks. This will let them develop their design, problem solving and computational logic skills.
Computers with Inernet access and at least 1 USB port.
1 Smart Cutebot robot for each team (2 or 3 students by team)
1 micro:bit board per robot
USB cable for programming the micro:bit board
3 AAA batteries for powering each Smart CuteBot.
Paper track (included with the Smart CuteBot) and laser cut modular track.
Students will:
This kind of activity is always engaging and motivating for the majority or students. Using actual robots has great impact, specially when students witness how their code changes the way the robot behaves. The challenges that they face help them refine their logic and think of better (or different) was of solving problems. The modular track is a nice addition because it helps to change and adapt the dificulty level and offers space for creativity. As a proposed improvement, there could be some more time devoted to bug hunting and redesign.
Brief presentation and introdution to the basics of mobile robots.
If the Smart Cutebot hasn’t been assembled yet, this is a great opportunity to have the students put the system together. It is verry easy and will give them confidence for the tasks ahead.
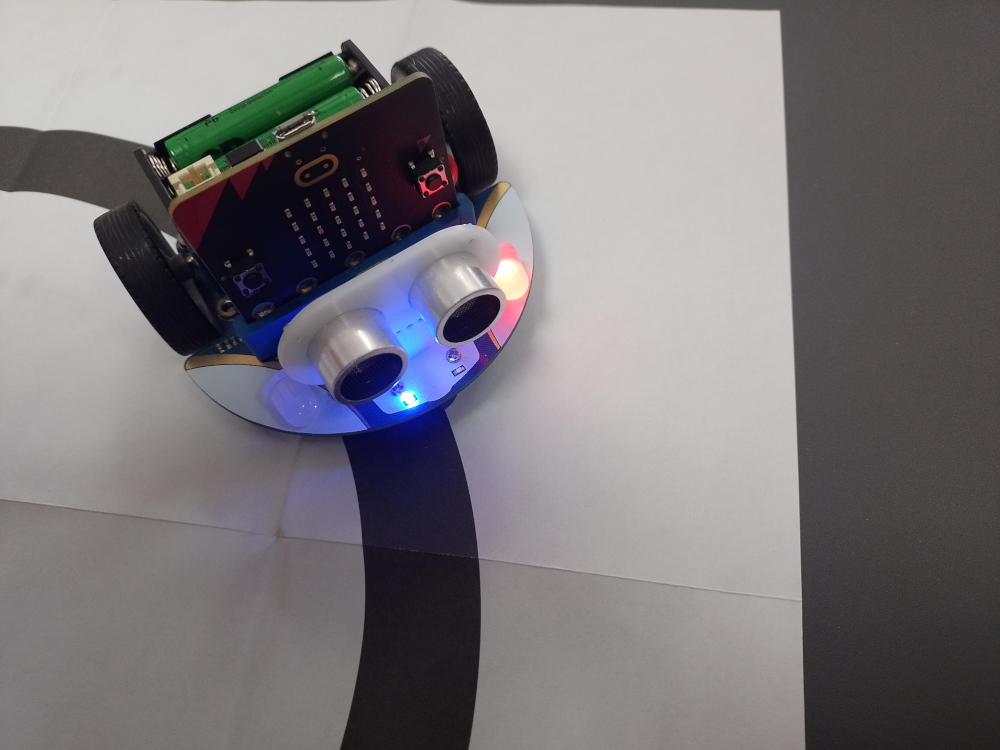
The students explore the different parts of the robot and try to identify each of the components, specially those that make it possible line following. They can put the sensors over the printed line on the paper track to see how their states change. That way they can see that the system is reacting to the different conditions on the physical world.
After that they can look for information (web sites and videos) about how these sensors work and why they can be used to detect lines.
In this step the students will learn how to program the micro:bit and Smart Cutebot using MakeCode.
The students will go to the MakeCode website, and get into the section for programming the micro:bit. Once there, if they don’t have any previous experience with miceo:bit, they can start exploring and following some of the tutorials presented there. That way they can learn the basics of micro:bit programming with MakeCode.

Once they feel comfortable with the system, they will go to the extensions sections and look for the Smart Cutebot Extension.

After loading it, they can explore the new blocks that will appear in MakeCode. They can build some test programs to see how the robot’s motor s and LEDs work. After programming the micro:bit, they can put it on the Smart Cutebot and see the result of their programming. They can keep doing this until they feel confident programming the robot for basic movements.

In this step students will build a basic line follower.
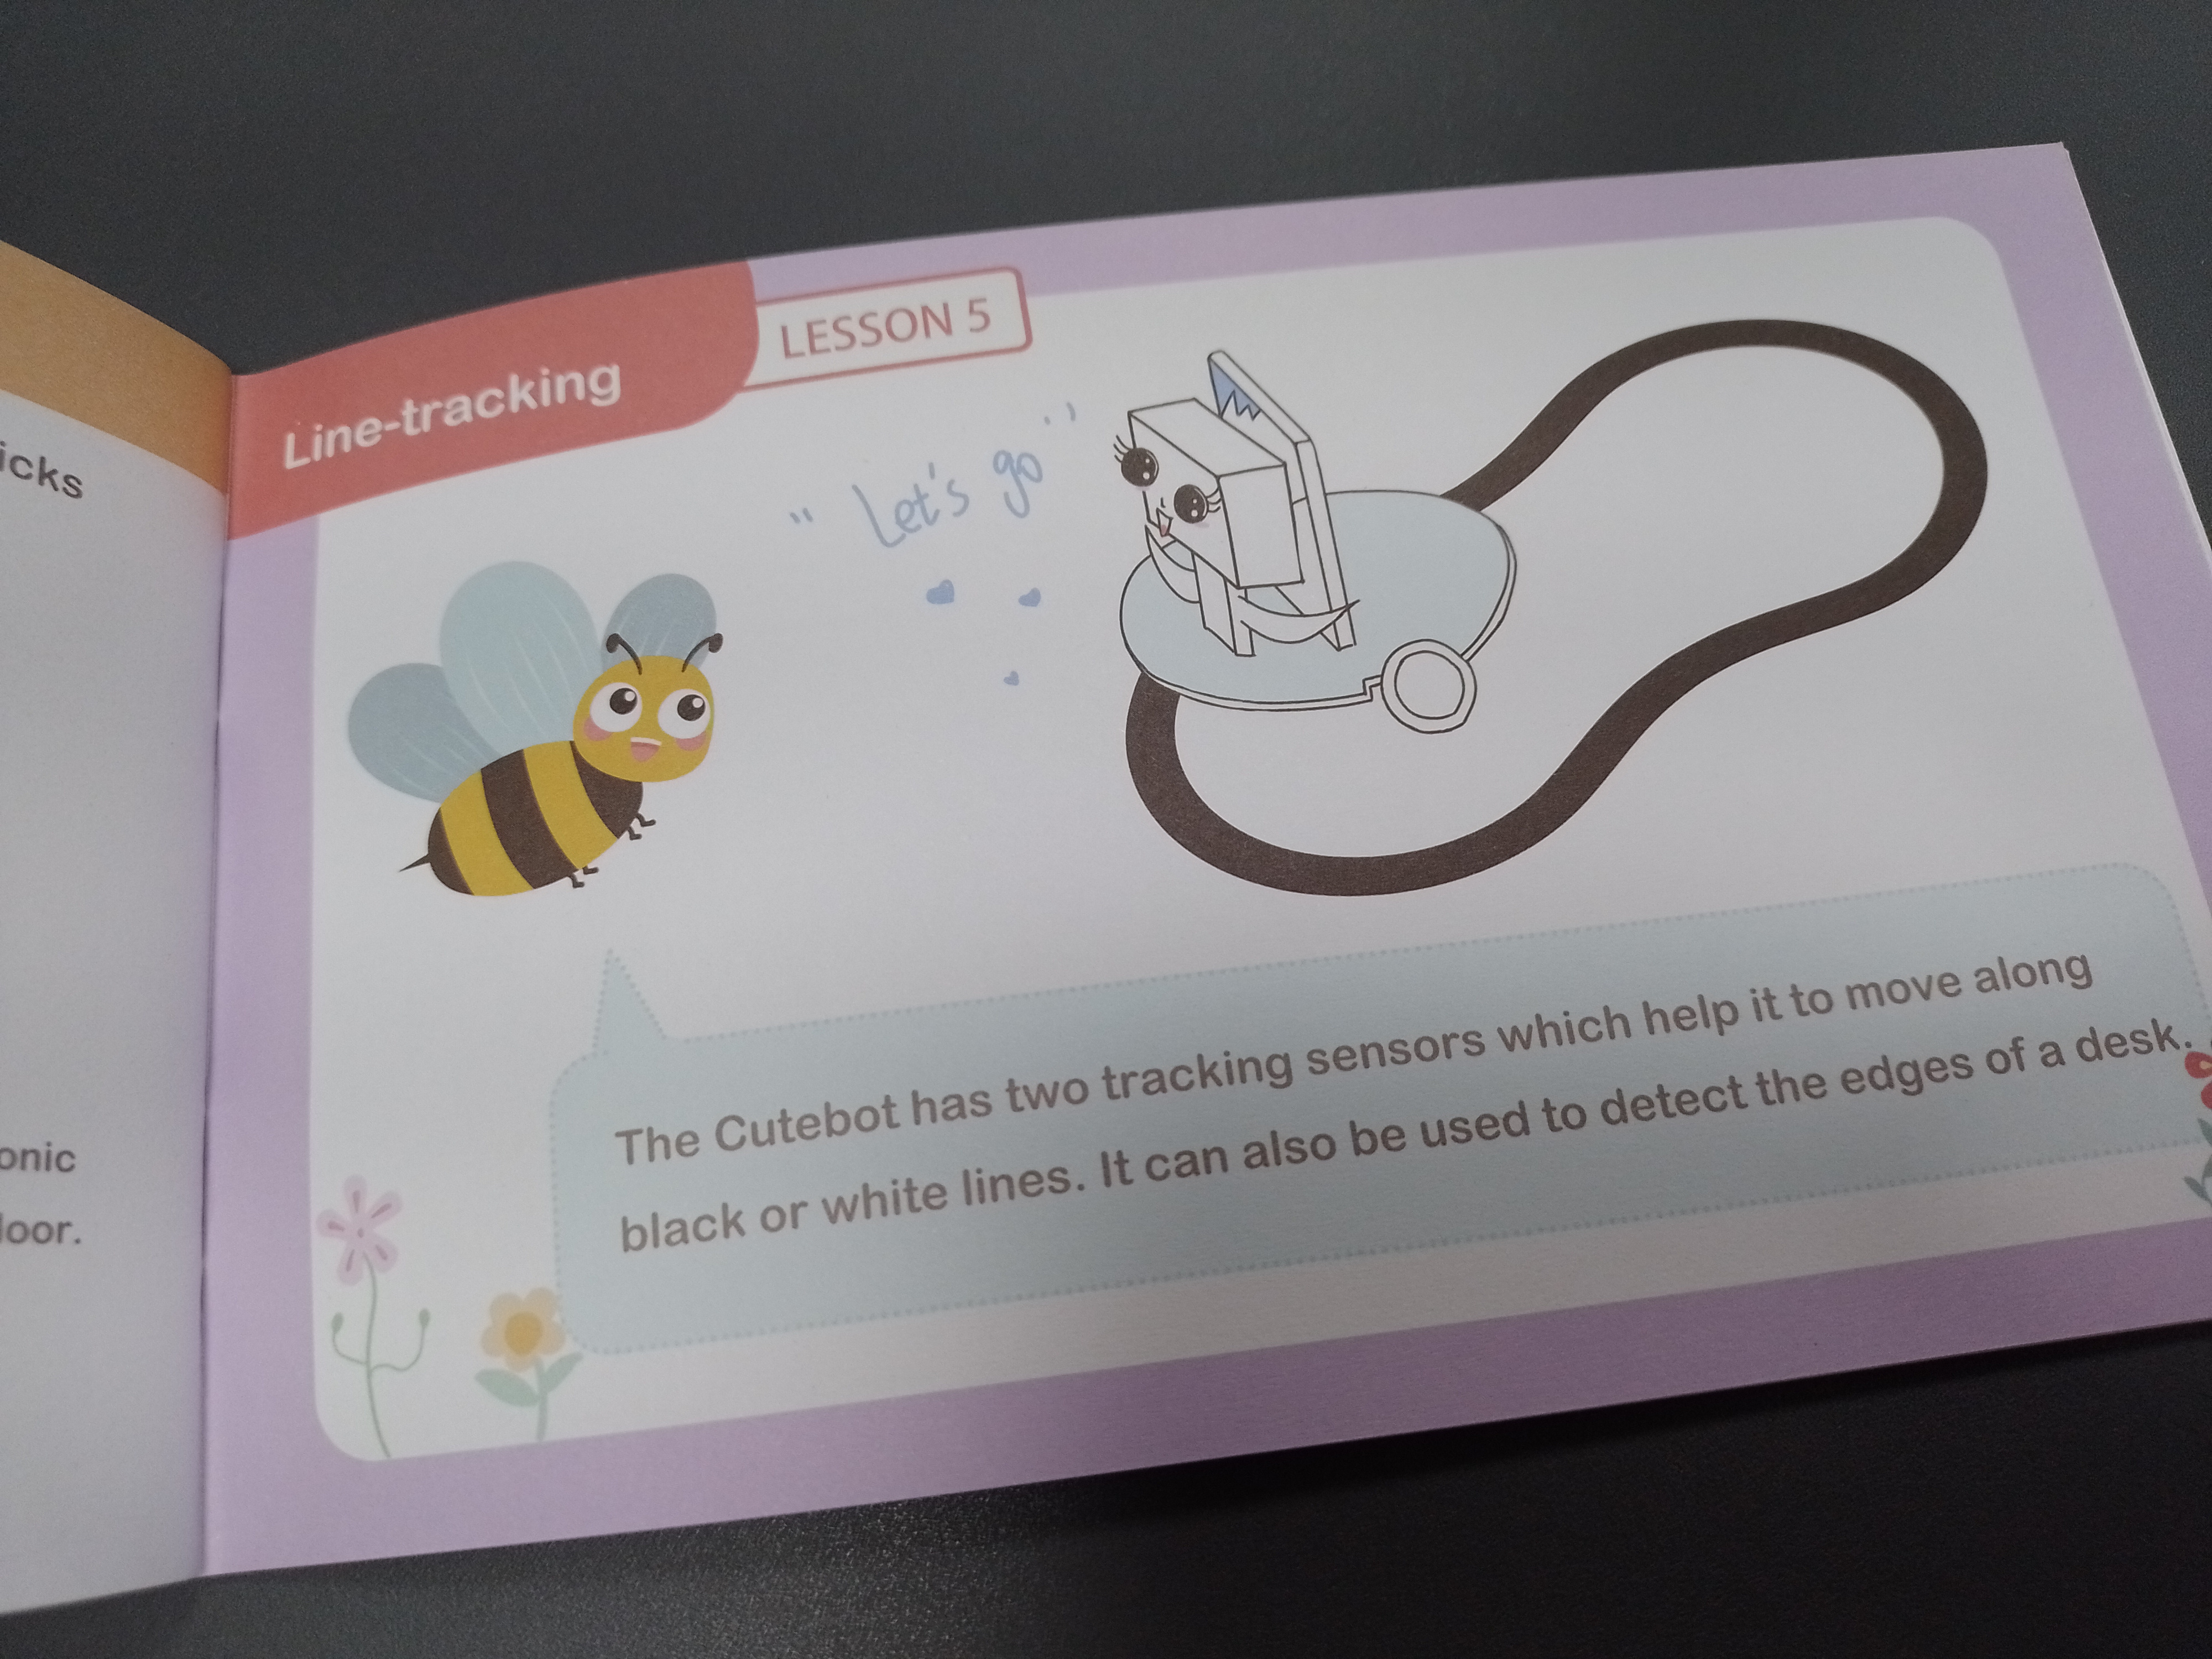
Students follow the instructions for Lesson 5 in the booklet included with the Smart Cutebot. Those instructions will help them build a basic line follower. They will build the program, save in on the micro:bit and test it with the Smart Cutebot on the paper track.
Students will test if their programs work without problems, and if they find any they will have to check their code and fix any error they find, and test it again. They can also test changes to the sample code to see if they can improve it, making the robot go faster or turning more precisely, etc.
Students will face a challenge when presented with the modular track.
Students are presented with a laser cut modular track that the teacher has previously prepared based on the atteched design (shown on the following image):

The idea is that by cutting the provided pieces many times (and creating new pieces with different paths) a kit for track building can be had that is adjustable and can be changed depending on the level of difficulty the teacher wants to present to the students. Teachers can use the provided file as a template to create more complex paths with steeper curves, bifurcations, etc.
Students then will have to adapt their programs to have their robots navigate succesfully on the new track. They will have to, collaboratively, propose changes to their codes based on their navigation strategies.
Having trouble? Let us know by completing the form below. We'll do our best to get your issues resolved quickly.
"*" indicates required fields