The Birds Aren't Real: A Collaboration Between Shop and Computer – SCOPES-DF

Lesson Details

Age Ranges *

Author

Lauren Kartzman

Summary

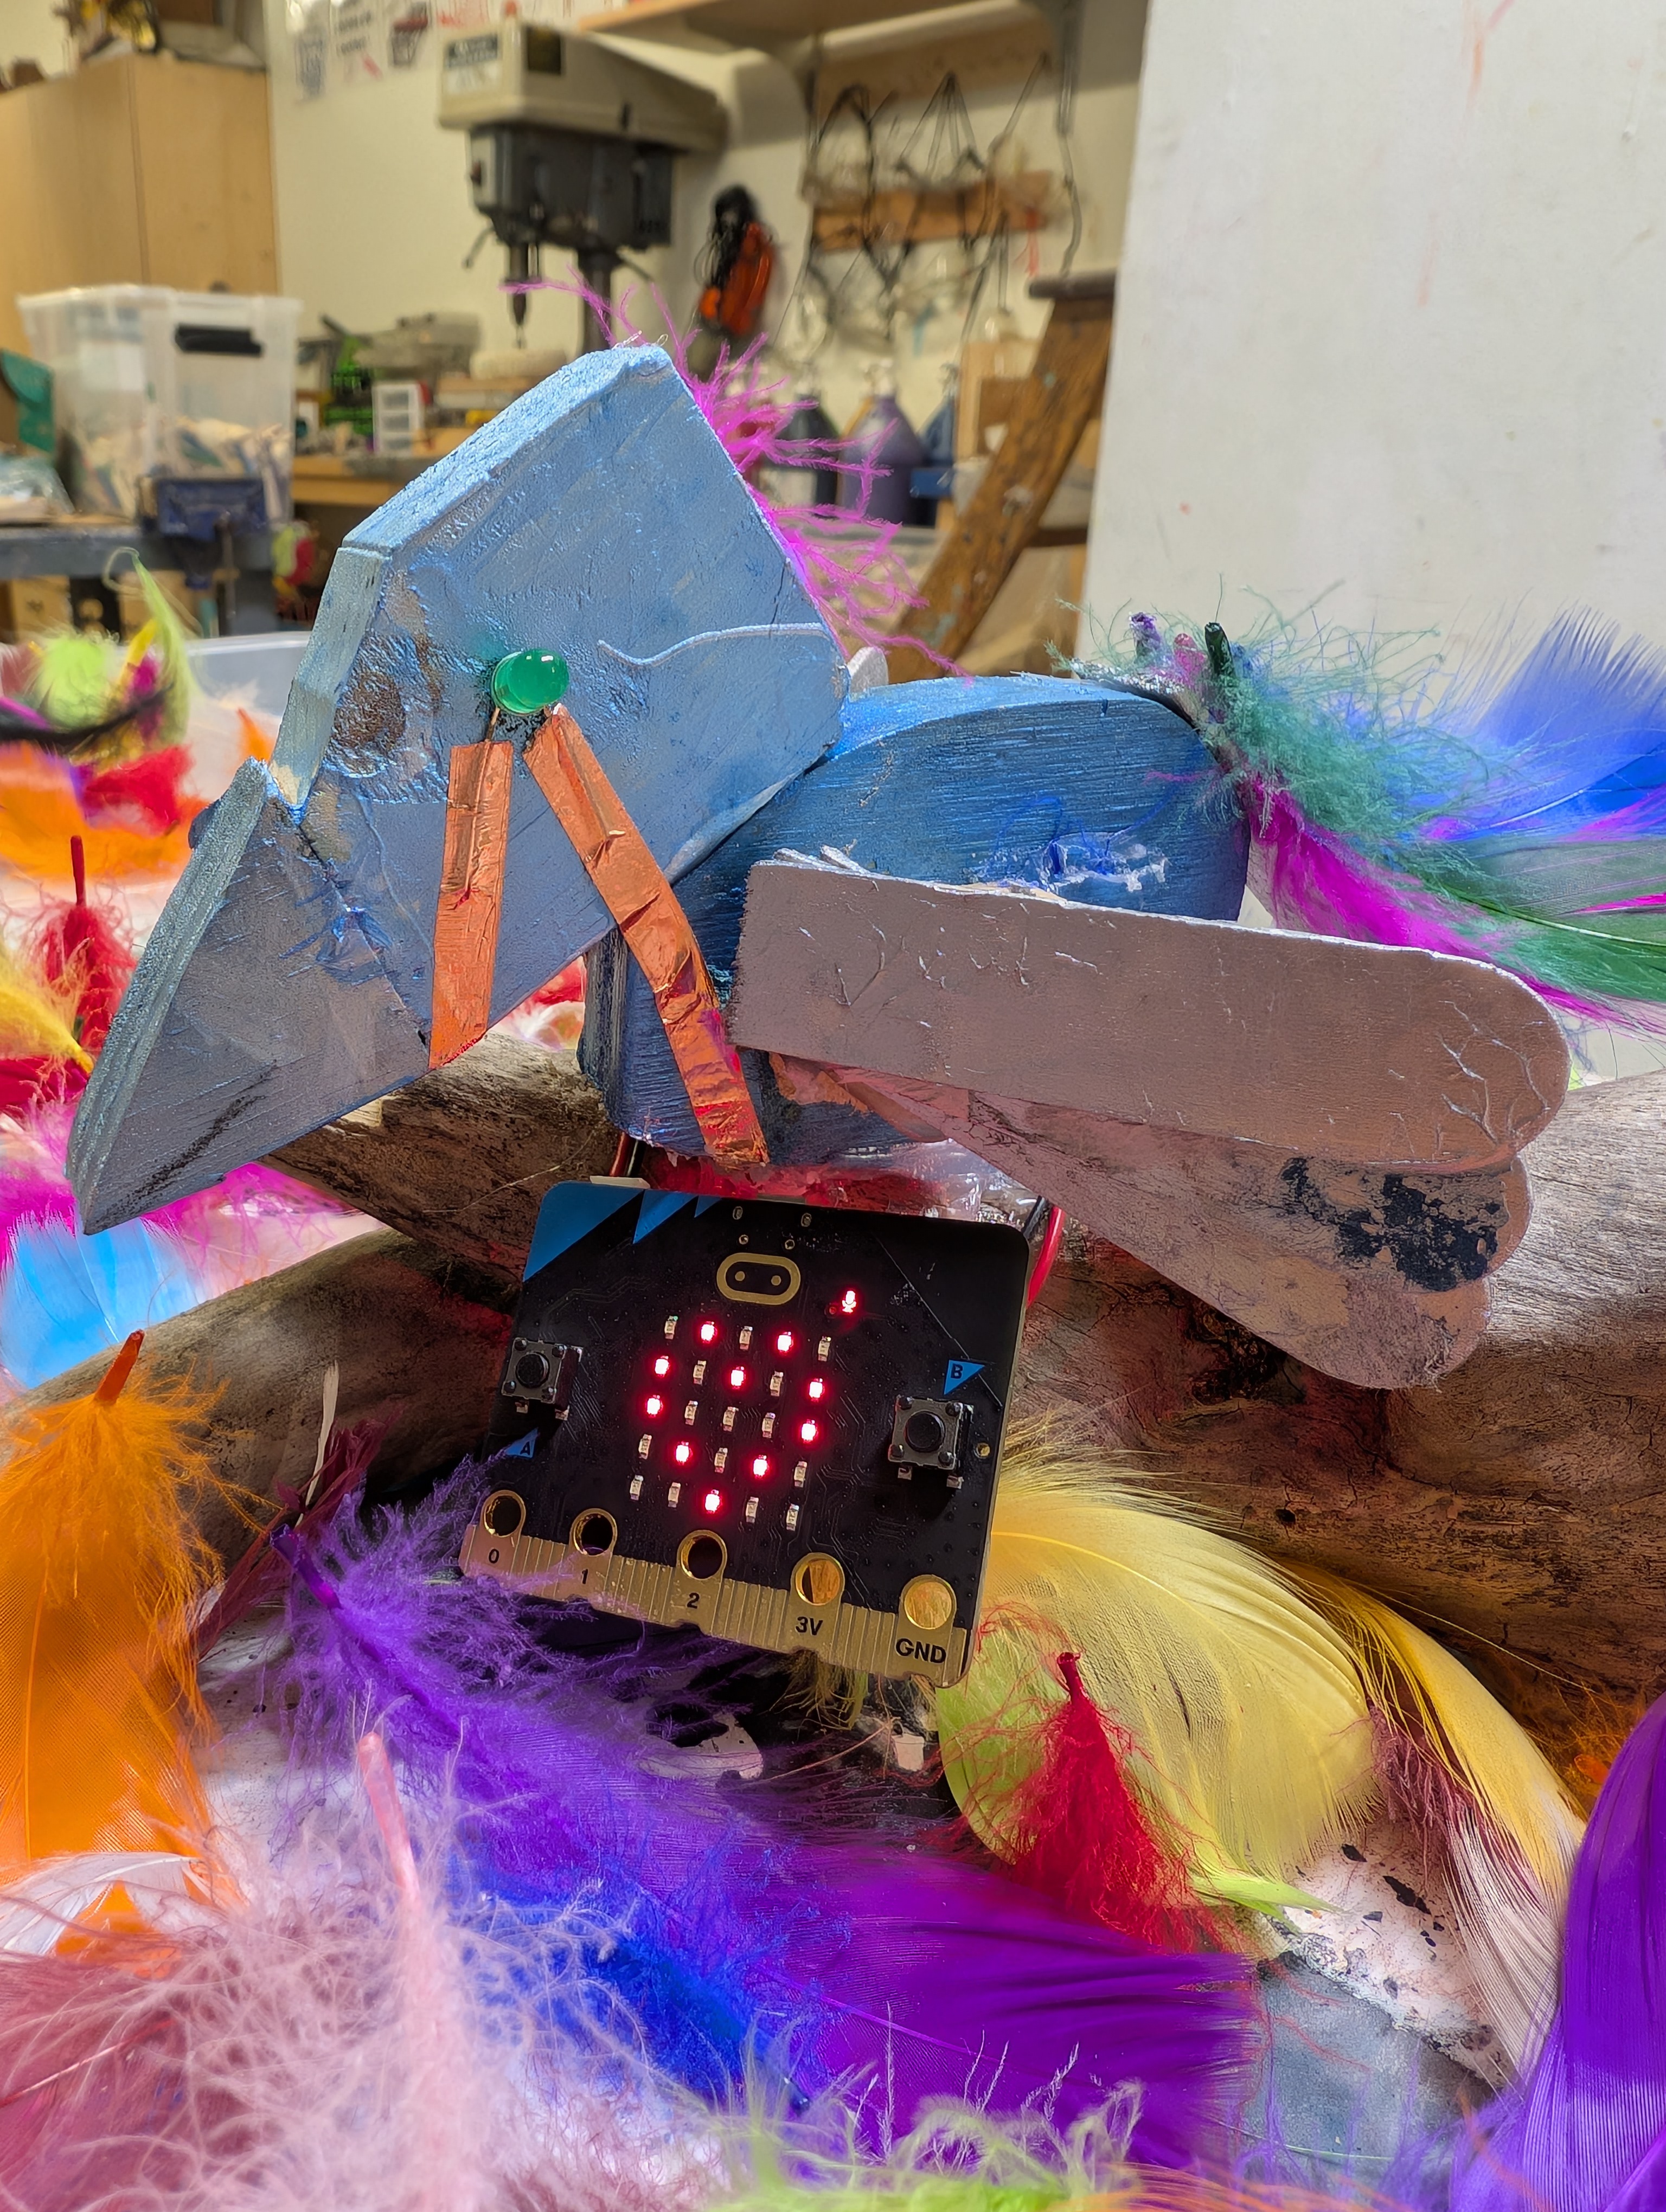
In this interdisciplinary unit, students will create three-dimensional wooden bird sculptures that incorporate basic robotics using the BBC microbit. Inspired by the satirical conspiracy theory “Birds Aren’t Real,” students will combine art, engineering, and media literacy to create interactive sculptures that respond to environmental input (e.g., sound, motion, or light). In computer class, students analyze misinformation and logical fallacies, then apply coding skills to design reactive behavior in their wooden birds. In shop, students focus on physical design, construction, and integration of circuitry.


What You'll Need

Computer Class Materials:

  • Computers
  • Microbit

It works best to have one computer and microbit per student, but students can work in pairs or rotate working with the electronic components.


Shop Class Materials:

  • Sketch Paper or Planning Worksheet
  • Pencils
  • Wood Materials
  • Pliers/Wire Cutters
  • Glue (Wood and Hot Glue)
  • Any hand tools you are allowing to be used in the activity – I restricted cutting and had students source shapes that worked from the scrap bin
  • Computers
  • Microbit – At least one per group
  • Copper Wire
  • Copper Tape
  • LED lights
  • Servos
  • Vibrating Motors
  • Paint
  • Any extra materials like feathers, googly eyes, etc.
  • Build a working model to share with students.


Learning Objectives

Computer Class Learning Objectives:

  • Students will understand how misinformation spreads.
  • Students will be able to use inputs to trigger responses in block-based programming.


Shop Class Learning Objectives:

  • Students will design and build a structurally sound 3D bird.
  • Students will plan and edit their designs through drawing and notation.


Shared Learning Objectives:

  • Students will be able to communicate media literacy through creative engineering projects.
  • Students will be able to apply design thinking and block-based programming to animate physical objects.
  • Students will be able to collaborate and creatively problem solve with peers while building and coding.


Curriculum Standards Met:


Visual Arts: National Core Arts Standards (NCAS)

VA:Cr1.1.5a: Combine ideas to generate an innovative idea for art-making.


Technology & Engineering: ITEEA Standards for Technological and Engineering Literacy (STEL)

STEL 4: Design in Technology and Engineering Education

  • Students use design processes to solve problems.
  • Students create and test prototypes.


Computer Science Teachers Association (CSTA) K-12 Standards: Grades 3–5

Algorithms and Programming:

  • 1B-AP-10: Create programs that include sequences, events, loops, and conditionals.
  • 1B-AP-15: Test and debug a program or algorithm to ensure it accomplishes the intended task.


CASEL:

Developing social-emotional learning (SEL) skills: collaboration, problem-solving, and critical thinking


Reflection

This is a fun coding activity that bridges three-dimensional sculpture in wood shop and media literacy studies in computer class. This was the 5th-graders’ first experience animating three-dimensional sculptures and Microbit, so I had students work in pairs. It was helpful for students to have a partner to troubleshoot with before reaching out for teacher support. It also helped to keep projects moving along in the event of student absences. 


The computer teacher and I reflected that it was crucial to co-teach as often as possible. Students required frequent teacher support in coding and wiring, and it was helpful to have multiple teachers present. 


This lesson can be modified to use different building materials (e.g., upcycled materials, cardboard, etc.) and different microcontrollers or robotics kits. 


Most projects met the assessment criteria listed below, though I did allow students to use non-sensor, button inputs on a case-by-case basis.


Assessment Criteria:

  • Completed sculpture that is structurally sound and has a working integration of Microbit
  • Effective use of environmental input and response
  • Clear narrative connection to the “Birds Aren’t Real” hoax
  • Evidence of planning and revision in sketches
  • Collaboration and creative problem-solving during building and coding


The Instructions

Lesson 1: Introduction & Concept Planning

In this lesson, students will develop an understanding of the project goals and parameters, make connections between their learning about misinformation in computer class and their sculpture work, and begin designing a bird that embodies key elements of the "Birds Aren’t Real" conspiracy theory. This is preceded by a lesson on misinformation and logical fallacies relating to the " Birds Aren't Real" Hoax. A free online lesson is linked in the materials below. Duration: 45 Minutes Location: Shop or Computer Class

Materials:


Procedure:


  1. Class Discussion & Brainstorm (10 min):
  2. Lead a discussion and record responses:
  3. What is the “Birds Aren’t Real” hoax?
  4. What arguments were used to convince people that the birds were fake?
  5. For example, birds charge on power lines, migrate to repair depots, and are used as surveillance drones
  6. Brainstorming Prompt (10 min):
  7. STUDENT INSTRUCTIONS: Write down three ideas from the hoax you could represent in your sculpture.
  8. Sketch (20 min):
  9. STUDENT INSTRUCTIONS: Choose one of your ideas and sketch what your bird sculpture will look like. Your sketch should include:
  10. Bird’s general shape and estimated size
  11. Physical bird details (feathers, beak, legs, etc.)
  12. Placement of microbit and response elements (LEDs, motors)
  13. Environmental input and output plan
  14. Equipment & materials list (e.g., copper tape, LEDs, servo motors)
  15. CLEAN-UP (5 min)


Computer Class Lesson 1: Intro to Coding with Microbit

Students will learn basic block-based programming using microbit tutorials at Makecode.Microbit.org. Duration: Two 45 minute classes Location: Computer Class

PREP:

  • Share the Microbit tutorial slides with individual students ahead of class.
  • Check that your students have access to the MakeCode website.
  • Pre-organize all hardware in labeled bags
  • Create your clean-up plan.


Materials:

  • Computers
  • Microbits with batteries and USB connectors


Procedure:

  1. Introduce the Microbit (Slides 1-3) (5 min)
  2. Show the board and identify the different parts:
  3. LEDS
  4. Buttons
  5. Pins
  6. Speaker
  7. Motion and sound sensors
  8. Power and USB ports
  9. STUDENT INSTRUCTIONS: (5 min)
  10. (Slides 4-5) Go to makecode.microbit.org and log in with your school email. You may need to set up an account. You will have two classes to complete three tutorials: Light Up, Clap Lights, and Blow Away.
  11. (Slide 6-7) Check off your progress in the table on the final slide of the Microbit Introduction slideshow shared with you through Google Drive.
  12. If you run into an issue, Troubleshoot in this order:
  13. 1) Double-check instructions,
  14. 2) Ask a peer
  15. 3) Ask the teacher
  16. Pass out Microbits, connection cords, and battery packs.
  17. STUDENT WORK TIME (30 min)
  18. CLEAN-UP (5 min)


TEACHER NOTES:

  • Most students completed these tutorials in two 45-minute classes. If students finish early, they can help others and test other tutorials.
  • Chromebooks have small screens, and often, students will miss steps because they have not scrolled through the tutorial steps, or they miss instructions while scrolling to find the “next” button.


Shop Class Lesson 3: Sculpture Build Sessions (2 Sessions)

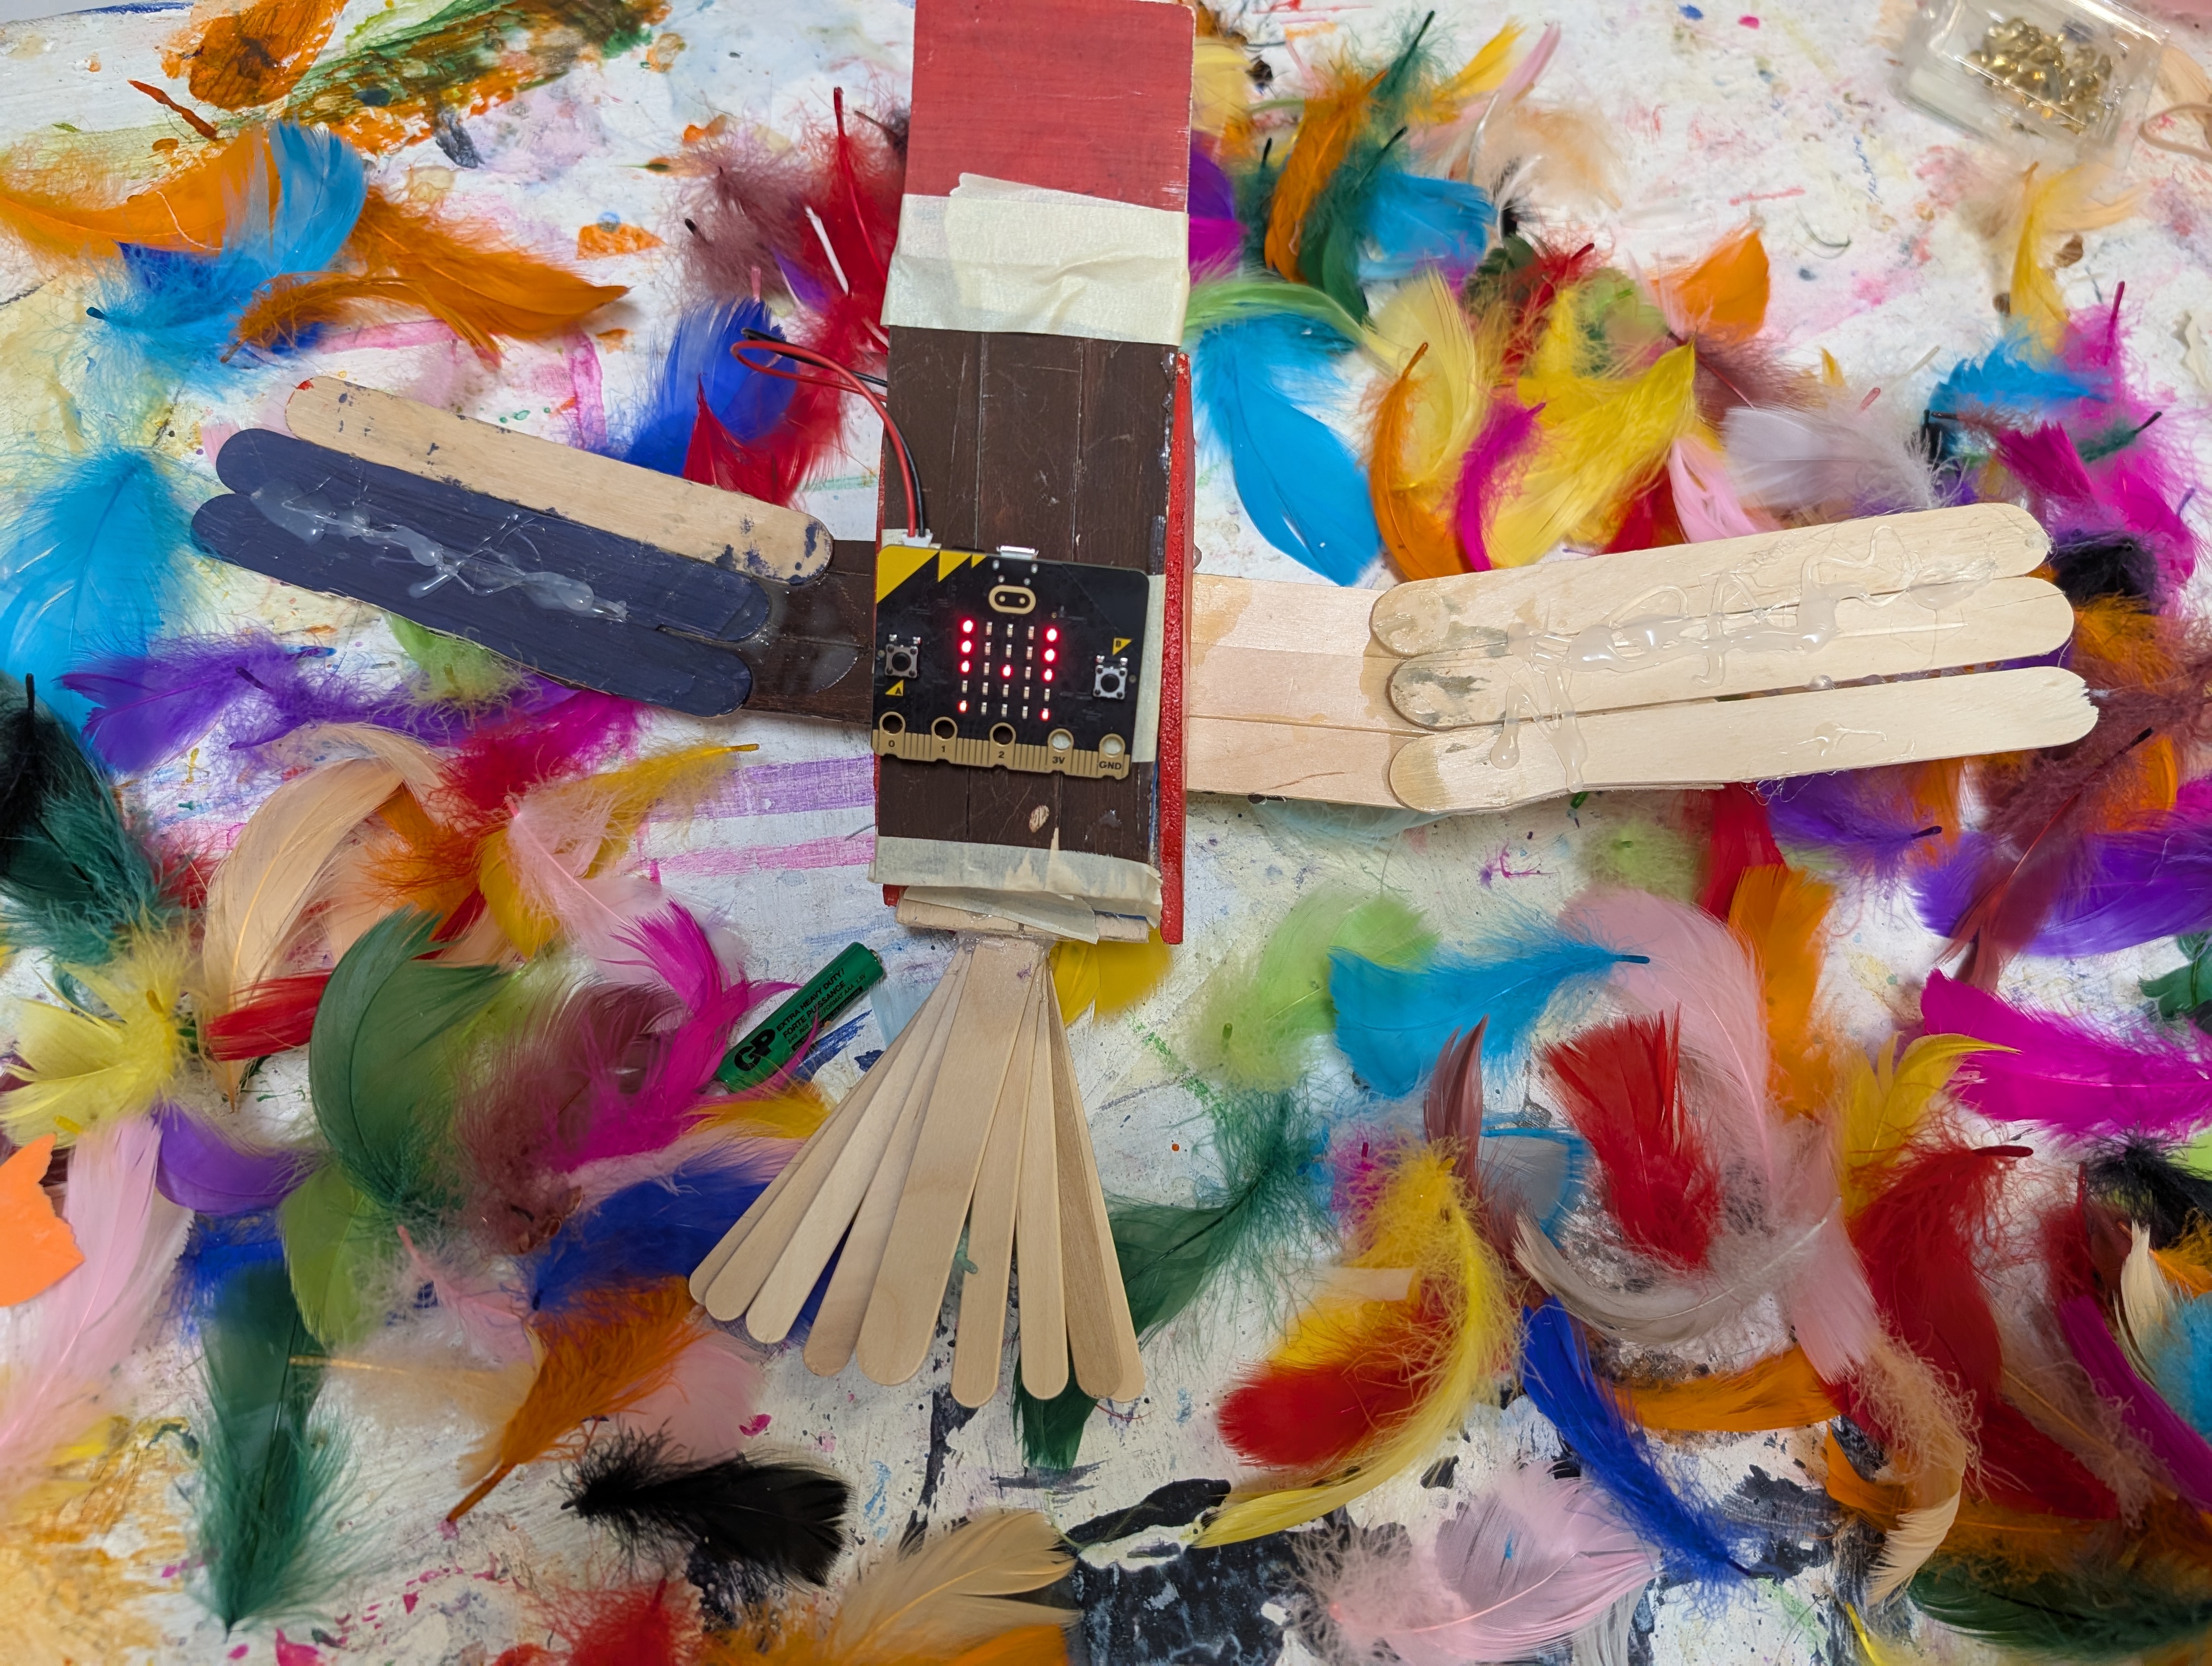
Students will construct 3D bird sculptures using scrap wood, being mindful of their design plan and leaving space to allow for future hardware integration. This will take (at least) two sessions. Duration: Two 45-minute Classes Location: Shop Class

PREP: Review each group’s drawing and leave feedback/questions, and prepare a supply of scrap wood and wood glue.


Materials:

  • Wood Scraps
  • Wood Glue (method for spreading – we use small containers and popsicle sticks)
  • Sketches/Planning Sheets


Procedure:


Session 1: Building

  1. STUDENT INSTRUCTIONS: (5 min)
  2. Use your sketch to begin building your birds. Use only wood scraps (no cutting without the teacher’s okay) and do your best to source pieces that fit your design. You are welcome to make adjustments to your design as you work.
  3. During this initial building period, only wood glue is allowed.
  4. You have two class sessions to finish building and painting the sculpture and any movable appendages.
  5. No wet materials may be used after these two classes to protect electronics. (You can extend the work period or set up a wet materials table.)
  6. WORK TIME (35 min)
  7. CLEAN-UP (5 min)


Session 2: Revisiting Sketches and Reworking Designs and Story Integration:

  1. INTRODUCTION (10 min): Today, you should work to finish building, integrating details that reflect the physical traits of birds, and paint your pieces.
  2. (Bring out the model.) This is my bird sculpture. I built a model whose eyes light up in response to loud sounds. (Change description to fit your model.) At this point, go over the wiring involved and how to think about the placement of the microbit.
  3. My bird has a story: Share a story that answers the three prompts students will incorporate into their designs today.
  4. Example: My bird sits on a branch overlooking a playground. Loud sounds from the playground trigger the bird’s surveillance mode to turn on, and its eyes light up when this happens.
  5. STUDENT INSTRUCTIONS: (5 min)
  6. On your planning sheet/sketch, answer the following questions:
  7. Scene: Where is your bird, and what is it doing?
  8. Input: What happens while it is there?
  9. Reaction: How does it react?
  10. Make any revisions to your sculpture design needed to fulfill your final design narrative. Adjust your materials and equipment list as necessary.
  11. WORK TIME (20 min)
  12. CLEAN-UP (5 min)


TEACHER NOTE:

  • Circulate and ask structural questions:
  • How will this stay upright?
  • What will the bird be attached to when displayed?
  • Do you want the microbit to be seen or hidden?
  • Copper tape or copper wire?
  • It’s helpful to hot glue LED lights before taping or wiring.
  • Guide problem-solving and reinforce the timeline.


Computer Class Lesson 2: Custom Code & Refinement

Students will write or adapt the Microbit tutorial code to fit the input and responses needed for their sculpture. This can continue to be worked on in future shop and computer classes. Time: 45 minutes Location: Computer Lab

Materials:

  • computers
  • microbits + cords & batteries
  • servos
  • LEDs
  • It’s helpful to have sculptures accessible.


Procedure:

  1. INTRODUCTION: (5 min)
  2. With your partner, write the code specific to your sculpture
  3. You may alter the code from the tutorials or build your code from scratch.
  4. Use the simulator on the left side to check that your code functions as you want.
  5. Download your code and test it to ensure that it works with LEDs and Servos as you go along.
  6. SERVOS: (5 min)
  7. Offer a quick introduction to angles for groups using servos. Other groups can begin coding.
  8. I projected the simulator on the board and we quickly noted how far the blade should move with different angle inputs.
  9. WORK TIME (25 min)
  10. CLEAN-UP (5 min)


TEACHER NOTE:

  • Offer coding help while reinforcing autonomy and pair troubleshooting
  • Designate students who have mastered a piece of the coding (scrolling messages, LEDs, servos) as helpers for groups experiencing issues.


Shop Class Lesson 4: Wiring the Birds

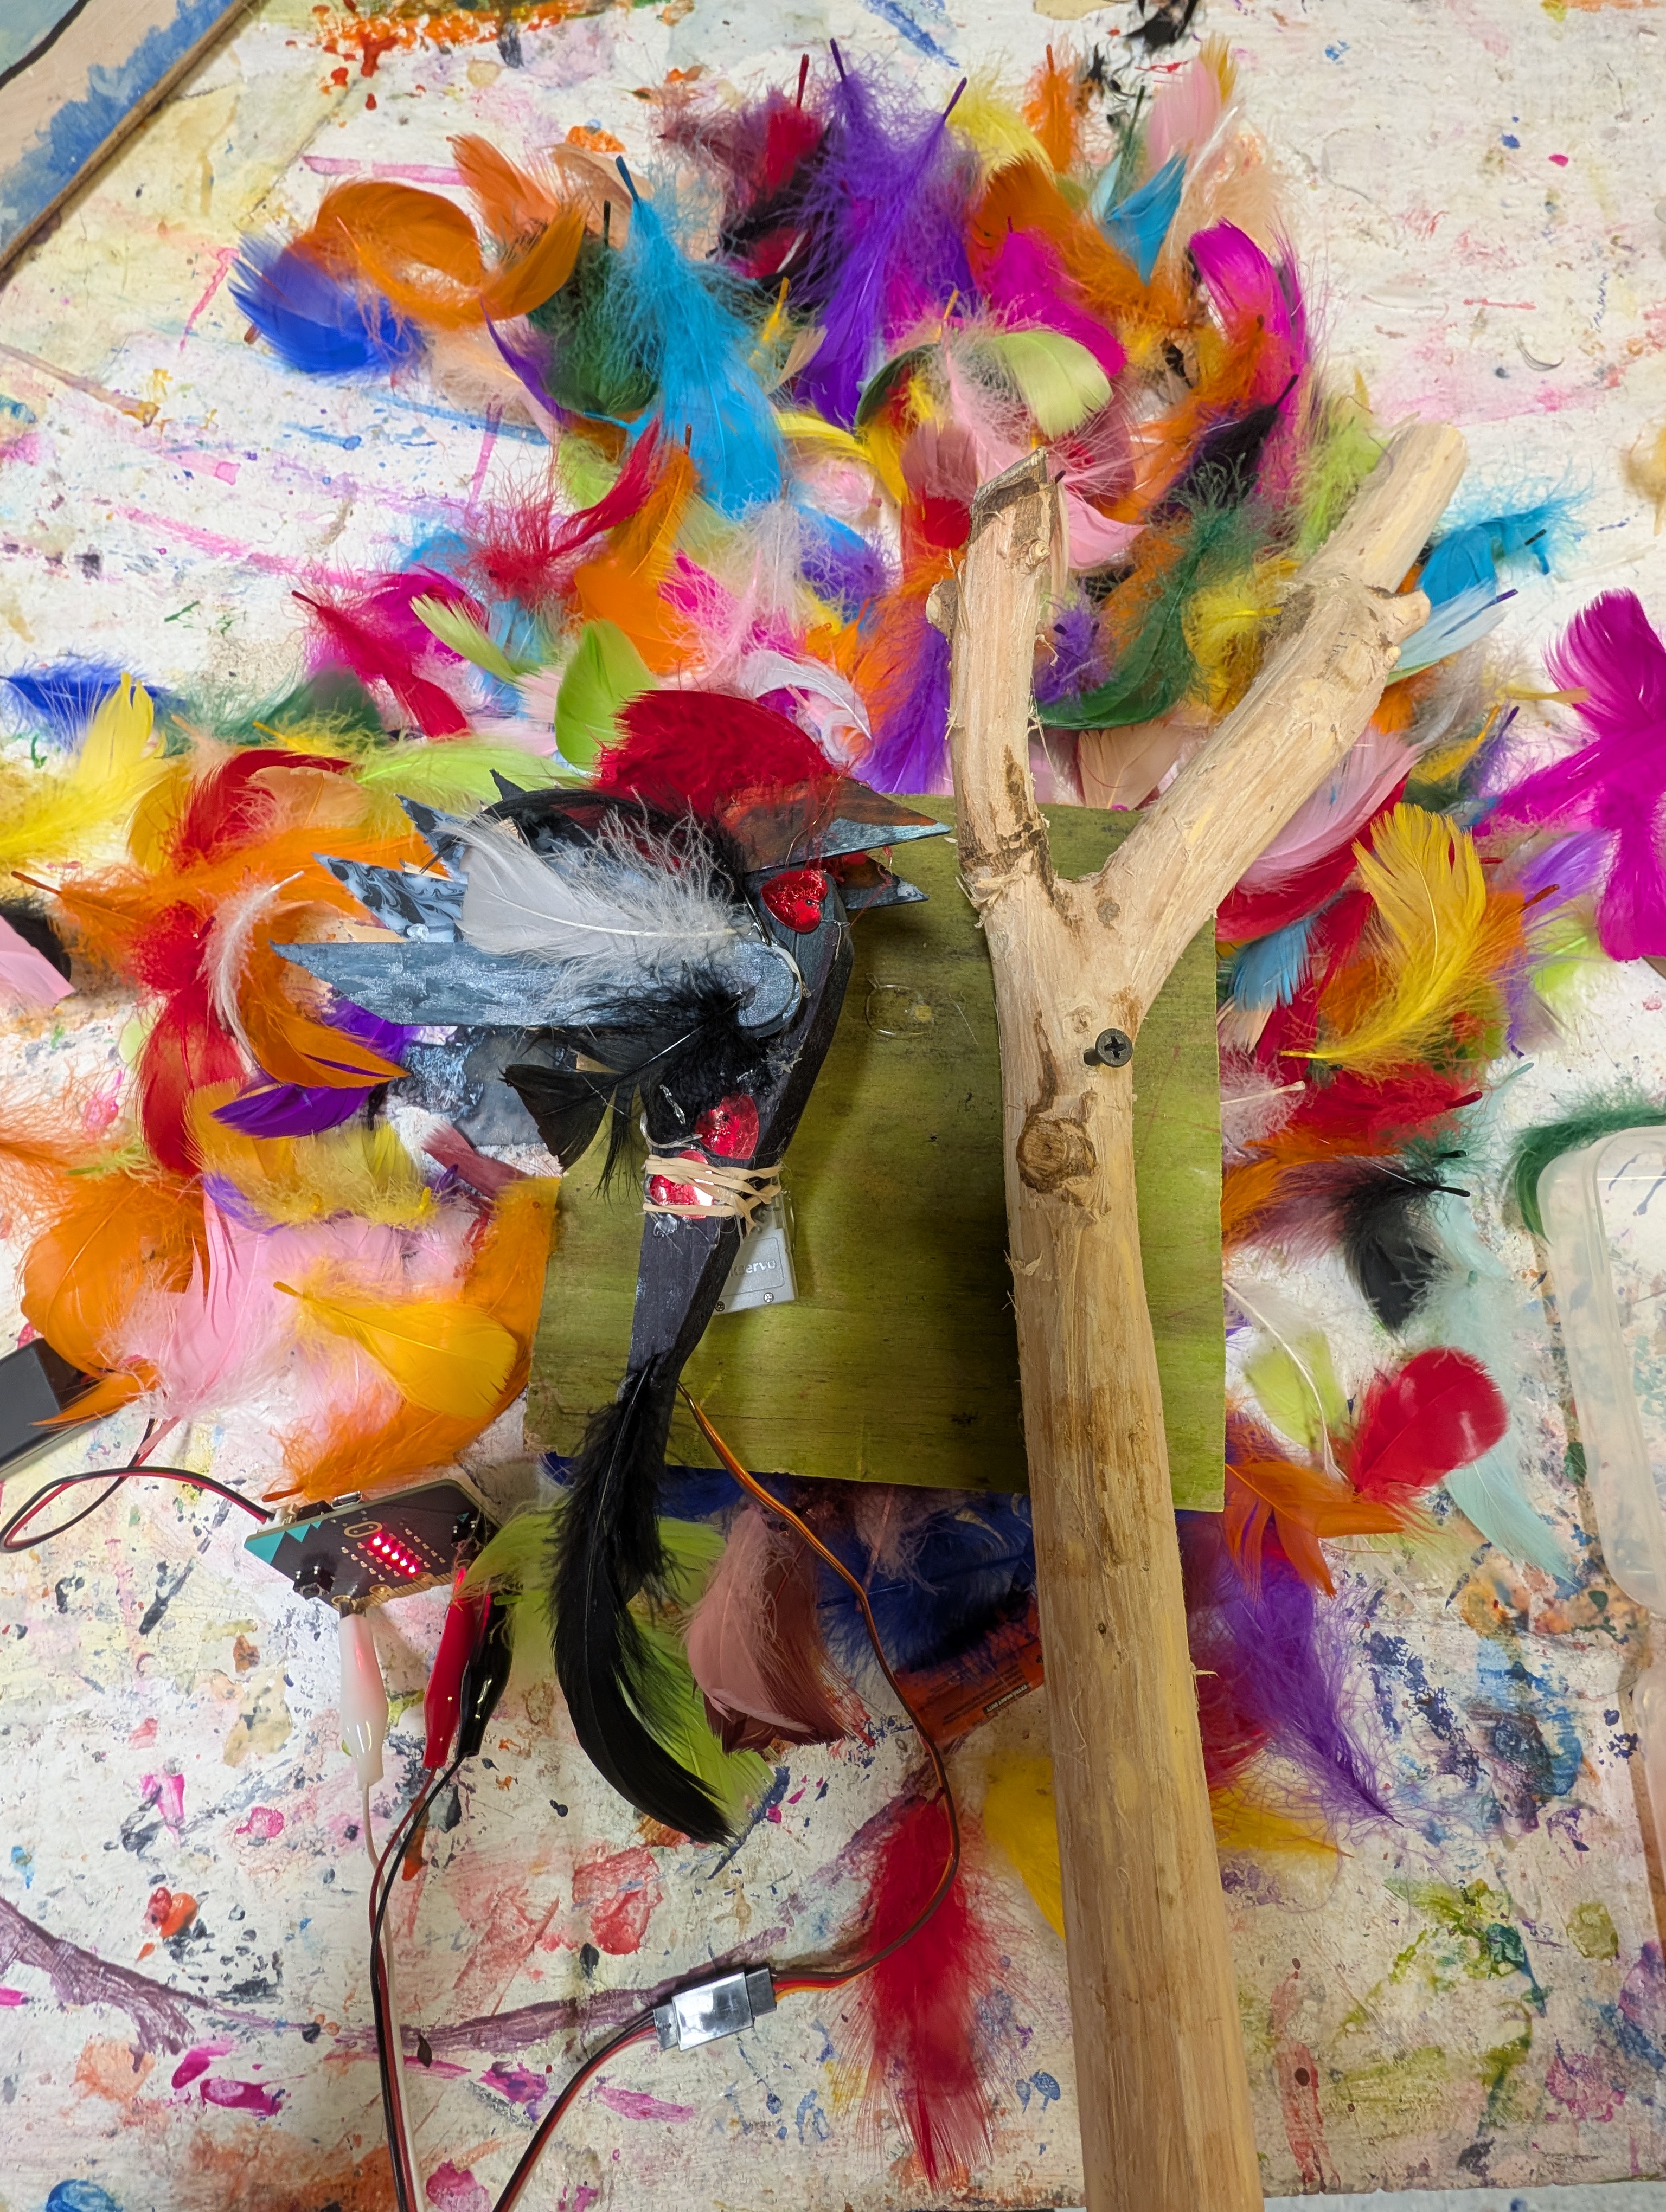
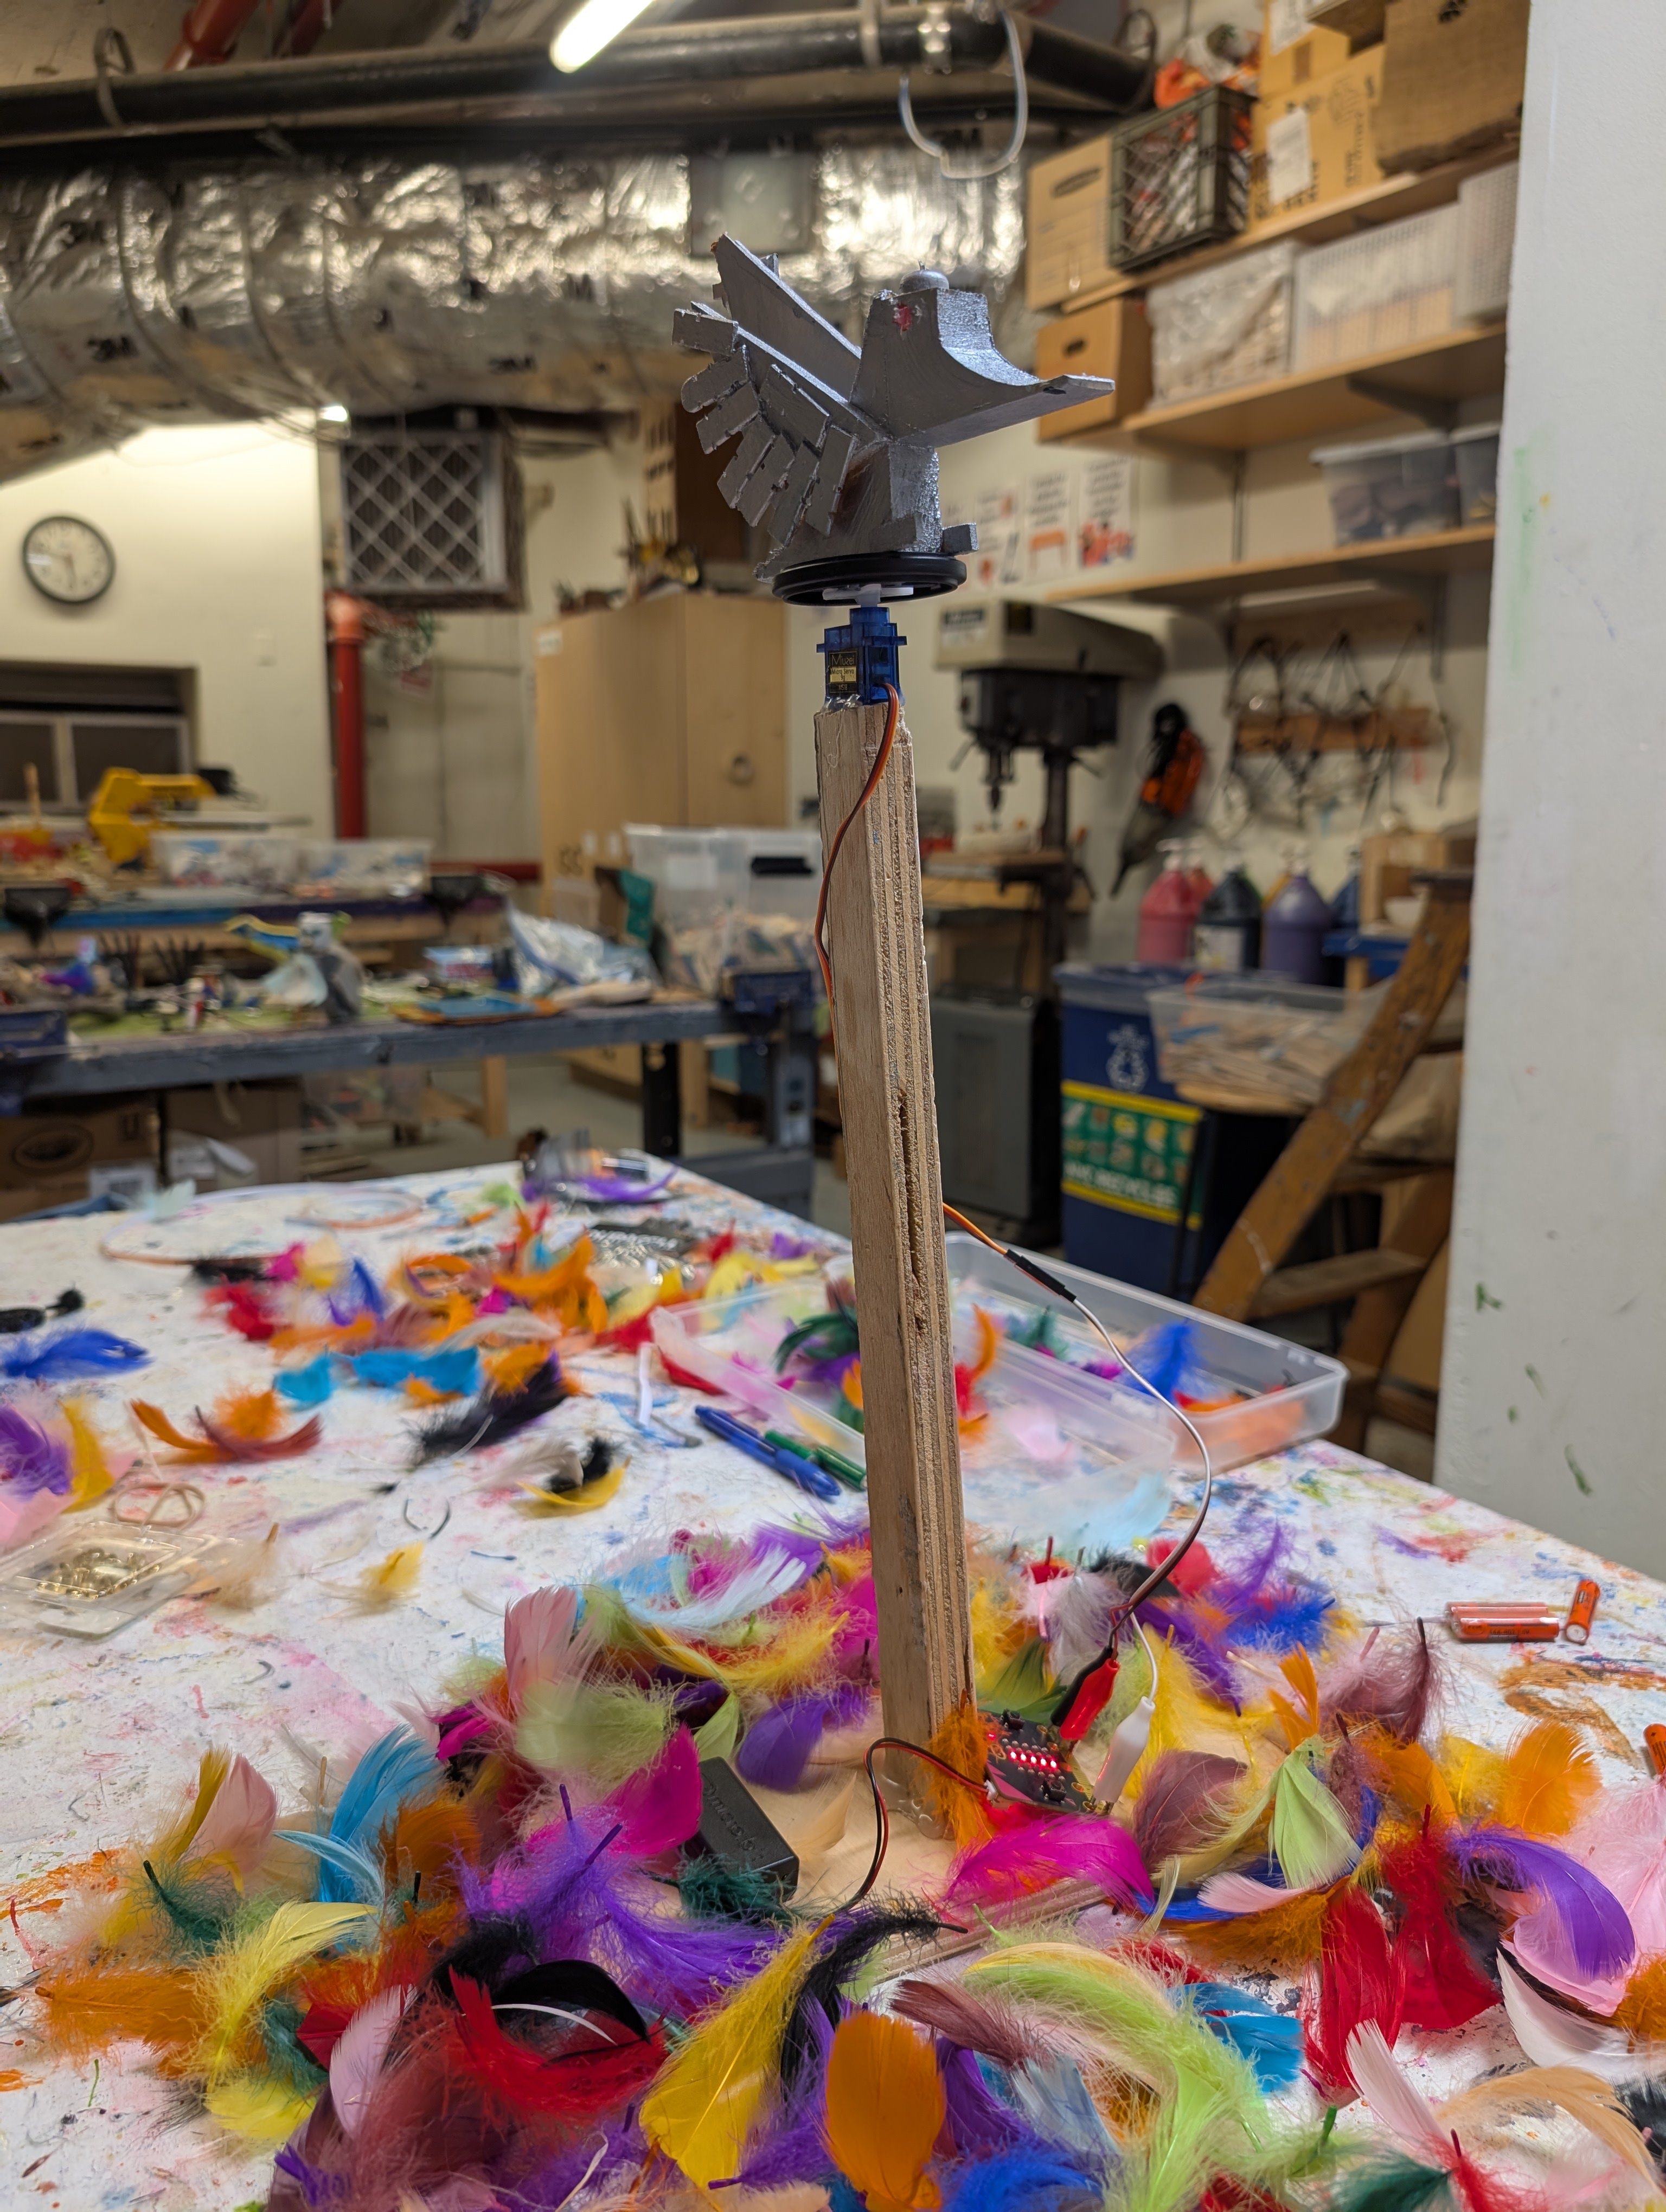
Students attach their microbits with downloaded codes and wire components to the sculpture. After birds are wired, they can be installed in a display. Time: Two 45 minutes Sessions Location: Shop Class

Materials:

  • sculptures
  • microbits + wires & batteries
  • computers
  • hot glue guns + glue sticks
  • Art materials for detailing (e.g., feathers)
  • planning sheets/sketches


Procedure:

  1. Demo Copper wiring from pins (10 min)
  2. Demonstrate how you wired it using copper tape
  3. show how to attach copper wire to pins and attach to copper tape or directly to LEDs
  4. Show points that can hot glue can be added to secure servos and LEDs
  5. WORK TIME: (30 min)
  6. Assist students in translating their diagrams into physical circuits
  7. Encourage logical wire placement and secure mounting of microbit
  8. CLEAN-UP (5 min)


Add Microbit to Sculpture!

Lesson Feedback

Contact us

Having trouble? Let us know by completing the form below. We'll do our best to get your issues resolved quickly.

"*" indicates required fields

Name*
Email*
This field is for validation purposes and should be left unchanged.
?