- Loading…
This project will show you how to make an earthquake shake table to simulate earthquakes at different frequencies. Connect the model with a microcontroller to measure and visualize the earthquake intensity in Mind+. Then you can build earthquake-proof structures and test out their seismic resistance.
Build & Test Earthquake Buildings | STEM Projects
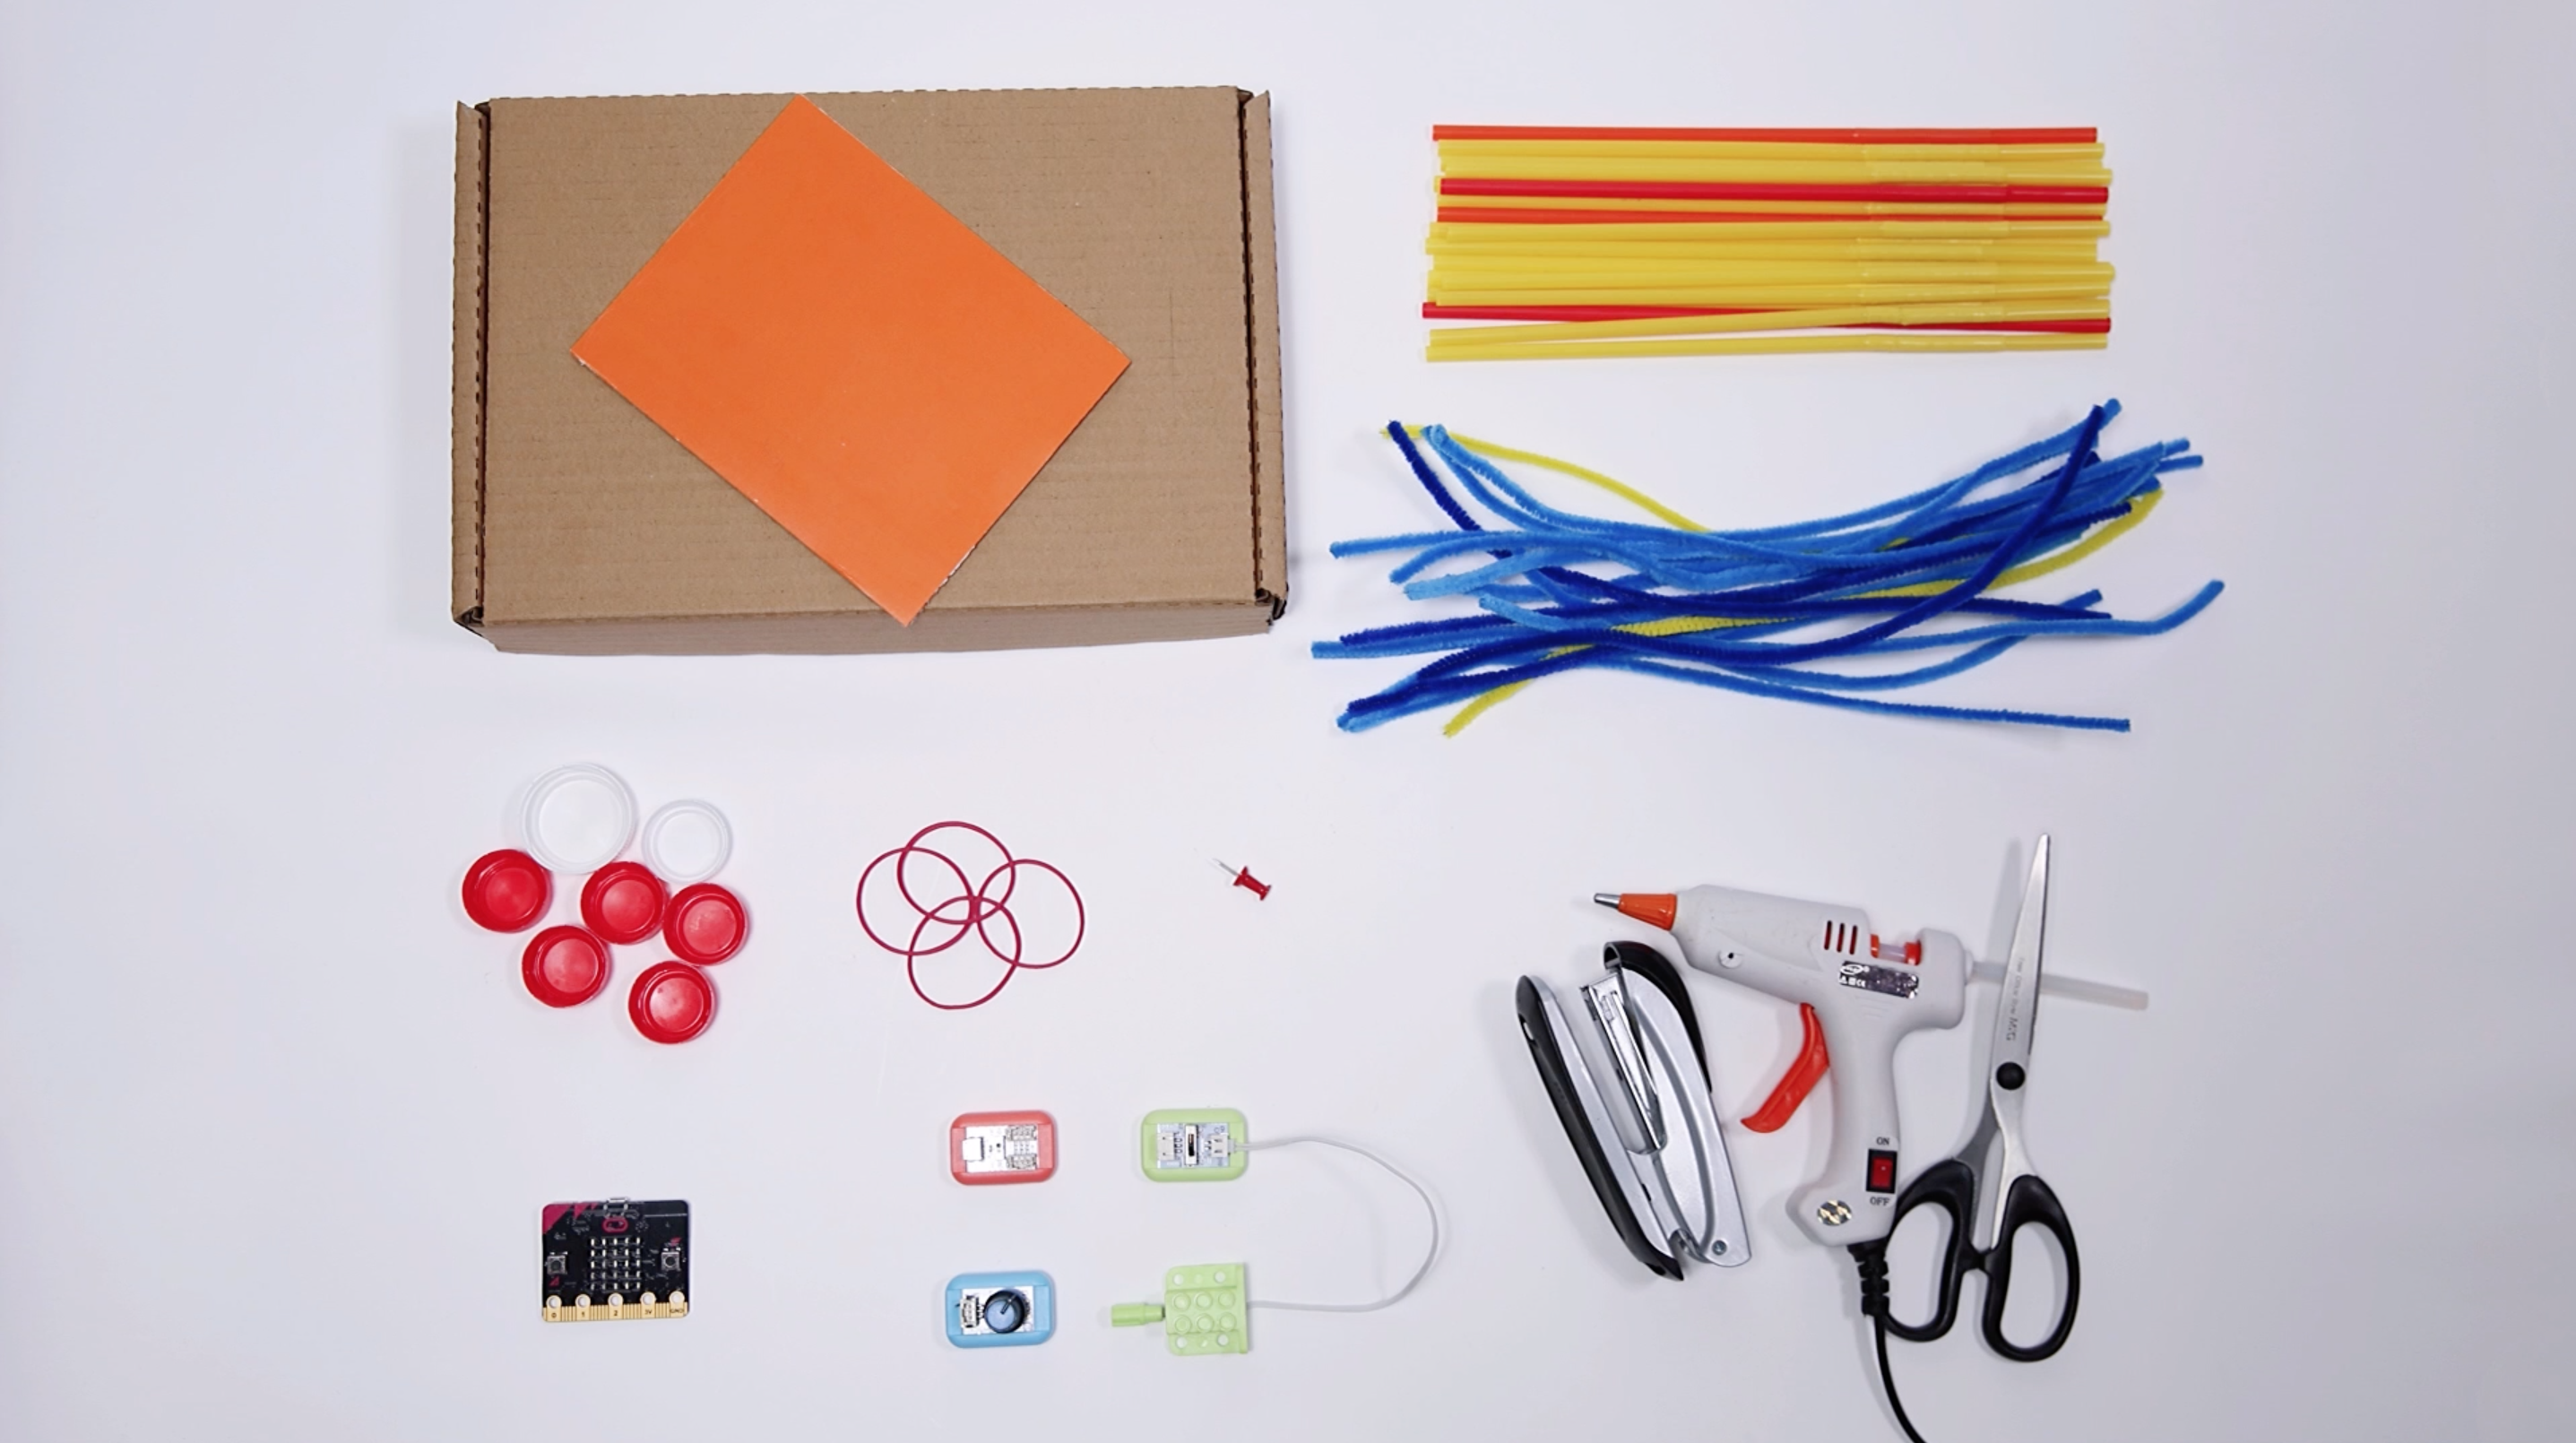
1 micro:bit
1 BOSON Mainboard 1IO
1 BOSON Rotation Sensor
1 BOSON Motor Controller
1 BOSON Geared Motor
Get the BOSON module pack: https://www.dfrobot.com/product-2461.html
Students will:
1. Value of Hands-On Fabrication (Traditional Craft Methods) vs. Potential Digital Enhancements:
The original lesson relies on accessible, low-cost craft materials (straws, pipe cleaners, bottle caps) and basic hand tools, which makes it highly inclusive for students with limited access to digital fabrication tools. This traditional approach excels at fostering fine motor skills, as students cut, bend, and assemble components manually—encouraging attention to detail when forming joints or securing connections. However, the tradeoff is consistency: hand-bent pipe cleaner joints or unevenly cut straws may lead to unstable structures, which can skew test data. A potential enhancement (if digital tools were available) would be standardized templates for joints or base components, but the core value of the traditional method lies in its simplicity and ability to let students focus on “making and troubleshooting” without technical barriers. The extra value of the original’s hands-on approach is that it demystifies engineering—showing students that complex concepts (seismic resistance) can be explored with everyday materials.
2. Expected Challenges and Solutions:
– Challenge 1: Students may struggle with programming or connecting the micro:bit to Mind+ for data visualization.
Solution: Provide pre-downloaded sample programs (as suggested in the lesson) and step-by-step visual guides for connecting hardware. Pair students with stronger tech skills as “tech helpers” to support peers, and limit the focus to basic data capture (rather than coding from scratch) to keep the activity centered on seismic testing, not programming.
– Challenge 2: Loose connections between straws and pipe cleaner joints can cause buildings to collapse during shake table testing, making it hard to compare seismic resistance.
Solution: Instruct students to twist pipe cleaners tightly around straw ends and add a small dot of glue to reinforce joints. Demonstrate how to check for stability before testing, and have extra materials on hand for quick repairs.
– Challenge 3: Abstract concepts like “frequency” and “acceleration” may be confusing for younger students (the lesson’s implied age range, likely 9-12).
Solution: Use concrete analogies (e.g., “low-frequency = slow, big shakes like a gentle swing; high-frequency = fast, small shakes like a vibrating phone”) and link data from Mind+ graphs to observable outcomes (“If the graph has big waves, your building shook a lot—its seismic resistance is low”). Avoid technical jargon and focus on “cause and effect” (e.g., “Adding diagonal braces made the graph waves smaller—so braces help!”).
– Challenge 4: The shake table may not vibrate smoothly if rubber bands are too tight or the motor connection is misaligned.
Solution: Test the shake table prototype before the lesson, and create a “troubleshooting checklist” (e.g., “Loosen rubber bands if the table sticks; re-glue the motor if it wobbles”) for students to reference.
3. Key Takeaways from Fabrication and Teaching:
This lesson reinforces that engineering is an iterative process—students will likely need to adjust their buildings (e.g., add more braces, reposition the suspended nut damper) after initial testing, which is a critical learning outcome. As an educator, the fabrication process highlights the importance of “constraint-driven design”: working with limited materials (straws, bottle caps) pushes students to be creative (e.g., using bottle caps as weights, rubber bands for flexibility). I also learned that the Tuned Mass Damper example (Taipei 101) is powerful—students connect the small-scale suspended nut to a real-world skyscraper, making abstract engineering tangible. A notable improvement for the lesson would be including a comparison of different structural shapes (e.g., rectangular vs. triangular frames) to explicitly teach how geometry impacts stability. Additionally, the shake table’s single-axis motion (X-axis) is a simplification of real earthquakes, which is appropriate for the lesson’s scope—but acknowledging this simplification (e.g., “Real earthquakes shake in multiple directions!”) helps build students’ scientific literacy. Overall, the lesson’s strength is its balance of hands-on making, data collection, and real-world relevance—proving that students can engage deeply with STEM concepts through low-tech, high-engagement activities.
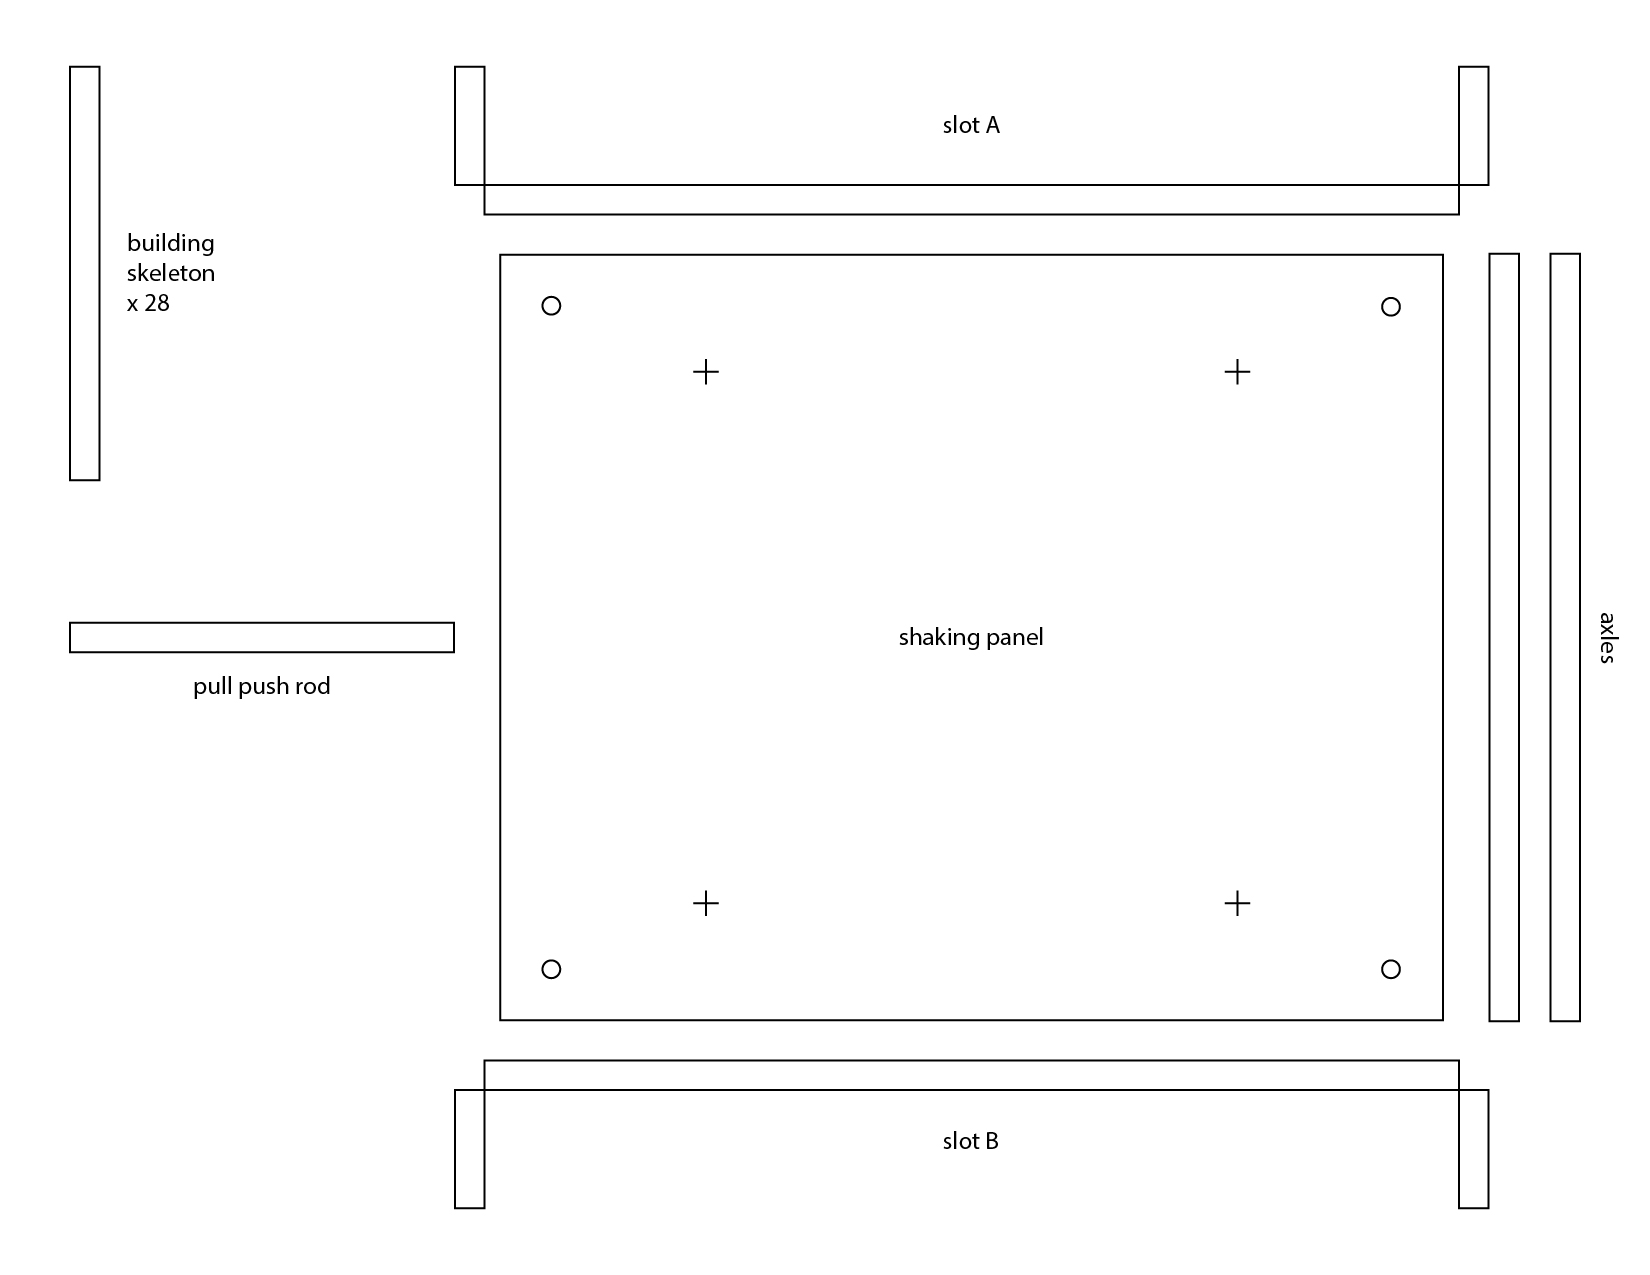
Please find the following steps by steps

Please find the following steps by steps


Measure the Earthquake Intensity
Fix the micro:bit on the top of the building, we can visualize the acceleration data from micro:bit to a data graph.
Download the sample program and open it in Mind+. Press the green flag to run the program, it will ask you to input the time you want the data to be captured. Then press the SPACE bar, it will generate a grid automatically. Press A to draw your first piece of data.
Compare Earthquake-Proof Resistance
Comparing two pieces of data on the same screen, it’s obvious to see how effective the earthquake-proof structure is. Press A to draw your first piece of data, when it’s done, press B for the second piece.


Having trouble? Let us know by completing the form below. We'll do our best to get your issues resolved quickly.
"*" indicates required fields