Centripetal Forces: 3D Modelling Banked Turns – SCOPES-DF

Lesson Details

Subjects *
Age Ranges *
Fab Tools *
Author

Author

Brady Snyder
Brady Snyder

Summary

  1. [PRIOR CLASS] Introduce circular motion, including the equation for centripetal force, mv^2/r
  2. Combine prior knowledge of forces on an inclined plane and motion in a circle.
  3. Provide assignment details, separate students into groups, and assign each group a velocity.
  4. Give students access to Shapr3D, if they do not already.
  5. Students complete assignment during provided class time (two periods) and for homework.
  6. Provide scaffolding for students, answering questions and providing guidance.
  7. Students print their designs using the school 3D printers.
  8. Set up marble launcher tubes at specific angles to get desired velocities.
  9. Test student curves using lab setup.


Designed for MEQ Secondary V Physics; meets Progressions of Learning in Dynamics (2c, 5, 7)

What You'll Need

  • Attached Slides
  • 3D Printer (preferably multiple)
  • CAD Software (Shapr3D, Fusion360, OnShape, etc.)
  • Mass balance
  • Marble apparatus (steel bearing marble, retort stand, claw clamp, PVC tubing, protractor, ruler)

Learning Objectives

The primary learning objective of this activity is for students to use real-world practical scenarios to establish concrete understanding of the relationships between different types of forces, and to observe the mathematical behaviour of circular motion on a track.


Secondary learning objectives include:

  • Engineering principles: precision and material efficiency
  • Basic 3D-modeling and 3D printing
  • Testing and iteration


Reflection

  • As I completed this lesson plan during March Break, I was not able to test with learners or colleagues. Instead I did a pilot test myself, and approached Gemini for feedback.
  • Iteration was a large impact on my feedback process. I developed multiple versions of the design before arriving at one that was reasonable, effective, and functional. In addition, I posed direct probing questions to the LLM to double-check my thinking was within reason.
  • Consulted an LLM audit of the lesson plan. The feedback highlighted that while the physical test is a strong summative assessment for the physics goals, the sustainability goal requires explicit documentation of material usage (e.g., slicer weight estimates) to be truly measurable. The feedback also suggested implementing a ‘Recovery Protocol’ for print failures to ensure that technical issues with the printer do not prevent students from completing their physics assessment.
  • I think that putting more focus on effective slicing and collecting information from the slicer is an excellent suggestion for minor improvement, and the estimated print mass can be compared afterwards to the actual measured mass.
  • I implemented SDG 12, Responsible Consumption and Production. I did have some difficulty brainstorming activities for Physics 11 that directly integrate with the Sustainable Development Goals, but my two primary foci in integrating SDG12 were on material use in production and in reducing tire wear at high speeds. Reducing the amount that a racing automobile needs to turn allows for much longer lifetimes for tires and less rubber pellets wasted on the road. This SDG is implicitly included, but not explicitly.


The Instructions

Introduce Banked Turns

Using the slides provided, give the class an overview of how centripetal force and normal force of an inclined plane can be combined to cause an object to turn in space.

Feel free to use the slides provided (1-12), physical demonstrations, and/or worked examples on the board for the following lesson.

  1. Review centripetal force. Using an example, calculate the centripetal force of the skier in a turn
  2. Reintroduce inclined planes and normal force. Remind students that normal force always extends outward from contact with a surface. If an inclined plane can push an object along the x-axis, it can do so in a circle.
  3. Derive the equation for ideal bank angle. Demonstrate how students can use their understanding of vector components to find the equivalent force required to equal an object’s centripetal force in circular motion. This allows for an object to turn in a circle without any added force.
  4. Discuss banked turns in real life. Ask students to reflect on why this is done in real life and how it can affect turning at high speeds.
  5. Discuss benefits of banking. Discuss with students the difference between a banked turn and a turn on a flat surface. What problems can arise when relying solely on friction for turning? How does banking alleviate those problems?


Introduce Assignment

Using the slides provided, give the students the details for the assignment. Give a brief overview of how chamfering works and some useful advice for effective design.

Separate students into groups of two or three.


Assignment Details:

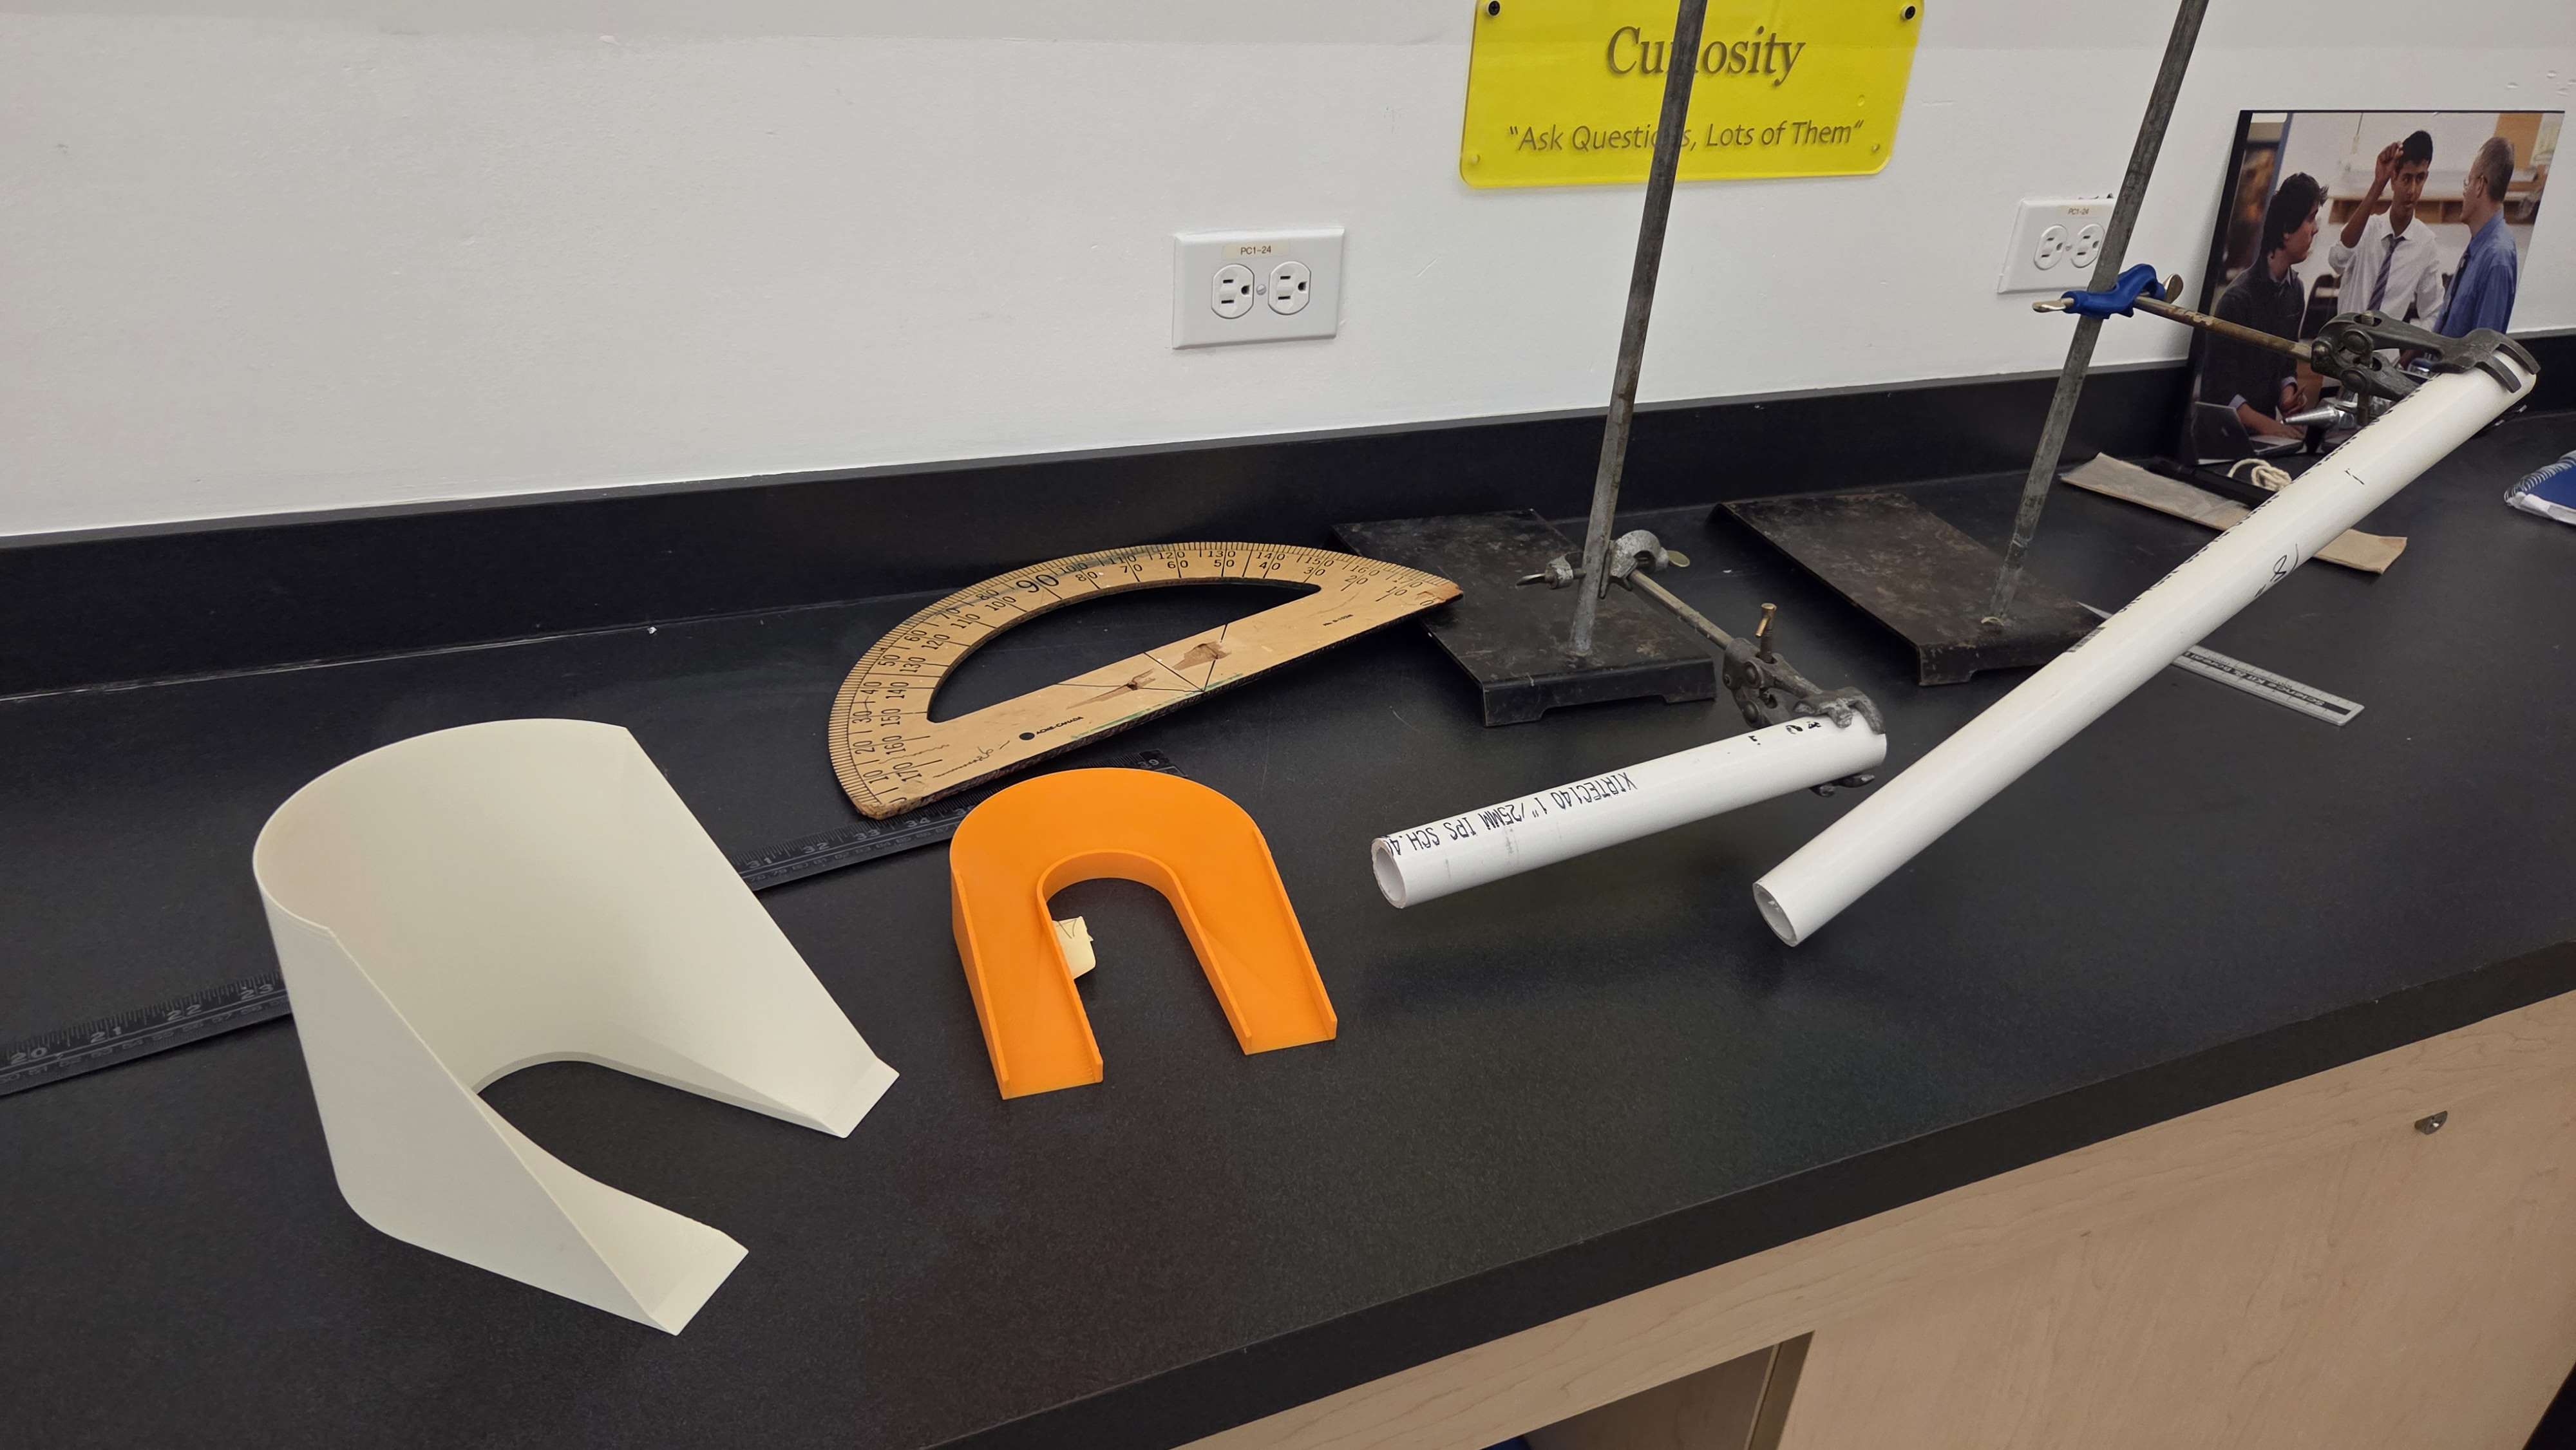
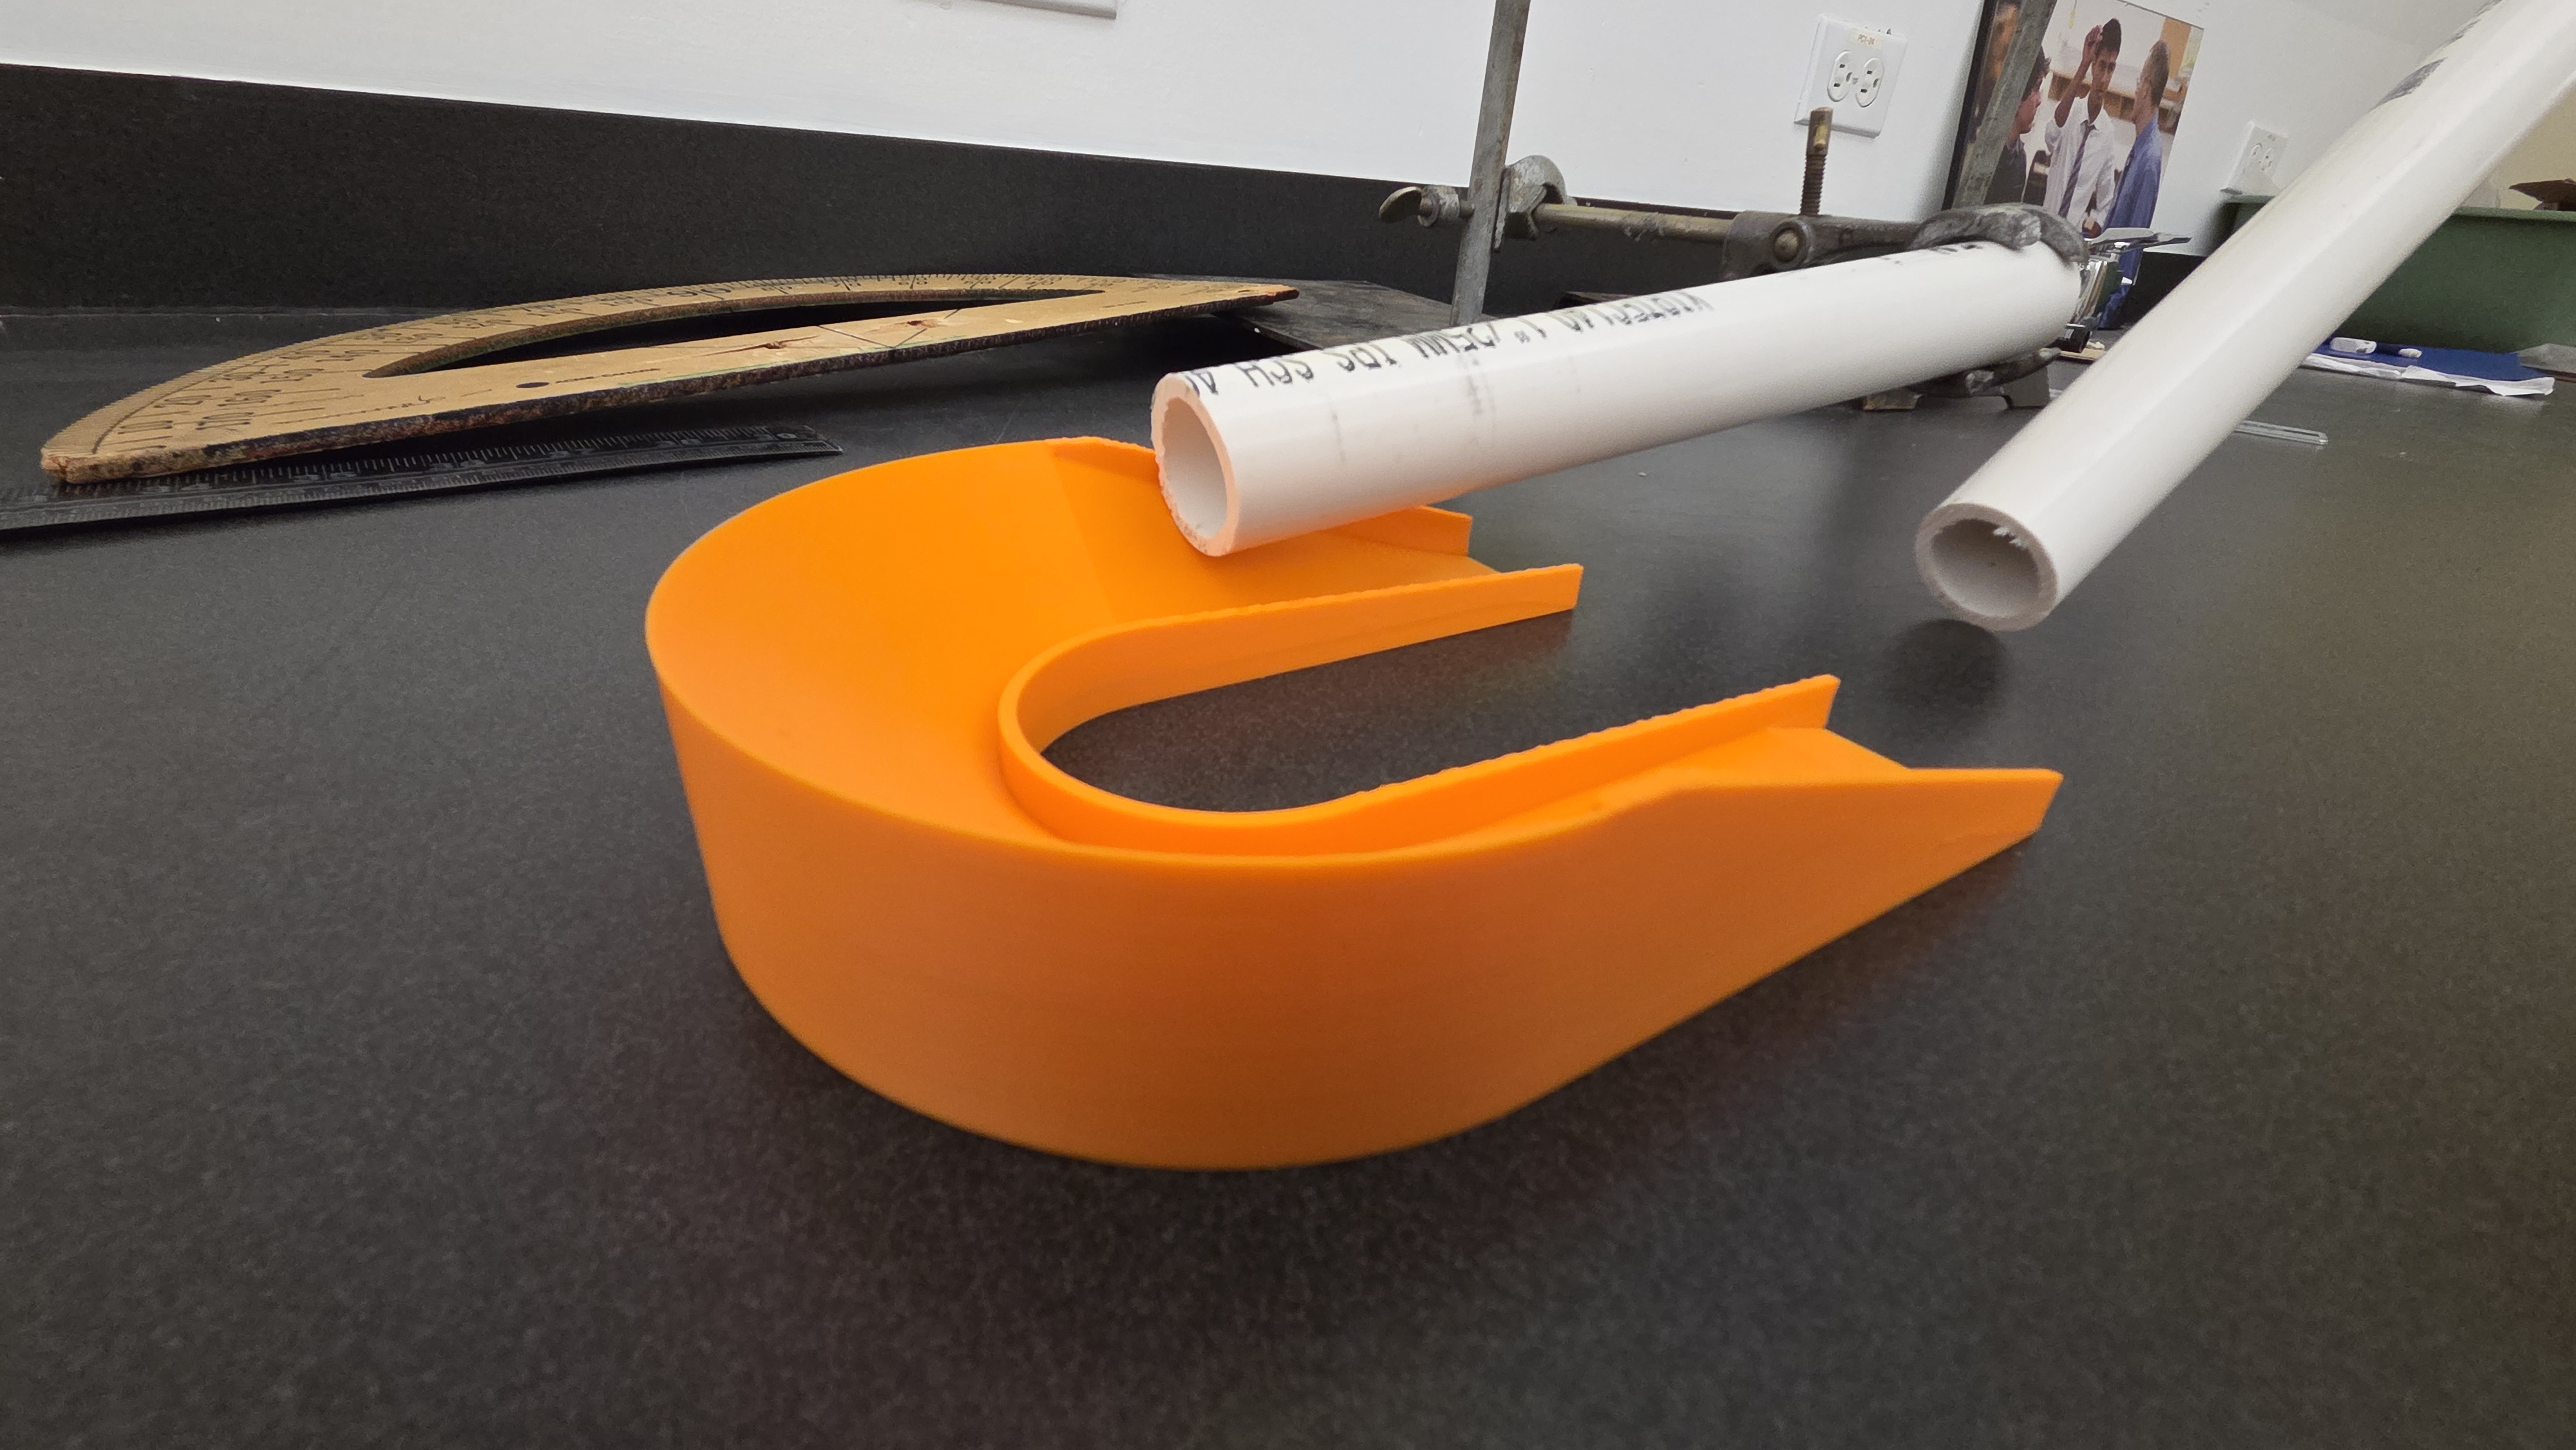
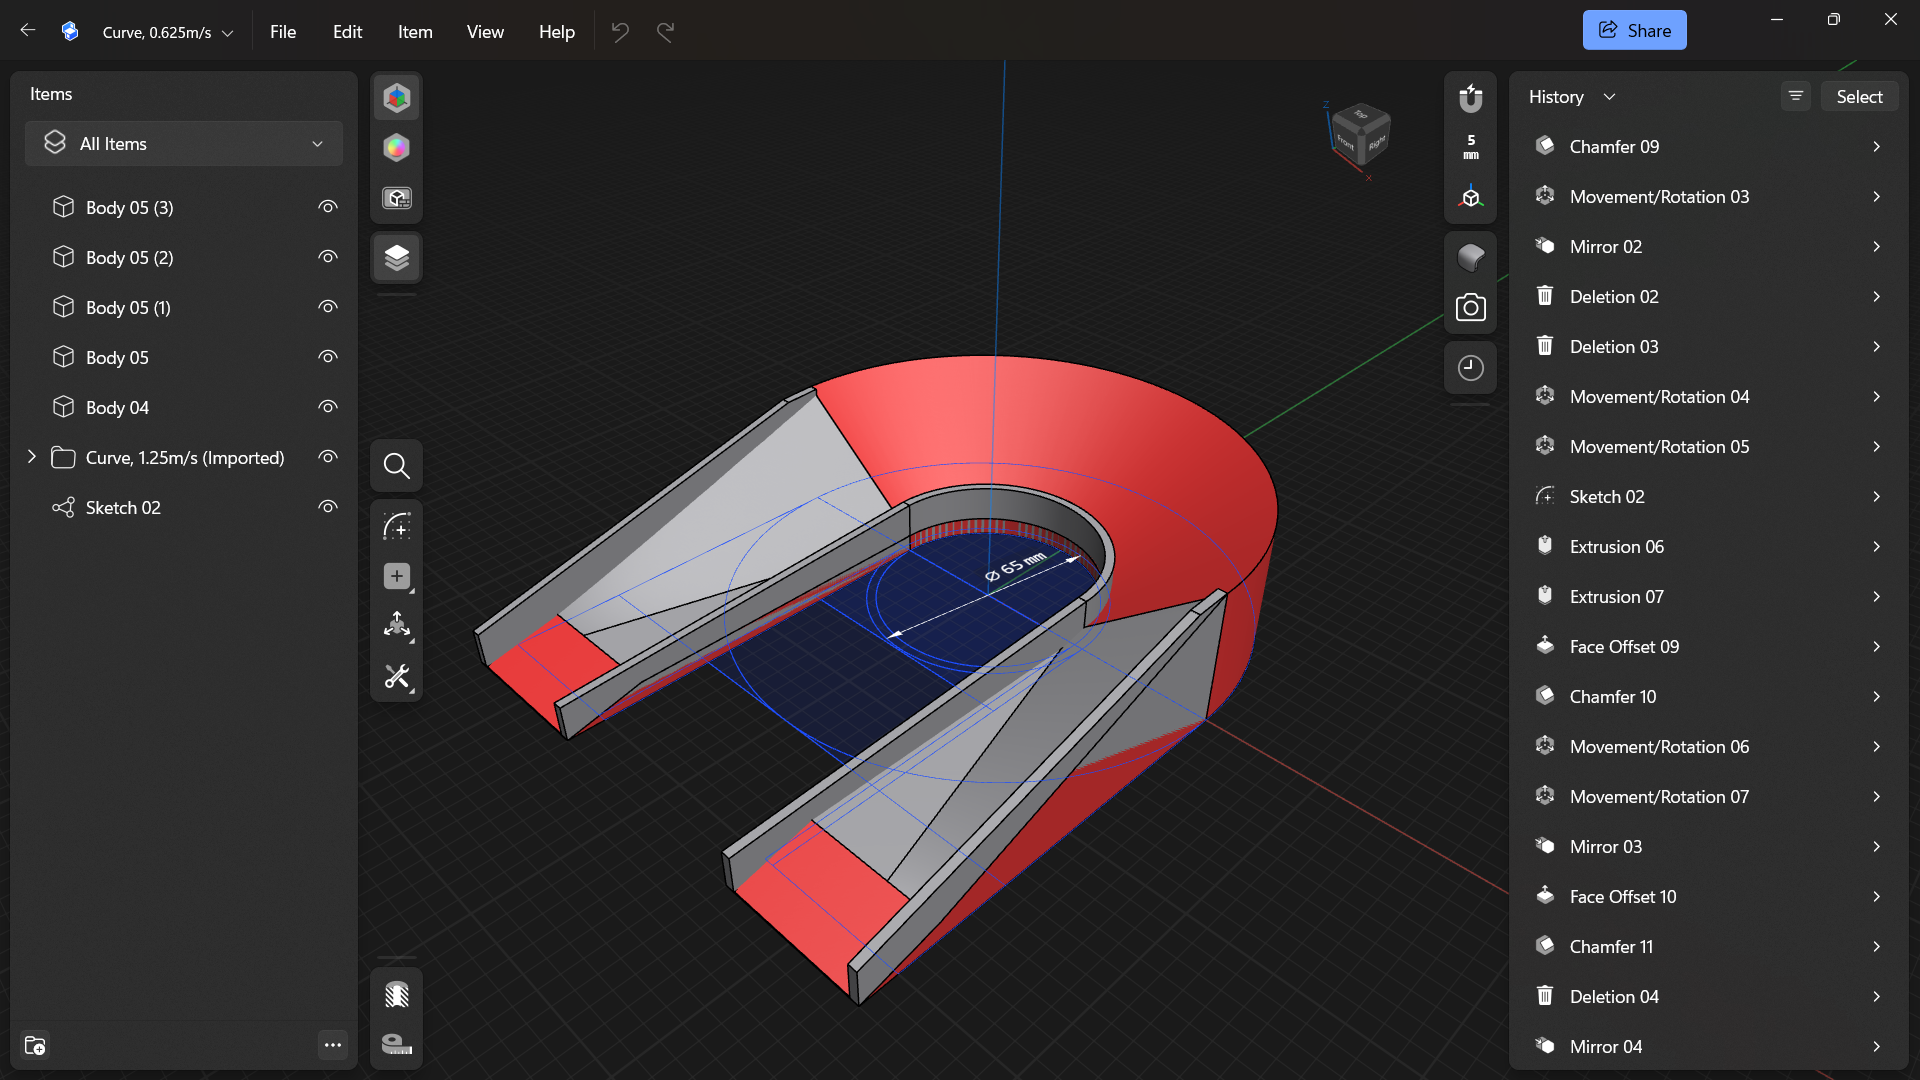
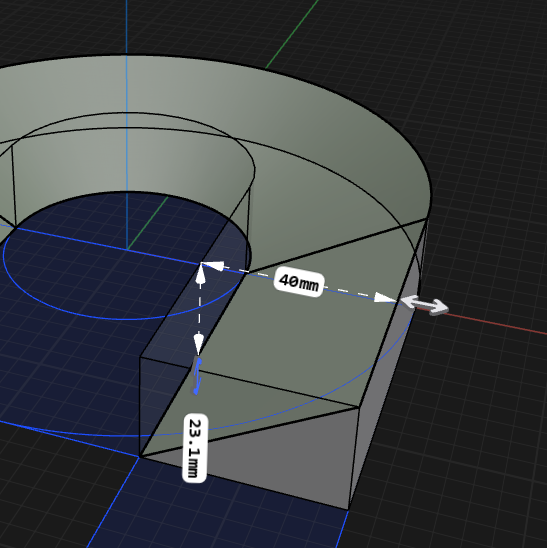
Your task is to design and 3D print a 180° turn that will allow a marble of a given velocity to travel down the middle of the track and turn all the way around.

  • I recommend a turning radius of 5 cm, but it can be whatever you’d like, so long as it fits on the printing bed (25.6 cm long ✕ 25.6 cm wide ✕ 25.6 cm high)
  • Each group will be given a different speed.
  • Combine your radius and speed to find the angle.
  • Think sustainably! When printing your designs, think about how the forces of the marble will affect the printed object. How can you reduce the material you use while still maintaining structural integrity?
  • The closer your marble stays to the centre, the better!


Recommended Velocity Range: 0.3 m/s – 0.7 m/s

This gives a range of angles between 10° and 45° within a turning radius of 5 cm.


Assessment Categories:

Design

Was your design built to the proper angle for your track?

Are the radius and height reasonable? Do you have an easy entry point for the marble?

To Submit: Your Shapr3D file or a technical drawing, your calculations


Efficiency

How much filament did you use? What infill level and what type of internal supports did you choose? Can your print support the force of the marble?

To Submit: A brief justification for your slicing choices (one or two paragraphs, discussing sustainability and integrity)


Testing

Does it work? Does the marble fly off the edge or roll down the ramp, or does it stick to the centre and travel all the way around?

To Submit: A brief discussion of your observations; explain what happened during your test. What could be improved?


After previewing the assignment, provide the link to Shapr3D. If students need a subscription, direct them to the link to a free student account.


One useful tool for this assignment is chamfering, particularly the 2-Distance Chamfer. Give students a demonstration or tutorial on how to effectively use this tool.

Student Work

Provide the students 1-2 in-class periods to work on this assignment. While they work, ensure that you are circulating the room to catch any student confusion or difficulty.

Provide the groups 1-2 in-class periods to work on this assignment. While they work, ensure that you are circulating the room to catch any student confusion or difficulty.

If a student is stuck starting, prod them with questions such as “what is the most important thing you will need to know in order to build this? how can you find that?”. Make sure they have access to the slides and can go back to the derivation and equation if necessary. Allow them to learn the intricacies of the CAD software on their own, but feel free to respond to specific questions that may arise about the program.


When it is time for students to print, remind them of the sustainability and efficiency criterion. How can they print this in a way that is both effective and not wasteful? They should consider layer thickness, infill support shape and density, and number of wall loops when slicing. If they are new to slicing, show them the basics of how to upload files to 3dprinteros and how to properly slice for the appropriate printer.

Testing

Test the students' designs

Give the students at least a week before testing, in order to give them time to print and iterate versions, if necessary.


When testing, set up an apparatus for each group. The height of the ramp tube should be approximated based on the kinetic-potential energy relationship (h = v^2 / 2g). For a 0.625 m/s marble, the tube’s end should be about 2 cm above the surface. Shallower angles allow for less energy loss at the transition from the tube to the curve.


Measure and note the mass of each group’s submission.

Run three tests for each curve, recording video of each test (ideally in slow motion for better visual analysis). Determine how closely the marble maintains its trajectory through the turn. If it rises up in the bank, it is travelling too fast for the angle, and vice versa if it falls down.


https://youtu.be/nV4AKZ408Qs

https://youtu.be/5rZDh4ZQsls


Have students submit their calculations and discussions.

Lesson Feedback

Contact us

Having trouble? Let us know by completing the form below. We'll do our best to get your issues resolved quickly.

"*" indicates required fields

This field is for validation purposes and should be left unchanged.
Name*
Email*
?