Circuit Exploration - SCOPES Digital Fabrication

Lesson Details

Age Ranges
Author

You need to login or register to bookmark/favorite this content.

Author

Ryan Moreno
Ryan Moreno
K-12 admin
Ryan Moreno is a father of 3, and Administrator/S.T.E.M. Educator at REM Learning Center. REM is an NAEYC accredited school focused on early childhood education and former Maker Corps Host Site in Miami Florida. Ryan earned a Ph.D. in Mechanical… Read More

Summary

Children are fascinated and engaged by toys that light up and move. This lesson is an example of how teachers can take advantage of this fascination by combining digital fabrication equipment and techniques with traditional craft materials to create an introduction to simple circuits. The students construct, tinker with, and explore the use of circuits to convert electrical energy into light or motion. Students are then challenged to use this circuit as the base for their unique creation of a toy or prop that lights up and/or moves.

What You'll Need

Materials List

  • Cardboard – We have found a steady stream of recycled cardboard in the form of large Domino’s pizza box tops which measure about 0.10 inch
  • Hot Glue
  • Jumbo Craft Sticks
  • 2032 Coin Cell Batteries, AA Batteries
  • 10mm LED Lights
  • Hobby Motor in the past we have taken apart dollar store electric toothbrushes but have settled on using these from Kelvin instead http://kelvin.com/project-motor-1-5v-3-0v/

Materials List

Digital Fabrication Equipment Details

Hardware
50 Watt Epilog Helix Laser Cutter bed size 24 x 18

Software
Vector design software for laser cutting Inkscape, and CorelDraw.

Design Files attachment:

The laser cutter .svg files can be found here: https://goo.gl/X26JqI

The Instructions

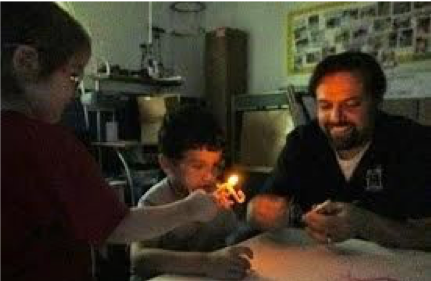
Step One: How Does Electricity Flow?

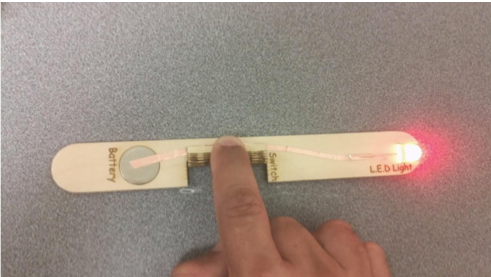
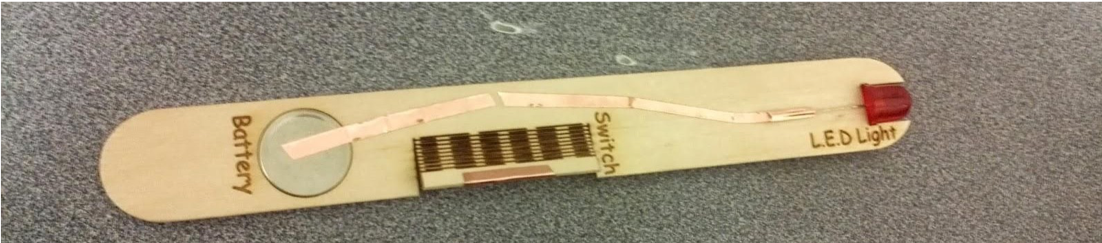
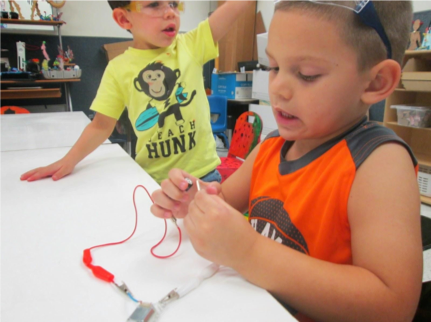
TEACHER NOTE: Before class, provide each student with components that can be used to make simple circuits (Batteries, L.E.D. Lights, Motors). Also provide students with familiar materials like cardboard and craft sticks that have been pre-cut using the laser cutter so that components can be press fit and easily connected.

Essential Question: How Does Electricity Flow?

  1. In whole class, hold up the coin cell battery and LED light first. Have students look closely at each component and ask questions like “What do you think these are?” and “Why do we use them?”
  2. Guide discussion describing how a battery is used to store electrical energy. How battery can be converted into other forms of energy like light when connected to the LED.
  3. In small groups, have students connect the LED with the battery and tinker with it awhile to see if they can make this conversion happen. If any groups are successful, ask them to share their strategy with the whole class.
  4. Introduce the laser cut cardboard triangle or craft stick. Ask students what shapes they see to encourage students to match the outlined press fit hole with the correct electronic component.
  5. Ask students if they can connect the battery to the light so that it will light up.
  6. The students should quickly notice that they must hold the legs to the battery to keep the LED light on. From the craft sticks, introduce the copper tape as a way of connecting the legs of the LED to the battery at the other end.
  7. Have students cut one side of the copper tape and make a switch by putting some copper tape on the end of the living hinge. Then, students can practice using the switch to turn the light off and on.


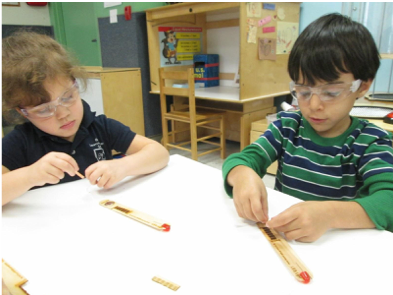
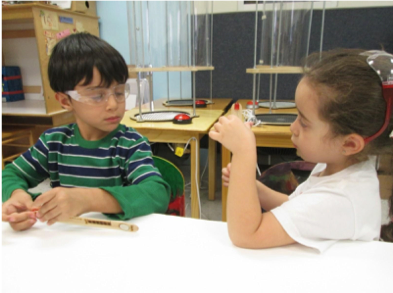
Step Two: Build Your Own Circuit

  1. Have students design light up props that use the simple circuit as a base.
  2. Guide students in discussion describing how a battery that stores electrical energy can be converted into other forms of energy like rotational motion when connected to a motor.
  3. Show students the triangular cardboard pieces with holes for press fitting batteries and motors.
  4. In small groups, have students look closely at the shapes and tinker with the components to see if they can get the motor to work. Have students share successful strategies.
  5. Guide students and give them time to press fit the components and connect the wires from the motor to the battery. When they do this and place the motor with the shaft touching the table, the whole thing begins to move and makes a buzzing noise.
  6. Give students the different parts that can be attached to the shaft of the motor. One example is hot glue sticks that have been cut into shorter pieces and have holes drilled in them. We also have pre-cut circles with holes drilled in them. Some of the holes are in the center, and others are off centered.
  7. Students take time to tinker with the different attachments and make different motions.

Extension: Have the students take apart a simple motorized item, such as a vibrating toothbrush.


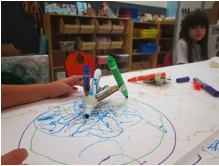
Formative Assessment: Give students the challenge to make a toy, or object like an art machine that moves, using the circuit they have made.

Lesson Feedback

One Response

  1. SCOPES-DF March 8, 2019
Load More