- Loading…

Online Unplugged lesson plan showing the wearable technology used by cyclist for safety, we will also introduce participant to the ways of building such technology using microcontrollers.
We will be introducing the participant to what we will do in the session, Also, we will break the ice in between to encourage them to interact.
1- We will start by an ice breaking question:
“What do you think about cycling safety”

2- Then we will mention the cycling as a general definition for them.

3- After that we will discuss the safety meaning and the advantages of making safety as a first priority.

4- Then we will mention the new technology equipment’s that have been used lately in the field of cycling.

In this section we will show the participant what we will do today as reflection for the reality of equipment's and applications we have in reality.
1- We will be making a circuit for a signal indicator for cyclist applications.

2- We will show also the video that shows the application we want to build.
3- Then we will ask the participant about if they have built a prototype before to know their background in design and coding.

In this step we will discuss the hardware we need to build this circuit, and we will show them some samples of this hardware.
1- We will show the full list of hardware we need to build this circuit.

2- Then we will start discussing each hardware a side.
3- We will start by discussing the Microcontroller as the main module that is going to control the whole circuit.

4- Then we will discuss the RGB LED’s, as device emits light which work by combining the three colours to hue more than 16 million of colour.

5- Then we will briefly explain the push button.

6- At the end we will discuss the transmitter and receiver, and we will mention the IR type which works by emitting infra-red light to transmit data.

In this section we will mention the codes we need to build and the instructions we have to have in our code, so our circuit will work perfectly.
1- We will explain what is meant by coding to the participant, and we will try to discuss the different languages we have.

2- Then we will mention the types of coding used like the text coding and the block coding and what we are going to use today.


3- Then we will show the participant a video regarding programming.

4- Then we will discuss the If statement as an important function to have in any code.

In this section we will show the participant how we will build the circuit step-by-step, Also, we will show the participant and explain to them some functions and loops.
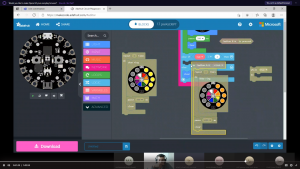
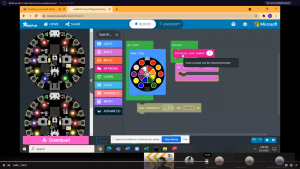
1- We will build our circuit on the Adafruit platform using block coding.

2- We will show them how to access the workspace by pressing on new project.

3- We will start by explaining the difference between the on start loop and the forever loop as “on start loop are going to be executed once” and “forever loop are going to be executed as long as the microcontroller is working”
4- Then we will let them build an on start loop to initiate the Microcontroller as an animation shown at the start.
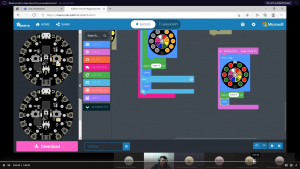
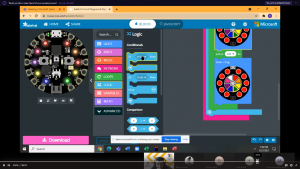
5- Then we will start explaining that we want to send a number to the other microcontroller using the IR transmitter and when received the other Microcontroller should animate a signal to the right or left depends on which push button I have pressed.

6- Then we will explain to them that we will have a transmitter side and a receiver side.
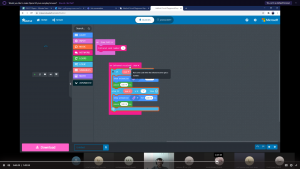
7- The transmitter will have the send function and the receiver will have the on received function.
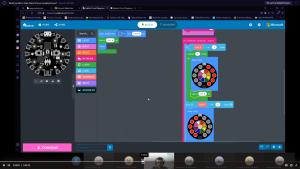
8- Then we will explain to them that when we push the button “A” I will be sending a number, this number is an address to play a specific animation on the receiver side.
9- So by doing this we are explaining to them the on button function which is equivalent to “IF Pressed”.

10- Then we will show them how to build the code.


Having trouble? Let us know by completing the form below. We'll do our best to get your issues resolved quickly.
"*" indicates required fields