- Loading…

In this program, participants are going to learn how to develop a mobile application to display two collections (winter & summer) of their own designs. They will also design some unique products to be displayed in the app.
-Computer.
-Internet connection.
-Thunkable platform.
https://thunkable.com/#/
Participants will be introduced to the concept of digital fashion and how digital fabrication can be used in fashion design. They will also discover the Thunkable platform and design the user-interface of the application.
Presentation:
1- Who are we and what we do in Studio 56.
2- Intro to Microsoft Teams interface.
3- Introduce the client letter.
4- What is the meaning of Fashion?
5- The combination of Fashion and Technology.
6- Examples of Digitalized fashion products.
7- The meaning Mobile Applications.
8- Types of Mobile Applications.
9- What is paper-based prototyping.
7- Introduction to the Thunkable platform.
8- What we will be doing today.
Prototype:
1- Explain the UI of the Thunkable website and the structure of the platform.
2- Explain how you can add multiple screens to the application.
3- Explain how you can add different components to the screen and edit them.
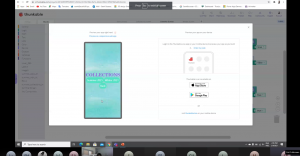
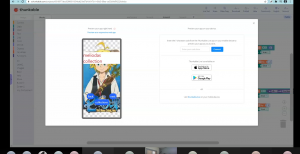
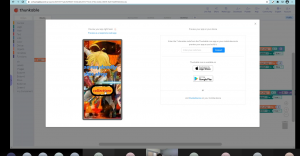
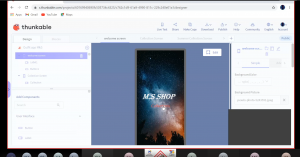
4- Design the first screen (Start screen).
•Add label and button components to the screen.
•Edit the components to suit the theme of the application.
•Add background image.
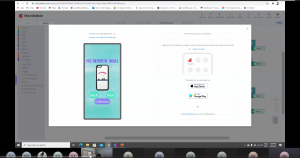
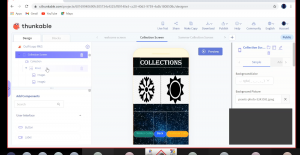
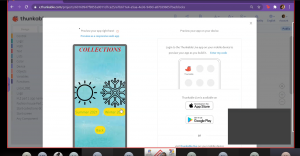
5- Design the second screen (Collections screen).
•Add and edit buttons, images, labels.
•Add background image.
•Search for icons/images.

Participants will continue designing the screens of the application. They will also start designing their own customized clothing products.
Presentation:
1- Overview on what was done on Day 1.
2- Video about 4D printing.
3- What is the meaning of User-interface design.
4- What we will be doing today.
Prototype:
1- Design the third screen (Summer screen).
•Add label and button components to the screen.
•Edit the components to suit the theme of the application.
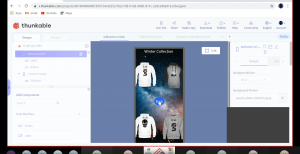
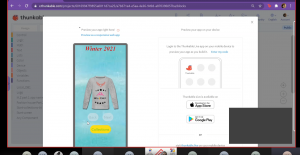
2- Design the fourth screen (Winter screen).
•Add and edit buttons, images, labels.
•Add background image.
3- Introduce the Spreadshirt platform and how it works.
4- Explain how you can make customized products and save them.
5- Explain that they will be designing two different collections (summer and winter), each with 1 product.

Participants will design two collections of outfits for their fashion house, winter collection and summer collection. They will use the Spreadshirt platform to design their own outfits. They will also add a database to their application of the different products.
Presentation:
1- Overview on what was done on Day2.
2- Introduction to Spreadshirt platform.
3- Design a customized product and search for unique products in the field of Tech-fashion.
4- What is the meaning of a Database.
5- How to add a database to the application.
6- What we will be doing today.
Prototype:
1- Overview on the Spreadshirt platform.
2- Design the outfits of the summer collection.
•Design the product.
3- Design the outfits of the winter collection.
•Design the product.
4- Search for tech-fashion products for the 2 collections and save the pictures.
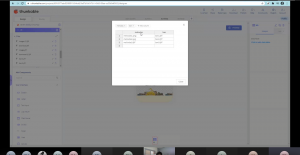
5- Add a database component to the application.
•Add two columns (summer, winter) to the database.
•Add three rows to each column with the images of each collection.
•Upload the images to the application.

Participants will use block coding to program the application to take certain actions based on the user requests.
Presentation:
1- Overview on what was done on Day3.
2- What is the meaning of Coding.
3- Discuss the existing programming languages and their uses.
4- Explain the meaning of Variables and Functions in the coding field.
5- What we will be doing today.
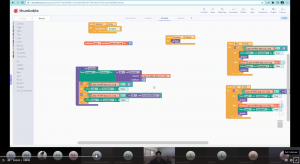
Prototype:
1- Program the first screen (Start screen).
•Navigate the user to the collections screen when the button is pressed.
2- Program the second screen (Collections screen).
•Navigate the user to the summer/winter collection based on the pressed button.
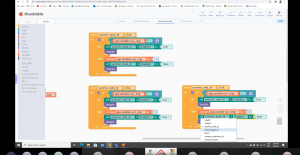
3- Program the third screen (Summer screen).
•Program it to update the image component constantly when the user press on either “Back” or “Next” button.
•Program it to read the correct image from the database and display it.
•Program the “Collections” button to navigate the user to the Collections screen.
4- Program the fourth screen (Winter screen).
•Program it to update the image component constantly when the user press on either “Back” or “Next” button.
•Program it to read the correct image from the database and display it.
•Program the “Collections” button to navigate the user to the Collections screen.

Participants will test the final application, fix any issues, and share their final prototype with others.
Presentation:
1- Overview on what was done on Day4.
2- Discuss what was learned during the past week.
3- Video about PolyJet technology and how it is used in digital fashion.
4- What we will be doing today.
Prototype:
1- Run the application on the phone.
2- Test if the app is fully working.
3- Fix any problems found.
4- Ask the participants to share their prototypes with others.
5- Discuss what they have learned during the five days.

Having trouble? Let us know by completing the form below. We'll do our best to get your issues resolved quickly.
"*" indicates required fields