DIY Biomaterials with Acorn Flour - SCOPES Digital Fabrication

Lesson Details

Age Ranges
Standards
Fab-Safety.2

You need to login or register to bookmark/favorite this content.

Author

Jean-Luc Pierite
Jean-Luc Pierite
Maker
Originally from New Orleans, Louisiana, Jean-Luc now resides in Jamaica Plain. Prior to his election to the North American Indian Center of Boston Board of Directors, Jean-Luc was also elected to the Community Linguist seat of the Advisory Circle for… Read More

Summary

How can we elevate knowledge about local ecosystems through experimentations with DIY biomaterials?


In this lesson, we will explore the creation of a collection of DIY biomaterial samples following these steps:

  1. Identify and map plants in the local ecosystem.
  2. Research documented applications for materials identified.
  3. Harvest samples for processing. We use the example of red oak acorns.
  4. Document processing of samples towards DIY biomaterial production.
  5. Modify a base recipe and document results.
  6. Ask questions for further experiments.


*NOTE* The time required for this lesson:

  1. Week One – Exploration and Harvesting
  2. Weeks Two & Three – Processing materials
  3. Weeks Four & Five – Material experimentation, production, and observation
  4. Final Day – Documenting results. What questions remain?


What You'll Need

Equipment:

  1. Digital camera or Smartphone
  2. N95 mask
  3. Disposable gloves
  4. Compact Digital Bench Scale
  5. Stove Top or Heated plate
  6. Sauce pan
  7. Spoon
  8. Clean glass, plastic, or aluminum mold

Software:

  1. PictureThis, PlantSnap, Pl@ntNet

Ingredients (base recipe, per biomaterial sample):

  1. Cold water (240 ml)
  2. Gelatin powder (48g); OR
  3. Agar Agar (48g)
  4. Glycerine / Glycerol (12g)


Example video: click here


Reference:

Pistofidou, A., & Davis, C. (2017, February 28). The secrets of bioplastic. Retrieved November 09, 2020, from https://issuu.com/nat_arc/ docs/the_secrets_of_bioplastic_


The Instructions

Exploring Local Ecosystem

Where are the green spaces in our local communities? Are there areas where plants go that are less obvious? How do seasonal changes affect the type and quantity of plants available? Who can I ask about changes in: population, landscape, and environmental quality?

  1. Start by looking on a map for green spaces or public parks in your neighborhood. A radius to use for this type of exploration is half a mile or one kilometer.
  2. If there are no obvious green spaces or public parks on a map; look for places where trees or plants may grow. This could be between cracks in pavement or along city streets.
  3. Accompanied by an adult, walk through the space and take photos of plants that you see. Be sure to take clear photos of different parts of plants (stems, leaves, flowers, branches, fruits, nuts, etc.)
  4. When approaching or handling plants, it is important to protect yourself from poisons or allergens. A face mask and gloves must be used to safely document your local plants.
  5. Take note of the current season and weather. Note down if there is snow or water on the ground. Note down the temperature.
  6. Ask an elder (either the accompanying adult or another local resident) what has changed about our neighborhood and local ecosystem in the past few years or decades.


Building a catalogue of samples

How can I organize my pictures of local plants? What digital tools can I use to help me identify plants? How is machine learning applied to plant identification? What are sources of information for uses of local plants? References: Otter, J., Mayer, S., & Tomaszewski, C. A. (2020). Swipe Right: a Comparison of Accuracy of Plant Identification Apps for Toxic Plants. Journal of Medical Toxicology, 1-6. Saarugesan, S. (2019). Animal and plant recognition using android for kids (Doctoral dissertation, UTAR).

  1. Using one of the iOS or Android apps find identifying characteristics of your sample plant photos.
  2. Optionally, use another app to find the same characteristics and compare results.
  3. Reflect on the technology used to deliver results:
  4. What forms of machine learning are used to train models for plant identification?
  5. Which photos deliver consistent results? Which photos deliver inconsistent results?
  6. Ask an adult or elder to identify plants based on their own local knowledge:
  7. How do human provided answers differ from those provided by digital tools?
  8. Search online and document uses of plants in DIY biomaterials:
  9. Which plants are useful as polymers*?
  10. Which plants can be used as natural dyes?
  11. Which plants can be ground in flour?
  12. Are there other uses of plants?


What are Polymers?

A polymer is a chemical made up of repeating units. They can be: resistant to chemicals, electrical or thermal insulators, and made into waterproof films. More information can be found here.

Harvesting and Processing Materials

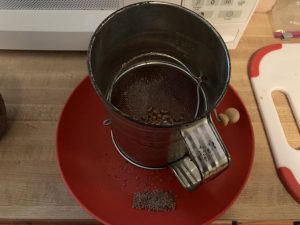
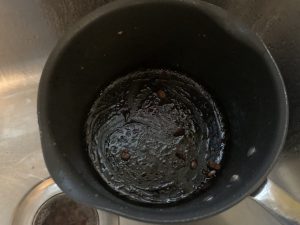
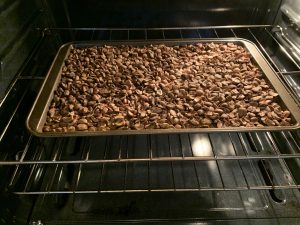
The example exercise focuses on the processing of red oak acorns. This lesson can be modified based upon the availability of local plants and time of the year. What is an acceptable amount of plants to harvest? How does harvesting affect the local ecosystem? What are the food supplies for local animals? How are insects such as bees impacted by harvesting plants? How much energy and resources are needed to yield a useful amount of materials?

  1. Harvest less than 5 pounds of red oak acorns.
  2. What is the impact to the local ecosystem from harvesting?
  3. Dry cracked and shelled red oak acorns by either using a dehydrator, leaving them out in the sun on screens, or using the oven at a low temperature.
  4. What is the trade off between time and energy when drying the acorns?
  5. Separate the meat of the acorn from the shells and skins by rub pieces with hands. Smash with a potato masher.
  6. Cold-leaching the smashed acorn pieces will make the inedible parts edible by removing the tannins. Place the parts in a cheese cloth bag. Then, submerge the pack into a five gallon bucket of cold water. Squeeze the bag to ensure that the pieces are saturated. Leave the bag to soak for 30 minutes. Drain the bucket. Then repeat the cycle until the water is clear; OR
  7. Hot-leach the smashed acorn pieces by placing them in a sauce pan of boiling water. Leave the pieces to simmer for 30 minutes. Drain the sauce pan and observe the amount of resin left at the bottom of the sauce pan. Repeat the cycle until the water drained is clear.
  8. How long does cold-leaching take as opposed to hot-leaching?
  9. Should we retain the tannins for use in DIY biomaterials? OR should we continue to extract tannins to produce edible acorn flour?
  10. Dry the acorn pieces by spreading them out on a cookie sheet and place them in the oven at 200F/94C for a few hours or until dry.
  11. Should we use an oven, a dehydrator, or leave the pieces out in the sun? What is the trade off between time and energy?
  12. Mash the dried acorn pieces with the potato masher until they make a fine powder.
  13. Sift the flour with a mesh colander to make sure no large or hard pieces remain.


Experiment with DIY biomaterials recipes

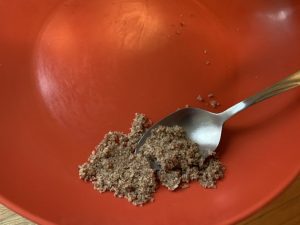
In the previous step, we asked questions regarding processing acorn flour. Thinking about the time, energy, and resources. It's possible that we have different samples of acorn flour based upon our processing. In this step we explore DIY biomaterials recipes by modifying the base recipe in "What You'll Need". More recipes can be found in the Materiom - Materials Library.
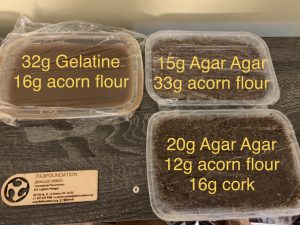
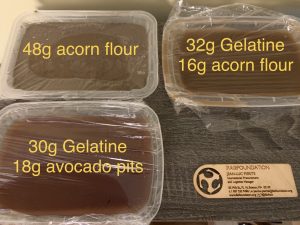
  1. Spend some time browsing the Materiom – Materials Library
  2. The base recipe that we will modify is:
  3. Cold water (240 ml)
  4. Gelatin powder (48g); OR
  5. Agar Agar (48g)
  6. Glycerine / Glycerol (12g)
  7. Experiment with different ratios of gelatin powder or agar agar to additives such as acorn flour
  8. Use the digital bench scale to ensure proper amounts
  9. Mix 48g gelatin or agar agar and additive combinations with 240ml of cold water in a pan without any heat.
  10. The mixture should turn into a granular paste.
  11. Start heating the mixture while stirring slowly to make sure that there are no lumps.
  12. Stir until the mixture is liquid and homogeneous. Then, add the glycerol.
  13. Continue mixing and heating until there is a deposit on the surface. This can be removed to make a transparent material.
  14. Pour the mixture into a mold or a prepared surface.
  15. Let dry 2-3 days at least, preferably a week, before removing.


Example recipes:


Wrapping Up

What are the results of your experiments? How can we use your recipe to make items needed for day to day life? What have you learned about your local ecosystem? What have you learned about your neighbors?
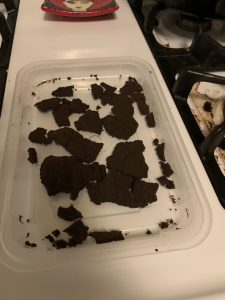
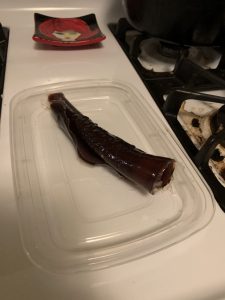
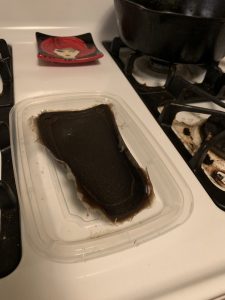
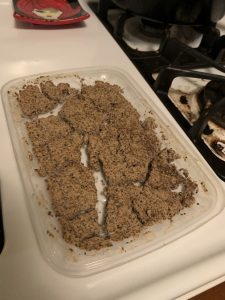
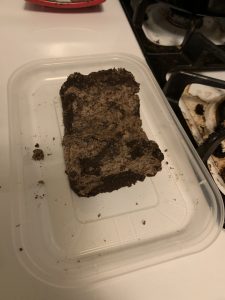
  1. Reflect on the questions in the Brief Description
  2. Think about further questions that you have for future experiments.
  3. What would you change about your process?
  4. What new recipes would you like to explore?


Example materials:


Standards

  • (Fab-Safety.2): I can operate equipment in a Fab Lab following safety protocols.

Lesson Feedback