- Loading…
The goal of this lesson is to use the design process to create accessories compatible with LEGO minifigures. The advantage of this lesson is that the objects can be modeled and printed quickly. At the end of the lesson, students will have their 3D printed accessory. Given the small size of the modeled objects, it is quite possible to do several iterations during the allotted class time.
Materials List
Digital Fabrication Tools
Hardware:
3D Printer
Software:
TinkerCAD

Step One: Introduction and presentation of 3D printing – 15 mins
TEACHER NOTE: The teacher will run through the entire 3D modeling process to demonstrate the software TinkerCAD. Students watch while the teacher describes what they are doing. The teacher asks participants to follow along, up until the 3D printing step. After launching the 3D print of the demo model, students create their own 3D model.
In whole class, Introduce 3D printing with a video and presentation of your local equipment.

Recommended by Techno Culture Club: https://abc3d.technoculture.club/en/resources/presentation PBS Off the Book: https://www.pbs.org/video/-book-will-3d-printing-change-world/
Future Engineers: https://www.youtube.com/watch?v=XTP-WBrAnPY Coursera – 3D printing at Fab Lab Champaign Urbana IL (start at 4:22):
https://www.coursera.org/learn/3d-printing-applications/lecture/PuC0A/learning-by-making-and-making-for-f un-at-the-fab-lab
Step 2: Overview of the activity – 5 min
Briefly explain the flow of steps for the day’s activity. What will the participants do? : Create an accessory for a LEGO minifigure. Explain the Design Process:
Step Three: Log in each participant to the software TinkerCAD – 5 min
Log in each participant to the software TinkerCAD. Use a single account per class or teacher or school.
Ask each participant to log into the software TinkerCAD. Provide the username and password.
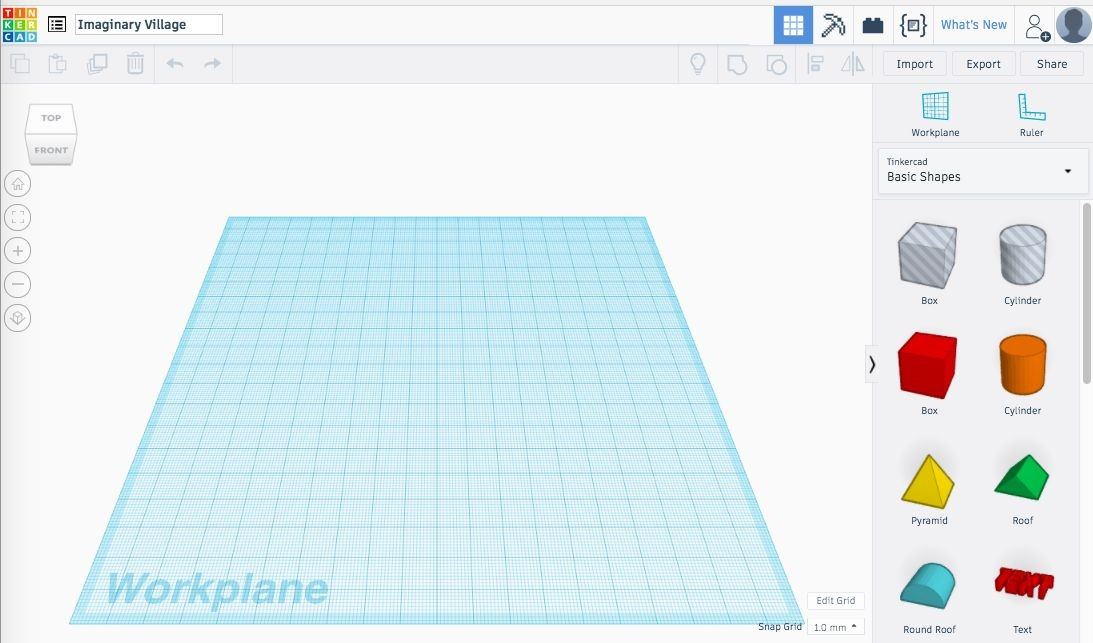
Step Four: Introduction to TinkerCAD – 15 min
TEACHER NOTE: In whole class exercise provide definitions and review of TinkerCAD key concepts to show students
Place students into small groups of 3-4. Using “Put Your Two Cents In” strategy, each student take turns explaining a concept by putting one cent in the center of the table and sharing a definition. Once everyone has had a turn, students put one more cent in and respond to what other students in group have shared.
Step Five: Document Your Prototype
Have students draw and finalize their LEGO accessory design. Students record the results of their prototyping process in their journals. Remind students that the prototype is not their final design.
In small groups, students share their LEGO accessory prototypes with other students. The teacher moves around the room to assist and re-explain concepts as necessary. Review common questions or repeat challenging concepts to all students.

Formative Assessment: Students record their prototyping process in their journals.
Make sure students include:
Extension: Have students hack an existing LEGO minifig, adding accessories or traits of famous engineers, scientists or other personal heros. For example, Fabbers from MIT Media Lab created this mini fig persona of Seymour Papert!
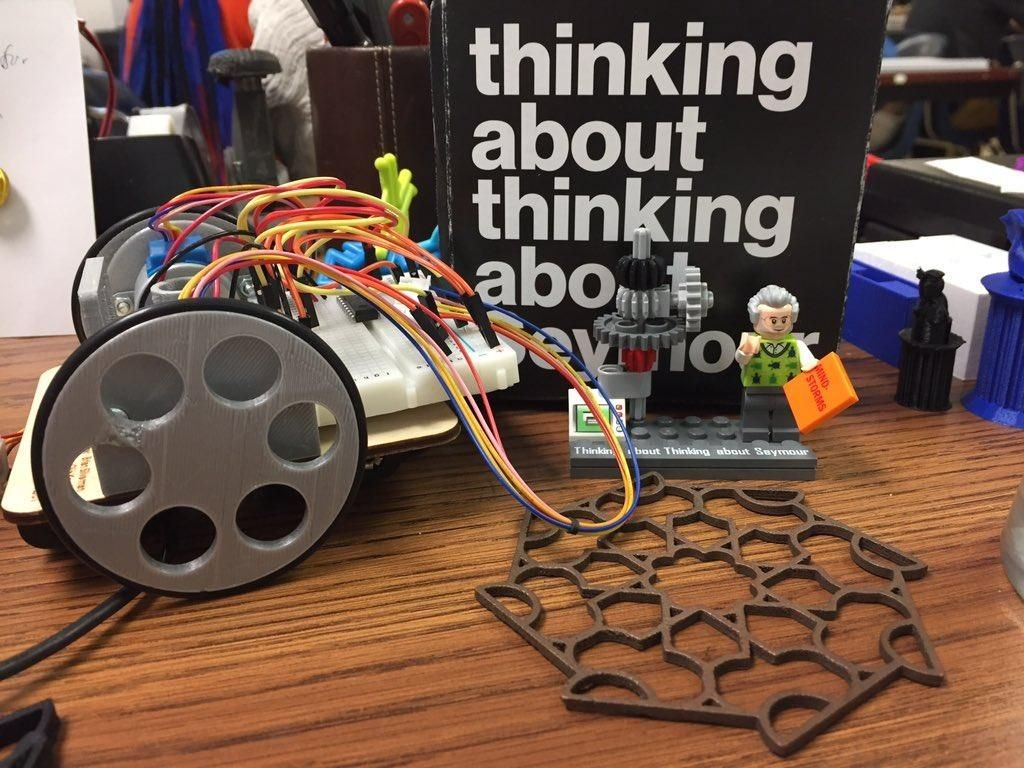
“Logo Turtle with Seymour Papert Lego MiniFig” kindness of Christopher Sweeney – Susan Klimczak FabLearn Fellow Blog
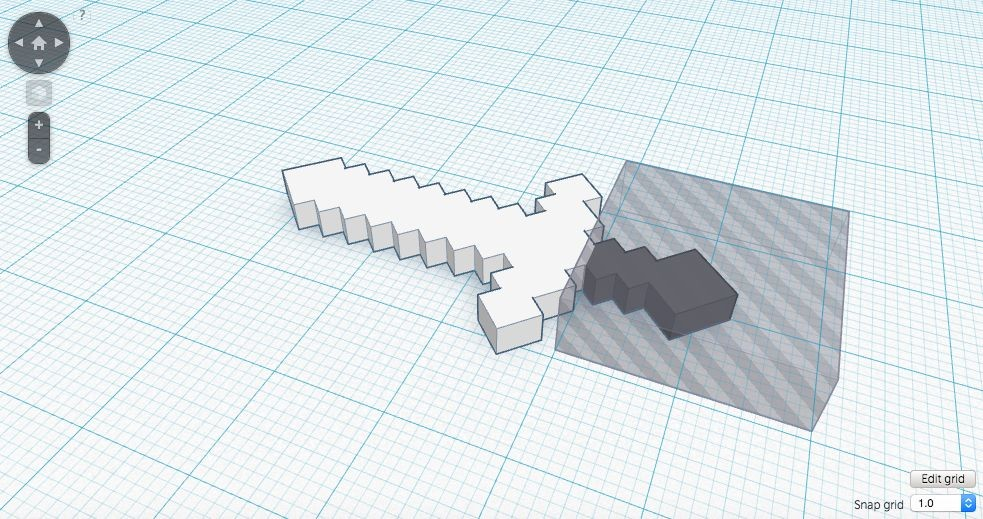
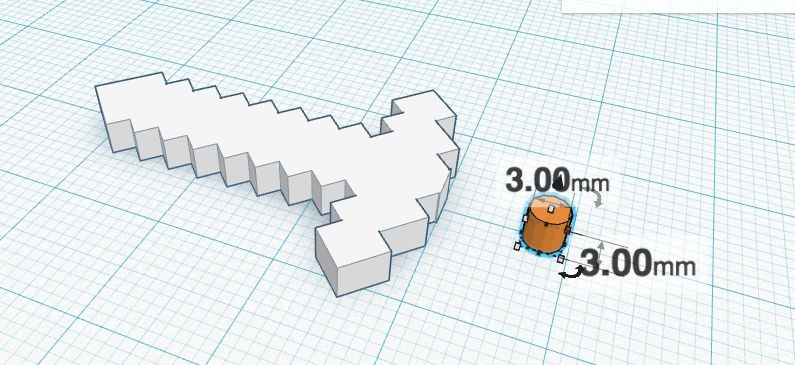
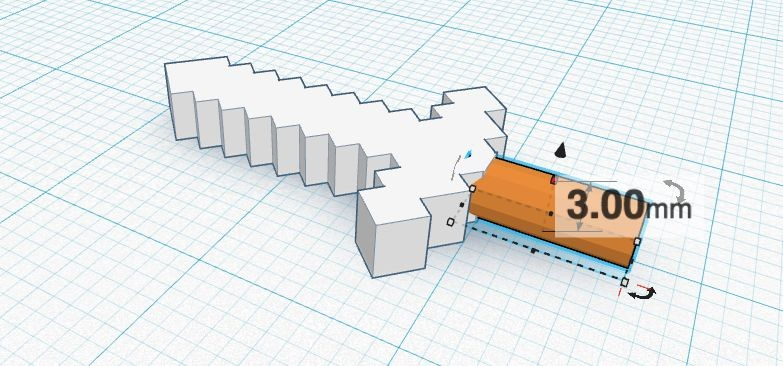
Step Six: Students convert a base model into personal designs
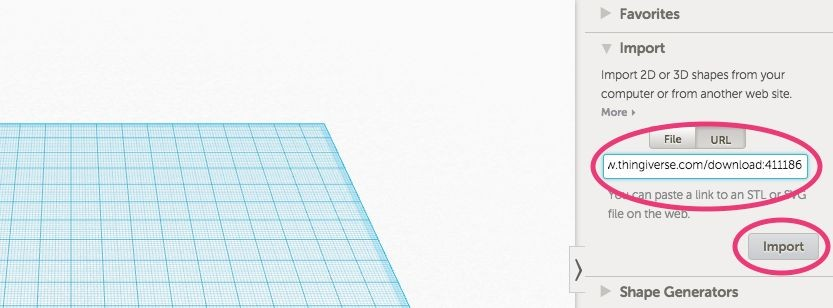
Step Seven: Saving the STL file
Ask participants to rename their files
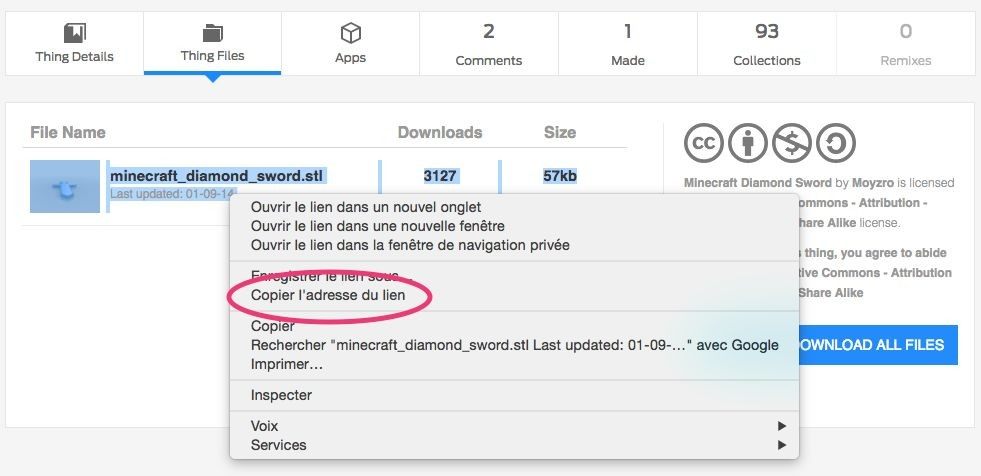
Log-in to the common user account and download the STL files
Step Eight: Import the files into Slicer software

More resources: EduTech Wiki, Tinkerine U or Ultimaker Cura Help.
Step Nine: 3D Printing – 30–45 min
Step Ten: Feedback – 5 min
Ask the participants to provide feedback on the workshop while the models are being printed.
Review what was learned. Ask students to provide feedback on the lesson while the models are being printed.
Have students clean-up work area.
Having trouble? Let us know by completing the form below. We'll do our best to get your issues resolved quickly.
"*" indicates required fields