
- Loading…

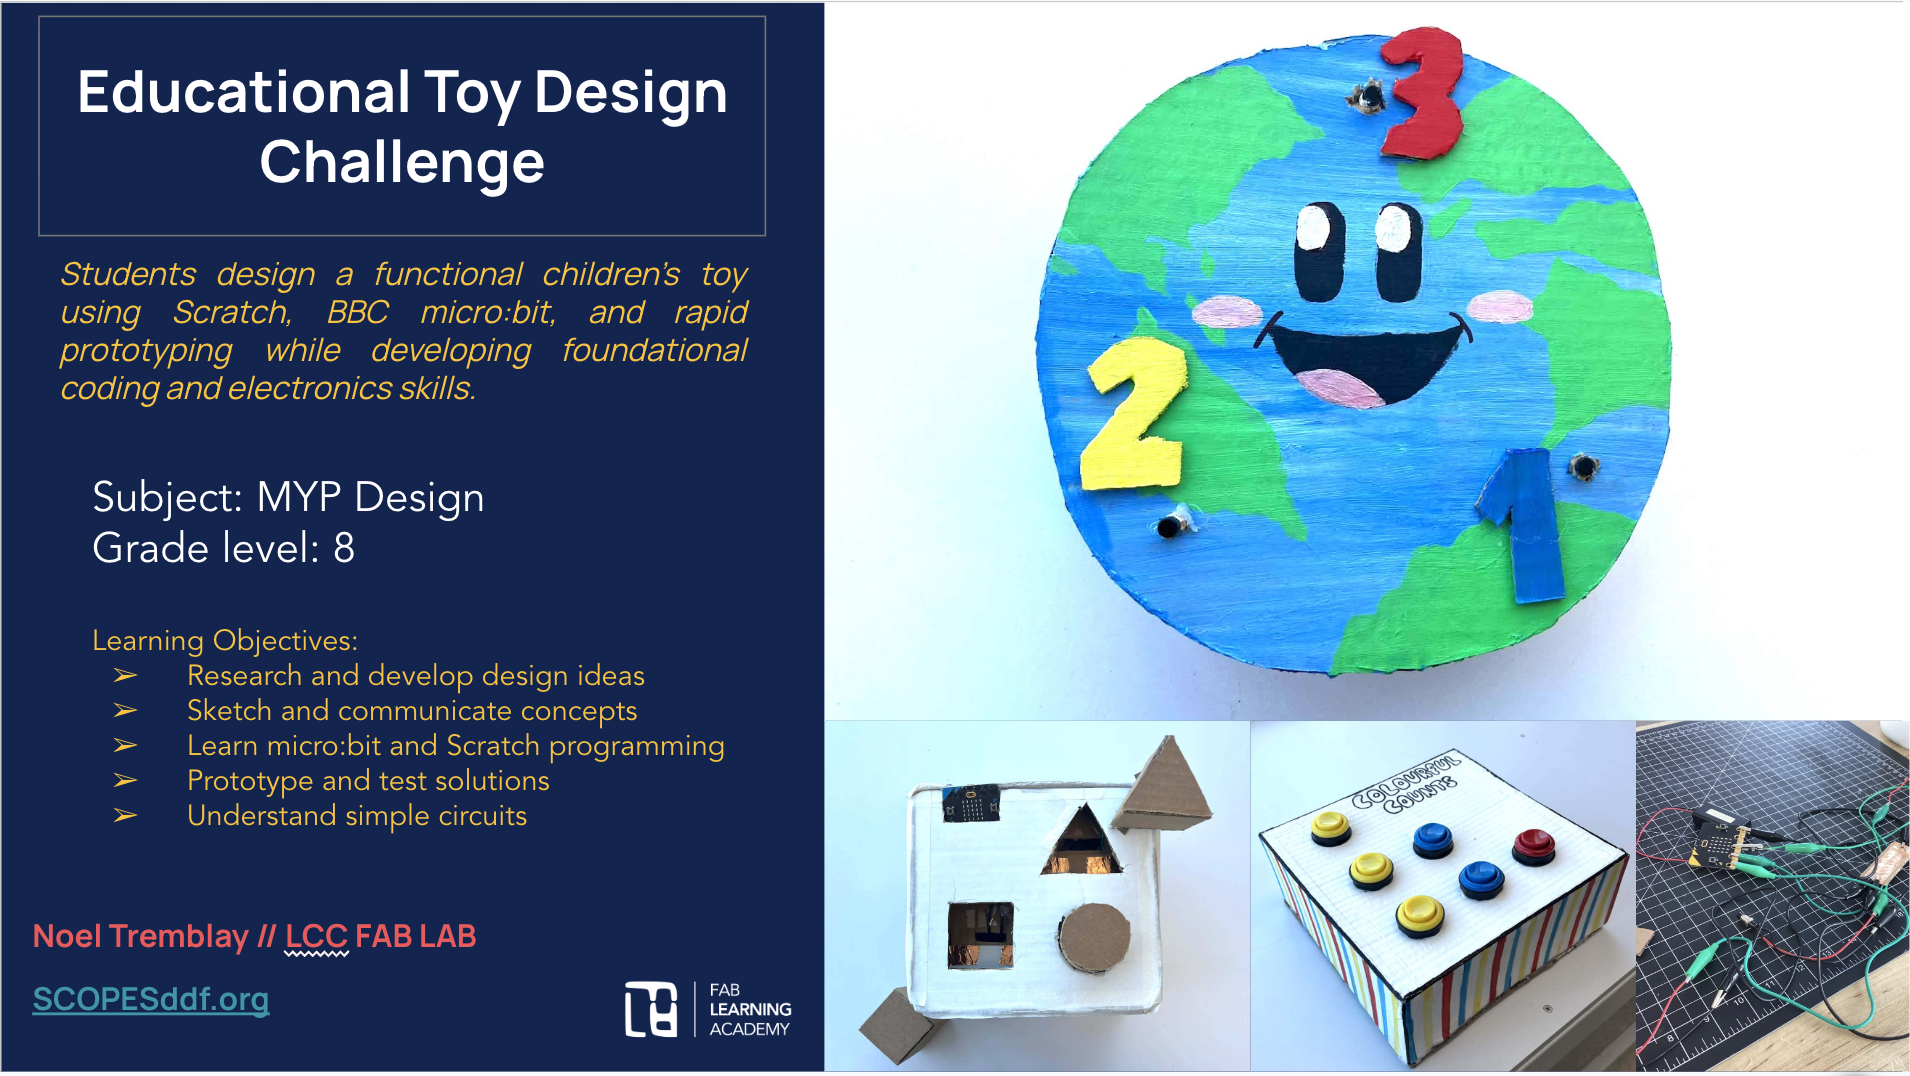
This unit (6 lessons) immerses students in the full MYP Design Cycle through an authentic, real-world challenge: designing an age-appropriate educational toy.
Students act as professional toy designers, researching early childhood learning needs, developing multiple design ideas, and creating a functional prototype using:
The unit emphasizes:
a. Learning through play
b. Age-appropriate design
c. Iterative problem-solving
d. Clear documentation of process
Prior experience with Micro:bit and Scratch will support student success in this unit. It is recommended that students complete several introductory Micro:bit tutorials before beginning the project to build foundational coding confidence.
DOWNLOAD
1. Curriculum & Planning Requirements (Unit Structure)
Teacher should have prepared:
2. Teacher Content Knowledge & Preparation
Before starting the unit, teachers should be comfortable with:
Teacher tip: You do not need to be an expert — only one step ahead of students.
3. Pre-Unit Student Preparation (Highly Recommended)
4. Materials & Equipment
Electronics (Per Group or Student)
Digital Tools
5. Classroom Setup & Organization
6. Student Deliverables
Students must maintain a Design Process Journal including:
7. Assessment & Feedback
Formative checks during Lessons 3–6
Summative assessment at:
Feedback Methods
8. Differentiation & Support
9. Time & Pacing Considerations
By the end of this unit, students will be able to:
Inquiry & Analysis (Criterion A)
Design & Planning (Criterion B)
Creating & Making (Criterion C)
Evaluation & Reflection (Criterion D)
Approaches to Learning (ATL)
Student Feedback
Students responded very positively to this unit, particularly appreciating the structure of learning a new skill each week and then immediately applying it in a hands-on context. They enjoyed building a range of competencies—coding, circuits, and prototyping—while seeing how these skills connect to real-world applications. Many students found it especially engaging to explore how everyday children’s toys and simple machines function, which helped make abstract concepts more concrete.
A common point of pride among students was seeing their final products come together successfully. Several expressed surprise—and excitement—that their designs not only worked, but worked as intended. This sense of accomplishment appeared to build confidence and independence. Notably, after completing the unit, many students chose to continue exploring tools such as micro:bit, Scratch, and basic electronics in subsequent projects, demonstrating sustained interest and curiosity beyond the classroom requirements.
Personal Reflections
This was a highly rewarding project to teach from start to finish. The pacing felt effective, allowing students enough time to meaningfully develop and apply a variety of technical skills, including coding, 3D printing, circuit design, and iterative prototyping. The interdisciplinary nature of the unit created a strong balance between creativity and technical problem-solving.
From a teaching perspective, this project also strengthened my own comfort level with electronics and circuit-based learning. One logistical challenge, however, was managing and organizing the materials—buttons, wires, micro:bits, and other components—which required a significant investment of time. For future implementations, I would strongly recommend having a clear organizational system in place from the outset to streamline setup and transitions.
I was also impressed by how responsive and accessible tools like micro:bit and Scratch were for students, enabling them to quickly test ideas and see immediate results. Overall, the quality of the final products was very strong, with most students producing functional and thoughtfully designed outcomes. This unit not only met its learning objectives but also fostered genuine engagement and enthusiasm for design and technology.
Introduce the project to the students.
Review the Overview section of the Design Journal with students. Introduce the project and its expectations, then watch the videos included in the slides. Finally, either assign scenarios to groups or allow groups to select their preferred scenario.
Research & Analysis
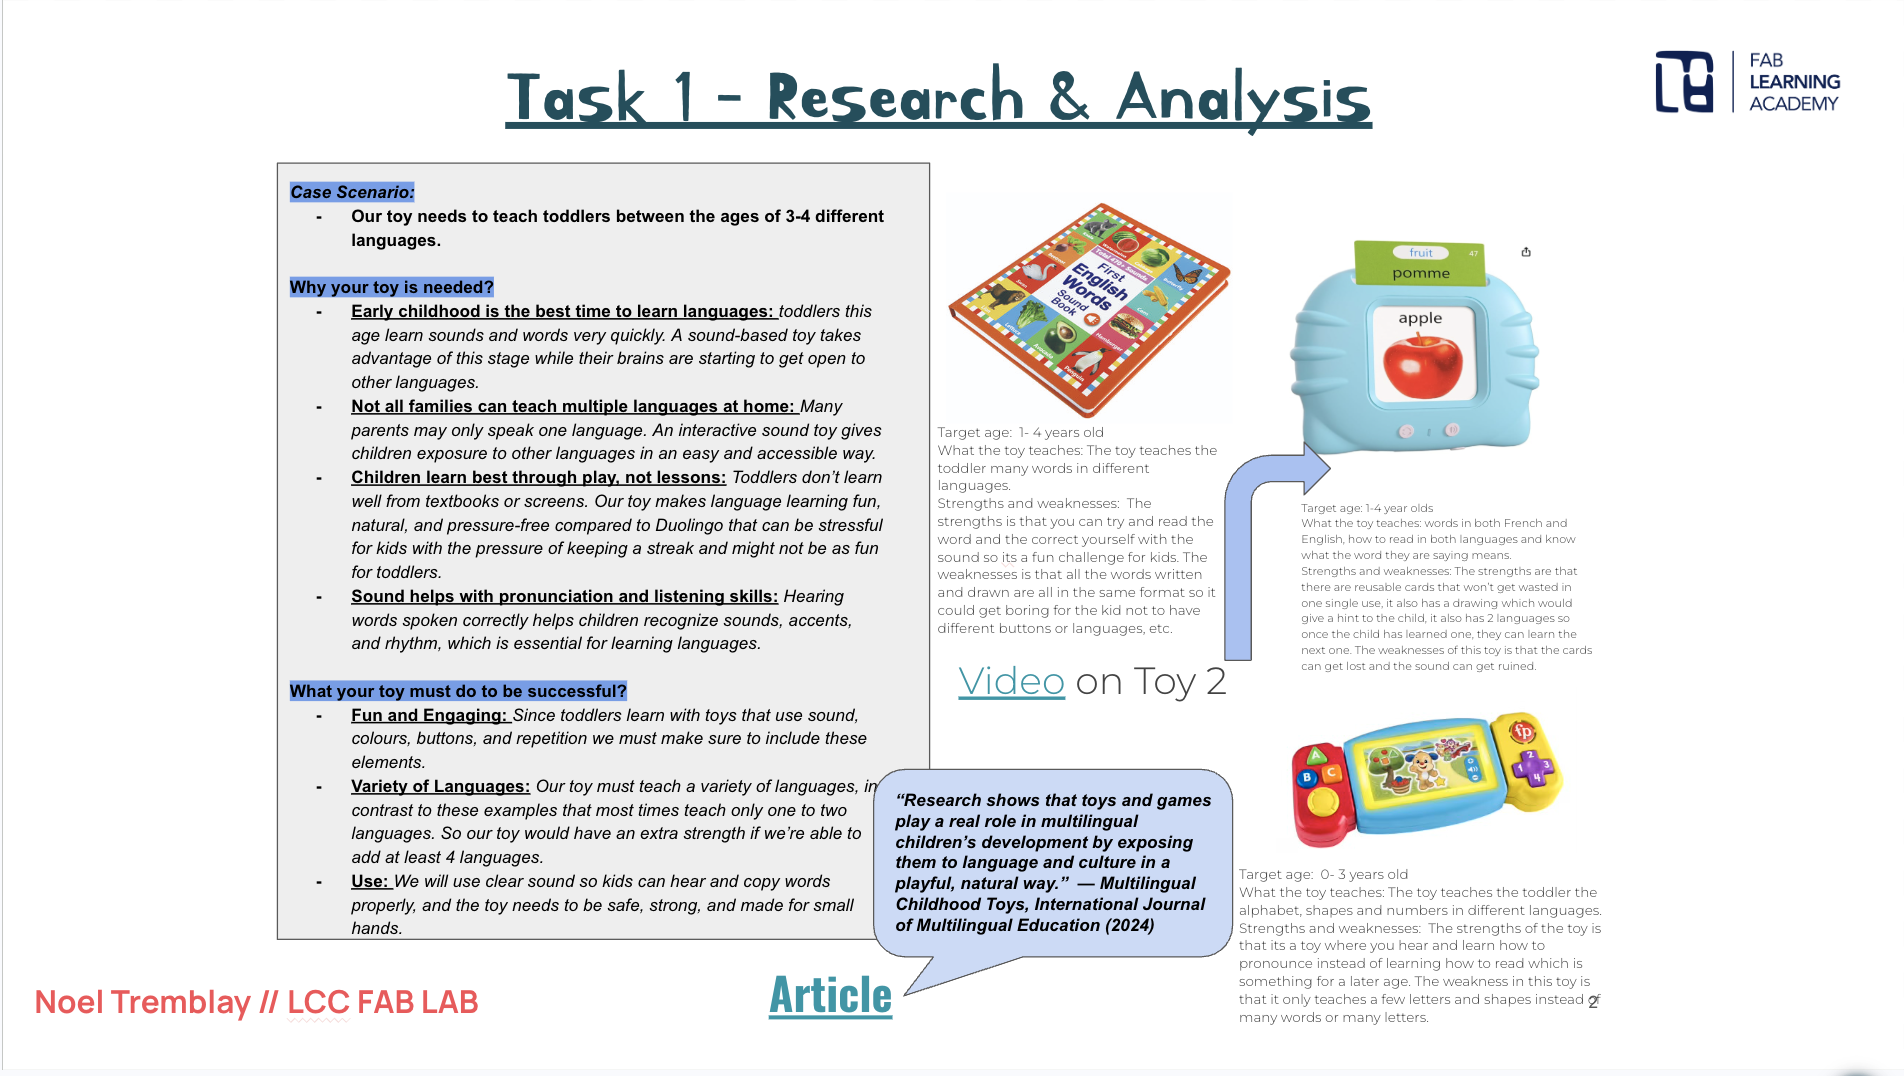
Go over the Research and Analysis section of the Design Journal with the students. Students must research how toys support learning for their assigned age group. They are required to analyze three existing children’s toys, using at least one video and one article as sources. For each toy, students must identify the target age, what the toy teaches, and its strengths and weaknesses. Students must then explain why their toy is needed and define what their toy must do to be successful. This task assesses students’ understanding of user needs, their ability to analyze existing products, and their justification of a design need.
This task is for homework, due the following class.
Developing Design Ideas
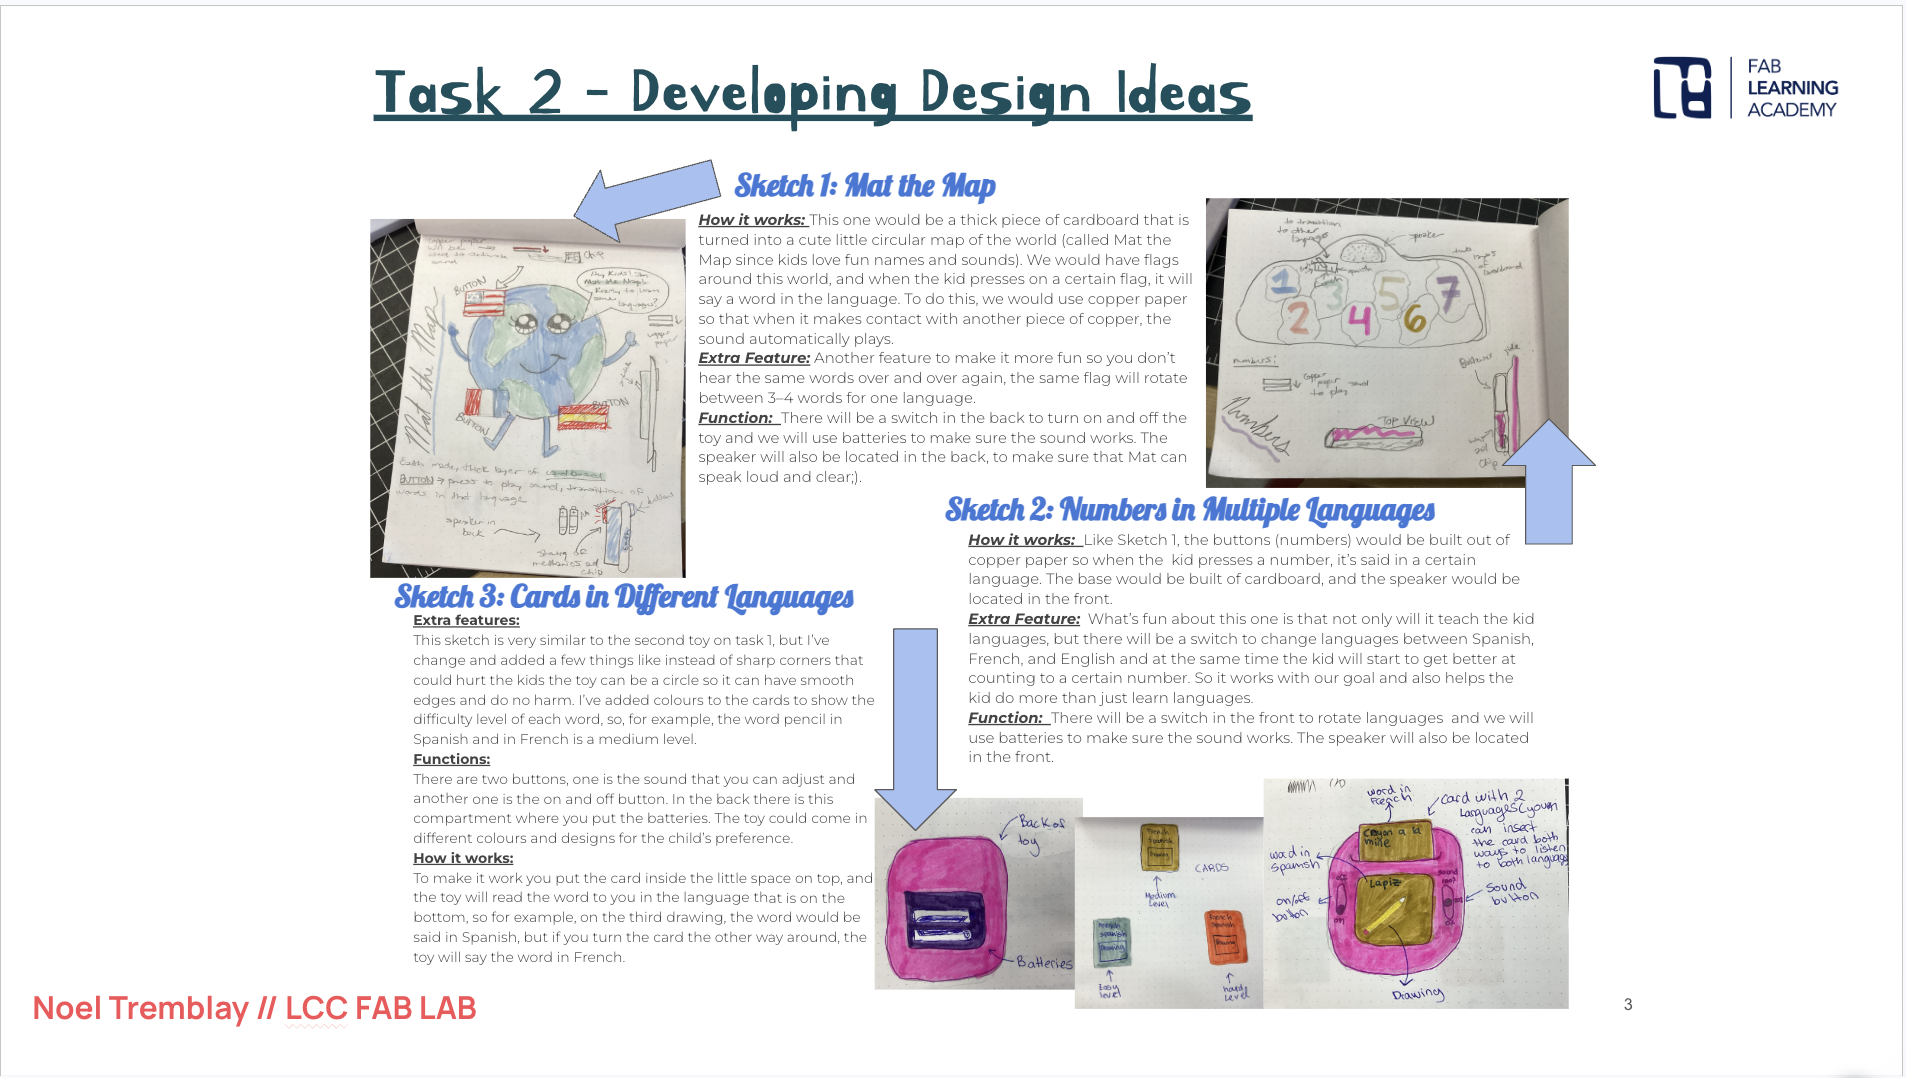
Go over the Developing Ideas section of the Design Journal with the students. Students must generate possible toy ideas before selecting a final design. They are required to produce three different design sketches, each clearly labeled, explained, and linked to the assigned learning goal. Students must then select one final design and present it in detail, showing the physical shape of the toy, key interaction points (such as buttons or movement), and how Micro:bit, Scratch, and simple circuits will be used. This task assesses students’ ability to generate ideas, communicate visually, and plan a clear, feasible solution.
Note: Emphasize annotations on sketches.
This task is for homework, due the following class.
Exploring Coding & Micro:bit
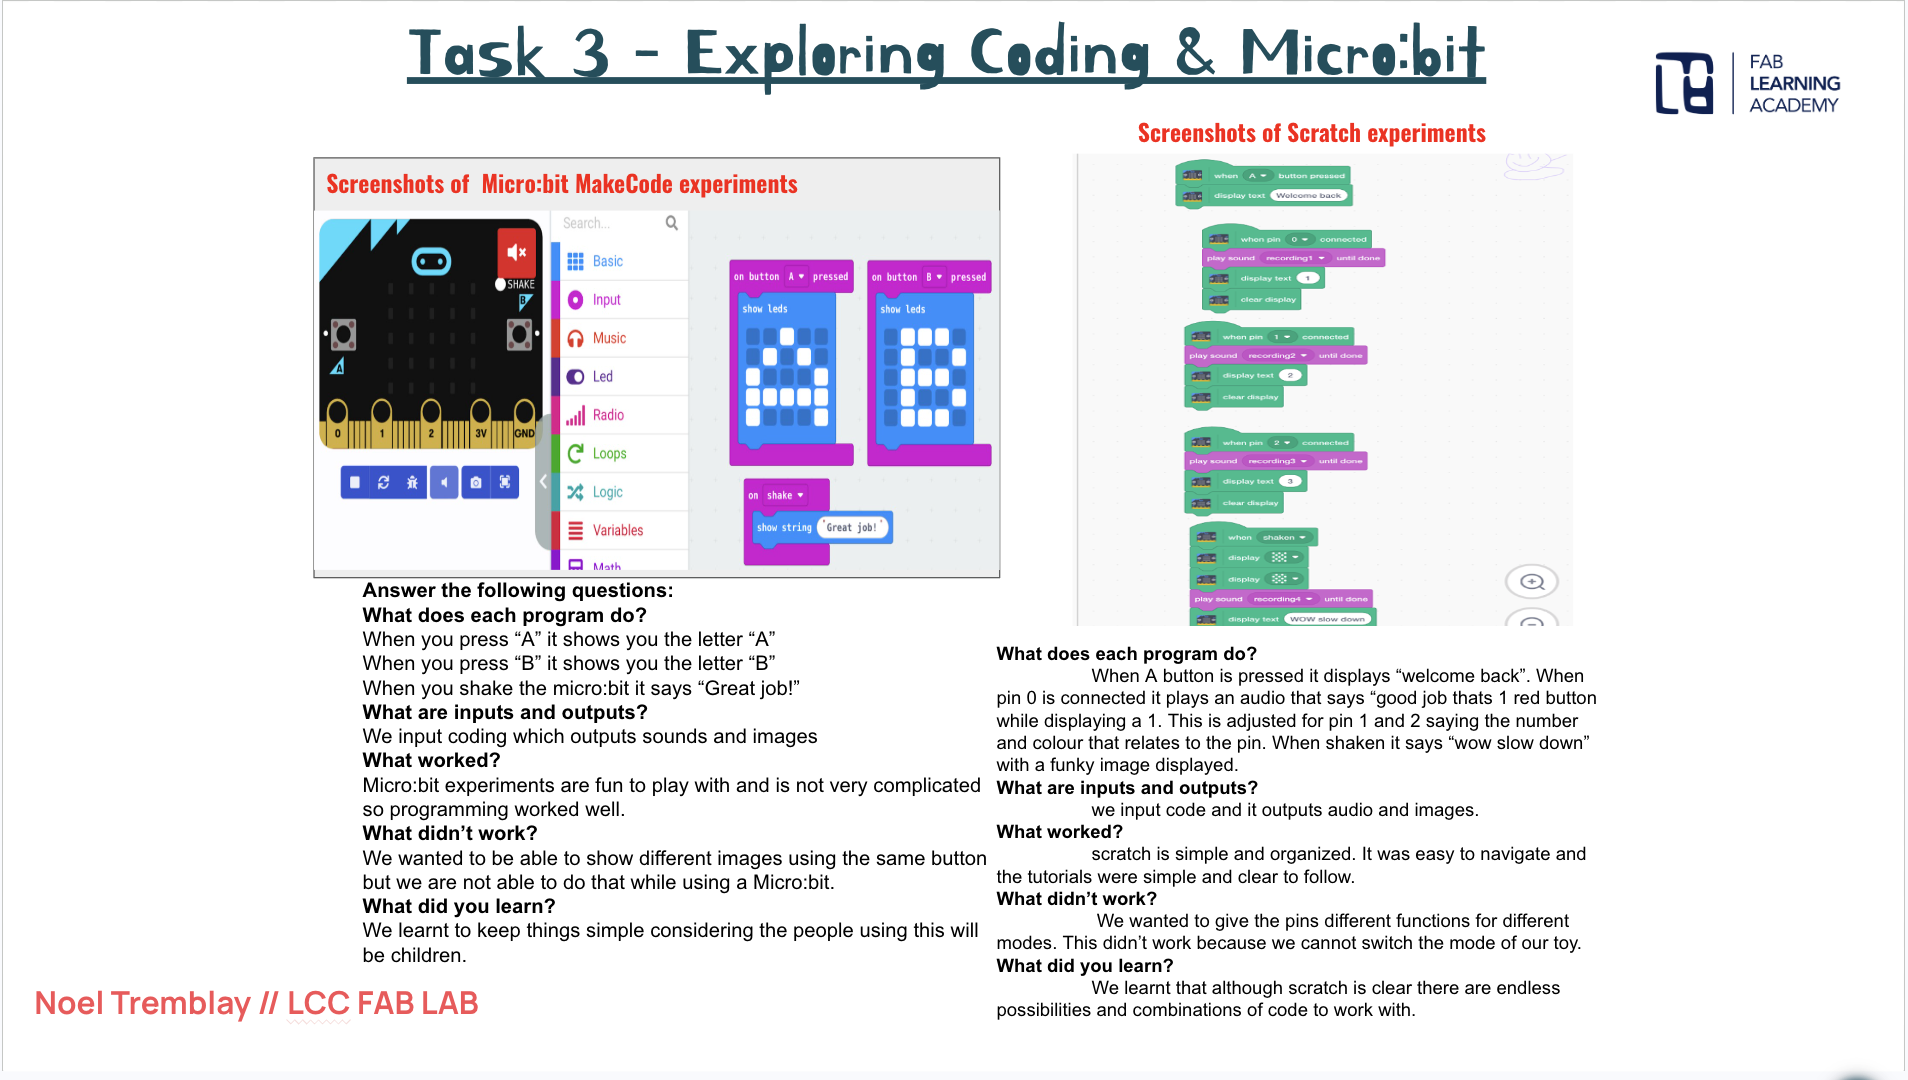
Go over the Exploring Micro:bit and Scratch section of the Design Journal with the students. Before beginning their final build, students must explore how Micro:bit and Scratch work through experimentation. Students are required to collect screenshots of their Scratch experiments and Micro:bit MakeCode experiments. They must include short explanations describing what each program does and clearly identify the inputs and outputs used. Students must also record notes explaining what worked, what did not work, and what they learned from their experiments. This task assesses students’ ability to explore tools, reflect on learning, and prepare for creating a functional solution.
This task is for homework, due the following class.
Coding Documentation
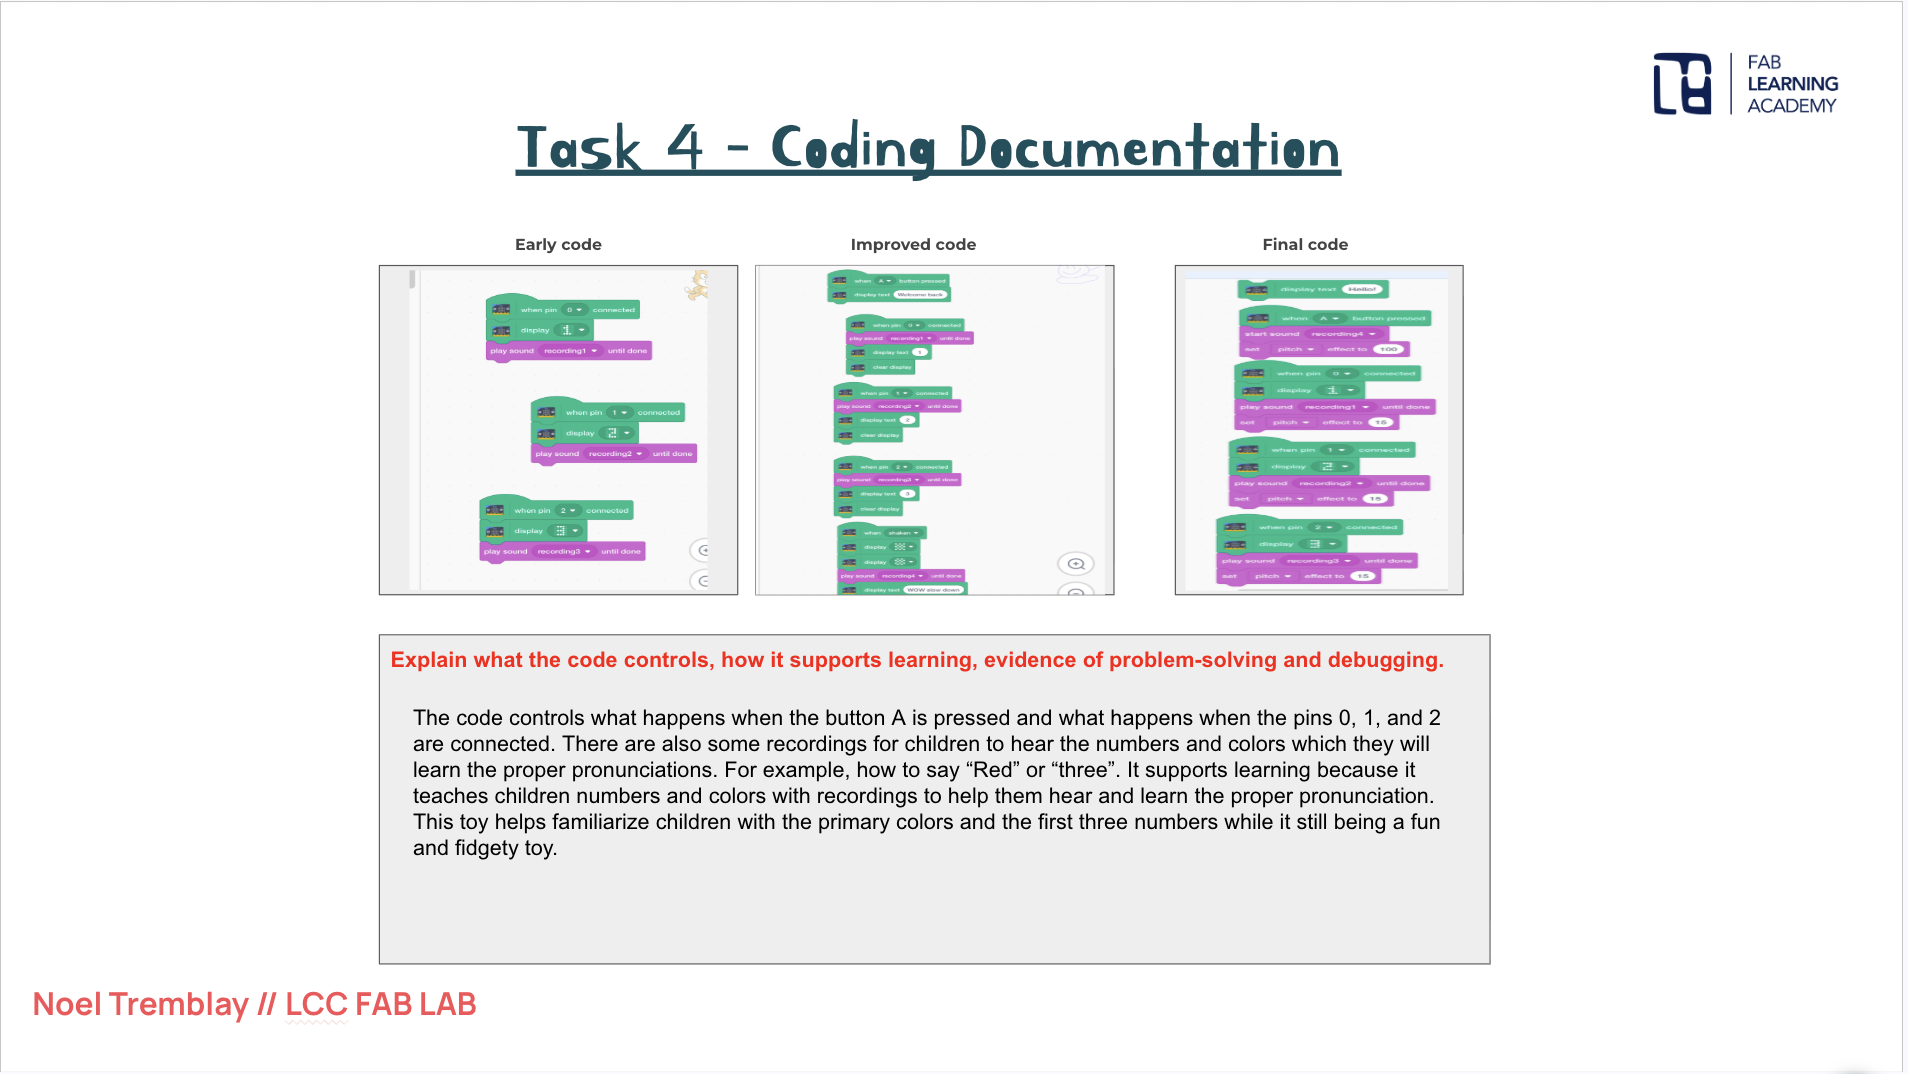
Go over the Coding Development and Documentation section of the Design Journal with the students. Students must document how their code develops from early attempts to a final working solution. They are required to include screenshots of early code, improved versions, and the final working code. Students must also provide clear explanations describing what the code controls, how it supports the intended learning goal, and how they solved problems or debugged issues during development. This task assesses students’ ability to apply coding skills, document iteration, and demonstrate problem-solving throughout the design process.
Note: You may have to provide extra support for students that have difficulty with block coding.
This task will be submitted with the final submission.
Electrical / Circuit Documentation (Criterion C)
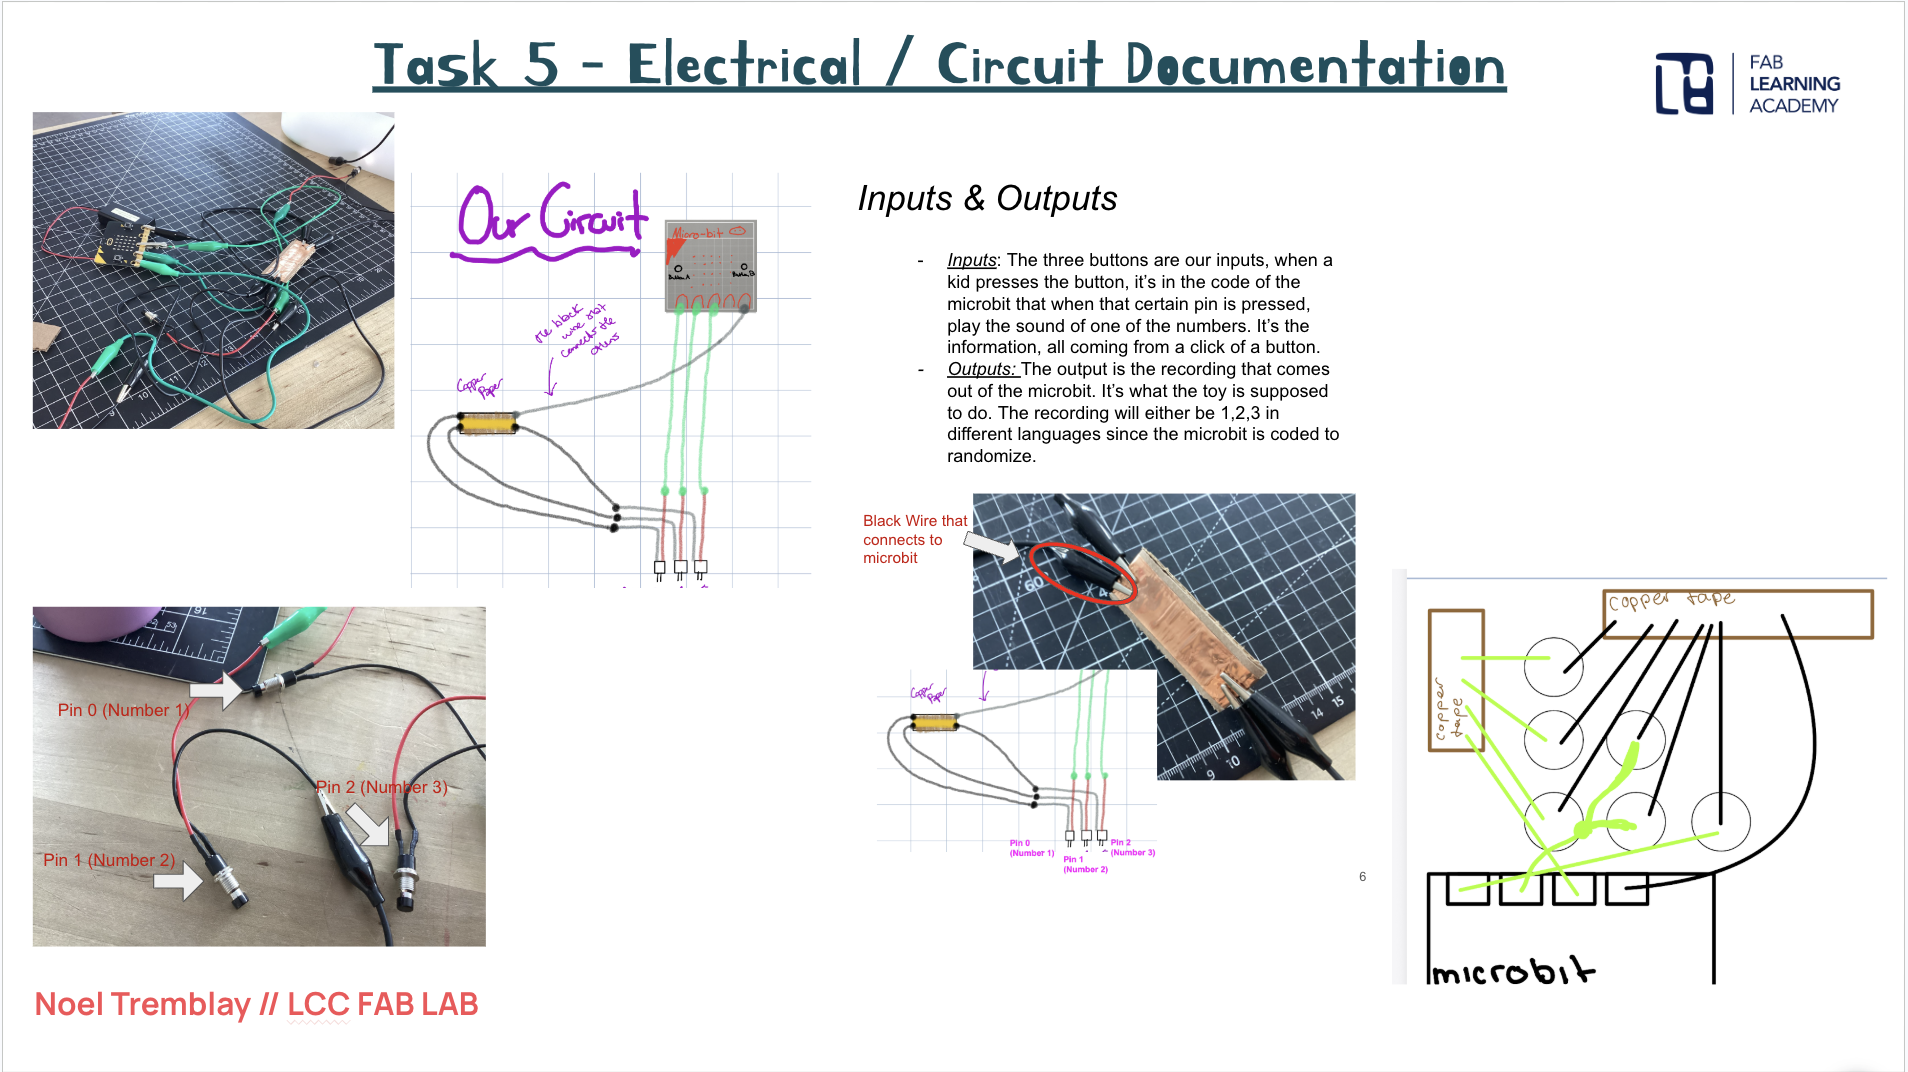
Go over the Electrical / Circuit Documentation section of the Design Journal with the students. Students must document how electricity is used in their toy. They are required to include photos or diagrams of their circuits, as well as photos showing buttons, LEDs, or sensors and clearly identifying inputs and outputs. Students must provide an explanation of how electricity flows through their circuit and how the circuit connects to their code. Students must also include a reflection describing at least one circuit issue they encountered and how it was fixed. This task assesses students’ understanding of electrical systems, their ability to connect circuits to code, and their problem-solving skills.
This task will be submitted with the final submission.
Physical Prototyping Documentation
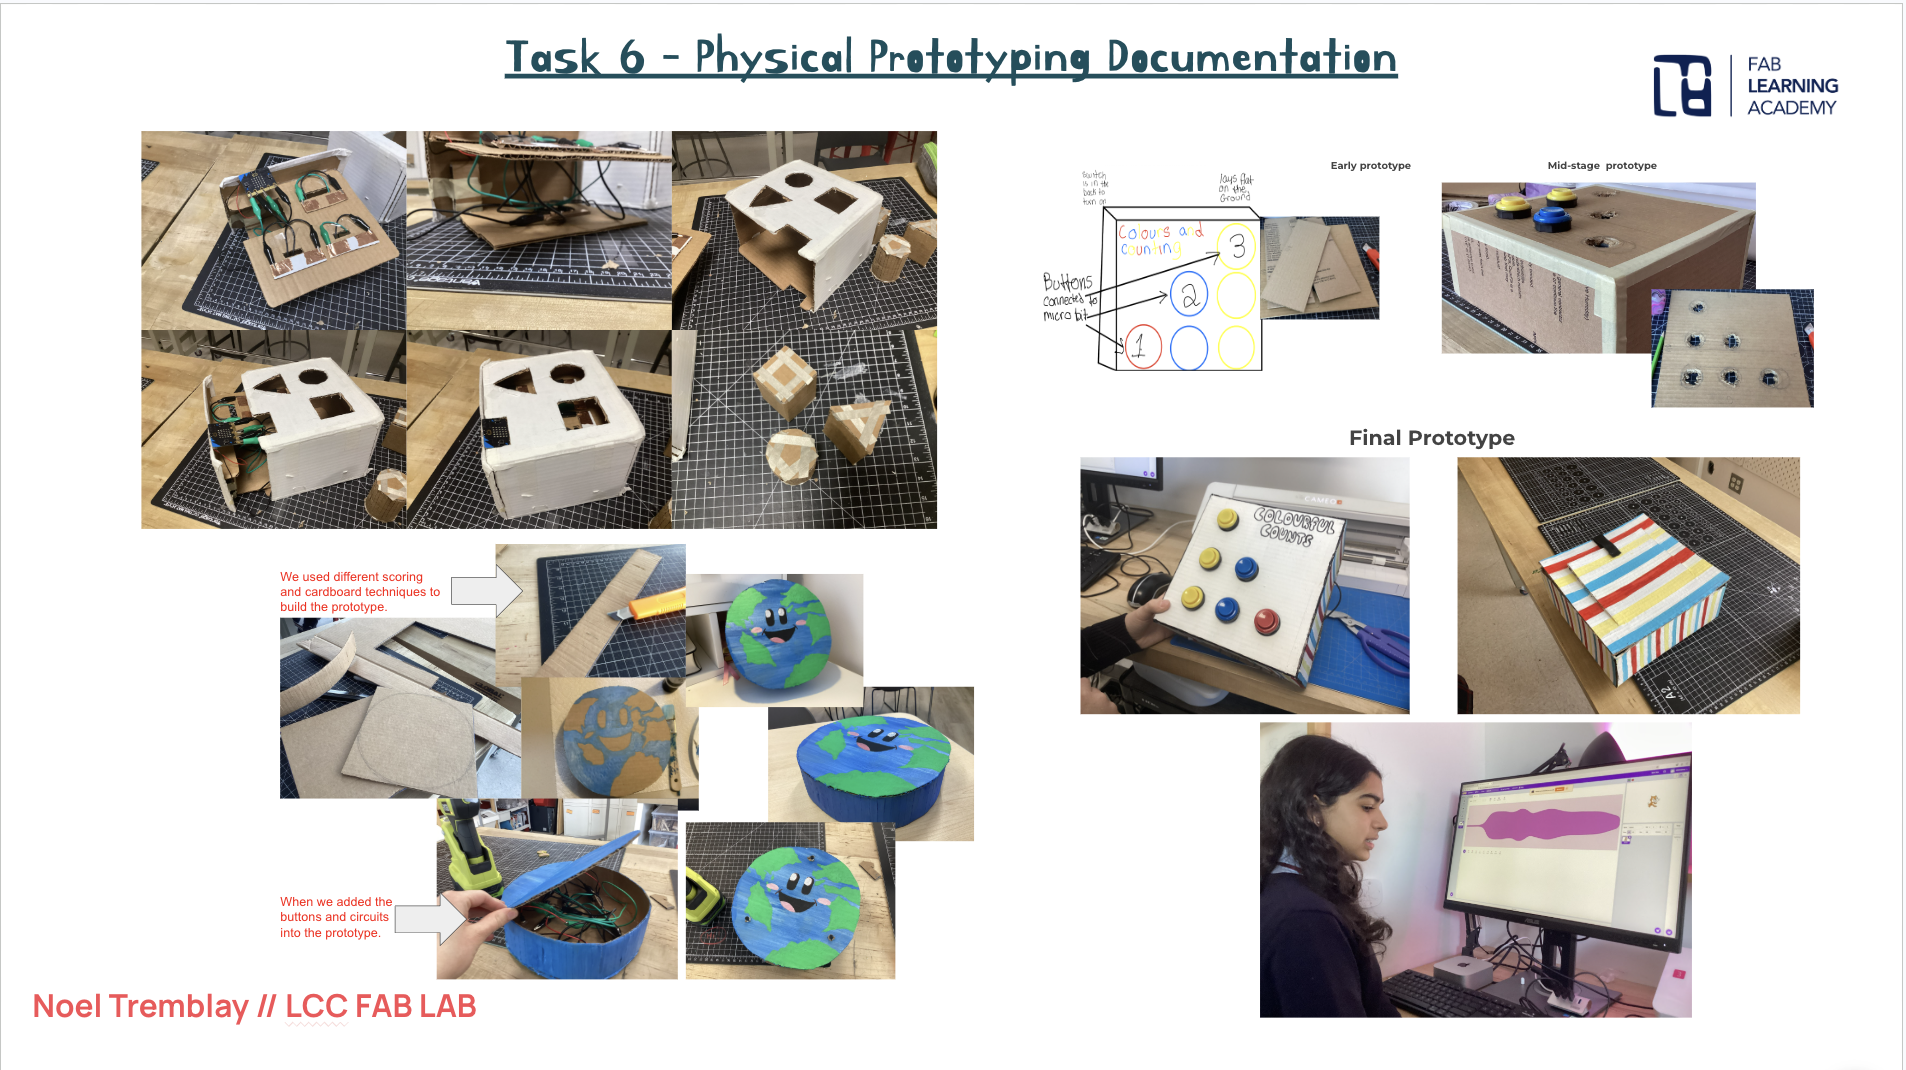
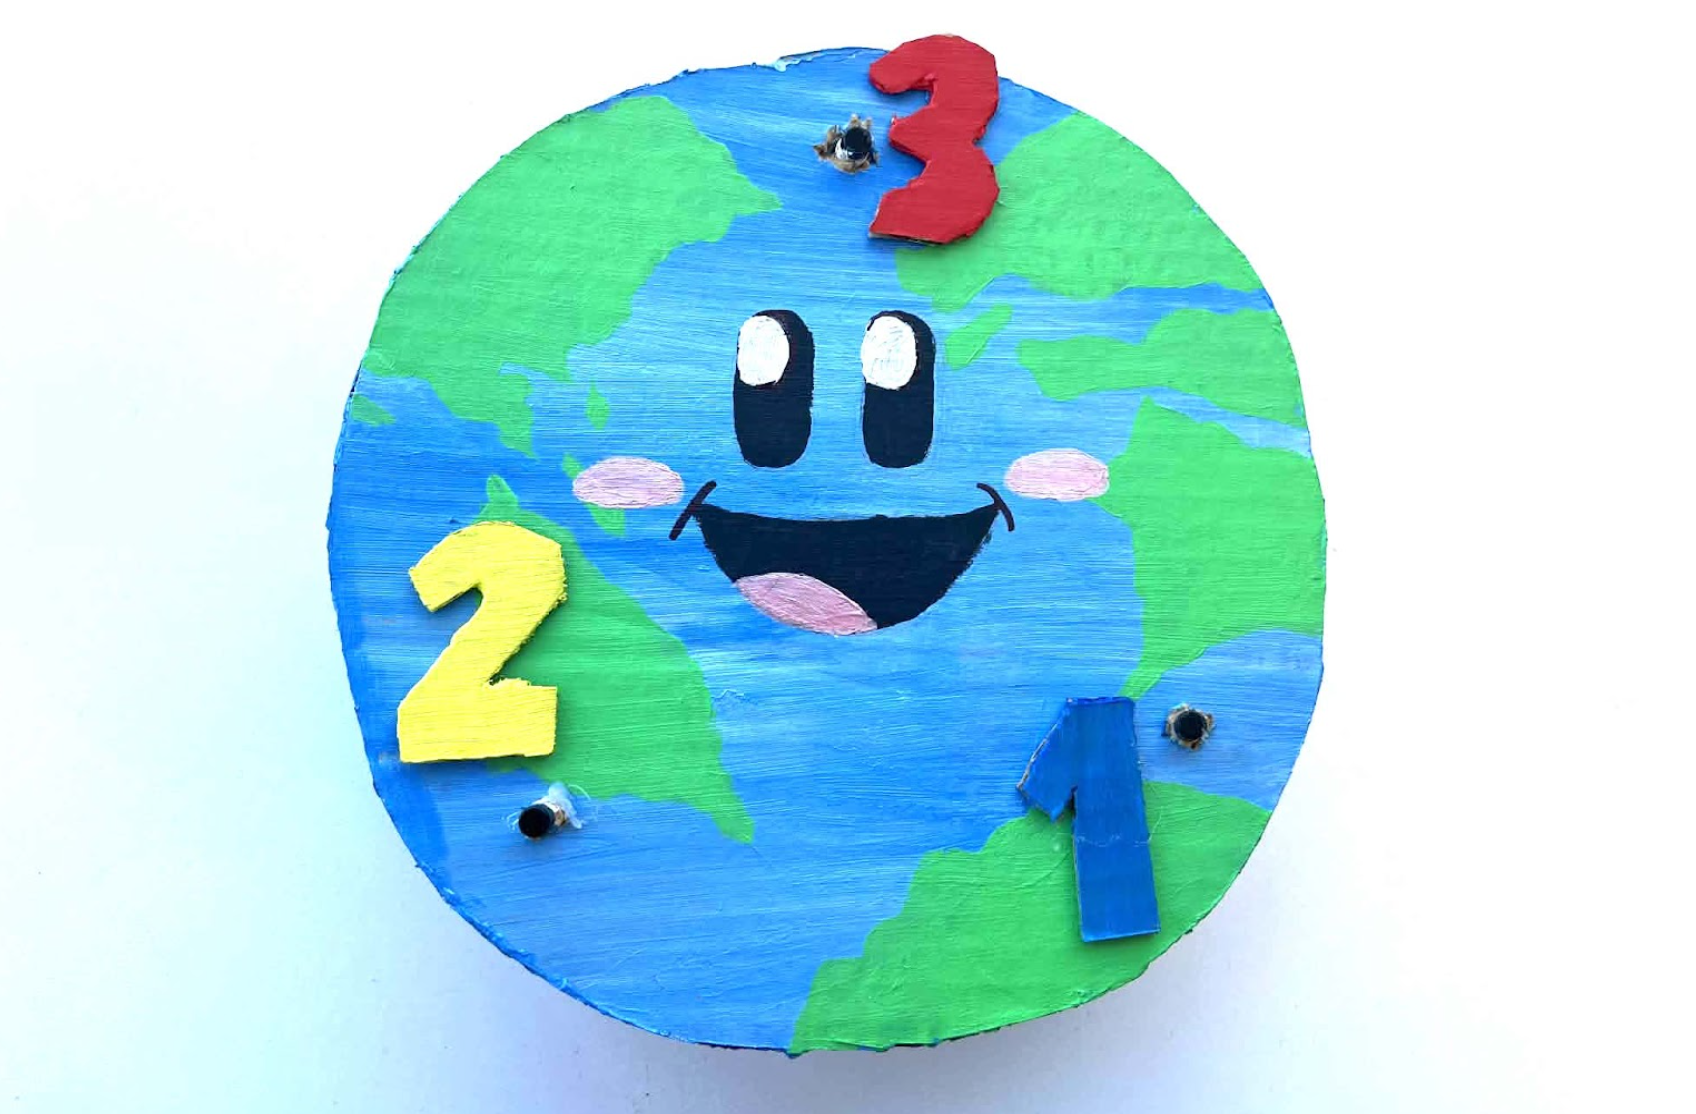
Go over the Physical Prototyping and Final Integration section of the Design Journal with the students. Students must document how they build and improve their fully functional prototype throughout the unit. Remind students that the final prototype must demonstrate that physical interaction triggers the circuits, the circuits activate the Micro:bit, the code produces visual or sound responses, and Scratch is used to support or extend interaction. Students are required to include photos of their early prototype, mid-stage build, and final prototype, along with notes explaining their material choices, changes made during construction, and how the design is appropriate for the target age group. Students must also include a reflection addressing safety, durability, and usability. To complete this task, students must provide a video or live demonstration of their toy and include a clear explanation of how all systems (physical design, circuits, and code) work together. This task assesses students’ ability to integrate systems, refine a solution through iteration, and create a functional, age-appropriate prototype.
Having trouble? Let us know by completing the form below. We'll do our best to get your issues resolved quickly.
"*" indicates required fields