- Loading…
This lesson is for instructing beginning video production students using multiple recording instruments for the first time, and will guide them through using a clapboard or “slate” to create an audio-visual cue that will be helpful in synchronizing media in the editing bay.
This lesson Also incorporates the following National Core Arts Standards,
MA:Pr4.1
Integrate various arts, media arts forms, and content into unified media arts productions, considering the reaction and interaction of the audience, such as experiential design.
MA:CR3.1
a. Consolidate production processes to demonstrate deliberate choices in organizing and integrating content and stylistic conventions in media arts productions, demonstrating understanding of associated principles, such as emphasis and tone.

Tools needed:
— Laser cutter and or Vinyl cutter or paint for making the clapboard.
– Camera,
– Audio Recorder,
– memory cards for each recording device
– charged batteries,
– Tripod/device holders
– the slate kit, including:
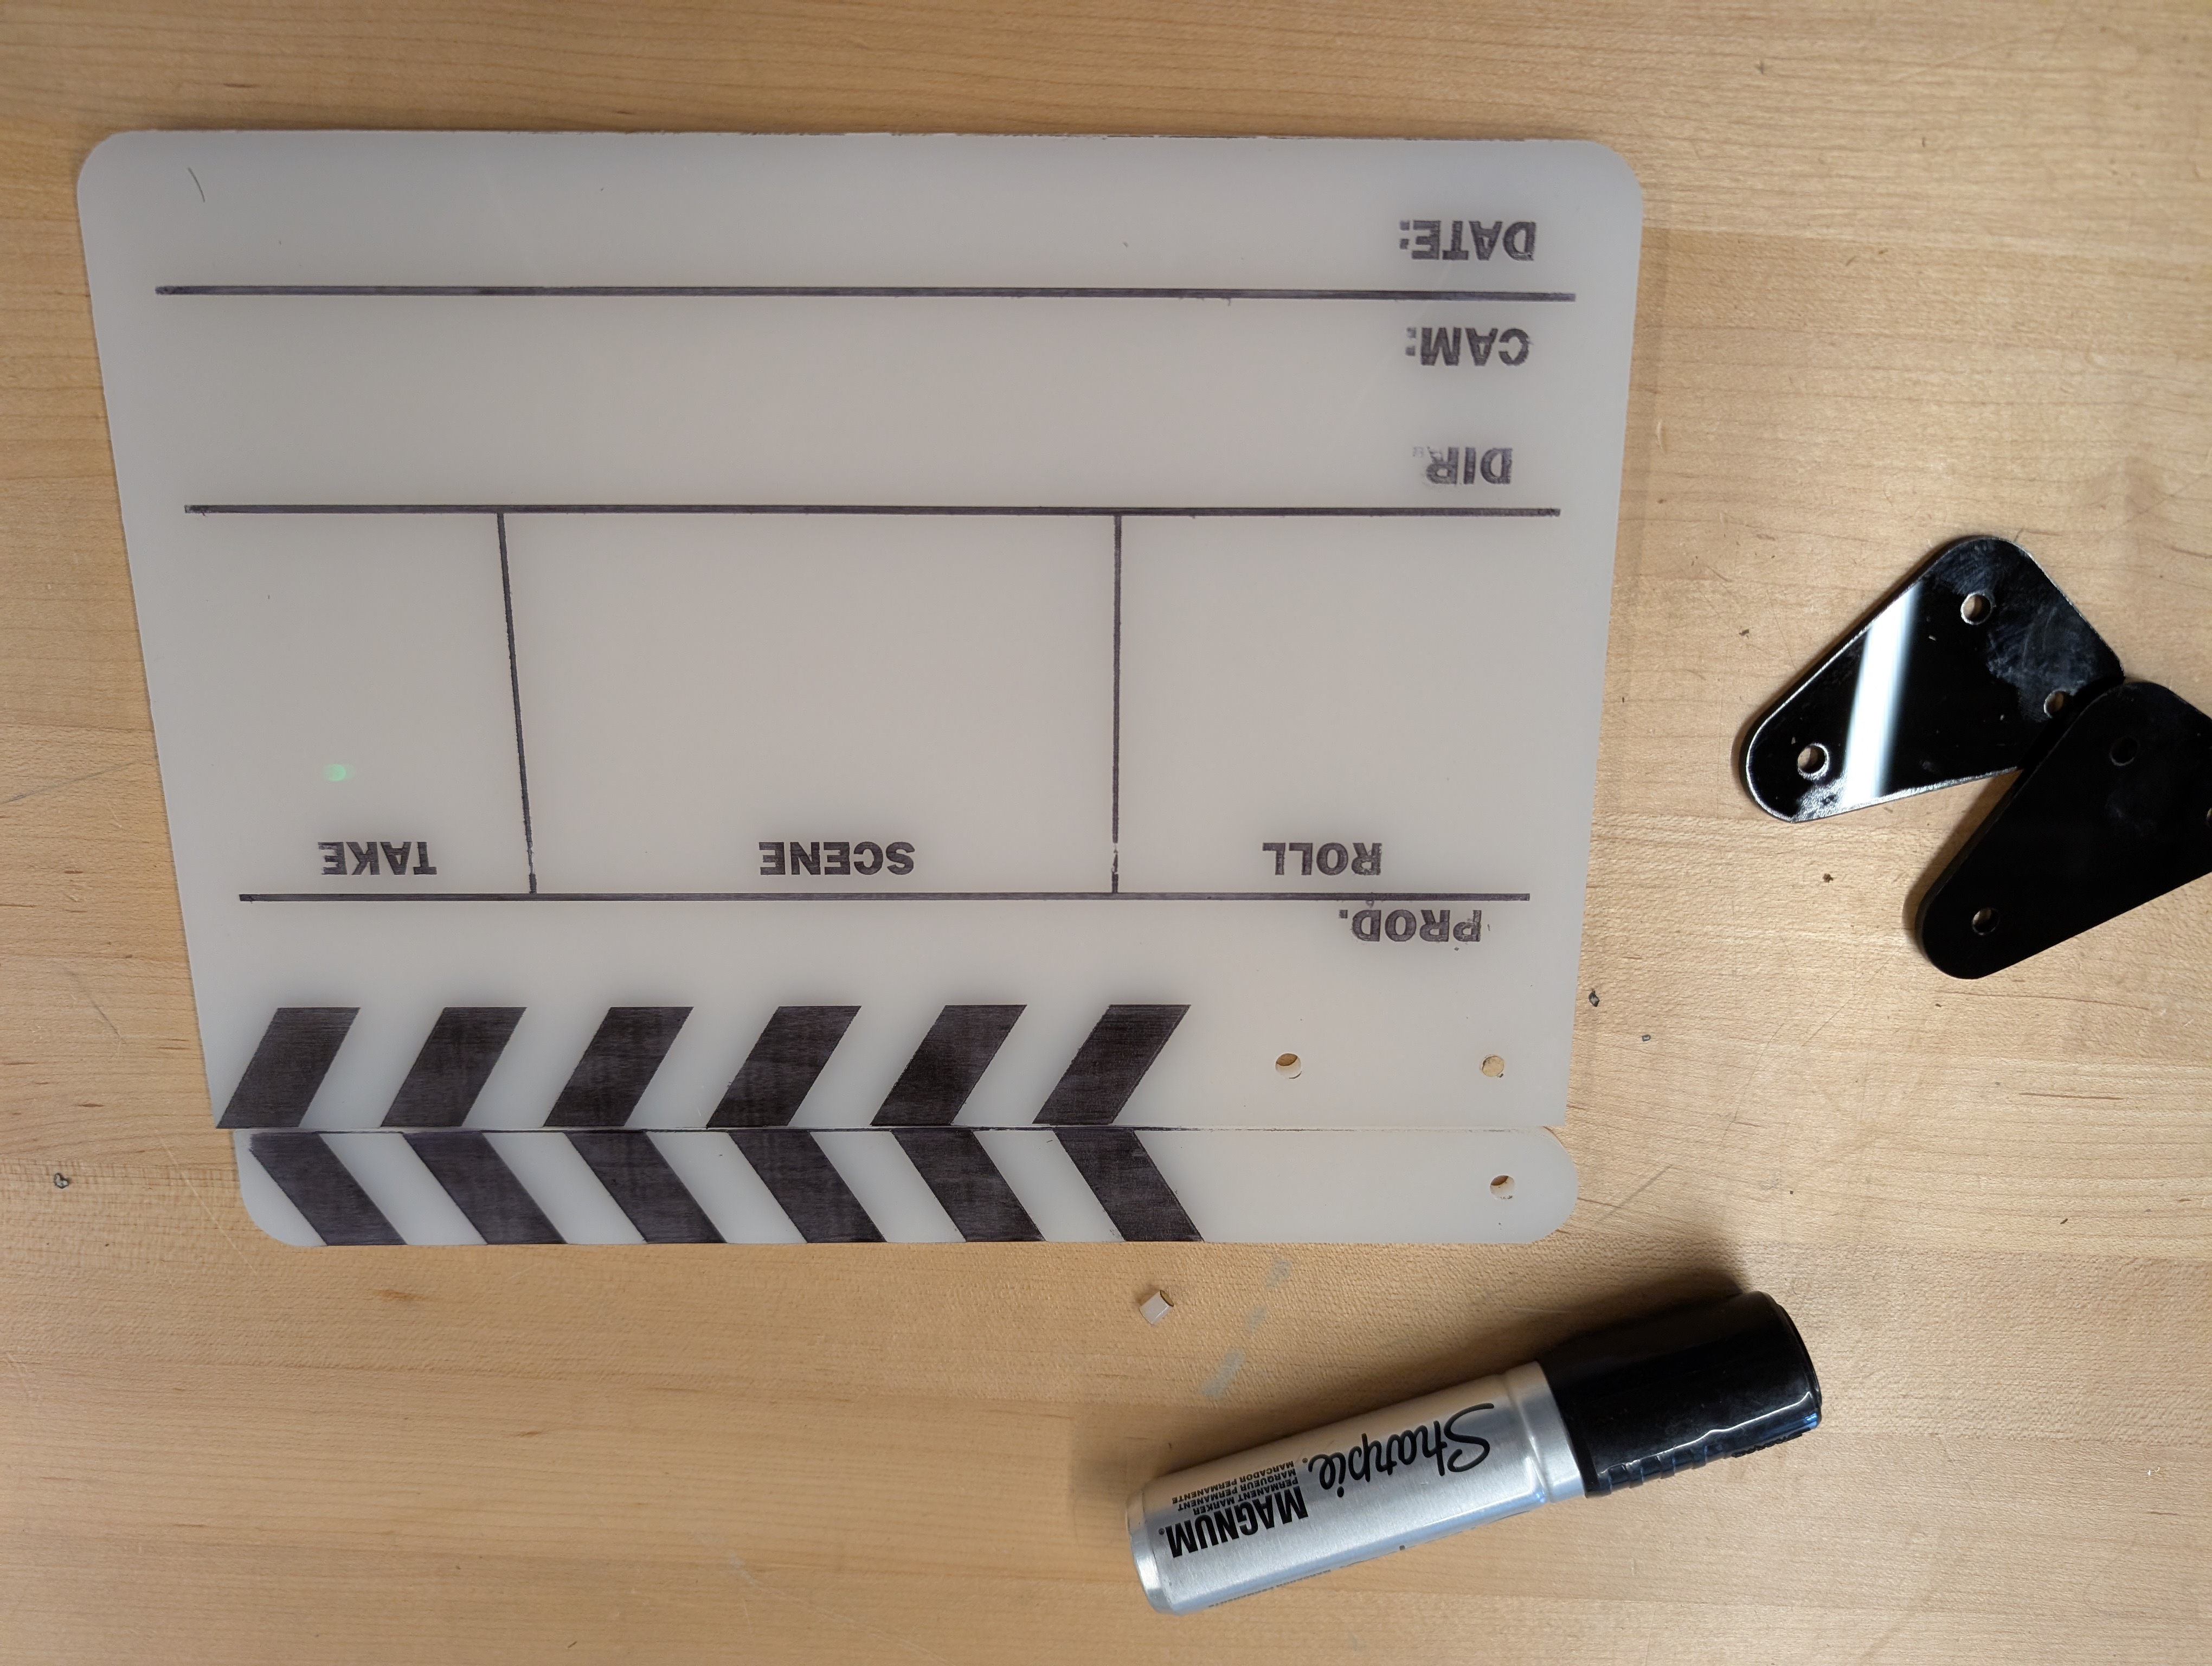
○ One digi-fab made Clapboard
○ One dry erase marker
○ One clipboard and shot-list
○ One pen or pencil.
PREP Ahead:
Students will arrive on location with everything needed to collect footage, including the clapboard itself.
Students will demonstrate use of the clapboard in footage that records audio and video information separately. They will ingest each piece of footage into their class hard drive, and edit the separate clips into a single, combined piece .
Each student will display a clip which shows the aligned footage, including the recorded use of the clapboard.
On many sets, there isn’t a physical need as harsh as it might have been in the early days of “Talkies,” where literal film was being wound up, and there was NO way to record video and audio together. Many cameras now come with onboard mics, and smartphones certainly are among them.
But, the rhythm of the clapboard is a rather large psychological symbol that an intentional process is underway, and it helps rally the group around the directors vision, in real time on set.
So, yes, the assignment COULD have been done without it. Even where there IS a need for separate sound and video to be synchronized through a crisp clap, it is possible for a person to do so with their hands. A somewhat rougher clapboard could have been made without using Digital Fabrication, by cutting the parts with more traditional tools. Or, an even fancier one could just be purchased online, like so many other consumable goods.
I think the advantage here is being able to create one bespoke to the class, and even several, if multiple filming groups are going out at the same time.
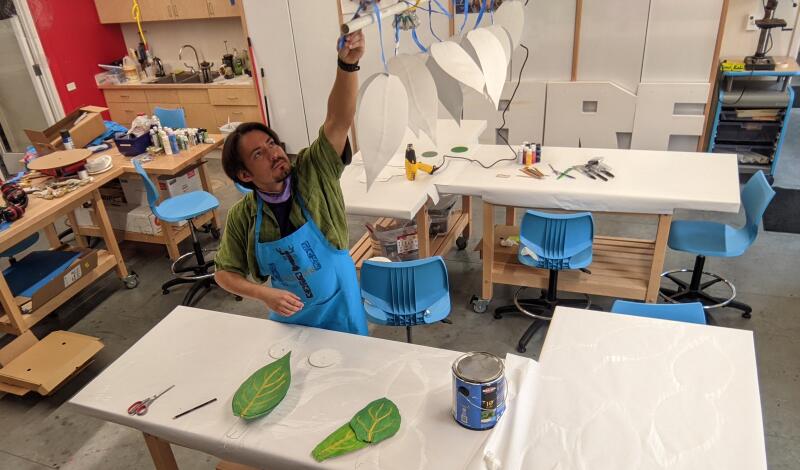
The big challenge for students in this activity is making sure they don’t forget the purpose behind the clapboard. The notes taken can mean a substantially smaller intellectual load, in the editing process. The producer stands at the ready to gently coach a slate operator into making sure the camera can see the clapboard, or that all the notes make it to where they need to go.
Dimensional constraints are a big deal in any fabrication process, and this particular design seemed at first not to have any. I made an arbitrary choice to make the whole board slightly smaller than a sheet of paper, but realized there is definitely good reason to be more flexible, and my illustrator model does not have that flexibility built in. Perhaps a more parametrically designed model would offer such by default, especially where the important constraints might not be noticeable until after the first version is real.
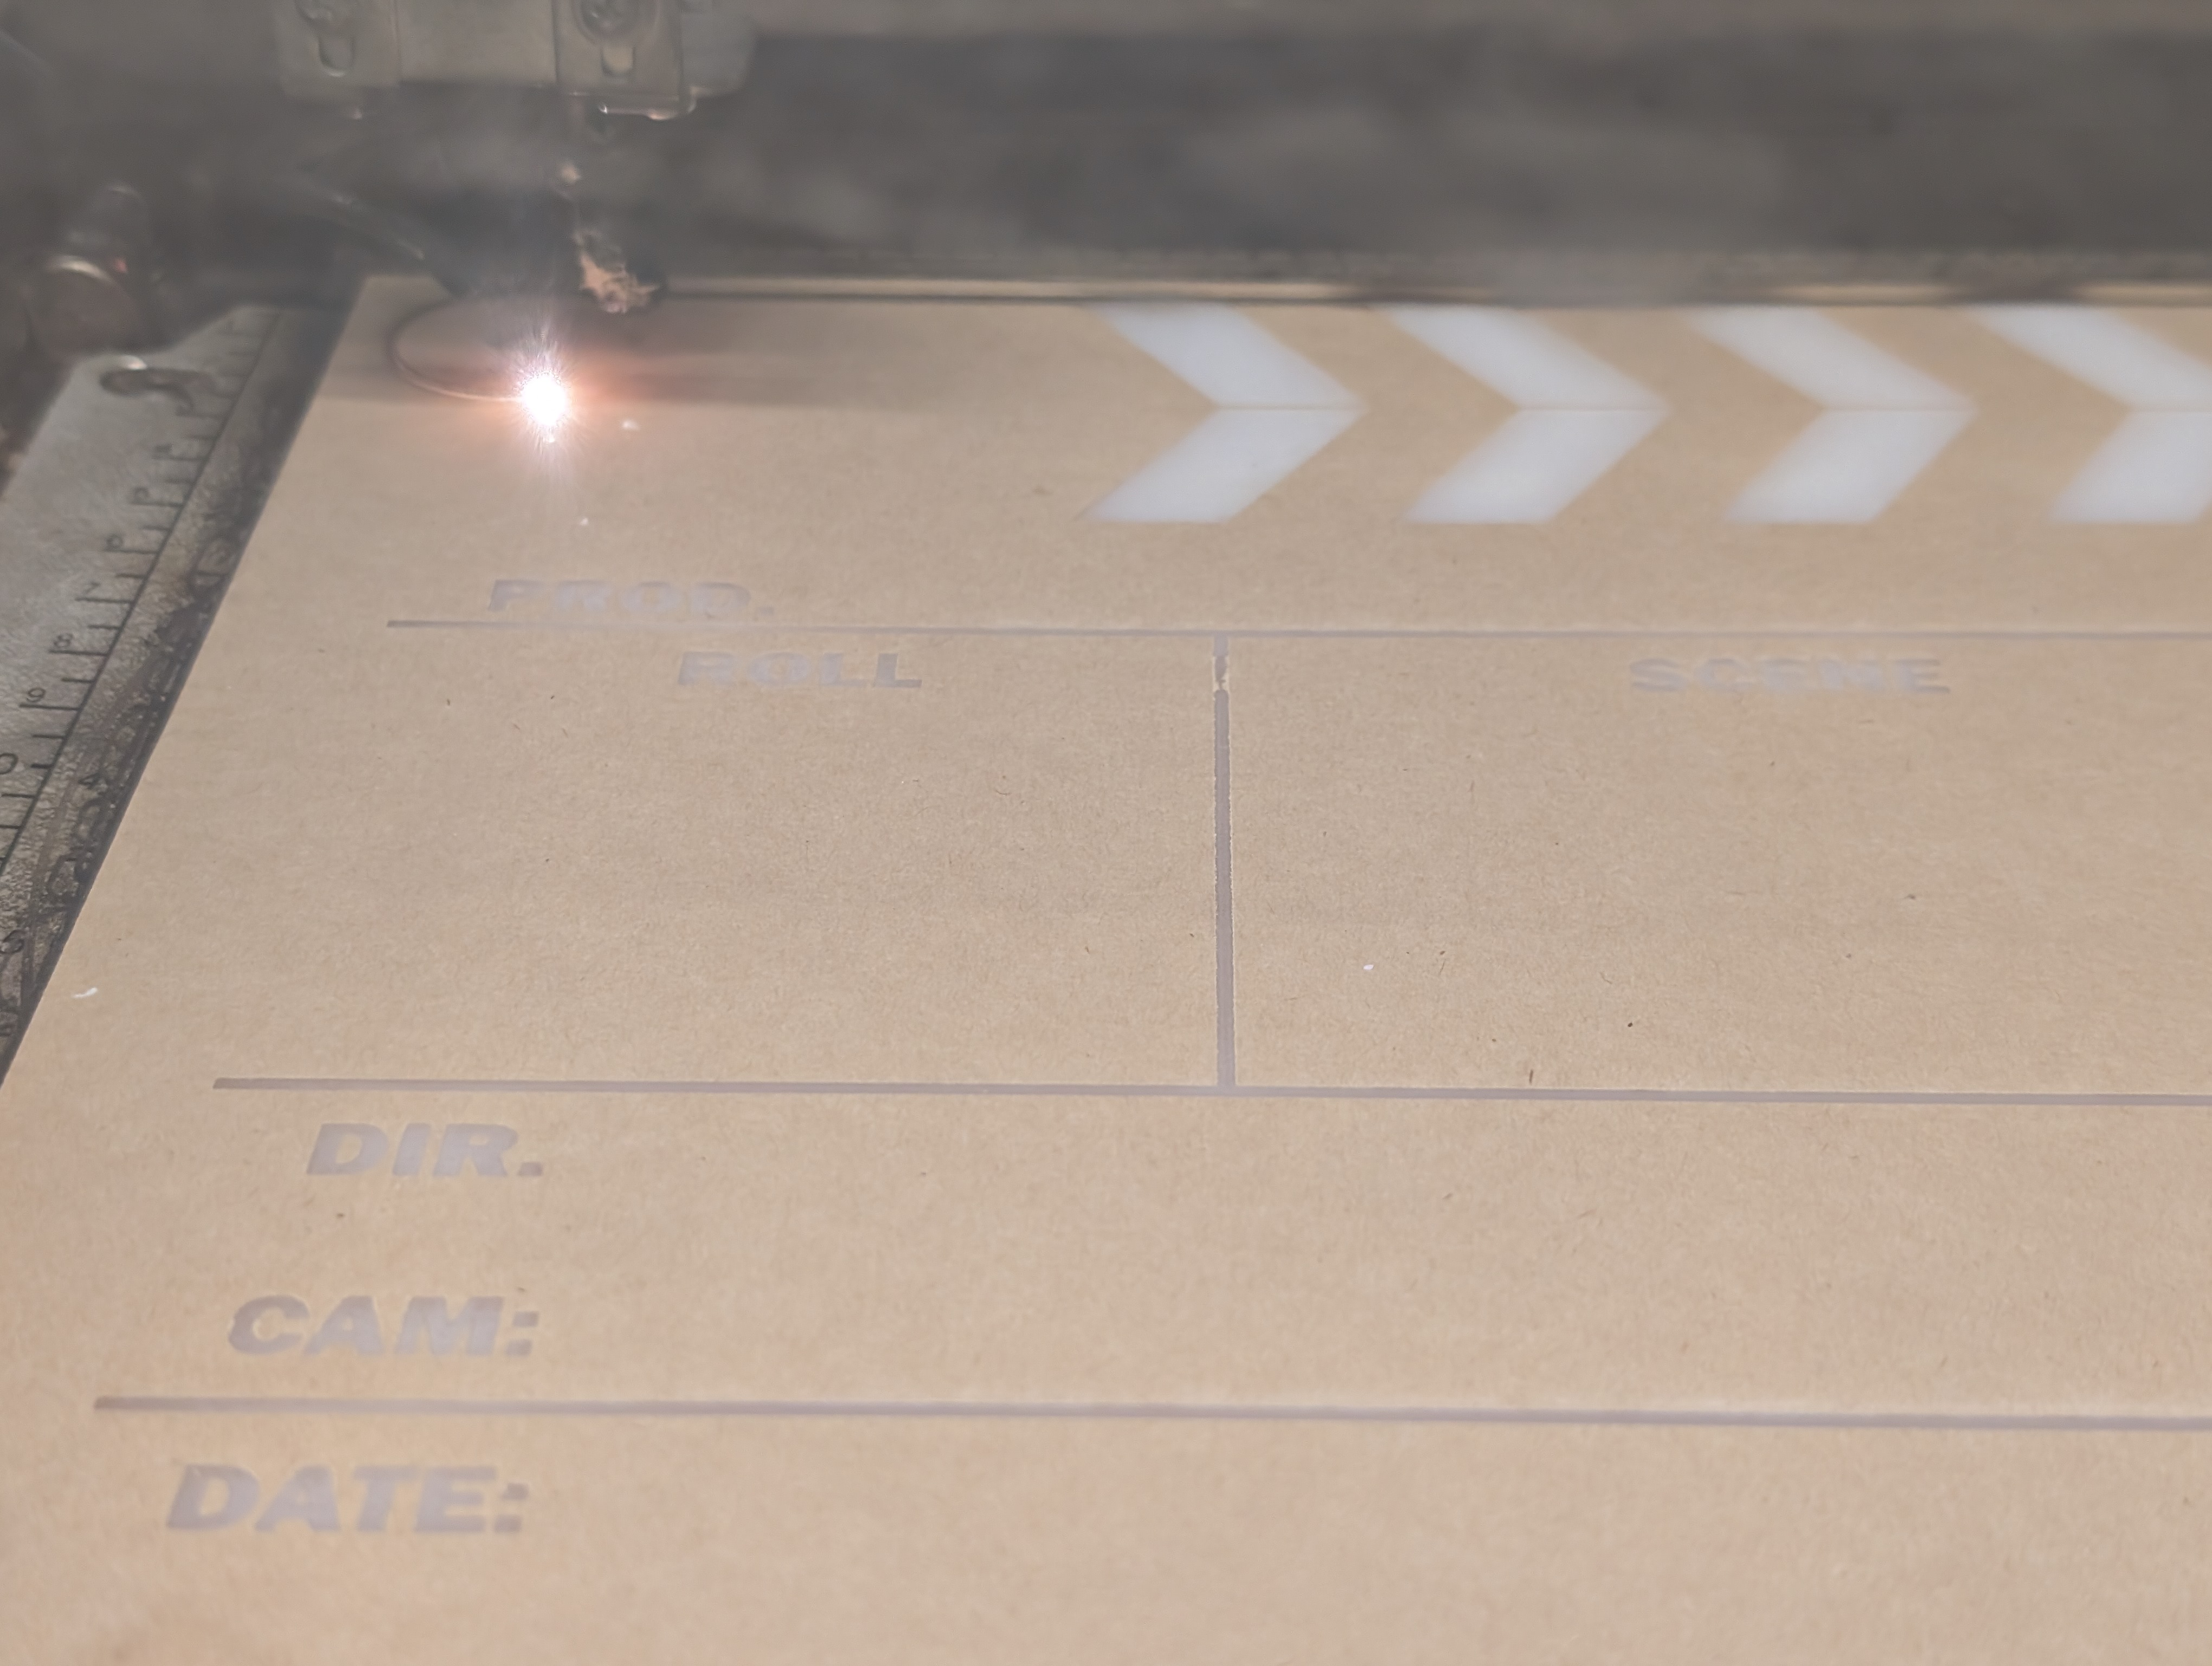
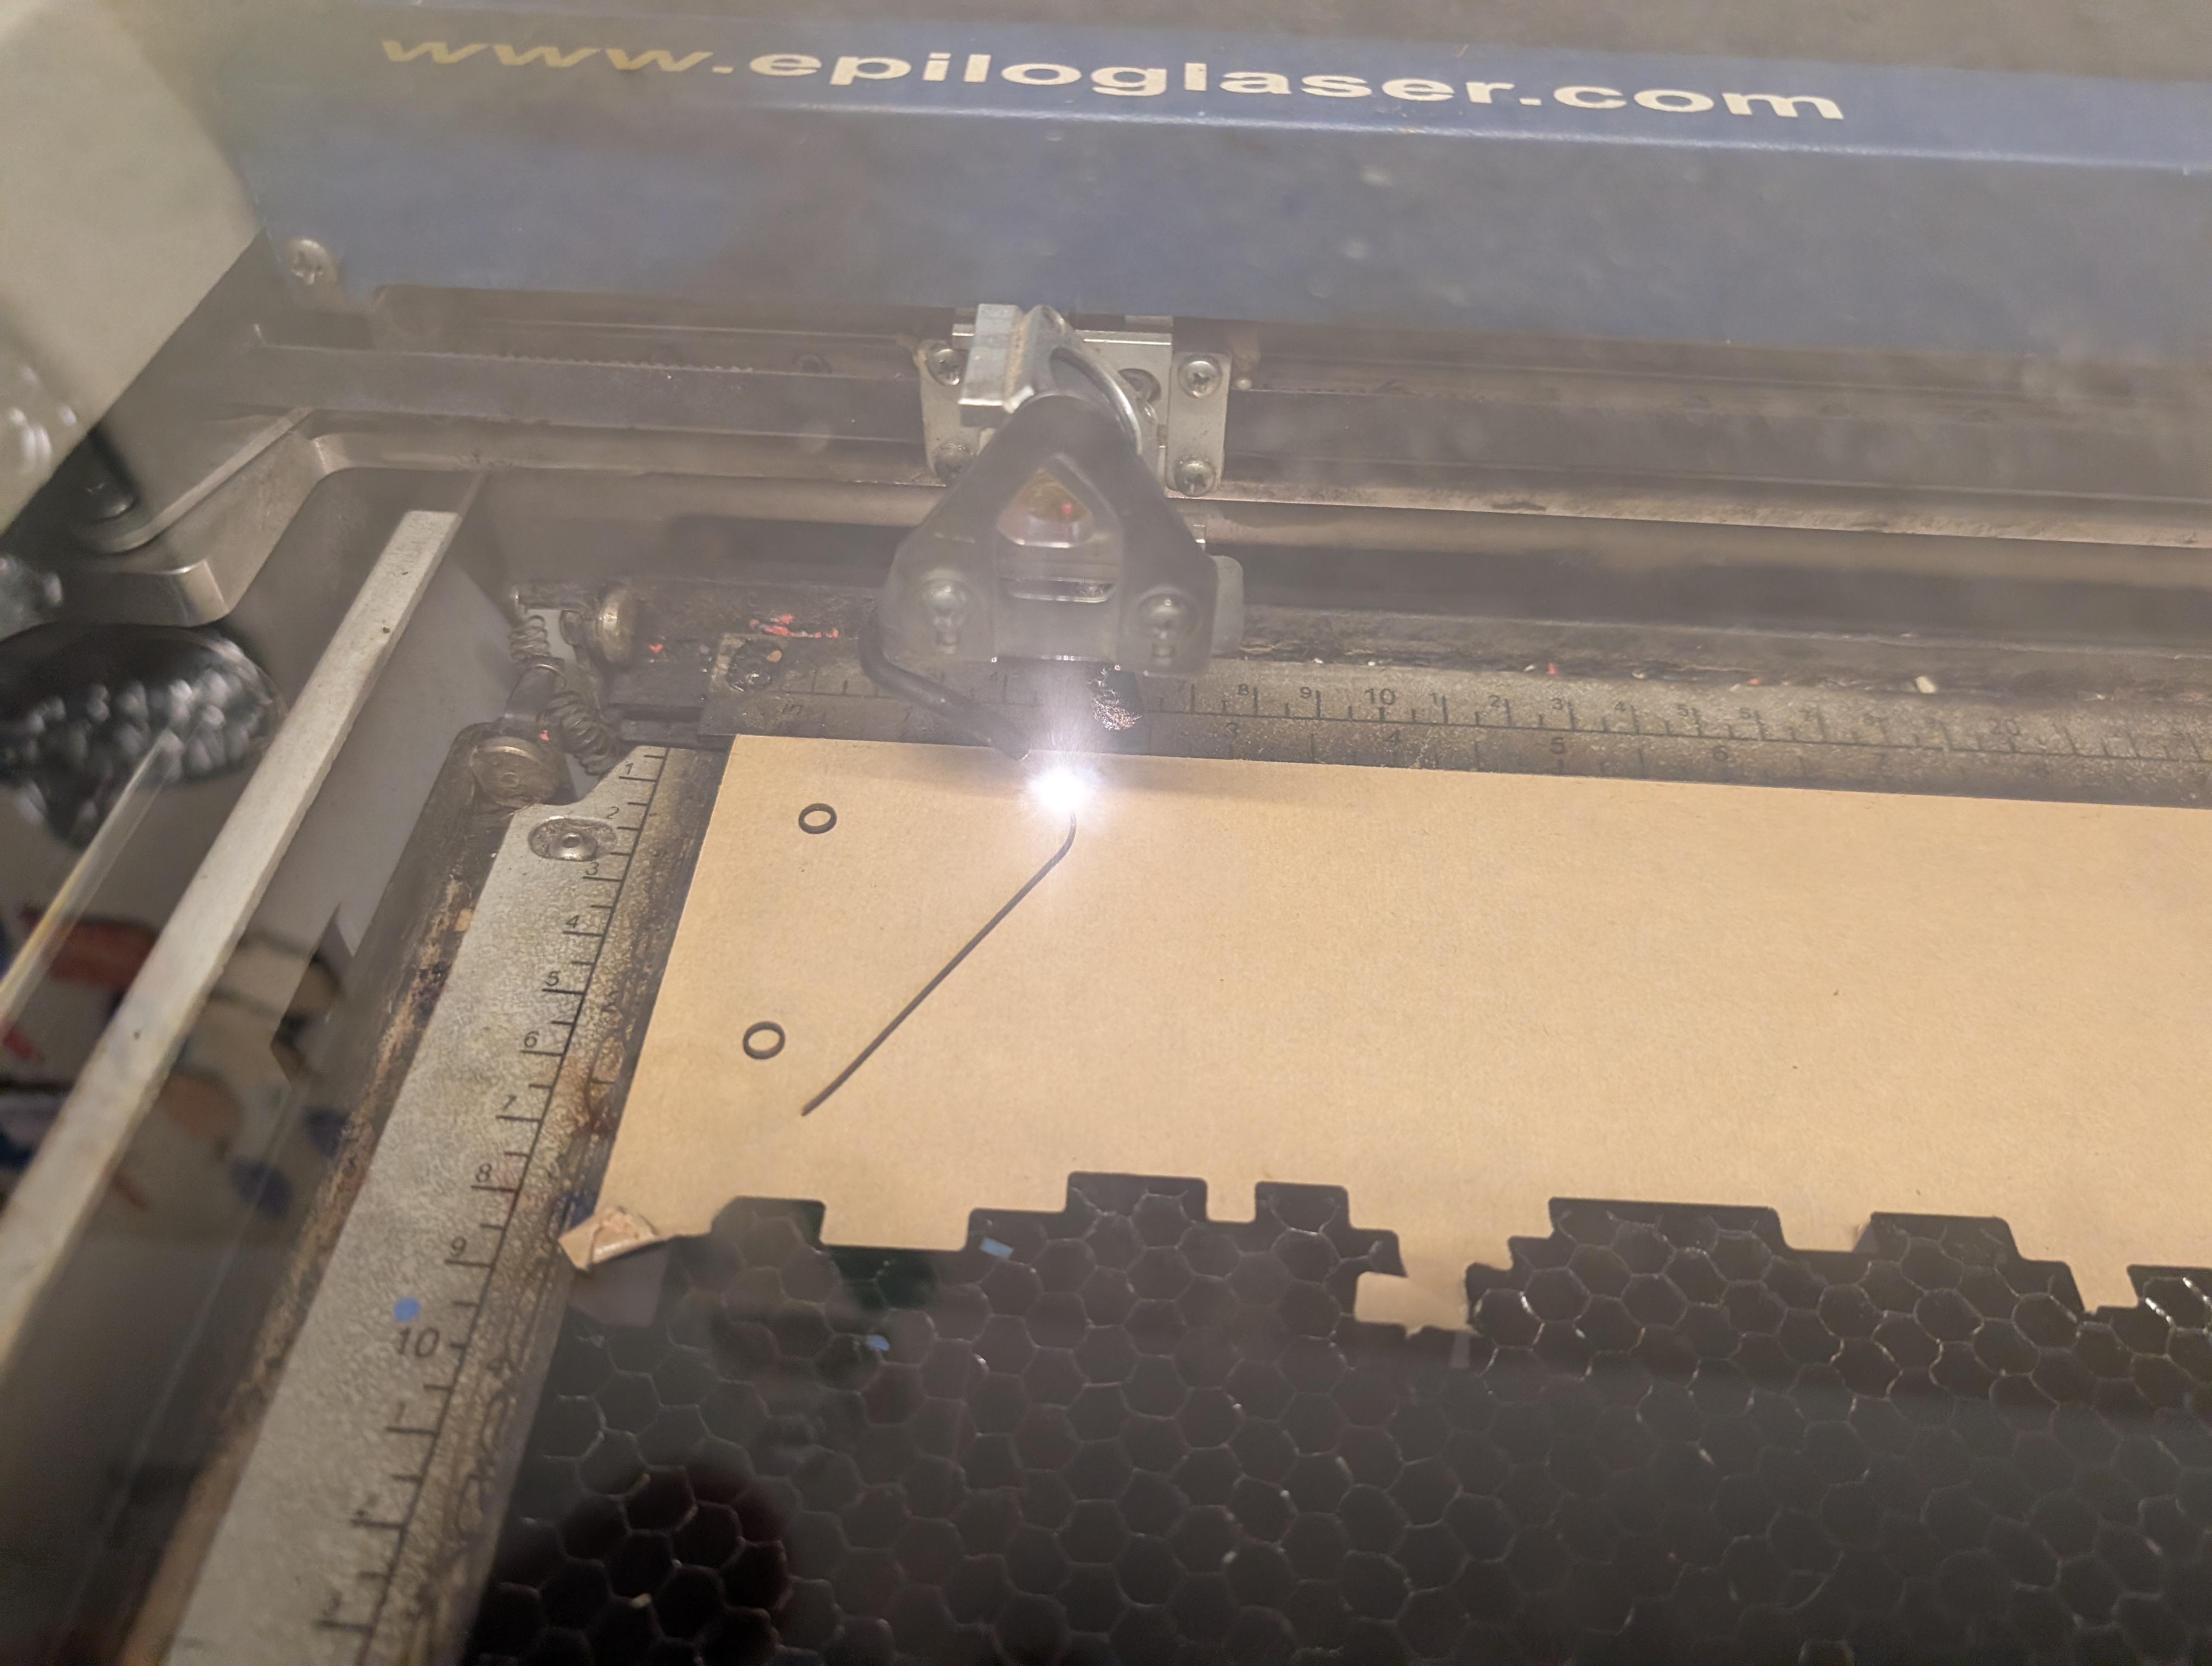
Use the included digital file to create the clapboard pieces, then join them together with three 4mm screws and locking nuts.
The file is organized into layers which allow the user to handle its assets in multiple different ways:
The large panel where the text is aligned should be cut from white acrylic, but the black linework and letter forms can either be etched through the masking paper, then painted OR they can be cut from black vinyl and adhered. The upper parts can be cut from black acrylic with white stripes either painted or adhered upon them.
The two triangular pieces should mount to either side of the main panel, and the lower screws should attach first, so it can be held steady when the upper part is joined in.
The upper joint should not be so tight that the lever arm cannot be freely swung to make the iconic clapping sound that is the purpose for the tool.
Repeat as needed to achieve as many as needed for your filming groups.
OPTIONAL: students could help with the assembly process, and gain a sense of familiarity with the clapboards even before using them for real.
Getting all the equipment out to a shooting location, having the "talent" ready to go, and a limited time to get the footage needed is NO time for students to be "winging it." As such, this lesson is intended to follow a series of pre-production lessons where a "shot sheet" was created by students to guide the cinematography itself.
Set the camera(s) and sound recorder to be focused on the action of the scene.
Verify that each device is ready to record, and that onscreen talent is aware of their planned action. Consult the shot-sheet as needed to check, and to use information on it to fill in the information that will be displayed on the Clapboard.
Make sure that the shot sheet and the clapboard are consistent for the scene currently being shot.
Make sure that all cameras currently pointing at the action can see the clapboard, and that the mic is close enough to hear it.
While different production teams may vary, what's important and consistent here is that there will be a call of "Quiet on the set" which is to let everyone know that things are getting started.
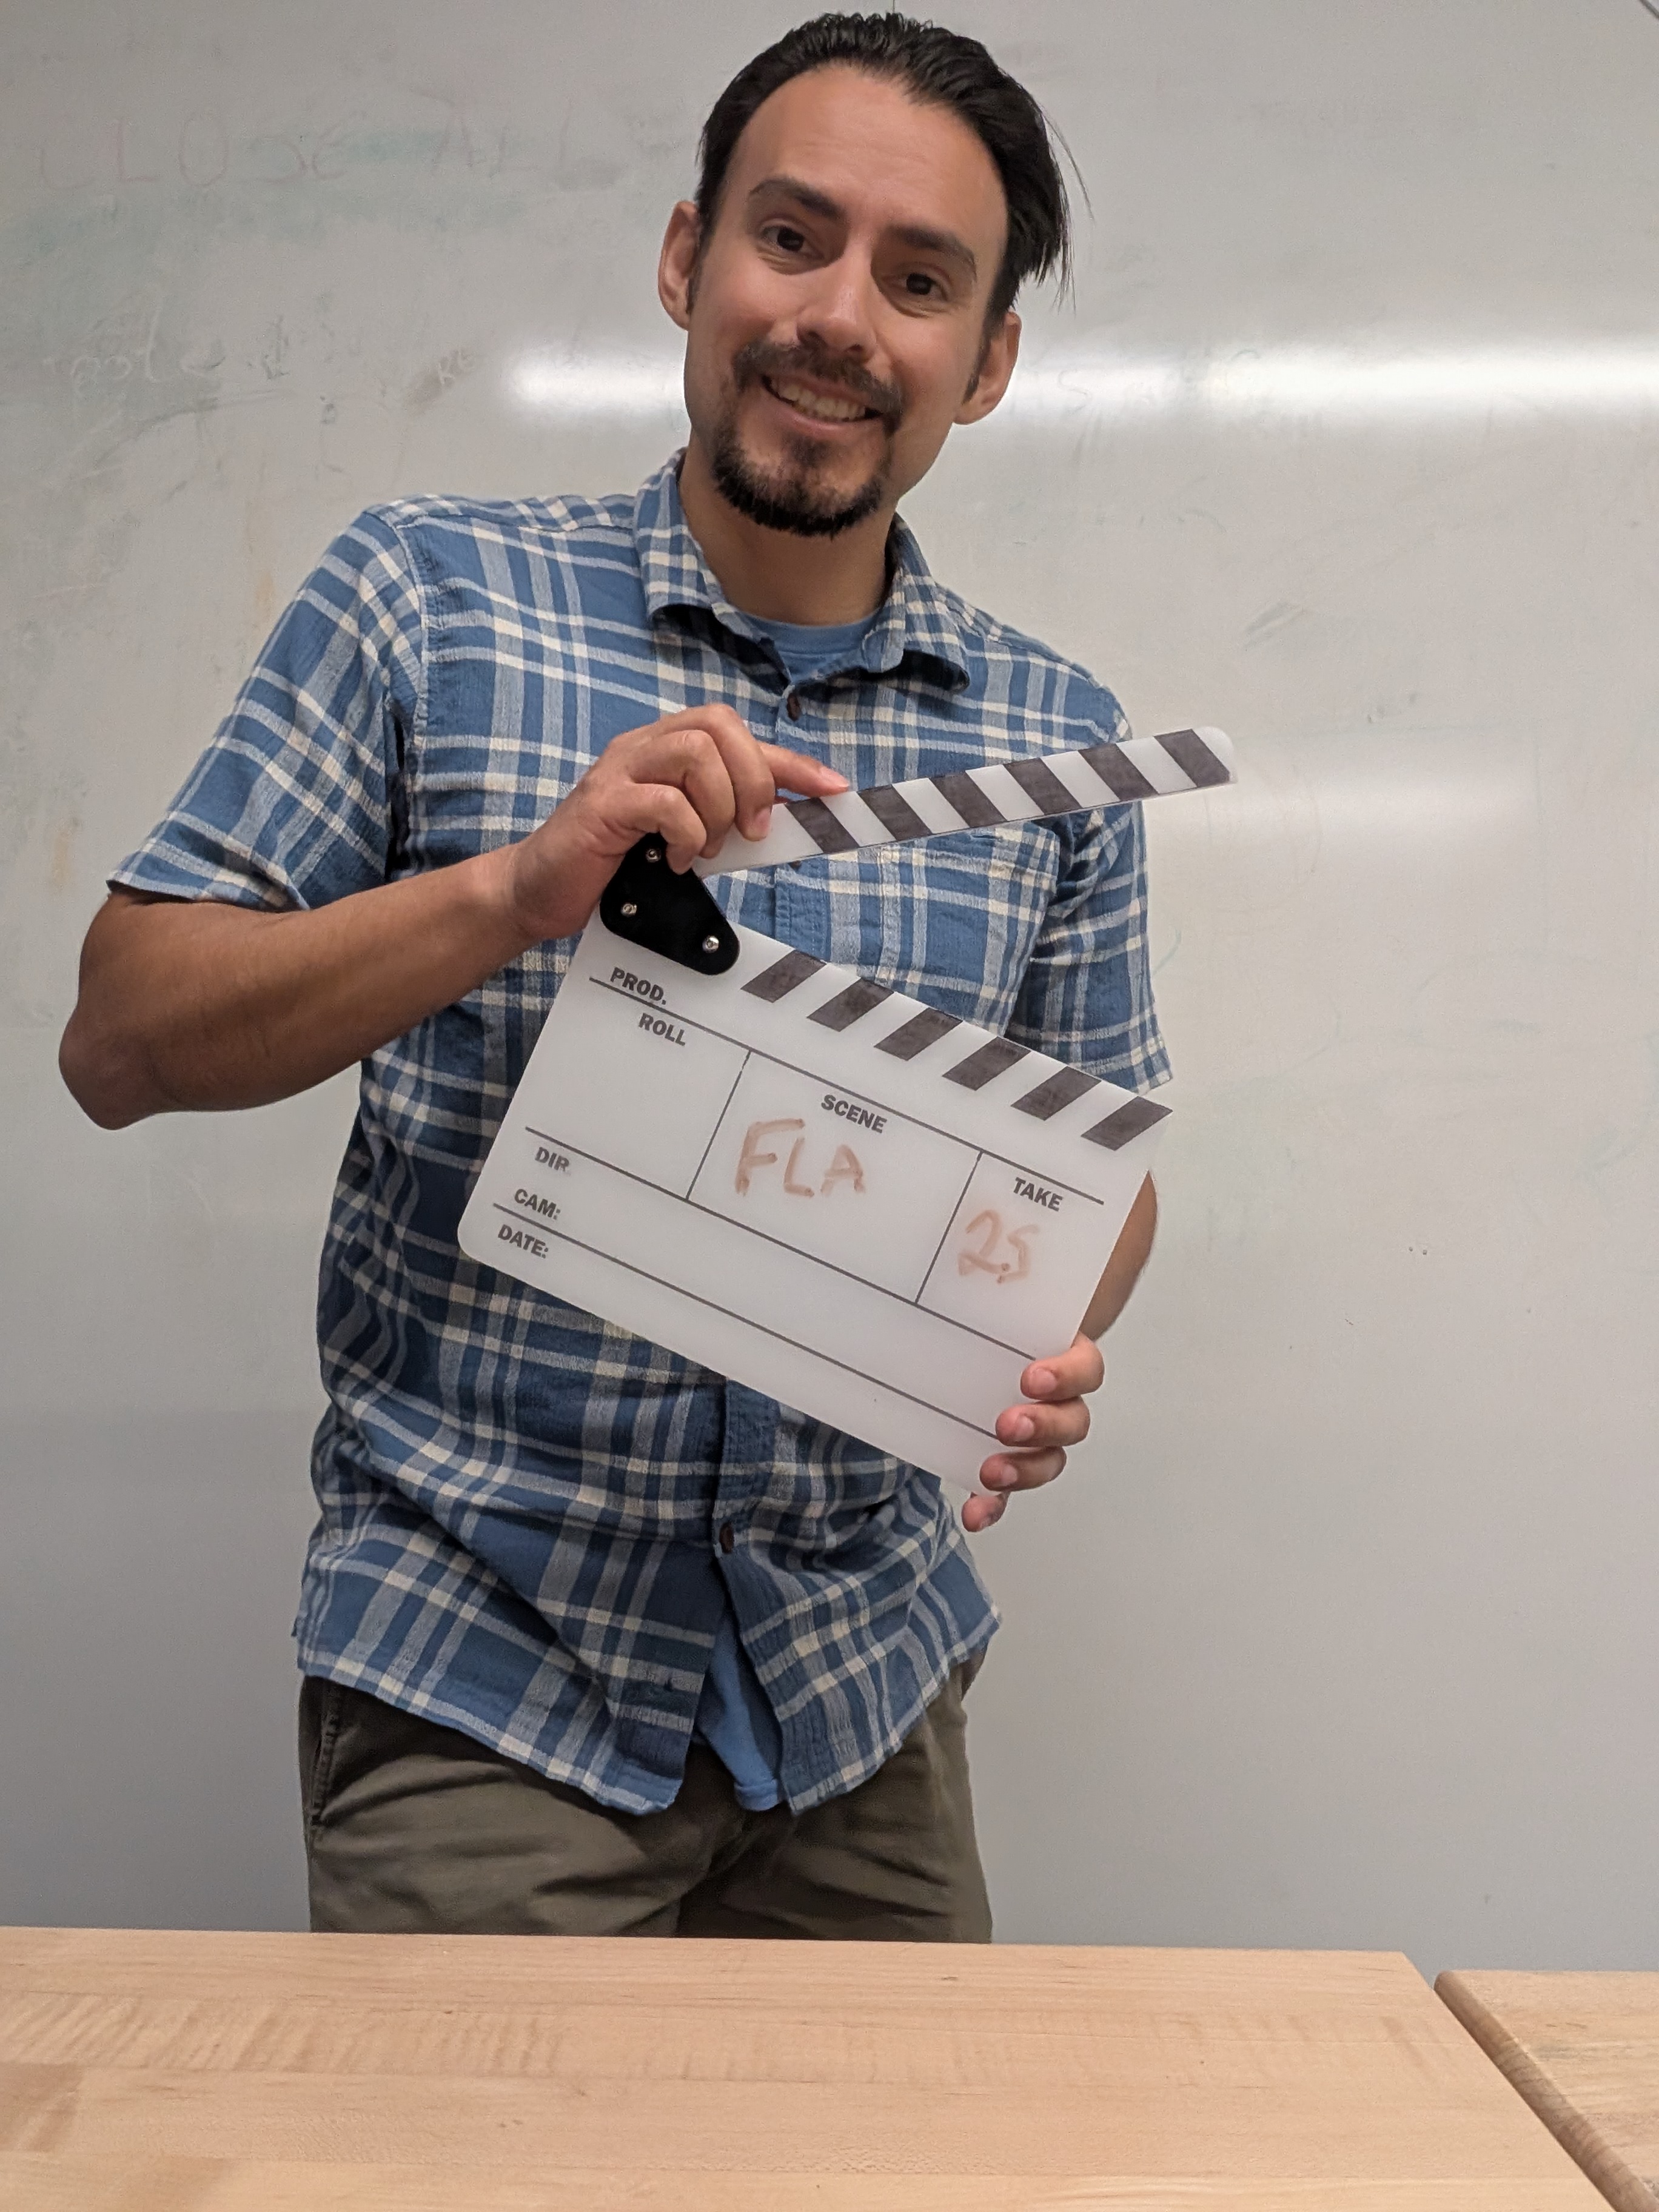
Hold the clapboard in view of all cameras, and have the lever at its top opened.
Each recorder signals when they are successfully recording, then its time to say, in clear tone, what’s on the slate for this shot. While the cameras should be able to see the writing on the clapboard, the verbal note is for the sound recorders, which can’t see it.
After the note is read in, it is customary on some sets to announce that the clap is coming by saying “Marker”
Even if this step is omitted, the next one should be more than clear. Push the lever down so that it makes a clean, crisp snapping sound.
Once that is done, exit from view as quickly and safely as possible.
As soon as the clapboard and its operator are no longer visible, the director calls “Action” and the scene begins.
If something goes wrong the, call for “Cut” will be followed by “Reset” and everything repeats, with a slightly different note in the “TAKE” column.
Once the final take has been had, note which take ended up being the good one, then set the slate up to show the next sequence to be recorded.
After the Director has ended the shooting day with the, "That's a Wrap" call, it's time to collect the media cards, and gather their footage onto a production hard drive.
Load each card onto a reader, and transfer its footage to a folder on the production drive.
Rename files as needed to make sure they match with the names given to things on the shot sheet. Remember, it’s not extra if it saves time in the process.
Import the clips into the video editing software, to synchronize them into a project. For this activity, Adobe Premiere Pro was used, but programs like PowerDirector, iMovie, Final Cut, or VideoStudio could do similarly. Look for a program that can handle multiple pieces of audio and video.
Import clips, and check to see that you have captured all of the ones listed in the Shot sheet.
Arrange each one on an editing track appropriate to its type. (programs typically designate between video and audio)
Ensure that the audio track view mode allows for wave-form viewing.
Play through the primary video track and watch for the clap of the clapboard.
Now hide that video track, to view others, and drag them into positions where the visible clap on those tracks aligns with the marker created.
When working with Audio tracks, it is no longer necessary to hide video, and is preferrable to have at least one visible.
Once all clips are aligned, playback should allow for a visual check that not only do the clapping and sound of clap line up, anything else that happens in the clips should be just as observably synchronized.
From here, using the razor tool to cut and modify clips will allow you to select which video is visible when, and throughout, audio should sound clear and consistent, unperturbed by the cutting, so long as nothing moves.
Make any further edits by cutting and removing chunks from the clips as desired.
OPTIONAL: Use graphics to add a title or credits to the end of your video.
Once your composition is complete, export it as an MP4, using standard settings for web display.
Having trouble? Let us know by completing the form below. We'll do our best to get your issues resolved quickly.
"*" indicates required fields