- Loading…

Online lesson plan, Introduce innovation and how Islam encouraged the innovators, in order to address some of the innovators of the Islamic world in the golden era of the Islam.
We will also address the unreal technologies like (VR, AR, and MR), to try distinguishing between them.
We will also introduce Spark-AR application from Facebook in order t create AR filters form both Instagram and Facebook.
This lesson plan is a track of 5 days; each day will have its own headline and deliverable.
Day 1 : Augmented Reality
Day 2 : Artificial Intelligent
Day 3 : Virtual reality
Day 4 : Special Effects
Day 5 : Shot & Share


In this day we will briefly introduce the track to the participant and also we will ice break with them in order to have their attention and introduce them to the first deliverable of the first day.
1- We usually start with introducing the participant to our fabrication laboratory and encourage them to follow us on all of our social media accounts in order to be updated with the latest sessions.

2- Then we will introduce the participant to the track and what we are going to deliver in the 5 days.

3- Then we will break the Ice with the participant by asking about the Islamic Art and what is the most used in the Islamic Art.

In this section we will introduce the participant to Islam and how Islam Encouraged Innovators at the the golden era.
1- We will start by introducing Islam to the Participant, “As Islam Is an Abrahamic religion which aims to fully submission to Allah (God) as one has no partner”.

2- Then we will introduce how Islam encouraged innovation as any act of working, thinking, and any action will cause life on earth is considered to be part of the religion and it’s a worship.

3- Then we will introduce one of the innovators in Islam, Which is Ibn AL-Haytham; who was a pioneering scientific thinker who has his observation of light if entering to a dark room, had made a major breakthrough in understanding the light and sight.

4- Then we will introduce the participant to the Camera Obscure which Ibn Al-Haytham has invented, which had put the first stone for the camera we are using these days.


5- Then we will show the participant a quick video regarding Ibn Al-haytham.

6- Then we will talk about the Islamic art as visual arts produced from the seventh century by both Muslims and non-Muslims.

7- Then we will show a video shows some Arts in the Islamic era

8- Then we will ask the participant about if they have seen any Islamic art previously or if they have some in their homes.

In this section we will introduce the participant to what we are going to do today.
1- We will introduce the participant to Spark-AR and how to download it.
2- Spark-AR application is a tool from Facebook that allow people to create AR (Augmented Reality) effects to be shared on Facebook and on Instagram.
** how to download the application step-by-step.
– At the beginning we need to go to https://sparkar.facebook.com/ar-studio/
– Then we need to go to the download page.
– Finally, we need to press download to start the downloading of the installer.
3- Then we need to install the application on the PC, so we follow the following steps:
– We will open the installer we downloaded.

– Then we need to click next, and then we have to accept the terms.

– Then it will ask if you have IOS you have to download iTunes.

– Then we will just follow the process till the application finish the installation process.
– Then the application will ask to sign in using your Facebook account or Instagram account.
– Then the application will open.

In this section we will introduce the participant to the Artificial Intelligent (AI) and how the augmented reality is taking advantage from this.
1- We will start by introducing one of the Innovators in Islam “Mohamed Mousa Al-Khwarizmi”, As a mathematician, astronomer, astrologer, and geographer.
2- “Al-khwarizmi” is the founder of the algorithm, as his innovation in algebra played the role in having nowadays technology.

3- Algorithm is a list of rules to follow in order to solve a problem.

4- Then we will show the participant a video shows what is meant by algorithm and the inventor of it.

In this section we will Introduce the participant to the Artificial intelligent and how does it benefits the Augmented reality realm.
1- We will start by asking the participant about their knowledge in AI and how it’s been used nowadays.

2- Then we will briefly describe what is AI for the participant as “Simulation for the human intelligent in machines that are programmed to mimic their actions and their thinking”

3- Then we will Show the participant a video to clarify what is meant by AI

4- Then we will ask them about their opinion in the future with this technology.

In this section we will introduce the linkage between both of the technology and how AI is being beneficial to Unreal technologies in general.
1- We will start by showing how the AI technologies is an added advantage to the unreal technologies and how it helps developers on building interactive applications.

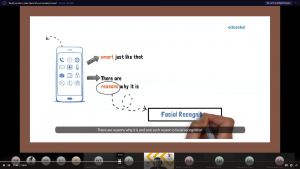
2- Then we will briefly discuss and clarify the facial recognition function the AI is doing after tracking the head and the facial POS.

3- We will show a video to clarify facial technology tracking and its applications.


4- Then we will introduce them to the face mesh layers as “Digital layers added by the computer to the face in order to modify the layer and add any kind of effects to it without affecting the camera layer been extracted from”

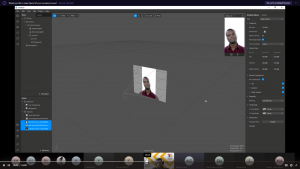
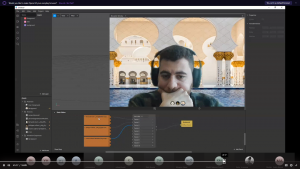
In this section we will show the participant how to use Spark-AR application.
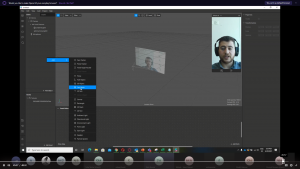
1- We will start by showing the participant how to create a new project on Spark-AR.

2- Then we will show participant how to deal with the layer and its importance in making the projects.

3- We will show the participant the importance of having the sort of the layer in this order and any change would change the appearance of the filter.
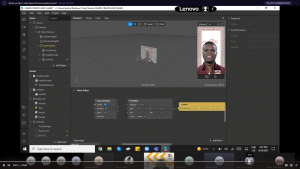
4- Then we will show the participant how to add a face mesh to their face.


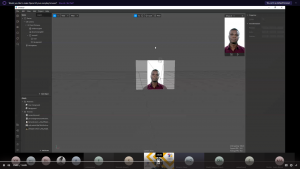
5- Then we will add material to this face mesh.


6- Then we will rename the material, and we will change it shader type to “Retouching”; using this we can smooth the skin tone or sharpen it.

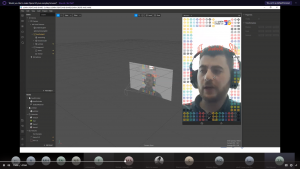
6- Then we will show the participant how to extract the camera texture and the person segmentation out from the camera.

In this day we will introduce the participant to virtual reality and we will start by ice-breaking question to attract them and also to recap what we delivered within the previous 2 days.
1- We will start by asking the participant “What is Virtual reality”

2- Then we will clarify what is Virtual reality to the participant.

3- Then we will show the participant how this technology works.

4- Then we will list the uses of VR to the participant.

5- Then we will show the participant a video about VR experience.

6- Then we will ask the participant about the difference between AR and VR.

In this section we will be completing what we already started in the previous days as we will be introducing the participant to the 3D objects and how to distinguish between them and 2D objects.
1- We will show the participant what is meant by 3D objects and the how to differentiate between them and 2D objects.


2- Then we will show the steps we will be doing to the participant.
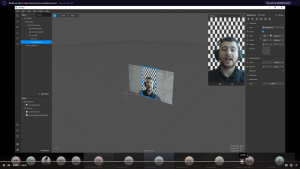
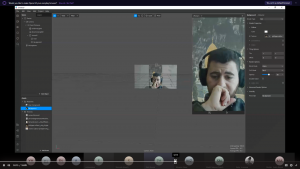
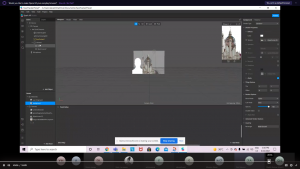
3- The first step we have to do is creating a rectangle layer for the background and another one for the foreground which is for the user (Person segmentation material extracted from the camera)

4- For the user rectangle the layer is going to be (Foreground) then we will be creating a material for this rectangle.
For this material, we will call it “User Foreground”,
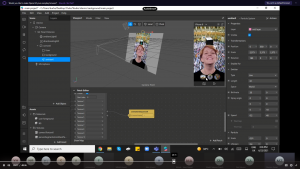
5- Under the material option we will add the camera texture under the diffuse properties, and we will choose under the render option for the blend mode “Alpha” and the cull Mode to be back.
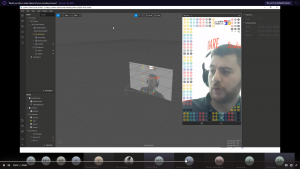
6- We will also choose the shader type to be flat, so it’s not affected by the light sources, and we will enable the alpha option and add the person segmentation texture to its texture.

7- Then we will add the material to the rectangle.

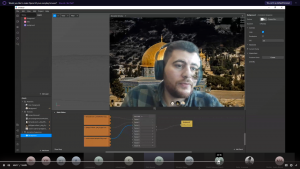
8- Then for the other rectangle we will choose the Background layer, so it appears at the back of the person, and we will add a material to it, we will call it “Background”

9- For the material we can choose any background image and add it to the diffuse texture, We will also choose the shader type to be flat, so it can’t be affected by the light sources.


In this section we will introduce the participant to special and visual effects and how they are being created and used.
1- We will start as usual by asking the participant a question, “What they know about visual effects and special effects”

2- Then we will describe special effects to the participant as “Effects being physically created and then manipulated through the capture angle or simply the needed effects for adding the visual effects later on”

3- Then we will clarify what is meant by the visual effects to the participant as “Effects been added by the computer to give the scene a bit of live reactions and reality”


4- Then we will show the participant a video, clarify what is special effects and Visual effects and how to distinguish between them.

5- Then we will briefly define what is meant by animation.

6- Then we will present a video to the participant to clarify what is meant by animation.

7- Then we will show the pros of having animation in the scene.

8- Then we will ask the participant if they think this technology will fall back because of the having new technologies like AR and VR.

In this section we will continue what we already started previously.
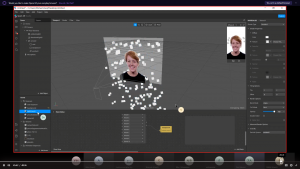
1- We will recap briefly what we have already done before and what we are going to do today in the project, as we are going to add the emitter particle system to show moving animation in the middle layer between the user and the background.

2- To add the particle system, we will right-click at the scene Hierarchy and choose the particle system at the end of the list.

3- The emitter should be added at the middle layer, so it will appear between the background layer and the user layer.
4- We can also manipulate the sittings of the emitter, and we have to add a material to it, so we can change the diffuse texture which is going to be what is appearing for the particle.

5- For the texture, we will create an animation sequence contains the images we need the particle system to show.
6- Then after creating the animation sequence, we need to added to the particle system material under the diffuse shader, so we can control it through taping on the screen from the code.

7- Then we need to use the patch editor and add the code we need so when taping we will change the frame.

8- And for the background, we can create also an animation sequence to use the picker UI to choose which frame (Background) we need.

In this day we will show the participant how to share their projects with their friends on both IOS and Android platforms as they differ from each other.
1- The slides built on the presentation will show the steps in details step by step.


2- It’s a bit tricky for android as you have to enable the developer mode to use your filters on Facebook.


3- After enabling the developer mode and the USB debugging option, we have to back to the application and open it to give the needed permission for the app to work.


4- Then we will share a filter we made with the participant to encourage them to use it and share it on their Instagram.


Having trouble? Let us know by completing the form below. We'll do our best to get your issues resolved quickly.
"*" indicates required fields