- Loading…
Combine tradition and technology in learning how to make a glowing Yup’ik dance fan! They were used in winter ceremonies, accompanied by masks they helped illustrate the story told by the song, accentuating fluid movements of the dancer’s arms.
Use this project to talk about cultural heritage, learn about Yup’ik traditions and ceremonies. You can bring them to life by spicing it up with some technology, and perhaps learning how to dance in the dark.

to make a PAIR of fans you’ll need:
tools:
The fans will be made of 4 layers of plywood
Download the file and laser cut the shapes. The fans are about 4.5 inch (12 cm) wide.
There is a red line meant to be engraved, not cut! to help you position the little pieces of layers 2 and 3.
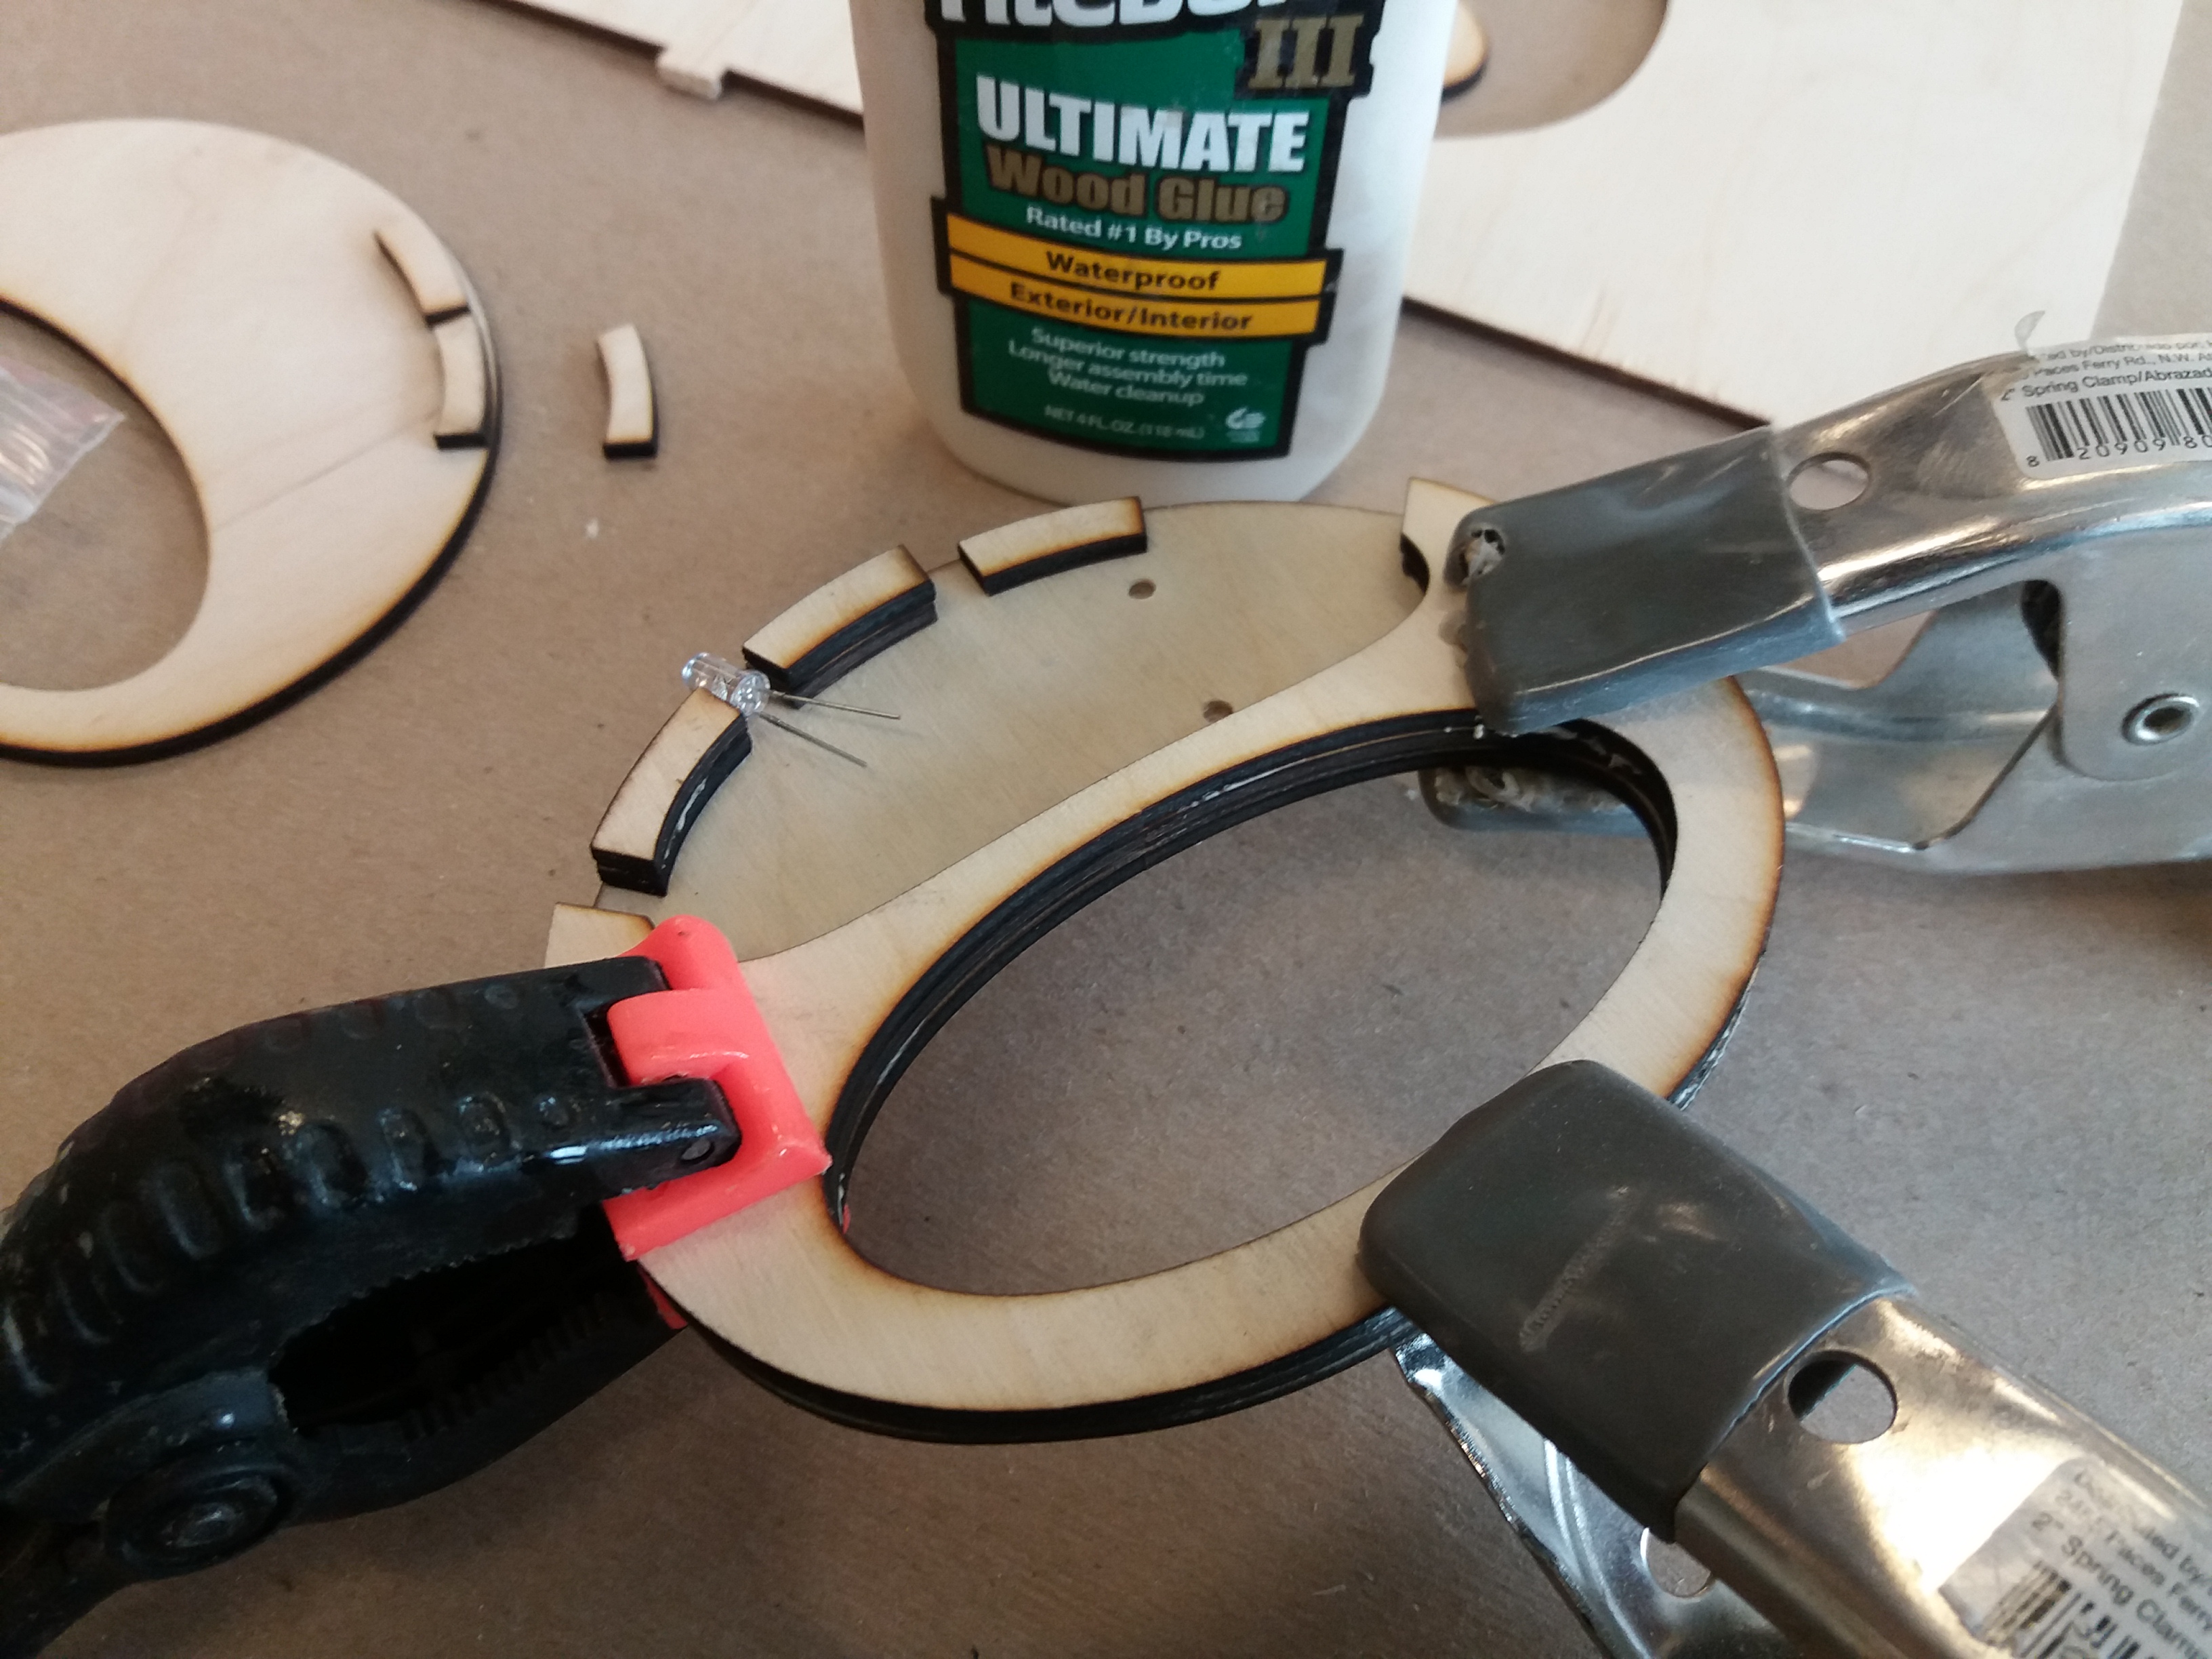
Glue the first three layers of both fans – all but the big ones without engraving. When gluing in the little pieces, make sure that your LED bulbs will fit in the spaces between them.


tip: you can use clothes pins as little clamps to hold the pieces together as glue dries!
Your LED's have two 'legs' - metal leads. The longer one is the positive leg, the shorter - negative. LED's are polarized, which means that they only allow the current to flow in one direction. This will be important when connecting all of it!
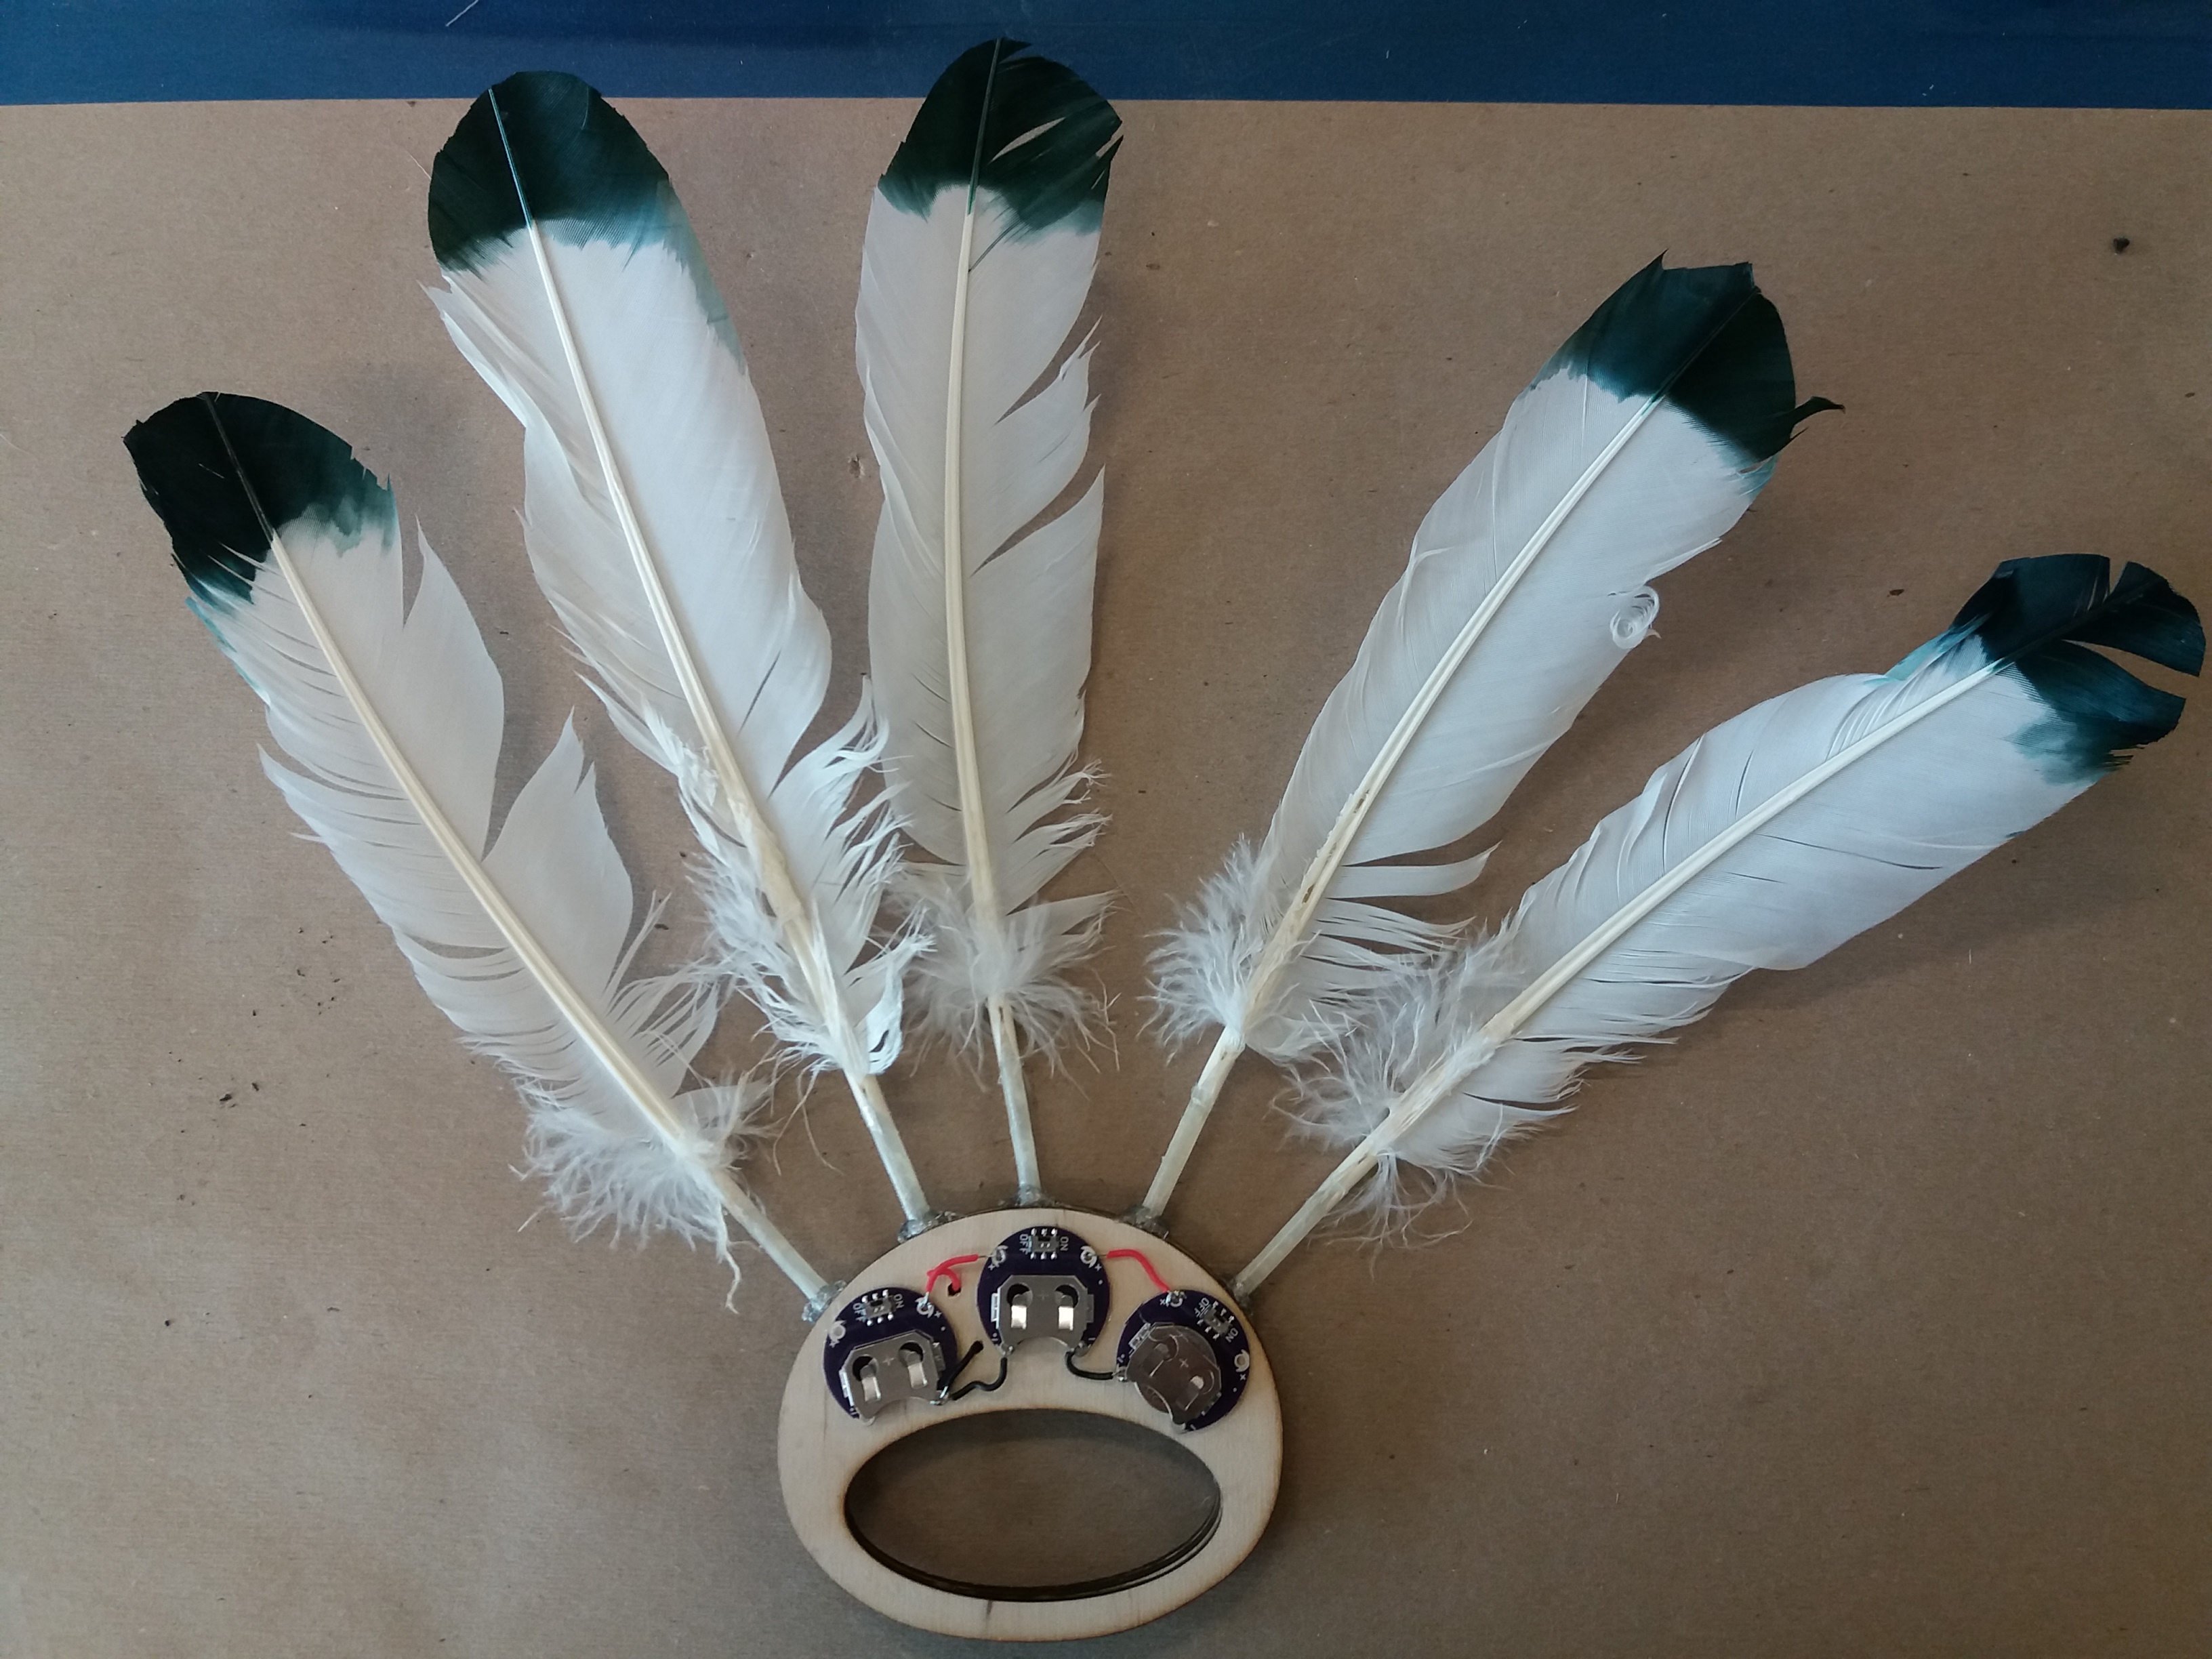
Arrange your LED’s in their slots:
Use little blobs of hot glue to hold them in place.
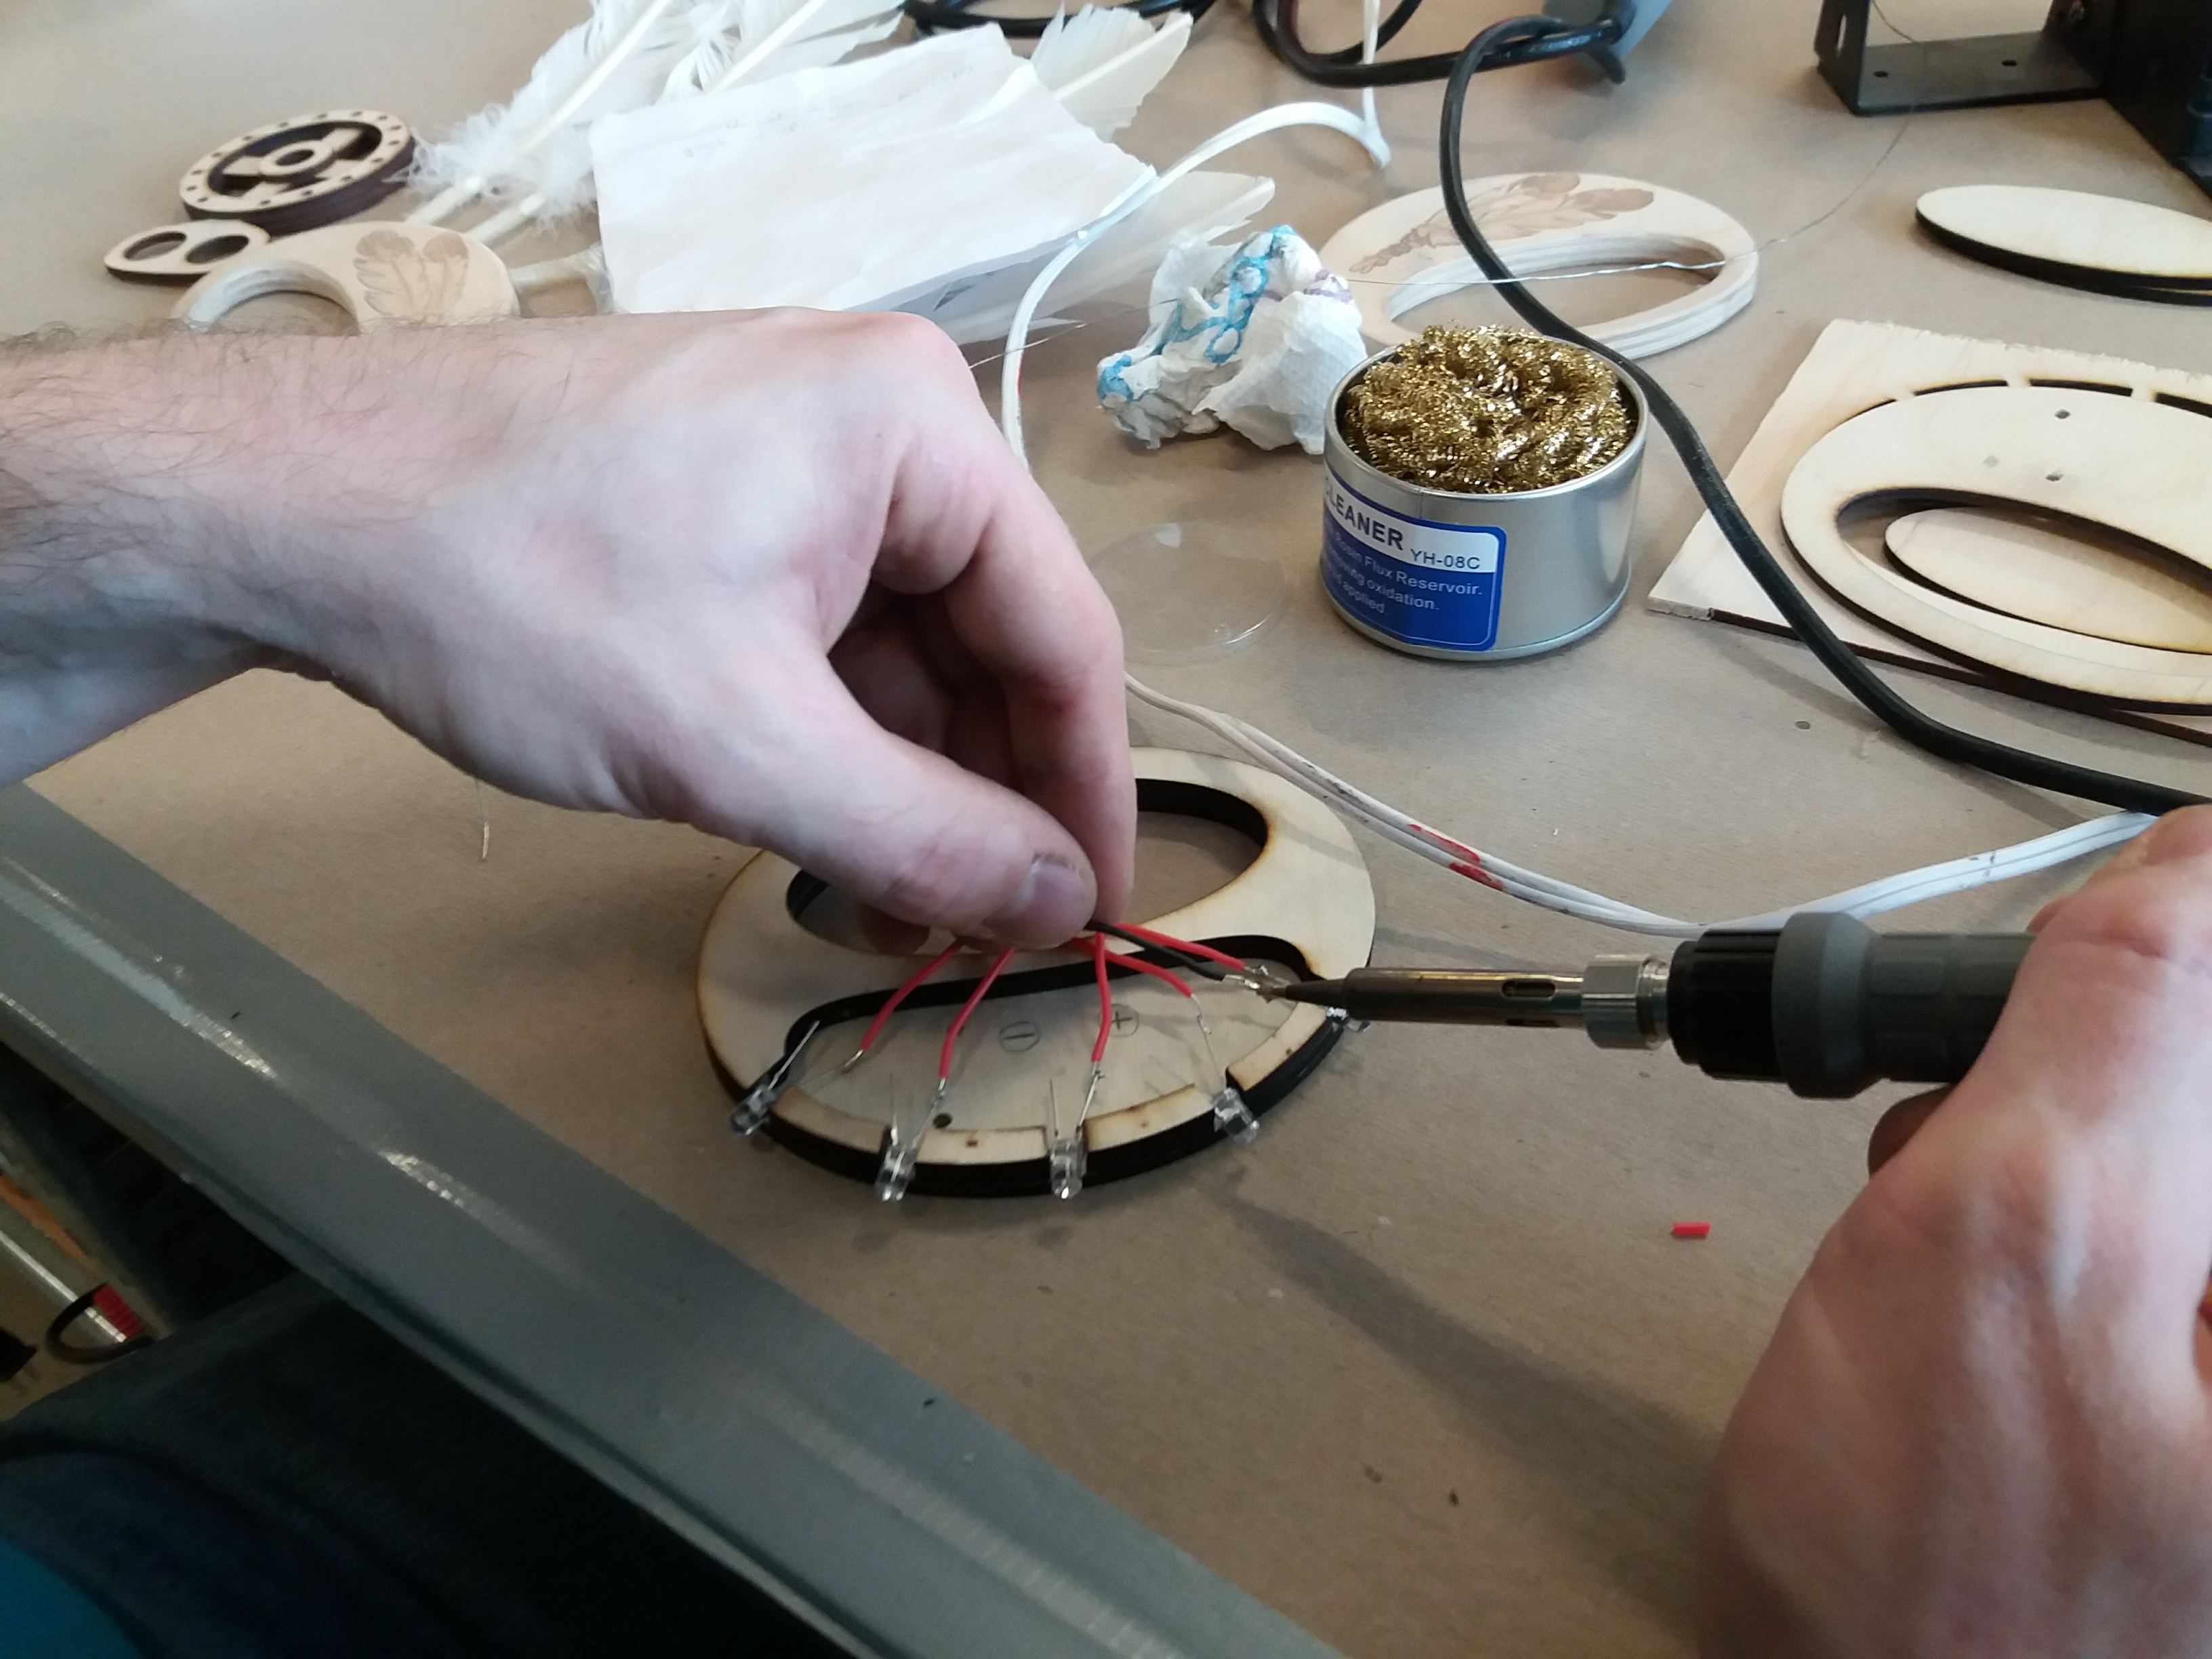
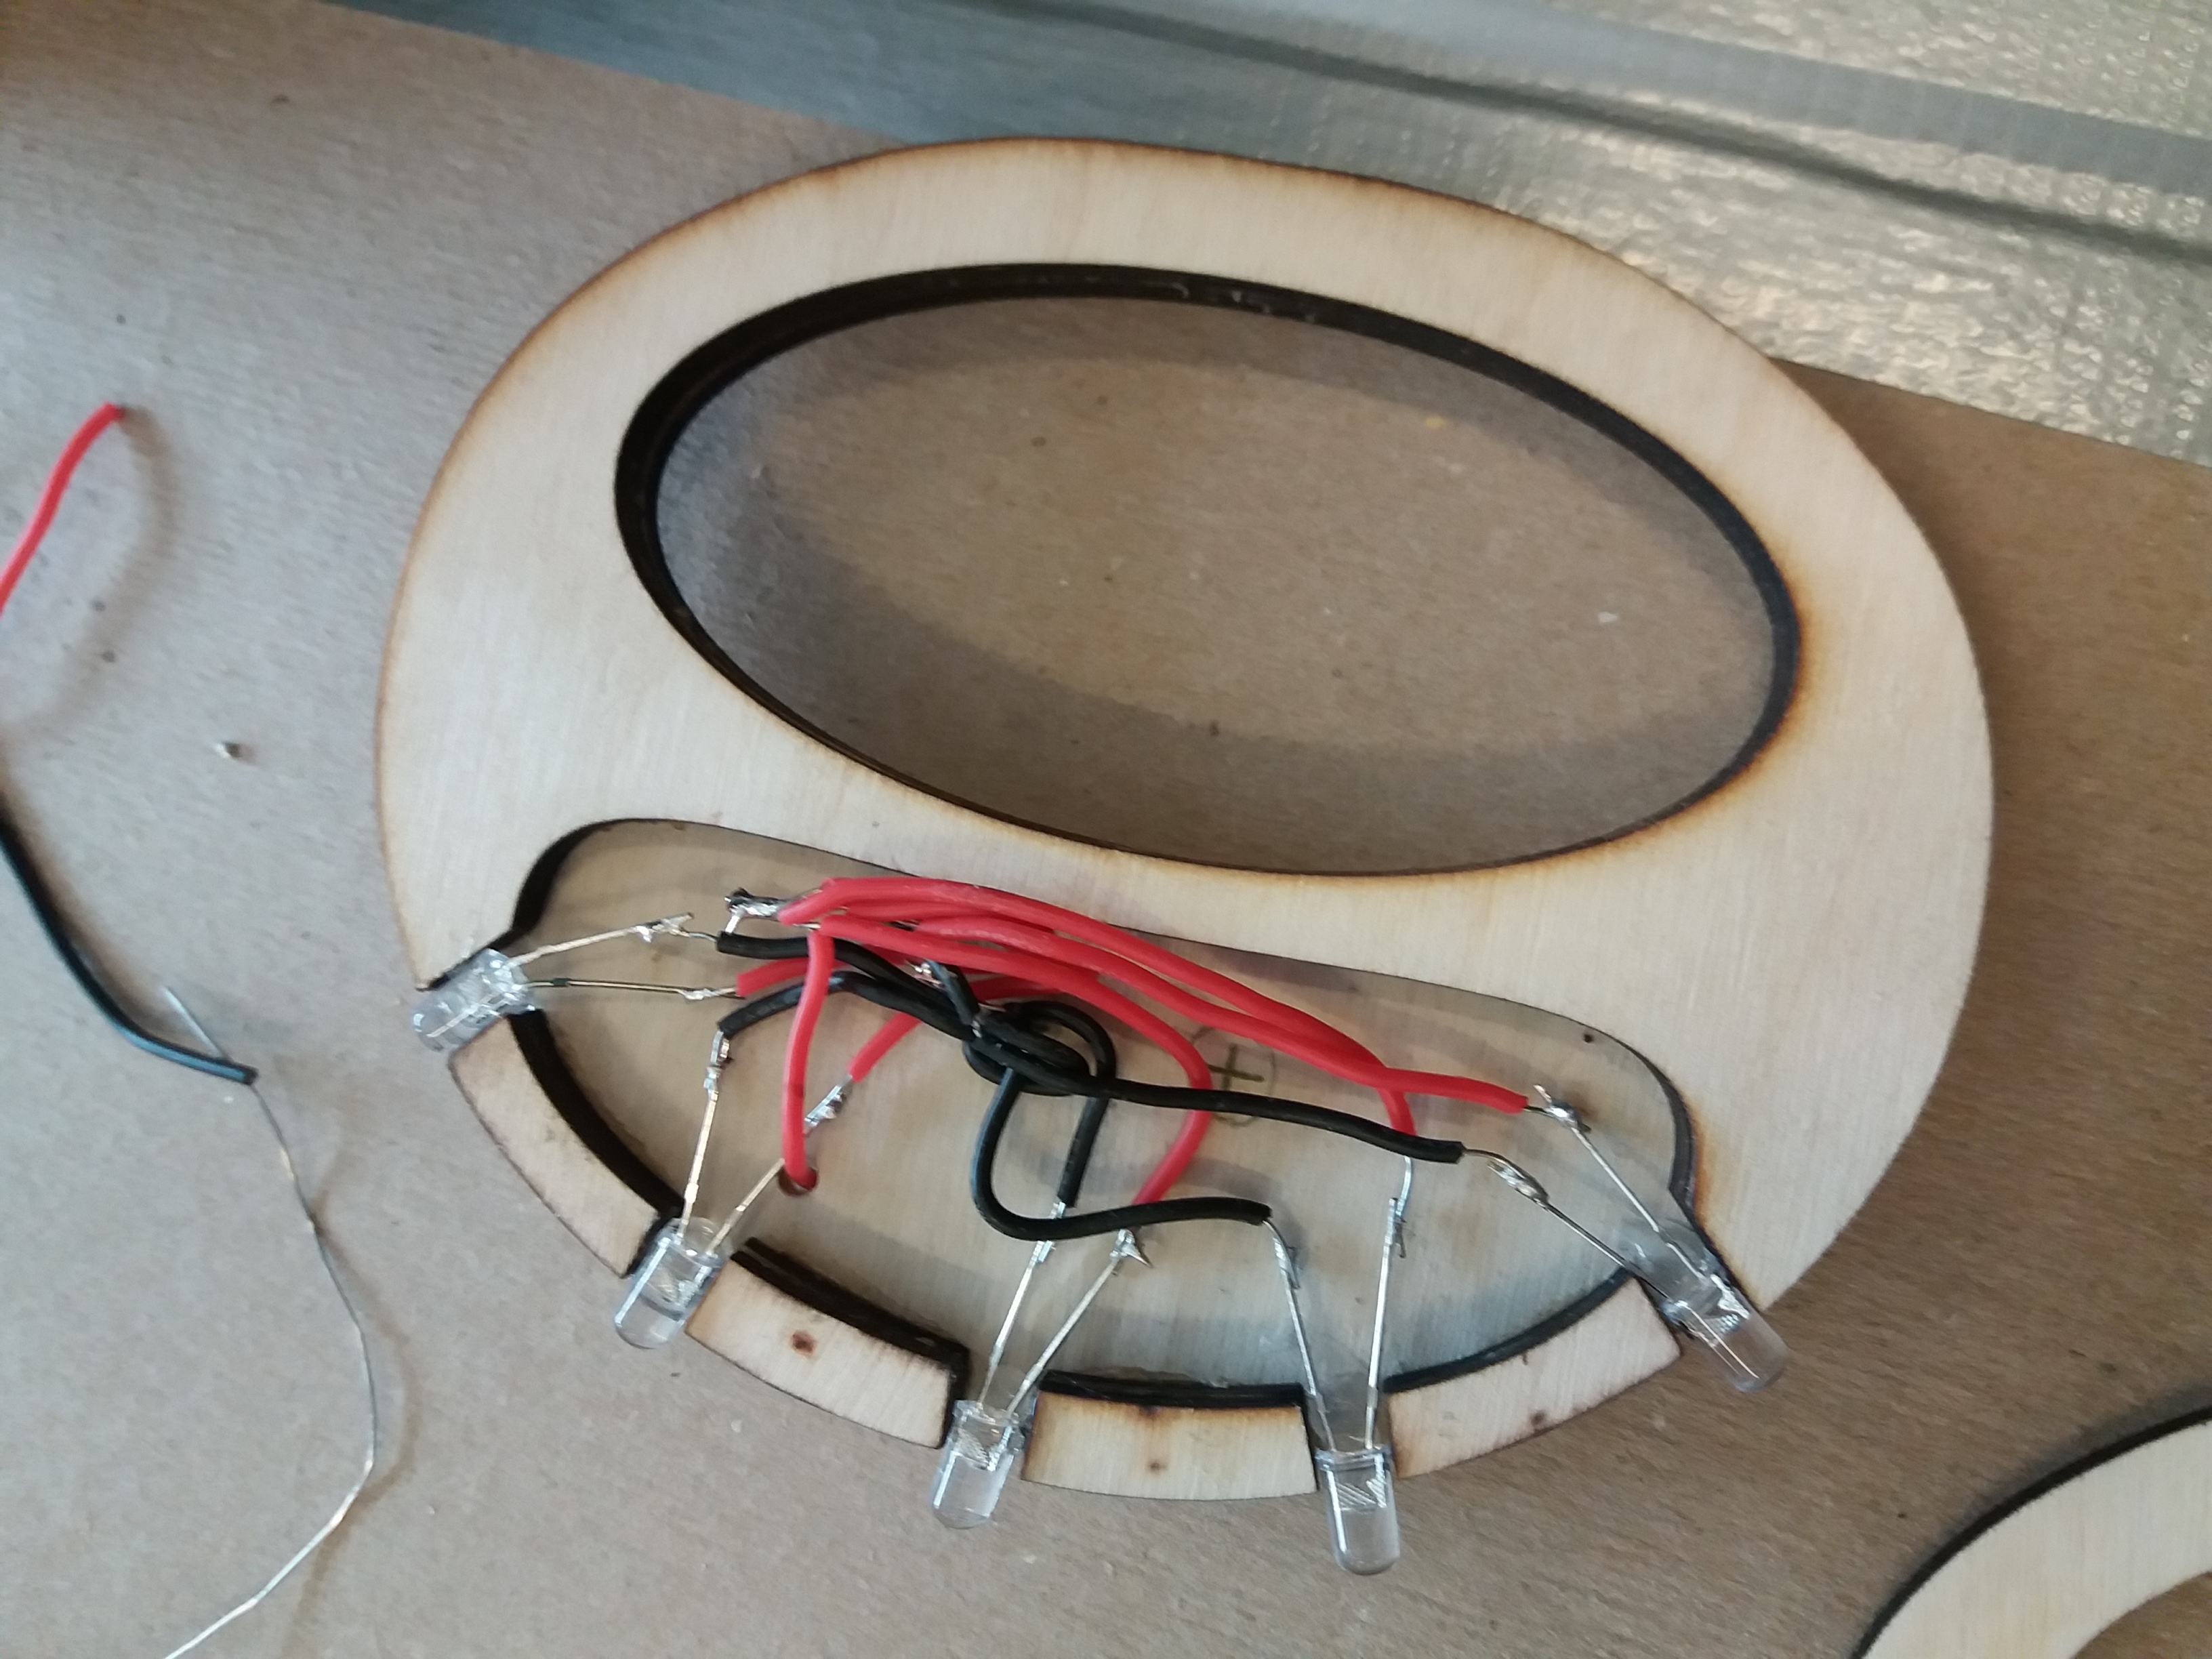
Let's get to soldering! In order for the LED's to work properly, we will connect them in parallel. This way all of them will get the same voltage.
To keep things organized, use one color of wire for positive (usually red) and one color for negative (black) connections. Make sure that (+) and (-) wires cross each other only when insulated!

Solder a 2″ (5 cm) piece of wire (stripped of insulation at the ends first, using wire strippers) to each long leg of the LED’s. Braid and solder their loose ends in one place, adding one 3″ wire – this one will go out to the batteries.

Use a different color of wire to solder all the short (-) legs just like we did with the (+).
Braid and solder their loose ends in one place, adding one 3″ wire to go out to the batteries.

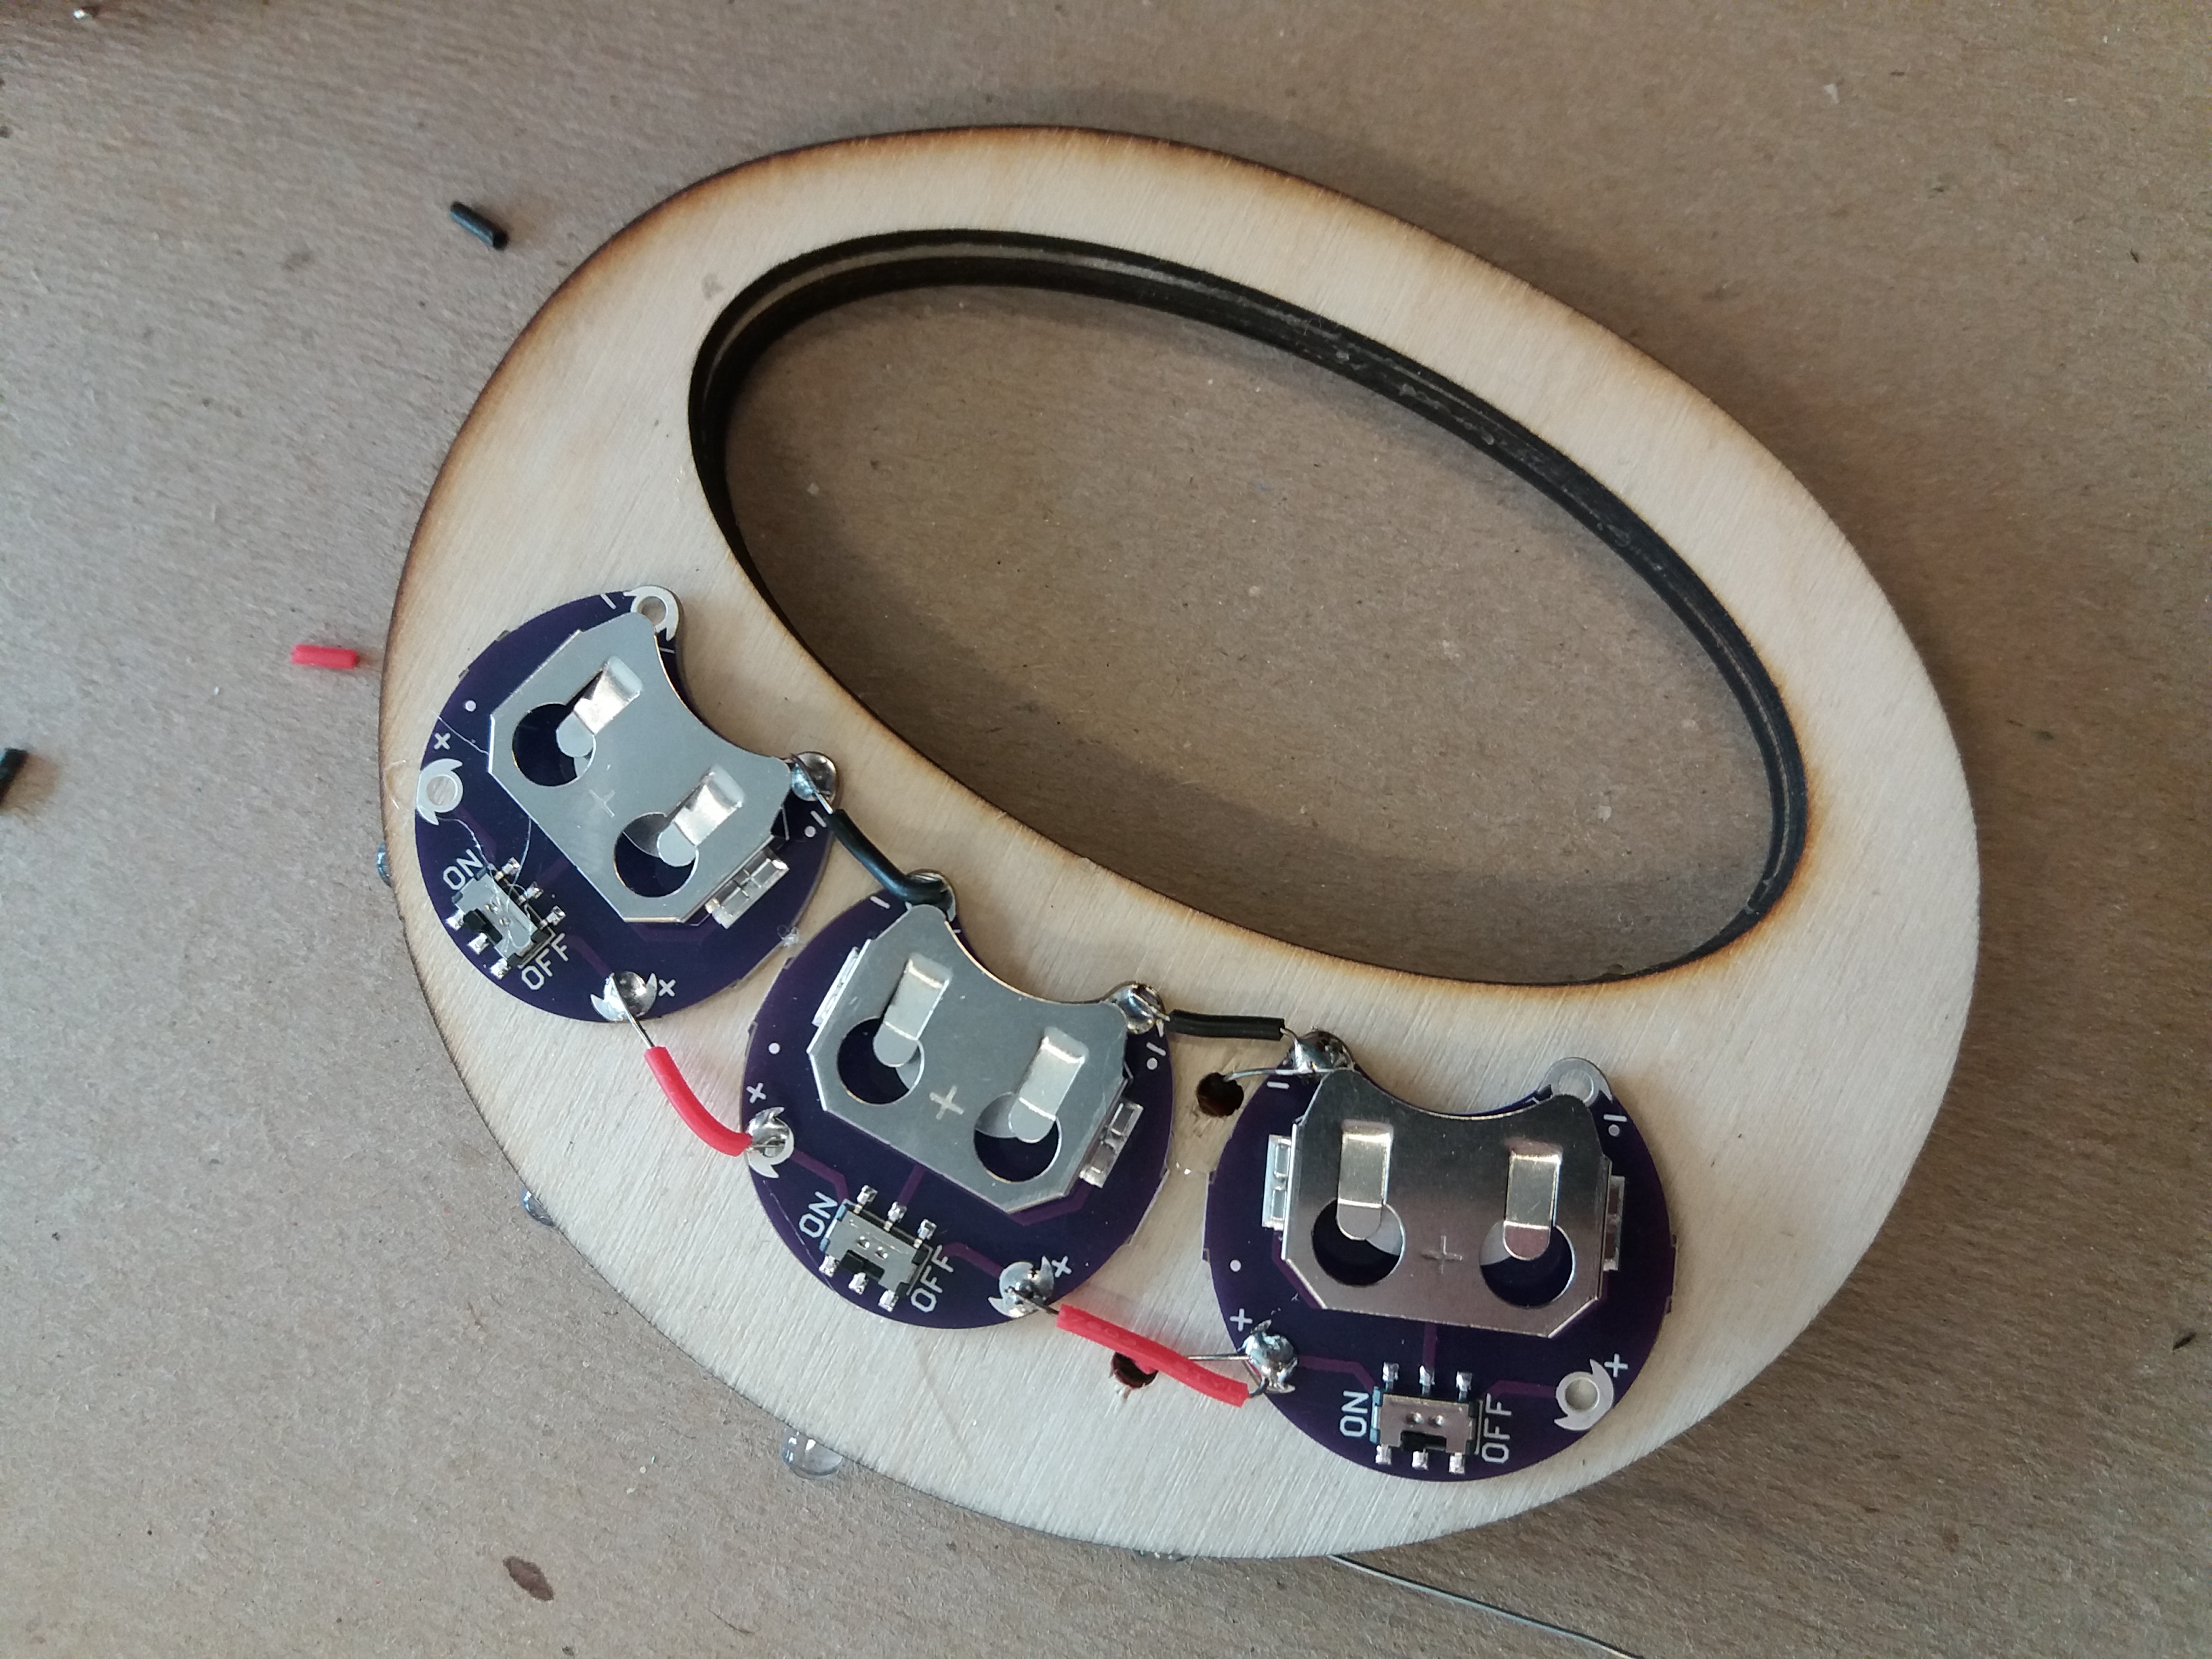
We need a power source to light up our LED's! Most single LED's need a power supply of about 3V - and this is what our batteries are. We are using 3 of them so that they will last longer, and to be quite honest: for the cool bionic look as well! We will connect them in parallel - this way we keep voltage the same, while adding their capacities.
On the back side of the fans, got glue 3 battery packs on each one of them. Make sure you will be able to easily change the batteries if needed.
Poke the 3″ wires from below through the holes in the cover, and solder the positive (red) one to the nearest (+) of the battery, and the negative (black) one to the nearest (-).


More information to be found here:
https://zbattery.com/Connecting-Batteries-in-Series-or-Parallel
See if it works... and troubleshooting.
Put in the batteries and turn the switches on! Yay if it works!
If something doesn’t work, check all your connections, see if the positive and negative wires are not touching each other and shorting the circuit?
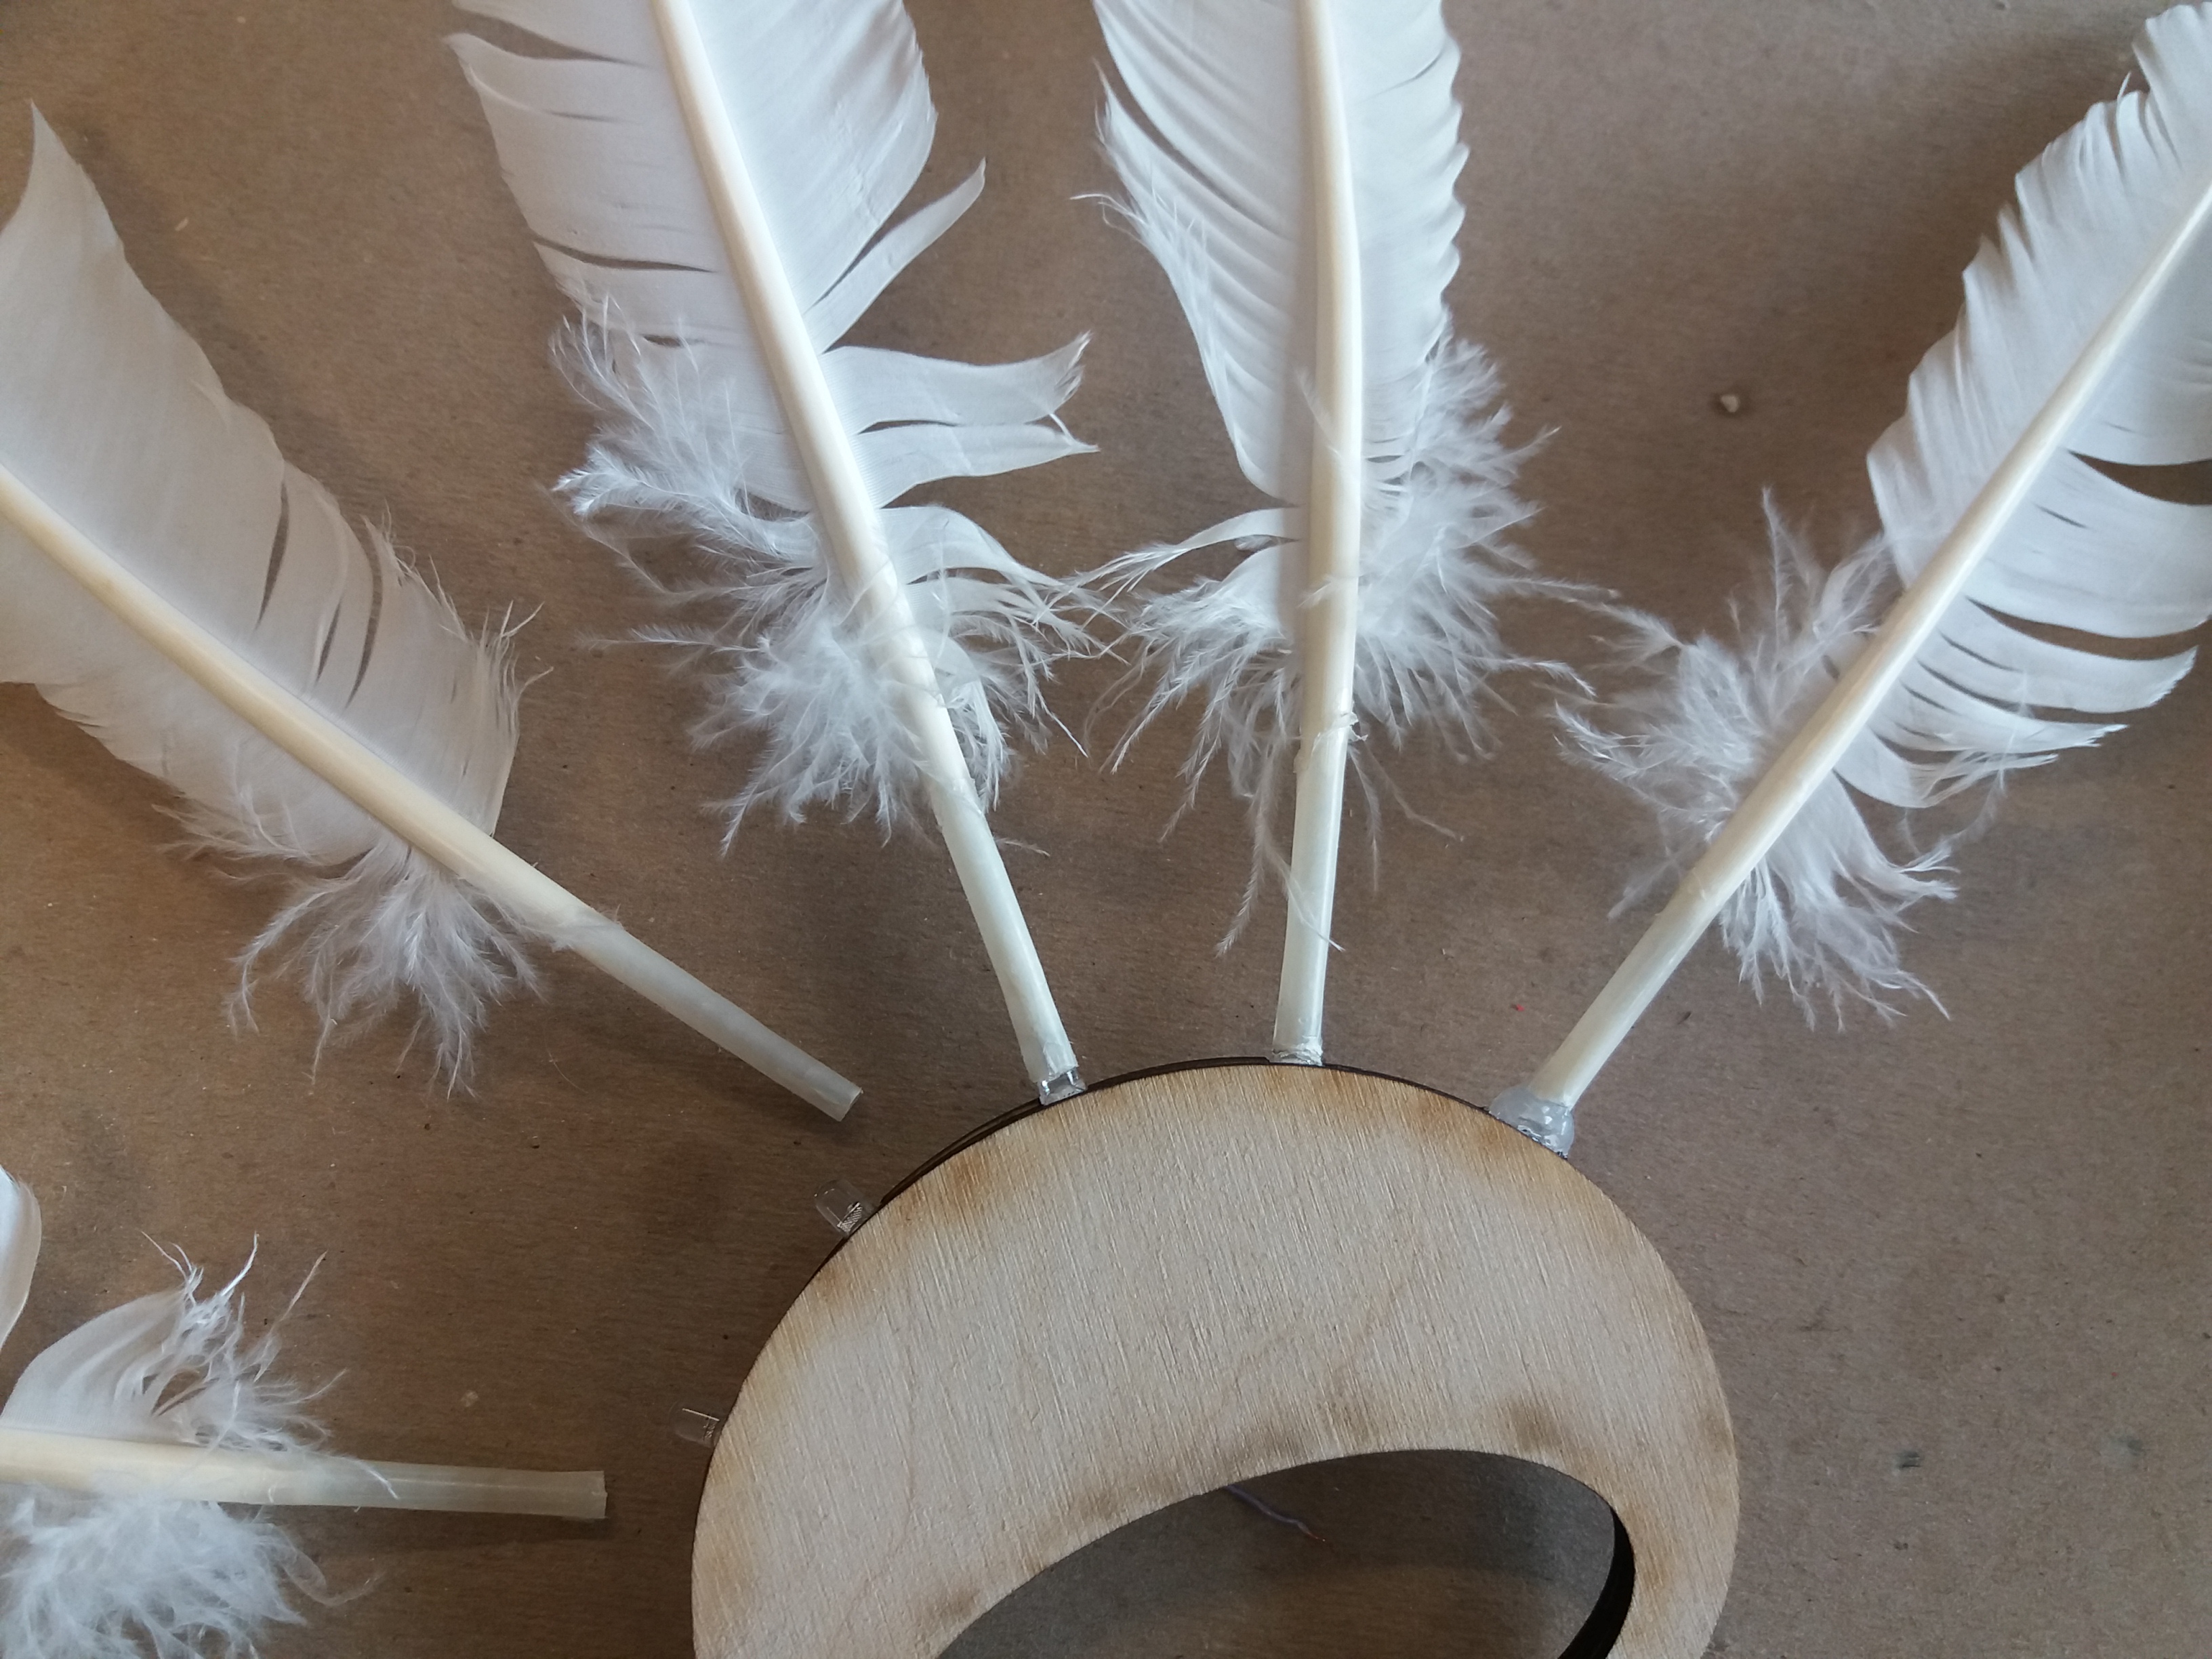
Natural fiber optics come into play - the translucent hollow shaft of the feather will light up when mounted on the LED, and the fluffy rachis will catch the rays.
Clip the ends of your feathers, to make sure they can be fitted on the bulbs. You can clean out the insides with a wire to make room for the light.
Using super glue, put the feathers on your LED’s, and secure them with hot glue around the base.

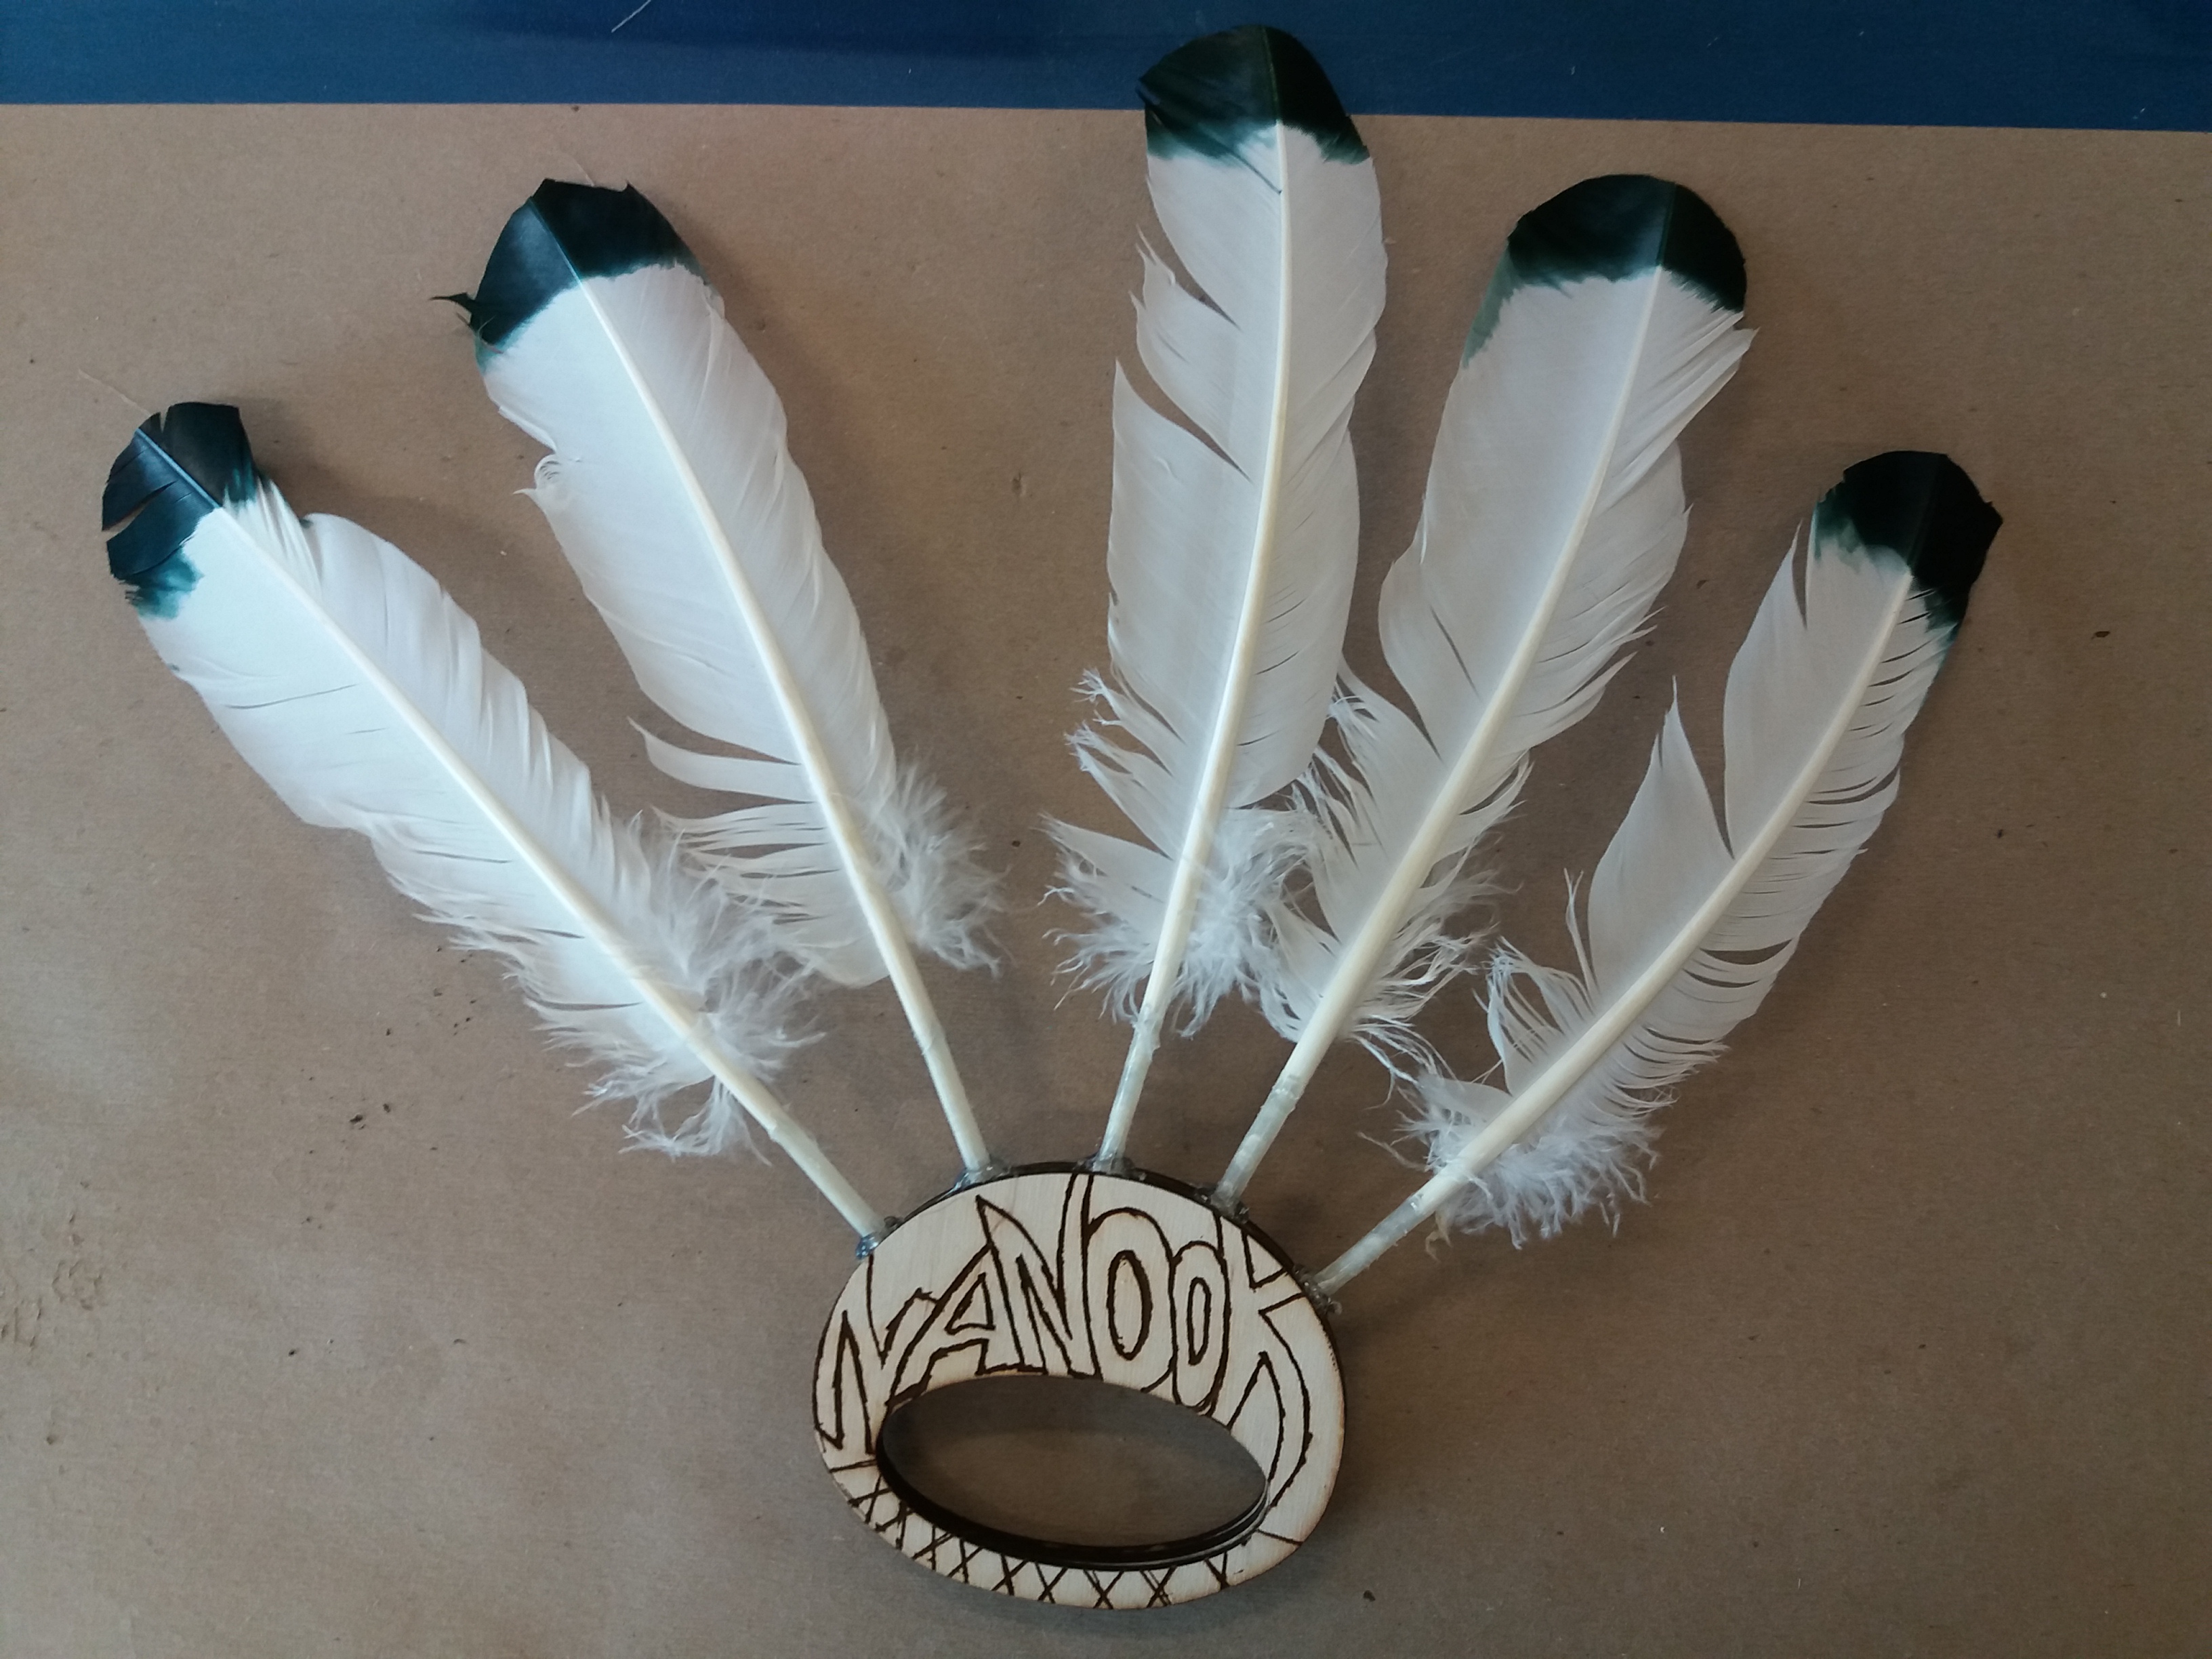
Personalize your fans by adding a design on the front cover
On the remaining piece of plywood, draw, paint or laser engrave your name, logo or other design to make it your own.
Glue the cover on to hide all the wires inside.

Lights off and LED's on
Here is an example of a dance with the fans – male ones with feathers, female with caribou fur:
https://www.youtube.com/watch?v=beU485Bxqxs
Having trouble? Let us know by completing the form below. We'll do our best to get your issues resolved quickly.
"*" indicates required fields
I would love to hear more about the Yup’ik culture in this lesson. Great idea for a very unique project!