- Loading…

This is a lesson where students explore circuits, storytelling principles and build a scenario to present their story. The idea is that a group of students imagine and create a story considering beginning, middle and end by building backgrounds, characters and additional props they need. Also some important considerations are that at least one part of the story needs to be lit up using a minimum of one circuit. The story needs to have a moral or teaching a value in some moment of the story.
Important note: I was looking the icon to add standards but I coulnd’t find them. Here they are

Copper or aluminum foil.
Light leds
Coin batteries
Cardboard
All the reusable materials your students can have access.
A box as a stantard size to create the scenario (suggested)
Device to record the story
At the end of the project students will…
1.How well did the activity align with your intended curriculum or standards, and what adjustments (if any) would strengthen this alignment?
As a developer of STEAM projects, this activity serves as a primary example of my classroom methodology. My approach focuses on reinforcing core standards from other disciplines, such as Science. In this specific project, I aligned the curriculum with NGSS (Next Generation Science Standards) related to energy, as well as Engineering Design Standards. Beyond the technical components, the project integrated the Arts through the design of backgrounds, props, and environmental elements. Finally, Literacy was an important component of the activity, as students applied storytelling aspects to develop their narratives.
2.In what ways did students’ ZPD guide your decisions about pacing, scaffolding, or complexity of the activity?
In terms of the Zone of Proximal Development (ZPD), it is essential to first assess students’ prior knowledge. I observed that while some students can intuitively bridge the gap between technical circuits and creative storytelling, others find this integration quite abstract. Identifying this challenge early is crucial, as the cognitive leap required to merge these two distinct skill sets—engineering and narrative—can often be more difficult for a learner than mastering the individual concepts in isolation. By recognizing this, I can better calibrate the pacing and provide the necessary scaffolding to help every student make that connection.
3.What support did you provide in the lesson plan to support diverse student needs? How did these supports work in the overall lesson?
To support diverse learner needs, I implemented a two-fold strategy. First, I balanced direct instruction with experiential learning, providing a series of preparatory exercises that allowed students to troubleshoot and ‘fail forward.’ This ensured they could master the mechanics of circuitry in a low-stakes environment before applying them to their final project. Second, I prioritized student agency by granting them the creative freedom to decide how and where to integrate their circuits. By allowing their imagination and narrative plans to dictate the technical application, I ensured that the project remained accessible and engaging for students with varying levels of technical confidence. I also empowered the students that had a high performance in circuity skills to teach other peers.
4.After testing the lesson, what changes would you make to better meet diverse learner needs or to better maintain the learning objectives?
Reflecting on the lesson, I plan to diversify the physical materials used, such as introducing traditional wire alongside copper tape and aluminum foil to offer a more robust engineering experience. Additionally, I intend to invite an industry expert to share real-world applications of these skills, bridging the gap between the classroom and professional practice. I also recognized the immense value of peer mentorship; by supporting students who grasp the concepts quickly, I can empower them to assist their classmates. This ‘peer-to-peer’ teaching is often highly effective, as students can explain complex ideas to one another using familiar language and at a more accessible level.”
Dedicate time to exploring basic circuitry using conductive materials, LEDs, and batteries. During this phase, the teacher should guide students to work in small groups, preferably in teams of three. Teachers may allow students to choose their own partners or pre-arrange the groups to ensure a balanced distribution of skills and collaborative dynamics.
Start by sparking curiosity: let students observe flashlights and light-up toys, questioning how they work and their roles in real life. Introduce the basics of circuits, energy, and conductivity. After giving students time to play with batteries and bulbs, task them with a specific challenge: light up an LED by building a continuous circuit path using conductive materials. Arrange groups to encourage team work and collaboration.
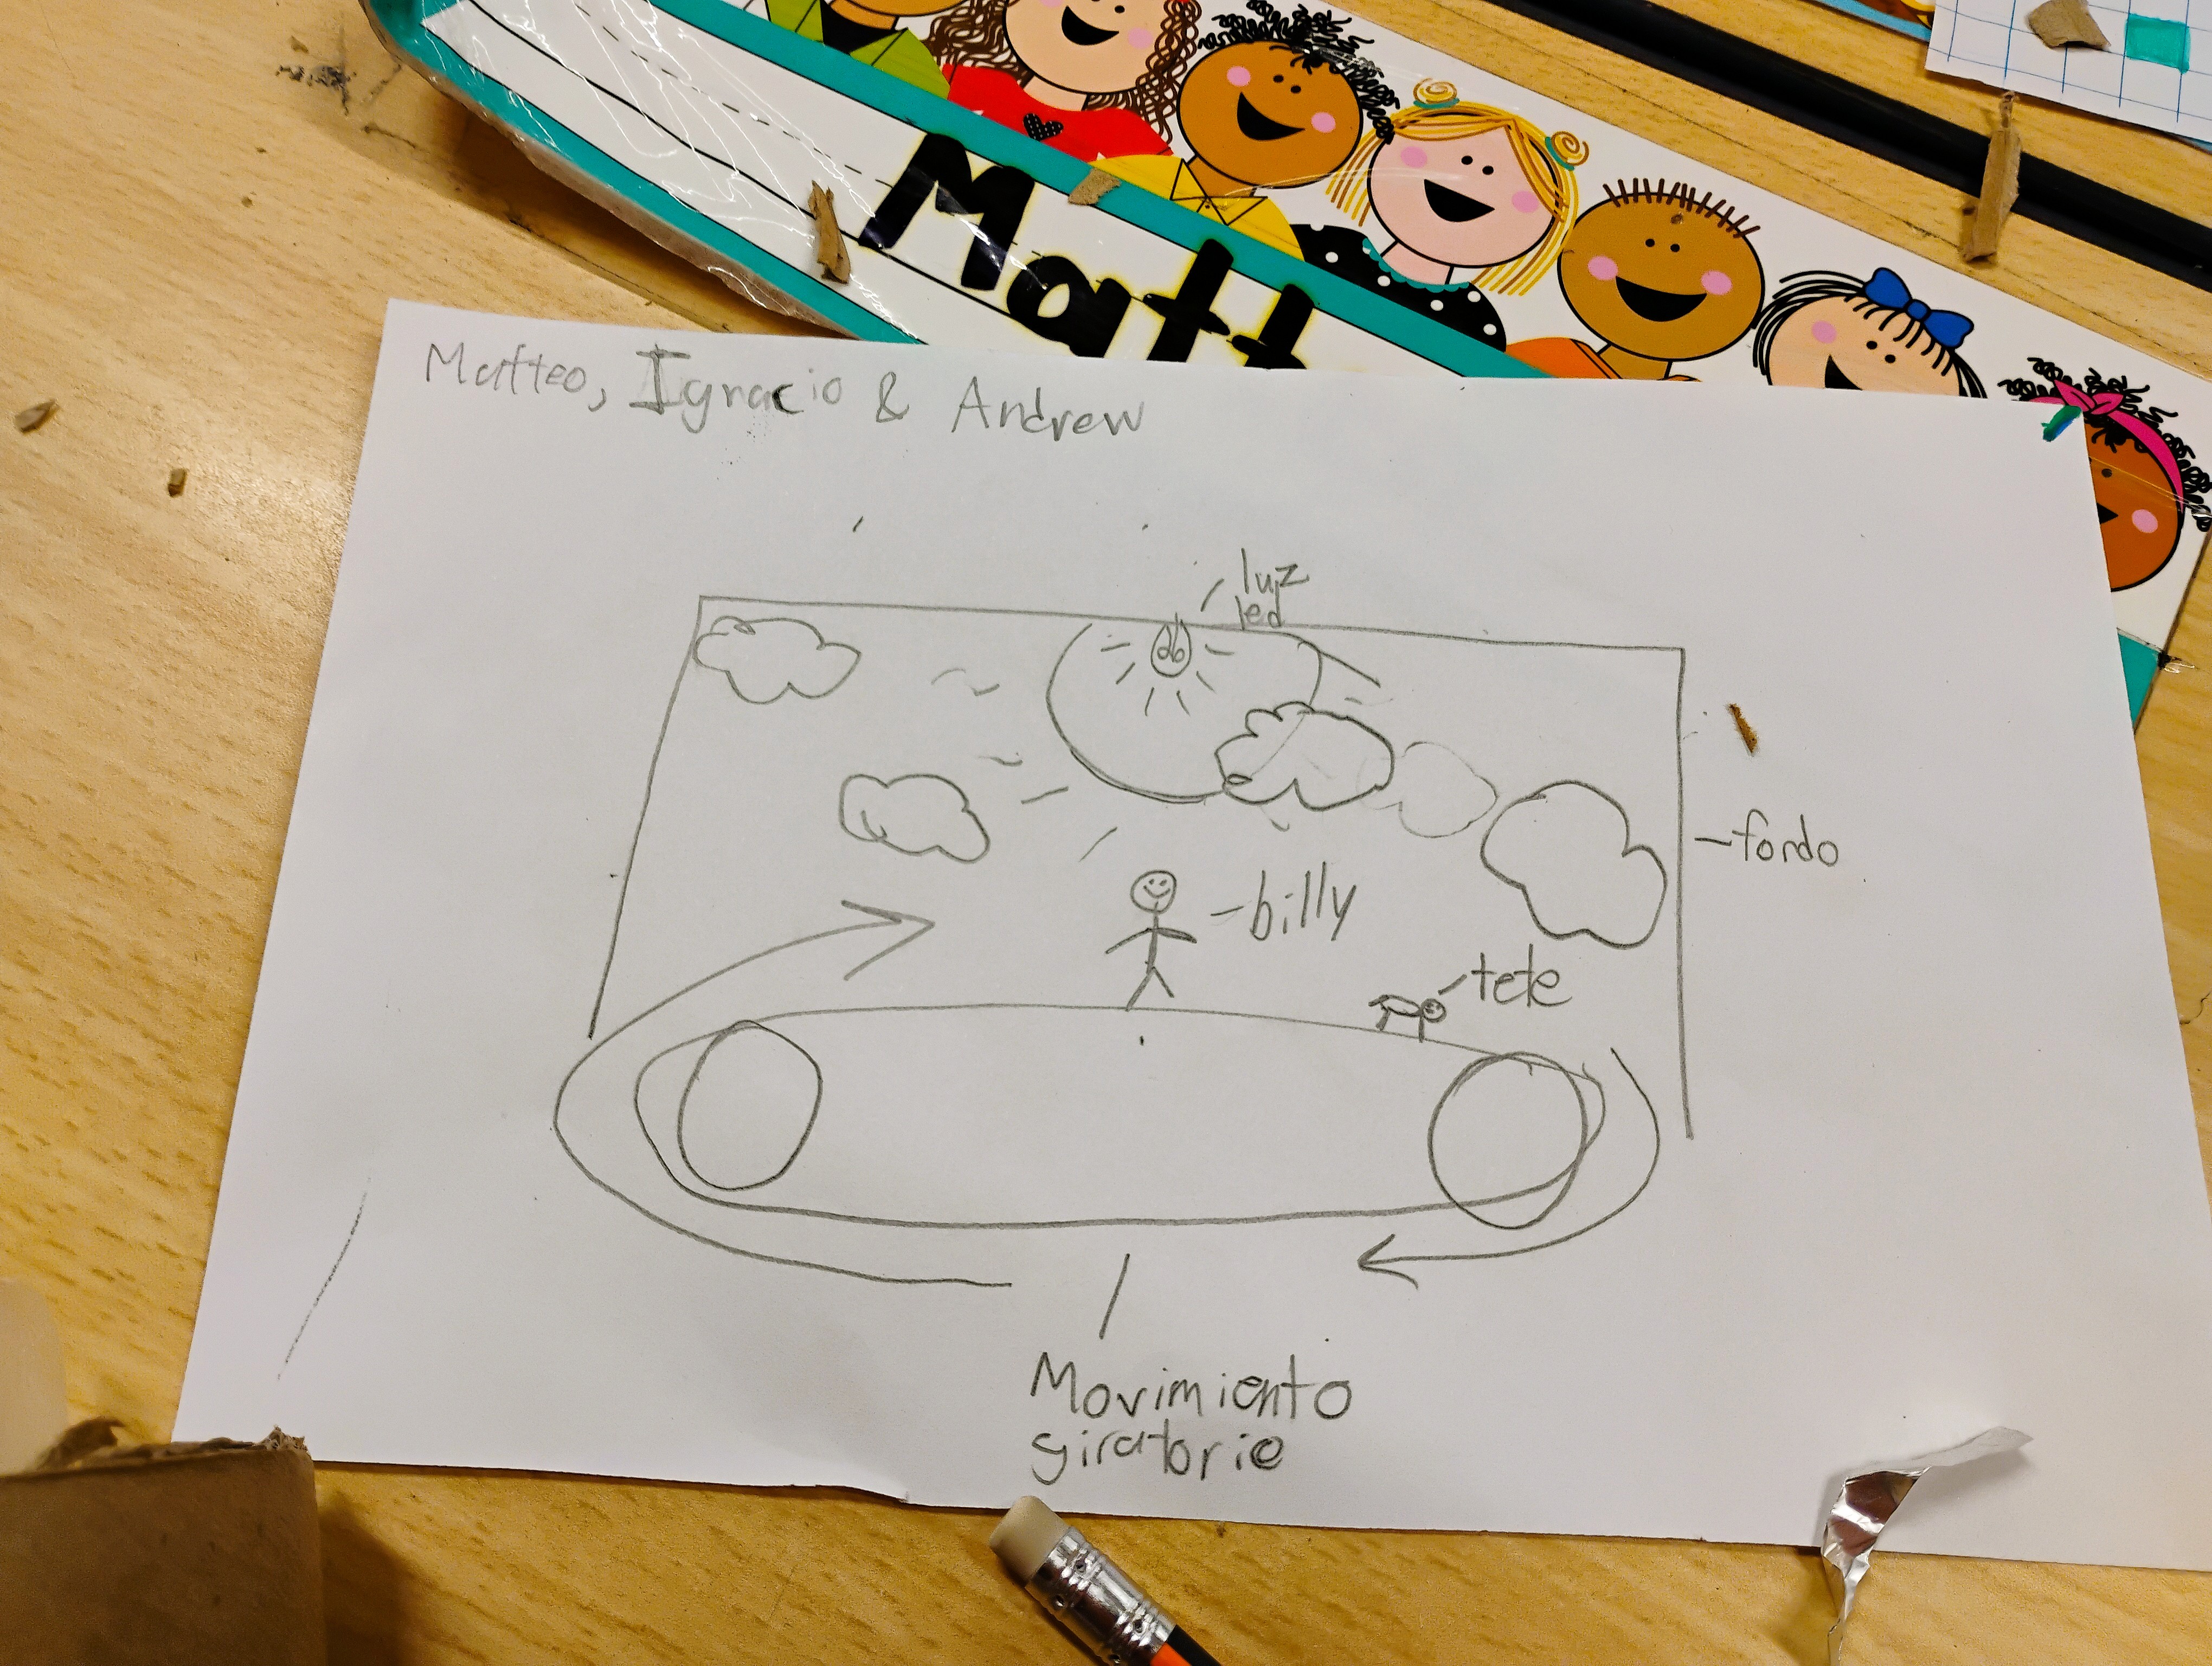
Provide a creative workspace where students can sketch their ideas and plan their entire project journey. This process covers everything from writing the initial script to finalizing the design and integrating the circuitry. By illustrating their own circuit diagrams, students learn to visualize the flow of energy and plan their builds with precision before they ever pick up a tool. Take some time to teach how to diagram a circuit which will be the evidence of their final circuit.
Invite your students to plan their project having in mind this criteria:
Now it’s time to map out your project. You can use a storyboard, write a script, or sketch your ideas—just make sure your plan follows these four rules:
This is when the real building begins! As students work on their ideas, it’s the perfect time to offer different learning paths. For those finding the electronics a bit tricky, I step in to reinforce how a simple circuit works. They can still achieve great results by using several simple, separate circuits to light up different parts of their story. For my "pro" students who are ready for more, I challenge them to experiment with series and parallel circuits. This keeps everyone engaged and ensures that the technical requirements match their individual skill levels.
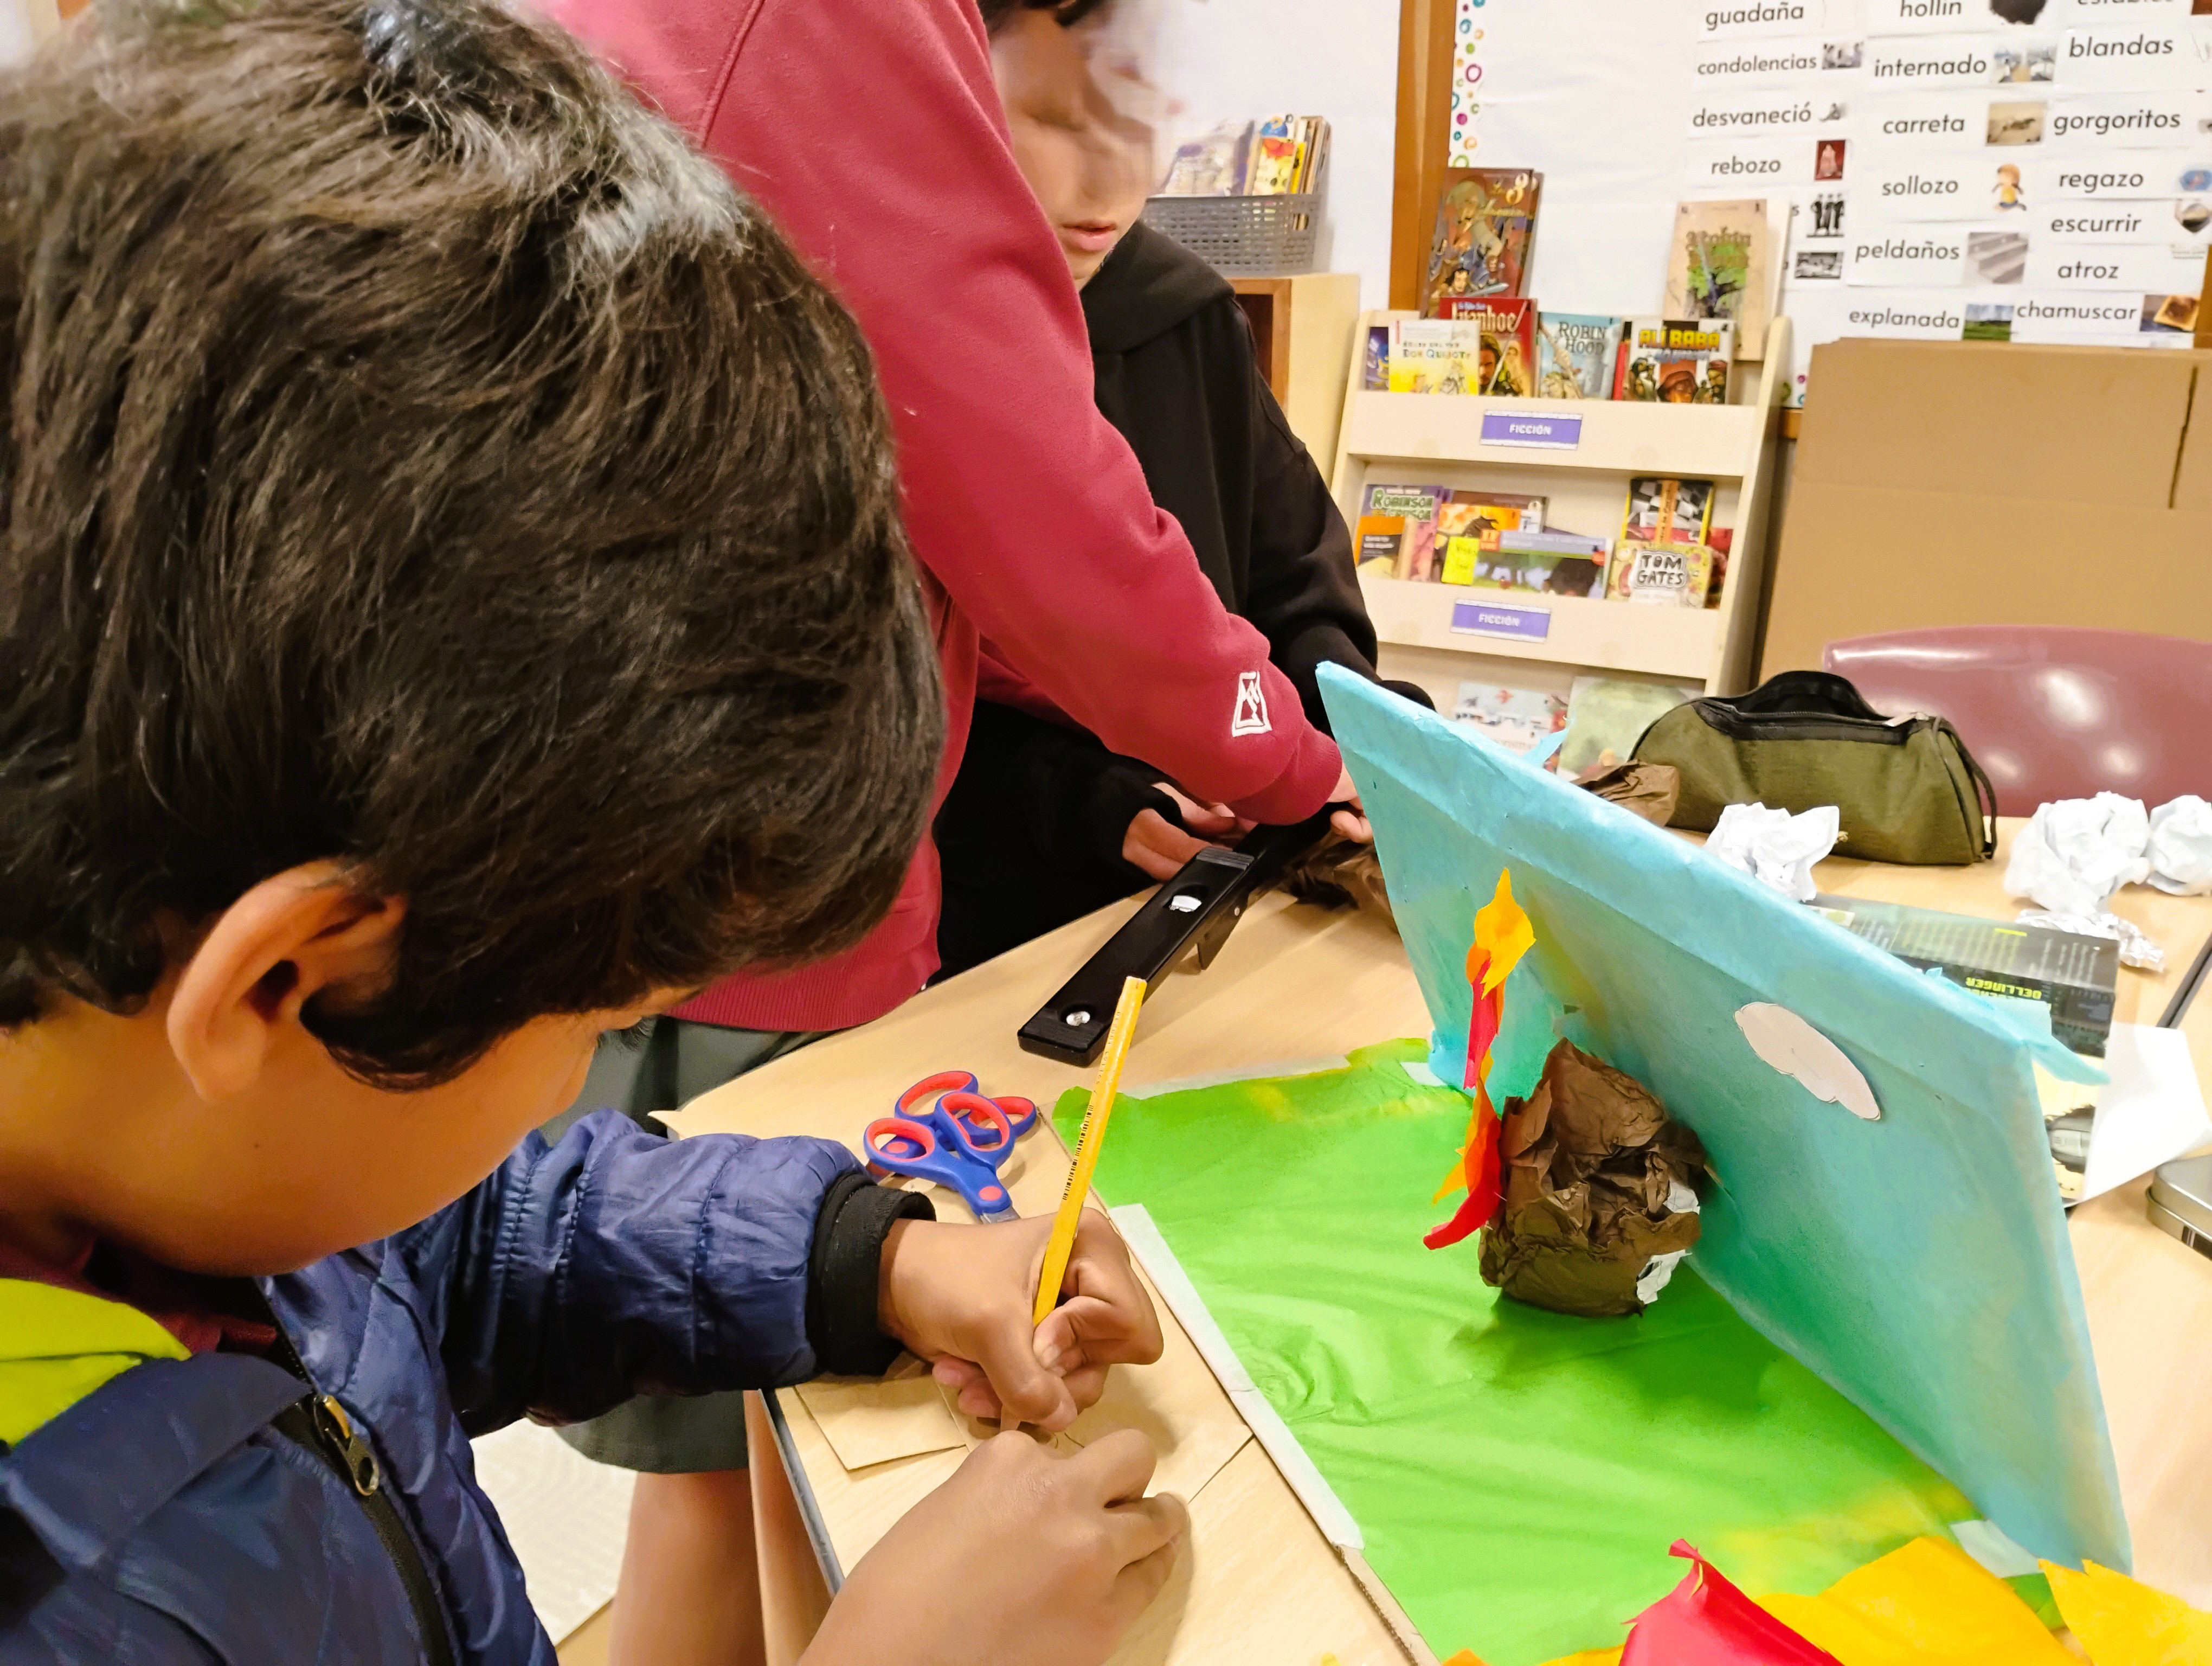
In this stage, students transition from ideation to reality by constructing their story elements and integrated circuits. Working collaboratively in teams, they engage in hands-on engineering, utilizing cardboard for 3D builds while incorporating 2D elements as needed. This phase is characterized by iterative testing; students frequently troubleshoot their circuits to ensure reliability. It is a dynamic environment where teamwork and problem-solving bring their creative visions to life.
This is the time where each group of students students present their play considering the criteria requested.
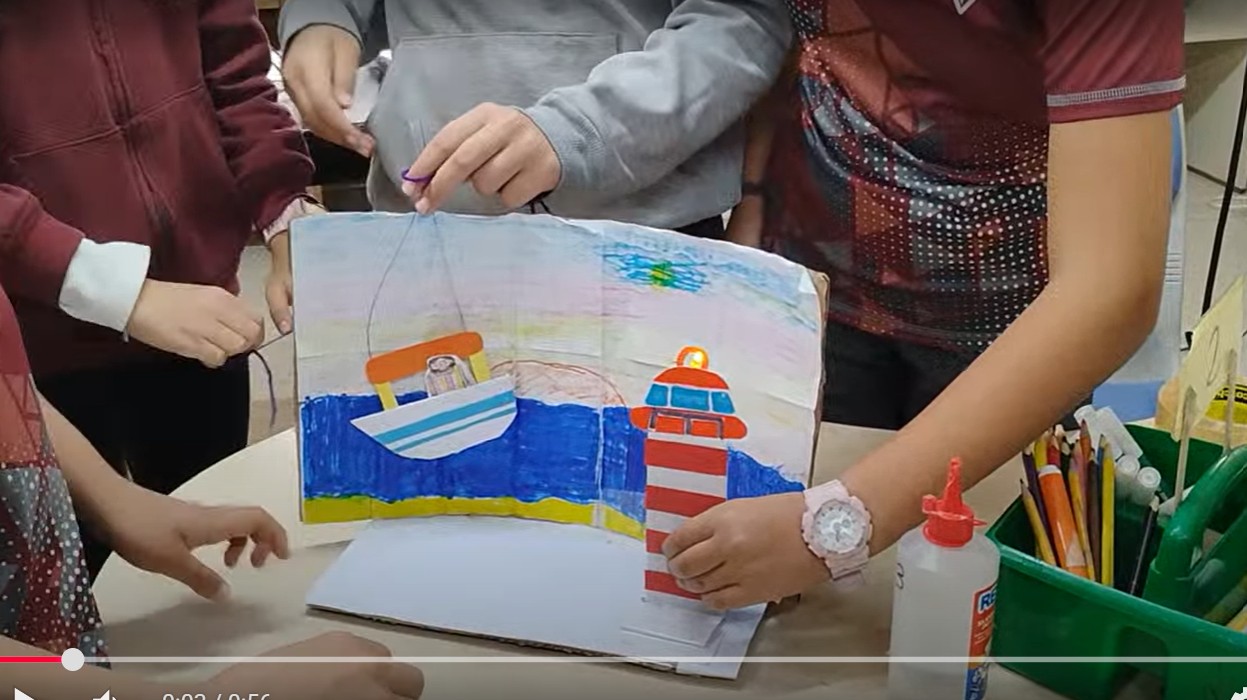
It’s “Lights, Camera, Action!” Students have two minutes maximum to present their finalized projects (each group), either through a live demonstration or a recorded video. This stage is designed to be flexible, allowing students to leverage their specific digital skill sets. Whether presenting in person or via a digital medium, the focus remains on the successful integration of their story and circuitry.
After the presentation, students will use a checklist to self-evaluate their stories. While the project was a team effort, reflections are individual to encourage personal commitment and ownership. The teacher will also provide a final evaluation based on a rubric.
Can you say “Yes” to these?
[ ] Does my story have a clear lesson/moral?
[ ] Does my LED light up without me having to hold the wires together?
[ ] Can I explain why my circuit failed on the first try?
[ ] Can I show the diagram of the circuit I used?
The teacher will evaluate the project according to the rubric attached.
Having trouble? Let us know by completing the form below. We'll do our best to get your issues resolved quickly.
"*" indicates required fields