- Loading…
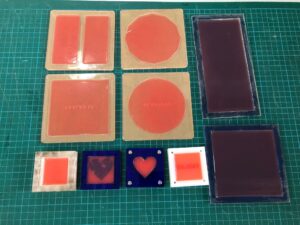
1. Create a mould in 3mm or 5mm plywood / acrylic using the laser cutter.
2. Prepare all the necessary recipe and cook your own material. Pour it into your cut moulds.
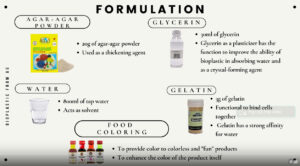
1) 20g of agar-agar powder, used as a thickening agent.
2) 30ml of glycerine to improve the ability of bioplastic in absorbing water and as a crystal-forming agent.
3) 800ml of tap water, acts as solvent.
4) 3g of gelatine that has a strong affinity for water, used to bind cells together.
5) Food colouring to provide all sorts of colour to colourless and “fun” products.
Design a mould using a selected design software. Select a material (3mm/5mm Plywood/Acrylic) and use digital fabrication equipment to cut out the designed mould.
1) Open CorelDRAW software and create a NEW file –> Create 1-piece 125mm x 125mm x 3mm thk base plate using 3mm acrylic and 1-piece 125mm x 125mm x 5mm thk outer-size with 10mm thk frame using 5mm acrylic.


2) Select “HAIRLINE” line type for all profile cuts. Select different colour lines represent different layer of the workdone.
3) Send the file to EpiLog Engraver software on parameter settings for the laser cutter by selecting “PRINT” option.
4) Input the correct parameters before sending it to the laser cutter.

For 3mm acrylic: -Auto Focus – Thickness
-Process Type – Vector (profile cut)
-Speed – 16% (adjust based on requirement)
-Power – 85% (adjust based on requirement)
-Frequency – 90% (adjust based on requirement)
-Cycles – 1 (preferred, adjustable based on material thickness)
-Thickness – 3mm (given)

For 5mm acrylic: -Auto Focus – Thickness
-Process Type – Vector (profile cut)
-Speed – 12% (adjust based on requirement)
-Power – 95% (adjust based on requirement)
-Frequency – 95% (adjust based on requirement)
-Cycles – 1 (preferred, adjustable based on material thickness)
-Thickness – 5mm (given)
5) Send the file to the laser cutter and cut out the respective parts using different thickness of materials.

6) Stick both parts together using acrylic glue and wait for it to dry.

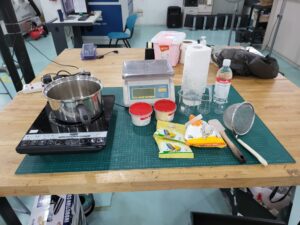
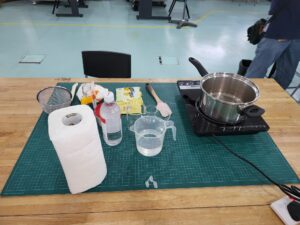
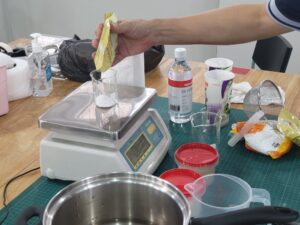
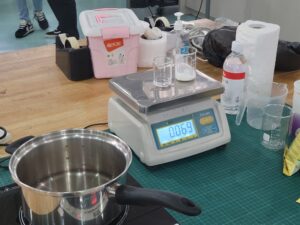
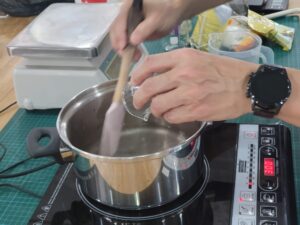
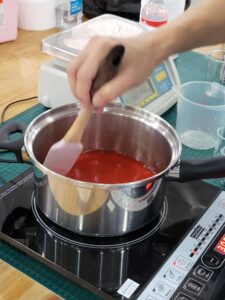
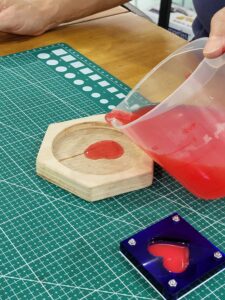
Prepare all the necessary ingredient and equipment before starts to cook. Mix the selective ingredient according to the given procedure and instruction. Pour the liquid into the mould and let it dry at room temperature.
1) Preparation for the requirement ingredient and equipment based on the given recipe.


2) Mix the ingredient by following the amount and steps given from the recipe. Set the correct cooking temperature.


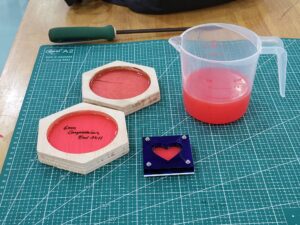
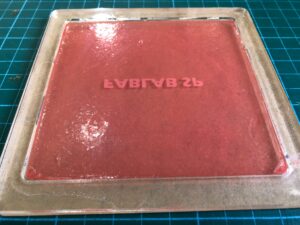
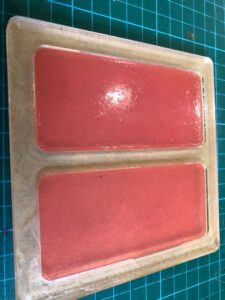
3) Pour the solution into the moulds that have prepared. Place at room temperature and let them dry for 3-4 days.


4) Biomaterial has been dried out and ready for further cutting process.


Reflection on making our very own biomaterial.
1) Each biomaterial can be prepared by different ingredient, and each ingredient under the respective biomaterial carries different weightage. Change in the amount of the ingredient will affect the outcome of the material due to change in its material properties.
2) After a couple of days of drying out the biomaterial, we found out that the volume has been decreased dramatically. some of our material has even shrink and crumble, instead of a sheet of material, it became a sponge-like material. Suggest using a bigger container with a deeper tray to make the biomaterial flatter and bigger in piece in order to use for fabrication.
3) Advisable to use plastic/acrylic tray instead of wood-based container to prevent absorption of the liquid-form biomaterial.
Having trouble? Let us know by completing the form below. We'll do our best to get your issues resolved quickly.
"*" indicates required fields