Modeling Flight: The Basics of Aerospace Engineering - SCOPES Digital Fabrication

Lesson Details

Age Ranges
Standards
Fab-Safety.1, Fab-Programming.1, Fab-Modeling.1, Fab-Fabrication.1, Fab-Design.1
Author
Original Lesson Here

You need to login or register to bookmark/favorite this content.

Author

Brian Purvis
Brian Purvis
Other
Brian is the former Manager of Instruction for the GE Brilliant Career Lab, a curriculum centered mobile FAB Lab that served Boston area public high schools.  Previously he led the Gilbert Innovation Hub, where he leveraged his 18 years as… Read More

Summary

This lesson immerses participants in the knowledge base and processes of an aerospace engineer. While designing their own working airplanes, students will learn about the science involved with making things fly, the design processes necessary for iterating a model airplane, and the digital fabrication methods that can build a prototype.

What You'll Need

Teacher Preparation:​ Consider the following in planning for your activity: facility needs, prerequisite skills and knowledge, student types, class length, and classroom management techniques.

Facility needs​: laser cutter, space for testing of prototype planes and performance contests (long straight hallways, or outdoors is suggested) space for laser cutter and small group work, internet, the ability to charge a class set of computers.

Prerequisite Skills: ​Basic knowledge of the nature of force and friction and basic understanding of the scientific method. The teacher should also be competent with a CAD program such as Inkscape or Corel Draw. The teacher should have operational knowledge in using a laser cutter to make the student produced wing designs.

Recommended resources: ​Knowledge of project-based learning is helpful when understanding and implementing the structure of this lesson. This lesson plan utilizes the 5E Lesson Plan model and references the Engineering Design Process

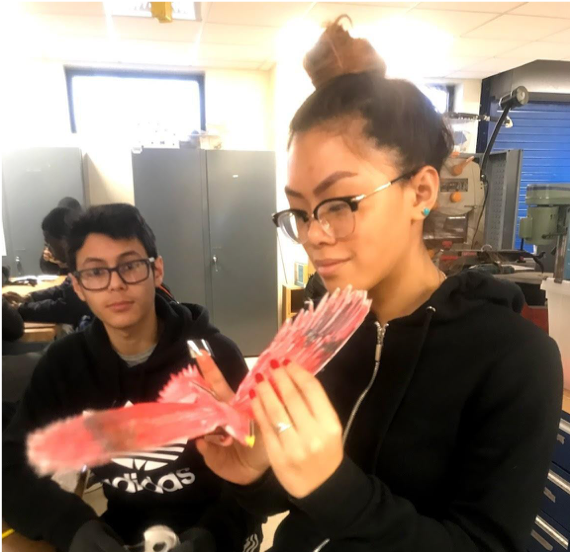
Materials List: Premade balsa wood airplane kits​ (one kit per two class minimum, while you do not need the exact kit linked, having a similar kit greatly reduces the needed preparation time for the project), adhesive tape (roll per group), scissors (pair per group), box cutters (one per adult minimum, one per group ideal), rulers (class set), heavy-duty card stock (1 pack per two classes), 2 sheets of 24×12 ¼ inch thick cardboard per class, airplane body templates, science notebooks, computers with Inkscape.

The Instructions

Engage

See below.

Step One: Engage – ​An engagement that sets the table for the learning objectives and piques student interest in concepts, careers, and fabrication.

Needs​:

10 minutes

  • Premade working balsa wood plane model


  1. The instructor demonstrates the construction and flight of a premade balsa wood airplane (or a strong custom airplane model from a previous class).
  2. The instructor engages students by challenging them to make their own working airplane models.


Explore

See below.

Step Two: Explore – ​Initial hands-on foray into concept.

Needs:

  • A supply of premade balsa wood airplane parts sufficient for the class size (see above for recommendations)

At least 40 minutes

  1. The instructor groups the class into teams of 2-3 students for the activity.
  2. The instructor and teacher provide the materials for the premade balsa wood airplanes for easy distribution to teams.
  3. The instructor explains the specific norms and classroom management for the activity, including areas that are reserved for testing, and baselines for documentation in student notebooks.
  4. The instructor encourages innovation and creativity, while advising students of any limitations of the balsa wood models (these may vary depending on the nature of the models used, but could include if specific fuselages are only compatible with specific parts. In the models linked in the supply section this would include only narrow fuselages being compatible with the propeller systems.)
  5. Students are given a supply of transparent tape for repairing broken balsa wood parts.
  6. The instructor emphasizes that this is a time for finding out “what works and what doesn’t?” with regards to the airplane flying, so that student designs of their own custom airplanes can be informed. Students are encouraged to document these discoveries via text or pictures in their science notebooks.
  7. At the end of the period the instructor informs students of the procedure for taking their planes apart and returning all materials in preparation for future classes. (If the plane materials are not to be reused, the students may keep their planes for personal use.)


Explain

See below.

Step Three: Explain – (Connect content with explore and elaborate.)

Needs:

  • A white board or large Post It notes for creation of the public matrix
  • A mechanism for students to watch the “How Do Airplanes Fly?” video
  • Laser Cutter
  • Computer with Inkscape.

35 minutes

Class begins with the teacher connecting the behaviors of the premade balsa wood planes to scientific concepts that are relevant to the curriculum. (Often these are drag/friction, propulsion/force, lift/force, and gravity). The teacher then segues into creating a matrix of these forces and discoveries students have made as to how the forces can be manipulated in order for the plane to fly better. This matrix should be left in a public space for reference and for students to add further discoveries. Additional steps are below.

  1. The instructor shows the​​“How Do Airplanes Fly?”​ video to further explain the ​science behind the module.
  2. The instructor uses the laser cutter to make cardboard fuselages (these patterns are included in the attachments) for the student’s custom airplanes. As this takes place the instructor describes how the laser cutter works and demonstrates how the patterns were made via Inkscape (an activity the students will be involved in the 6-8 hour modules).
  3. The instructor will list and explain the steps of the design process as a model for student team workflow.


Elaborate

See below.

Step Four: Elaborate: ​(Take content knowledge and utilize it to complete a challenge in design and fabrication process.)

Needs:

  • Laser cut fuselages (templates are included in the attachments section of this lesson plan)
  • Heavy card stock and/or any other cheap, thin but relatively strong material that can be cut with scissors
  • Scissors
  • Box cutters (consider age of students and student knowledge of safe use before distributing)
  • Writing utensils (colored pencils are the best)
  • Science notebooks/graph paper
  • Rulers

55 minutes or more spread over two days

Additional steps are below.

  1. The instructor introduces the custom airplane module.
  2. Students are asked to take the given laser cut fuselages and combine them with custom wings and attachments created with card-stock (or other appropriate material) to make flying model airplanes.
  3. Students should first design their wings on the cardstock, then cut them out with the scissors provided. Should students want thicker wings, they can cut out two or more copies and glue them together.
  4. Students are also instructed to carefully measure the needed slit in the fuselage for the wings to be attached and to draw it on the cardboard. (Depending on the instructor’s comfort with student use of box cutters, the students may cut this slit, OR they may come to the instructor for the slit to be cut.)
  5. The instructor provides the procedures for teams to collect the materials for creating their custom planes.
  6. The instructor encourages students to iterate on their wing design as they get feedback from testing them. Students should collect data on their designs and add to the matrix as they find methods that work best. This is a teachable moment where the instructor can brainstorm with the class what types of data would be useful. Examples: distance flown, time in the air, distance from a target, angle of the nose when thrown, angle of the wings, etc.)
  7. The instructor informs the students airplane design will be evaluated based on their ability to fly their airplane to a given target. Depending on time, the instructor may also encourage students to join a “trick” competition where they show special abilities of the airplanes they have built. Students will need plenty of time to experiment and finalize their design. It is often best if the contest is held during the next class meeting.
  8. Students utilize the provided materials to create custom working airplane models informed by their knowledge of science and data collected from successive experimentation.

Evaluate

See below.

Step Five: Evaluate: ​(Compare student capability to use the content to meet a goal.)

Select a target goal that will evaluate how effectively students can control the flight of their custom aircraft.(Teachers may want to develop a rubric for scoring this that fits their class needs).

Needs​:

  • Science notebooks

55 minutes

The instructor begins the module by returning to the matrix to synthesize student discoveries about how to manipulate the forces for added airplane model performance.

  1. Each student team uses their science notebook to give a short summary of how their airplane design evolved over the course of the module.
  2. Student teams evaluate​the effectiveness of their design by attempting to fly their model airplane to a target determined by the Instructor. Immediately after the flight, students from other groups are asked to note three positive aspects of the airplane’s design. This is followed by the current group noting an aspect of their airplane that could use more improvement given time.
  3. The instructor will highlight local examples of aerospace jobs and encourage students to use their computers to search for jobs in this STEM career, (General searches can work, but showing students how to use a job search website like Monster.com or Indeed.com can be even more impactful given time.)


Extensions to the lesson:


Below is a list of STEM careers that currently exist and/or are in high demand which directly relate to the activity. These are all careers and job openings that exist today:

  • Aircraft Powerplant Technician
  • Airframe Mechanics Technician
  • Aircraft Maintenance Technician
  • Aircraft Engine Specialist
  • Helicopter Engine Specialist


With your students, ask if they have heard of any of these jobs. What does a person in this position do? What part of S.T.E.M. is utilized in each of these roles? You may even ask students what STEM careers are interesting to them.


Would students like to further their curiosity about studies in aerospace science and have fun?

Make students aware that flight simulator applications exist on almost every type of device, computer and game console.


Standards

  • (Fab-Safety.1): I can safely conduct myself in a Fab Lab and observe operations under instructor guidance.
  • (Fab-Programming.1): I understand the basic structure of a simple program and can modify values, variables, or other parameters to alter its output, function, or behavior.
  • (Fab-Modeling.1): I can arrange and manipulate simple geometric elements, 2D shapes, and 3D solids using a variety of technologies.
  • (Fab-Fabrication.1): I can follow instructor guided steps that link a software to a machine to produce a simple physical artifact.
  • (Fab-Design.1): I can be responsible for various activities throughout a design process within a group under instructor guidance.

Lesson Feedback