- Loading…
This lesson aims to foster a sense of community through active listening, empathy, and meaningful collaboration. By exploring and sharing their backgrounds, interests, values, and personal experiences, students work together to create a collective mosaic that represents an aspect of their identity. Using recycled or sustainably sourced materials, each student designs a piece featuring an object that holds personal significance and reflects who they are. Students then share the story behind their chosen object, encouraging their peers to appreciate diverse perspectives and experiences. Through this creative process, the lesson also supports Sustainable Development Goal (SDG) 12: Responsible Consumption and Production, by promoting the thoughtful use of resources, reducing waste, and encouraging sustainable practices in artistic expression.
3D Printer
Lasser Cutter
Glycerine
Gelatine
Water
Pot
Stove
Paper
Marker
Students will be able to:
Create an artwork that represents something important about themselves.
Listen respectfully to classmates’ stories.
Share the meaning behind the artwork with others.
Work together with classmates to create a collaborative mosaic.
Appreciate and respect different experiences and perspectives.
Use recycled or sustainable materials responsibly.
Explain how choices help support sustainable consumption and production.
This project provided students with an opportunity to express their identities while building meaningful connections with their classmates. Through sharing personal stories and listening to different perspectives, students developed empathy, respect, and a stronger sense of belonging within the classroom community. The use of recycled and sustainable materials also encouraged students to think critically about responsible resource use and the importance of reducing waste, reinforcing the principles of Sustainable Development Goal 12 (Responsible Consumption and Production). The collaborative mosaic served as a visual representation of both individual uniqueness and collective unity, highlighting how diverse experiences contribute to a stronger and more inclusive community.
Students began by drawing an object on a piece of paper that represents an aspect of their identity or something meaningful in their lives. After completing their drawings, they worked in pairs to share the personal stories behind their chosen objects, practicing active listening and respectful communication. Estimated time: 15min.
Using a thick marker draw an object on a piece of paper that represents something meaningful about you. Then share the story behind your object with a partner.
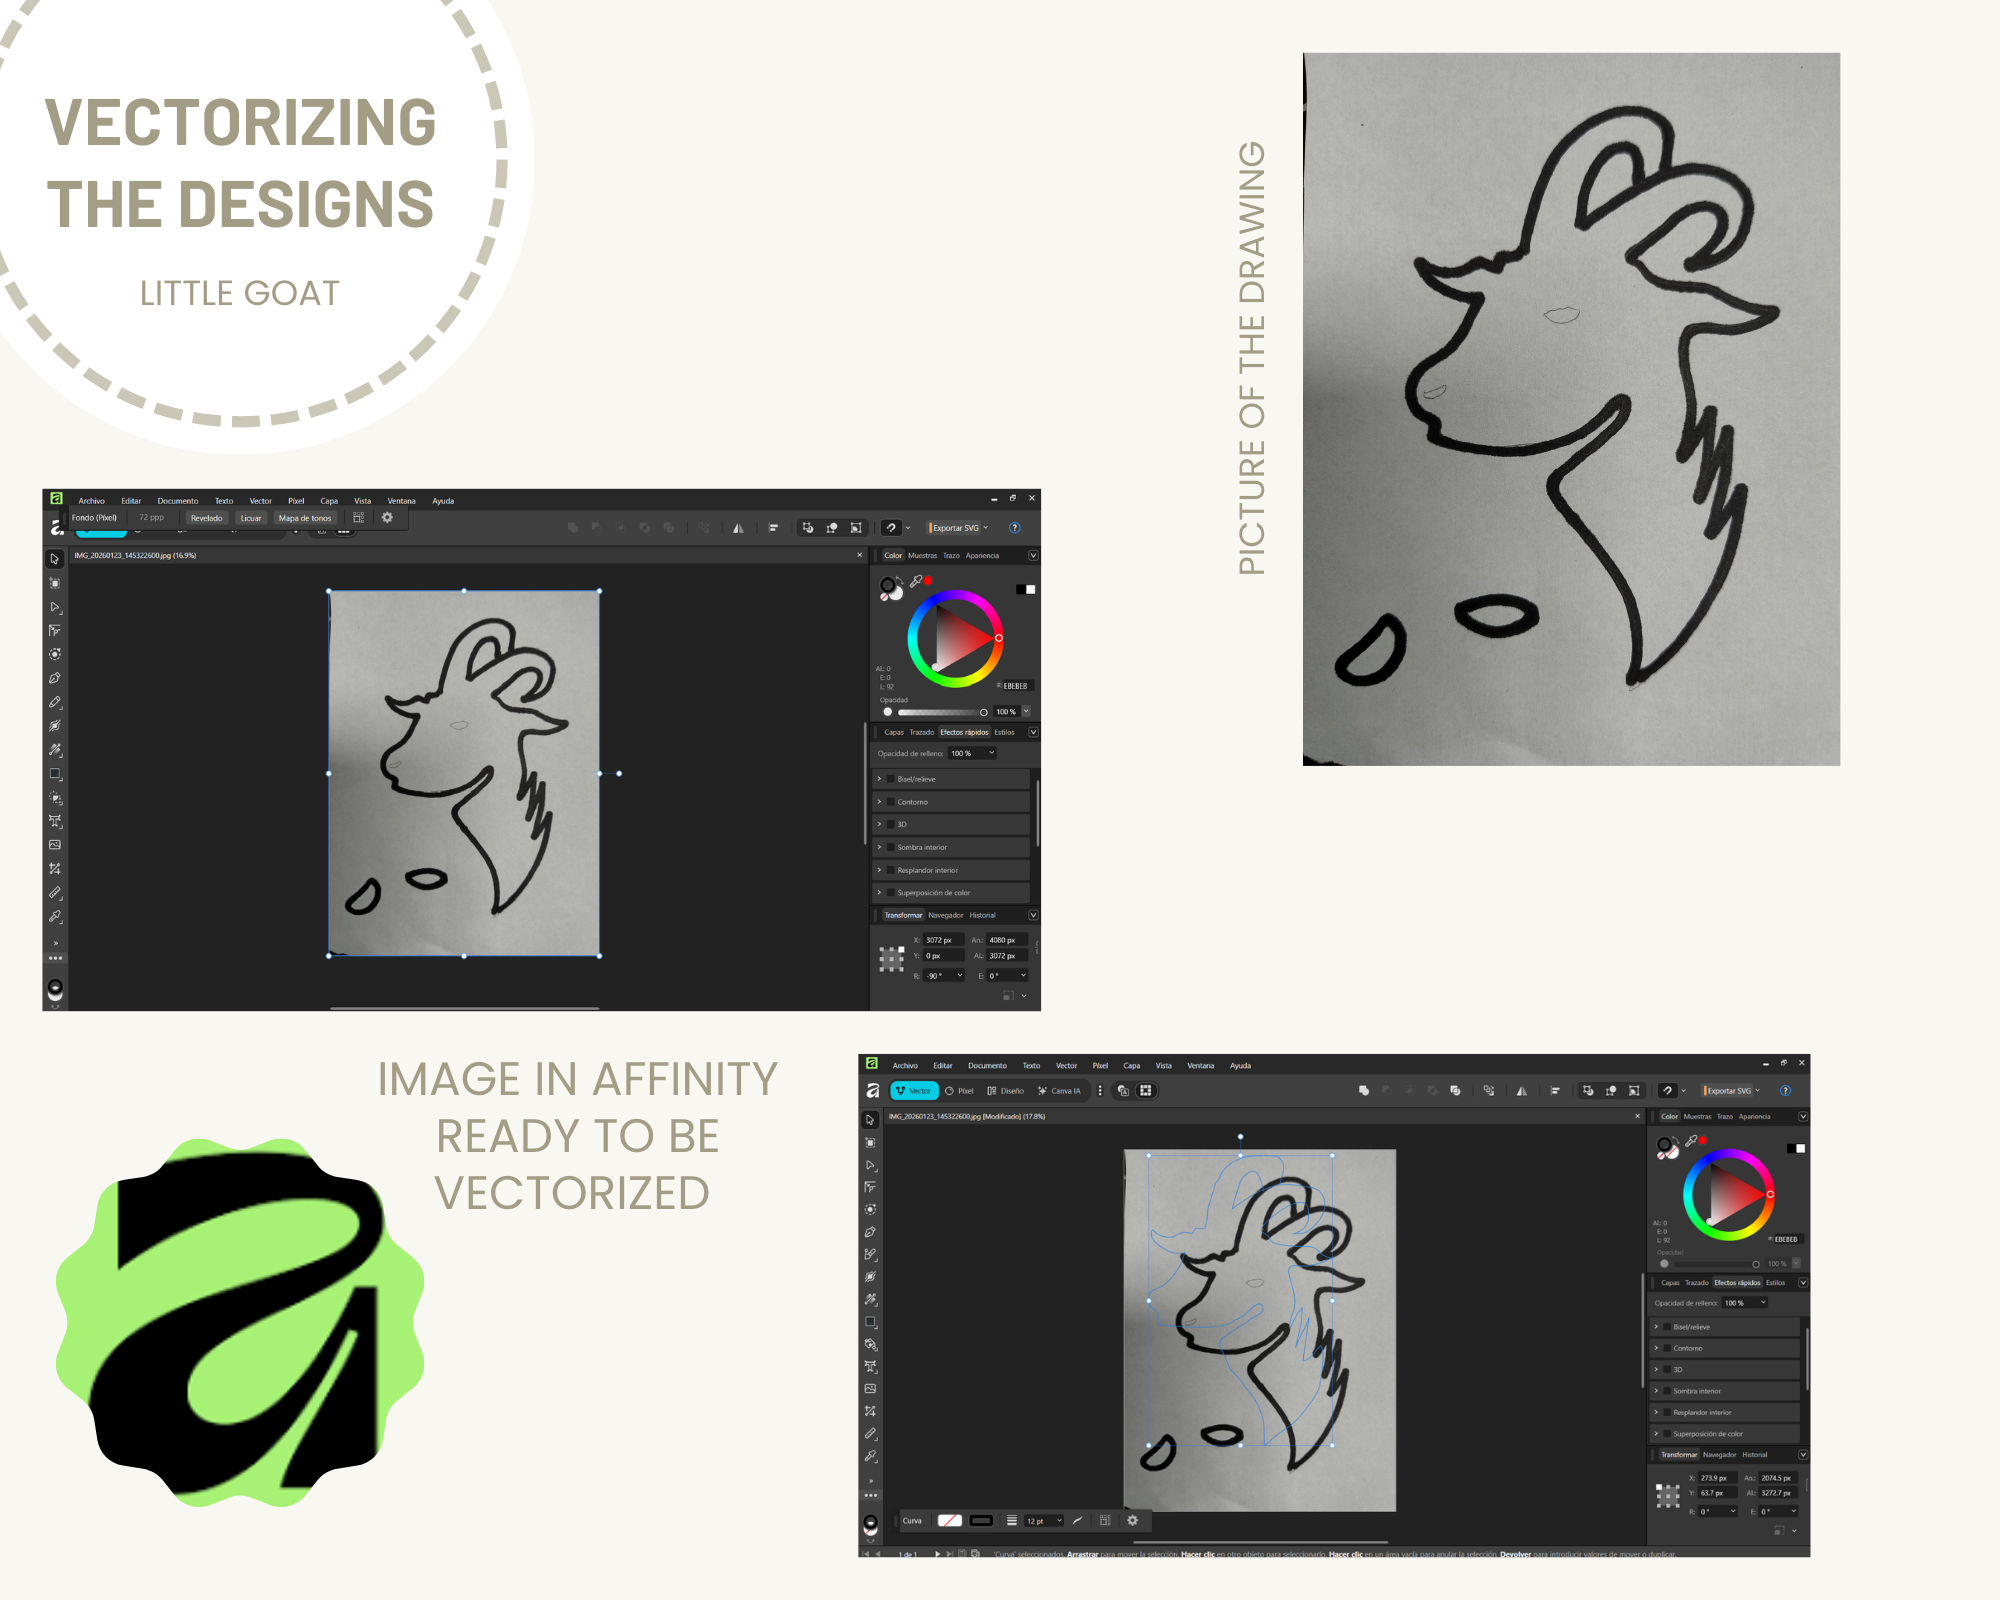
Students then converted their drawings into a svg file. This step allowed them to transform their hand-drawn ideas into designs that could be used with digital fabrication tools. Estimated time: 5 min.
Take a picture of the drawing you just made, open it in affinity. Then choose the vector option, select the image with an image trace tool, and save it as svg.
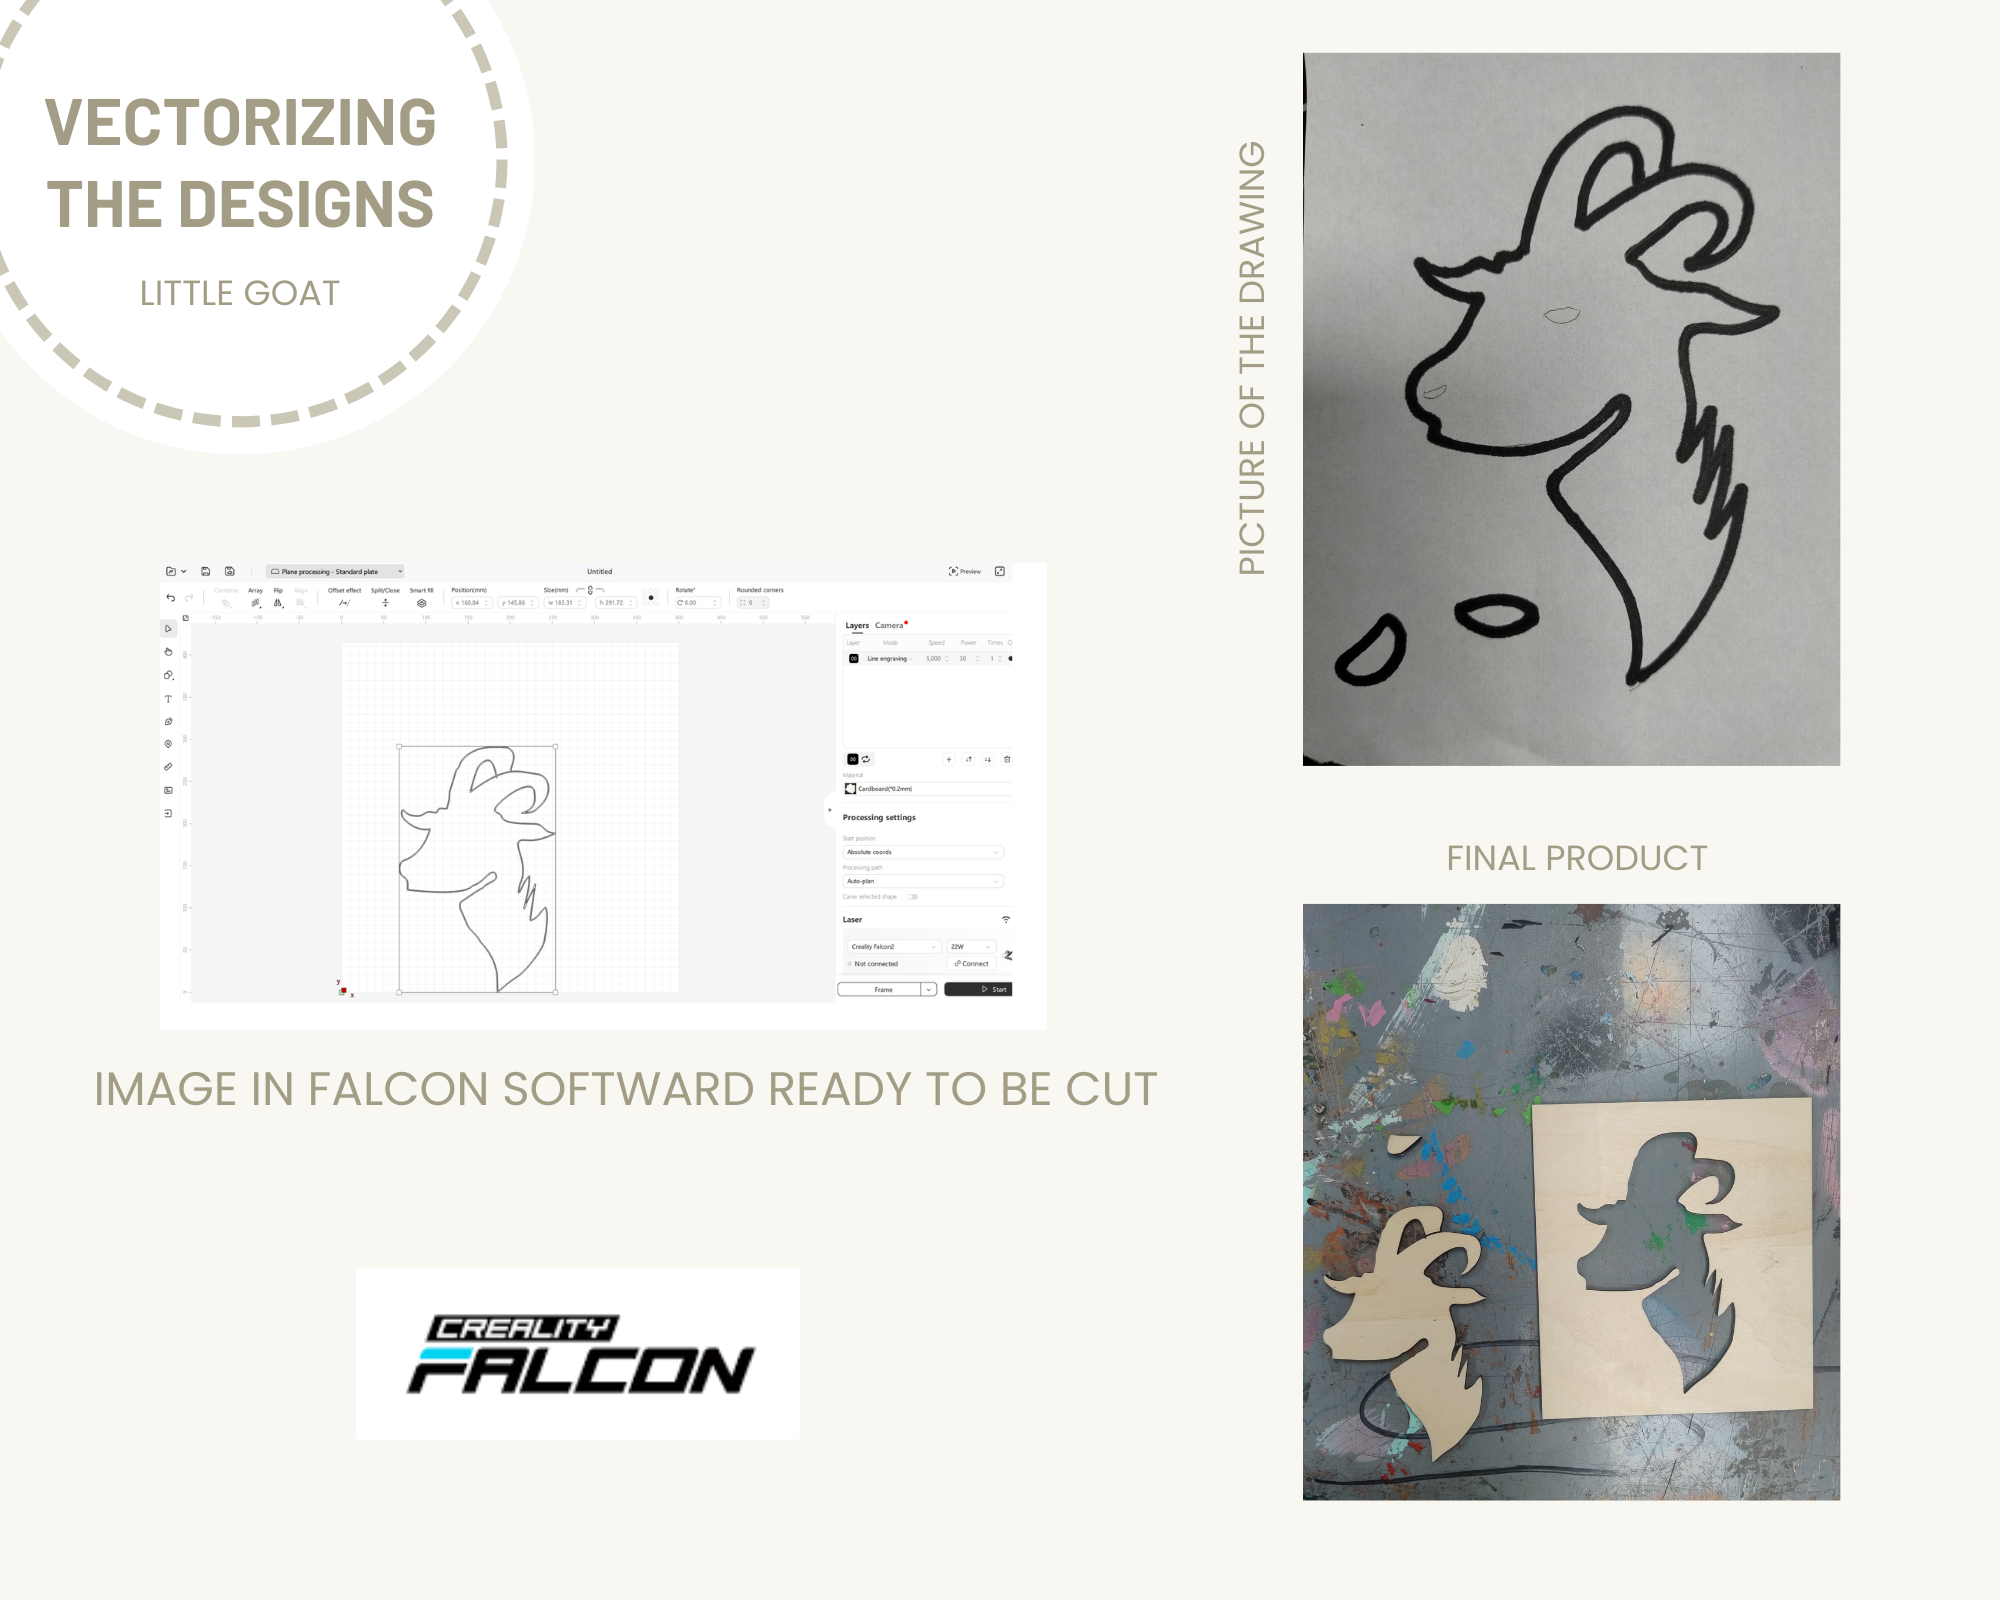
Using their vectorized designs, students created molds through two different processes: a 3D printer for three-dimensional molds and a laser cutter to produce two-dimensional molds using wood. Estimated time: 20min depending on the design
Use your vector design svg or stl to create molds with the digital fabrication tools: a 3D printer for a 3D mold and a laser cutter to cut a 2D mold in wood.
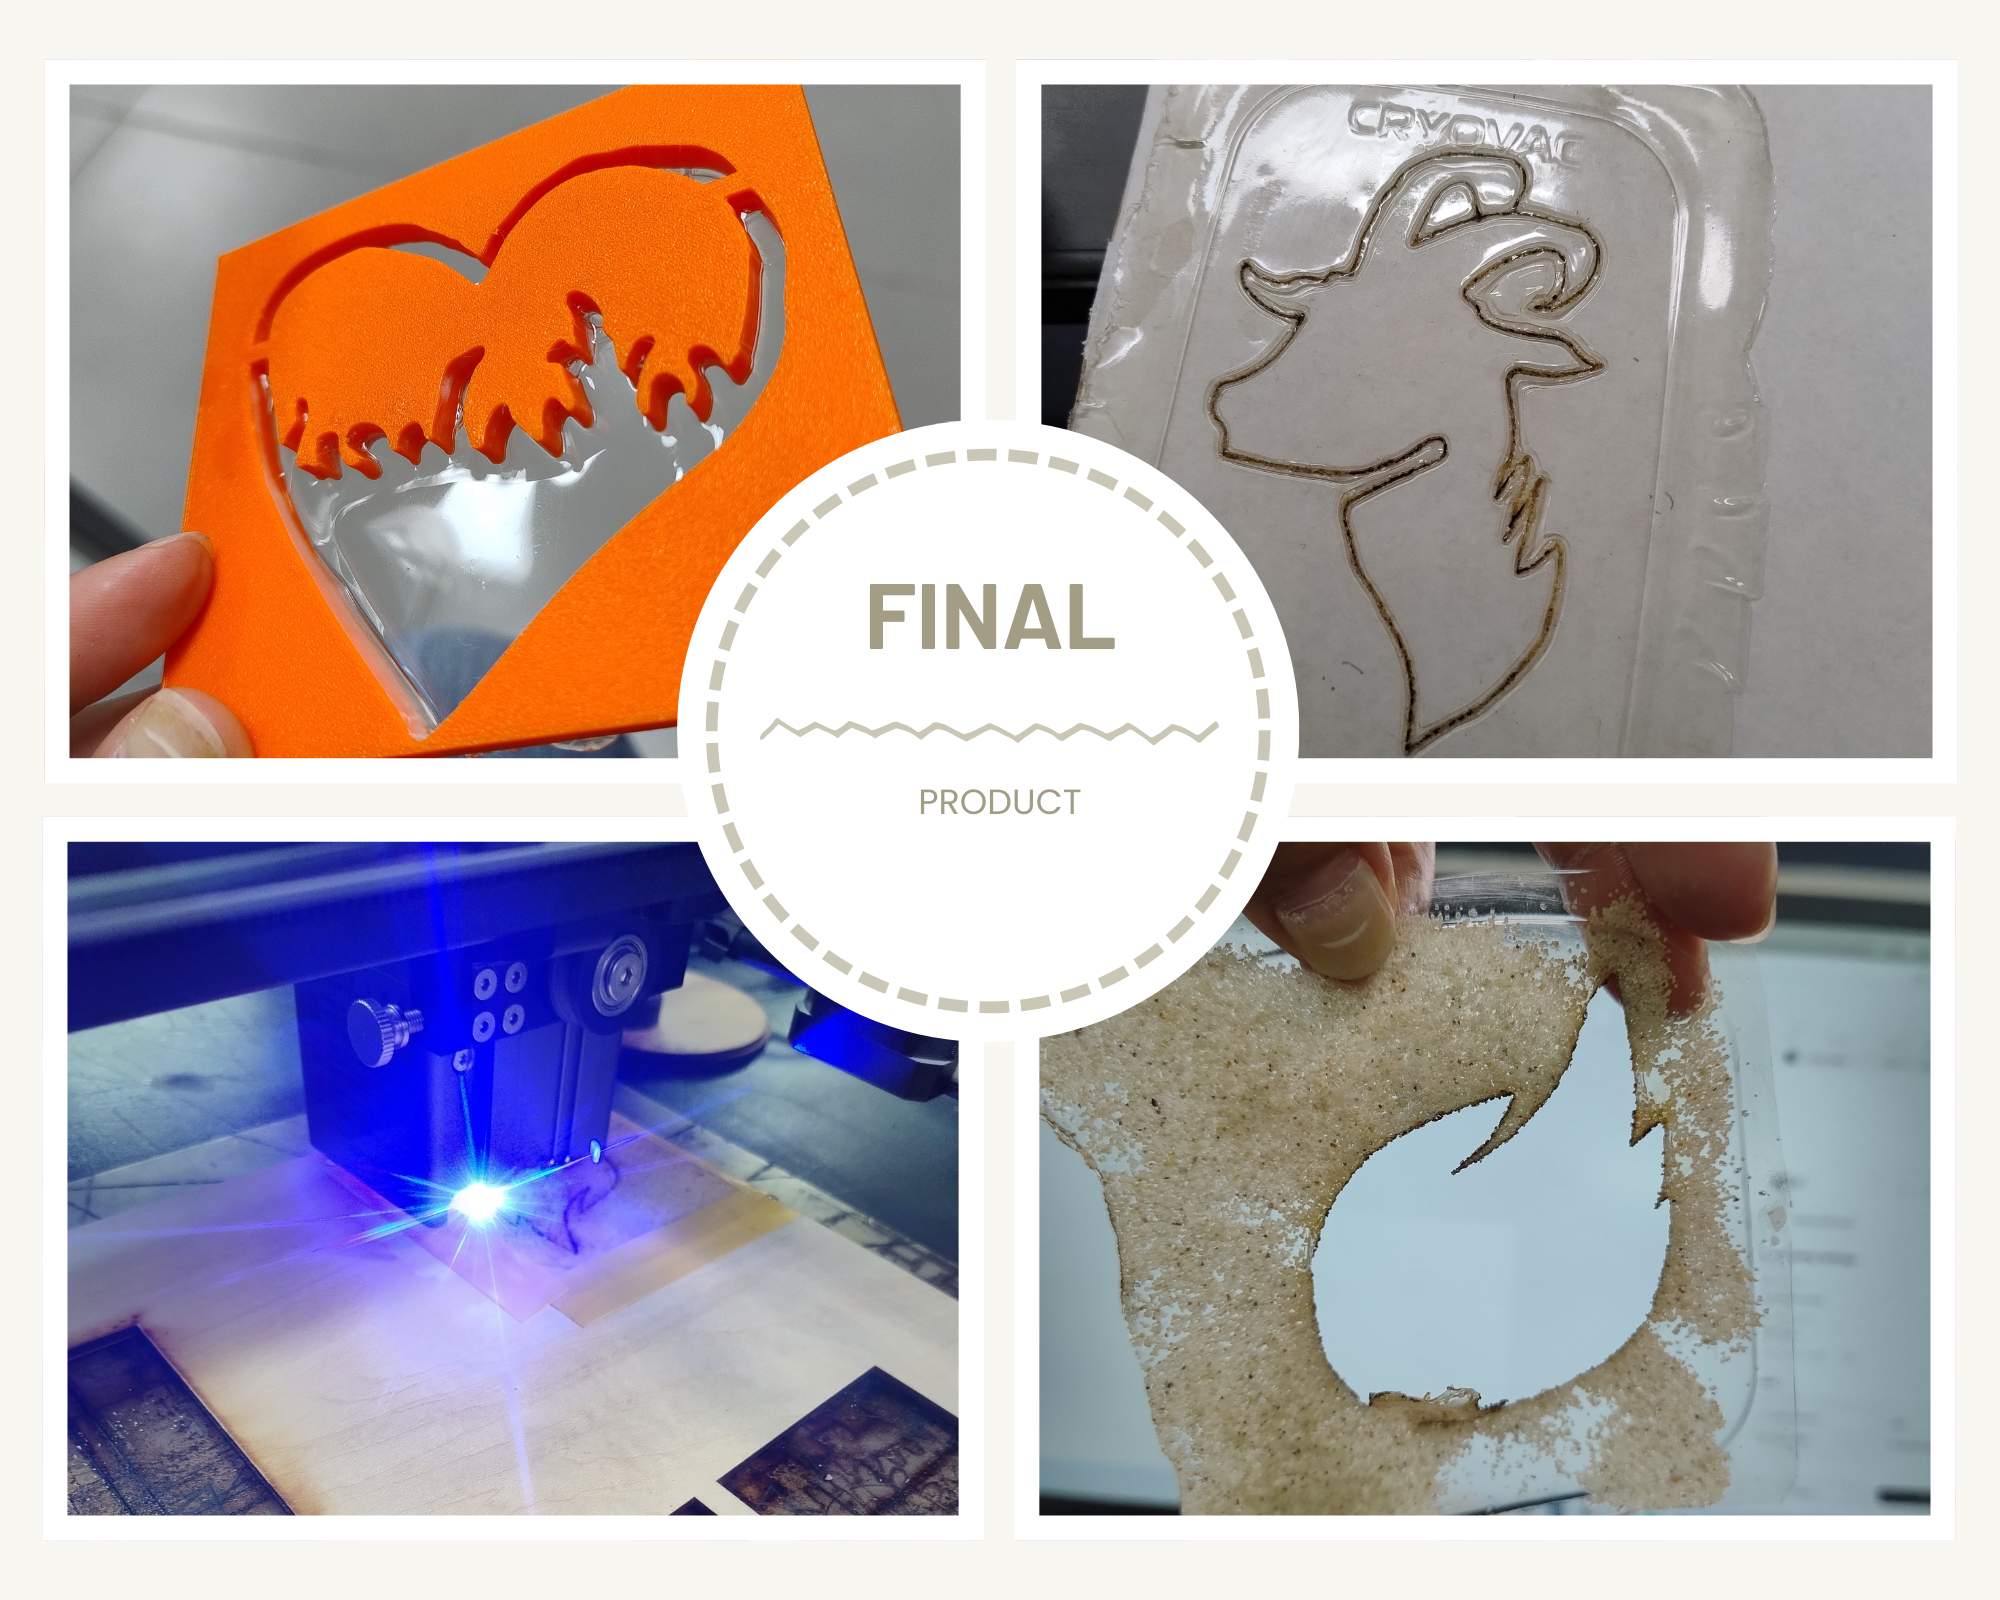
Students prepared a mixture of gelatin, glycerin, and water. They poured this mixture into the molds they had created and left the material to dry for more than 48 hours. Stimated time: 15min
Mix gelatin, glycerin, and water. Carefully pour the mixture into your molds, then wait at least for 24hours to get dry.
When the molds did not produce the expected results, students reflected on the outcome and explored alternative solutions. They used the laser cutter again to create new images based on their designs.
Allow the molds to dry for at least 48 hours. If the molds do not work as expected, modify your design and use the laser cutter to create new images.
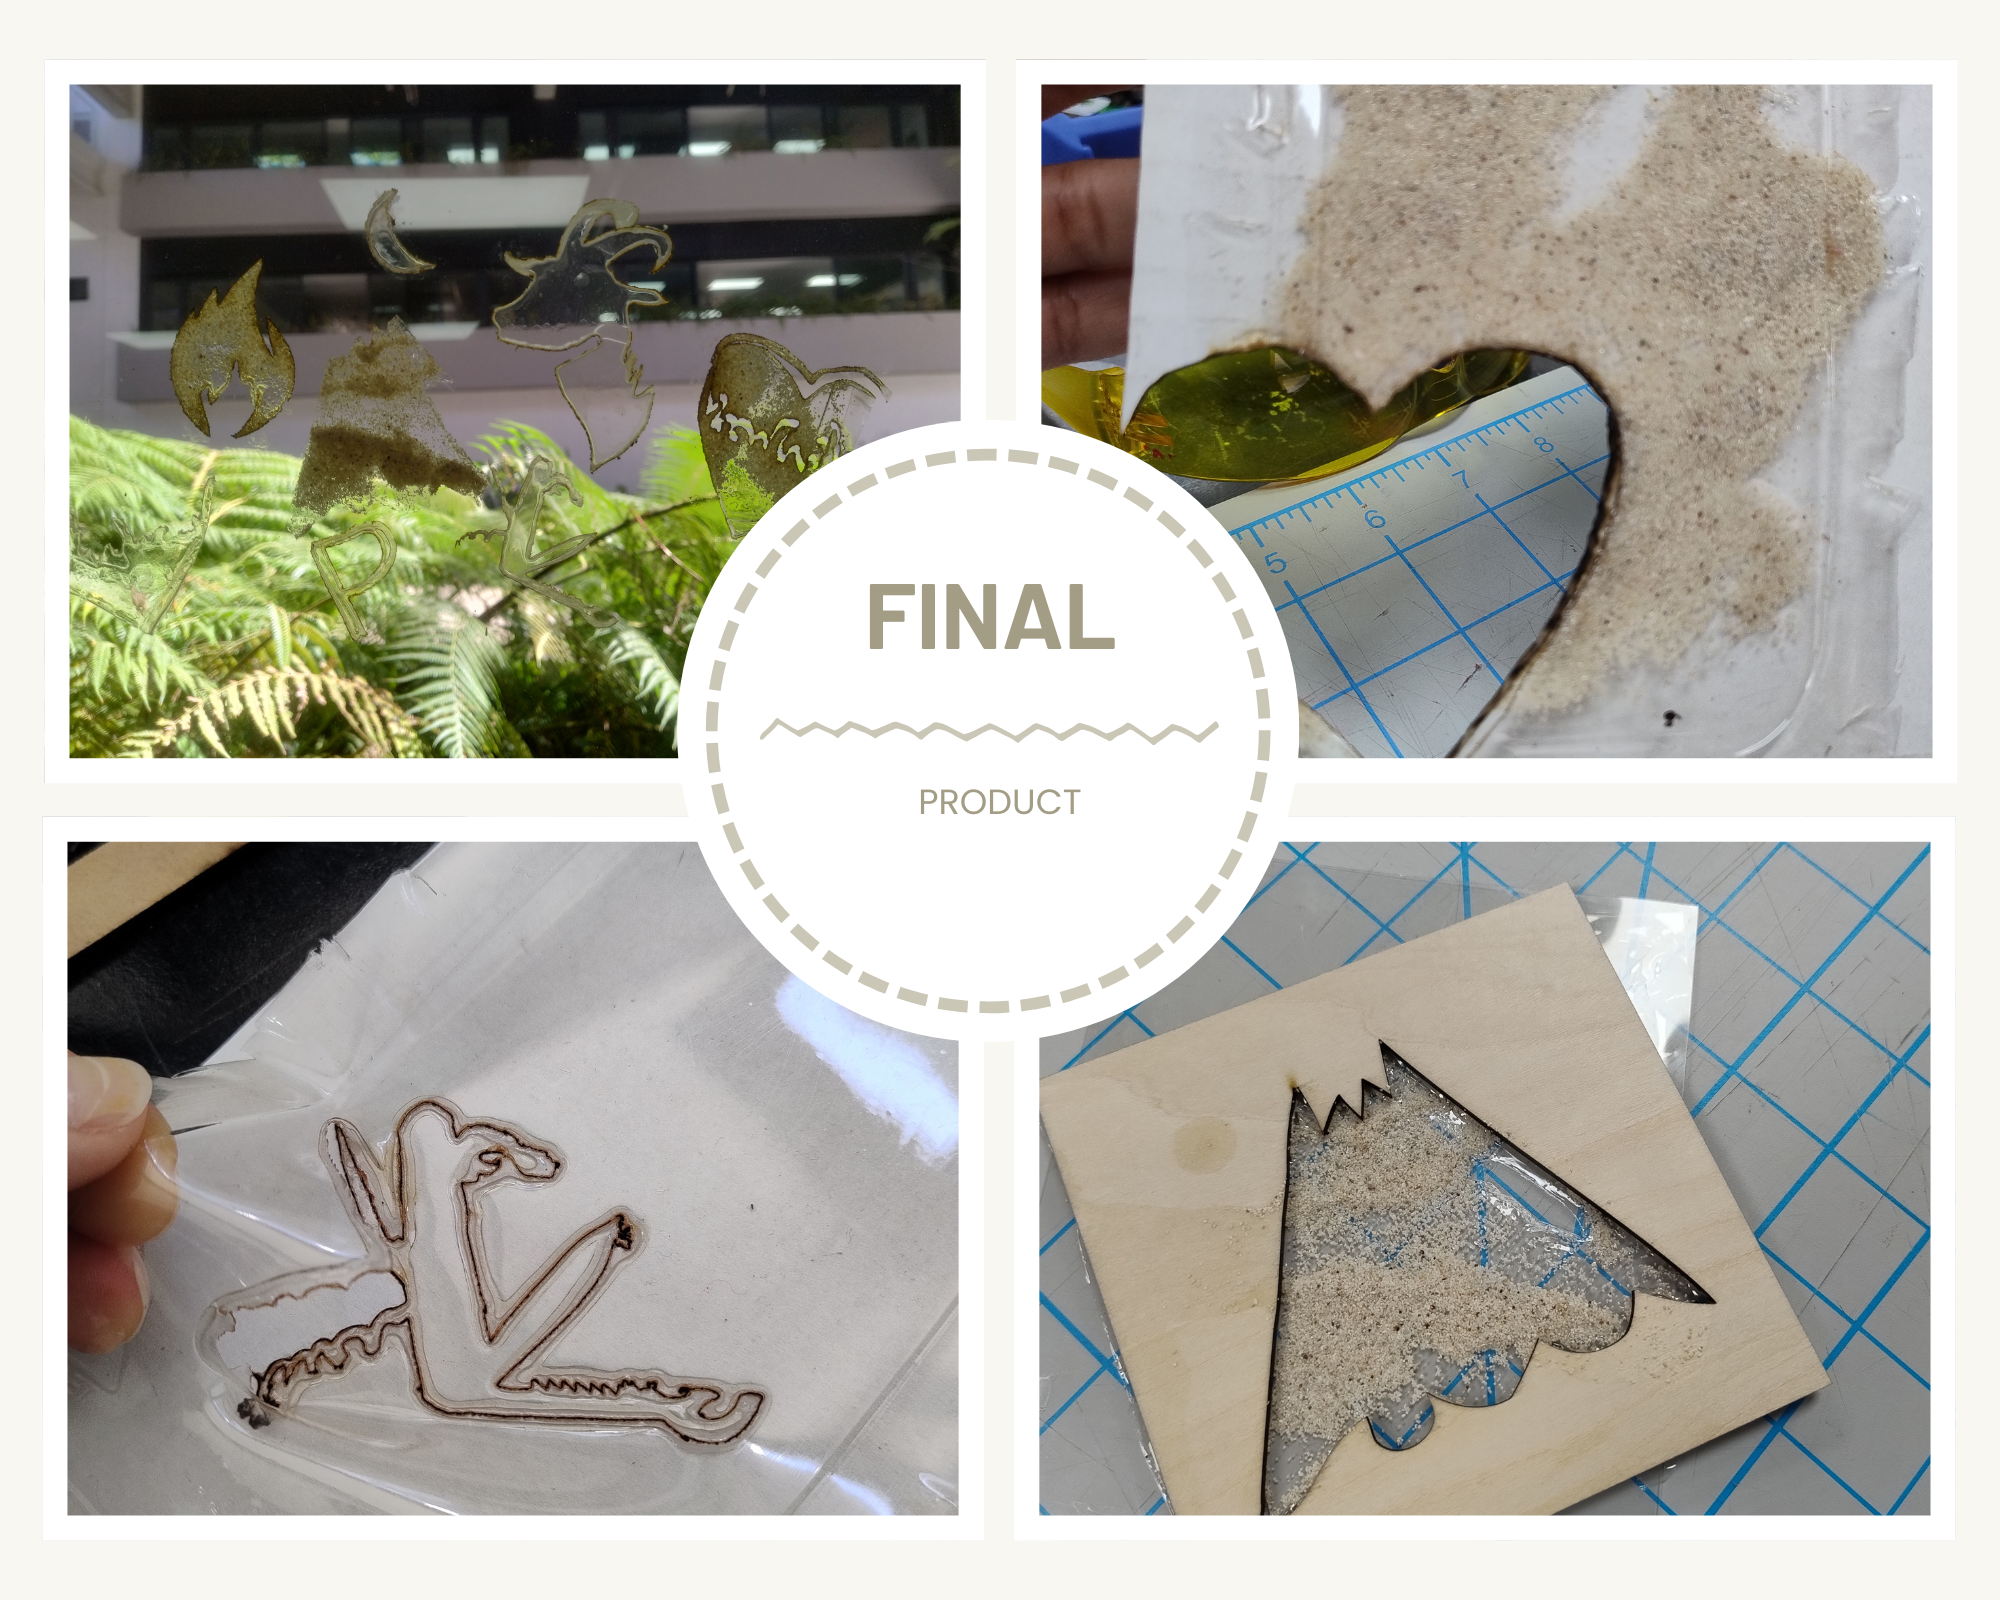
Finally, students placed and pasted the laser-cut images onto the classroom window, creating a collective visual display that represents their identities and personal stories.
Place and attach your final images on the classroom window to create a collective installation.
Having trouble? Let us know by completing the form below. We'll do our best to get your issues resolved quickly.
"*" indicates required fields